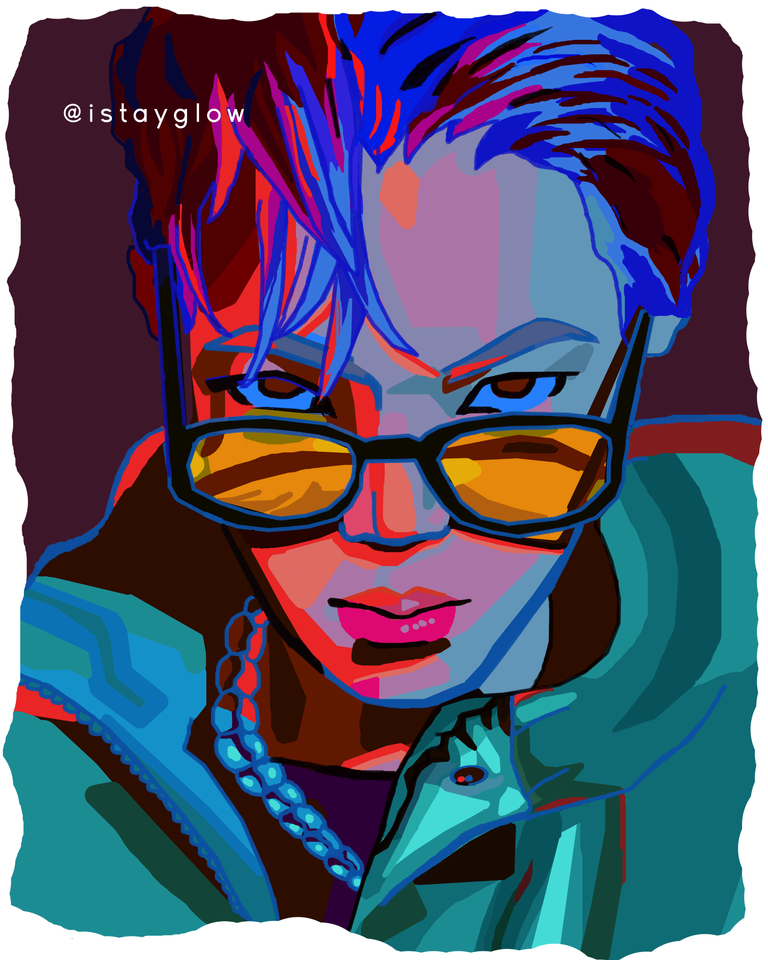
KAI | digital art [ESP/ENG]
¡Hola amigos de HIVE!
Han pasado varias semanas desde la última vez que publiqué por aquí, estuve algo ocupada con trabajo, universidad y responsabilidades pero cada vez que encuentro un poco de tiempo libre, dibujo.
Hace unas semanas me inspiré en Kai de EXO para hacer una ilustración, encontré navegando por Pinterest una referencia con gran variedad de colores llamativos y me decidí a llevarlo al siguiente nivel. Para el dibujo utilicé colores mucho más saturados y los fraccioné a través de la ilustración como suelo hacer con mi estilo. Disfruté mucho hacer esta pieza así que, aquí les comparto el resultado junto con el proceso paso a paso, ¡espero que les guste!
Hi HIVE friends!
It's been several weeks since I last posted here, I've been a bit busy with work, college and responsibilities but every time I find some free time, I draw.
A few weeks ago I was inspired by Kai from EXO to make an illustration, I found on Pinterest a reference with a great variety of bright colors and I decided to take it to the next level. For the drawing I used much more saturated colors and fractionated them through the illustration as I usually do with my style. I really enjoyed making this piece so, here I share with you the result along with the step by step process, I hope you like it!
Proceso / Process
Paso 1 / Step 1
Una vez elegida la referencia, comencé a dibujar el boceto en medio tradicional para después escanearlo.
Once the reference was chosen, I started drawing the sketch in traditional medium and then scanning it.
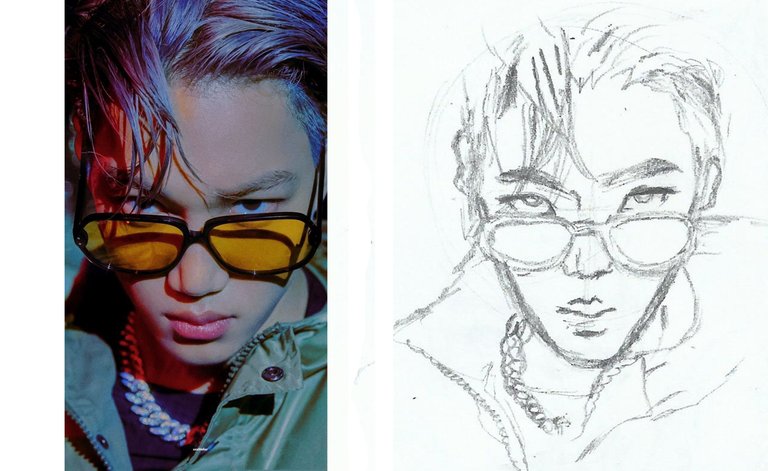
Reference | Sketch
Paso 2 / Step 2
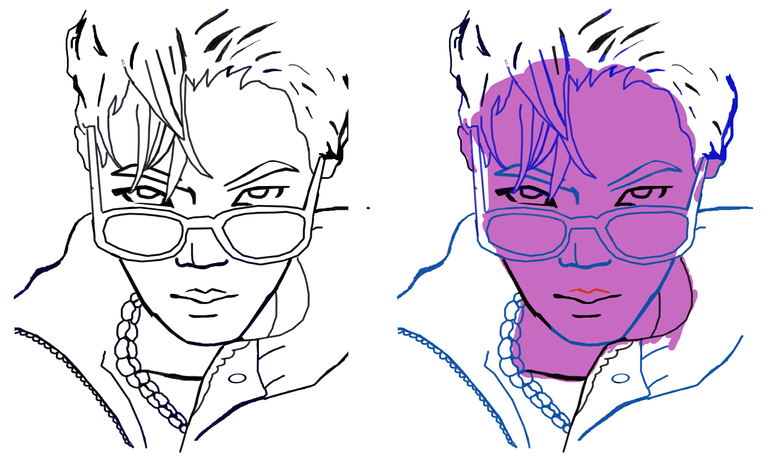
Con el boceto ya listo, creé un lienzo en Photoshop y coloqué el boceto escaneado para comenzar a hacer las líneas de contorno y añadir los colores base.
With the sketch ready, I created a canvas in Photoshop and placed the scanned sketch to start making the contour lines and adding the base colors.
Paso 3 / Step 3
Luego, seguí añadiendo color a la piel y los rasgos faciales, fraccionando cada parte y sin difuminar, al igual que con el cabello.
Then, I continued adding color to the skin and facial features, fractioning each part and without blurring, just like with the hair.
Paso 4 / Step 4
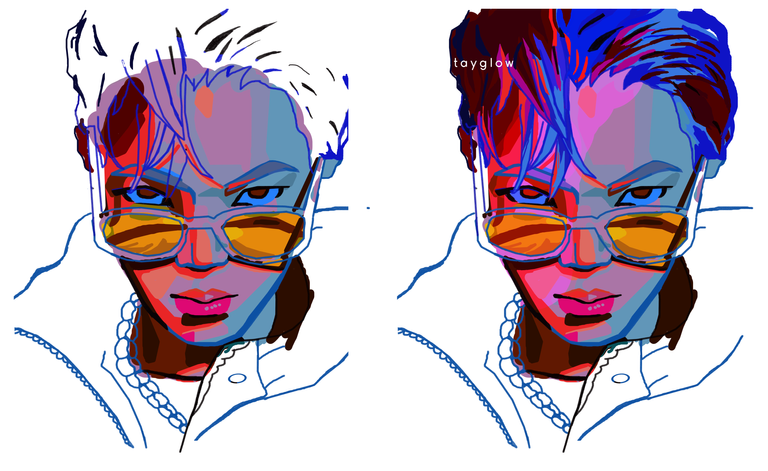
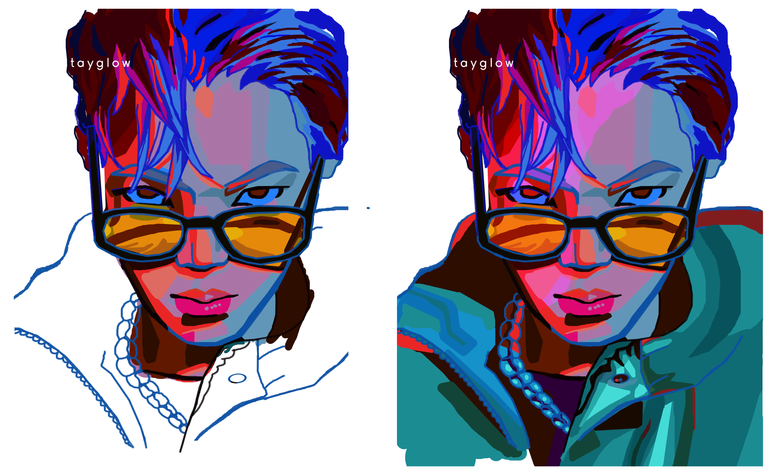
Continúe coloreando los lentes y la ropa, así como los detalles.
I continued coloring the glasses and clothes, as well as the details.
Paso 5 / Step 5
Finalmente, añadí color al fondo dejando un espacio en blanco alrededor del borde, dando la impresión de ser un papel rasgado, agregué la marca de agua, y ¡listo!
Finally, I added color to the background leaving a blank space around the border, giving the impression of a torn paper, added the watermark, and that's it!
Final
¡Nos vemos la próxima!...
Thank you for coming this far <3 I hope you liked it!
See you next time!...
Really nice drawing, I like the combination of colours used, it just gives into the spider verse vibe, well done.
thank you so much, i'm glad you liked it!
There's something about your art. Its captivating.
Wow, so happy to read that, thank you!
Hola istayglow, felicitaciones tu trabajo es bellísimo... Saludos, bendiciones que tengas muchos éxitos...❤️🤗