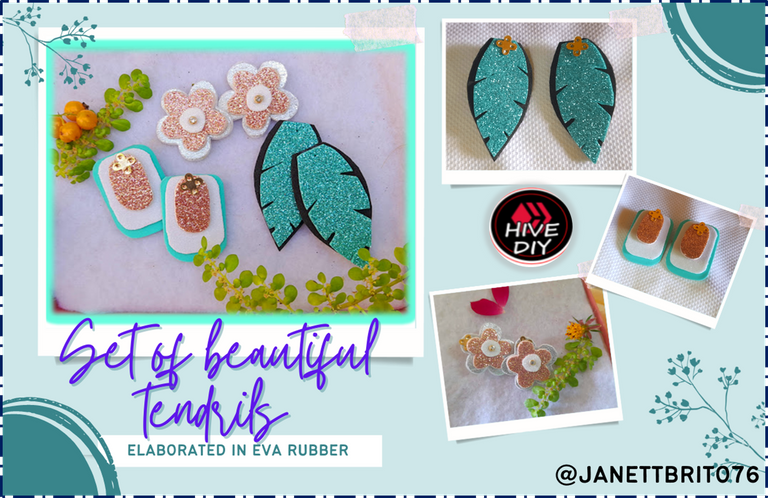
[ENG-ESP] Set of beautiful tendrils in Eva Rubber // Set de Bellos Zarcillos en Goma Eva

Greetings to all my wonderful crafters and craftero of this creative #HiveDiy community, I hope you are chevere and that you had a great and productive day.
My friends this time I will show you a simple set of tendrils in a few steps, which I made using eva rubber of different colors. This idea is great, because with a single base for tendrils you can get a series of them, because you can change the base for any presentation that you like or want to wear that moment.
Also these cute earrings can be made in any color you like or need, since today we can find infinite colors and textures of this eva rubber material... you just have to have a little imagination to create your own designs, and I assure you that you will love to design and create your own accessories, you can also combine them with a pendant of the same design of the earrings.
Well my creative friends here I am going to leave you the tutorial to make this set of earrings using eva rubber. This is a very simple and inexpensive project to make, let's get to work!

Saludos para todos mis maravillosos artesanos y craftero de esta creativa comunidad de #HiveDiy, espero se encuentren chevere y que hayan pasado un estupendo y productivo día.
Mis amigas en esta oportunidad les mostrare un sencillo set de zarcillos en pocos pasos, los cuales los elabore utilizando goma eva de distintos colores. Esta idea es genial, ya que con una sola base para zarcillos puedes obtener una serie de ellos, debido a que puedes cambiar la base para cualquier presentación que te guste o quieras lucir ese momento.
Ademas estos lindos zarcillos lo puedes elaborar del color que te guste o que necesites, ya que de este material de goma eva hoy en día podemos encontrar infinidades colores y texturas... solo tiene que tener un poquito de imaginación para que crees tus propios diseños, y les aseguro que les va encantar diseñar y crear sus propios accesorios, también puedes combinarlos con un dije del mismo diseño de los zarcillos.
Pues mis creativas amigas aquí les voy a dejar el tutorial para elaborar este set de zarcillos utilizando goma eva. Este es un proyecto bastante sencillo y económico de realizar. ¡¡Manos a la obra!!
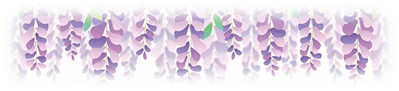

EVA rubber (white frosted, silver metallic, pink frosted, black, turquoise blue, turquoise blue frosted)
Base for tendrils
Scissors
Silicon
Flower, leaf and rectangle mold
Goma eva ( blanca escarchada, plateado metalizado,rosado escarchado, negro, azul turquesa, azul turquesa escarchado)
Base para zarcillos
Tijera
Silicon
Molde flor, hoja y rectángulo
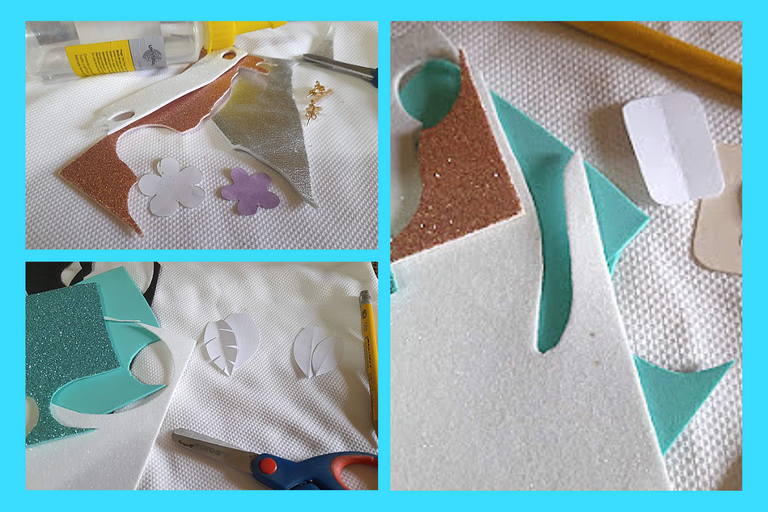

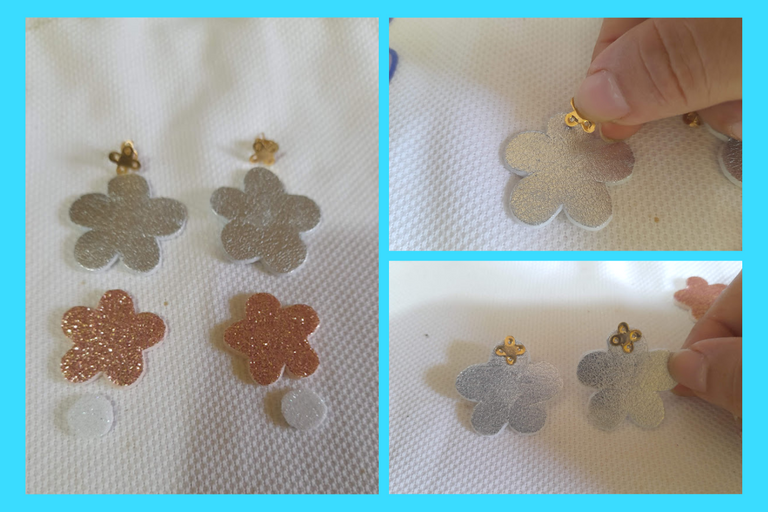
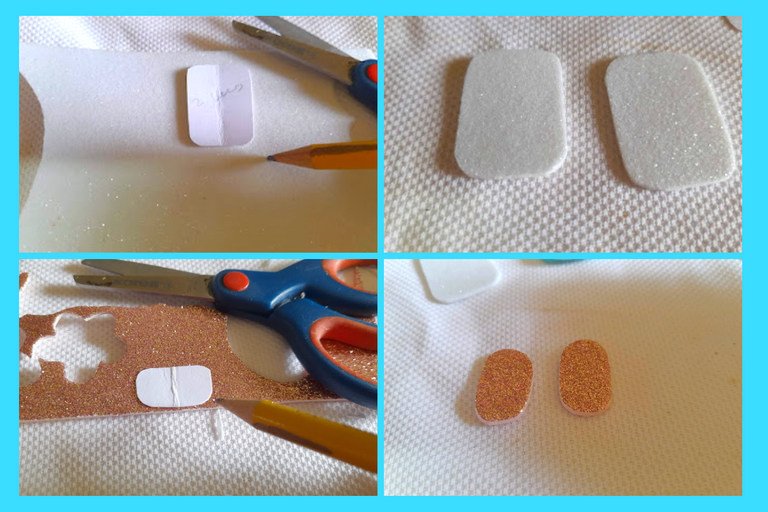
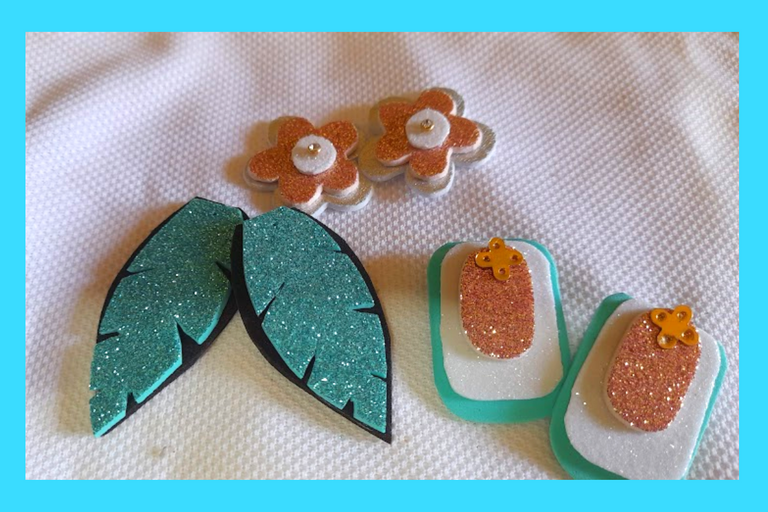
1: For our first tendril, we take our flower mold and mark one on the silver metallic eva rubber and on the pink frosted eva rubber we mark the smallest flower, then we proceed to cut it out.
1: Para nuestro primer zarcillo, tomamos nuestro molde de florecita y marcamos una en la goma eva plateado metalizado y en la goma eva rosado escarchado marcamos la flor mas pequeña, luego procedemos a recortar.
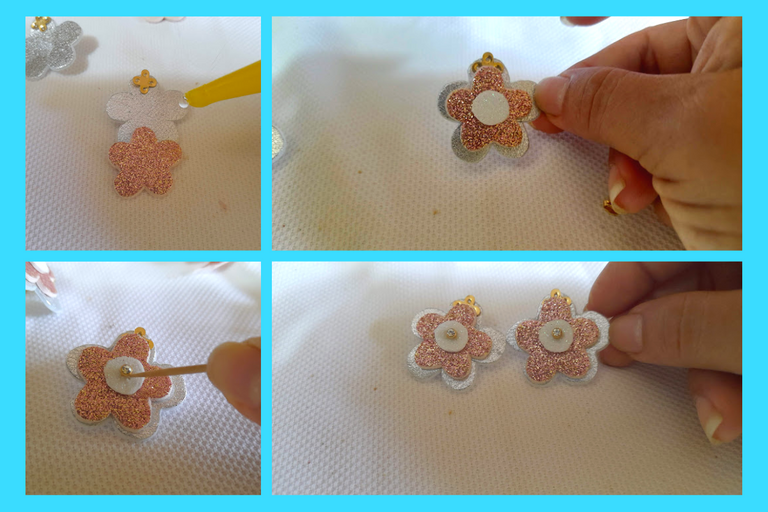
2: Once cut all the pieces of our first tendril, we proceed to make a small hole in the largest flower with the same base of the tendril at the top of the flower, then proceed to glue each of the pieces, decorating it in the center with a small crystal, as you can see in the pictures.
2: Una vez cortada todas las piezas de nuestro primer zarcillo, procedemos a realizar un pequeño agujero a la flor mas grande con la misma base del zarcillo en la parte superior de la flor, luego procedemos a pegar cada una de las piezas, decorandola en el centro con un pequeño cristal, como pueden observar en las imágenes.
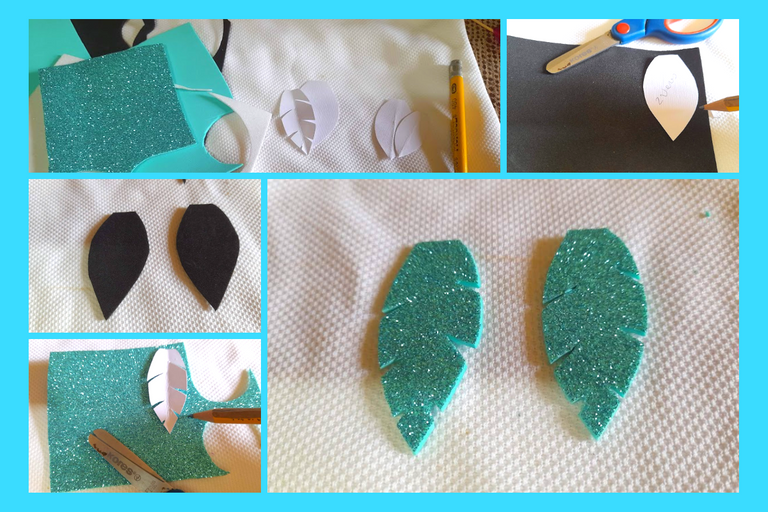
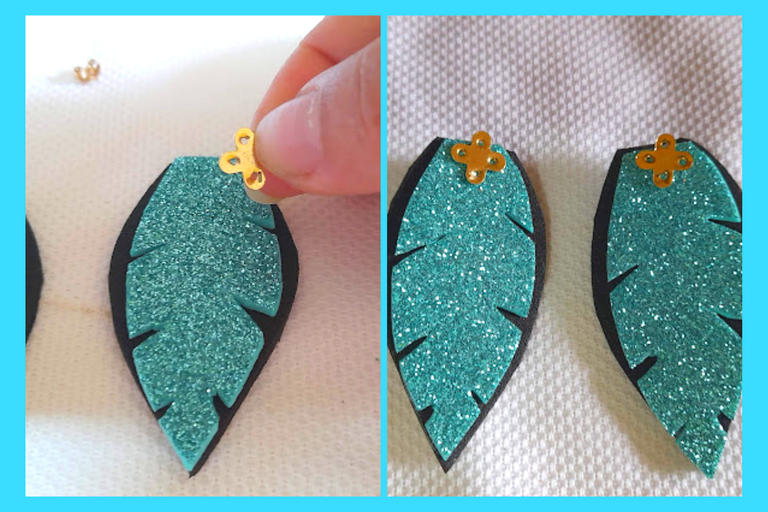
3: For our second tendril, we took the black eva rubber and marked the mold of a leaf, then in the frosted turquoise eva rubber we marked another smaller leaf with the difference that we made some small cuts, then we cut each piece.
3: Para nuestro segundo zarcillo, tomamos la goma eva negro y marcamos el molde de una hoja, seguidamente en el goma eva turquesa escarchado marcamos otra hoja mas pequeña con la diferencia que le realice unos pequeños cortes, luego recortamos cada pieza.
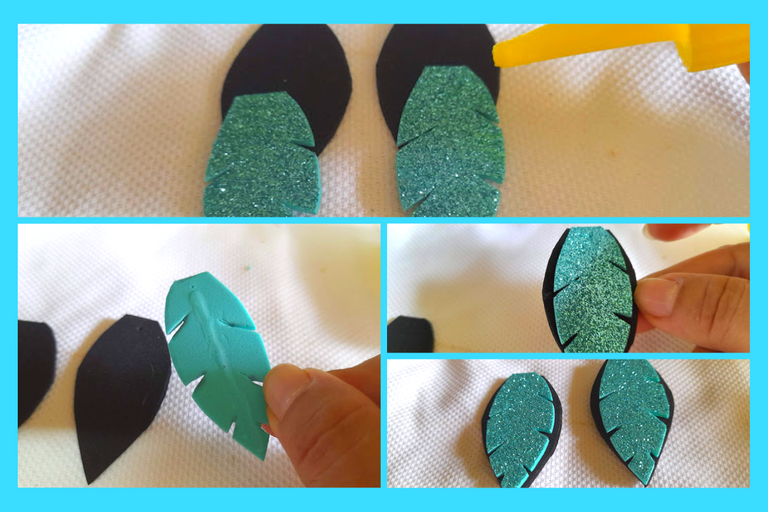
4: Now we proceed to glue each of the pieces and with the base of the tendril we make a small hole in the upper part of the leaf, as you can see.
4: Ahora procedemos a pegar cada una de las piezas y con la base del zarcillo le realizamos un pequeño agujero en la parte superior de la hoja, como pueden ver.
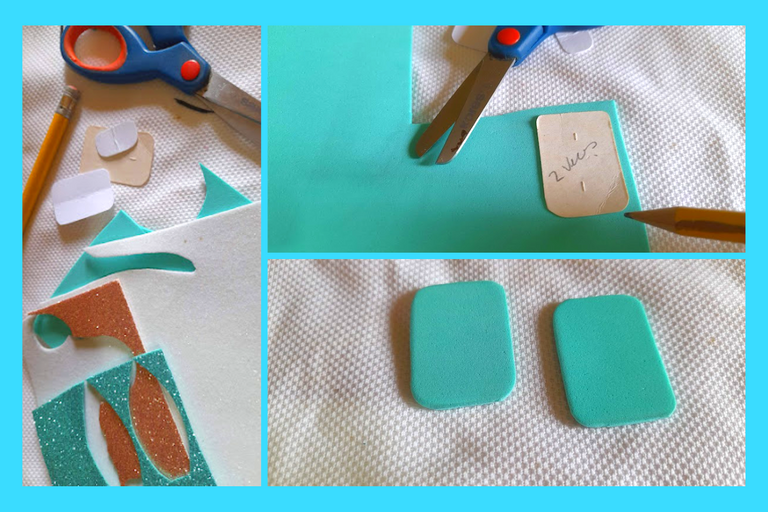
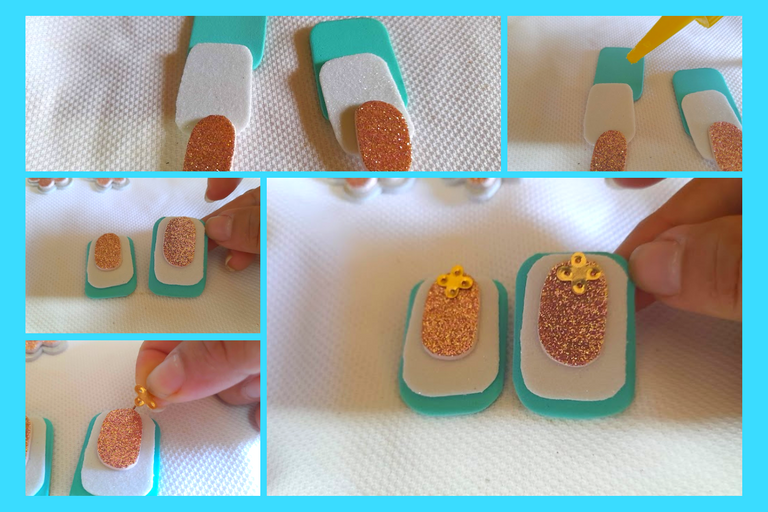
5: To create our last tendril, we take the turquoise eva rubber and mark a rectangle, then we mark another smaller rectangle in the white frosted eva rubber and in the pink frosted eva rubber we make a small oval, then we proceed to glue each of the pieces already cut out and finally we make a hole in the top of the rectangle with the base of the tendril, as you can see in the images.
5: Para crear nuestro último zarcillo, tomamos la goma eva turquesa y marcamos un rectángulo, seguidamente marcamos otro rectángulo mas pequeño en la goma eva blanco escarchado y en la goma eva rosado escarchado realizamos un pequeño ovalo, seguidamente procedemos a pegar cada una de las piezas ya recortadas y para finalizar le realizamos un agujero en la parte superior del rectángulo con la base del zarcillo, como pueden observar en las imágenes.
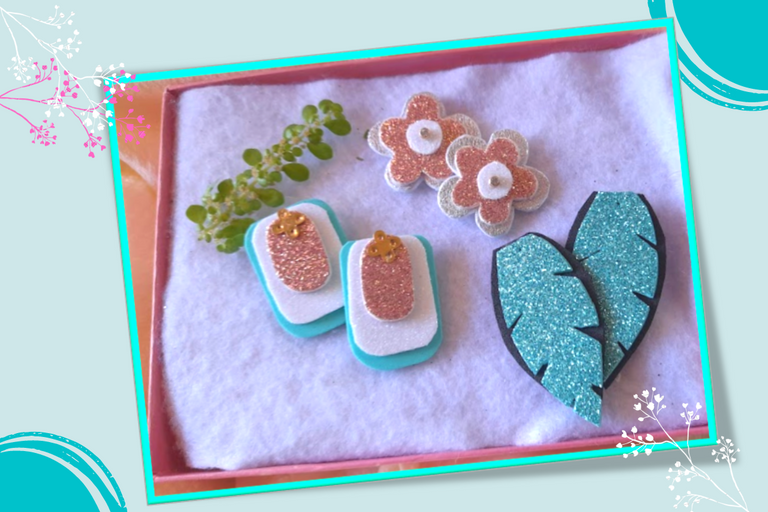
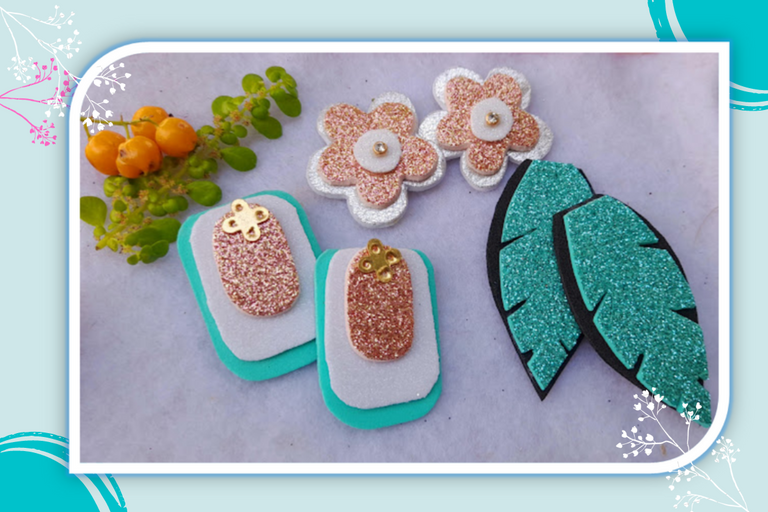
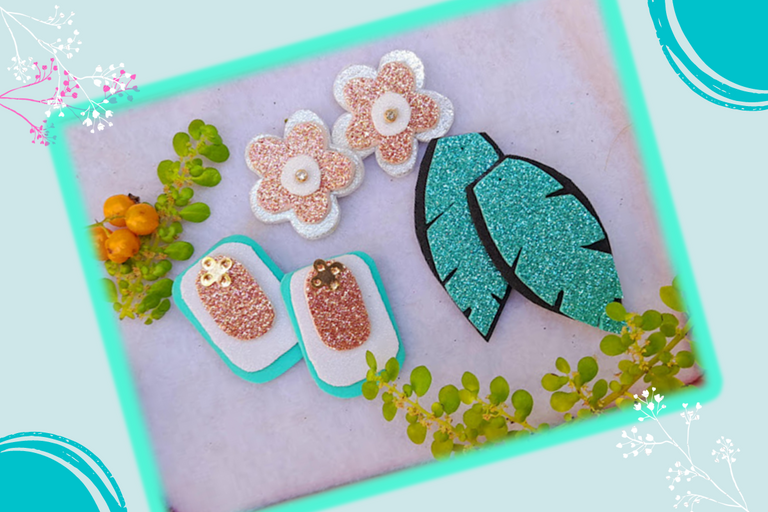
Ready, my beautiful set of earrings created with eva rubber, my dear friends I'm almost sure you will love today's project and you will be encouraged to create your own earrings, they are so cute to wear!
Until next time!
Listo, mi bello Set de zarcillos creados con goma eva.¡Mis queridas amigas estoy casi segura que les va a gustar este proyecto de hoy y se van animar a crear sus propios zarcillos, que son muy lindo lucir!
¡Hasta una próxima publicación!
Portada y plantillas elaboradas en canva
Fuente Separador


The photographs were taken with a Samsung A12 smartphone, the text was translated into English with the Google translator.link
The banner was designed on canvas link
Las fotografías fueron tomadas con un teléfono inteligente Samsung A12, el texto fue traducido al ingles con el traductor de Google.link
El banner fue diseñado en canvas link
Hermosos amiga
Gracias amiga, anímate a crear tus propios zarcillos son bastante fáciles y económicos porque los puedes crear con los retacitos de gama eva que te quedan de las manualidades. Saludos
Congratulations @janettbrito76! You have completed the following achievement on the Hive blockchain and have been rewarded with new badge(s):
Your next target is to reach 55000 upvotes.
You can view your badges on your board and compare yourself to others in the Ranking
If you no longer want to receive notifications, reply to this comment with the word
STOPTo support your work, I also upvoted your post!
Check out the last post from @hivebuzz:
Support the HiveBuzz project. Vote for our proposal!
Qué lindos y fáciles de hacer, amiga. Me encantaron y los colores que escogiste los hacen ver muy delicados. Gracias por compartir estas bellezas. Saludos, un abrazo.
Gracias amiga. En verdad son faciles de hacer y puedes crear el diseño que mas te guste. Un abrazo 🤗 feliz noche
The all look beautiful. Thanks for sharing
Thank you for sharing this amazing post on HIVE!
Your content got selected by our fellow curator @rezoanulvibes & you just received a little thank you via an upvote from our non-profit curation initiative!
You will be featured in one of our recurring curation compilations and on our pinterest boards! Both are aiming to offer you a stage to widen your audience within and outside of the DIY scene of hive.
Join the official DIYHub community on HIVE and show us more of your amazing work and feel free to connect with us and other DIYers via our discord server: https://discord.gg/mY5uCfQ !
If you want to support our goal to motivate other DIY/art/music/homesteading/... creators just delegate to us and earn 100% of your curation rewards!
Stay creative & hive on!
Se ven bien bonito. Una vez tuve la oportunidad de sentarme con mi prima de 9 años a hacerle unos zarcillos así. No de foami sino con bisutería, pero usando unas bases parecida a las que mencionas. Tiene varias piecitas, todas las resaltas en el post, así que te felicito, te quedó muy bien la publicación.
Gracias por compartirla en la comunidad.
Gracias amigo, por leer y comentar mi post. En verdad son bastante prácticos y fáciles de hacer y lo mejor de todo es que se puede crear cualquier diseño con la goma eva. Feliz día
Yay! 🤗
Your content has been boosted with Ecency Points, by @janettbrito76.
Use Ecency daily to boost your growth on platform!
Support Ecency
Vote for new Proposal
Delegate HP and earn more