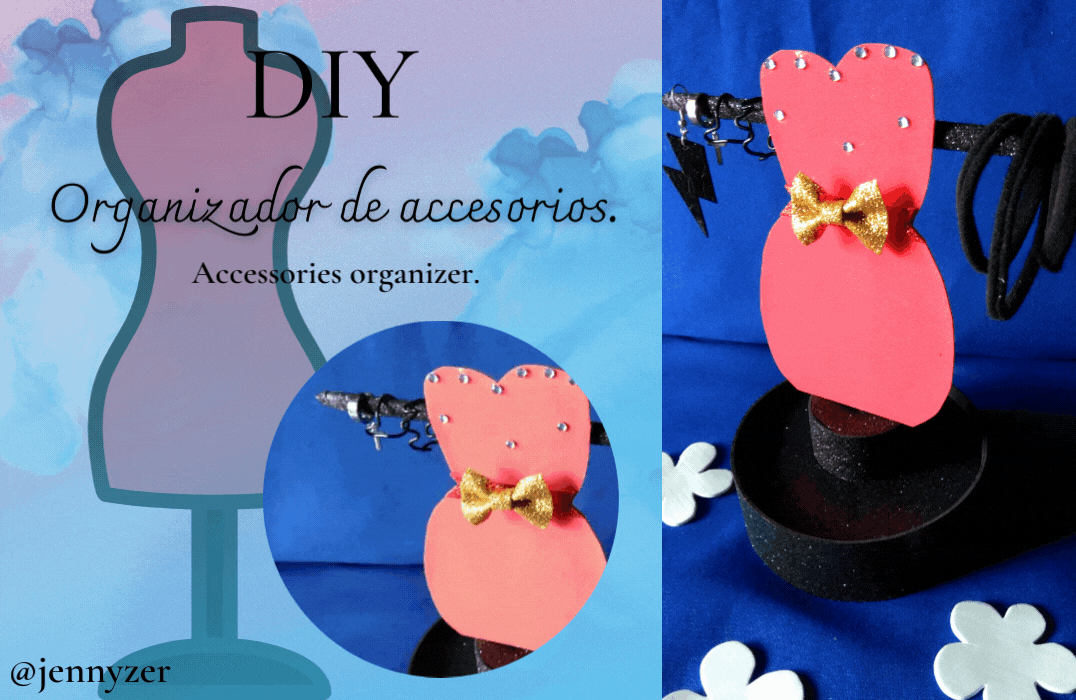
Organizador de accesorios. || Accessories organizer.

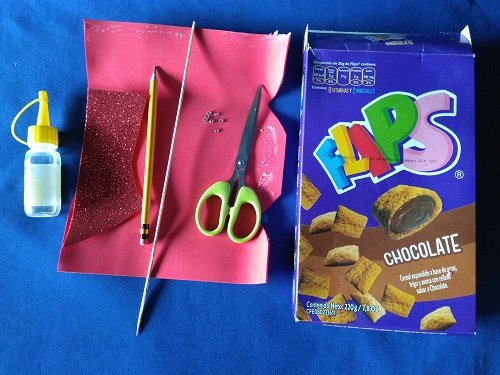
Primer paso: || First step:
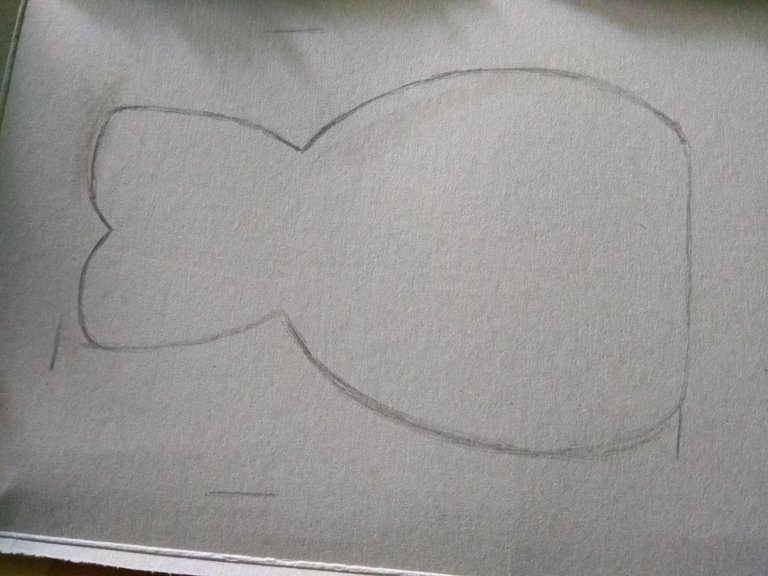
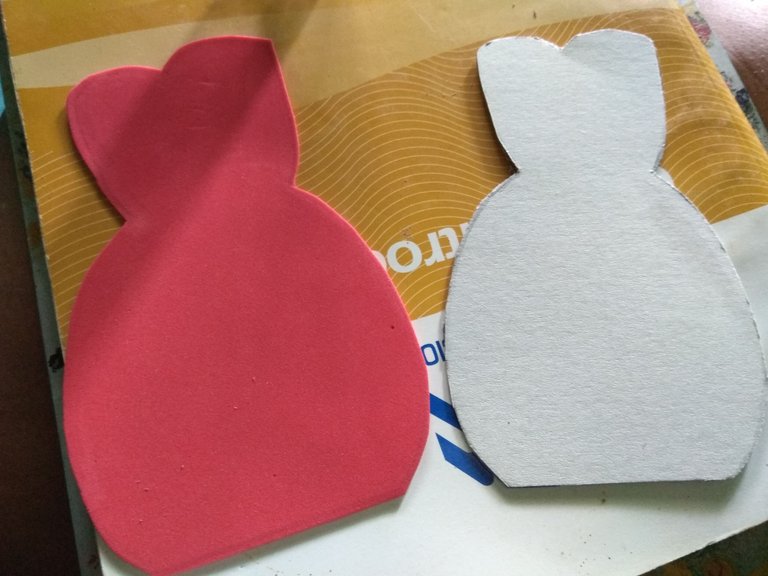
▪️ Sobre el cartón delgado dibujé el maniquí, pueden dibujar sobre un papel, luego recortar y trazar en el cartón.
On the thin cardboard I drew the mannequin, you can draw on paper, then cut out and trace on the cardboard.
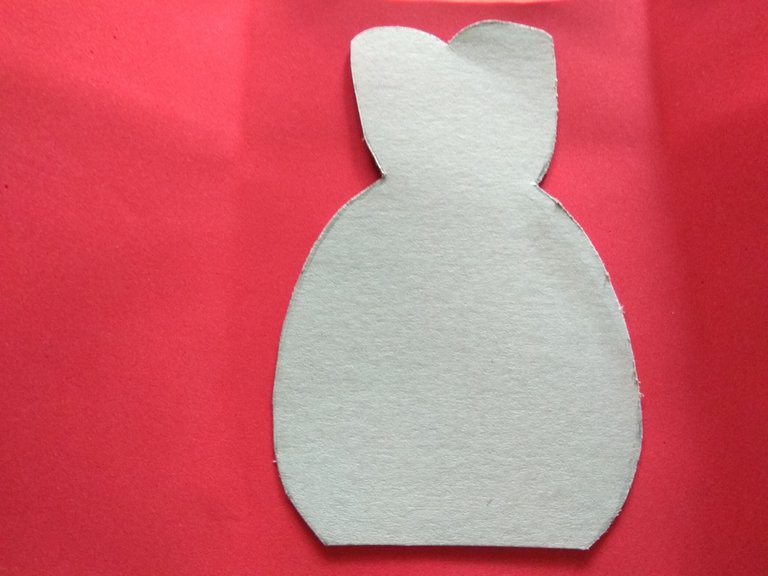
Segundo paso: || Second step:
▪️ Recortar la figura y trazar sobre el foami rojo, me gusta hacer es tipo de trazos con un palillo para no rallar el foami, y presiono con suavidad.
Cut out the figure and trace on the red foami, I like to do this kind of strokes with a toothpick to avoid scratching the foami, and I press gently.
Tercer paso: || Third step:
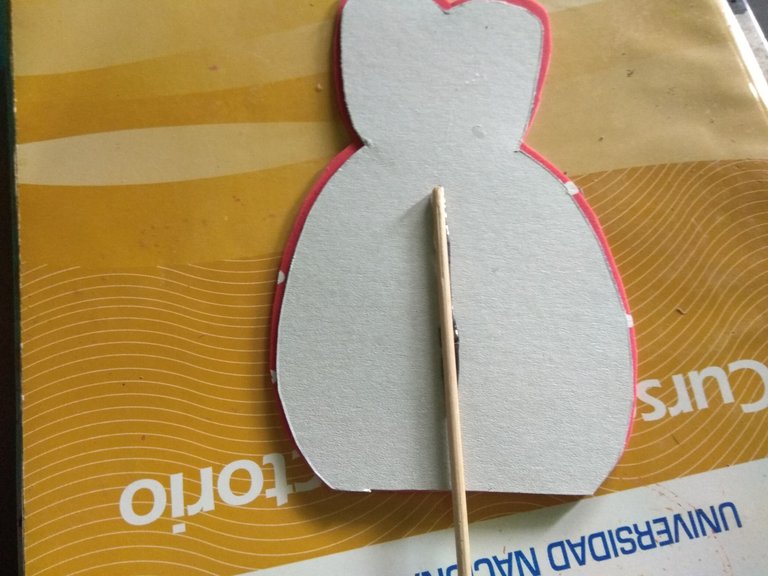
▪️ Unir ambas piezas usando silicón líquido, la pieza de foami debe cubrir el cartón.
Join both pieces using liquid silicone, the foami piece should cover the cardboard.
Cuarto paso: || Fourth step:
▪️ Mis palillos eran muy grandes, por ello tuve que cortar a la mitad uno de ellos y lo pegué a la parte trasera del maniquí, será muy útil a la hora de colocarlo en la base.
My toothpicks were too big, so I had to cut one of them in half and glued it to the back of the mannequin, it will be very useful when placing it on the base.
Quinto paso: || Fifth step:
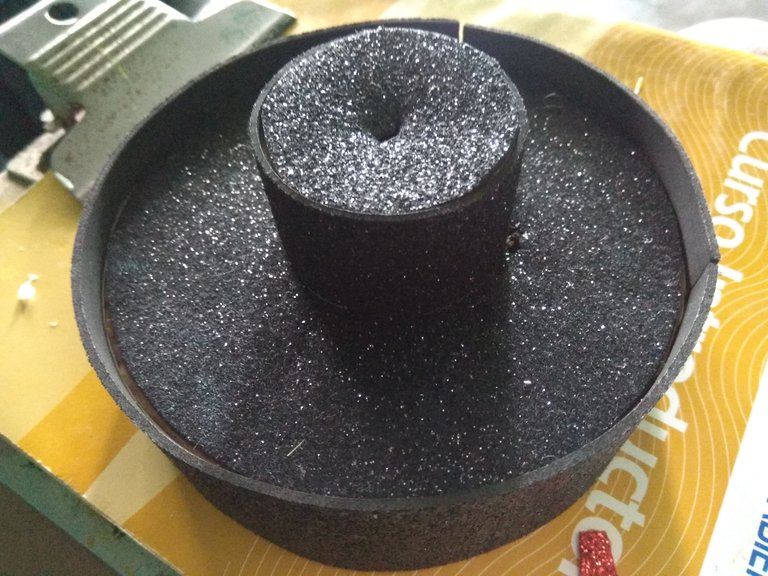
▪️ Esta base la tenía hecha desde hace tiempo, no tengo imágenes de como la hice pero puedo explicar como fue el proceso, primero tracé y recorté dos círculos, uno de 8 cm y otro de 3 cm, seguido de ello los cubrí con foami en la parte frontal, y recorté tiras de foami para pegar alrededor, el ancho dependerá de cuan alta quieran la base, mis tiras tenían 4 cm de ancho, uní ambos piezas y terminaron como ven la imagen.
I had this base made for a long time, I don't have pictures of how I made it but I can explain how the process was, first I traced and cut out two circles, one of 8 cm and another of 3 cm, then I covered them with foami on the front, and cut out strips of foami to paste around them, the width will depend on how high you want the base, my strips were 4 cm wide, I joined both pieces and they ended up as you see in the picture.
Sexto paso: || Sixth step:
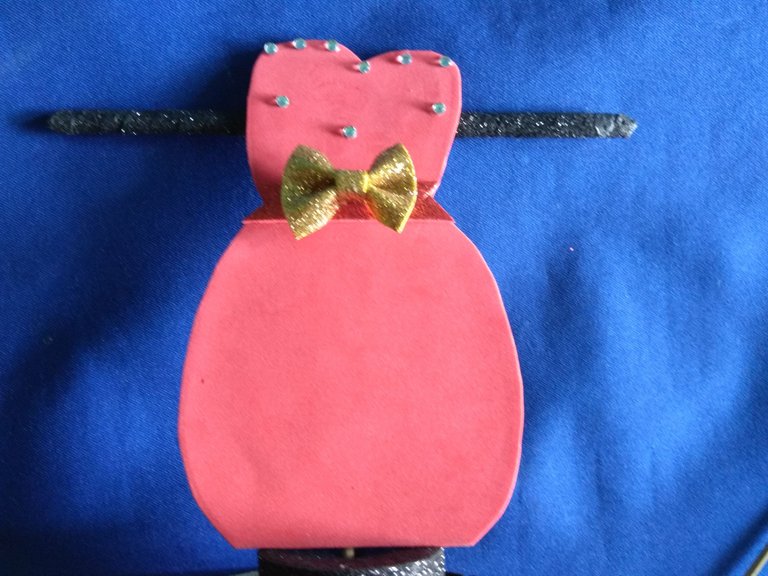
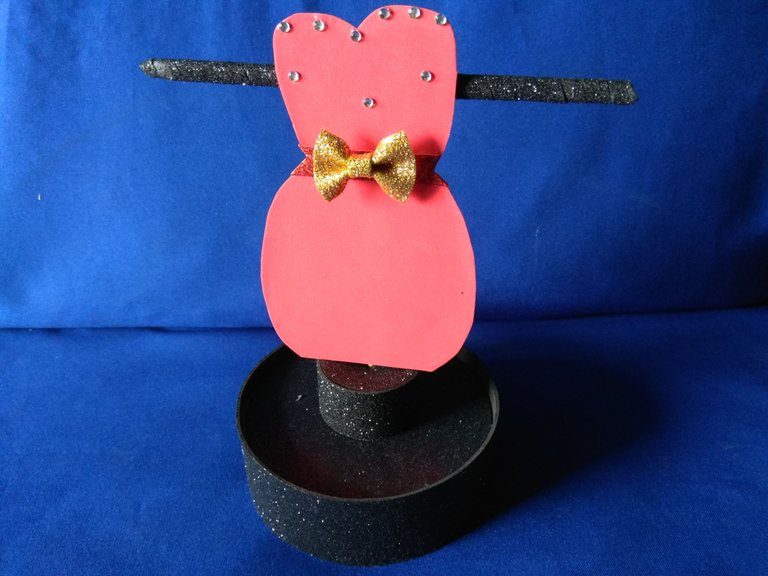
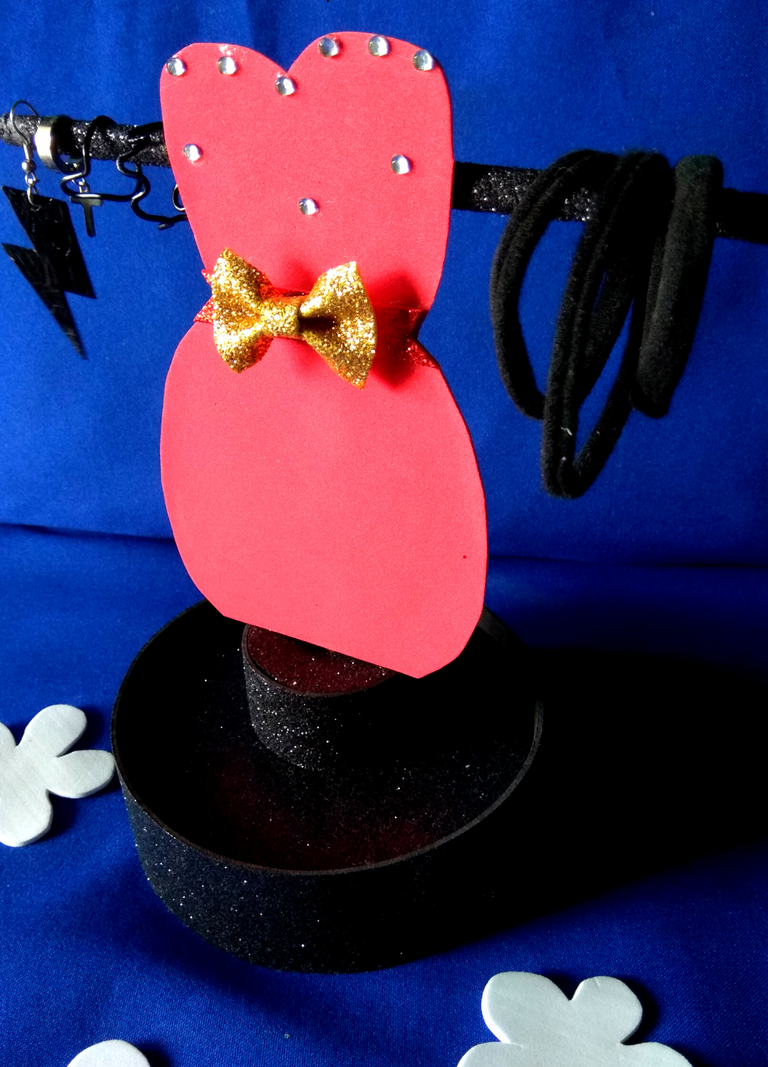
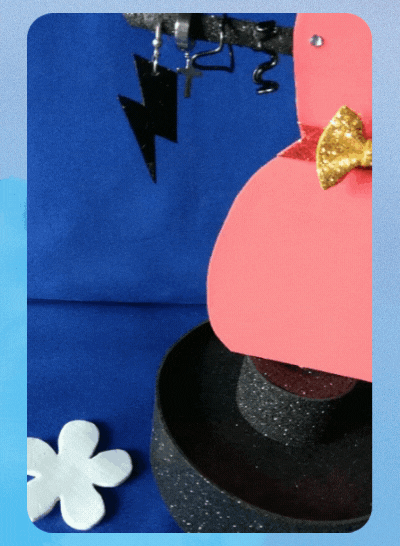
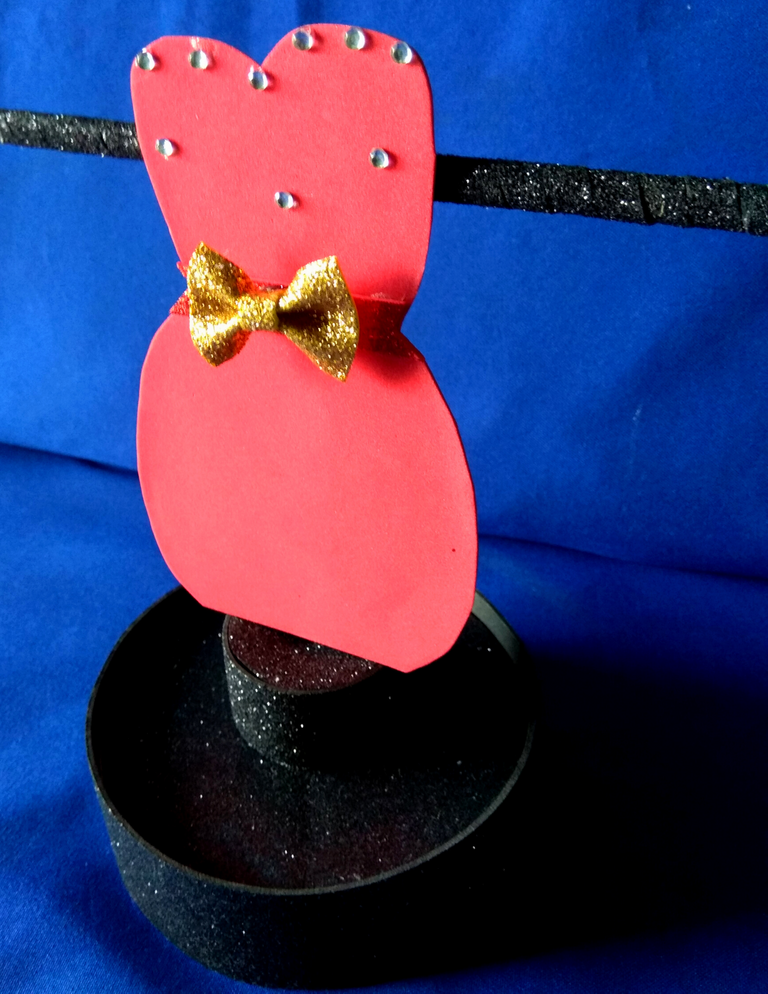
▪️ Para decoración solo pegué piedras en la parte superior del maniquí y un pequeño lazo de foami dorado, además corté a la mitad el palillo restante y los uní con una tira de foami negro, esto lo pegué en la parte trasera del maniquí.
For decoration I only glued stones on the top of the mannequin and a small gold foami bow, I also cut in half the remaining stick and joined them with a strip of black foami, this I glued on the back of the mannequin.
Séptimo paso: || Seventh step:
▪️ Entierren con sumo cuidado el maniquí en la base, traten de que quede lo más centrado posible, por debajo de la estructura agregué silicón líquido, donde sobresale el palillo, de esta manera me aseguro que la pieza se mantendrá firme.
Bury the mannequin very carefully in the base, try to keep it as centered as possible, underneath the structure I added liquid silicone, where the toothpick protrudes, this way I make sure the piece will remain firm.
Imágenes tomadas desde mi Xiaomi Redmi Note 4. || Images taken from my Xiaomi Redmi Note 4.
Separadores hechos en Canva. || Dividers made in Canva.
Ediciones hechas en Canva. || Editions made in Canva.
Translator Deepl.
https://twitter.com/gabimramirez25/status/1539046178993623042
The rewards earned on this comment will go directly to the people sharing the post on Twitter as long as they are registered with @poshtoken. Sign up at https://hiveposh.com.