Organizador de escritorio. || Desk organizer.


Materiales: || Materials:
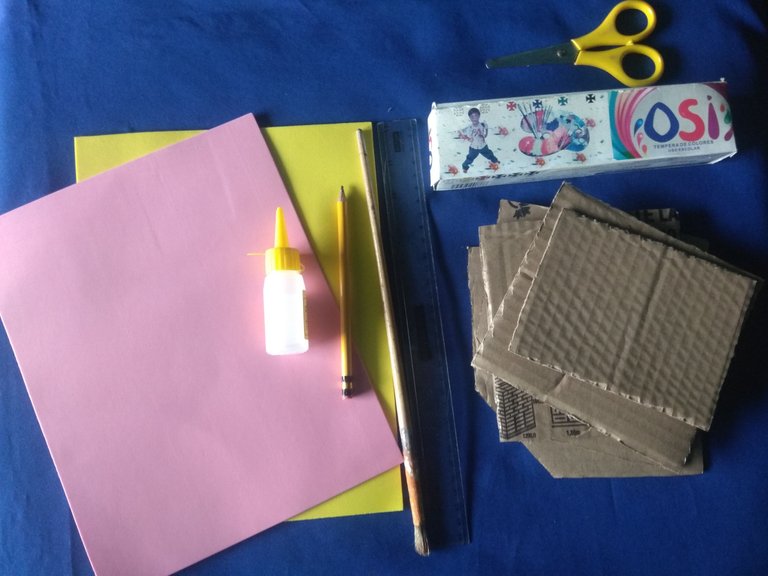
▪️ Cartón, lápiz, regla geométrica, tijeras, silicón líquido, pintura naranja, pincel, foami, rosado, amarillo y fucsia.
Cardboard, pencil, geometric ruler, scissors, liquid silicone, orange paint, paintbrush, foami, pink, yellow and fuchsia.
Paso a paso: || Step by step:
Primer paso: || First step:
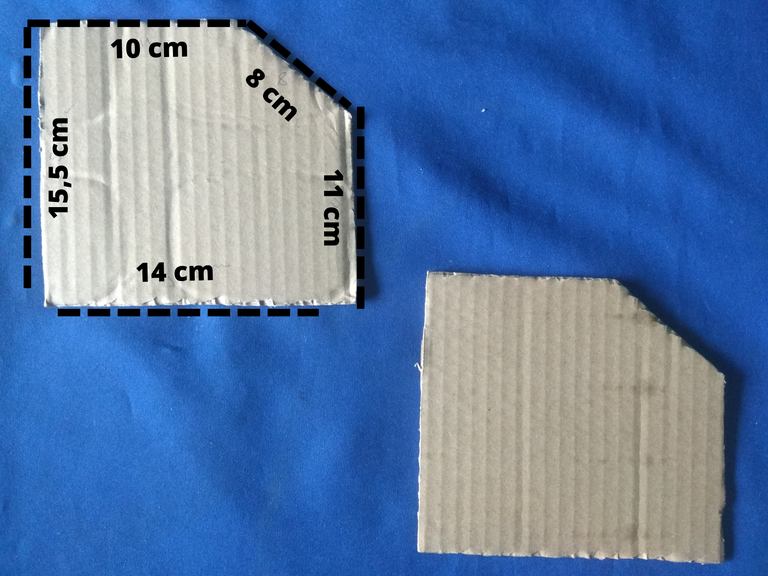
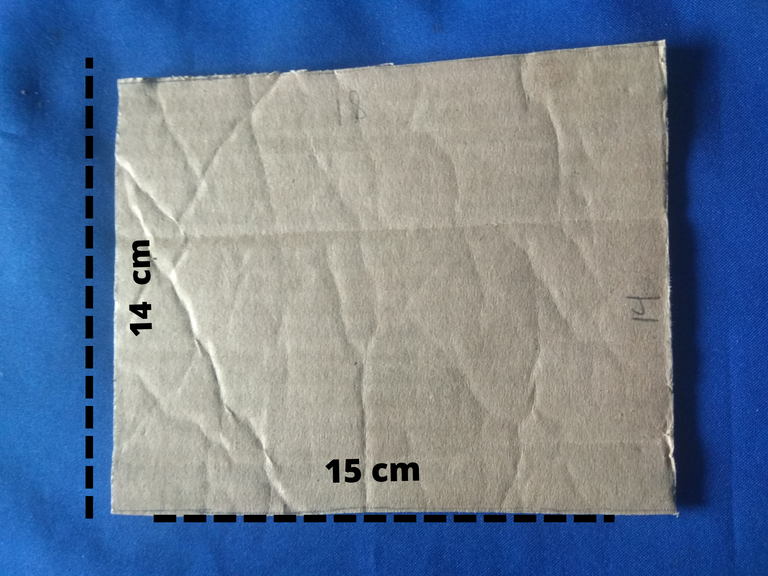
▪️ Este organizador requiere de varias piezas que deben ser recortadas en cartón, primero iniciaré por recortar dos piezas con las medidas mostradas.
This organizer requires several pieces to be cut out of cardboard, first I will start by cutting out two pieces with the measurements shown.
Segundo paso: || Second step:
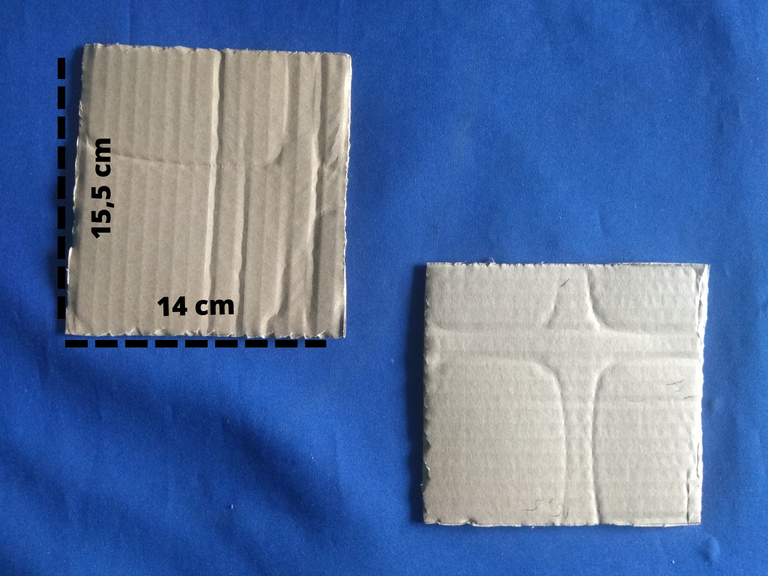
▪️ Las siguientes dos piezas por recortar será una que va en la parte trasera, y se encarga de unir a las anteriores piezas, y otra que será un divisor.
The next two pieces to be cut out will be one that goes on the back, and is in charge of joining the previous pieces, and another one that will be a divider.
Tercer paso: || Third step:
▪️ La tercera pieza será la base, asegúrense de que encajé con las piezas antes recortadas.
The third piece will be the base, make sure it fits with the previously cut pieces.

Cuarto paso: || Fourth step:
▪️ La última pieza es la más pequeña, esta estará situada en la parte frontal del organizador, las medidas son las mostradas en la imagen.
The last piece is the smallest, this will be located at the front of the organizer, the measurements are shown in the image.
Quinto paso: || Fifth step:
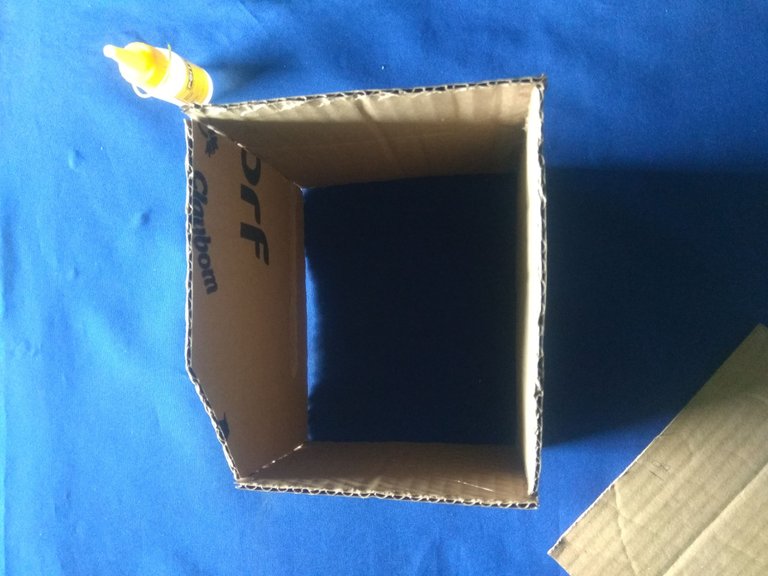
▪️ El tener las piezas recortadas se deben empezar a unir, primero pegué las piezas laterales a la pieza trasera, al secar uní la pieza delantera.
Once the pieces were cut out, they should be joined together, first I glued the side pieces to the back piece, after drying I joined the front piece.
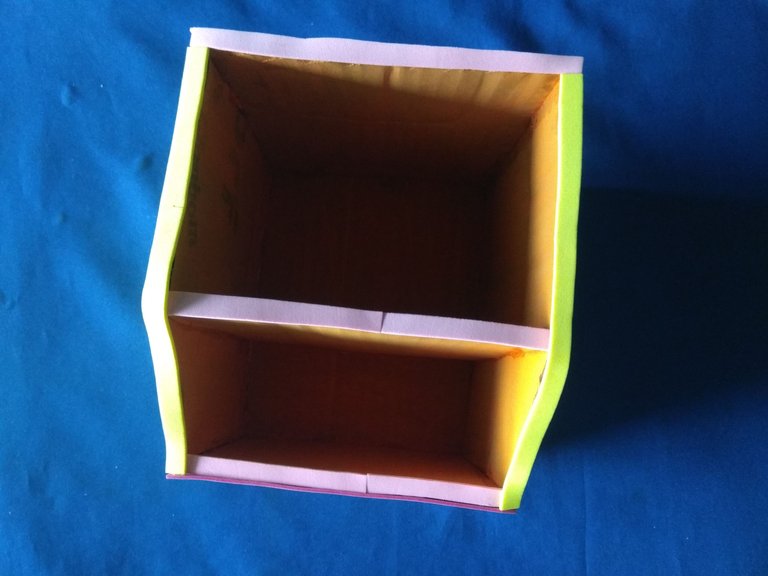
Sexto paso: || Sixth step:
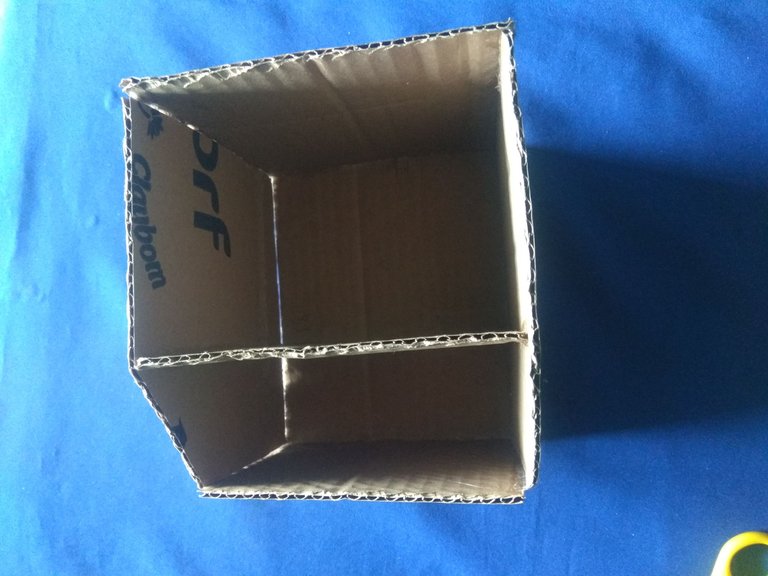
▪️ Peguen la base a la estructura para que esta sea más resistente, luego agreguen un poco de silicón al divisor e introdúzcanlo en el organizador.
Glue the base to the structure to make it more resistant, then add some silicone to the divider and insert it into the organizer.
Séptimo paso: || Seventh step:
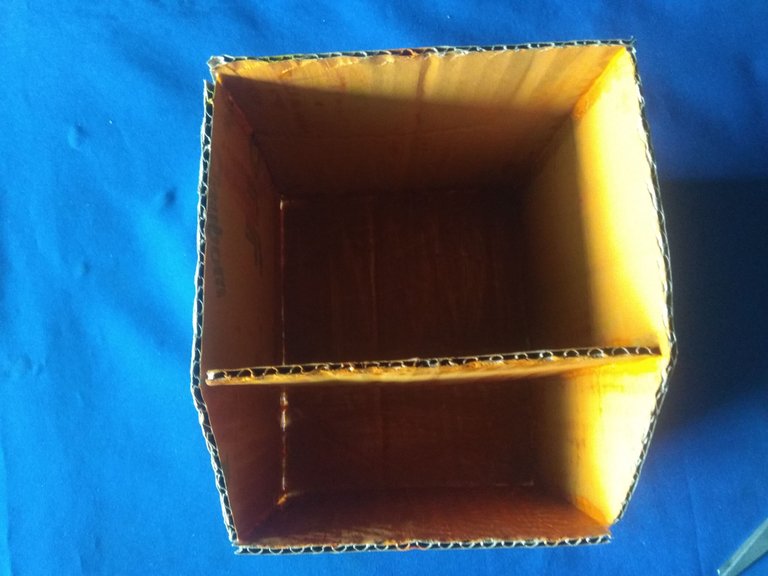
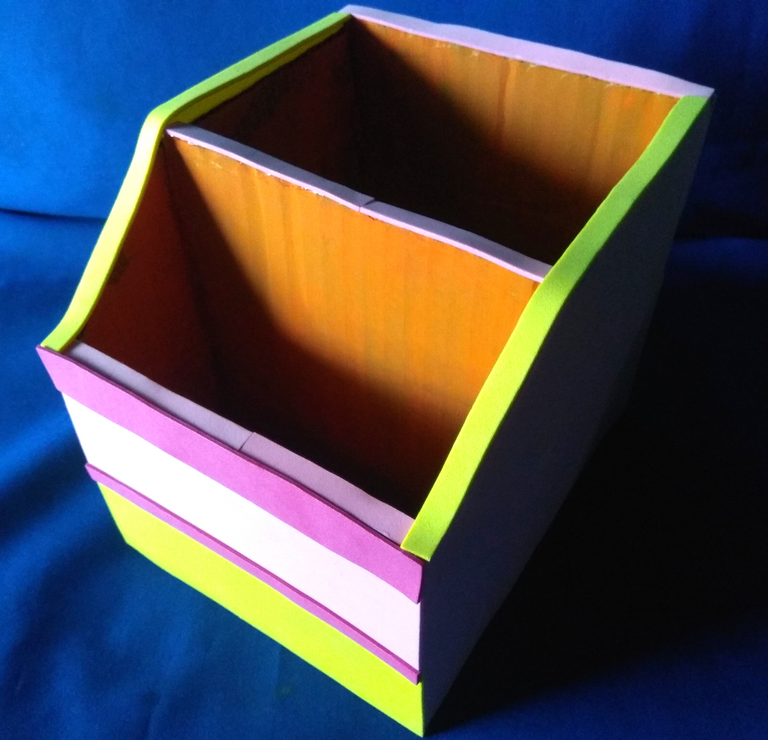
▪️ Pintar el interior del organizador es el siguiente paso, en mi caso le agregue color naranja, aunque fácilmente pueden pintar de otro color, para ser honesta hubiese preferido forrar el interior esto permite un mejor acabado, si tiene más foami pueden hacerlo.
Painting the inside of the organizer is the next step, in my case I added orange color, although you can easily paint another color, to be honest I would have preferred to line the inside of the organizer this allows a better finish, if you have more foami you can do it.
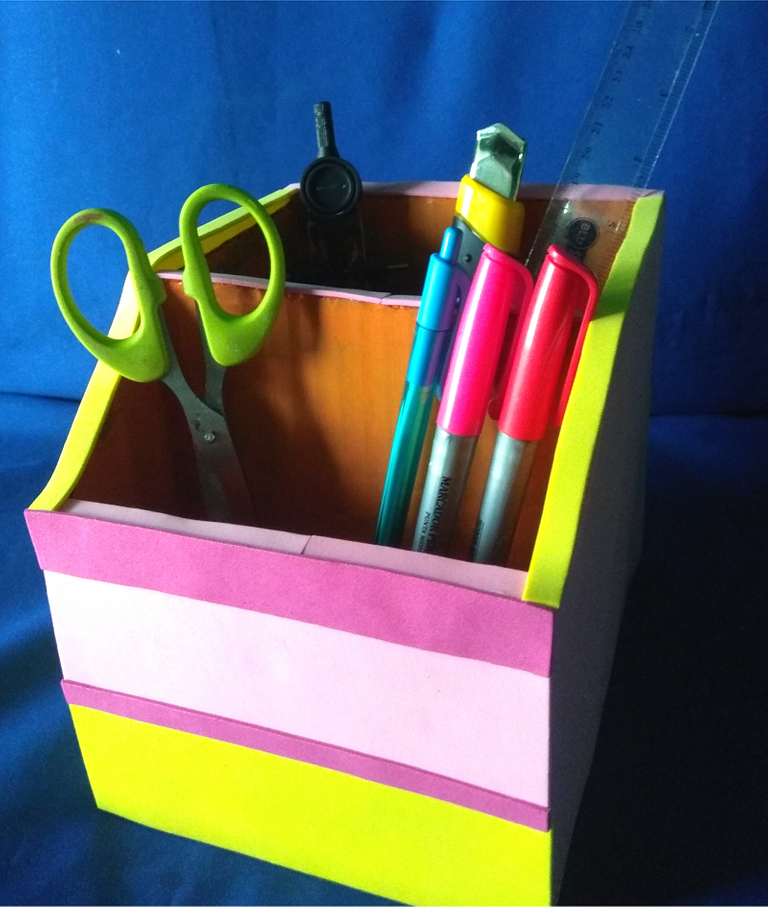
Octavo paso: || Eighth step:
▪️ Es tiempo de dar un mejor aspecto al organizador, forré los costados en foami intercambiando colores, en un lado amarillo y otro rosado.
It's time to give a better look to the organizer, I lined the sides in foami interchanging colors, on one side yellow and the other pink.

Noveno paso: || Ninth step:
▪️ La parte trasera y frontal estaban forradas en color amarillo y rosado ambos colores al mismo tiempo.
The back and front were lined in yellow and pink, both colors at the same time.
Décimo paso: || Tenth step:
▪️ Recorté tiras de foami y las pegué a los bordes para tapar todos los lados en los que el cartón era visible.
I cut out strips of foami and glued them to the edges to cover all the sides where the cardboard was visible.

Imágenes tomadas desde mi Xiaomi Redmi Note 4. || Images taken from my Xiaomi Redmi Note 4.
Separadores hechos en Canva. || Dividers made in Canva.
Ediciones hechas en Canva. || Editions made in Canva.
Vídeos convertidos en gif || Videos converted to gif IMG2GO
Translator Deepl.
https://twitter.com/genicedelvalle1/status/1572383991788888066
The rewards earned on this comment will go directly to the people sharing the post on Twitter as long as they are registered with @poshtoken. Sign up at https://hiveposh.com.
Que bien amiga muy necesario ahora que comenzara este nuevo año escolar, para mantener los lapices a la mano y bien organizados. Saludos
Un organizador básico pero útil, gracias por comentar.
Yo necesito uno de esos, soy una persona muy desorganizada y esos organizadores te hacen la vida más fácil aunque soy muy mala para todo lo que tenga que ver con crear a algo con las manos jajajajaj te quedó muy bien amiga.
Jajajjaaj es muy necesario tener nuestras cosas ordenadas facilita mucho el trabajo de crear, gracias por comentar.
Hola Jenny, siempre eres muy buena y creativa a la hora de utilizar materiales de reciclaje, te quedó muy bonito el organizador de escritorio. ❤️
Gracias por tu lindo comentario Gabi.
Thank you for sharing this amazing post on HIVE!
Your content got selected by our fellow curator @rezoanulvibes & you just received a little thank you via an upvote from our non-profit curation initiative!
You will be featured in one of our recurring curation compilations and on our pinterest boards! Both are aiming to offer you a stage to widen your audience within and outside of the DIY scene of hive.
Join the official DIYHub community on HIVE and show us more of your amazing work and feel free to connect with us and other DIYers via our discord server: https://discord.gg/mY5uCfQ !
If you want to support our goal to motivate other DIY/art/music/homesteading/... creators just delegate to us and earn 100% of your curation rewards!
Stay creative & hive on!
Thank you for your support!
simplemente hermoso. Parece como si fuera de madera!
No lo había notado, gracias por tu comentario.