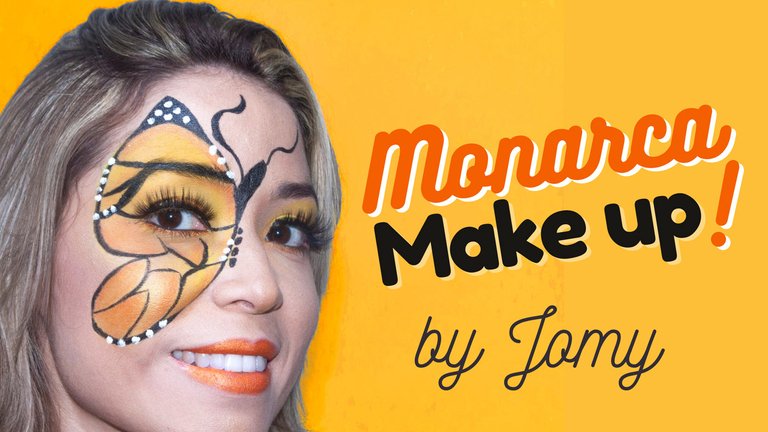
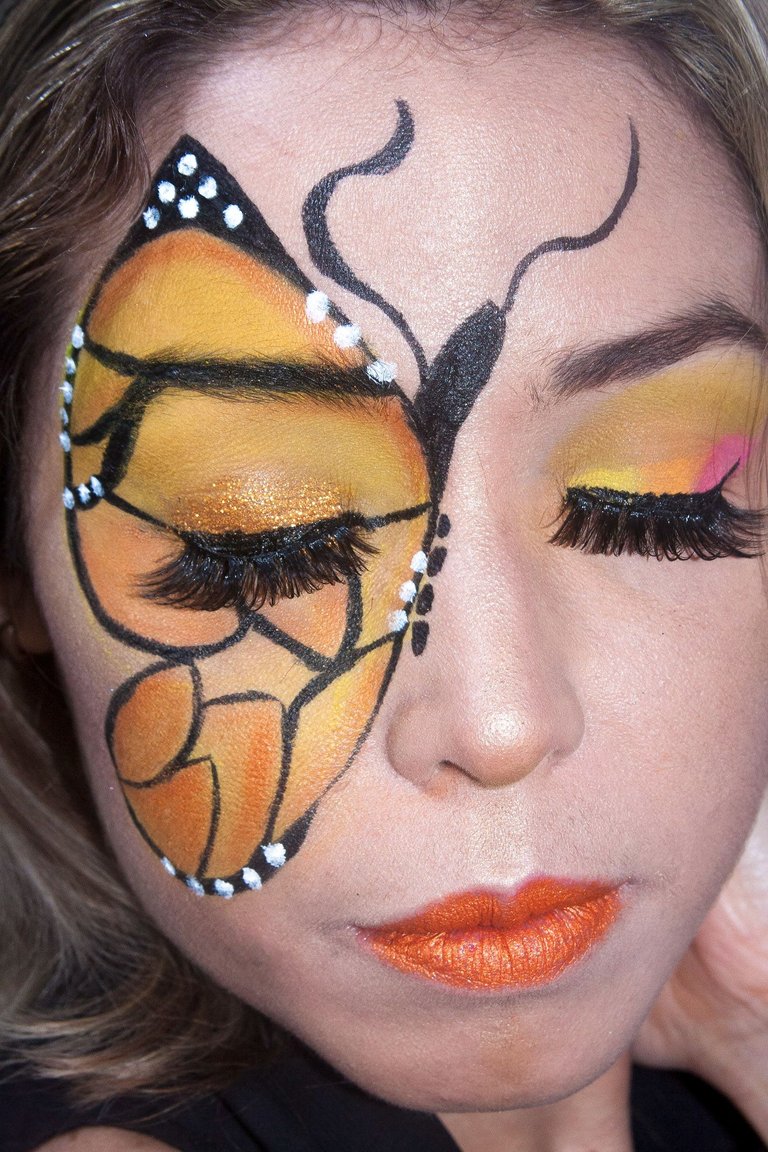
🦋 Maquillaje paso a paso de la Mariposa Monarca 🦋 Monarch Butterfly Step by Step Makeup 🦋

¡Qué magníficas son las mariposas! Y pensar que sus bellos colores y diseños son producto de una metamorfosis las hace una de las especies de insectos más interesantes. La Monarca no escapa a este proceso en la que sus colores naranja, negro y blanco se mezclan para convertirse en una de las mariposas más hermosas, pero su fama no sólo se debe a sus colores, sino al hecho de que ellas hacen un recorrido de e aproximadamente 5000 km desde el norte de América hasta California y México. Impresionante, ¿verdad?
Como me encanta los colores de este bello insecto quise plasmarlo en este laborioso maquillaje donde jugué con los colores naranja, amarillo, negro y blanco.
Si quieres intentarlo te invito a ver el paso a paso.

Materiales a utilizar :
💛 Base líquida beige
💛 Rubor rosa
💛 Iluminador
💛 Lápiz amarillo
💛 Brocha para polvo y rubor
💛 Brocha lengua de gato para base
💛 Pincel para cejas y ojos
💛 Lápiz de ojos negro
💛 Delineador negro
💛 Pintura líquida blanca o delineador blanco
💛 Polvo traslúcido beige
💛 Sombra amarilla, naranja, negra, fucsia y marrón
💛 Pestañas postizas

Tips: antes de maquillarte debes preparar tu rostro con productos que hidraten la piel. Yo me aplico ácido hialurónico o alguna crema hidratante en el rostro. En los labios algún labial hidratante. El acabado del maquillaje será genial.
Maquillaje
En este maquillaje predominan los colores vivos y los ojos son los protagonistas por lo que se debe dar profundidad a la mirada.
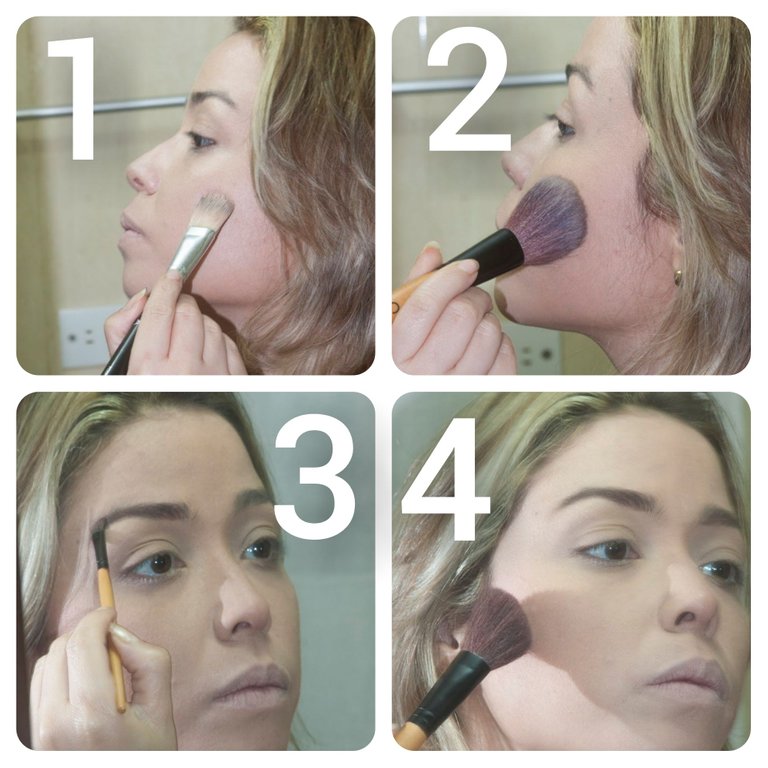
1er paso
Debes aplicarte el corrector en ojeras. Luego, aplica la base líquida dando toques suaves con la brocha lengua de gato.
Sella la base con polvo compacto utilizando una brocha, tal como se ve en la foto.
Luego, con un pincel, delinea las cejas.
Coloca rubor rosa. Opcionalmente puedes colocar iluminador en la nariz, en el pómulo y el arco de cupido (sobre los labios).
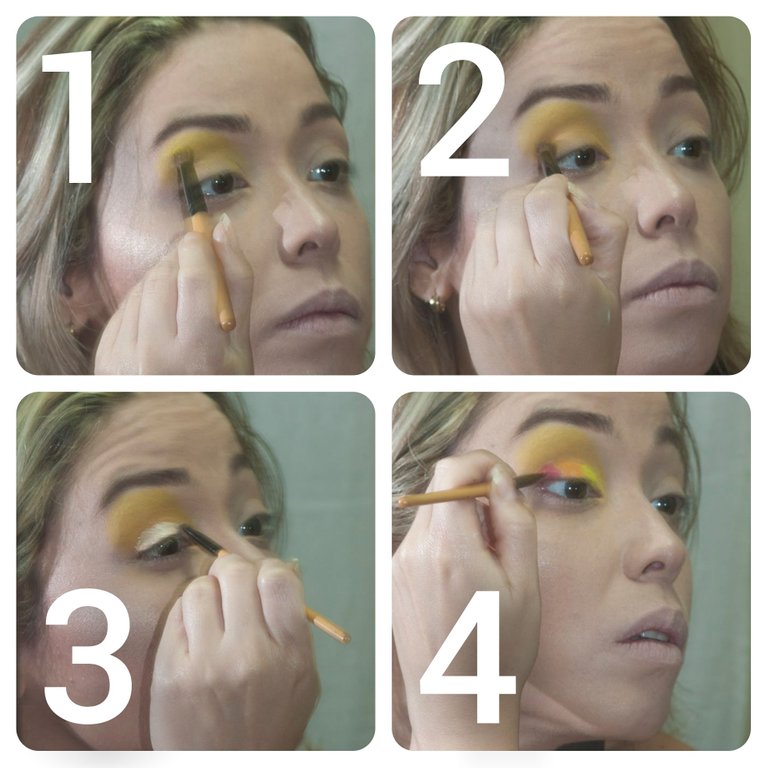
2do paso
Aplica sombra amarilla en el arco ciliar difuminando hacia el párpado móvil.
Luego, aplica sombra naranja en la cuenca del ojo. Debes difuminarlo.
Coloca un poco de base en el párpado móvil. Esto se hace para que los colores de la sombra se vean más intensos.
Ahora procede a colocar sombra amarilla, naranja y fucsia.
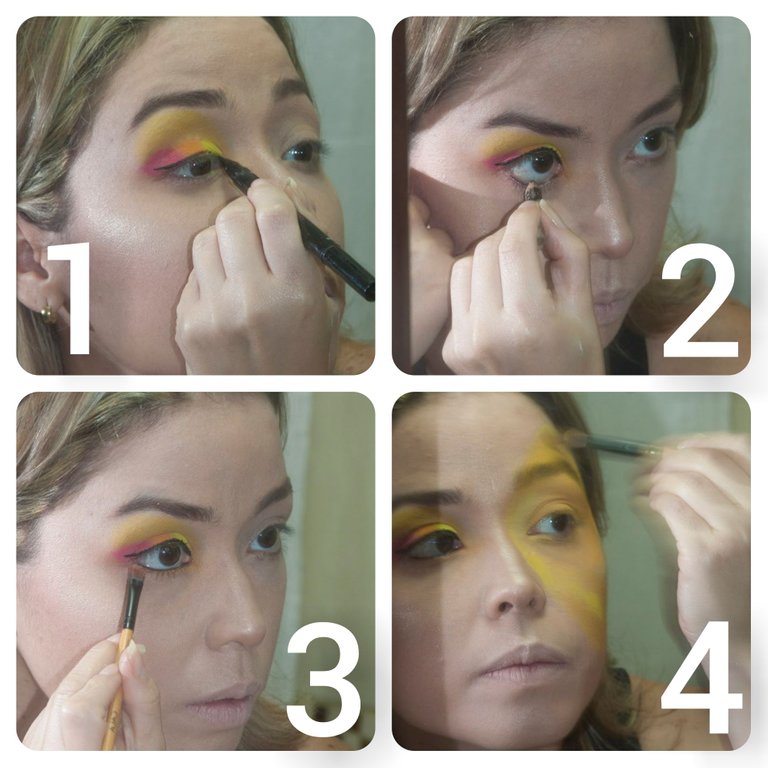
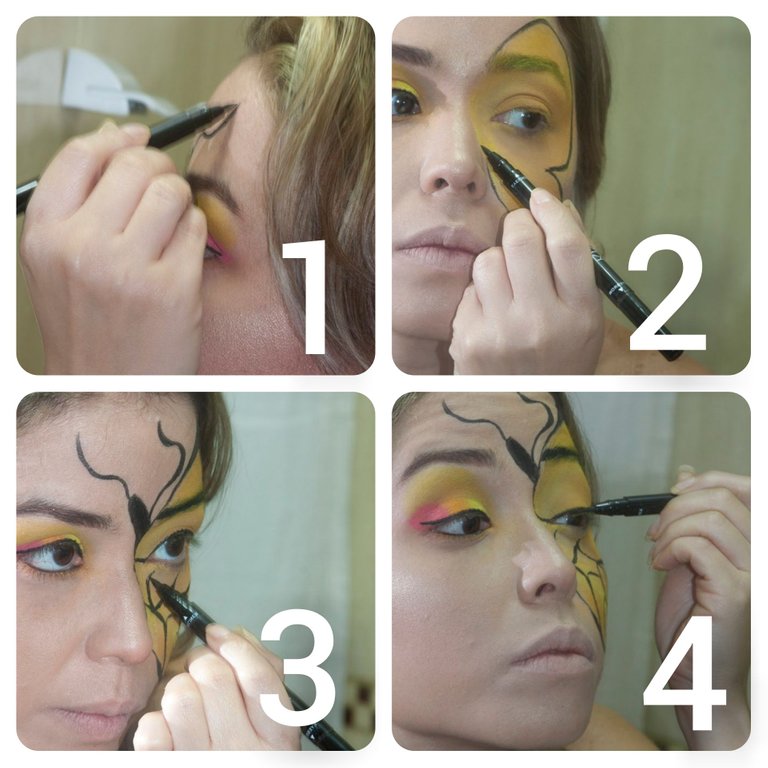
3er paso
Con un delineador negro, traza una línea fina en el párpado móvil a ras de las pestañas y termínala con un rabillo.
Con un creyón negro, delinea el lagrimal del ojo.
En la línea de las pestañas aplica sombra naranja.
Con ayuda de un marcador amarillo, puedes dibujar un ala de la mariposa. Luego, con la ayuda de una brocha o esponja, coloca sombra amarilla y naranja en el ala que dibujaste.
4to paso
Con un delineador negro, dibuja el ala de la mariposa.
Poco a poco ve dándole forma y dibuja la cabeza y las antenas.
Dibuja las venas del ala de la mariposa.
Con un delineador negro, traza una línea fina en el párpado móvil a ras de las pestañas y termínala con un rabillo.
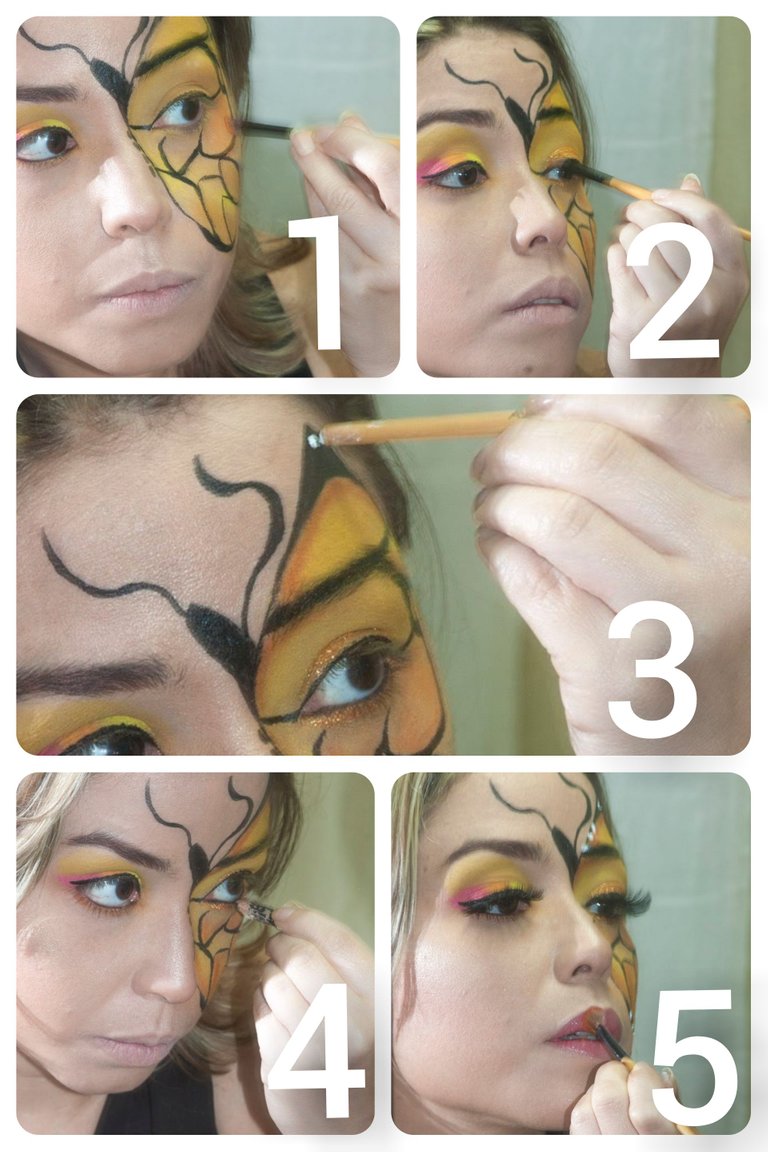
5to paso
Ahora, con sombra naranja, dale textura en varias partes.
En el párpado móvil puedes aplicar glitter amarillo para darle un toque chic.
Con pintura blanca líquida haces puntos blancos en varios lugares.
Con un creyón negro delinea el lagrimal del ojo y, luego, en la línea de las pestañas aplica sombra naranja. Luego monta las pestañas postizas.
Aplica brillo transparente y luego coloca sombra naranja. Yo lo hice de esta manera porque no tengo labial naranja.
Si llegaste hasta aquí, muchas gracias por leerme.
Me encantó maquillarme para ustedes.

Todas las fotos son propias.
Fotógrafo: @charsdesign
Cámara: Canon EOS 40D
Edición: InCollage y Adobe Photoshop
Banner creado con Canva
Traductor versión gratuita: DeepL
Locación: Mi apartamento.
Fuente: Partes del rostro, NatGeo y Maquillaje Mariposa
NOW IN ENGLISH
🦋 Monarch Butterfly Step by Step Makeup 🦋
How magnificent butterflies are! And to think that their beautiful colors and designs are the product of metamorphosis makes them one of the most interesting insect species. The Monarch does not escape this process in which its orange, black and white colors are mixed to become one of the most beautiful butterflies, but its fame is not only due to its colors, but to the fact that they make a journey of approximately 5000 km from North America to California and Mexico. Impressive, isn't it?
As I love the colors of this beautiful insect I wanted to capture it in this laborious makeup where I played with the colors orange, yellow, black, and white.
If you want to try it I invite you to see the step-by-step.
Materials to be used :
💛 Beige liquid foundation
💛 Pink blush
💛 Illuminator
💛 Yellow pencil
💛 Powder and blush brush
💛 Cat's tongue foundation brush
💛 Eyebrow & Eye Brush
💛 Black eyeliner pencil
💛 Black eyeliner
💛 White liquid paint or white liner
💛 Beige translucent powder
💛 Yellow, orange, black, fuchsia, and brown eyeshadow
💛 False eyelashes
Tips: before applying makeup you should prepare your face with products that moisturize the skin. I apply hyaluronic acid or moisturizing cream to my face. On the lips, I apply moisturizing lipstick. The makeup finish will be great.
Makeup
In this makeup, bright colors predominate and the eyes are the protagonists so you must give depth to the look.
1st step
You must apply concealer on dark circles under the eyes. Then, apply the liquid foundation with soft touches with the cat tongue brush.
Seal the foundation with pressed powder using a brush, as shown in the photo.
Then, with a brush, outline the eyebrows.
Apply pink blush. Optionally you can place a highlighter on the nose, cheekbone, and cupid's bow (above the lips).
2nd step
Apply yellow shadow on the ciliary arch blending towards the mobile eyelid.
Then, apply orange shadow in the eye socket. Blend it out.
Place a little foundation on the eyelid. This is done to make the eyeshadow colors look more intense.
Now proceed to place yellow, orange, and fuchsia shadows.
3rd step
With a black eyeliner, draw a thin line on the eyelid at the lash line and finish it with a corner of eyelashes.
With a black crayon, outline the tear trough of the eye.
On the lash line, apply orange shadow.
With the help of a yellow marker, you can draw a butterfly wing. Then, with the help of a brush or sponge, place a yellow and orange shadows on the wing you drew.
4th step
With black eyeliner, draw the wing of the butterfly.
Gradually shape it and draw the head and antennae.
Draw the veins of the butterfly's wing.
With a black eyeliner, draw a thin line on the mobile eyelid at the lashes and finish it with a corner.
5th step
Now, with orange shadow, give texture in several parts.
On the mobile eyelid you can apply yellow glitter to give it a chic touch.
With liquid white paint, make white dots in several places.
With a black crayon outline the tear of the eye and then apply orange shadow on the lash line. Then mount the false eyelashes.
Apply clear gloss and then apply orange shadow. I did it this way because I don't have orange lipstick.
If you made it this far, thank you so much for reading me.
I loved doing my makeup for you.
All photos are my own.
Photographer: @charsdesign
Camera: Canon EOS 40D
Editing: InCollage and Adobe Photoshop
Banner created with Canva
Translator free version: DeepL
Location: My apartment.
Source: Parts of the face, NatGeo and Makeup Butterfly
@jomarbym me encantó tu maquillaje amiga, los colores que utilizaste están magnifico, esta muy bien explicado el paso a paso. Interesante dato sobre su recorrido wow Felicidades. ❤️
Gracias @ayleenr por leerme y pasar por aquí 😘 . Que bueno que te gustó 😊
https://twitter.com/jomyfi/status/1418257656805003266
The rewards earned on this comment will go directly to the person sharing the post on Twitter as long as they are registered with @poshtoken. Sign up at https://hiveposh.com.
¡Que hermosa mariposa! 😍
Gracias linda 😘
¡Joma que linda con cambio de look muy bella! me encantó la sombra en los ojos el amarillo con el rosadito se ve tan lindo como para un maquillaje diario. Quedó muy hermoso tu arte, como siempre, 🌷 😊👍😀
Gracias mi Yen 😘. Que bueno que te gustó. Si con el toque fucsia queda muy bonito 😊
Gracias por leerme y comentarme
Congratulations @jomarbym! You have completed the following achievement on the Hive blockchain and have been rewarded with new badge(s) :
Your next target is to reach 600 comments.
You can view your badges on your board and compare yourself to others in the Ranking
If you no longer want to receive notifications, reply to this comment with the word
STOPTo support your work, I also upvoted your post!
@hivebuzz thank you very much 😘 😉
You're welcome @jomarbym, nice motivation 😊👍
BTW, it would be much appreciated if you support our proposal so we can continue our work!
https://peakd.com/me/proposals/147
Thank you!
@hivebuzz I am already supporting you 😘 😉 👍 🤣
Ho 😄 Well, thank you always and already @jomarbym 😊🌹😄 Have a nice day!
Te quedó de lujo. Las sombras en tu ojo son muy coloridas, le dió mucha luz a la mariposa. Además la combinación de colores fue perfecta.
Gracias por pasar por aquí 😁. Los colores son muy bonitos y vivos 😍
Te quedo genial es un gran maquillaje. Me encanto cómo te quedo y como mezclaste los colores para que quedarán incorporados en la mariposa
Gracias, los colores de la mariposa Monarca son muy lindos 😊. La difuminación de los colores es importante. 😊 😊