Art: Surreal Portrait
Arte Digital | Digital Art
Saludos querida comunidad, les presento un nuevo retrato digital, hemos vuelto a trabajos mas completos, extrañaba el uso de color y magia digital, hace un mes que no lo colocaba en practica, hoy traigo un nuevo arte con un hermoso concepto...
Greetings dear community, I present a new digital portrait, we have returned to more complete works, I missed the use of color and digital magic, a month ago I did not put it into practice, today I bring a new art with a beautiful concept...
¡Espero te guste! | I hope you like!
Presentación del diseño | Desing presentación
.png)
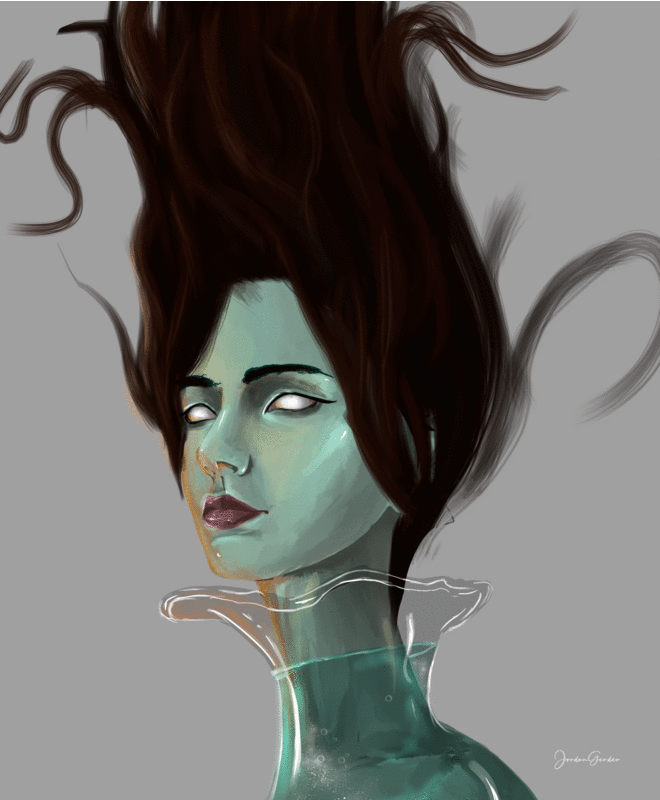
Una rosa más es la descripción perfecta para esta obra de arte. Mujer, hermosa y delicada como una rosa, que deja pétalos de vida, mientras vive la suya ...
One more rose is the perfect description for this work of art. Woman, as beautiful and delicate as a rose, that leaves petals of life, while she lives her own ...
Materiales | Materials
- Mini laptop
- Tableta Huion H950P
- Programa Adobe Photoshop 2019
- Mini laptop
- Huion H950P tablet
- Adobe Photoshop 2019 program

Proceso | Process
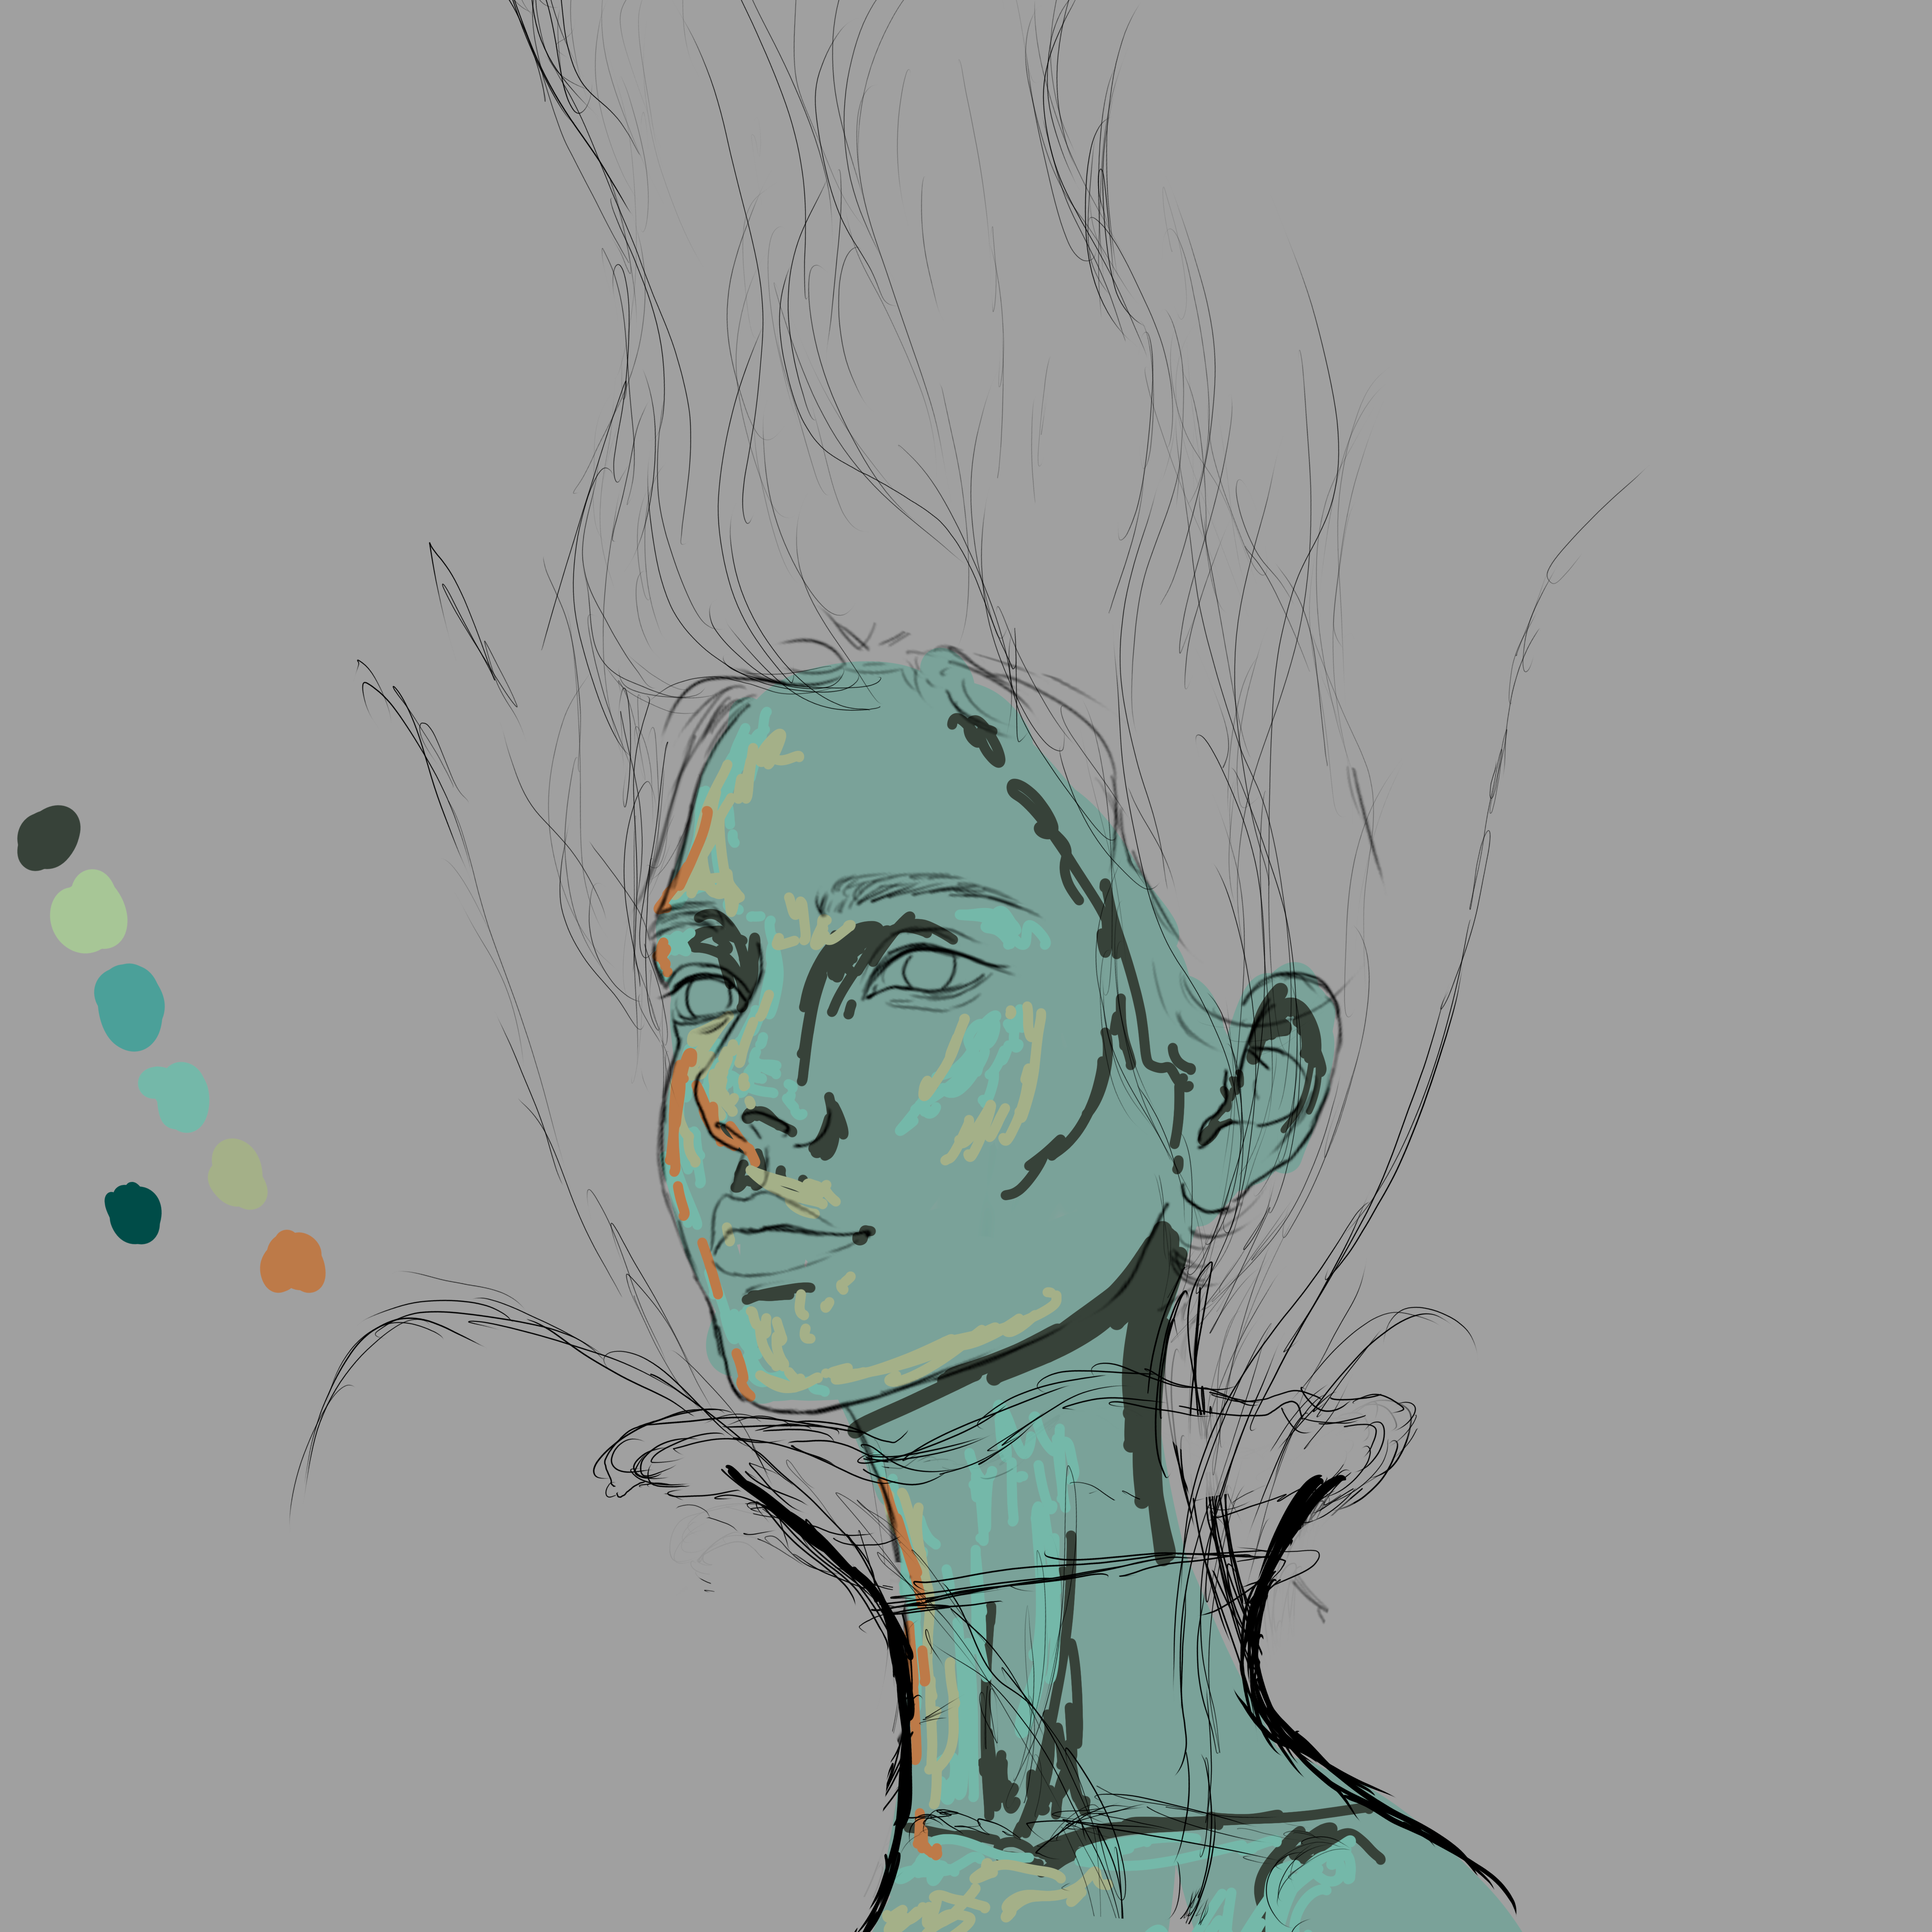
Primer paso: El boceto, es donde creamos la mayor parte de lo que queremos, despues tener lineas entendibles, continuamos al segundo paso:
First step: The sketch is where we create most of what we want, after having understandable lines, we continue to the second step:

Segundo paso: colores base, Selecionamos algunas tonalidades un tono medio y adicional a este uno oscuro partiendo de la base y un claro partiendo de la misma base escogida anteriormente, y una tonalidad saturada para que sea mejor trabajada al piel al momento de mezclar las tonalidades.
Para este paso uso un pincel difuso, resulta mejor al momento de mezclar el color:
Second step: base colors, we select some shades a medium tone and in addition to this a dark one starting from the base and a light one starting from the same base chosen previously, and a saturated shade so that it is better worked to the skin when mixing the shades .
For this step I use a diffuse brush, it is better when mixing the color:
Tercer paso: una vez mezclamos todo el color de la piel es momento de detallar las otras partes de la ilustracion:
Third step: once we mix all the skin color, it is time to detail the other parts of the illustration:

Cuarto paso: Agragamos el jarron donde esta preso su cuerpo, y algunas rosas marchitas a su alrededor, luego de haber agregado un fondo que se ajustara a la piel del personaje procedi a animar la imagen final :
Fourth step: We add the vase where his body is imprisoned, and some withered roses around it, after having added a background that fits the skin of the character, he proceeded to animate the final image:
.gif)
Ajusté detalles finales y así obtuve el fino resultado:
I adjusted final details and that was how I obtained the fine result

Espero te haya gustado lo he elaborado con cariño para ustedes, nos vemos en la próxima 😍
I hope you liked it, I have elaborated it with love for you, see you next time 😍
¿Cómo pintar la piel en Photoshop? (piel difusa) | How to paint skin in Photoshop? (fuzzy skin)

</center
Presentación del diseño | Desing presentación
Una rosa más es la descripción perfecta para esta obra de arte. Mujer, hermosa y delicada como una rosa, que deja pétalos de vida, mientras vive la suya ...
One more rose is the perfect description for this work of art. Woman, as beautiful and delicate as a rose, that leaves petals of life, while she lives her own ...
Materiales | Materials
- Mini laptop
- Tableta Huion H950P
- Programa Adobe Photoshop 2019
- Mini laptop
- Huion H950P tablet
- Adobe Photoshop 2019 program
Proceso | Process
Primer paso: El boceto, es donde creamos la mayor parte de lo que queremos, despues tener lineas entendibles, continuamos al segundo paso:
First step: The sketch is where we create most of what we want, after having understandable lines, we continue to the second step:
Segundo paso: colores base, Selecionamos algunas tonalidades un tono medio y adicional a este uno oscuro partiendo de la base y un claro partiendo de la misma base escogida anteriormente, y una tonalidad saturada para que sea mejor trabajada al piel al momento de mezclar las tonalidades.
Para este paso uso un pincel difuso, resulta mejor al momento de mezclar el color:
Second step: base colors, we select some shades a medium tone and in addition to this a dark one starting from the base and a light one starting from the same base chosen previously, and a saturated shade so that it is better worked to the skin when mixing the shades .
For this step I use a diffuse brush, it is better when mixing the color:
Tercer paso: una vez mezclamos todo el color de la piel es momento de detallar las otras partes de la ilustracion:
Third step: once we mix all the skin color, it is time to detail the other parts of the illustration:
Cuarto paso: Agragamos el jarron donde esta preso su cuerpo, y algunas rosas marchitas a su alrededor, luego de haber agregado un fondo que se ajustara a la piel del personaje procedi a animar la imagen final :
Fourth step: We add the vase where his body is imprisoned, and some withered roses around it, after having added a background that fits the skin of the character, he proceeded to animate the final image:
Ajusté detalles finales y así obtuve el fino resultado:
I adjusted final details and that was how I obtained the fine result
Espero te haya gustado lo he elaborado con cariño para ustedes, nos vemos en la próxima 😍
I hope you liked it, I have elaborated it with love for you, see you next time 😍
¿Cómo pintar la piel en Photoshop? (piel difusa) | How to paint skin in Photoshop? (fuzzy skin)
</center
0
0
0.000
INTERCOMMUNITY - HIVE - AFFILIATE team.