[ENG-ESP] Illustrated phrases | Frases ilustradas
Arte Digital | Digital Art
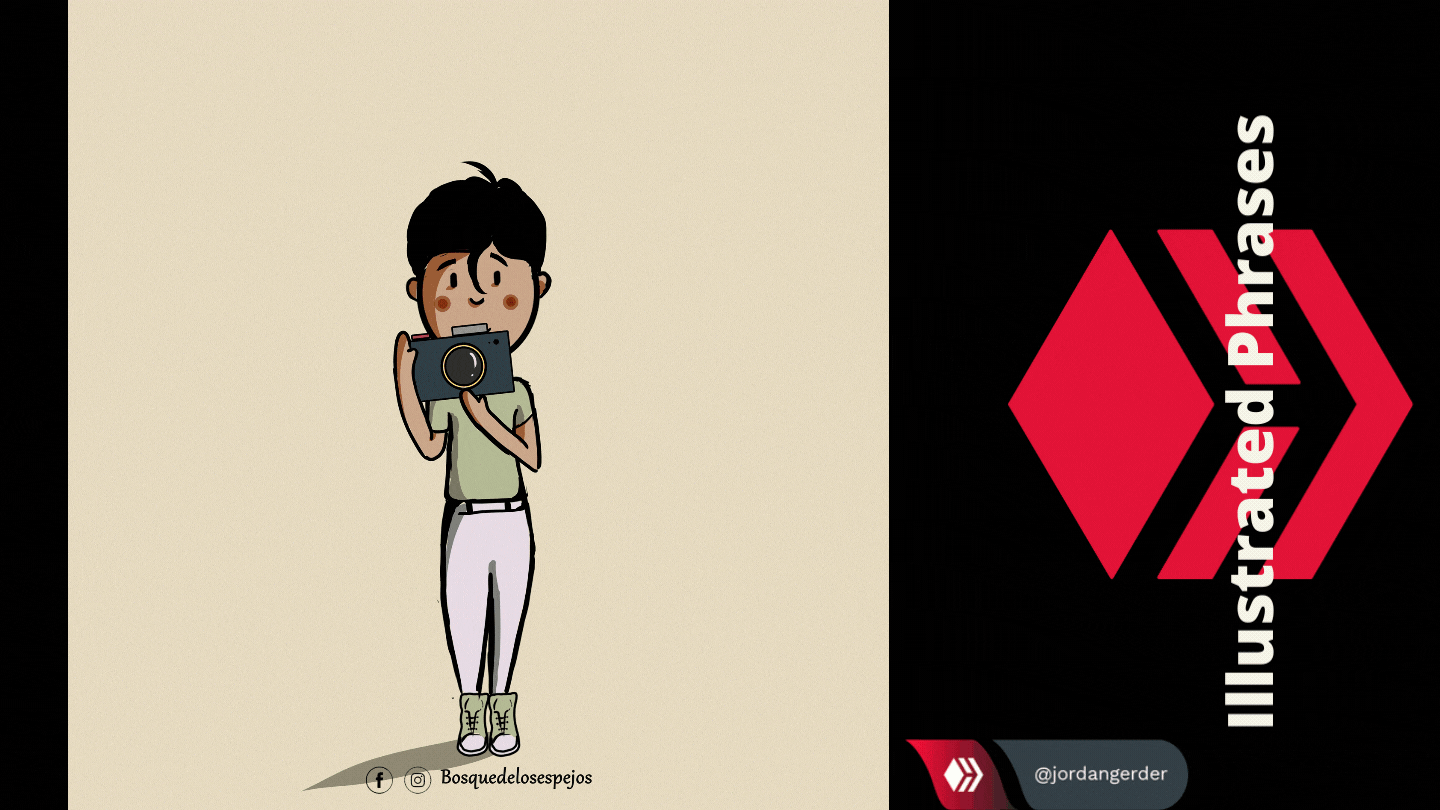
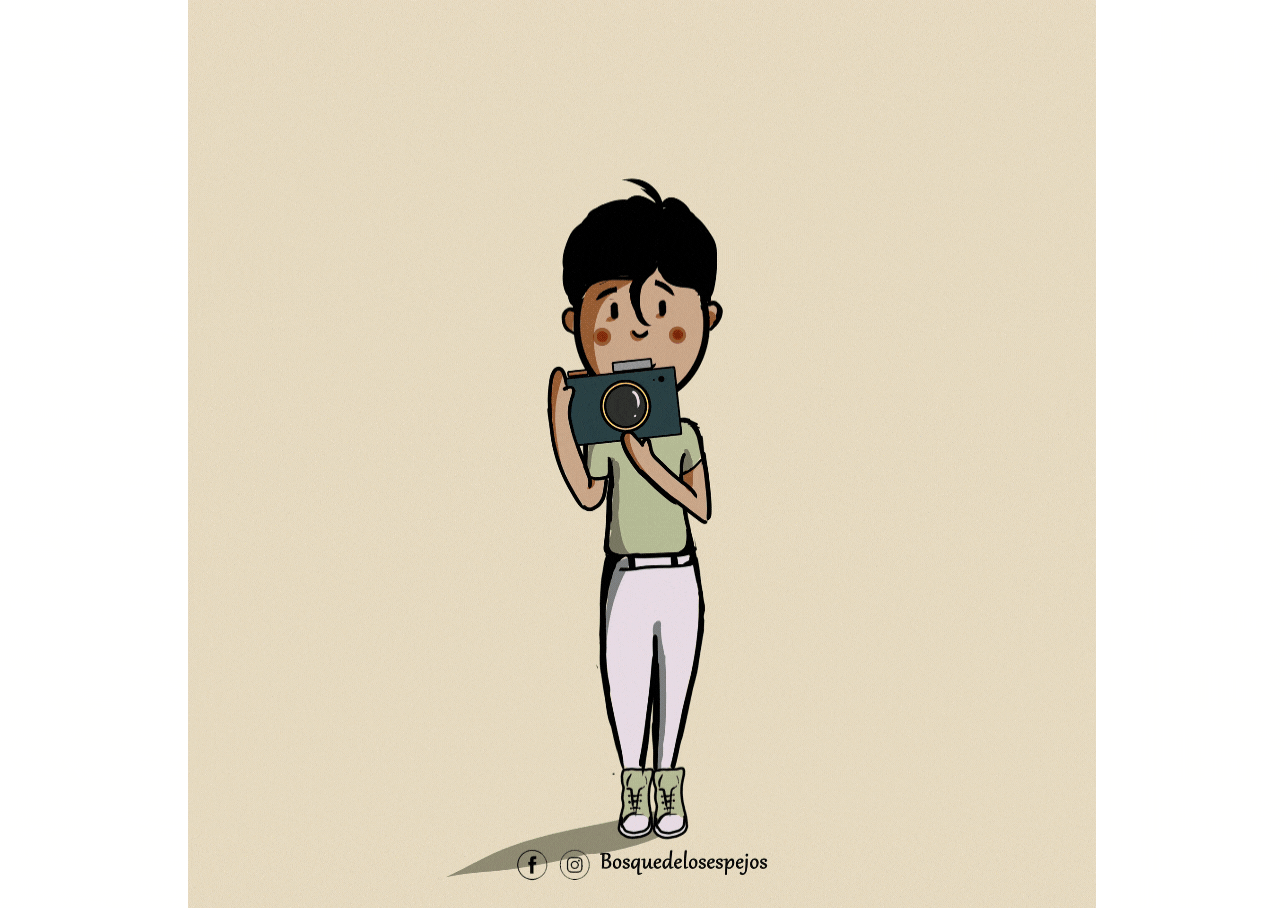
Saludos querida comunidad, les presento una nueva frase ilustrada en la cual hacemos mencion a esos montos felices que capturamos en fotografias, siendo la frase perfecta, Toma un afotografia cuando estes feliz, y cuando estes triste aumentara un poco tu estado de animo hacia lo positivo...
Greetings dear community, I present to you a new illustrated phrase in which we mention those happy amounts that we capture in photographs, being the perfect phrase, Take a photograph when you are happy, and when you are sad it will increase your mood a little towards the positive ...
¡Espero te guste! | I hope you like!
Presentación del diseño | Desing presentación
He decidido crear la imagen para la comunidad de habla ingles y habla hispana para mayor entendimiento...
I have decided to create the image for the English speaking and Spanish speaking community for greater understanding ...
Materiales | Materials
- Mini laptop
- Tableta Huion H950P
- Programa Adobe Photoshop 2019
- Mini laptop
- Huion H950P tablet
- Adobe Photoshop 2019 program

Proceso | Process
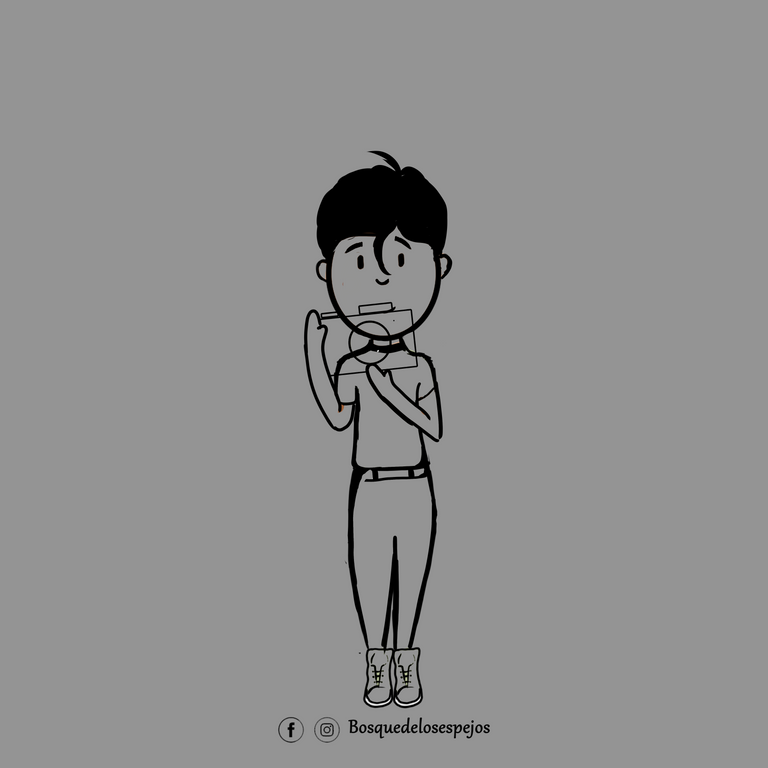
Primer paso: El boceto, es donde creamos la mayor parte de lo que queremos, despues tener lineas entendibles, continuamos al segundo paso:
First step: The sketch is where we create most of what we want, after having understandable lines, we continue to the second step:
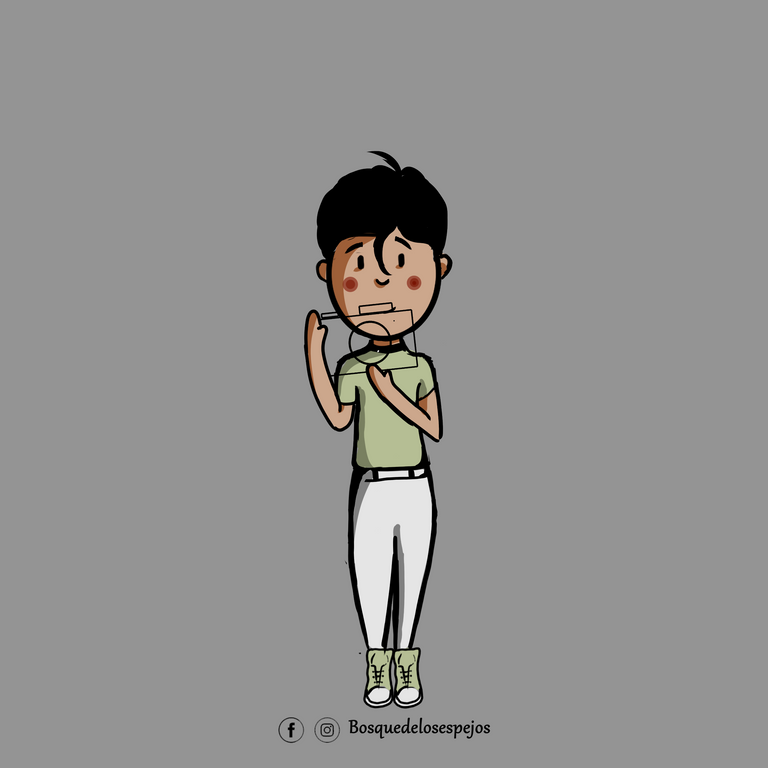
Segundo paso: colores base, Selecionamos algunas tonalidades un tono medio y adicional a este uno oscuro partiendo de la base y un claro partiendo de la misma base escogida anteriormente, y una tonalidad saturada para que sea mejor trabajada al piel al momento de mezclar las tonalidades:
Second step: base colors, we select some shades a medium tone and in addition to this a dark one starting from the base and a light one starting from the same base chosen previously, and a saturated shade so that it is better worked to the skin when mixing the shades:

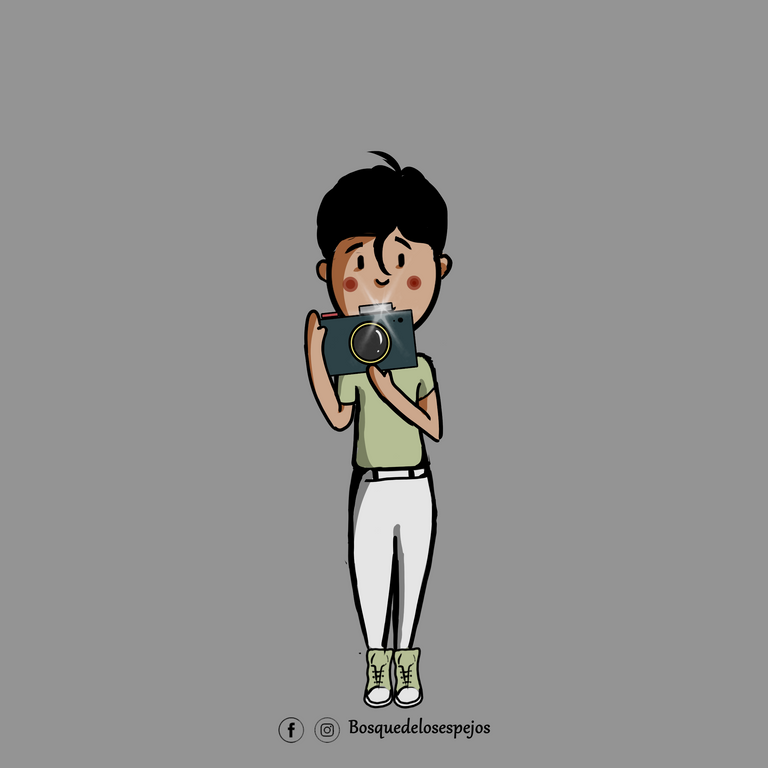
Tercer paso: una vez mezclamos todo el color de la piel es momento de detallar las otras partes de la ilustracion:
Third step: once we mix all the skin color, it is time to detail the other parts of the illustration:
Paso cuatro:al terminar de agregar color y detalle a la camara es momento de separar partes del cuerpo para crear la animacion, he creado un flash que se extiende y cubre toda la pantalla y algunas fotografias gratis de pixabay:
Step four: when you finish adding color and detail to the camera it is time to separate parts of the body to create the animation, I have created a flash that extends and covers the entire screen and some free photos from pixabay:
Ajusté detalles finales y así obtuve el fino resultado:
I adjusted final details and that was how I obtained the fine result
Espero te haya gustado lo he elaborado con cariño para ustedes, nos vemos en la próxima 😍
I hope you liked it, I have elaborated it with love for you, see you next time 😍
¿Cómo pintar la piel en Photoshop? (piel difusa) | How to paint skin in Photoshop? (fuzzy skin)

Presentación del diseño | Desing presentación
He decidido crear la imagen para la comunidad de habla ingles y habla hispana para mayor entendimiento...
I have decided to create the image for the English speaking and Spanish speaking community for greater understanding ...
Materiales | Materials
- Mini laptop
- Tableta Huion H950P
- Programa Adobe Photoshop 2019
- Mini laptop
- Huion H950P tablet
- Adobe Photoshop 2019 program
Proceso | Process
Primer paso: El boceto, es donde creamos la mayor parte de lo que queremos, despues tener lineas entendibles, continuamos al segundo paso:
First step: The sketch is where we create most of what we want, after having understandable lines, we continue to the second step:
Segundo paso: colores base, Selecionamos algunas tonalidades un tono medio y adicional a este uno oscuro partiendo de la base y un claro partiendo de la misma base escogida anteriormente, y una tonalidad saturada para que sea mejor trabajada al piel al momento de mezclar las tonalidades:
Second step: base colors, we select some shades a medium tone and in addition to this a dark one starting from the base and a light one starting from the same base chosen previously, and a saturated shade so that it is better worked to the skin when mixing the shades:
Tercer paso: una vez mezclamos todo el color de la piel es momento de detallar las otras partes de la ilustracion:
Third step: once we mix all the skin color, it is time to detail the other parts of the illustration:
Paso cuatro:al terminar de agregar color y detalle a la camara es momento de separar partes del cuerpo para crear la animacion, he creado un flash que se extiende y cubre toda la pantalla y algunas fotografias gratis de pixabay:
Step four: when you finish adding color and detail to the camera it is time to separate parts of the body to create the animation, I have created a flash that extends and covers the entire screen and some free photos from pixabay:
Ajusté detalles finales y así obtuve el fino resultado:
I adjusted final details and that was how I obtained the fine result
Espero te haya gustado lo he elaborado con cariño para ustedes, nos vemos en la próxima 😍
I hope you liked it, I have elaborated it with love for you, see you next time 😍
¿Cómo pintar la piel en Photoshop? (piel difusa) | How to paint skin in Photoshop? (fuzzy skin)
0
0
0.000
0 comments