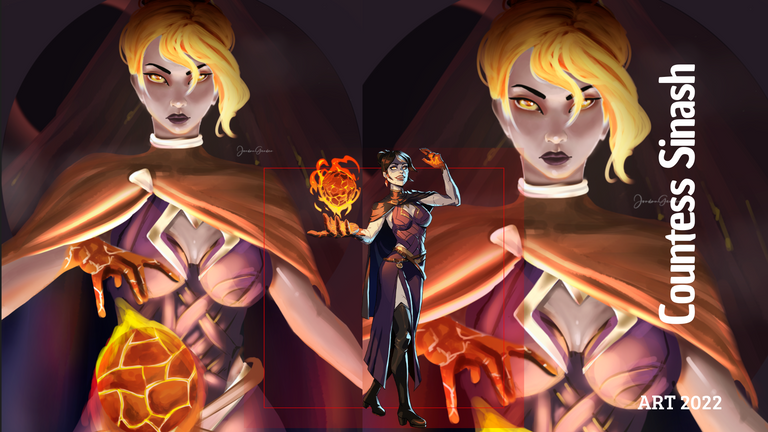
FanArt: Countess Sinash
Arte Digital | Digital Art
Saludos querida comunidad, presento un nuevo trabajo digital con el cual participare en el concurso de arte elaborado por @splinterlands. el dibujo a continuacion era mi entrada para la semana pasada pero se me complico terminarlo a tiempo por suerte el concurso es semanal y pude presentarlo esta semana. El personaje que he escogido es la hermosa y poderosa Countess Sinash un personaje con un potencial increible para recrearlo de mil maneras yo quede enamorado totalmente. Acompañeme a ver un poco del proceso...
Greetings dear community, I present a new digital work with which I will participate in the art contest prepared by @splinterlands. The drawing below was my entry for last week but it was difficult for me to finish it on time, luckily the contest is weekly and I was able to present it this week. The character that I have chosen is the beautiful and powerful Countess Sinash, a character with incredible potential to recreate her in a thousand ways. I totally fell in love. Join me to see a little of the process...
¡Espero te guste! | I hope you like!
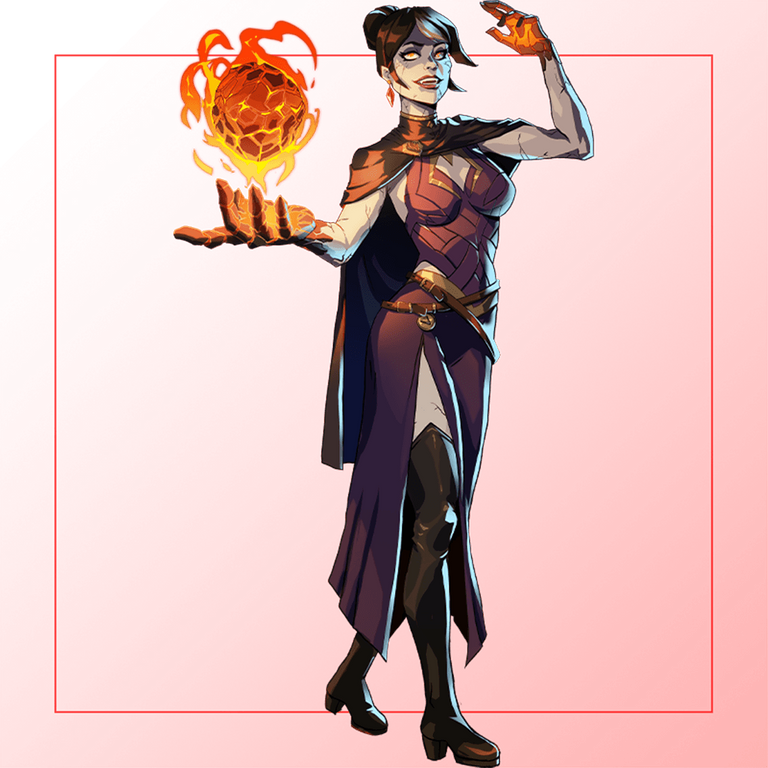
Presentación del diseño | Desing presentación
Materiales | Materials
- Mini laptop
- Tableta Huion H950P
- Programa Adobe Photoshop 2019
- Mini laptop
- Huion H950P tablet
- Adobe Photoshop 2019 program

Proceso | Process
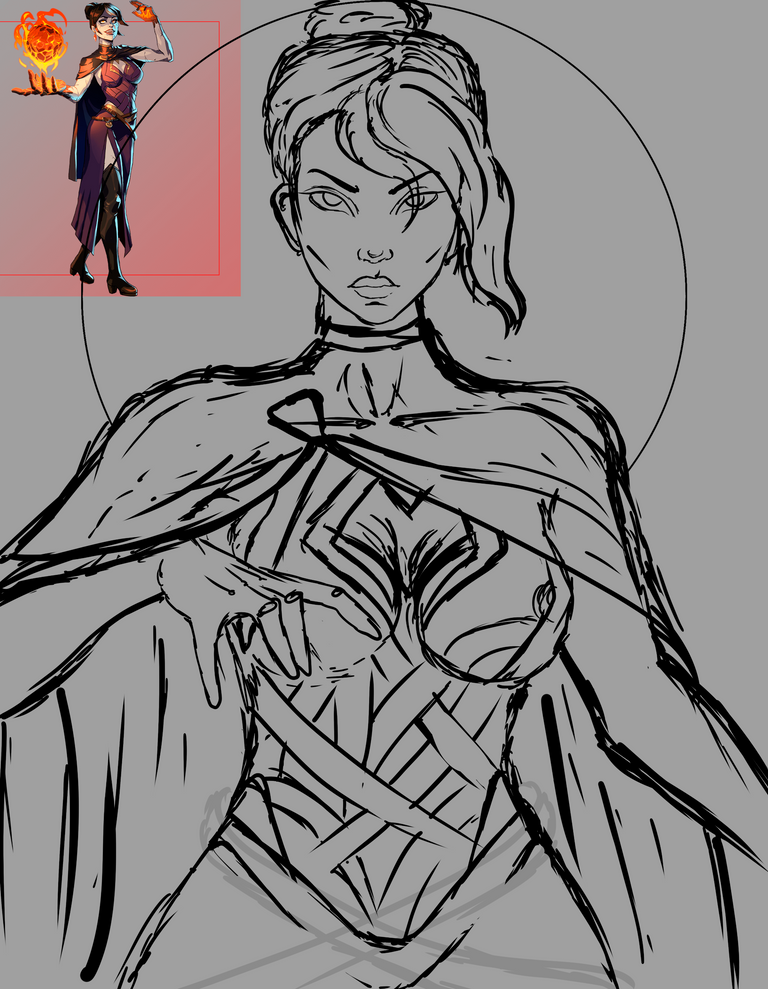
Primer paso: El boceto, es donde creamos la mayor parte de lo que queremos, despues tener lineas entendibles, continuamos al segundo paso:
First step: The sketch is where we create most of what we want, after having understandable lines, we continue to the second step:
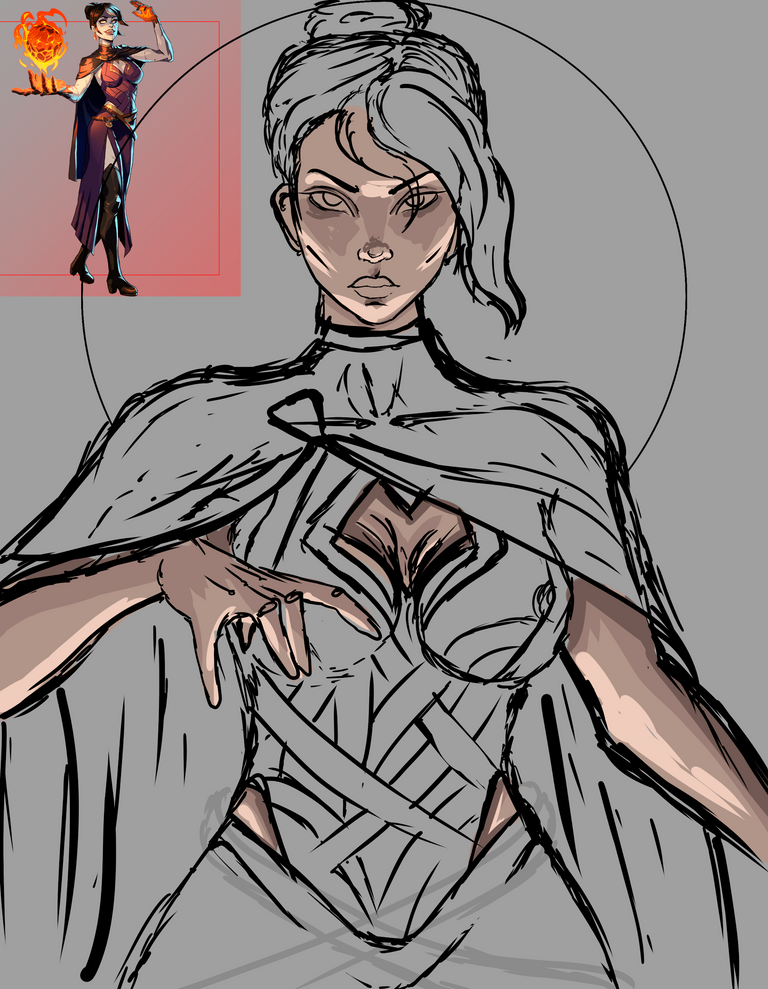
Segundo paso:Selecionamos algunas tonalidades un tono medio y adicional a este uno oscuro partiendo de la base y un claro partiendo de la misma base escogida anteriormente, y una tonalidad saturada para que sea mejor trabajada al piel al momento de mezclar las tonalidades.
Para este paso uso un pincel difuso, resulta mejor al momento de mezclar el color:
Second step:We selected some shades, a medium tone and in addition to this, a dark one starting from the base and a light one starting from the same base chosen previously, and a saturated tone so that it is better worked on the skin when mixing the tones.
For this step I use a diffuse brush, it is better when mixing the color:
Tercer paso: una vez mezclamos todo el color de la piel es momento de detallar las otras partes de la ilustracion:
Third step: once we mix all the skin color, it is time to detail the other parts of the illustration:
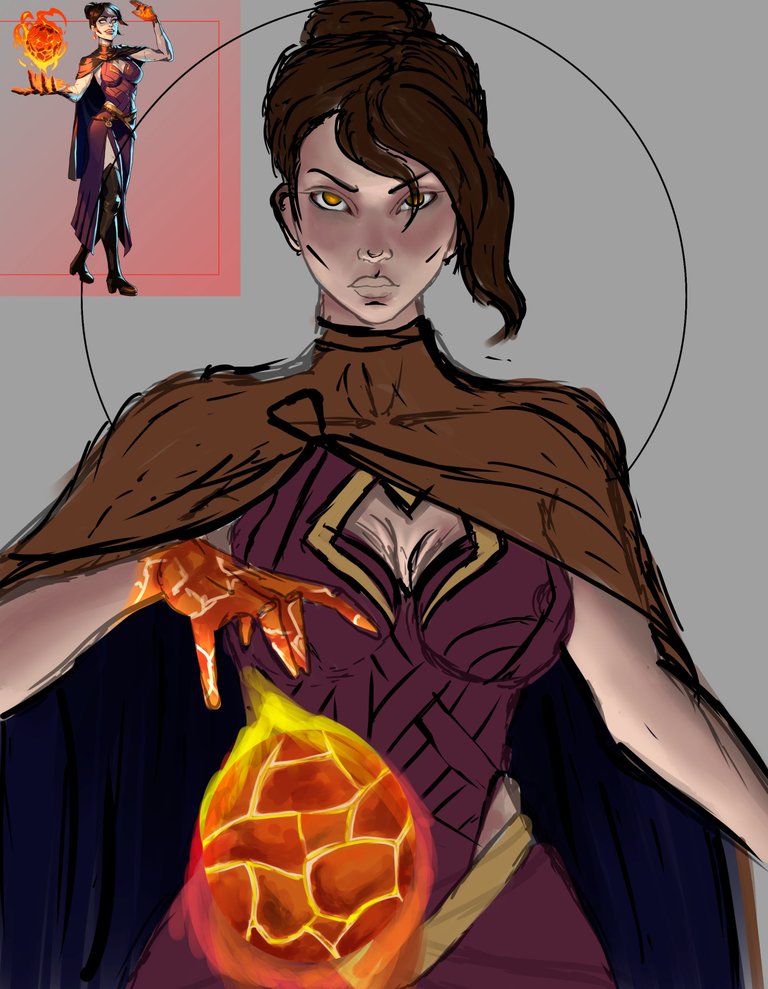
Paso cuatro: Trabajar la bola de lava que habia en su mano use una capa base con todos los tonos y luego de haber culminado todo el detalle procedo a duplicar esa capa y aplicar un modo de capa, dio el efecto de luminosidad que desaba. en los metales de su ropa use la herramienta satinado funciona perfecto para este tipo de metal luminoso:
Step four: Work the ball of lava that was in your hand, use a base layer with all the tones and after having finished all the detail I proceed to duplicate that layer and apply a layer mode, it gave the luminosity effect that I wanted. on the metals of your clothing use the satin tool it works perfect for this type of luminous metal:
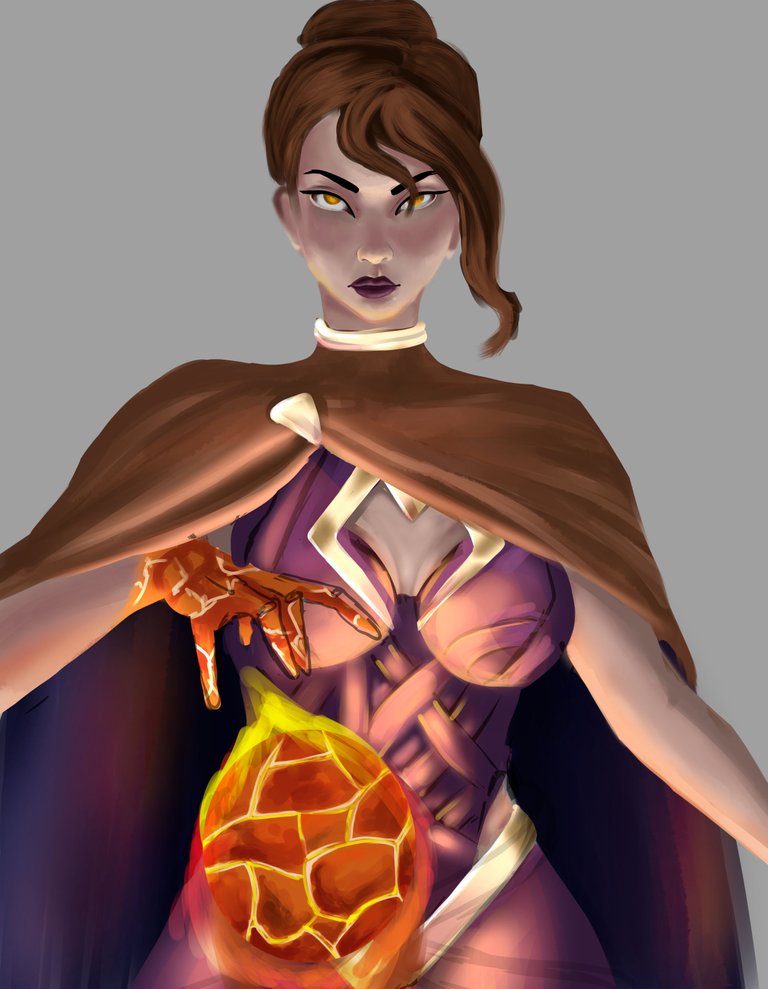
Ajusté detalles finales y así obtuve el fino resultado:
I adjusted final details and that was how I obtained the fine result
Espero te haya gustado lo he elaborado con cariño para ustedes, nos vemos en la próxima 😍
I hope you liked it, I have elaborated it with love for you, see you next time 😍
Art inspired by @splinterlands
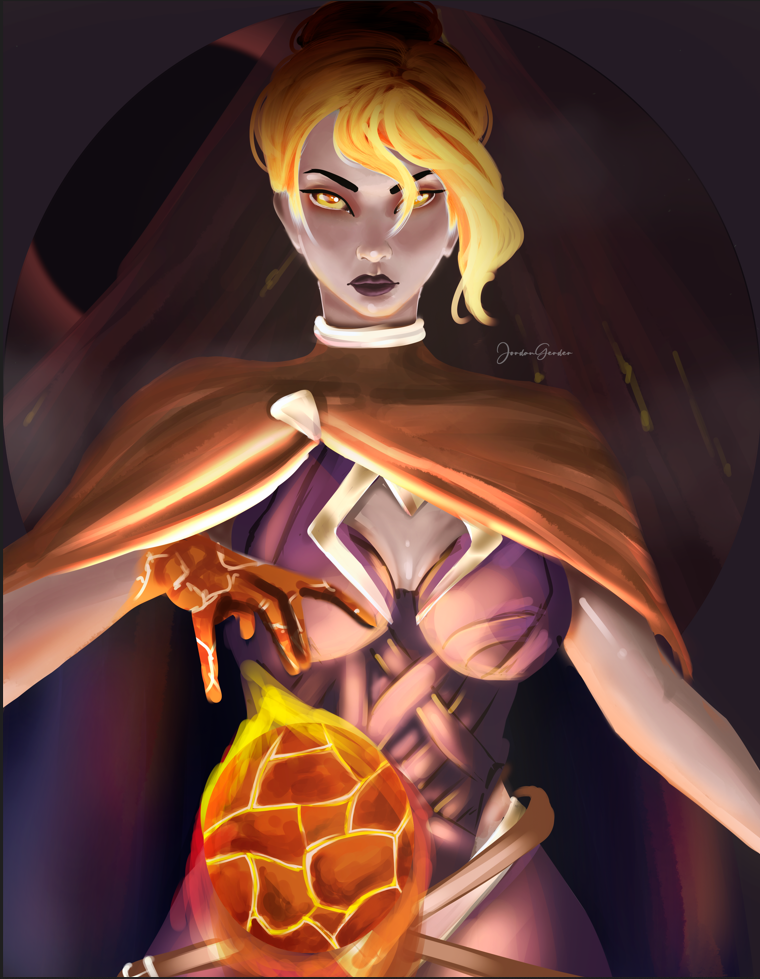
¿Cómo pintar la piel en Photoshop? (piel difusa) | How to paint skin in Photoshop? (fuzzy skin)

Presentación del diseño | Desing presentación
Materiales | Materials
- Mini laptop
- Tableta Huion H950P
- Programa Adobe Photoshop 2019
- Mini laptop
- Huion H950P tablet
- Adobe Photoshop 2019 program
Proceso | Process
Primer paso: El boceto, es donde creamos la mayor parte de lo que queremos, despues tener lineas entendibles, continuamos al segundo paso:
First step: The sketch is where we create most of what we want, after having understandable lines, we continue to the second step:
Segundo paso:Selecionamos algunas tonalidades un tono medio y adicional a este uno oscuro partiendo de la base y un claro partiendo de la misma base escogida anteriormente, y una tonalidad saturada para que sea mejor trabajada al piel al momento de mezclar las tonalidades.
Para este paso uso un pincel difuso, resulta mejor al momento de mezclar el color:
Second step:We selected some shades, a medium tone and in addition to this, a dark one starting from the base and a light one starting from the same base chosen previously, and a saturated tone so that it is better worked on the skin when mixing the tones.
For this step I use a diffuse brush, it is better when mixing the color:
Tercer paso: una vez mezclamos todo el color de la piel es momento de detallar las otras partes de la ilustracion:
Third step: once we mix all the skin color, it is time to detail the other parts of the illustration:
Paso cuatro: Trabajar la bola de lava que habia en su mano use una capa base con todos los tonos y luego de haber culminado todo el detalle procedo a duplicar esa capa y aplicar un modo de capa, dio el efecto de luminosidad que desaba. en los metales de su ropa use la herramienta satinado funciona perfecto para este tipo de metal luminoso:
Step four: Work the ball of lava that was in your hand, use a base layer with all the tones and after having finished all the detail I proceed to duplicate that layer and apply a layer mode, it gave the luminosity effect that I wanted. on the metals of your clothing use the satin tool it works perfect for this type of luminous metal:
Ajusté detalles finales y así obtuve el fino resultado:
I adjusted final details and that was how I obtained the fine result
Espero te haya gustado lo he elaborado con cariño para ustedes, nos vemos en la próxima 😍
I hope you liked it, I have elaborated it with love for you, see you next time 😍
Art inspired by @splinterlands
¿Cómo pintar la piel en Photoshop? (piel difusa) | How to paint skin in Photoshop? (fuzzy skin)
0
0
0.000
Te quedó bellisima 💕
Gracias amiga 😘
Hermoso trabajo como siempre hermano... Suerte en el concurso del spliterlands, creo que mereces uno de los lugares que obtienen los premios.
Saludos!!!
Gracias hermano por tu apoyo te lo agradezco saludos 😘
Wow. I love the eyes.
She's looking elegantly beautiful and serious at the same time.
Great job.
Keep it up.
!1UP
oh thnks so much😍
The pleasure is mine. 😊
You have received a 1UP from @thecuriousfool!
@monster-curator, @oneup-curator, @ccc-curator, @neoxag-curator, @pal-curator
And they will bring !PIZZA 🍕.
Learn more about our delegation service to earn daily rewards. Join the Cartel on Discord.
PIZZA Holders sent $PIZZA tips in this post's comments:
@curation-cartel(11/20) tipped @jordangerder (x1)
Join us in Discord!
https://twitter.com/ieronimus/status/1567839044427448321
The rewards earned on this comment will go directly to the people( @ieronimus ) sharing the post on Twitter as long as they are registered with @poshtoken. Sign up at https://hiveposh.com.
Que bella quedó ❤️❤️
Gracias amix😍
Hermoso trabajo. Mucha suerte en el concurso tu dibujo es muy bueno y espero que ganes
Ay muchas gracias saludos😇
Te quedo genial el dibujo me encanto la iluminación que le colocaste en algunas zonas del dibujo y las manos también están muy bien hechas realmente dibujar manos es difícil y te quedaron muy lindas
Muchas gracias saludos 😍
Está increíble, me recuerda a Azula, de Avatar. Con esa expresión un poco maliciosa pero a la vez con una figura bastante atlética.
jeje gracias si es parecida 😍