Accesorios : copos de nieves | Accessories : snowflakes
Hola buenos días tengan todos mis amigos , feliz y bendecido inicio de semana , espero que se encuentren bien , llenos de mucha salud , les quiero compartir unos hermosos accesorios que realice pensando en la época navideña , unos copos de nieves , son sencillos , pero pueden ser muy elegantes y llamativos , les cuento qué es un poco difícil trabajar con este pequeño copo de nieve pero con la ayuda de una buena tijera lo podremos lograr , les mostraré con detalles cada paso que realicé , y materiales qué utilicé
Hello good morning to all my friends, happy and blessed start of the week, I hope you are well, full of good health, I want to share some beautiful accessories that I made thinking about the Christmas season, some snowflakes, they are simple, but can be very elegant and striking, I tell you what is a little difficult to work with this little snowflake but with the help of a good scissors we can achieve, I will show you in detail each step I did, and materials I used
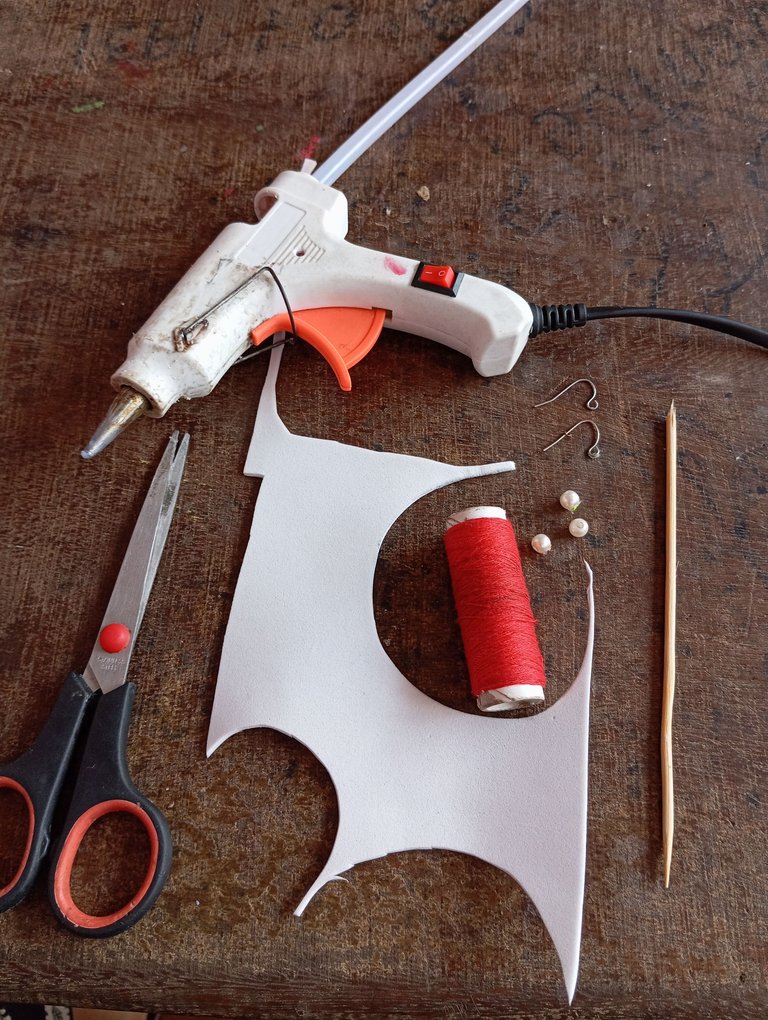
Materiales para realizar nuestros accesorios de copos navideños :
-Foamis
-Hilo de cocer
-Silicon
-Tijera
-Piedras plásticas
-Aros
Materials to make our Christmas snowflake accessories:
-Foamis
-Baking thread
-Silicon
-Scissors
-Plastic stones
-Rings
A continuación los pasos a seguir:
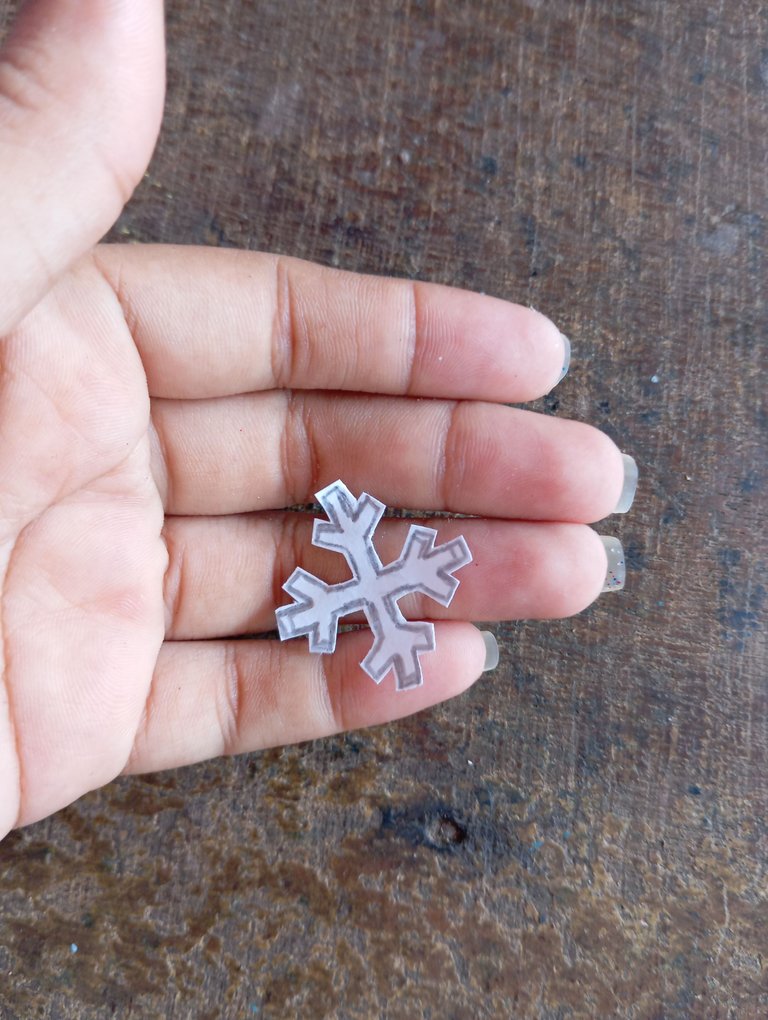
Iniciaremos realizando nuestro patrón con el qué vamos a trabajar, un copo de nieve , estos serán nuestros accesorios de hoy, el modelo de tamaño lo eligen a su gusto , me gusta siempre trabajar con patrón porque las medidas son iguales y más aún cuando trabajaremos con doble pieza
Here are the steps to follow:
We will start by making our pattern with which we are going to work, a snowflake, these will be our accessories today, the size model you choose to your liking, I always like to work with pattern because the measures are equal and even more when we work with double piece
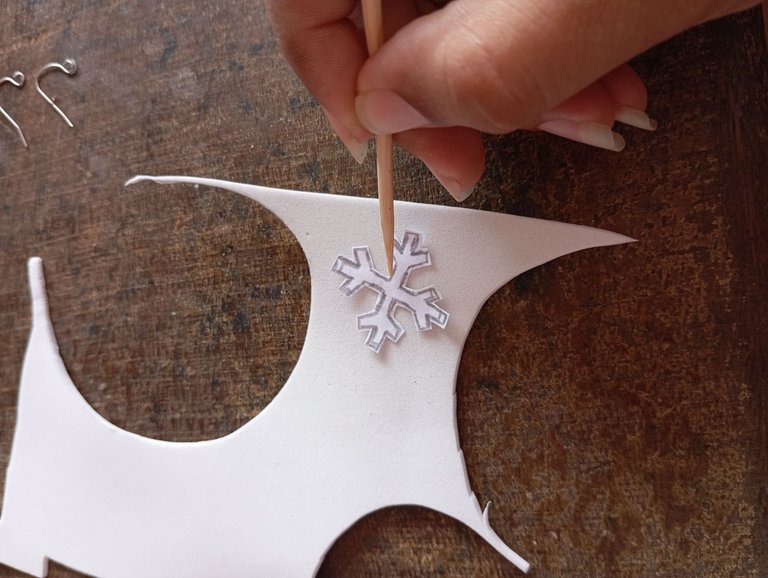
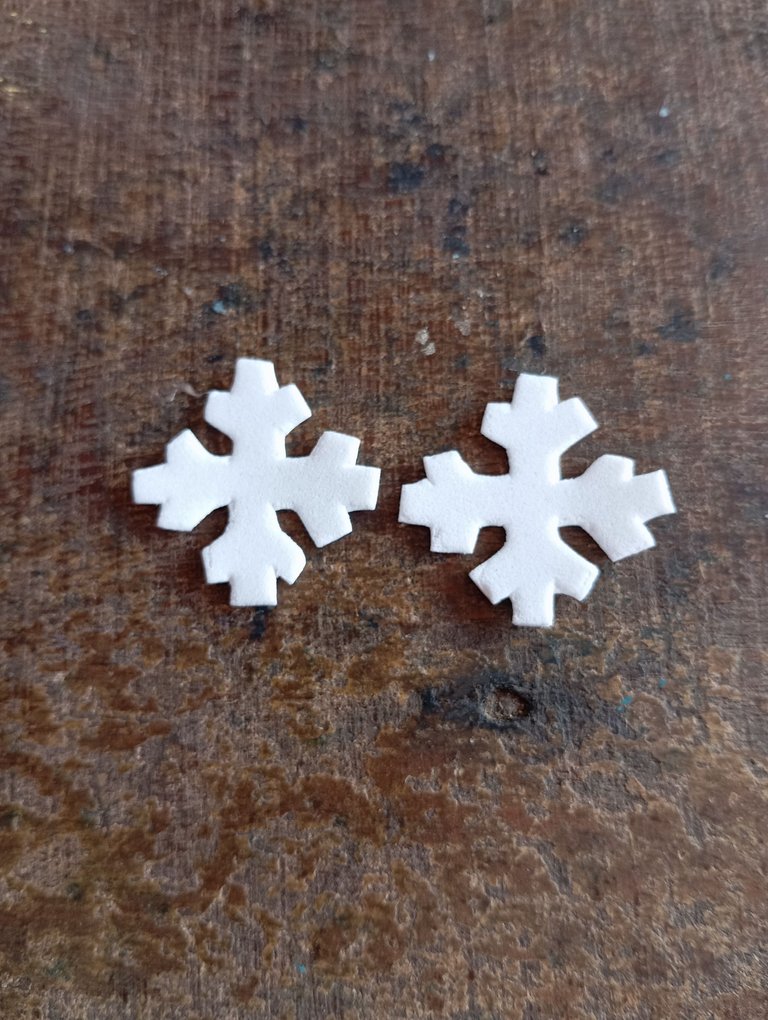
Luego que tengamos nuestro patrón , vamos a continuar marcando dos copos de nieves en el foamis color blanco , para ésto utilicé un palito de altura para no marcar el foamis con lápices por ser blanco
After we have our pattern, we will continue marking two snowflakes on the foamis white color, for this I used a height stick to avoid marking the foamis with pencils because it is white.
Una vez que marcamos nuestros dos copos de nieves , vamos a continuar en este siguiente paso recortando los con la ayuda de una tijera ,tomando en cuenta que debemos trabajar con mucho cuidado para no dañar el modelo ya que es muy pequeño el copo de nieve navideño amigos
Once we marked our two snowflakes, we will continue in this next step by cutting them with the help of a scissors, taking into account that we must work very carefully to avoid damaging the model as it is very small snowflake friends
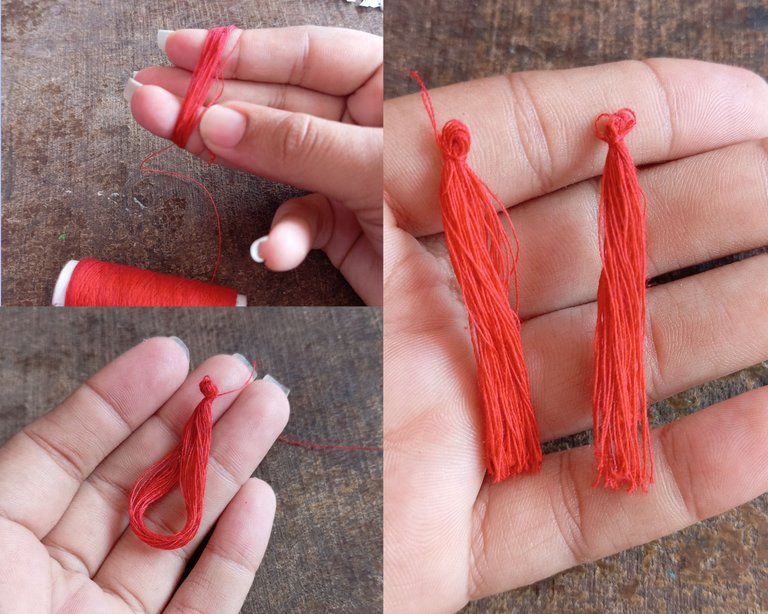
En este siguiente paso vamos a proceder realizando un diseño adicional para nuestros accesorios, esta ocasión unos flecos , tomaremos nuestro hilo de cocer , comenzaremos a enrollar con el apoyo de tres dedos , vamos a realizar 30 vueltas en total , las conté para que supieran la cantidad , una vez que realizamos nuestras vueltas, realizamos un nudo en la parte de arriba , por último tomaremos la tijera y recortaremos en la parte de abajo , realizando de esta manera los flecos que nuestros accesorios
In this next step we are going to proceed making an additional design for our accessories, this time some bangs , we will take our baking thread , we will begin to wind with the support of three fingers , we will make 30 turns in total , I counted them so you know the amount , once we made our turns, we make a knot at the top , finally we will take the scissors and cut at the bottom , thus making the bangs that our accessories
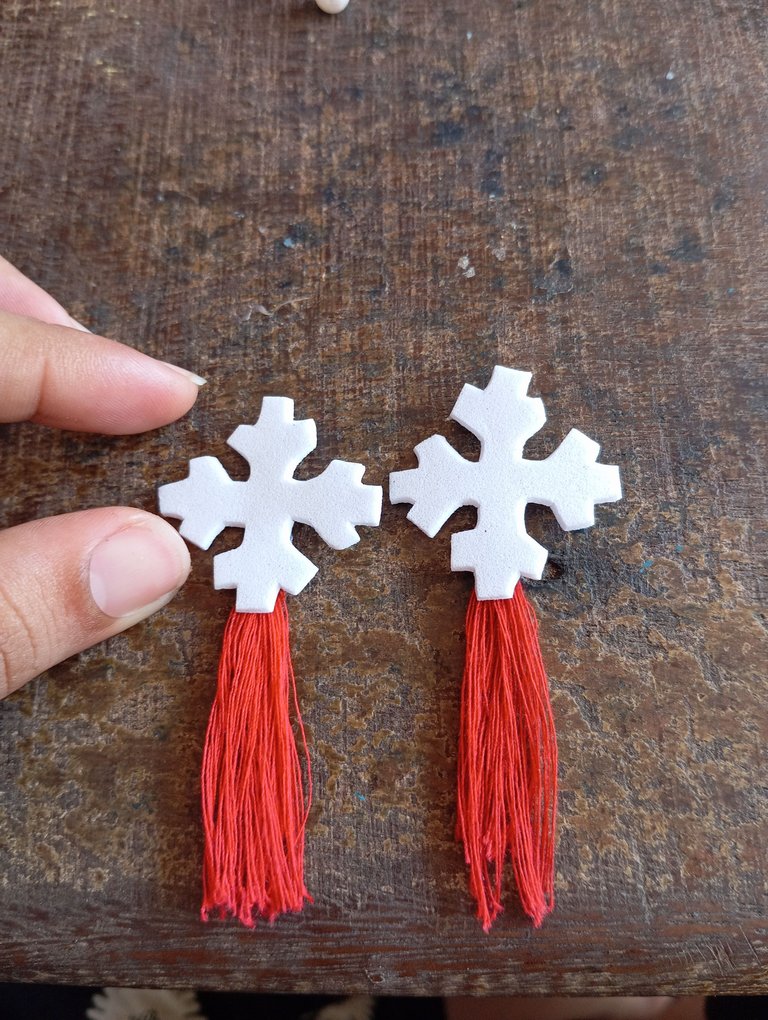
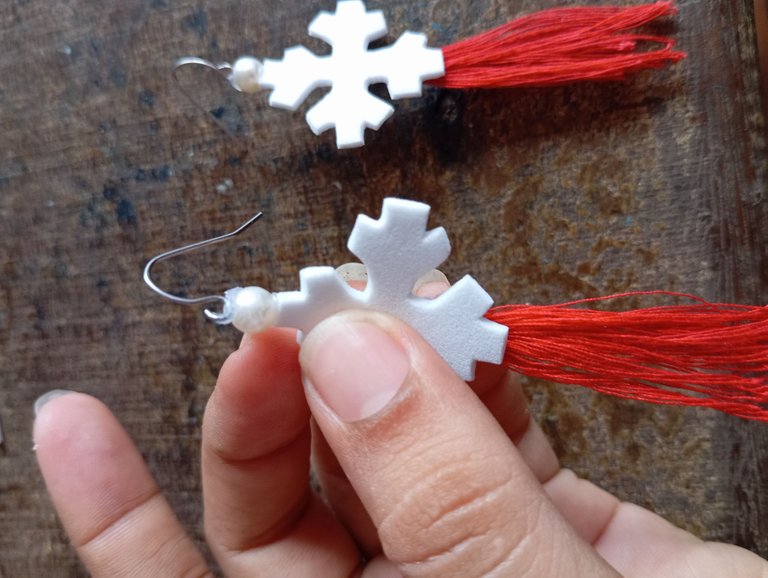
Luego vamos a continuar en este siguiente paso tomando nuestros flecos de hilo de cocer y los pegaremos en la parte de abajo del copo de nieve en una punta ,para que tenga un diseño adicional nuestros accesorios y no queden tan sencillos
Then we will continue in this next step taking our bangs of baking thread and we will glue them at the bottom of the snowflake at one end, so that our accessories have an additional design and are not so simple.
En este siguiente paso vamos a proceder tomando una perla plástica blanca , la pegaremos en la parte de arriba de nuestro copo de nieve para darle un diseño delicado y llamativo amigos
In this next step we are going to proceed taking a white plastic bead, we will glue it on the top of our snowflake to give it a delicate and striking design to our friends
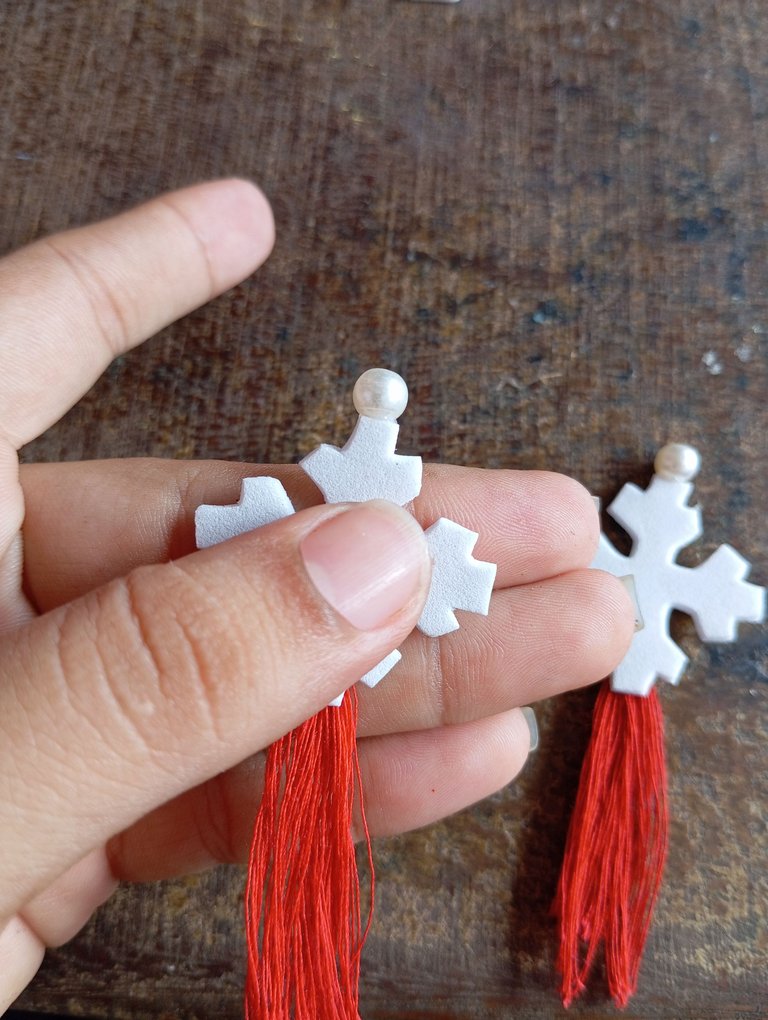
Para finalizar con nuestros accesorios vamos a continuar tomando nuestros aros y lo pegaremos en la parte de arriba de la perla plástica , para poder colgar lo en nuestras lindas orejas , finalizando con este paso nuestros accesorios
To finish with our accessories we will continue taking our earrings and we will glue it on the top of the plastic pearl, to be able to hang it on our pretty ears, finishing with this step our accessories.
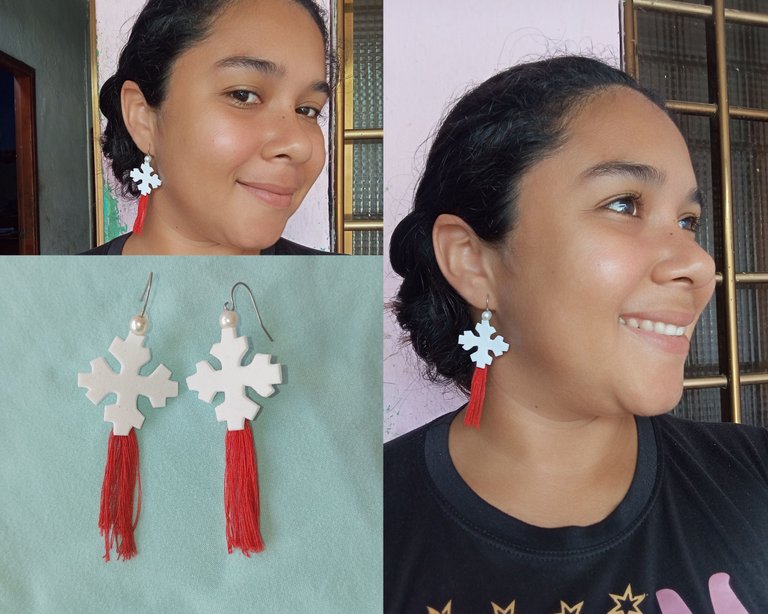
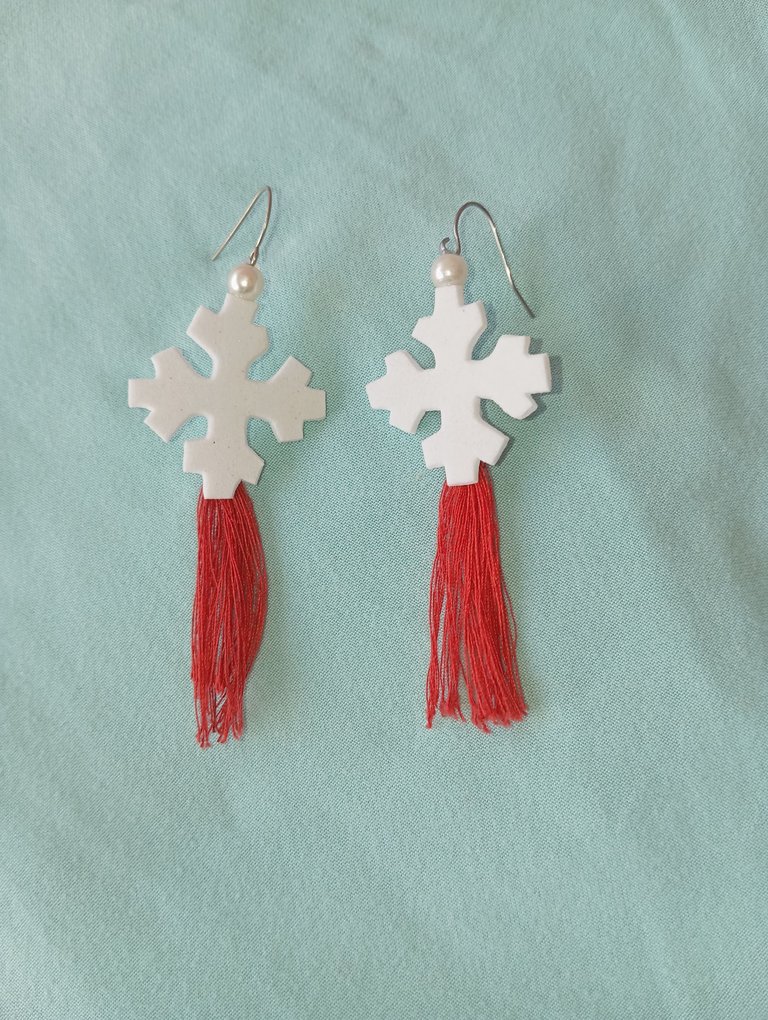
Este es el resultado final de mis hermosos accesorios navideños , ideales para lucir en navidad , elegantes pero sencillas , delicadas , las fotos las tomé con mi redmi 12 y traduje los textos con el traductor deepl, feliz día amigos , hasta la próxima ,que pasen una semana exitosa
This is the final result of my beautiful Christmas accessories , ideal to wear at Christmas , elegant but simple , delicate , the photos were taken with my redmi 12 and translated the texts with the deepl translator , happy day friends , until next time ,have a successful week
Muy bonitos y original esos aretes , te felicito.
Gracias amiga
Muy bonito diseño, excelentes para lucir en esta navidad, éxitos y bendiciones
Que hermosos te quedaron amiga me encanta el diseño muy original feliz noche.
Gracias amiga