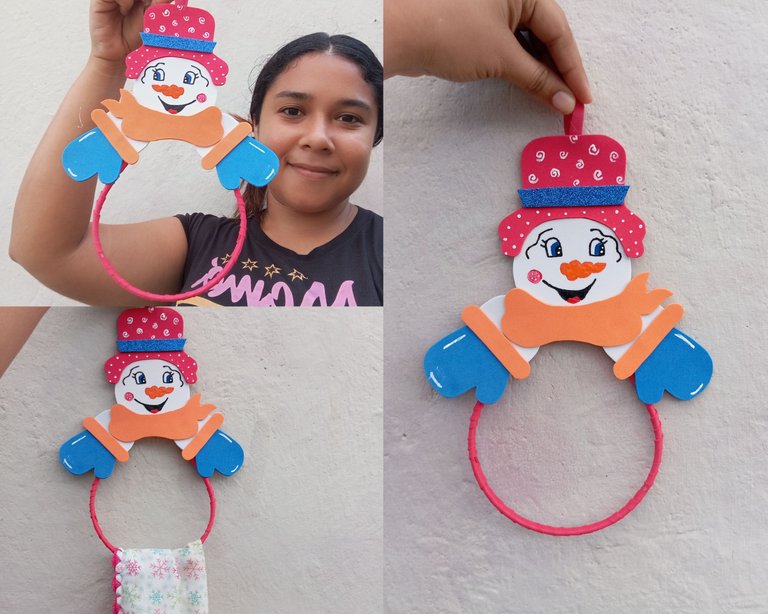
Adorno navideño para colgar bufandas | Christmas ornament for hanging scarves
Hola buenos días amigos , espero que hayan amanecido bien , mi más sincero saludo para todos y excelente día , hoy les quiero compartir un hermoso adorno navideño para colgar bufandas , desde que inició el mes de noviembre me preparo para la navidad y quiero compartirles una creación más de mi colección navideña
Hello good morning friends , I hope you have dawned well , my most sincere greetings to all and excellent day , today I want to share with you a beautiful Christmas ornament to hang scarves , since the beginning of November I prepare for Christmas and I want to share with you one more creation of my Christmas collection.
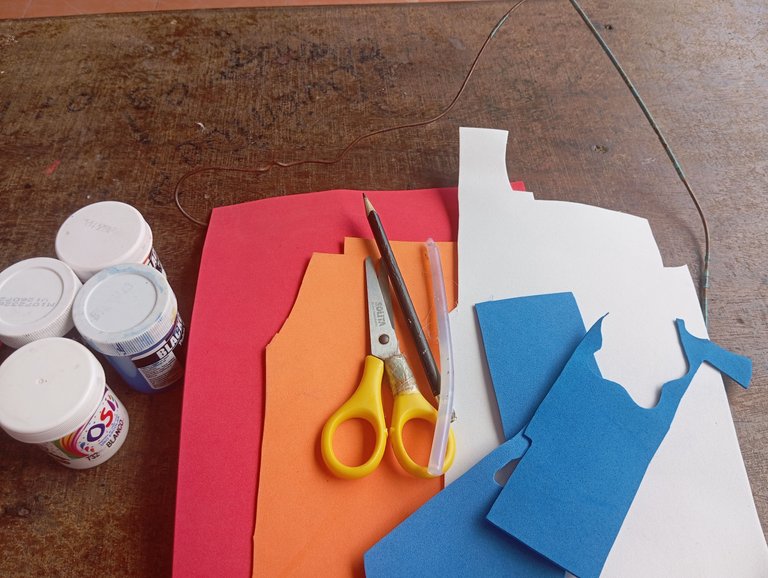
Materiales qué utilicé:
-Foamis
-Tijera
-Silicon
-pinturas al frío
-Cintillo reusable
Materials I used:
-Foamis
-Scissors
-Silicon
-Cold paints
-Reusable scissors
A continuación los pasos a seguir :
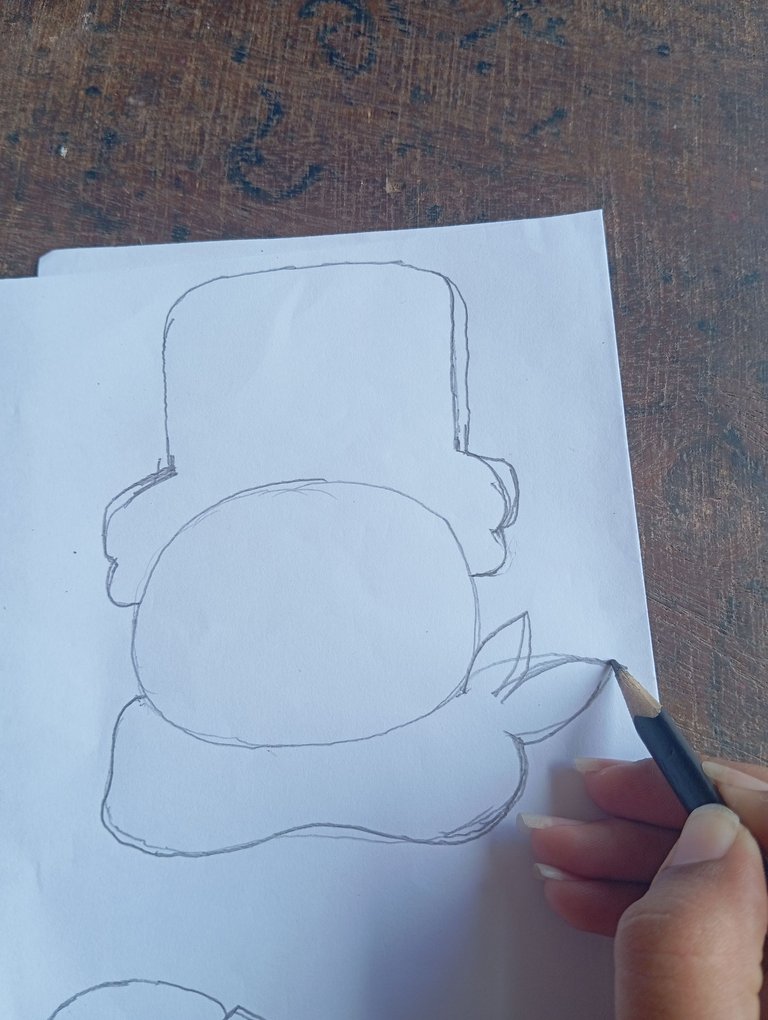
Iniciaremos dibujando primeramente un patrón con el que vamos a trabajar parte por parte , siempre es importante así podemos trabajar con buenas medidas , dibujé un muñeco de nieve con bufanda ya que es para colgar bufandas
Here are the steps to follow:
We will start by first drawing a pattern with which we will work part by part, it is always important so we can work with good measurements, I drew a snowman with a scarf because it is to hang scarves.
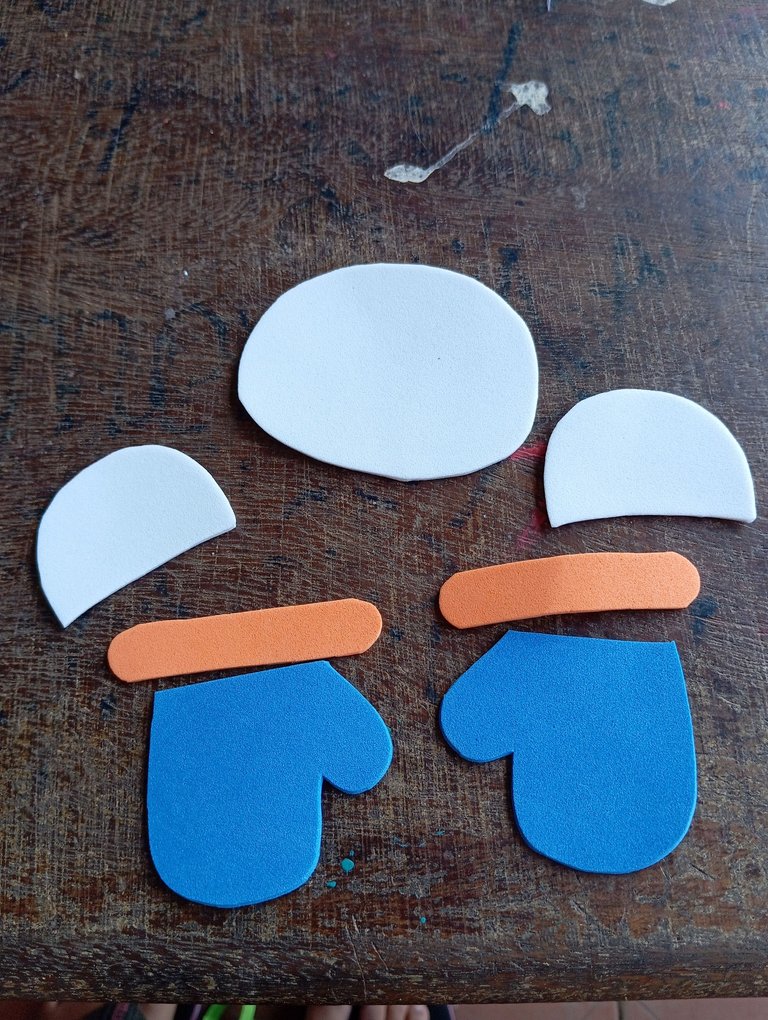
Inicié marcando en el foamis blanco la cabeza y manos de el muñeco de nieve , en el foamis azul dibujé sus adorables guantes
I started by marking on the white foamis the head and hands of the snowman, on the blue foamis I drew his adorable mittens.
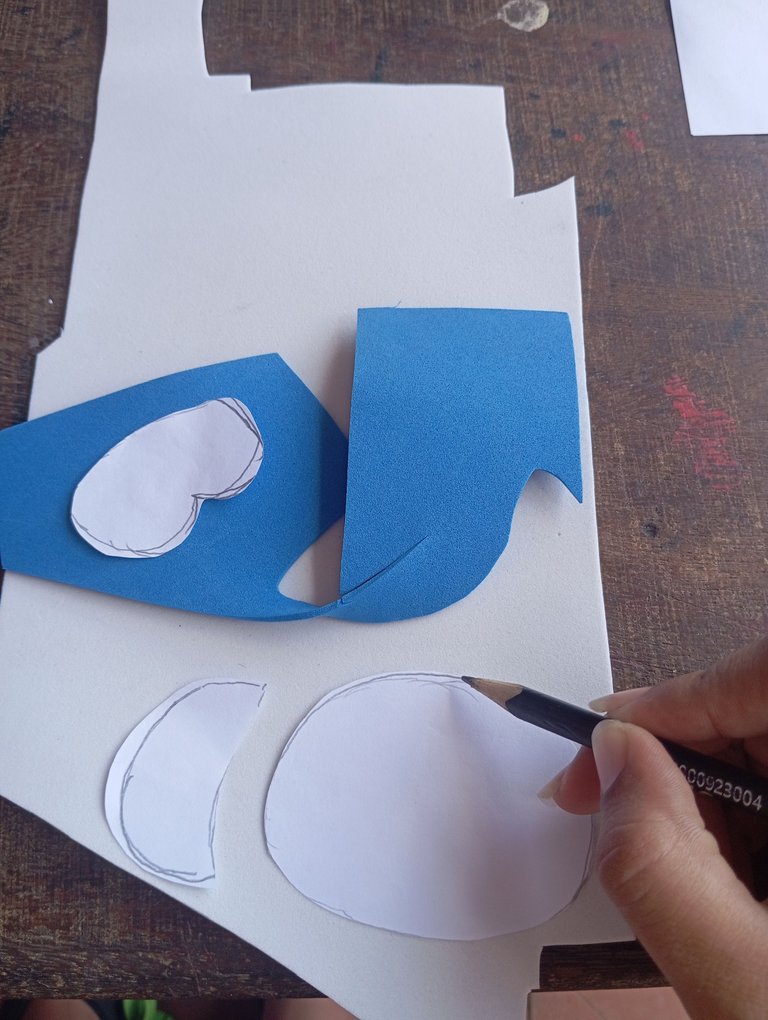
Una vez que marcamos en el paso anterior la cabeza , manos y guantes , vamos a continuar recortando lo con nuestra tijera
Once we marked in the previous step the head, hands and gloves, we will continue cutting them out with our scissors.
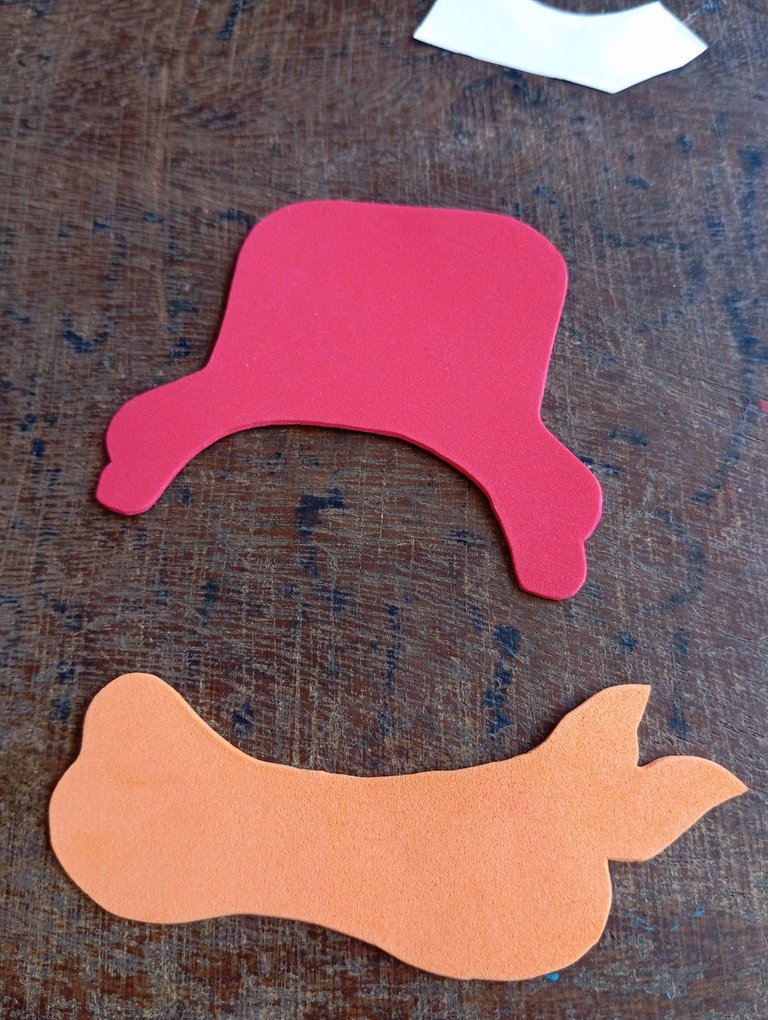
En este siguiente paso vamos a continuar marcando el sombrero del muñeco de nieve y su bufanda , para el sombrero rojo y bufanda naranja
In this next step we are going to continue marking the snowman's hat and scarf, for the red hat and orange scarf.
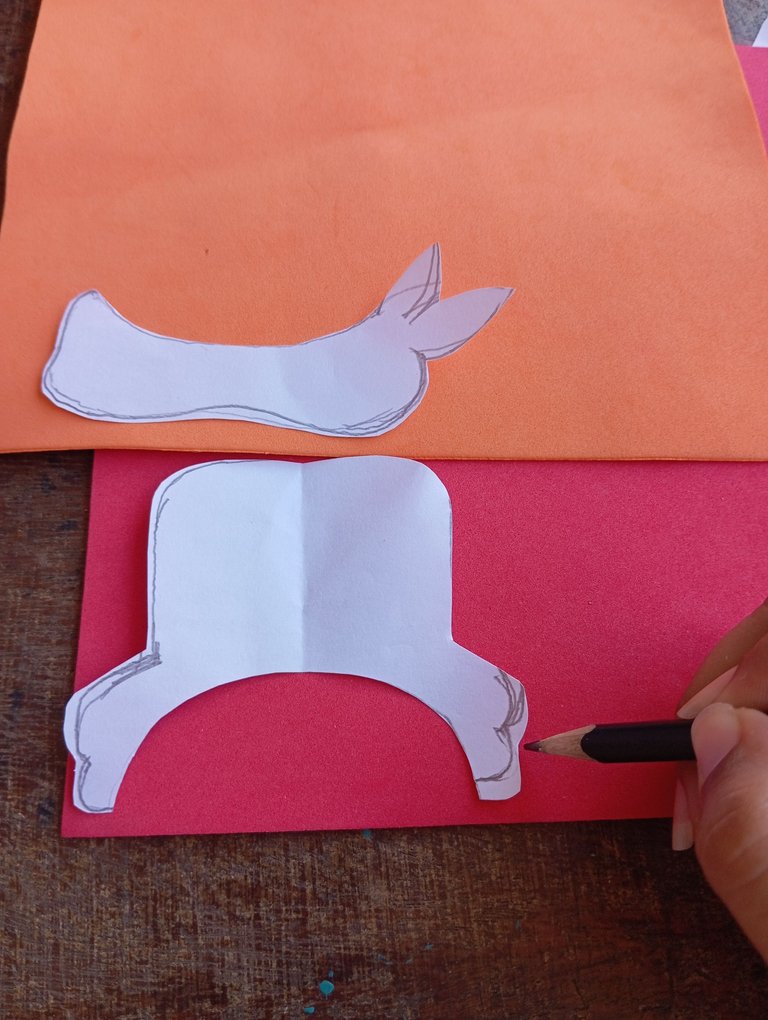
Seguidamente vamos a tomar nuestra tijera y recortaremos por todo el borde que marcamos en el paso anterior
Next we are going to take our scissors and cut all around the edge that we marked in the previous step.
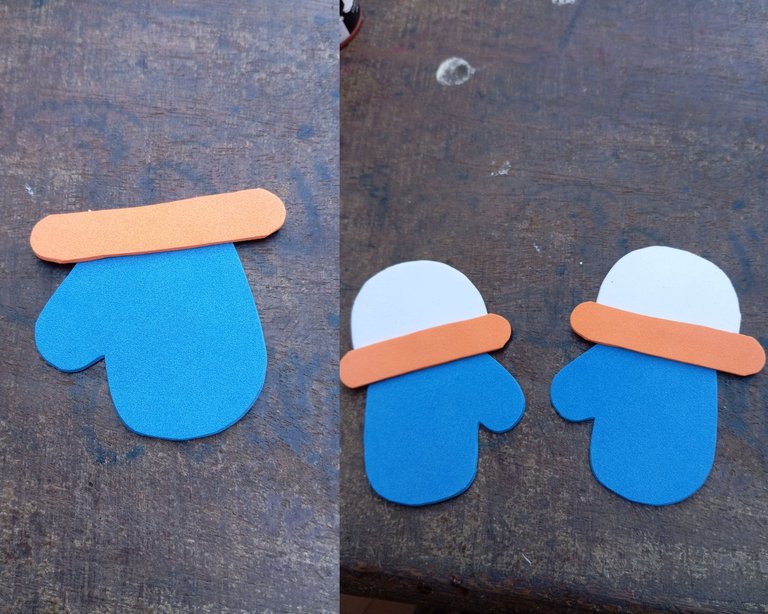
En nuestro presente paso vamos a tomar el guante y le pegaremos un borde naranja para que combine con la bufanda , luego tomaremos la mano del muñeco de nieve y la pegaremos en todo el centro cómo pueden apreciar
In our next step we are going to take the glove and glue an orange border to match the scarf, then we will take the snowman's hand and glue it all around the center as you can see.
A continuación vamos a pegar y formar la cabeza completa de nuestro muñeco, primero vamos a pegar el sombrero rojo , luego continuaremos pegando su bufanda naranja en la parte de abajo tal cómo lo pueden apreciar
Next we will glue and form the complete head of our snowman, first we will glue the red hat, then we will continue by gluing his orange scarf at the bottom as you can see.

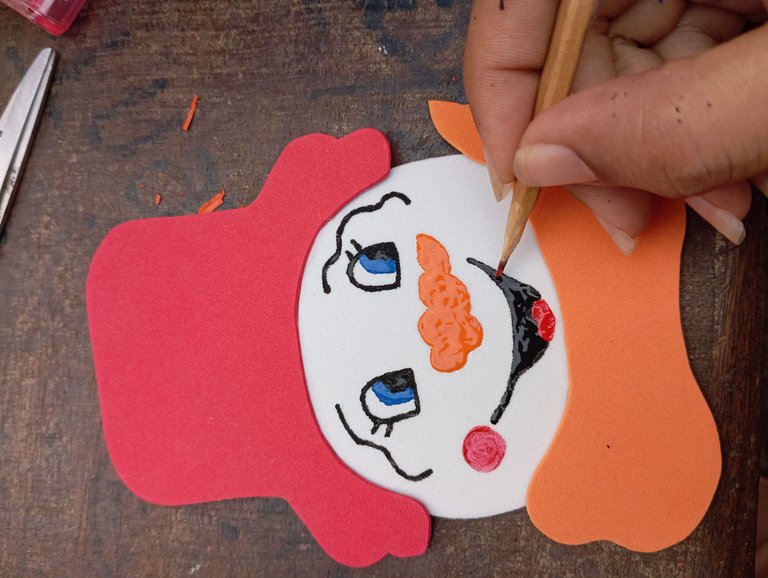
Seguidamente vamos a tomar nuestras pinturas al frío y pintaremos el rostro de nuestro adorable muñeco de nieve
Next we are going to take our cold paints and paint the face of our adorable snowman.
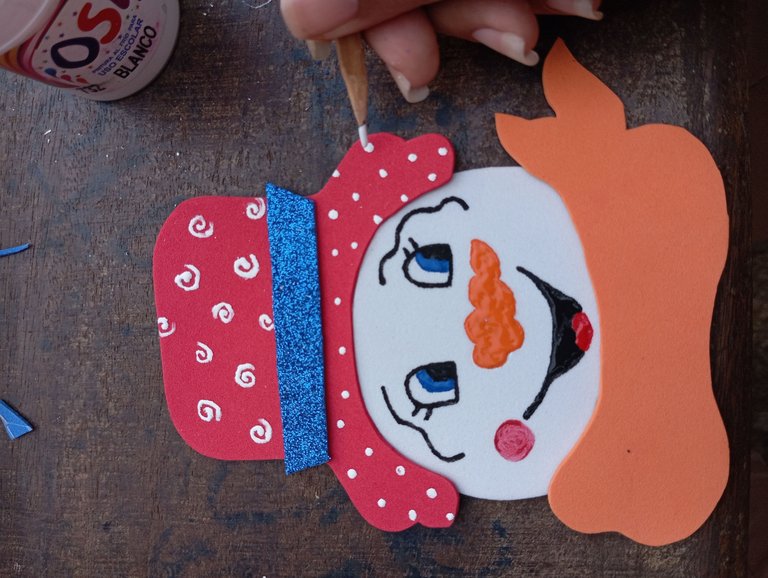
En la parte del centro del sombrero pegaremos una tira azul escarchada y dibujaremos unos adornos en el sombrero blanco para que se vea más llamativo
In the center part of the hat we will glue a frosted blue strip and we will draw some ornaments on the white hat to make it look more eye-catching.
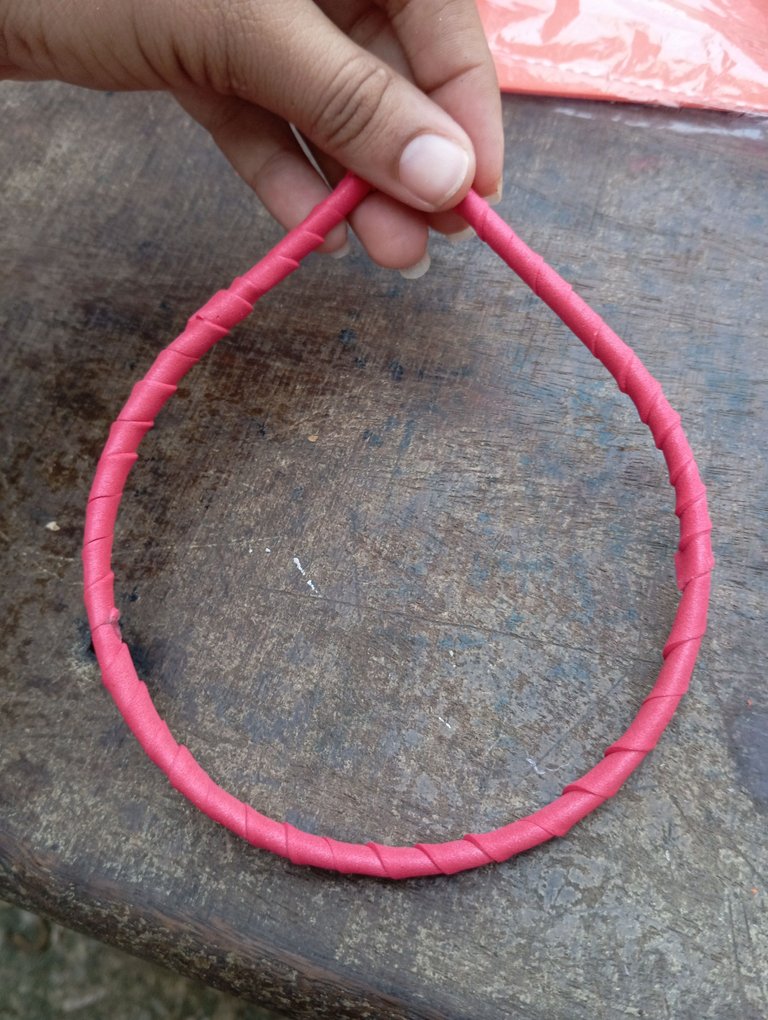
A continuación tomaremos el viejo cintillo qué recicle , recortaremos dos tiras y lo decoramos , pegando la tira de abajo hacia arriba enrollando como pueden ver
Next we will take the old headband which we recycle, cut out two strips and decorate it, gluing the strip from the bottom to the top, rolling it up as you can see.
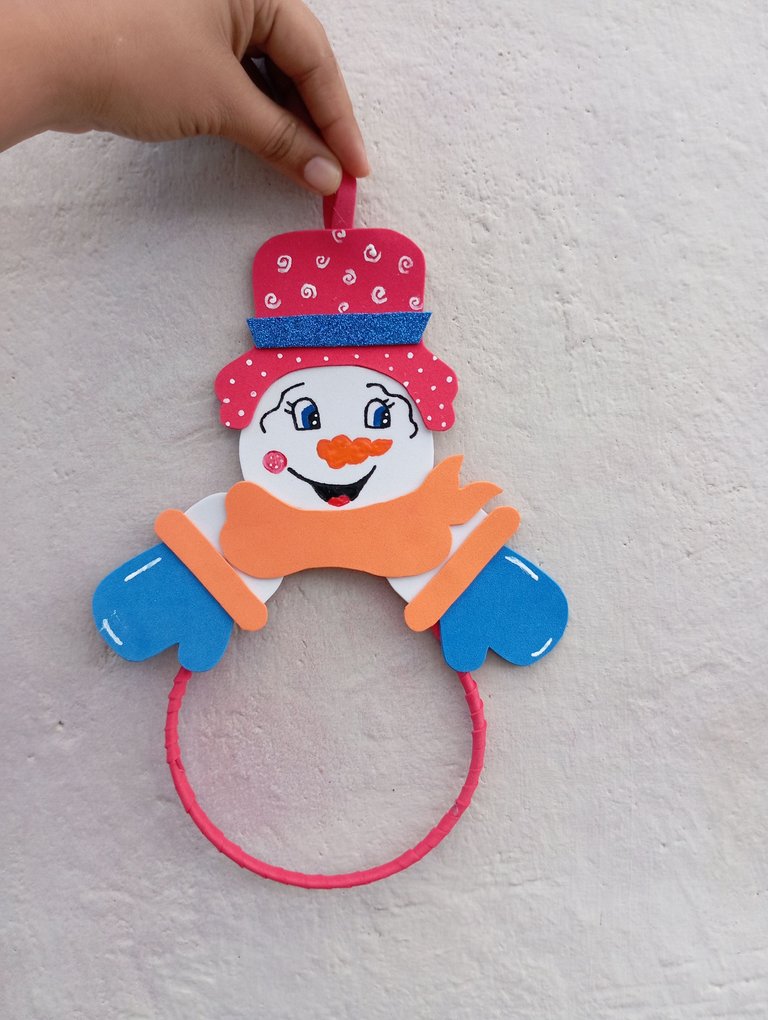
Luego vamos a continuar tomando las manos con los guantes y los pegaremos a los lados de nuestro muñeco para que el sostenga el aro dónde irán colgadas las bufandas
Then we will continue taking the hands with the gloves and we will glue them to the sides of our doll so that he will hold the ring where the scarves will be hung.
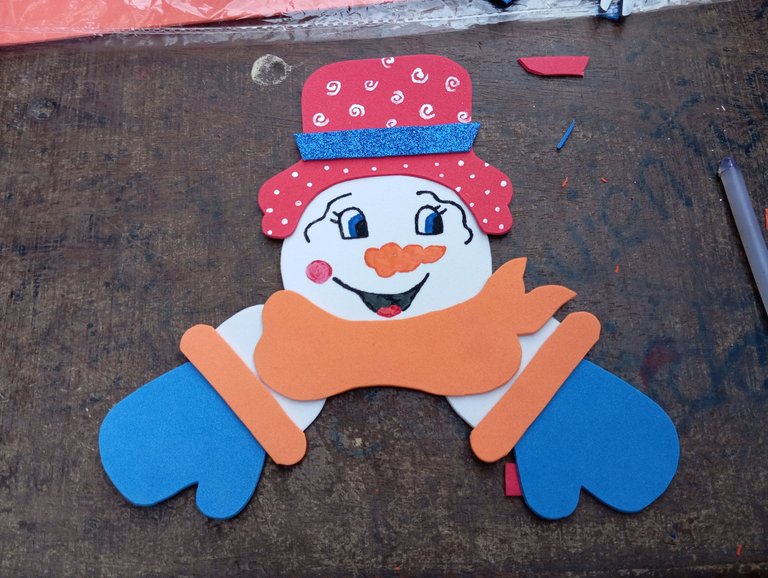
Por último tomaremos nuestro aro decorado (cintillo reciclado) y lo pegaremos en la parte de abajo del cintillo en todo el centro
Finally we will take our decorated hoop (recycled headband) and glue it to the bottom of the headband in the center.
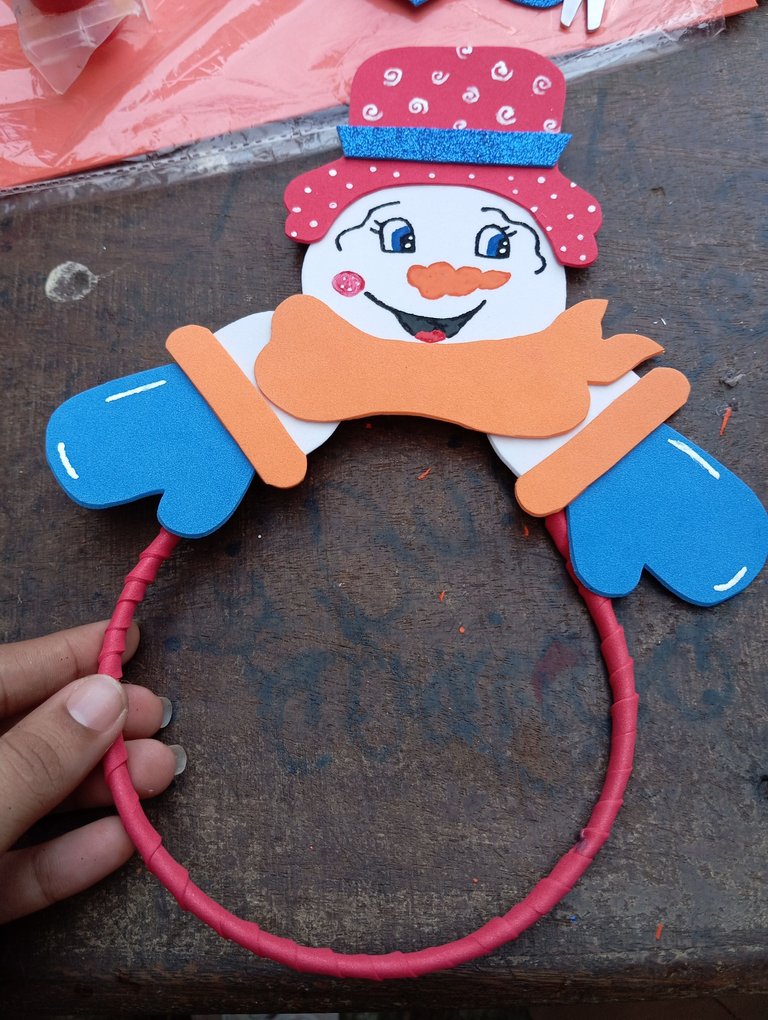
Este es el resultado final de mi hermoso adorno navideño para colgar bufandas en navidad , ideal para adornar nuestro hogar , negocios y oficinas , las fotos las tomé con mi redmi 12 y traduje los textos con el traductor deepl, que pasen un bello y bendecido día saludos
This is the final result of my beautiful Christmas ornament to hang scarves at Christmas, ideal for decorating our home, business and offices, the photos were taken with my redmi 12 and translated the texts with the translator deepl, have a beautiful and blessed day greetings
Muy original tu proyecto!
Gracias amiga
Ay que Cuchi está este adorno amiga, me encantó.
Me alegra amiga , saludos
Hiciste un buen tutorial, me gustó como te quedó. Se lo mostrarte a mi mamá para que se anime a hacerlo, saludos💞
Gracias amiga
It looks pretty cool! It gives a positive vibe. Nice work!