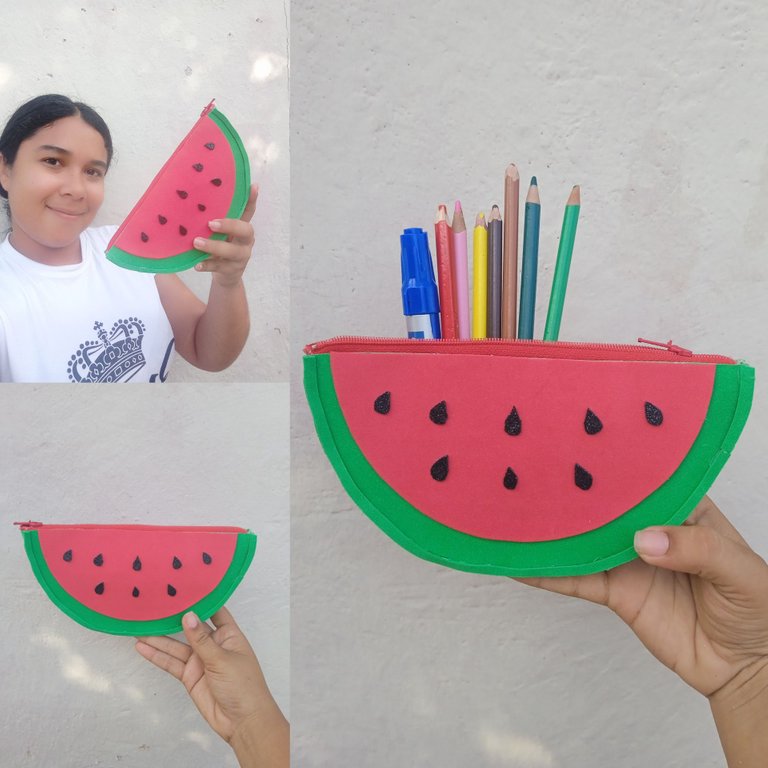
Cartuchera en forma de sandía / Watermelon shaped pencil case
Hola mis queridos amigos creadores de contenido ,feliz noche para todos , hoy les quiero compartir una linda cartuchera que realice con temática de sandía ( patilla ) una de mis frutas favoritas , ideal para que nuestras pequeñas lleven a las escuelas y guarden sus lápices y útiles escolares
Hello my dear friends content creators, happy evening to all, today I want to share a nice pencil case that I made with a watermelon theme (patilla) one of my favorite fruits, ideal for our little ones to take to school and keep their pencils and school supplies.
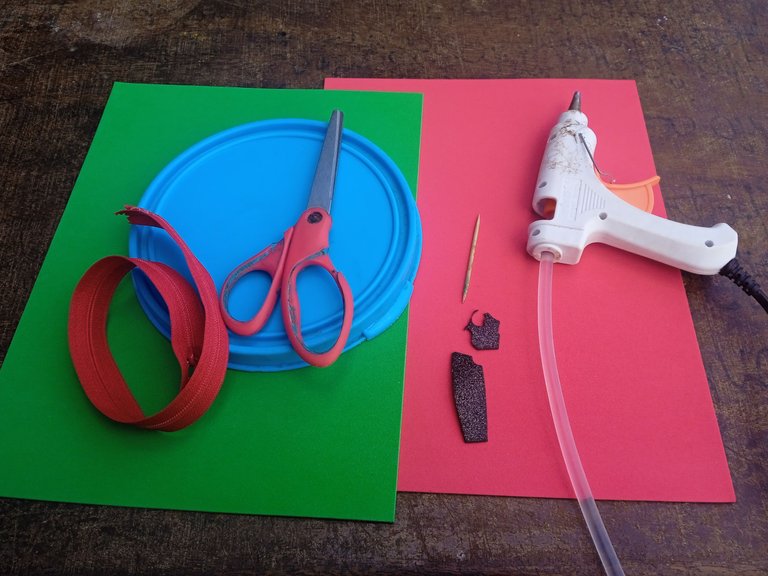
Materiales que utilice :
-Foamis rojo y verde
-Cierre color rojo
-Tijera
-Silicon
-Palito de altura
-Objeto redondo
Materials I used :
-Red and green Foamis
-Red zipper
-Scissors
-Silicon
-Height stick
-Round object
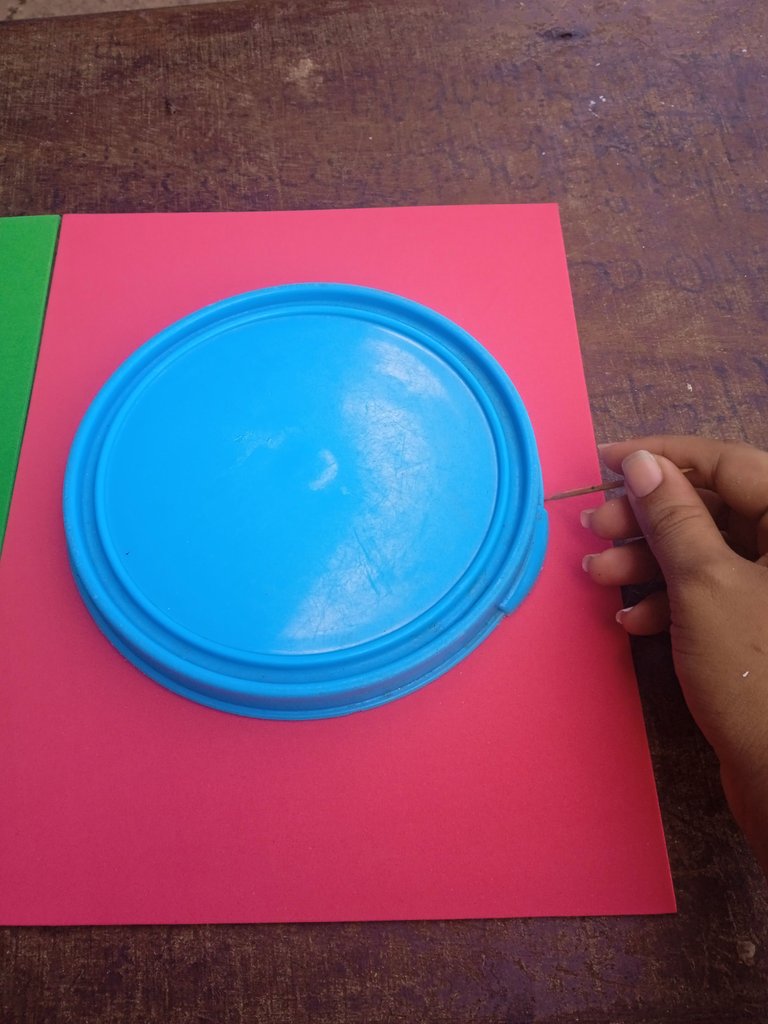
A continuación los pasos a seguir :
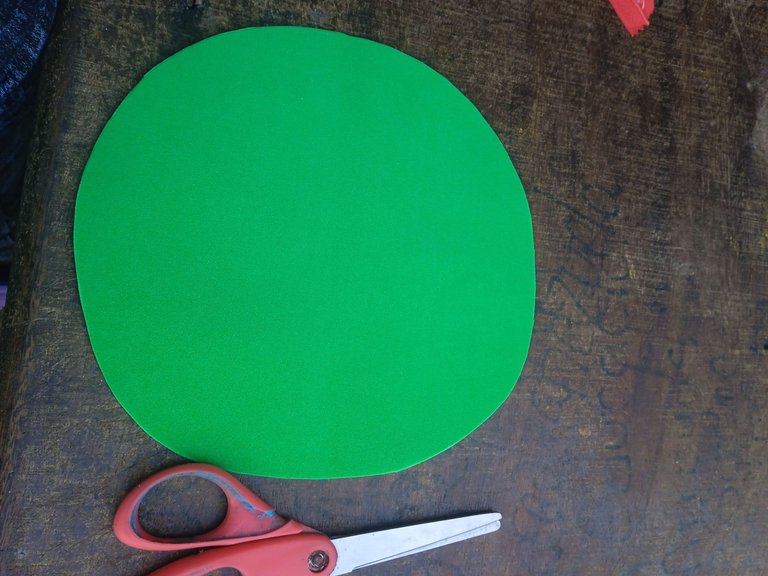
Para nuestra manualidad comenzaremos marcando en nuestros foamis círculos, iniciaremos con el foamis color rojo que es lo que comemos de la patilla , dependerá de nuestro gusto y comodidad el tamaño de nuestra cartuchera y círculos ,para realizar estos círculos utilice una tapa redonda y lo marque con un palito de altura para no ensuciar el foamis
Here are the steps to follow:
For our craft we will begin by marking on our foamis circles, we will start with the red foamis that is what we eat from the sideburn, it will depend on our taste and comfort the size of our pencil case and circles, to make these circles use a round lid and mark it with a stick height to avoid dirtying the foamis.
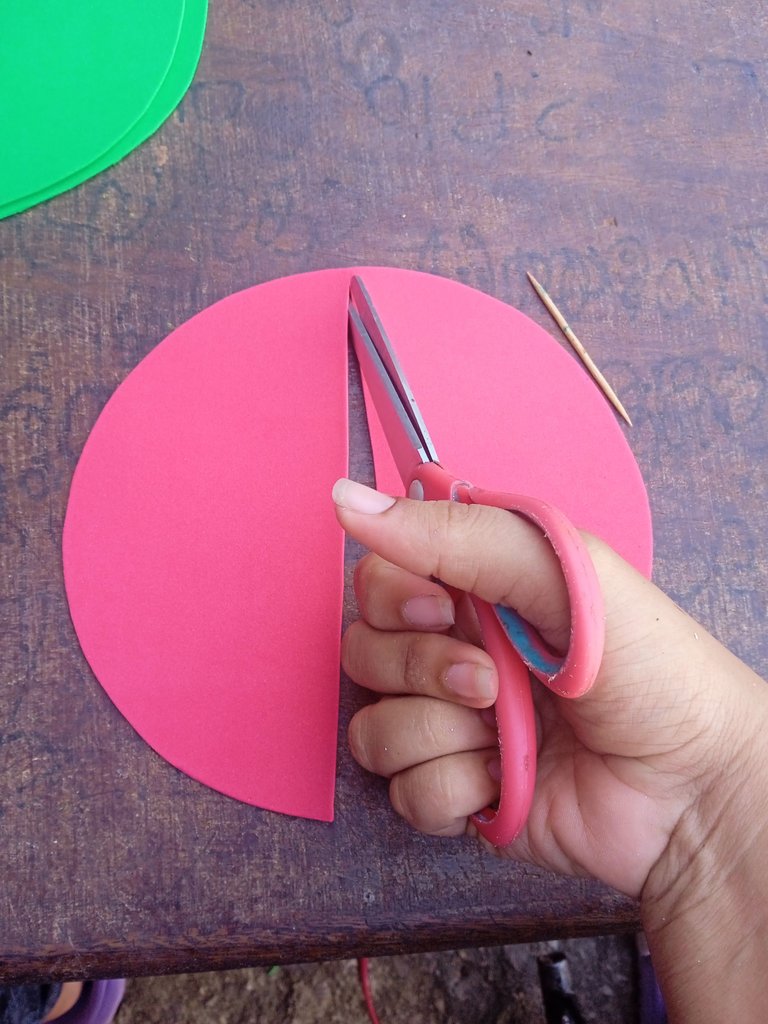
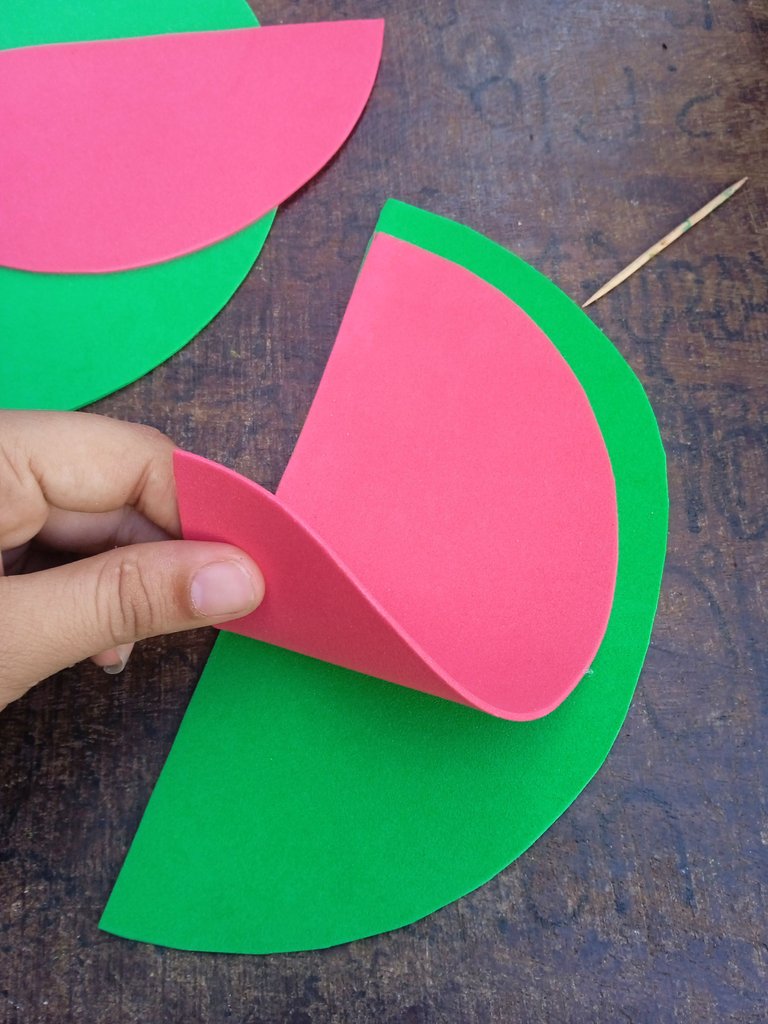
Luego continuaremos recortando nuestro círculo rojo y marcaremos en el foamis color verde el siguiente circulo que sería la concha de la patilla debemos asegurarnos que este circulo sea más grande que el rojo
Then we will continue cutting our red circle and we will mark on the green foamis the next circle that would be the shell of the sideburn, we must make sure that this circle is bigger than the red one.
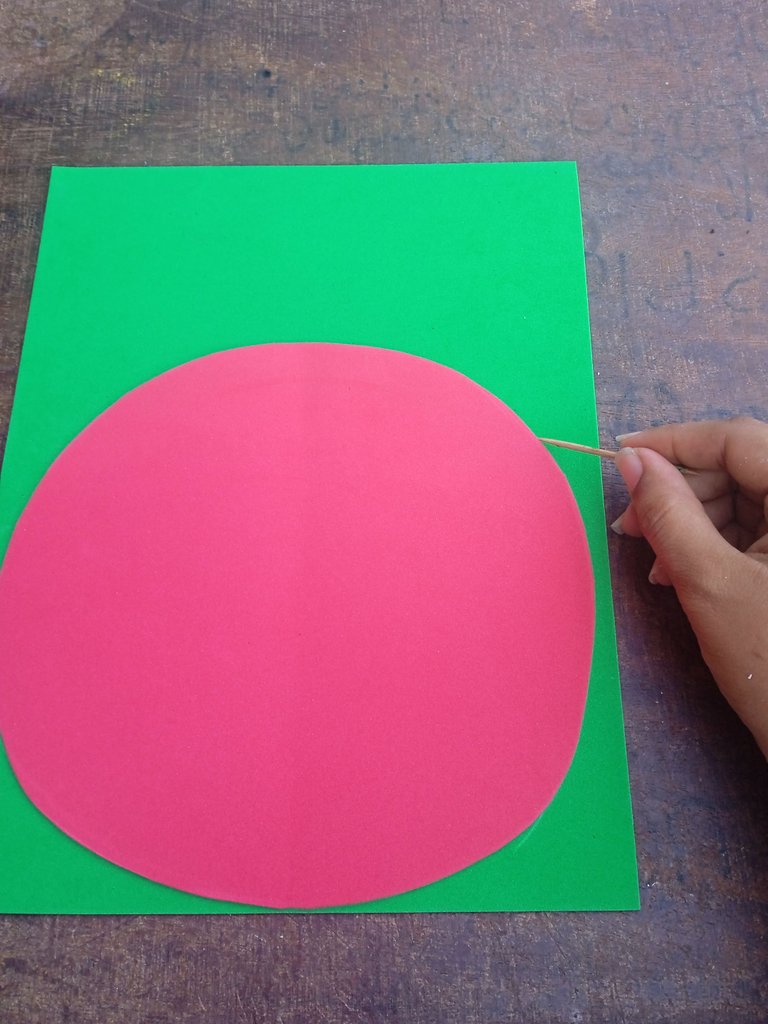
Los círculos son para que podamos utilizar ambos lados ,cortarlo por el centro y así tener medidas exactas ,de modo que la sandía este como picada, una vez que marcamos nuestros círculos lo recortamos con la ayuda de una tijera
The circles are so that we can use both sides, cut it in the center and thus have exact measurements, so that the watermelon is like chopped, once we mark our circles we cut it with the help of scissors.
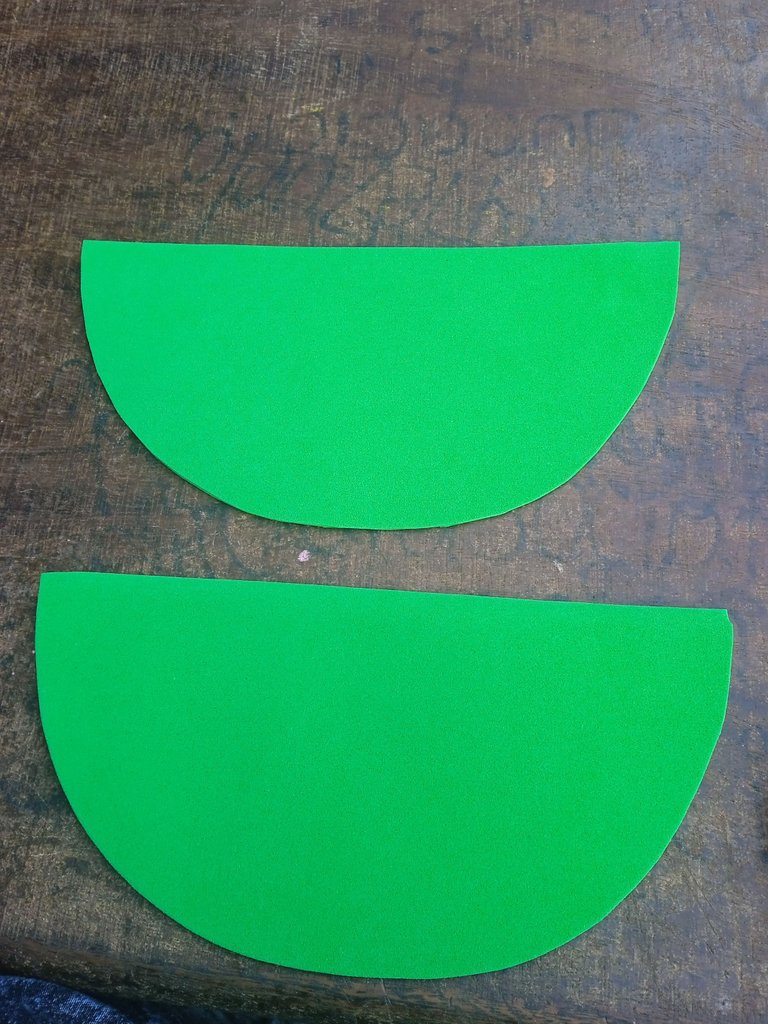
A continuación cuando los círculos esten listos ,vamos a proceder a recortar y dividir los en dos de esta manera tendremos la silueta de la sandía cuando la pidamos en rodajas, debemos cortar el foamis por todo el centro
Then when the circles are ready, we will proceed to cut and divide them in two in this way we will have the silhouette of the watermelon when we order it in slices, we must cut the foamis around the center.
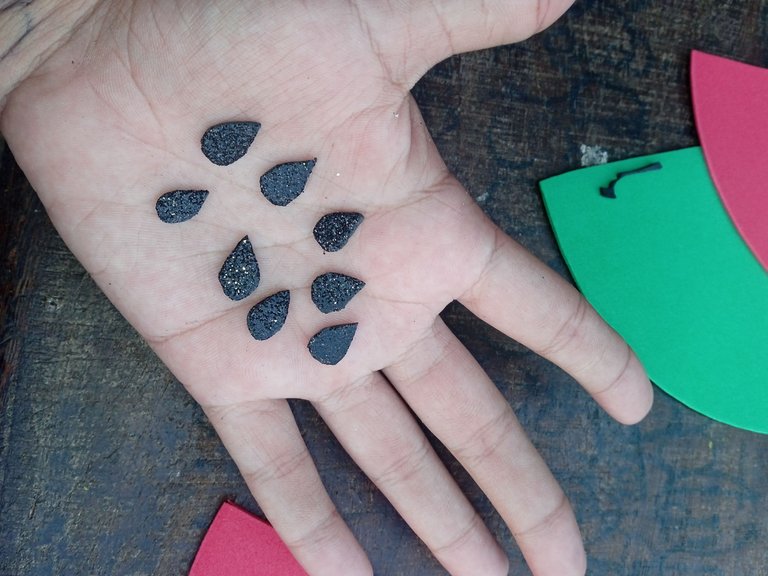
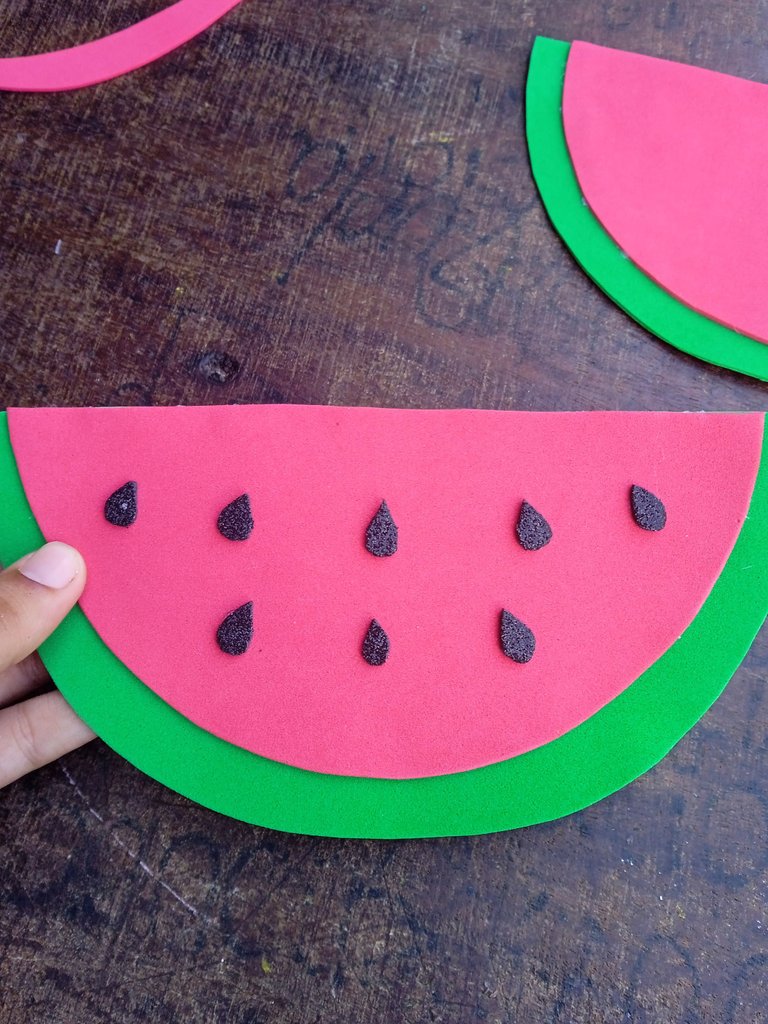
Luego tomaremos los recortes de foamis color negro y comenzaremos a realizar las semillas de nuestra sandía ,en total realizaremos 16 semillas 8 para cada lado
Then we will take the black foamis cuts and we will begin to make the seeds of our watermelon, in total we will make 16 seeds, 8 for each side.
A continuacion en este siguiente paso vamos a tomar las primeras piezas de la sandía y comenzaremos a pegar, pegaremos primeramente en la parte de arriba de el foamis verde el color rojo , este irá ubicado en todo el centro ya que es la comida de la sandía y los bordes que se observan cuando la picamos son las conchas
Then in this next step we will take the first pieces of the watermelon and we will begin to glue, we will first glue the red color on the top of the green foamis, this will be located throughout the center as it is the food of the watermelon and the edges that are observed when we chop it are the shells.
A continuación pegaremos las semilla en todo el centro de nuestra sandía ,debemos pegarlas de forma correcta y semi separadas que queden en todo el alrededor
Next we will glue the seeds all around the center of our watermelon, we must glue them in a correct and semi separated way so that they are all around.
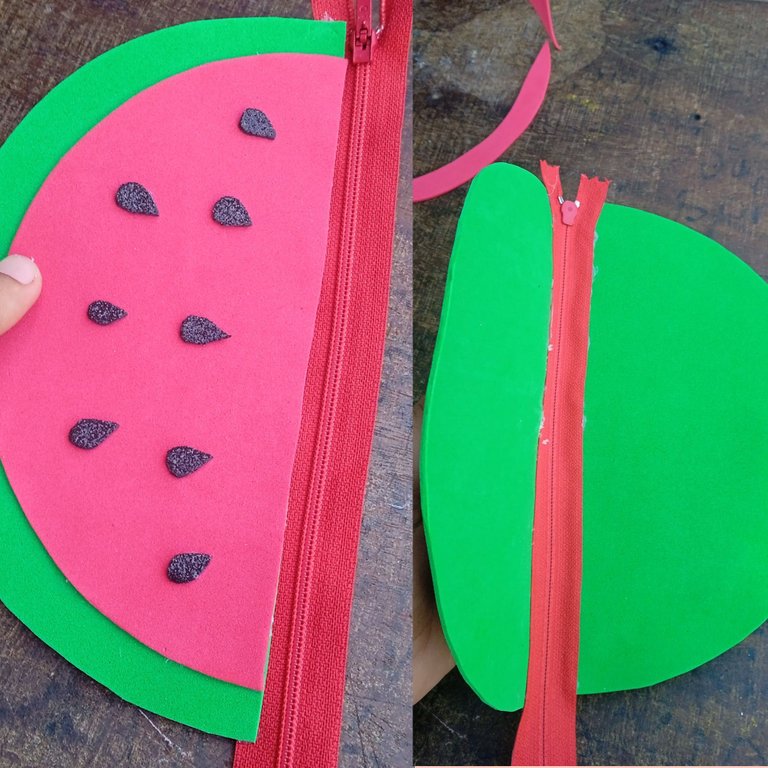
Luego tomaremos nuestras dos piezas iguales en forma de sandía , y vamos a pegar con mucho cuidado Por los lados de nuestro cierre color rojo ambas piezas que podamos abrir y cerrar la cartuchera
Then we will take our two equal pieces in the shape of watermelon, and we will glue very carefully on the sides of our red zipper both pieces that we can open and close the pencil case.
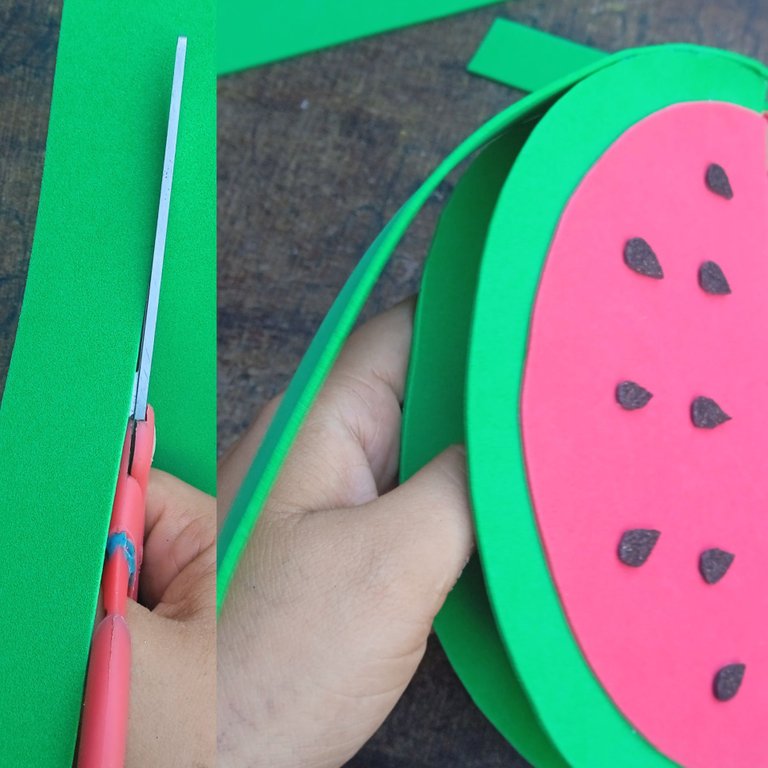
Por último tomaremos una tira de foamis con un grosor aproximadamente de 4 centímetros
Está tira gruesa será para pegar el alrededor de la parte de abajo de nuestra cartuchera para que no se salgan los colores ,la tira debe ser de el mismo color de la concha de la sandía ,es decir verde
Finally we will take a strip of foamis with a thickness of approximately 4 centimeters.
This thick strip will be to glue around the bottom of our pencil case so that the colors do not come out, the strip should be the same color of the watermelon shell, ie green.
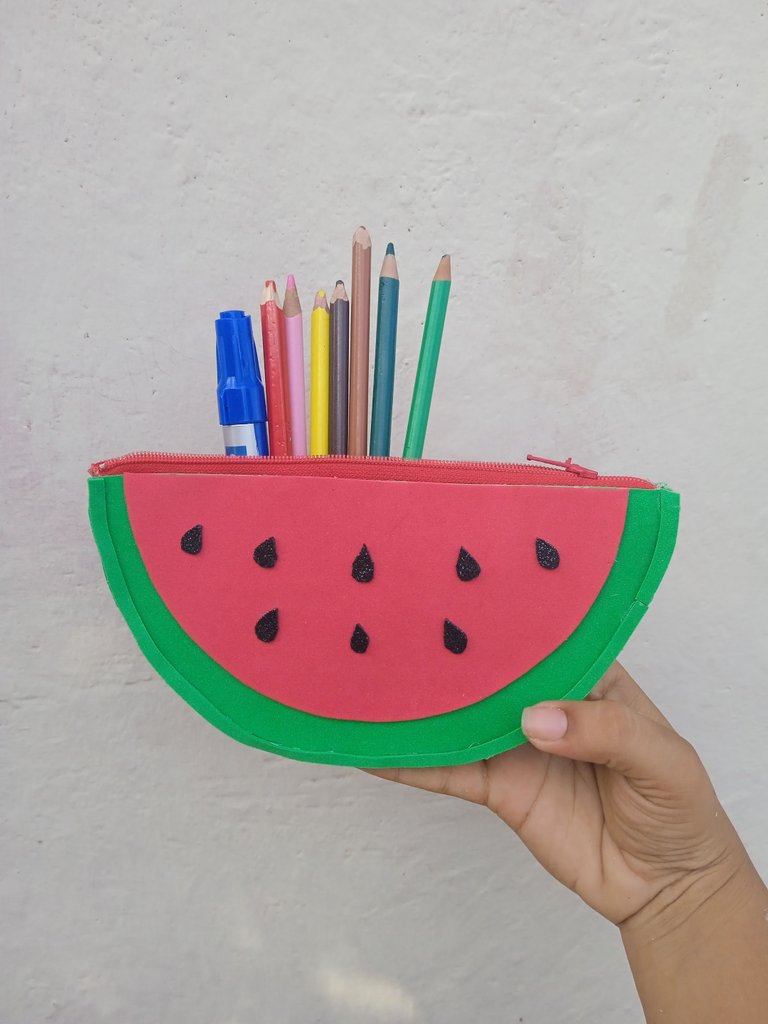
Este es el resultado final de mi hermosa cartuchera en forma de sandía ,un excelente accesorios para escuelas para guardar útiles como lápices ,colores ,sacapuntas y gomas,las pequeñas de el hogar las amaran ,las fotos las tomé con mi teléfono Redmi 9C y los textos los traduje con el traductor DeepL ,feliz noche ,nos vemos en el siguiente post
This is the final result of my beautiful watermelon shaped pencil case, an excellent accessory for schools to store supplies such as pencils, colors, pencil sharpeners and erasers, the little ones at home will love them, the photos were taken with my Redmi 9C phone and the texts were translated with the translator DeepL, happy night, see you in the next post.
Wow!! Qué bonito diseño 💕 me gusta mucho la forma de la sandía para este tipo de estuche/cartuchera!! Voy a tener esta idea en mente para algún proyecto!! Gracias por compartirlo 🌼
Me alegra que te haya gustado amiga
Diseño muy creativo, Carcajada, rebanada de sandía!
Gracias amigo
Un placer
Te felicito por tu creatividad
Gracias amigo