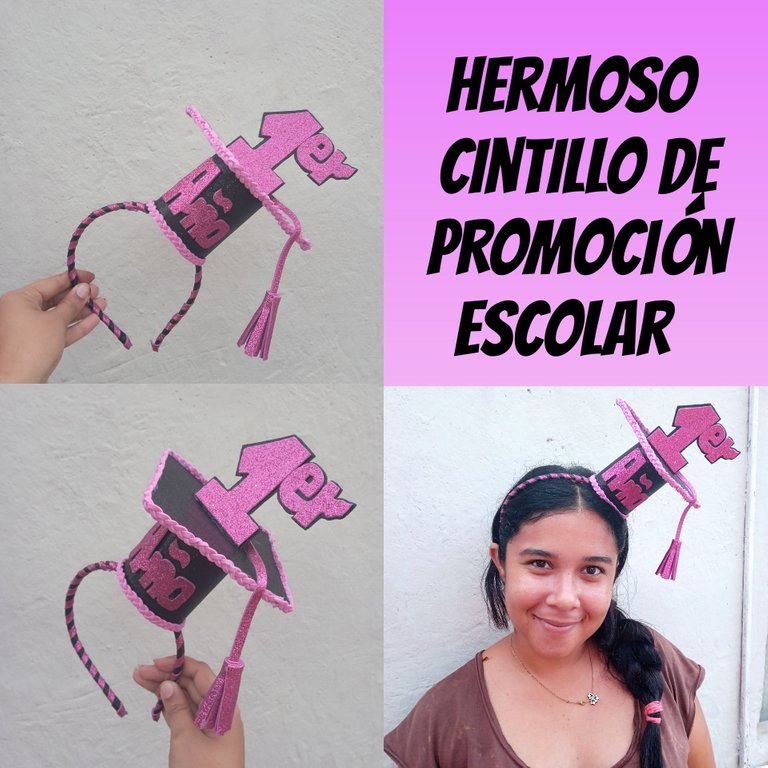
Hermoso cintillo de promoción / Beautiful promotional headband
Hola buenas noches mis apreciados amigos de esta bella comunidad , espero se encuentren bien , el día de hoy les quiero compartir como realice un cintillo de promoción escolar, les cuento que lo realice con un cintillo para que sea de una forma más única ,el modelo lo hace ver muy coqueto
Hello good evening my dear friends of this beautiful community, I hope you are well, today I want to share with you how I made a headband for school promotion, I tell you that I made it with a headband to make it a more unique way, the model makes it look very flirtatious.
Materiales :
-Cintillo
-Foamis
-Tijera
-Lapiz
-Silicon
Materials :
-Cintillo
-Foamis
-Scissors
-Pencil
-Silicon

Pasos a seguir:
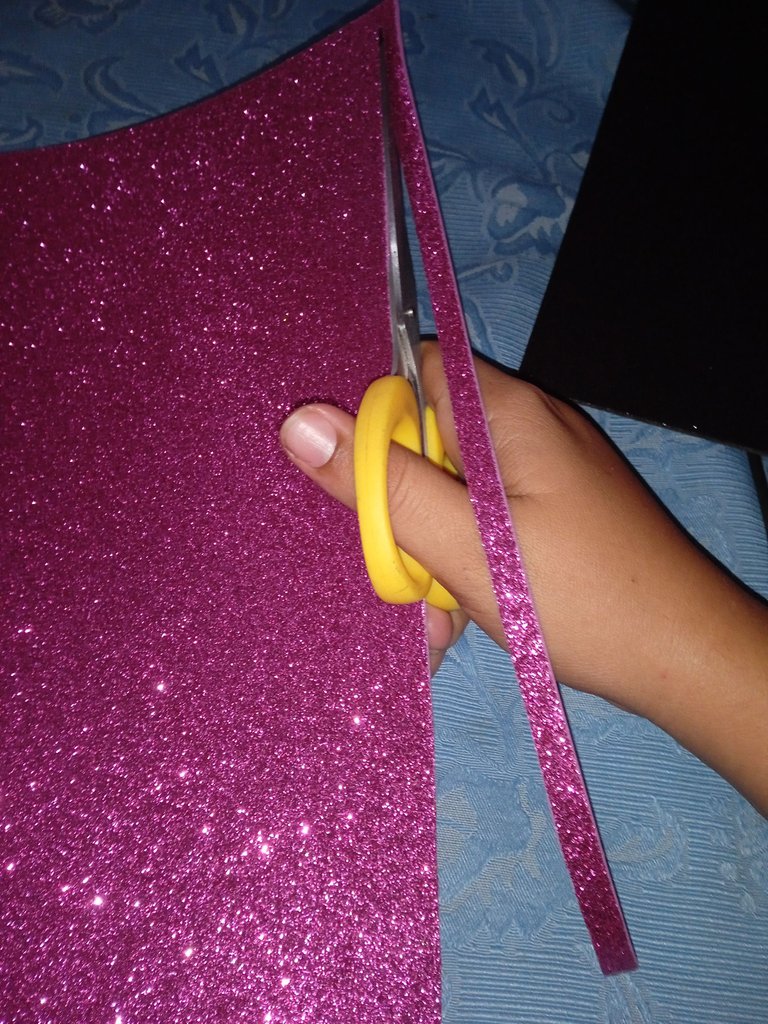
Iniciaremos con la decoración del cintillo , lo primero que debemos realizar es ,un corte de 2 tiras de 1 centímetro cada una es decir ,una fucsia y la otra negra
Steps to follow:
We will begin with the decoration of the headband, the first thing to do is to cut 2 strips of 1 centimeter each, one fuchsia and the other black.
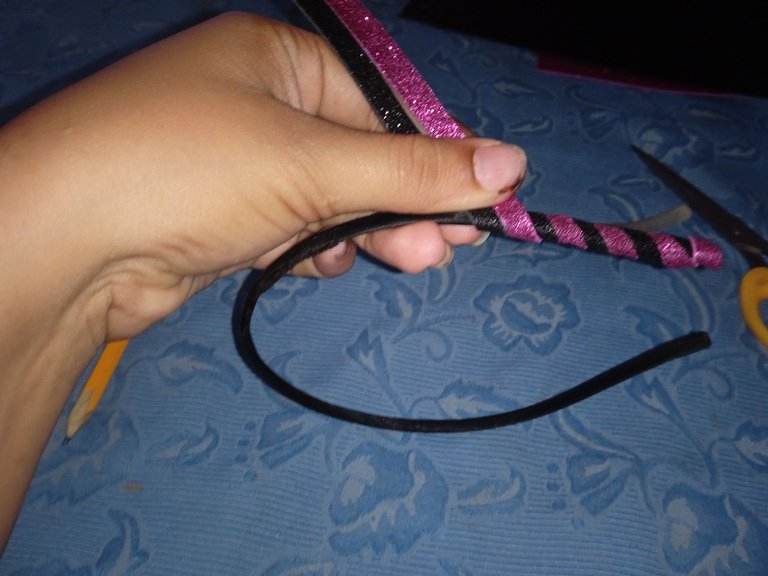
Luego continuaremos decorando el cintillo , tomamos las dos puntas de las tiras ,añadimos silicón y pegamos en toda la punta del cintillo , luego continuaremos enrollando envolviendo todo el cintillo , dejando un color al lado del otro
Then we continue decorating the headband, we take the two ends of the strips, add silicone and glue the whole headband, then we continue wrapping the whole headband, leaving one color next to the other.
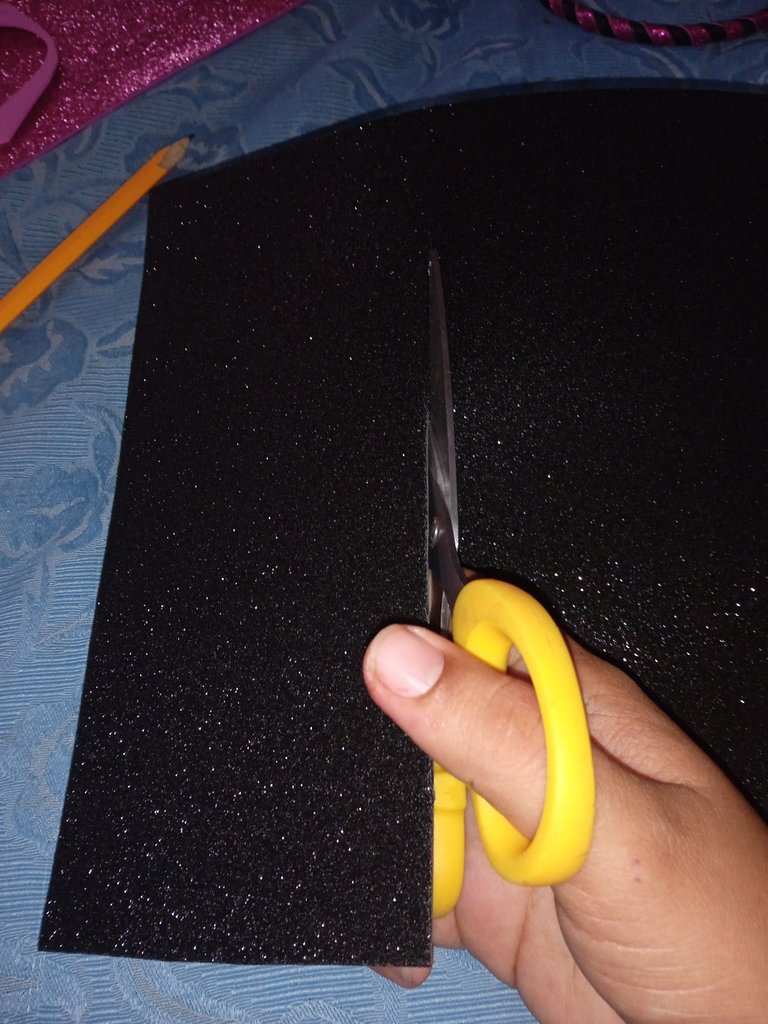
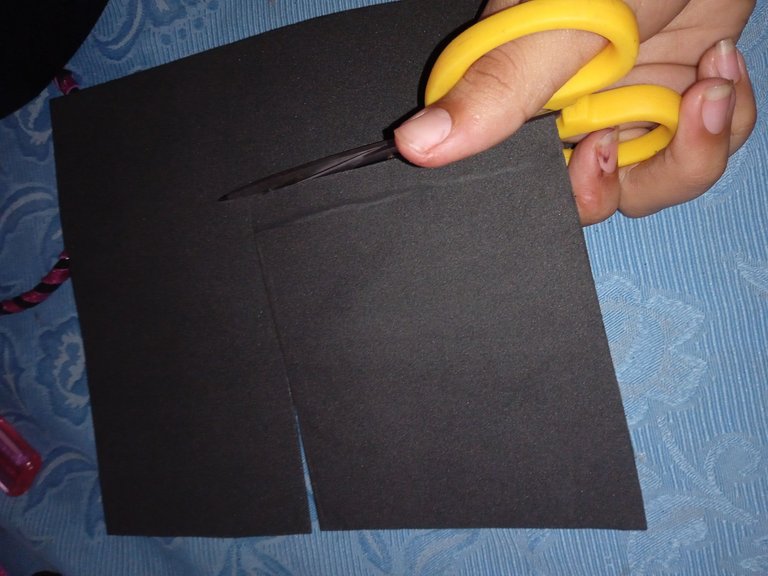
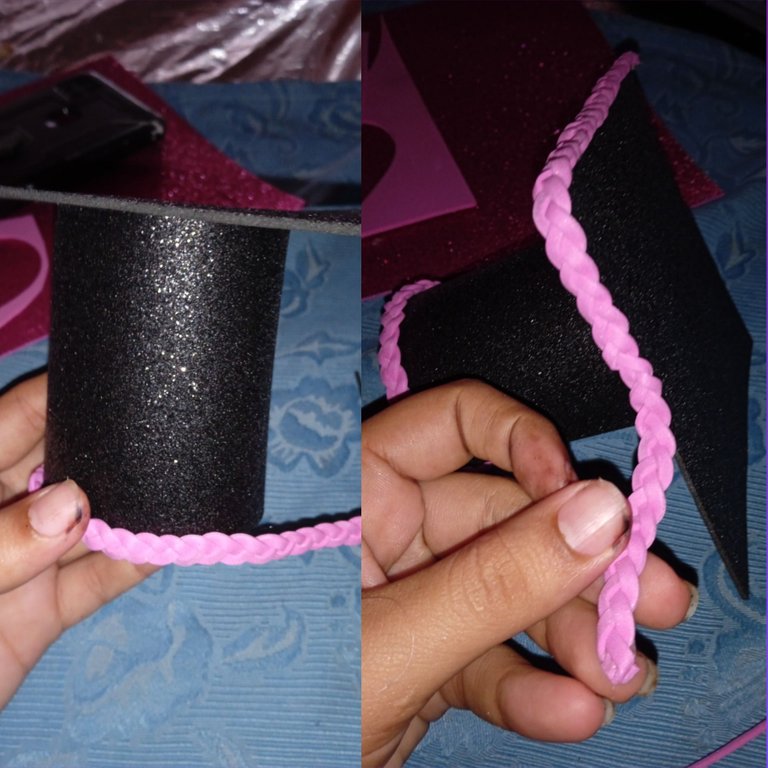
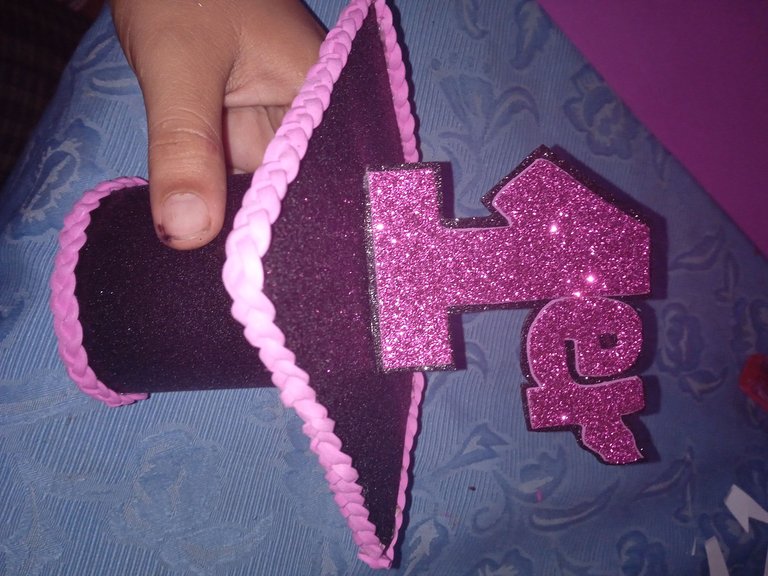
Iniciaremos con la elaboración del birrete que es el principal motivo de decoración , tomamos el foamis negro escarchado y recortamos una tira de 9 cm de altura y 18 cm de largo , con el realizaremos la base del birrete ,específicamente una forma de cilindro
We will begin with the elaboration of the biretta which is the main motif of decoration, we take the frosted black foamis and cut a strip of 9 cm high and 18 cm long, with it we will make the base of the biretta, specifically a cylinder shape.
Luego continuaremos recortando un cuadro , este cuadro irá en la parte de arriba del birrete , posee una media de 10 cm de ancho y 10 cm de altura
Then we will continue cutting out a square, this square will go on the top of the cap, it has an average width of 10 cm and a height of 10 cm.
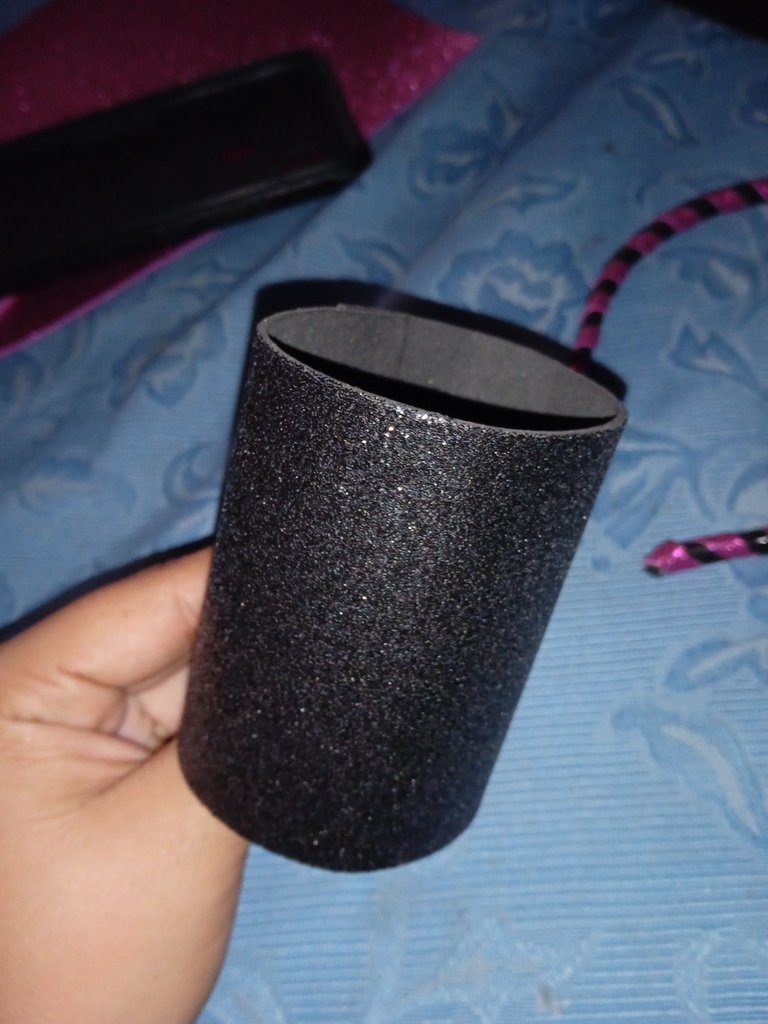
Continuamos con la elaboración de el birrete , comenzamos con la base ,añadimos silicón y pegamos borde con borde ,dejando así una forma de un cilindro
We continue with the elaboration of the biretta, we start with the base, add silicone and glue edge to edge, leaving a shape of a cylinder.
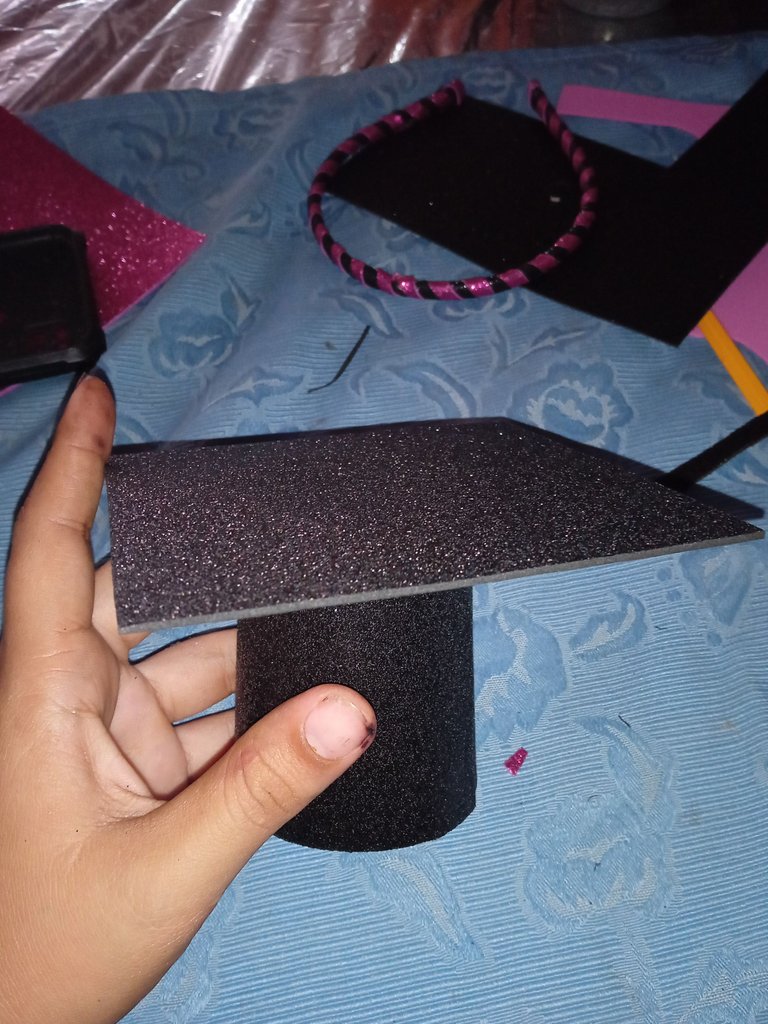
Luego tomamos el cuadro que recortamos y pegamos en la parte de arriba del birrete
Then we take the picture that we cut out and glue to the top of the cap.
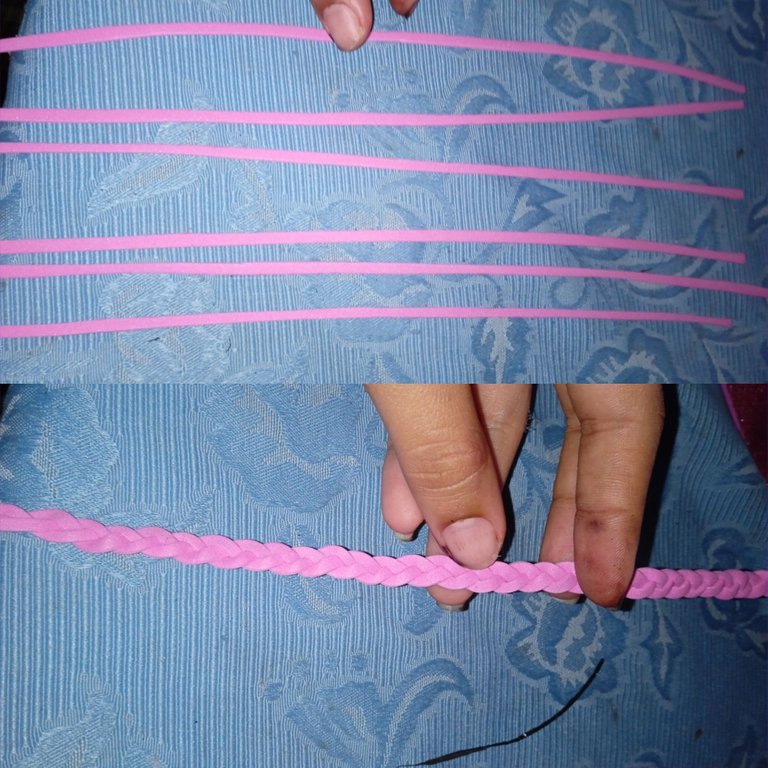
Para decorar el birrete ,tomé 6 tiras de foamis color rosa ,y realice 2 moños tejidos con ellas
To decorate the biretta, I took 6 strips of pink foamis, and made 2 woven bows with them.
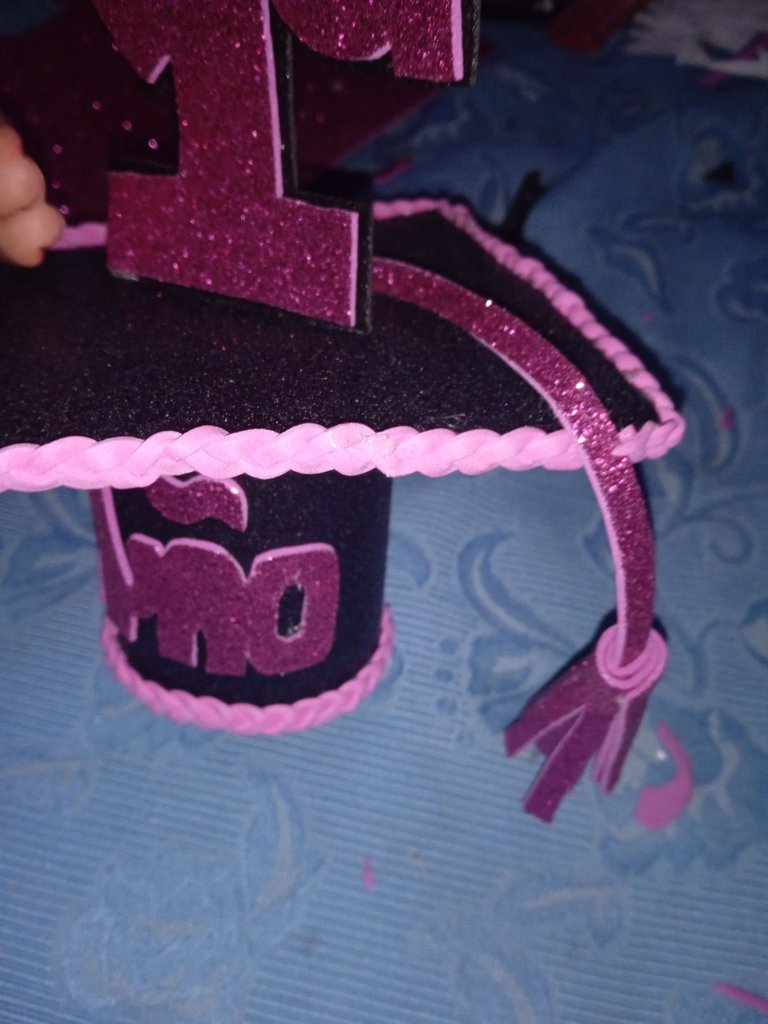
Luego continúe pegando los moños tejidos al birrete , uno pegue en la parte de abajo del cilindro y el otro en la parte de arriba del cuadro
Then continue gluing the woven bows to the cap, one on the bottom of the cylinder and the other on the top of the frame.
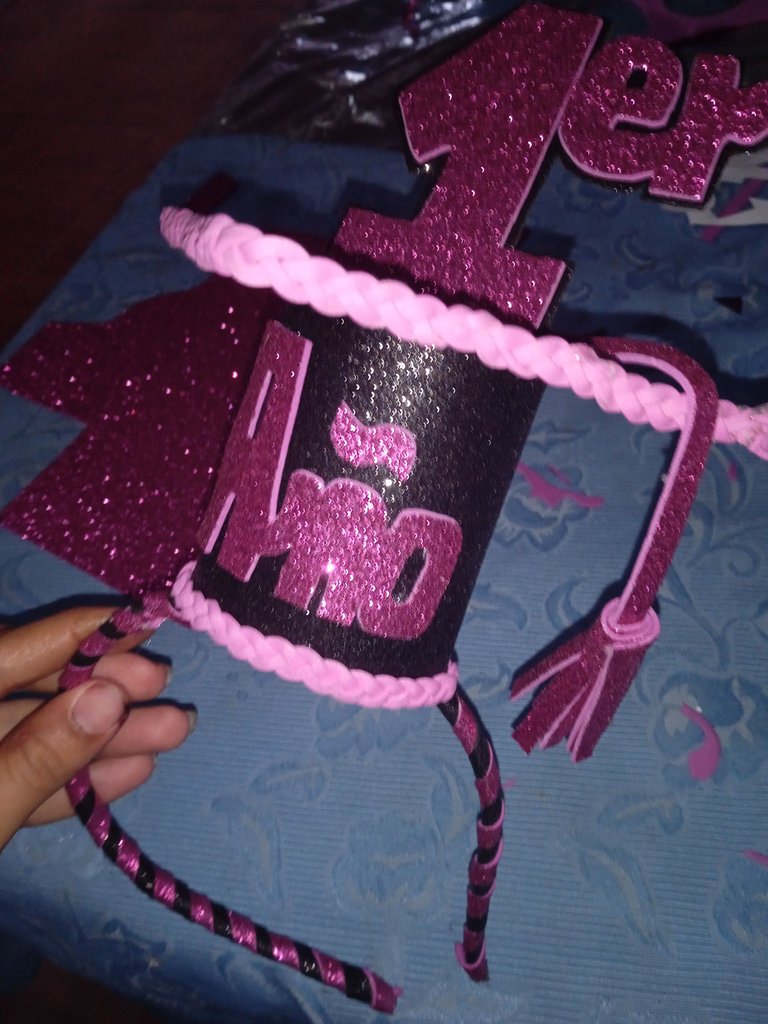
Luego continúe marcando en el foamis fucsia la palabra ( año, 1 y las letras ER ) que quiere decir :primer año
Then continue by marking on the fuchsia foamis the word ( year, 1 and the letters ER ) which means: first year.
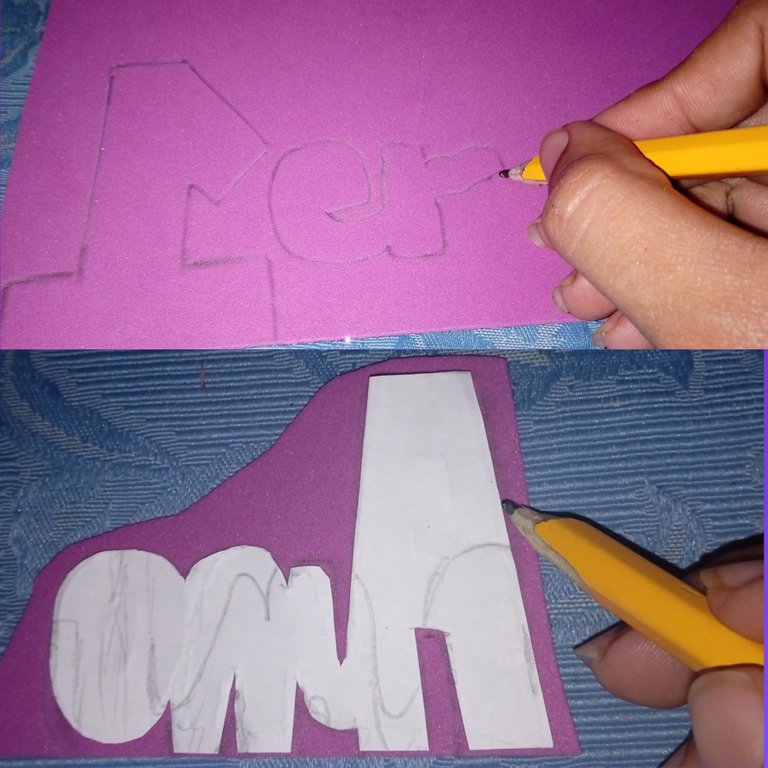
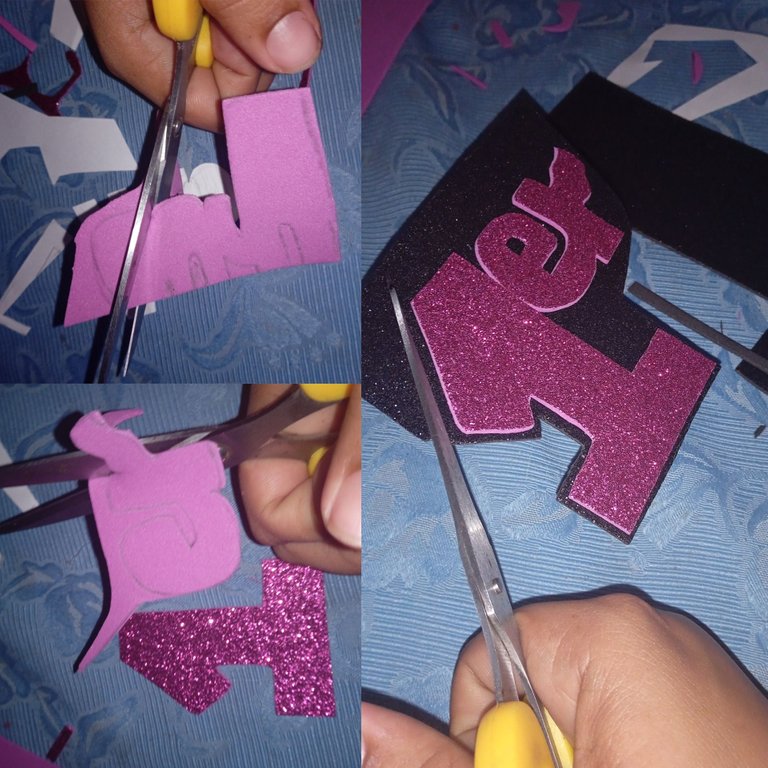
Una vez listo las letras y el número 1 continúe recortando los , el número 1 y las letras ER los pegue en el foamis negro y recorte dejando un borde negro
Once the letters and the number 1 are ready, continue cutting out the letters, the number 1 and the letters ER, glue them on the black foamis and cut out leaving a black border.
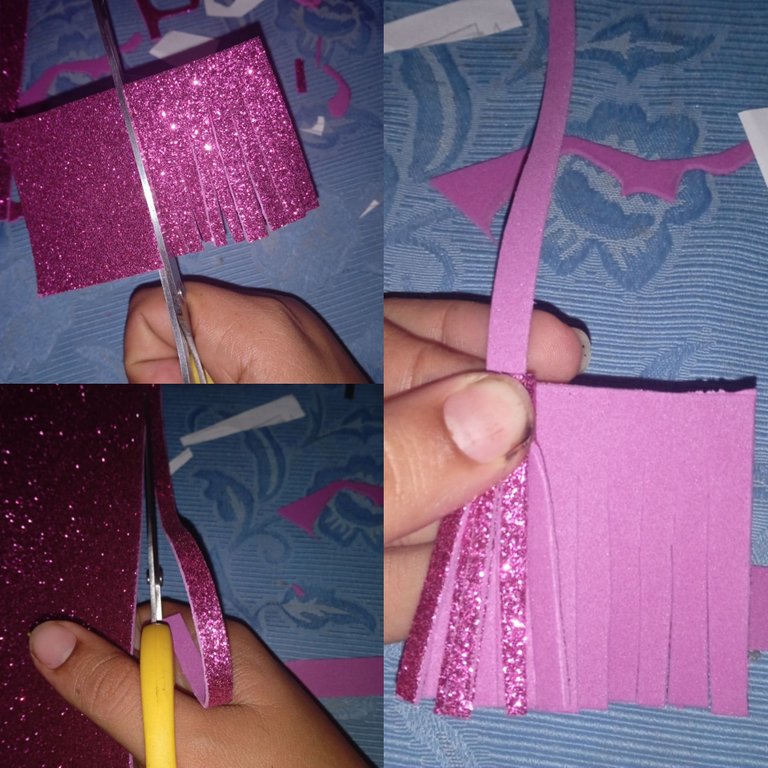
Luego continúe recortando un cuadro y le realice varios cortes en forma de tiras dejando un espacio sin cortar , recorte una tira del mismo color y lo coloque en el centro y fui enrollando realizando así la cuerda que ellos llevan colgando
Then I continued cutting a picture and made several cuts in the form of strips leaving a space without cutting, cut a strip of the same color and placed it in the center and I was winding up making the rope that they carry hanging.
En este presente paso en la parte de arriba del birrete en todo el centro pegue el (1Er)
In this step, on the top of the cap in the center of the cap, paste the (1Er)
Luego continuaremos pegando en la parte de arriba ,detrás del número 1er la cuerda que ellos traen , está la pegamos para que cuelgue hacia el lado contrario de la cabeza
Then we continue gluing on the top part, behind the number 1, the rope that they bring, we glue it so that it hangs to the opposite side of the head.
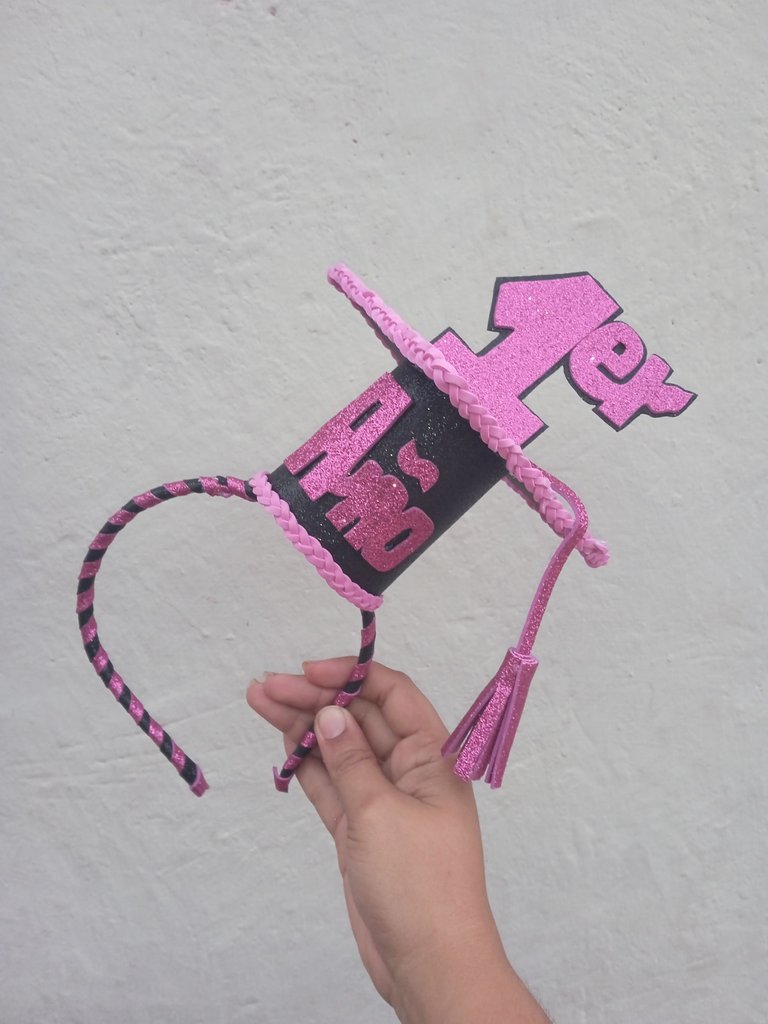
Por último para finalizar pegamos el birrete en una esquina del cintillo
Finally, we glue the biretta to one corner of the headband.
De este modo realice mi hermoso cintillo de promoción , tomé mis fotos de mi Redmi 9C y traduci mis textos con el traductor DeepL
So I made my beautiful promotional headband, took my photos of my Redmi 9C and translated my text with the translator DeepL
Que hermoso que quedó esta 'vincha' como le decimos en Argentina ❣️. La goma eva de brillos deja hermosa cualquier manualidad, que bueno que la usaste. Te felicito por tu proyecto y gracias por compartirlo 🙂. Saludos!
Gracias amiga me alegra que te haya gustado
Me encanto tu idea amiga, te ha quedado muy lindo.
Gracias amiga
OMG you really make this. Wow is so beautiful
thanks friend I'm glad you liked it
This is so beautiful
thanks friend
Thank you for sharing this amazing post on HIVE!
Your content got selected by our fellow curator @rezoanulvibes & you just received a little thank you via an upvote from our non-profit curation initiative!
You will be featured in one of our recurring curation compilations and on our pinterest boards! Both are aiming to offer you a stage to widen your audience within and outside of the DIY scene of hive.
Join the official DIYHub community on HIVE and show us more of your amazing work and feel free to connect with us and other DIYers via our discord server: https://discord.gg/mY5uCfQ !
If you want to support our goal to motivate other DIY/art/music/homesteading/... creators just delegate to us and earn 100% of your curation rewards!
Stay creative & hive on!
Te quedó muy lindo, gracias por compartir.
Saludos amiga que hermosa creación te invitamos a formar parte de la comunidad de @jewelry una comunidad para accesorios, en estos momentos tenemos un concurso de una creación de accesorios usando jeans, es hasta el lunes te invitamos a unirte.
Te dejamos el link de la comunidad:
https://peakd.com/c/hive-189504/created