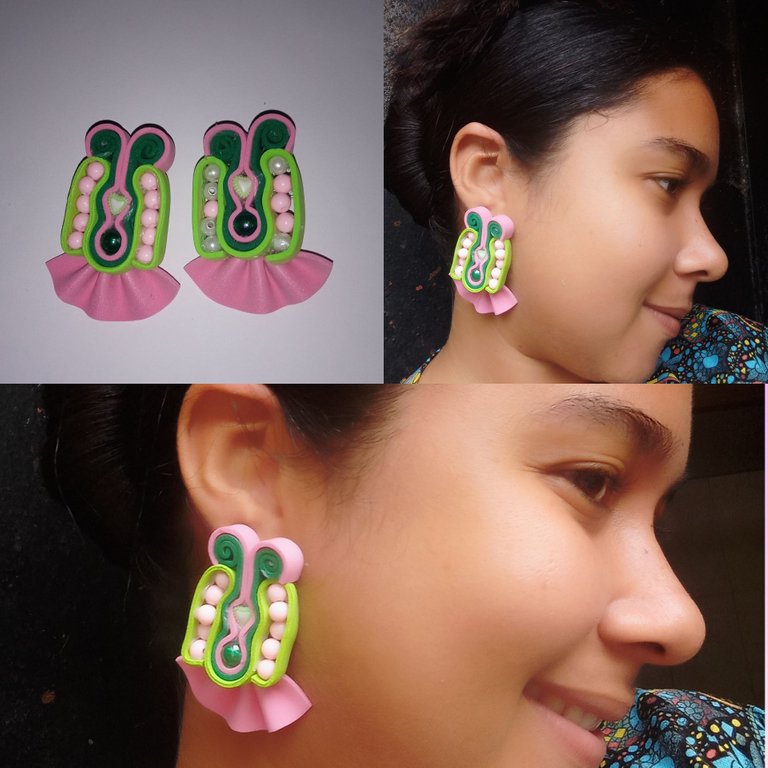
Hermosos zarcillos elegante con un diseño de pelotas combinado con abanico / Beautiful elegant tendrils with a balls design combined with fan
Hola buenas noches mis apreciados amigos , un abrazo para todos desde la distancia , deseo que el día de mañana sea un día bendecido para todos y puedan disfrutar de ese fin de semana , hoy les quiero compartir un tutorial que realice especialmente para compartir con ustedes , se tarta de la creación de unos zarcillos elegantes con piedras , ideal para cualquier noche de fiesta con amigos y amigas , a continuación les mostraré cada paso que realice y cada material que utilice para que puedan realizarlo y lucirlo .
Hello good evening my dear friends, a hug for everyone from afar, I wish that tomorrow is a blessed day for everyone and you can enjoy the weekend, today I want to share a tutorial that I made especially to share with you, it is about the creation of elegant earrings with stones, ideal for any night out with friends, then I will show you each step I made and each material I use so you can make it and show it off.
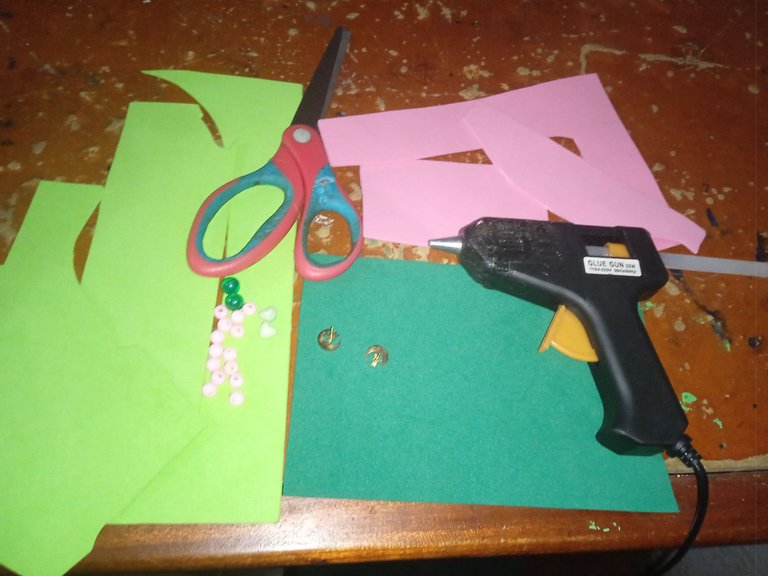
Materiales que utilice :
-Foamis también pueden utilizar fieltro para este tipo de zarcillos
-Pelotas (rosado y verde )
-Silicon en barra
-Tijera
- Cómo base Zarcillos reusable
Materials you use :
-Foamis can also use felt for this type of tendrils.
-Balls (pink and green)
-Silicon stick
-Scissors
- How to base reusable tendrils
A continuación los pasos a seguir:
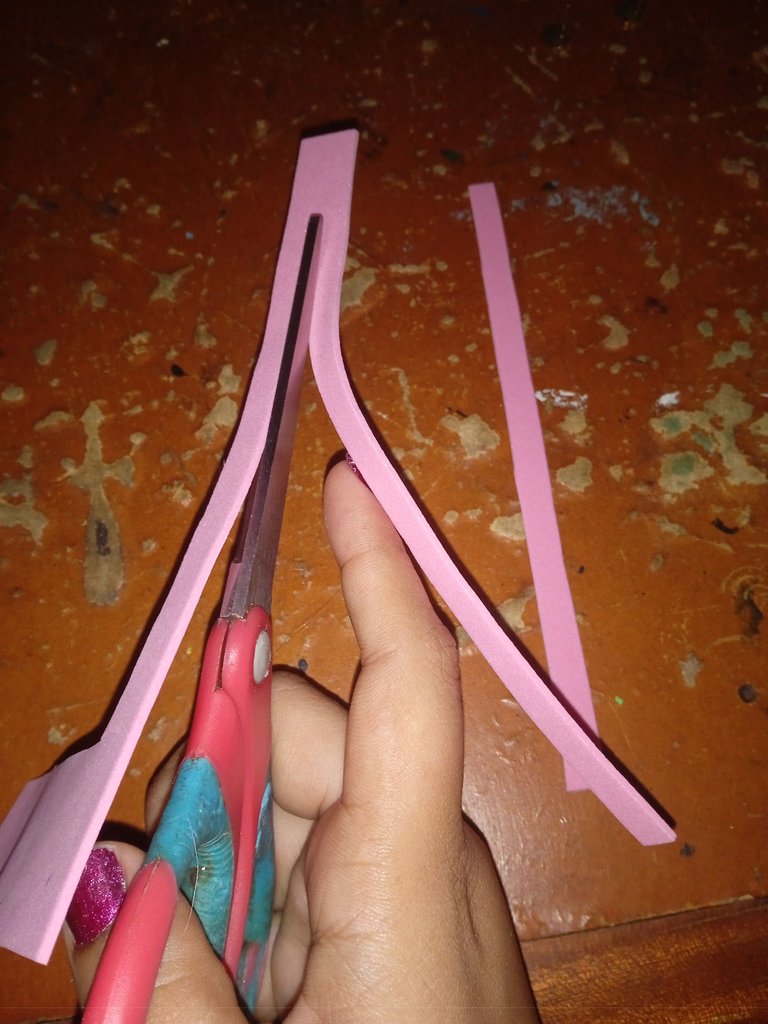
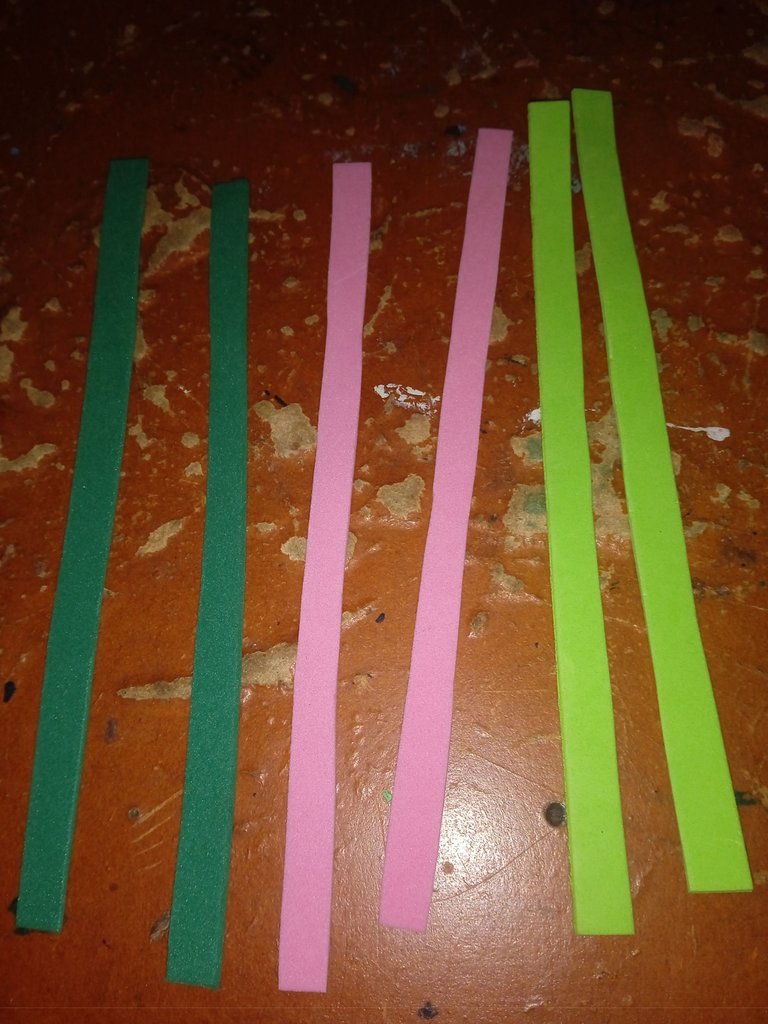
Iniciaremos recortando unas tiras para la creación de estos zarcillos , iniciamos con el rosado y culminamos con los otros colores , debemos recortar dos tira de cada color , en total sería 6 tiras , cada tira es de medio centímetro de ancho y 10 centímetros de largo
Here are the steps to follow:
We will start cutting some strips for the creation of these tendrils, we start with the pink and finish with the other colors, we must cut two strips of each color, in total it would be 6 strips, each strip is half a centimeter wide and 10 centimeters long.
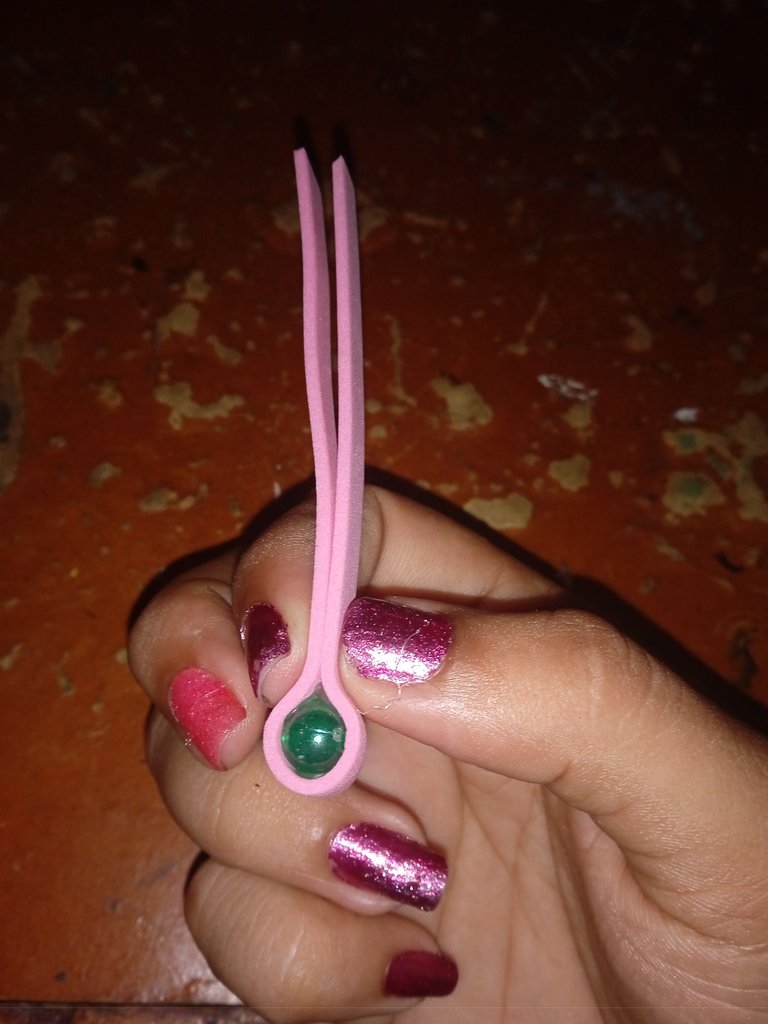
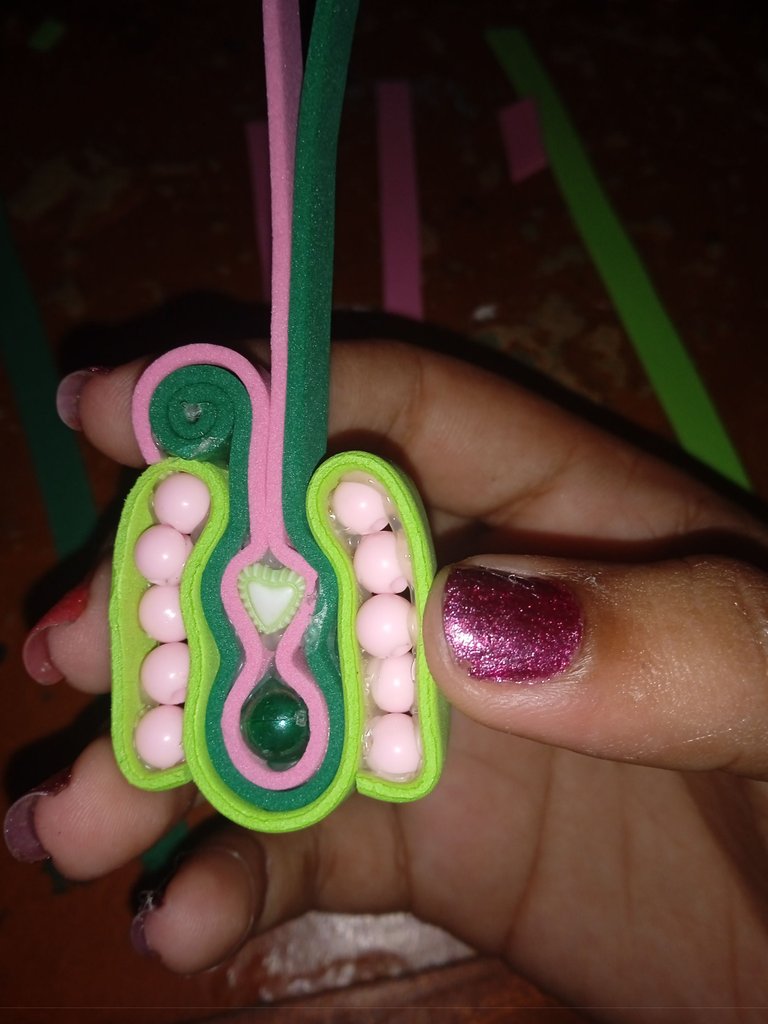
Continuaremos calculando el centro de la tira del foamis y vamos a pegar en ella la pelota verde cubriéndola toda hasta llegar arriba ,luego continuamos pegando en la parte de arriba un pequeño corazón al igual que pegamos la primera pelota
We will continue calculating the center of the foamis strip and we will glue on it the green ball covering it all the way to the top, then we continue gluing on the top a small heart as we glued the first ball.
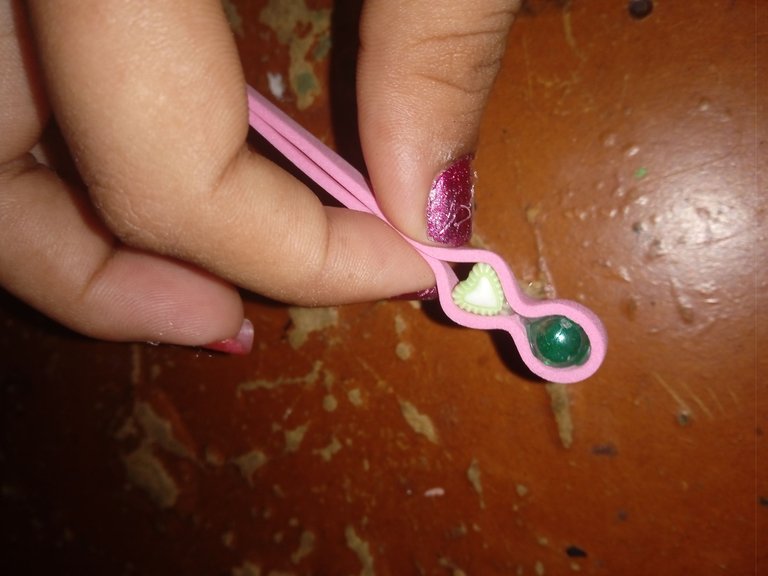
Luego continuaremos pegando las otras tiras como iniciamos pegando las al principio con las pelotas ,luego que pegamos la rosada ,continuamos con la verde oscura y por último con el verde claro ,recuerden que debemos dejar las tiras sueltas haci cómo sale en la foto sin pegar para más adelante dar el modelo que deseamos
Then we will continue gluing the other strips as we started gluing them at the beginning with the balls, after we glued the pink one, we continue with the dark green and finally with the light green, remember that we must leave the strips loose as shown in the picture without gluing to later give the model we want.
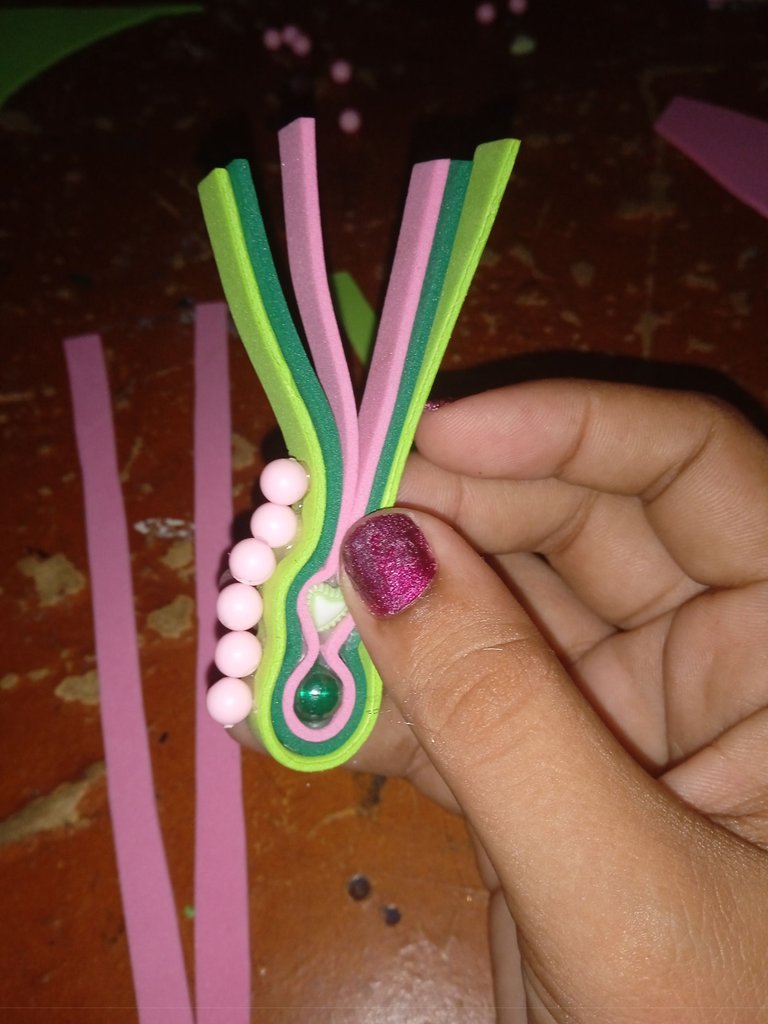
Luego continuaremos pegando a los alrededores las pelotas rosada en fila , les cuento que el otro zarcillo tiene unas de color blanco porque no me alcanzó pero lo realice asi igual para explicarle el modelo ,ustedes elijen los colores y se cuidan de que queden iguales
Then we will continue gluing the pink balls in a row around, I tell you that the other tendril has some white ones because I did not have enough but I did it this way to explain the model, you choose the colors and make sure that they are the same.
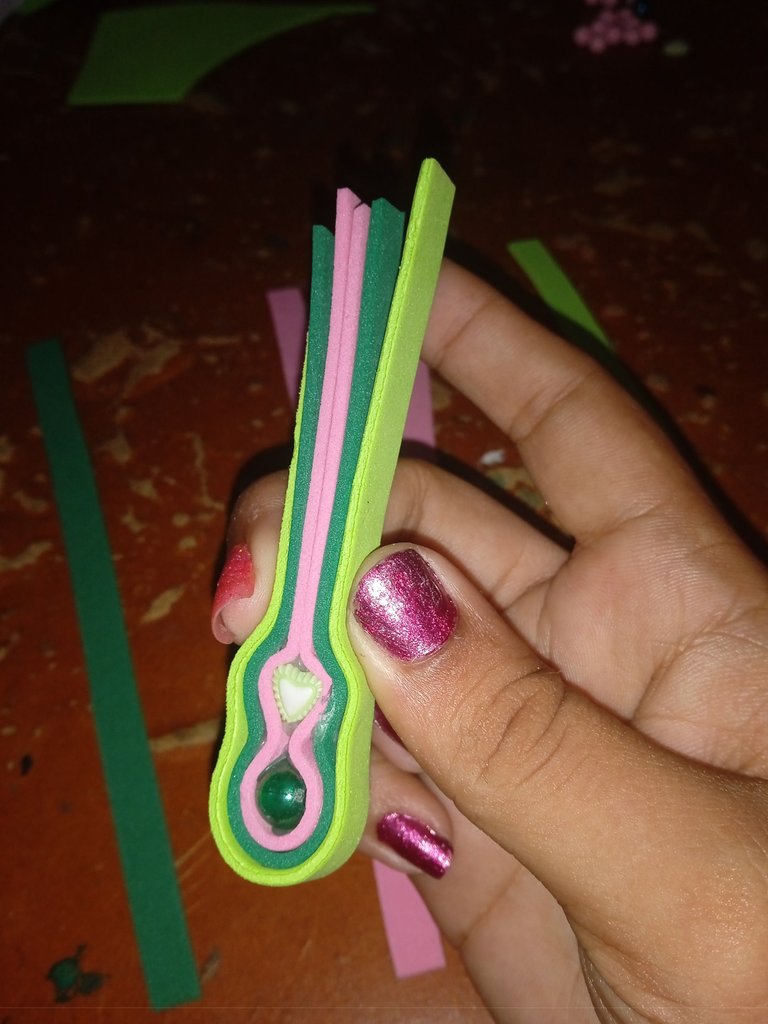
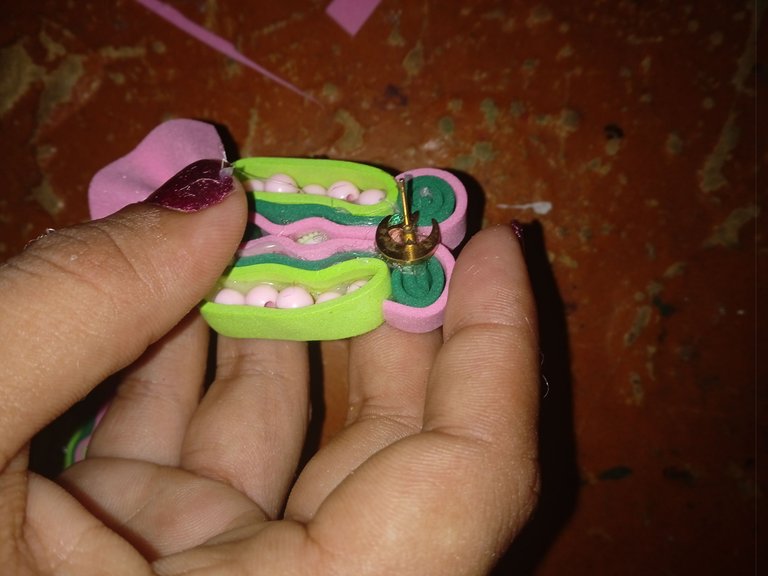
Luego que pegue las pelotas alrededor del diseño ,continúe pegando las tiras del foamis color verde por encima de las pelotas asegurando las y dando un diseño más atractivo
After gluing the balls around the design, continue gluing the green foamis strips on top of the balls securing them and giving a more attractive design.

Luego con las otras tiras sobrantes continúe realizando unos rollos en la parte de arriba , primero inicie con el color verde y luego finalice cubriendo el verde con el color rosado
Then with the other remaining strips continue making some rolls on the top, first start with the green color and then finish by covering the green with the pink color.
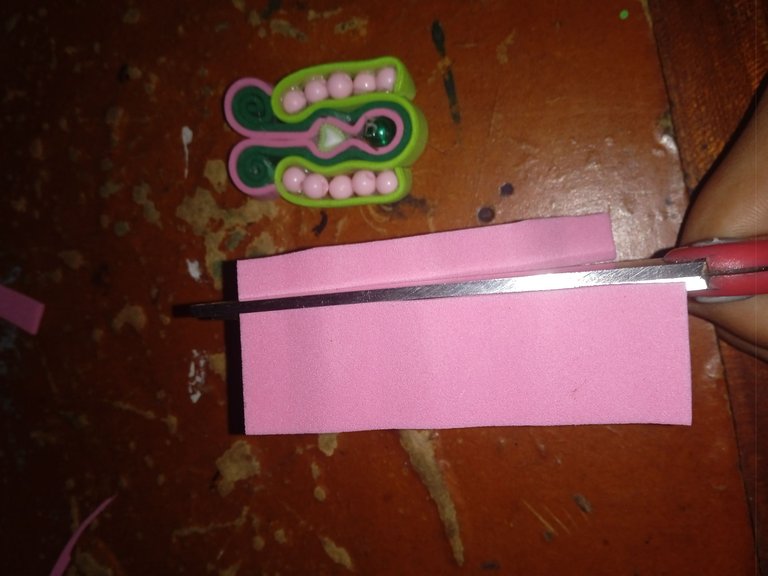
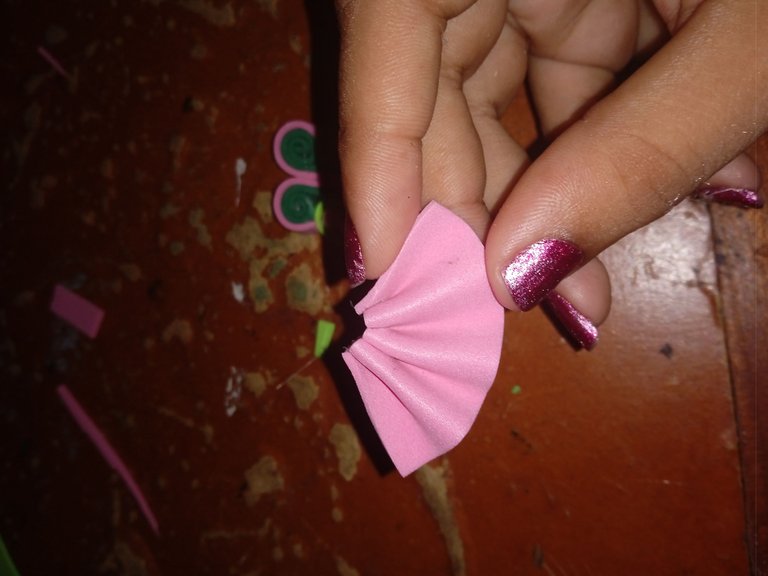
En este siguiente paso continúe recortando una pieza de foamis color rosado con una medida de 8 cm de largo y 5 cm de ancho ,con este recorte realice una forma de abanico para decorar la parte de abajo del zarcillo , iniciamos doblando y al mismo tiempo pegando la punta hacia atrás y luego hacia adelante hasta terminar haciendo un abanico como esos que realizamos de papel
In this next step continue cutting a piece of pink foamis with a measure of 8 cm long and 5 cm wide, with this cut make a fan shape to decorate the bottom of the tendril, we started folding and at the same time gluing the tip back and then forward to finish making a fan like those that we made of paper.
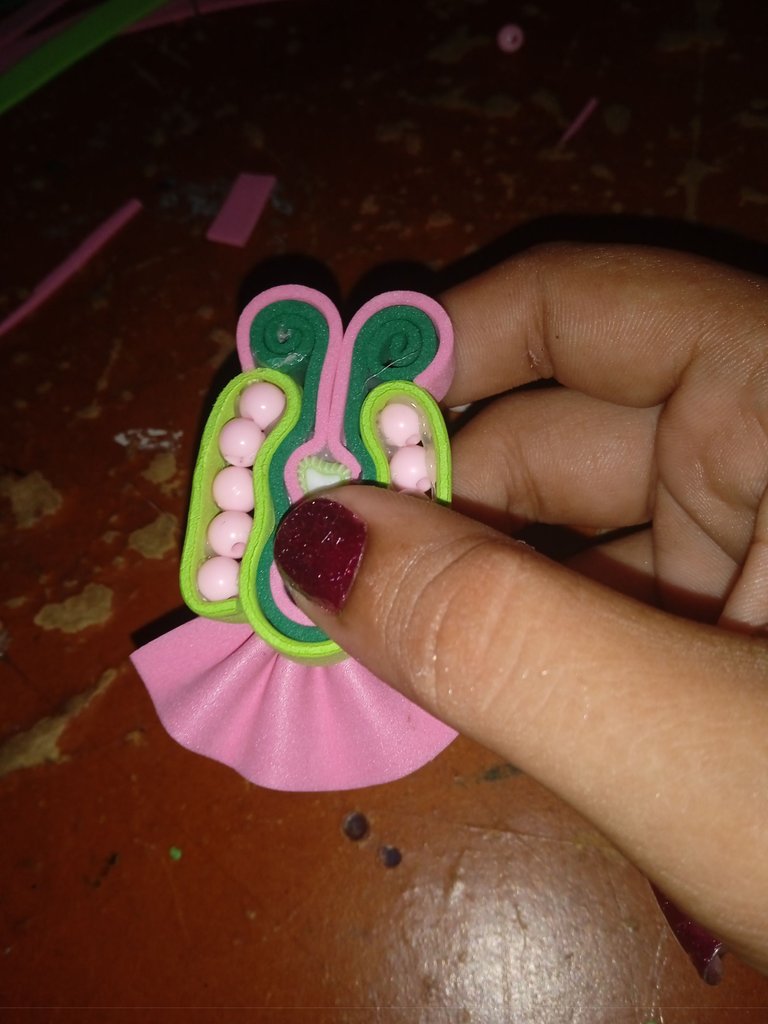
Luego continuaremos pegando el abanico que realizamos en el paso anterior en la parte de abajo del zarcillo ,pueden pegarlo en la parte de atrás o lo ideal sería borde con borde
Then we will continue gluing the fan that we made in the previous step at the bottom of the tendril, you can glue it on the back or ideally edge to edge.
Una vez que terminemos de realizar ambos zarcillos ,continuaremos procediendo a pegar la base del zarcillo o el zarcillo que rehusamos ,esto lo debemos pegar en la parte trasera del zarcillo
Once we have finished making both tendrils, we will proceed to glue the base of the tendril or the tendril we refused, this should be glued on the back of the tendril.
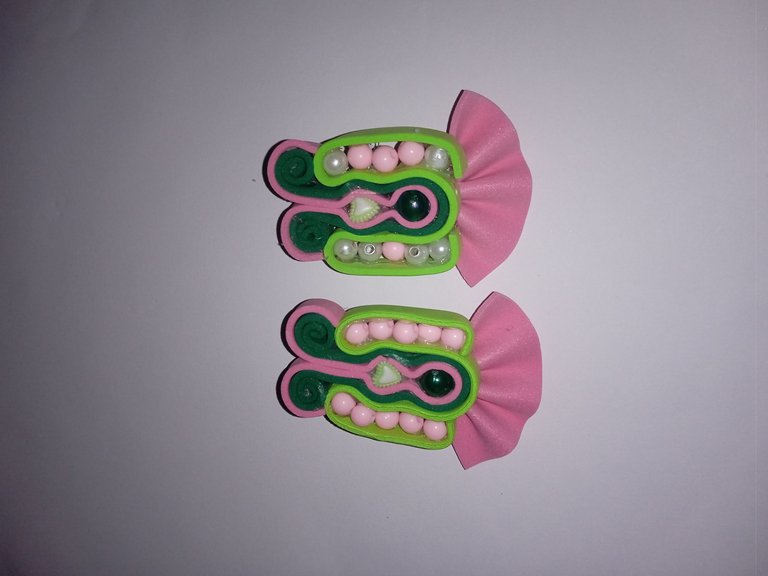
Este es el resultado de mis lindos y elegantes zarcillos con pelotas , les vuelvo a repetir que uno de ellos tienen unas pelotas de color distinto porque las otras no me alcanzaron pero igual las realice porque lo importante era enseñarle este diseño y el paso a paso de el , las fotos son de mi propiedad y las tomé con mi Redmi 9C , los textos los traduci con el traductor DeepL , que tengan una linda noche
This is the result of my beautiful and elegant tendrils with balls, I repeat that one of them has a different color balls because the others were not enough for me but I made them anyway because the important thing was to show you this design and the step by step of it, the photos are my property and I took them with my Redmi 9C, the texts were translated with the translator DeepL, have a nice evening.
Dear @jorgelissanchez,
May I ask you to review and support the Dev Marketing Proposal (https://peakd.com/me/proposals/232) we presented on Conference Day 1 at HiveFest?
The campaign aims to onboard new application developers to grow our ecosystem. If you missed the presentation, you can watch it on YouTube.
You cast your vote for the proposal on Peakd, Ecency, Hive.blog or using HiveSigner.
Thank you!
Muchas gracias
Saludos amiga @jorgelissanchez unos accesorios muy creativos, con las piedras les das un gran toque, has hecho un lindo trabajo 😉
Muchísimas gracias es un placer
Muy hermosos mi amiga @jorgelissanchez, lluvia de bendiciones.
Amén amiga