Preparándome para una exhibición de cuadros y cultores | Getting ready for an exhibition of paintings and cults
Hola buenos días tengan todos ustedes mis amigos lectores y creadores de contenido , espero que se encuentren bien , llenos de mucha salud , hoy les quiero compartir uno de los cuadros que estoy realizando para participar en una exhibición de cultores ( pintores,artesanos, artistas) buscando talento y además nos darán una beca de cultor , mi persona y otros compañeros vamos a participar. Este cuadro es para las personas que tienen espacios de madera en su hogar, por ello los colores y la temática , comparto con ustedes esto , porque gracias a la motivación de hive pude descubrir el talento que Dios puso en mi
Hello good morning to all of you my friends readers and content creators, I hope you are well, full of good health, today I want to share one of the paintings that I am doing to participate in an exhibition of artists (painters, artisans, artists) looking for talent and also give us a scholarship cultor, my person and other colleagues will participate. This painting is for people who have wooden spaces in your home, so the colors and the theme, I share with you this, because thanks to the motivation of hive I could discover the talent that God put in me.
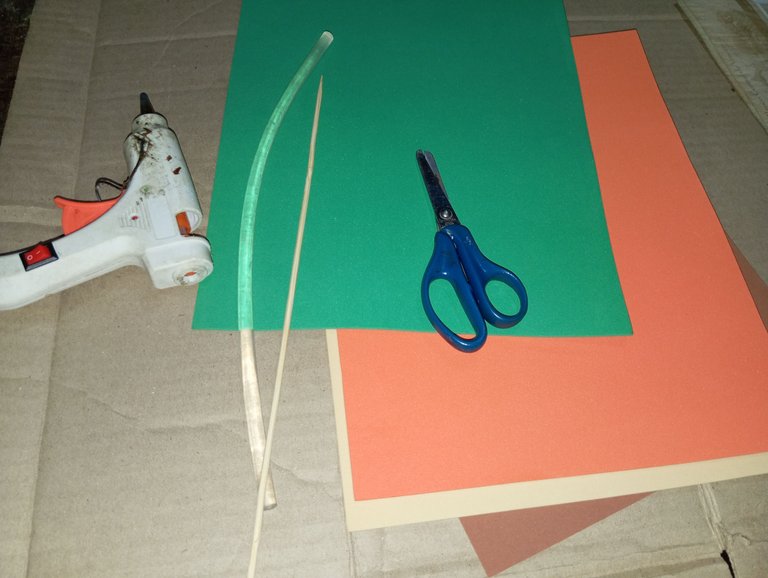
Materiales qué utilicé:
-Foamis
-Carton
-Tijera
-Silicon
Materials I used:
-Foamis
-Cardboard
-Scissors
-Silicon
A continuación los pasos a seguir:
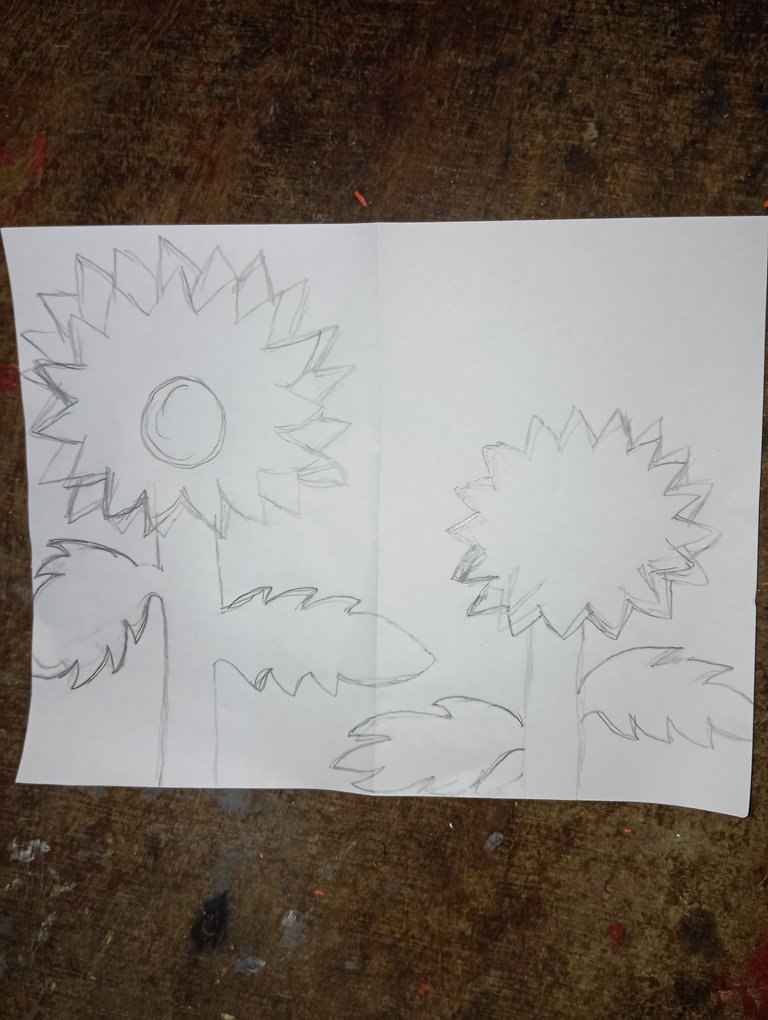
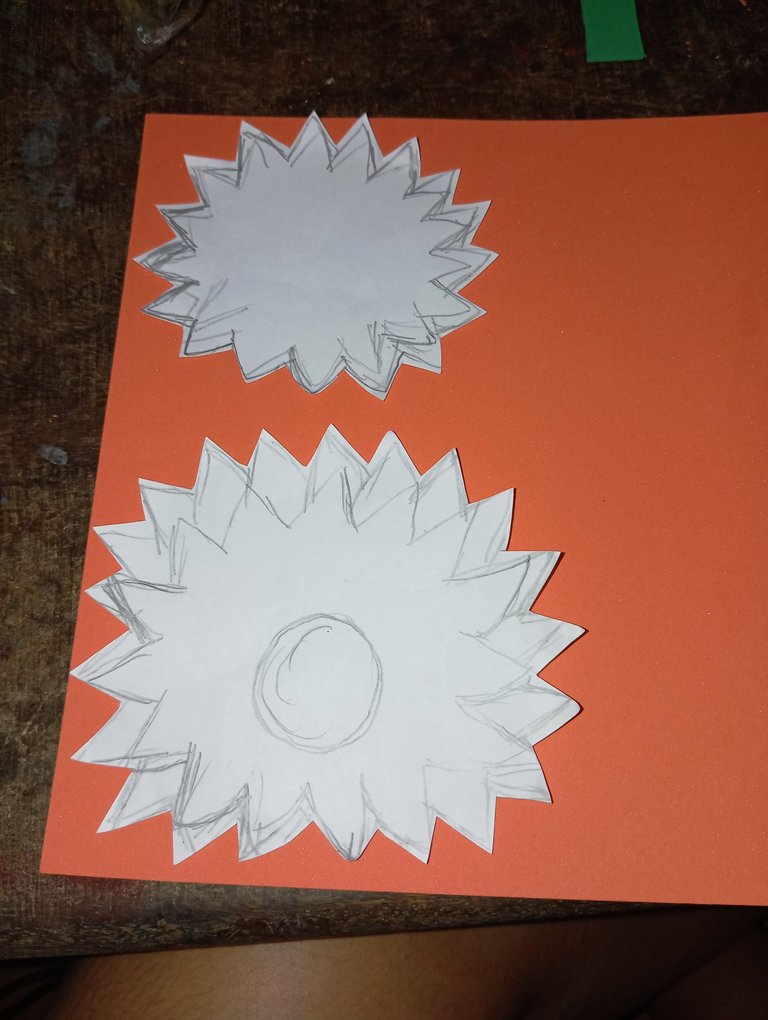
Comenzaremos primeramente realizando un patrón con el que vamos a trabajar, dibuje dos flores con sus tallos y hojas , estás son similares a un girasol , realicé una mas grande que la otra
Here are the steps to follow:
First we will start by making a pattern with which we are going to work, I drew two flowers with their stems and leaves, they are similar to a sunflower, I made one bigger than the other one.
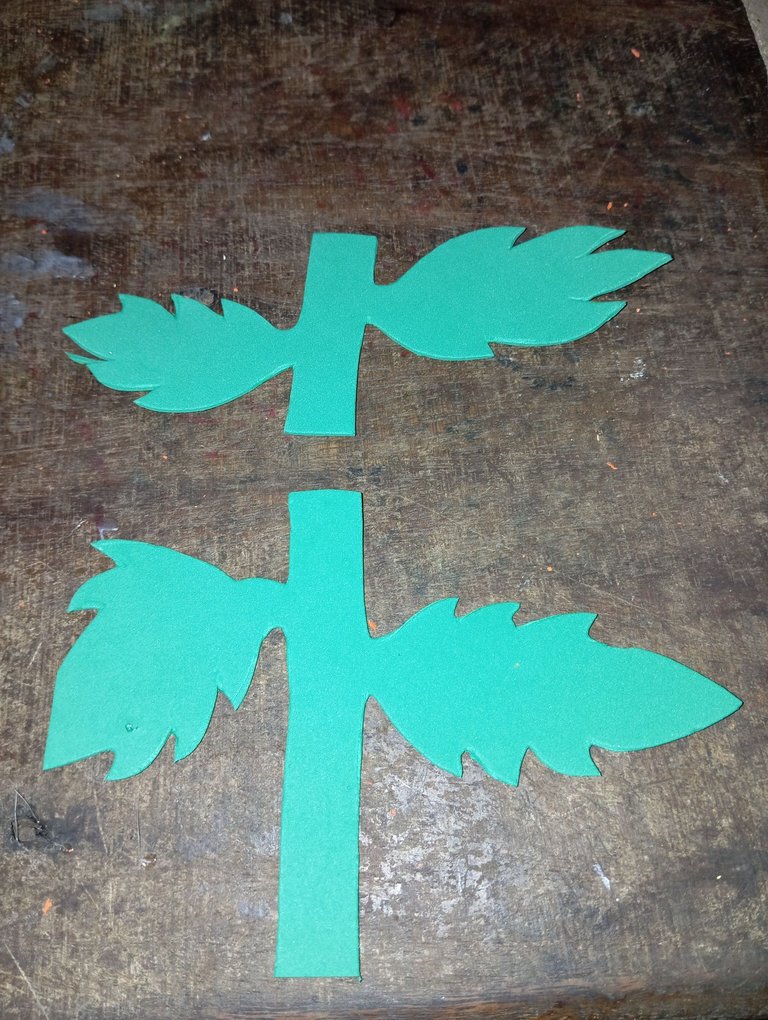
Primeramente inicié marcando los tallos juntos con las hijas en el foamis color verde , les recomiendo marcar lo con un palito de altura para que no se ensucie el foamis .
First I started by marking the stems together with the daughters on the green foamis , I recommend marking it with a height stick so that the foamis does not get dirty.

Seguidamente continuaremos recortando cada una con la ayuda de una tijera
Then we will continue cutting out each one with the help of a scissors.
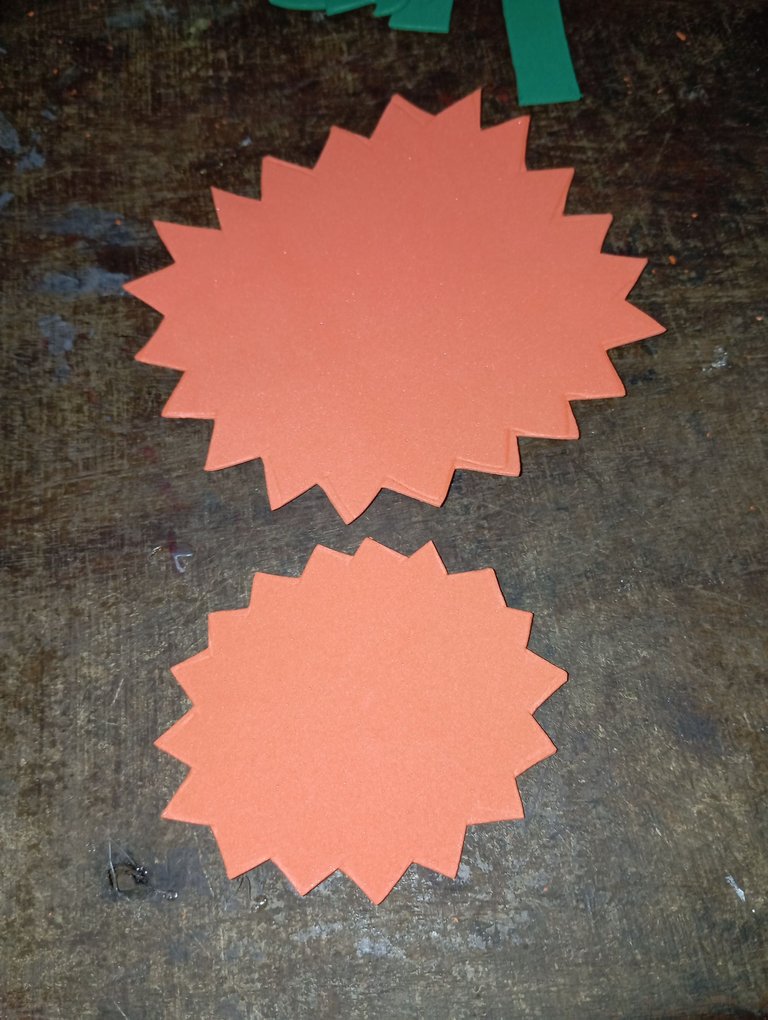
Iuego vamos a continuar marcando las flores en el foamis color naranja , marqué 6 en total , cada una la realicé de 3 para que quede abundante pétalos
Then we will continue marking the flowers on the orange foamis, I marked 6 in total, each one I made of 3 so that there are plenty of petals.
Una vez que marcamos las flores en el paso anterior,vamos a continuar recortando cada una con nuestra tijera
Once we marked the flowers in the previous step, we will continue cutting each one with our scissors.
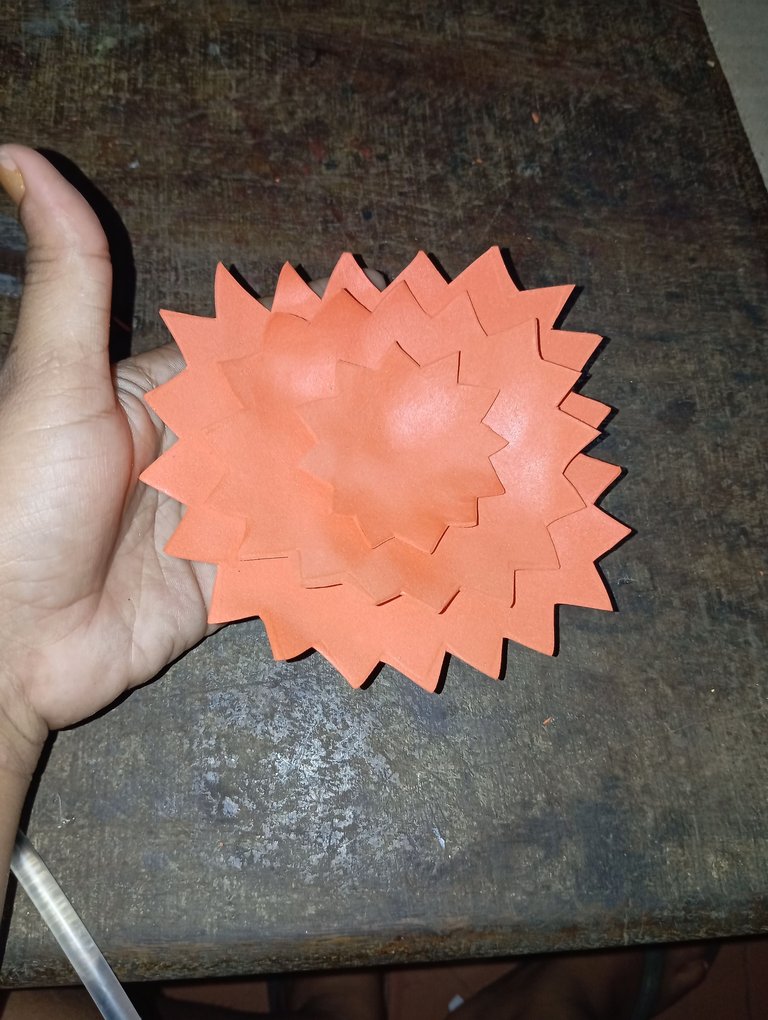
Luego vamos a continuar pegando una arriba de la otra de esta manera , la mediana en el centro de la grande y la pequeña de última
Then we will continue gluing one on top of the other in this way, the medium one in the center of the big one and the small one last
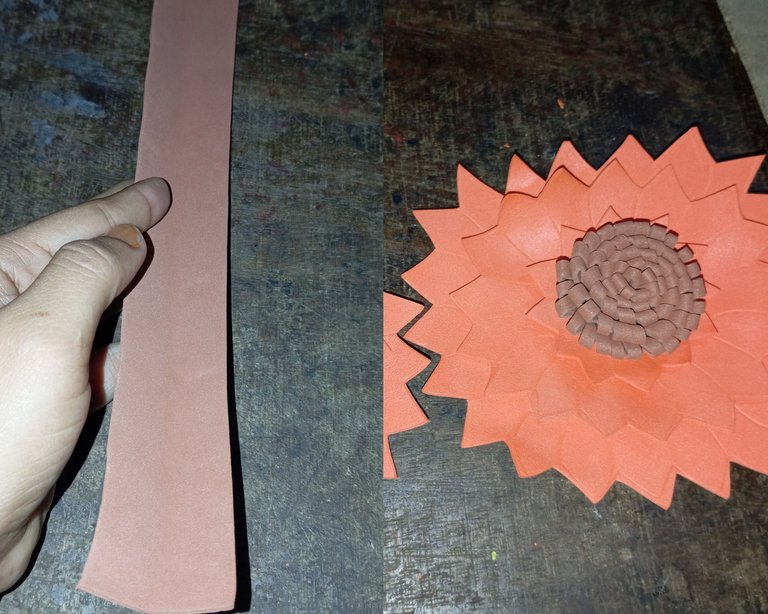
En este siguiente paso continúe recortando unas tiras de foamis marrón y realicé su semilla , doblando la y recortando en flecos , enrollamos hasta formar una semilla la cuál pegaremos en todo el centro de las flores
In this next step continue cutting out some strips of brown foamis and make your seed, folding it and cutting it into bangs, we roll it up to form a seed which we will glue all over the center of the flowers.
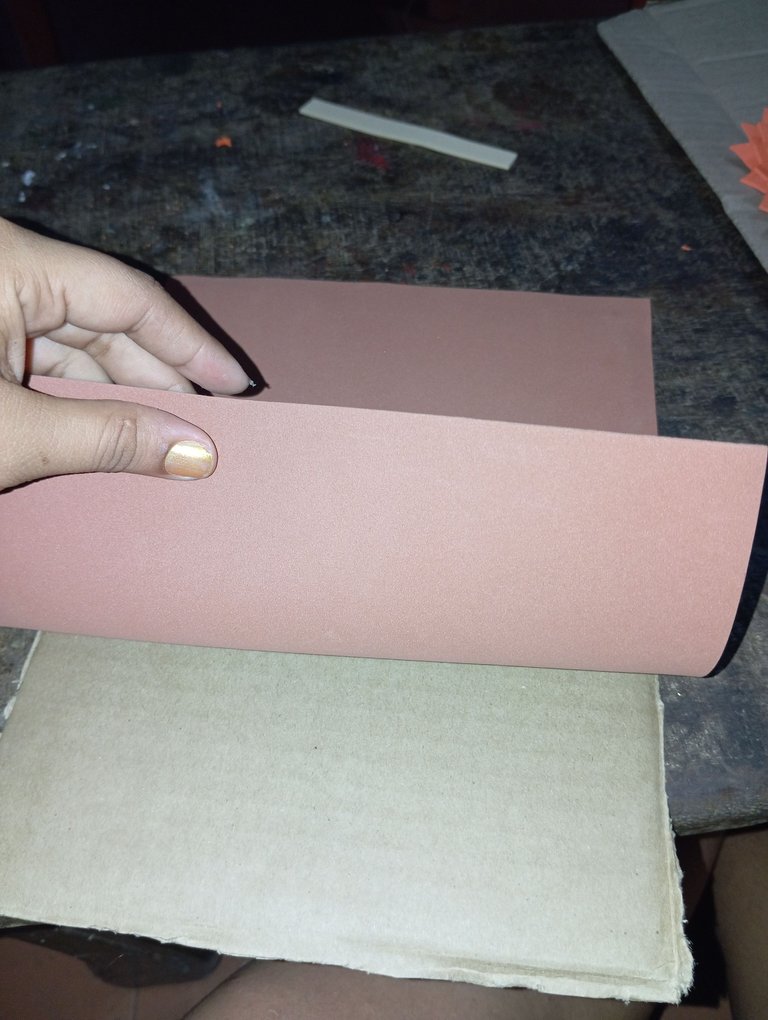
Luego continuaremos tomando el cartón y lo cubriremos con el foamis color marrón, la medida que usé es la de un foamis pequeño para que no fuera tan grande , lo cubrimos por delante y por detrás
Then we will continue taking the cardboard and we will cover it with the brown foamis, the measure I used is that of a small foamis so that it was not so big, we cover it in front and behind.
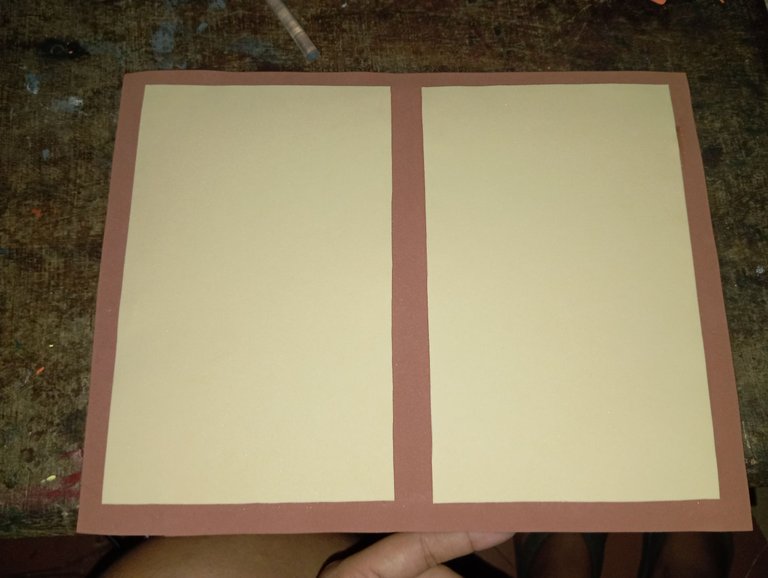
El foamis que es similar al color piel ,lo vamos a pegar en todo el centro del cuadro dividido en dos ,de modo que en cada lado irá ubicada una flor
The foamis that is similar to the skin color, we will glue it in the center of the frame divided in two, so that on each side will be located a flower
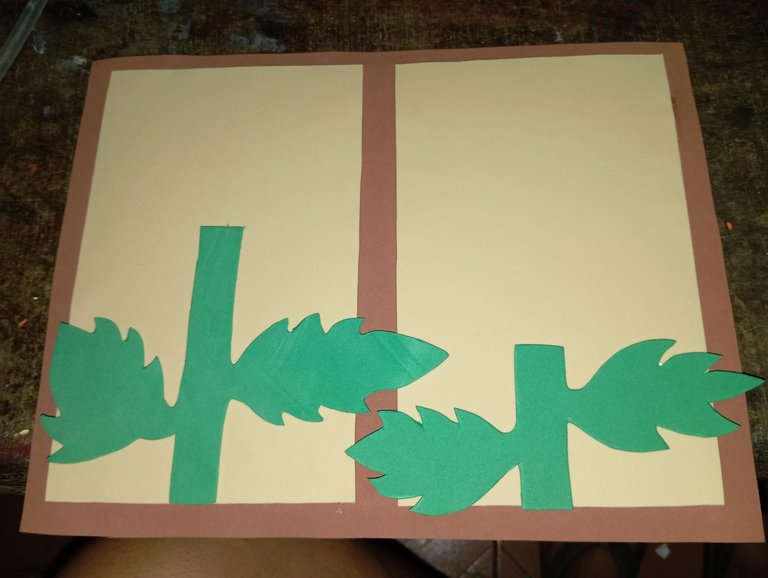
A continuación iniciaremos pegando el tallo junto con las hojas en todo el centro de la parte de abajo del cuadro
Next we will start gluing the stem together with the leaves in the center of the bottom of the frame.
Por último continuaremos pegando la flor en todo el centro de los tallos , finalizando así mi hermoso cuadro
Finally we will continue gluing the flower in the center of the stems, finishing this way my beautiful picture.
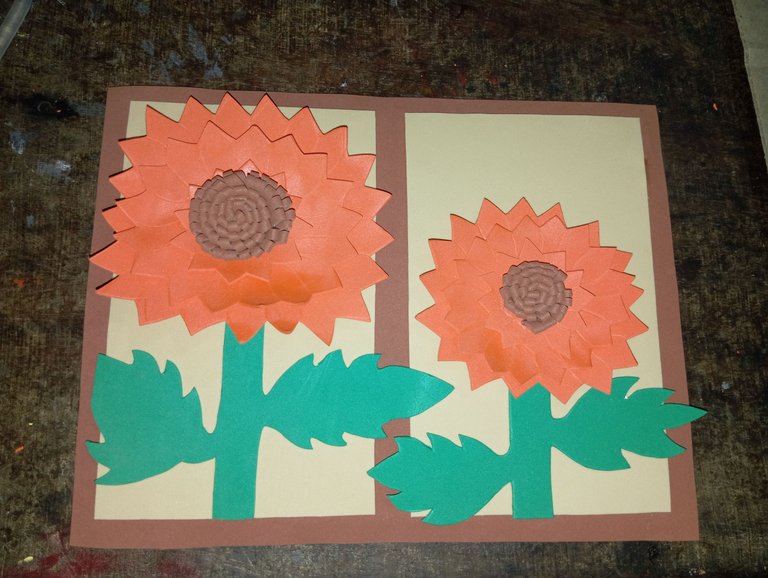
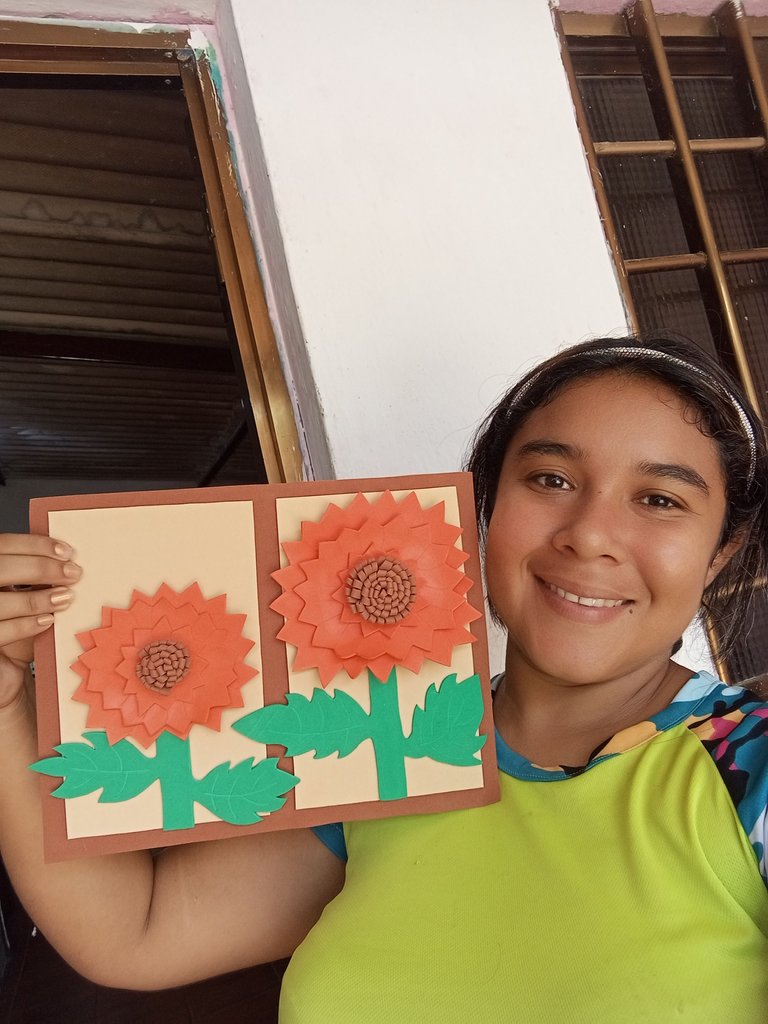
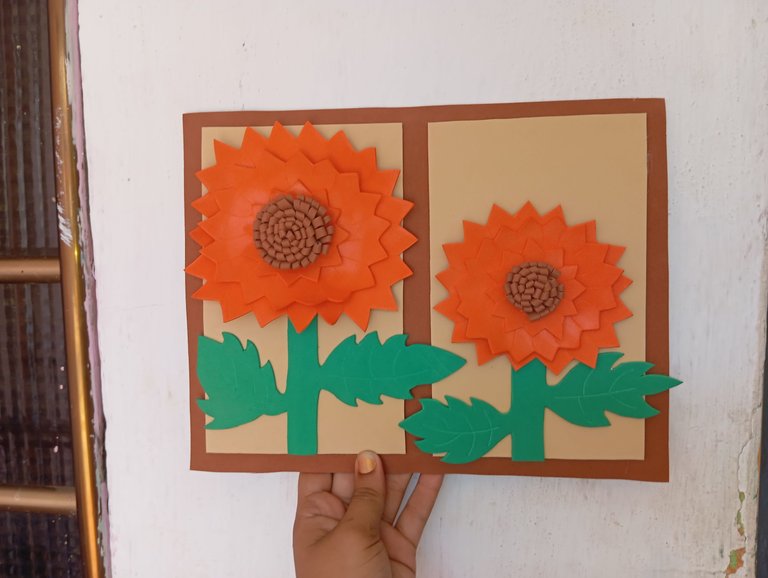
Este es el resultado final de mi hermoso cuadro , espero les gusten ,puedan realizar lo desde sus hogares , espero que aparte de mi persona a los demás el dia de mañana le vayan bien, y puedan apreciar nuestro talento .
Las fotos las tomé con mi redmi 12 y traduje los textos con el traductor deepl, feliz día
This is the final result of my beautiful picture, I hope you like it, you can make it from your homes, I hope that apart from me to others tomorrow will go well, and can appreciate our talent.
I took the pictures with my redmi 12 and translated the texts with the deepl translator, happy day.
Hermoso trabajo. Te deseo mucha suerte con tu participación en tu exhibición. Que bueno que sigas experimentando y probando otros materiales y técnicas. Me alegra.
Saludos y bendiciones.
Gracias amiga linda
Que lindo te quedó el cuadro me gustó mucho 🧡
Me alegro amiga
Está muy lindo tu cuadro amiga te deseo mucha suerte en tu participación para optar por esa beca
Gracias amiga amén
Súper lindo, me gustó muchísimo, gracias por compartir tu creativa manualidad, ¡saludos!
Gracias amiga linda, saludos
https://twitter.com/hivediy47901/status/1769063126303920503