Tutorial : Hermosos y elegantes zarcillos | Tutorial : Beautiful and elegant earrings
Buenas noches tengan todos mis apreciados amigos lectores sean bienvenidos una vez más a mis contenidos y perfil ,deseo que tengan una semana extraordinaria , aprovecho para desearles un feliz San Valentín ,espero que lo disfruten y sean consentidos ,hoy les quiero compartir unos preciosos y elegantes zarcillos que realice ideal para una noche de fiesta , lucir bellas y llamativas
Good evening have all my dear friends readers are welcome once again to my content and profile, I wish you to have an extraordinary week, I take this opportunity to wish you a happy Valentine's Day, I hope you enjoy it and be pampered, today I want to share some beautiful and elegant tendrils that I make ideal for a night out, look beautiful and striking.
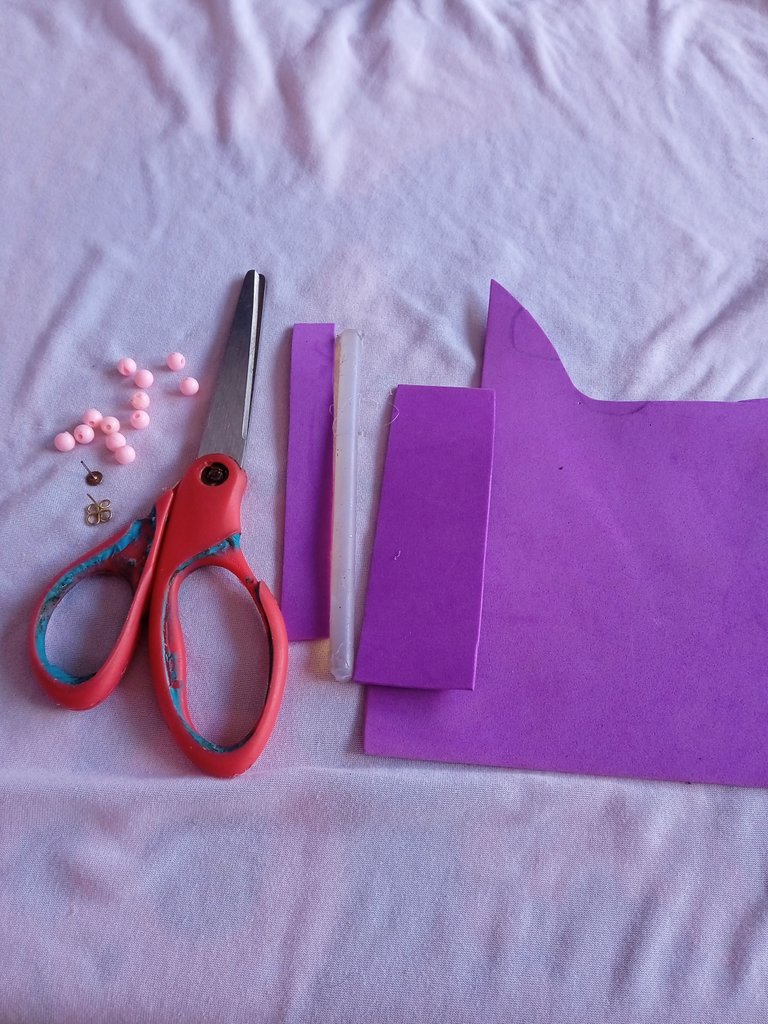
Materiales que utilice :
-Foamis (cómo material Opcional:Fieltro,cola de ratón)
-Tijera
-Piedras plástica
-Silicon
-Base de zarcillos
Materials I used:
-Foamis (as optional material: Felt, mouse tail)
-Scissors
-Plastic stones
-Silicon
-Base for tendrils
A continuación los pasos a seguir para la creación de estos bellos zarcillos :
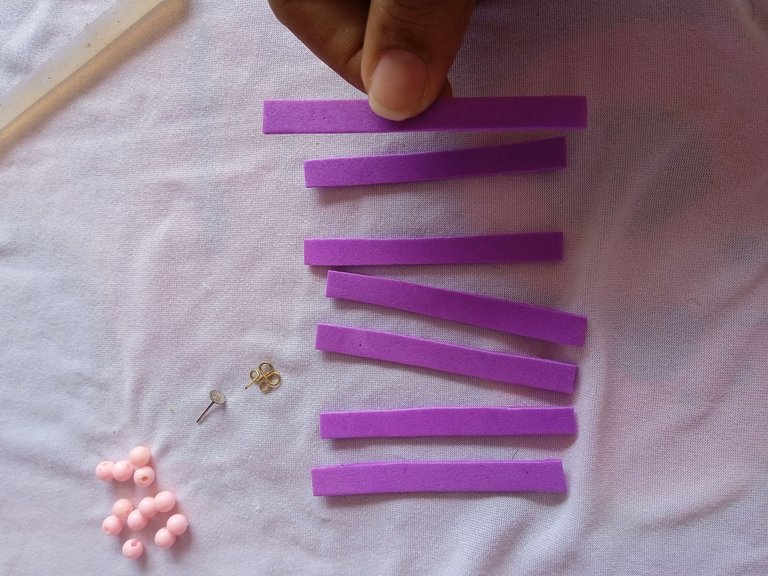
Para comenzar con estos hermosos zarcillos ,debemos iniciar recortando varias tiras de foamis con nuestra tijera,cada tira debe tener una altura de 7 centímetros,a mayor distancia ,más grande será el rollo ,depende de nosotros el tamaño que elijamos,en total recortaremos veinte tiras ,la vamos a dividir de esta manera :diez tiras para cada zarcillo
Here are the steps to follow for the creation of these beautiful tendrils:
To begin with these beautiful tendrils, we must start by cutting several strips of foamis with our scissors, each strip should have a height of 7 centimeters, the greater the distance, the larger the roll, it is up to us the size we choose, in total we will cut twenty strips, we will divide it this way: ten strips for each tendril.
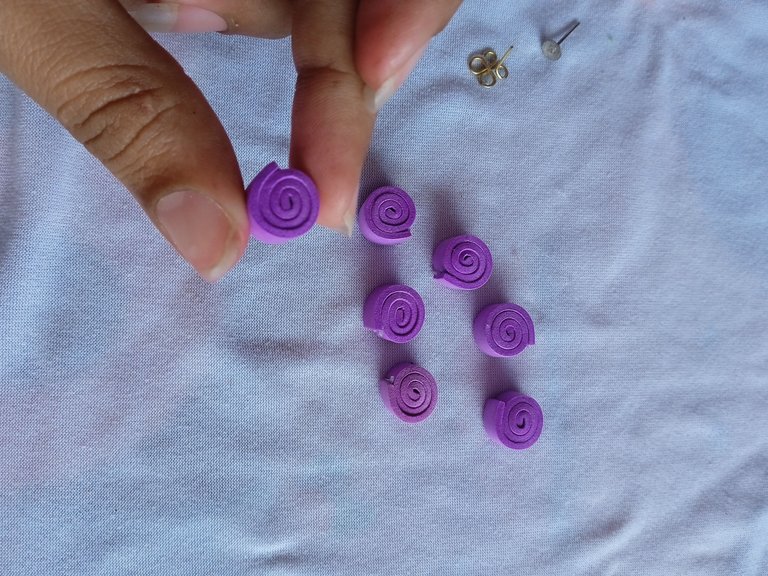
Luego que tengamos nuestras tiras listas ,vamos a continuar realizando unos mini rollos ,para ello vamos a añadir silicon en la punta y comenzaremos a enrollar hasta llegar al final de la tira y añadir nuevamente silicón para que no se desacomode el rollo
After we have our strips ready, we will continue making mini rolls, for this we will add silicone on the tip and start rolling until we reach the end of the strip and add silicone again so that the roll does not fall out of shape.
Una vez que tengamos todos nuestros rollos listos,vamos a continuar pegando uno encima de el otro hasta formar pequeñas columnas de tres
rollitos,dejando un rollo por fuera que es el que vamos a ubicar en la parte de arriba donde irá la base para usar el zarcillo
Once we have all our rolls ready, we will continue gluing one on top of the other to form small columns of three rolls, leaving one roll for each one.
leaving one roll on the outside which is the one we are going to place on the top where the base for the tendril will be.
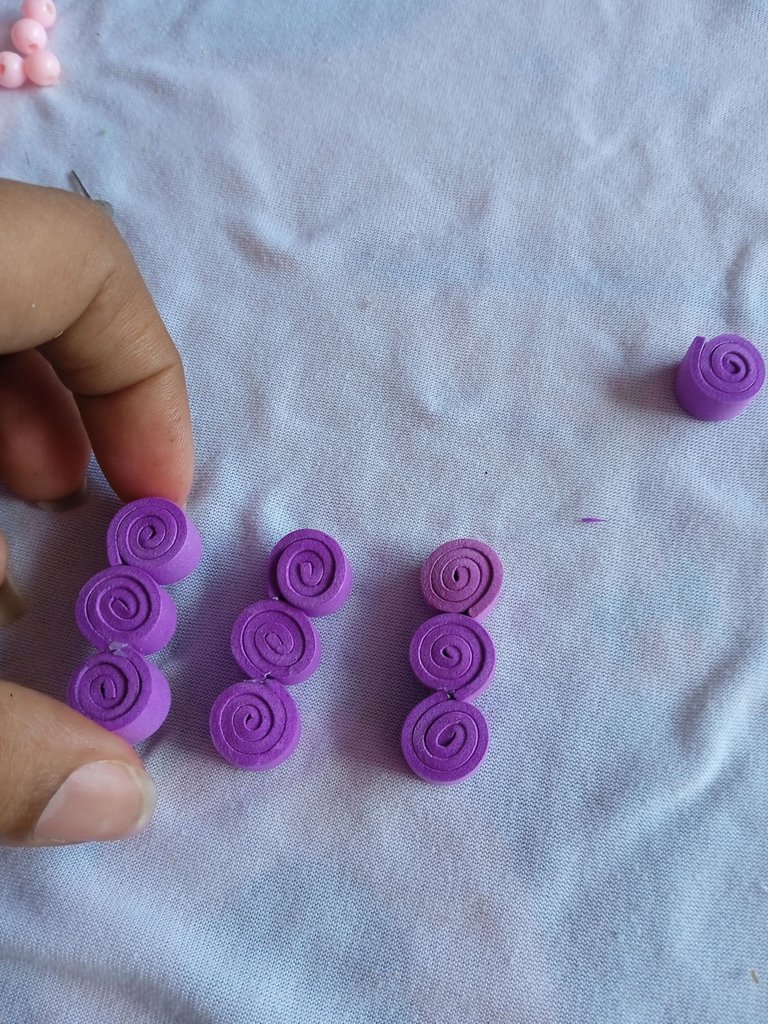
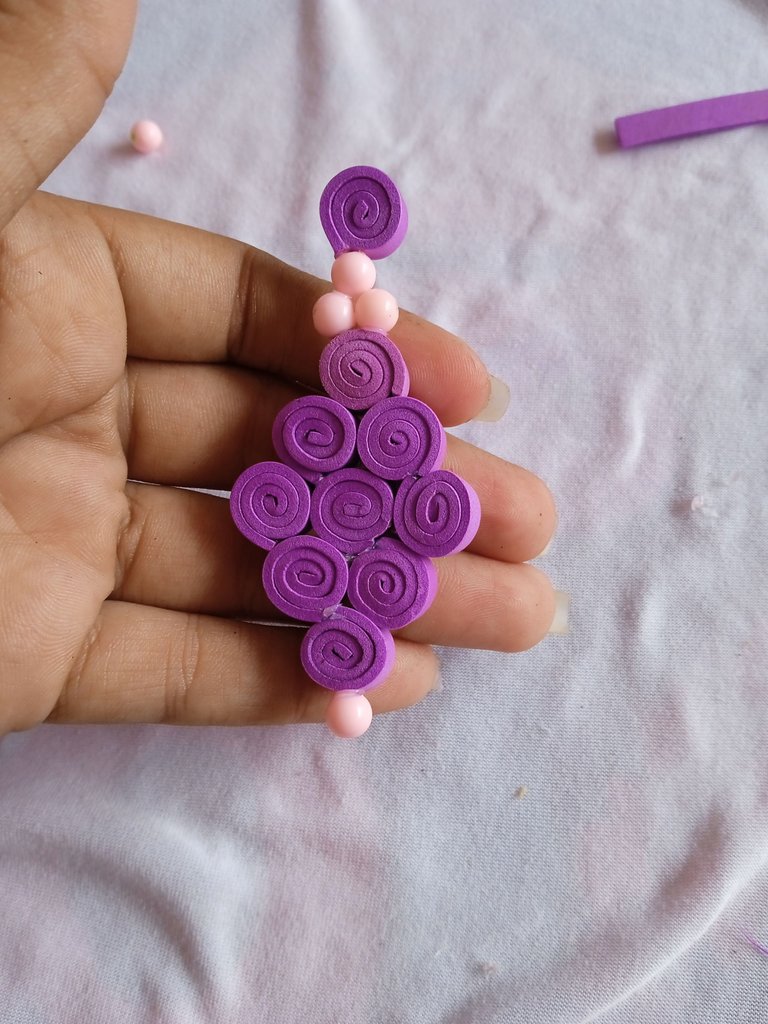
Luego que tengamos nuestras tres columnas listas vamos a continuar pegando una al lado de la otra,una arriba,otra más abajo y la otra más arriba dejando este precioso modelo cómo pueden apreciar
After we have our three columns ready we will continue gluing one next to the other, one on top, one below and one above leaving this beautiful model as you can see.
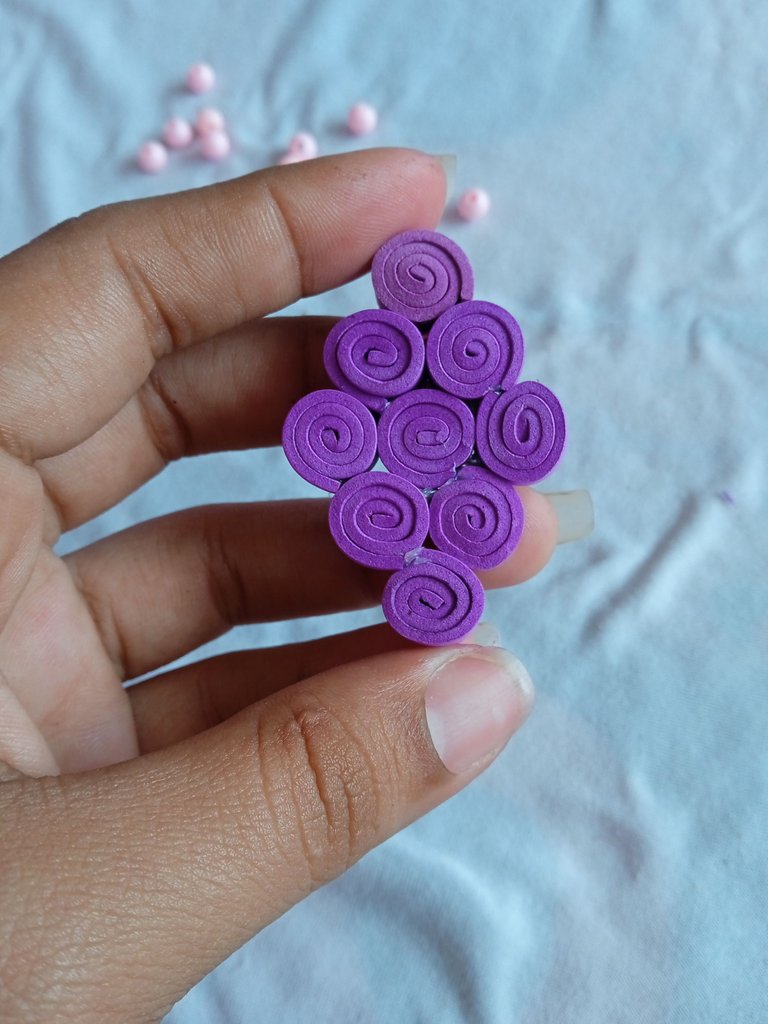
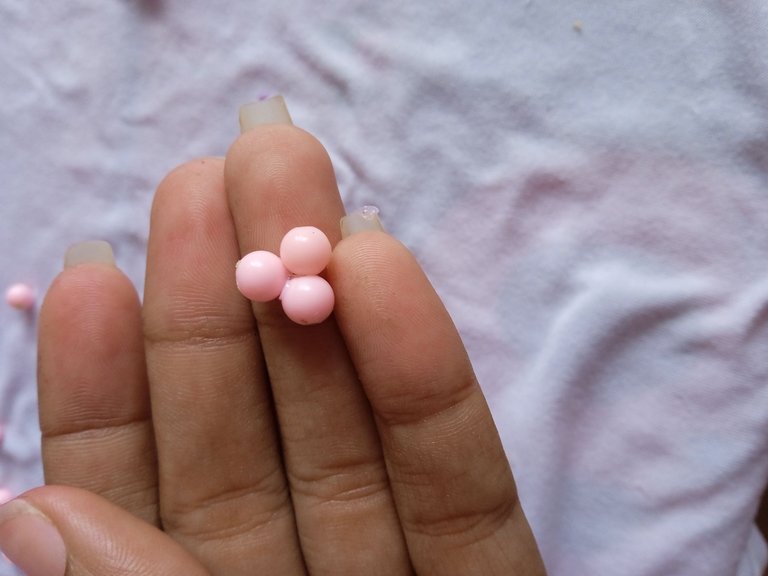
Luego que tengamos listo esta pieza ,vamos a tomar tres piedras plásticas y la vamos a pegar una al lado de la otra y la otra en la parte de arriba en todo el centro ,dejando una forma parecida a la de un triángulo o pirámide
After we have this piece ready, we are going to take three plastic stones and we are going to glue one next to the other and the other at the top in the center, leaving a shape similar to a triangle or pyramid.
Seguidamente vamos a continuar pegando en la parte de arriba las tres piedras plástica y en la parte de abajo solo pegaremos una ,de este modo quede más coqueto nuestros zarcillos
Then we will continue gluing the three plastic stones on the top and on the bottom we will glue only one, so that our tendrils will be more flirtatious.
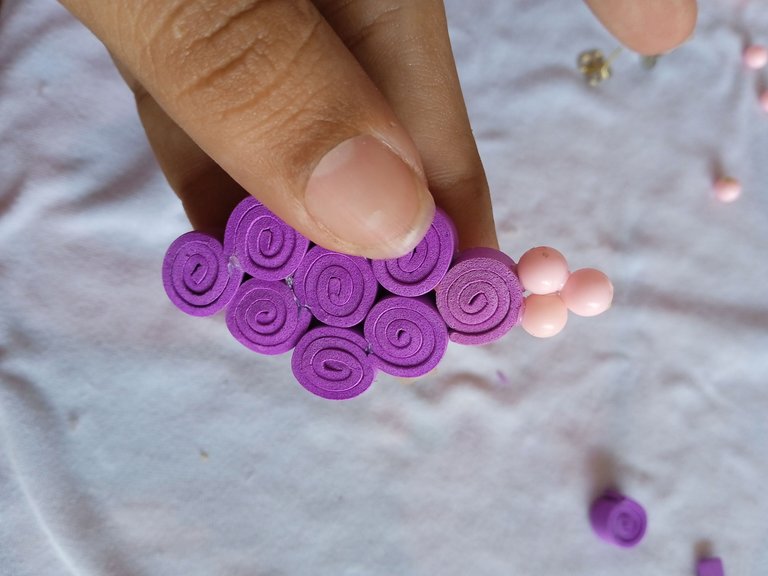
Luego que pegamos nuestras piedras plásticas en forma de triángulo ,vamos a continuar ubicando o pegando en la parte de arriba de las piedras color rosa el rollito que dejamos sin pegar por fuera dando lugar para poder ubicar más adelante la base de los zarcillos
After we glue our plastic stones in the shape of a triangle, we will continue to place or glue on the top of the pink stones the little roll that we left unglued on the outside, giving room to place the base of the tendrils later on.
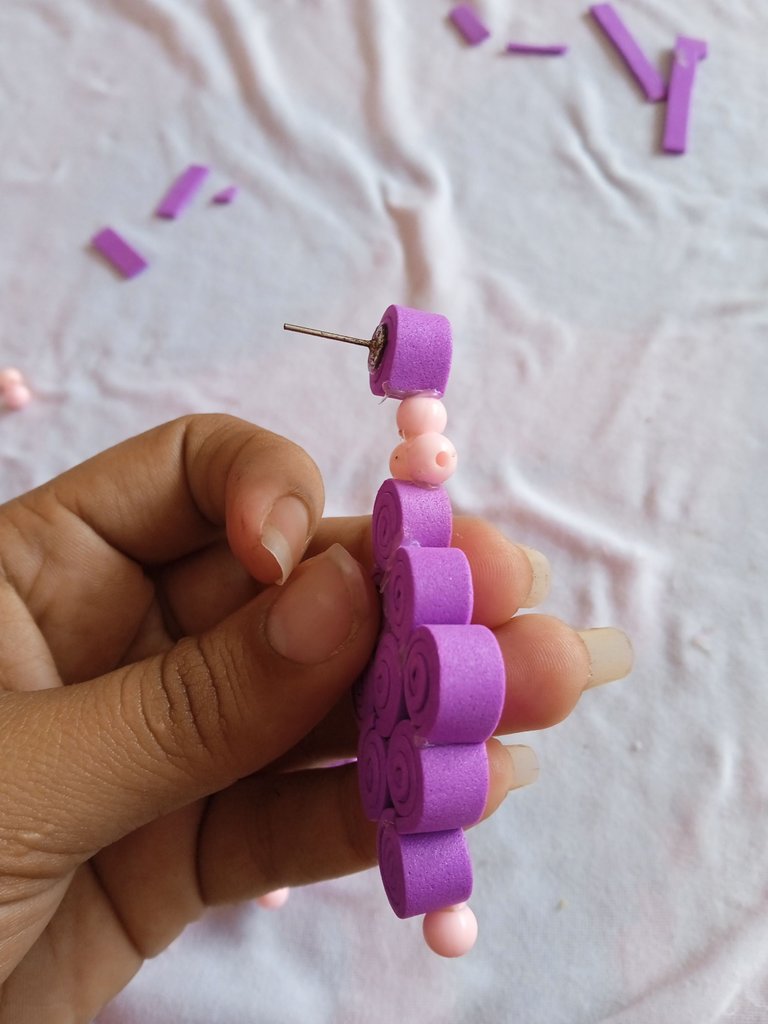
Por último vamos a tomar la base de nuestro zarcillo y lo vamos a pegar en la parte de atrás de el rollito cuidando que quede en todo el centro para poder lucir nuestros zarcillos
Finally we are going to take the base of our tendril and we are going to glue it on the back of the roll taking care that it remains in the center to be able to show off our tendrils.
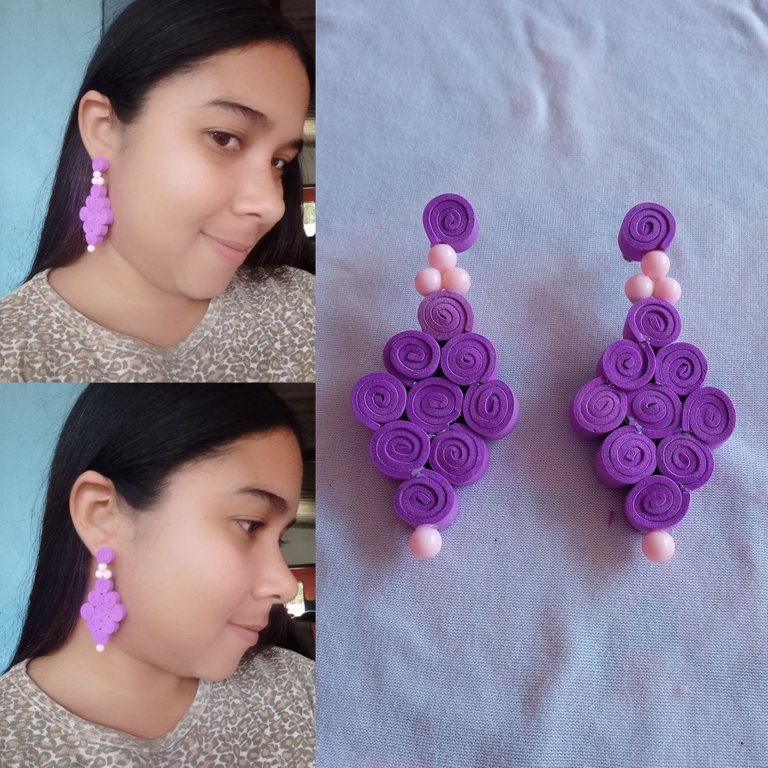
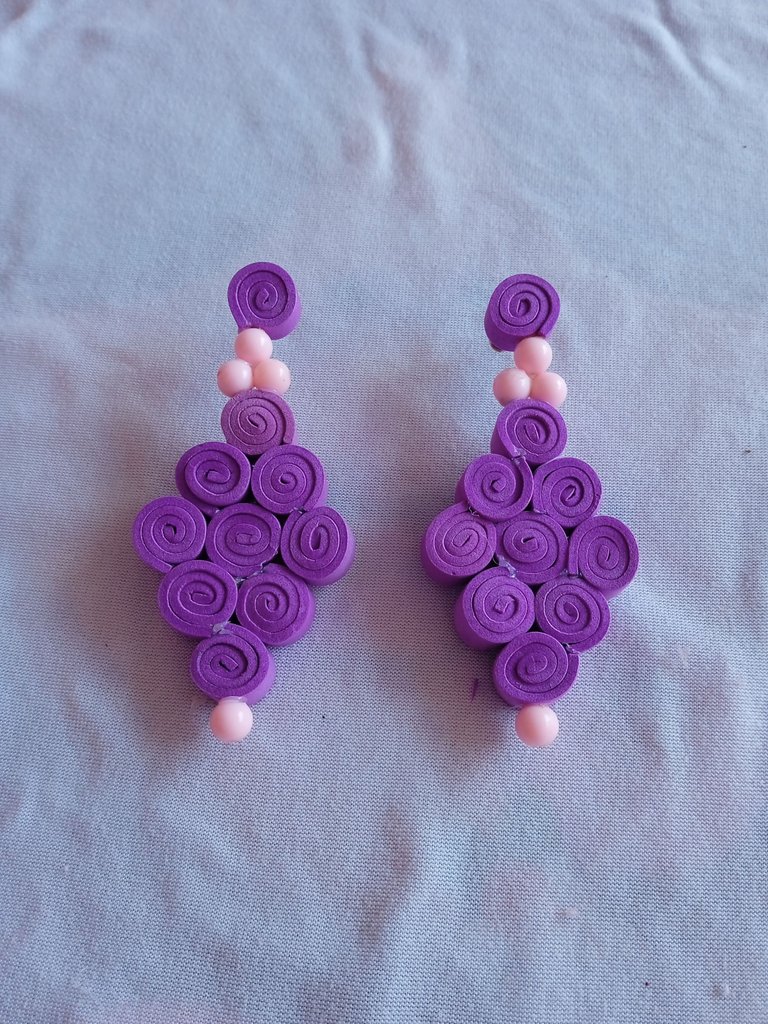
Este es el resultado final de mis hermosos zarcillos ideal para una noche de fiesta recordando que no necesitamos gastar dinero ,nosotras mismas podemos crear sin limitaciones ,lucir bellas y emprender,espero les guste son pendientes sencillos ,pero con mucha elegancia ,para la belleza no necesariamente es la extravagancia,les invito que sigan creando a nuestro propio estilo ,las fotos las tomé desde mi teléfono Redmi 9C y los textos los traduje con el traductor DeepL ,que tengan una hermosa noche ,nos vemos en el siguiente post
This is the final result of my beautiful tendrils ideal for a night out remembering that we do not need to spend money, we ourselves can create without limitations, look beautiful and undertake, I hope you like are simple earrings, but with elegance, for beauty is not necessarily extravagance, I invite you to continue creating our own style, the photos were taken from my phone Redmi 9C and translated the texts with the translator DeepL, have a beautiful night, see you in the next post
Beautiful this is hand made
Thank you, good day
Me encantaron @jorgelissanchez, súper elegantes nena, feliz día de San Valentín
Gracias amiga igualmente
Thank you for sharing this post on HIVE!
Your content got selected by our fellow curator rezoanulvibes & you just received a little thank you upvote from us for your great work! Your post will be featured in one of our recurring compilations which are aiming to offer you a stage to widen your audience within the DIY scene of Hive. Stay creative & HIVE ON!
Please vote for our hive witness <3