Tutorial : Orejas de conejo / Tutorial : Rabbit ears
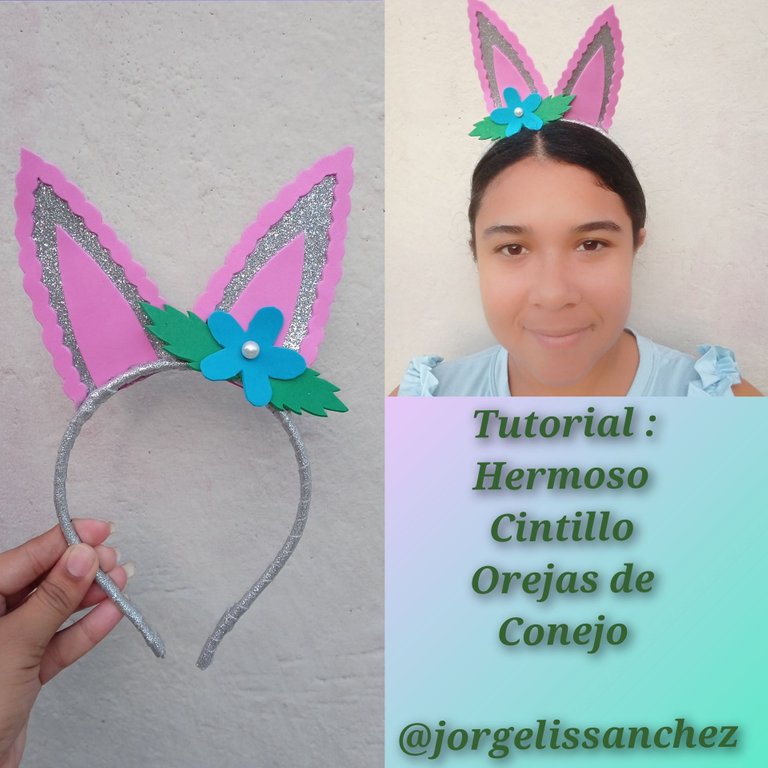
Hola feliz noche tengan todos mis apreciados amigos de esta bella comunidad ,espero que pasen un feliz fin de semana todos ,en esta ocasión les quiero compartir un precioso cintillo que realice para las pequeñas de el hogar ,inspirado en unas orejas de conejo ,coqueto y hermoso
Hello happy evening to all my dear friends of this beautiful community, I hope you all have a happy weekend, this time I want to share a beautiful headband that I made for the little ones at home, inspired by bunny ears, cute and beautiful.
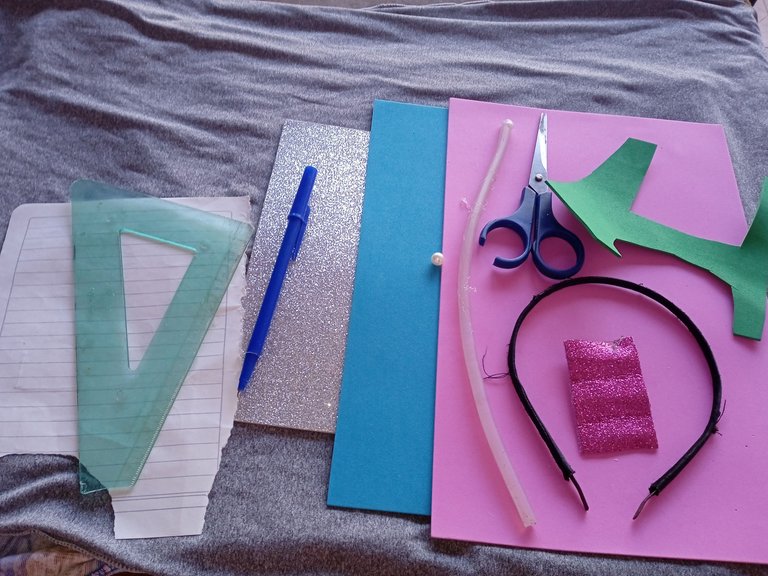
Materiales que utilice :
-Foamis
-Cintillo
-Tijera
-Silicon
-Regla geométrica
-Hoja reciclada y lápiz
-Piedra plastica
Materials I used :
-Foamis
-Headband
-Scissors
-Silicon
-Geometric ruler
-Recycled paper and pencil
-Plastic stone
A continuación los pasos a seguir:
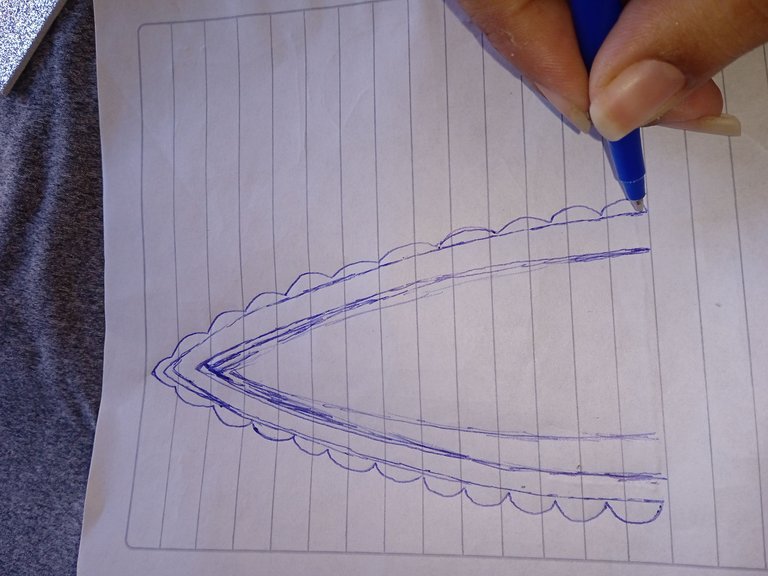
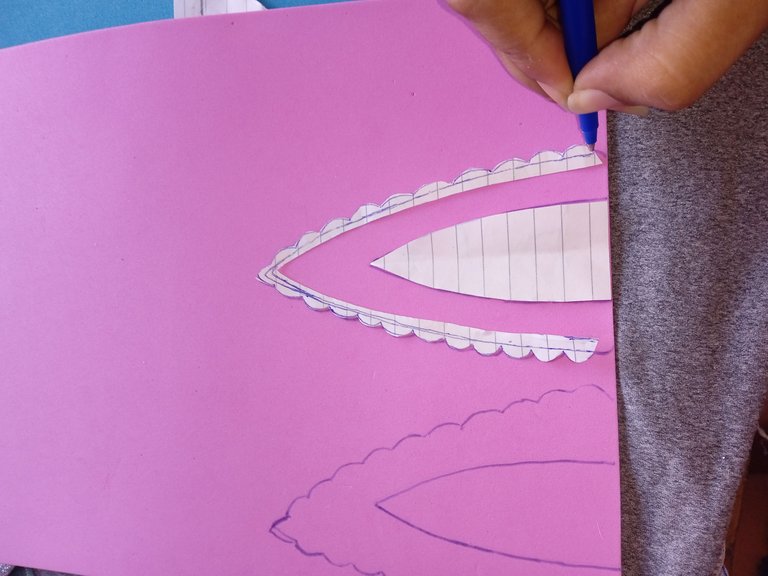
Iniciaremos tomando nuestra hoja reciclada y dibujaremos en ella la temática a utilizar , en esta ocasión vamos a dibujar unas orejas de conejo semi largas y puntiagudas ,estás orejas tienen 14 centímetros de altura
Here are the steps to follow:
We will start by taking our recycled sheet and draw on it the theme to use, this time we will draw a semi-long and pointed bunny ears, these ears are 14 centimeters high.
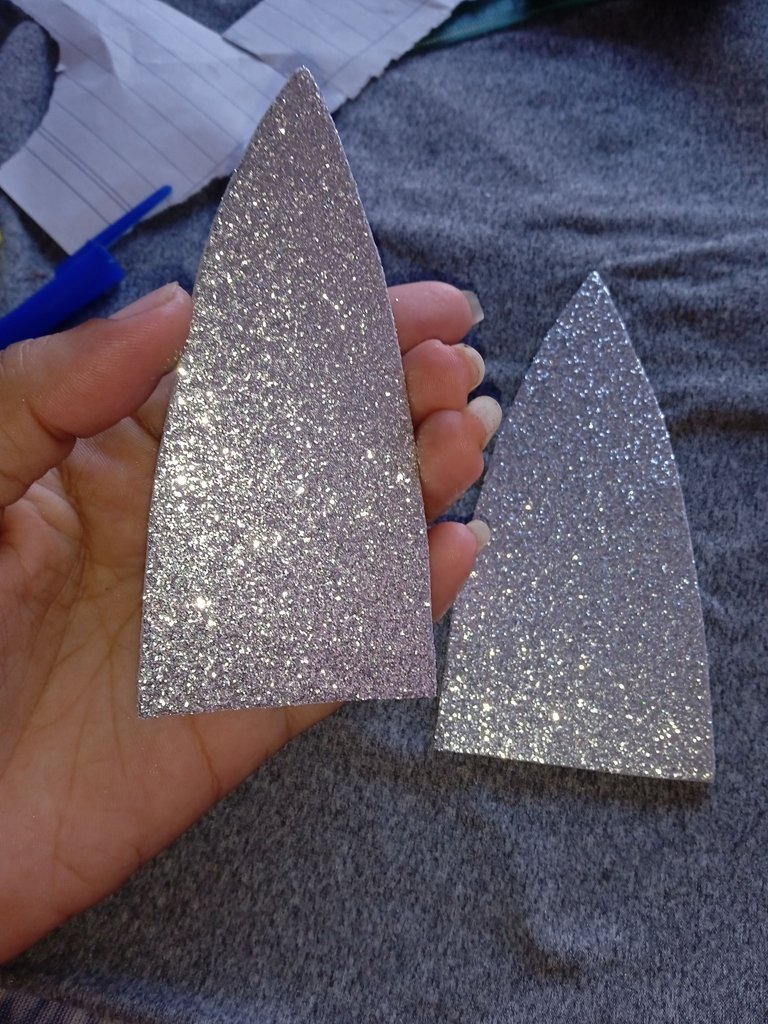
Luego que tengamos listo nuestro patrón (orejas de conejo) vamos a continuar marcando en el foamis de el color de nuestra preferencia nuestras dos orejas color plateado escarchado
After we have our pattern ready (bunny ears) we will continue marking on the foamis of the color of our preference our two silver frosted ears.
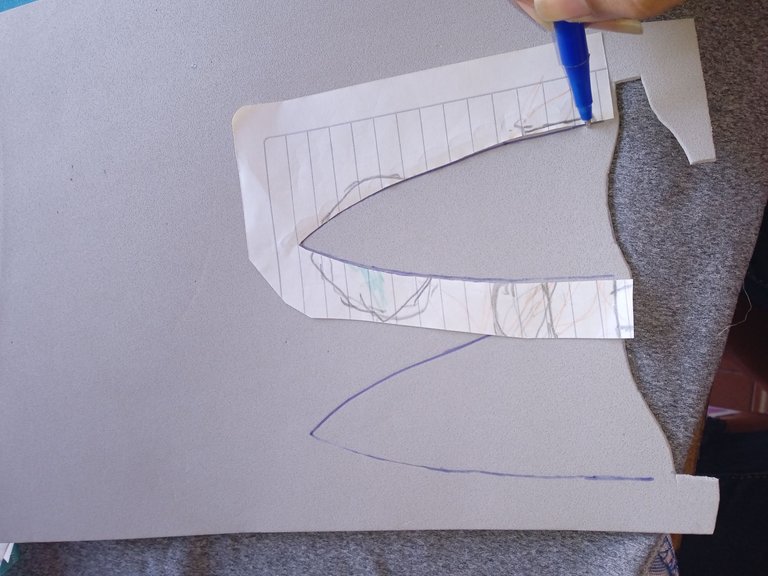
Seguidamente una vez listas nuestras orejas vamos a proceder tomando nuestra tijera y recortaremos las dos orejas que marcamos en el paso anterior
Next, once our ears are ready, we will proceed by taking our scissors and cut out the two ears that we marked in the previous step.
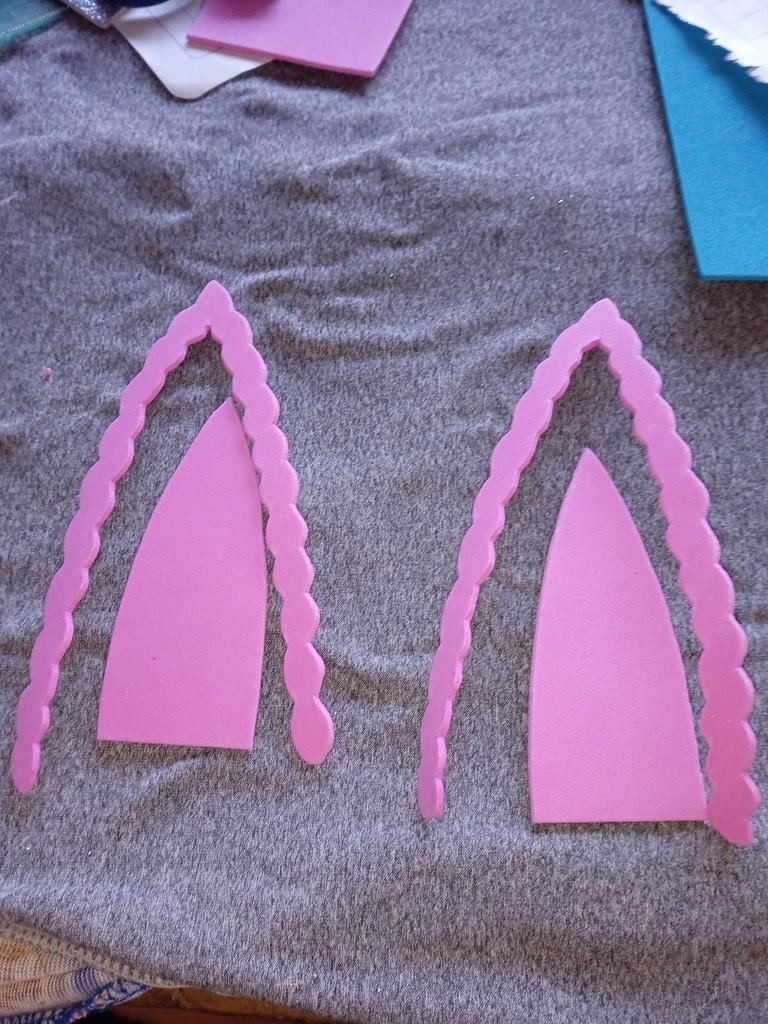
Con el foamis color rosa ,vamos a continuar marcando unas orejas miniaturas las cuales irán en el centro de las otras orejas para aque parezca el fondo de las orejas ,luego continuaremos recortando unos bordes con formas de el mismo color rosa para decorar el alrededor de las orejas
With the pink foamis, we will continue marking some miniature ears which will go in the center of the other ears to look like the bottom of the ears, then we will continue trimming some edges with shapes of the same pink color to decorate around the ears.
Una vez listo las orejas pequeñas junto con sus bordes moldeados ,vamos a continuar recortando cada pieza con nuestra tijera
Once the little ears are ready along with their molded edges, we will continue trimming each piece with our scissors.
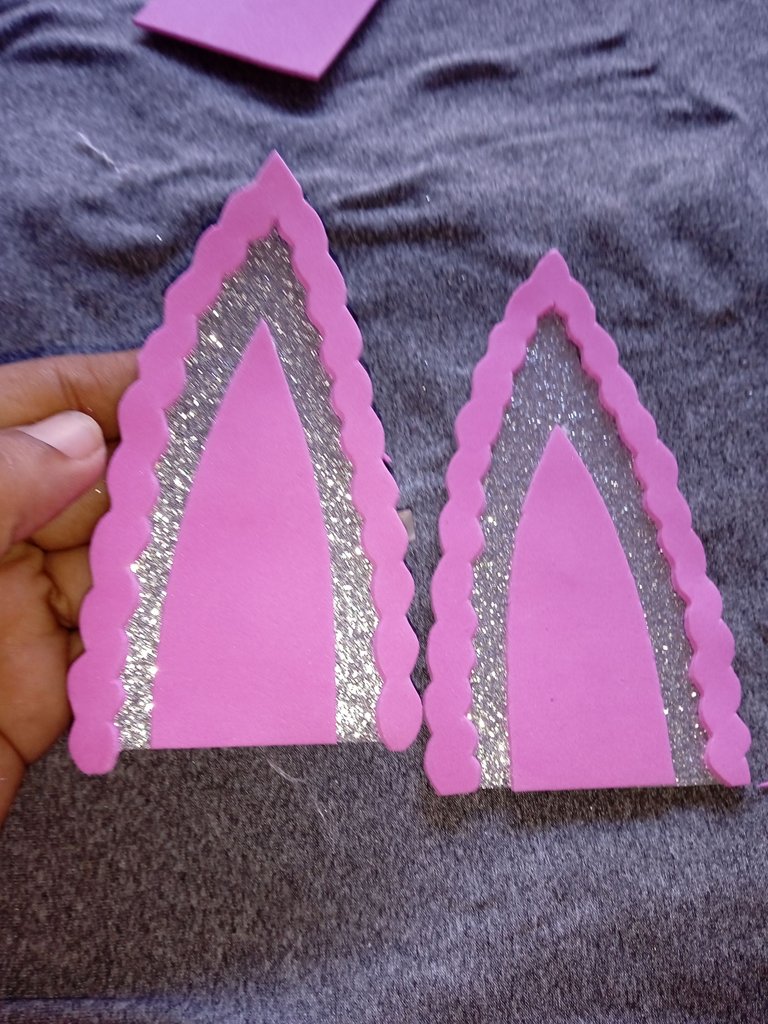
Seguidamente vamos a tomar las orejas que recortamos junto con sus bordes y las vamos a pegar ,la oreja pequeña color rosa en todo el centro de la plateada y los bordes alrededor de la oreja plateada también
Next we are going to take the ears that we cut out along with their edges and we are going to glue them together, the small pink ear all around the center of the silver one and the edges around the silver ear as well.
Luego vamos a continuar dibujando dos patrones con el restante de la hoja reciclada, dibujaremos una flor de cinco pétalos y una hoja,una vez listo nuestro patrón vamos a continuar marcando lo en el foamis de el color de nuestra preferencia ,es decir ,azul y verde para las hojas , recortaremos cada pieza dibujada y por último procederemos a pegar las dos hojas a los lados de la flor y la piedra plástica en todo el centro de la flor para que quede más llamativa
Then we will continue drawing two patterns with the rest of the recycled sheet, we will draw a flower with five petals and a leaf, once our pattern is ready we will continue marking it on the foamis of the color of our preference, that is, blue and green for the leaves, we will cut out each drawn piece and finally we will proceed to glue the two leaves on the sides of the flower and the plastic stone around the center of the flower to make it more striking.

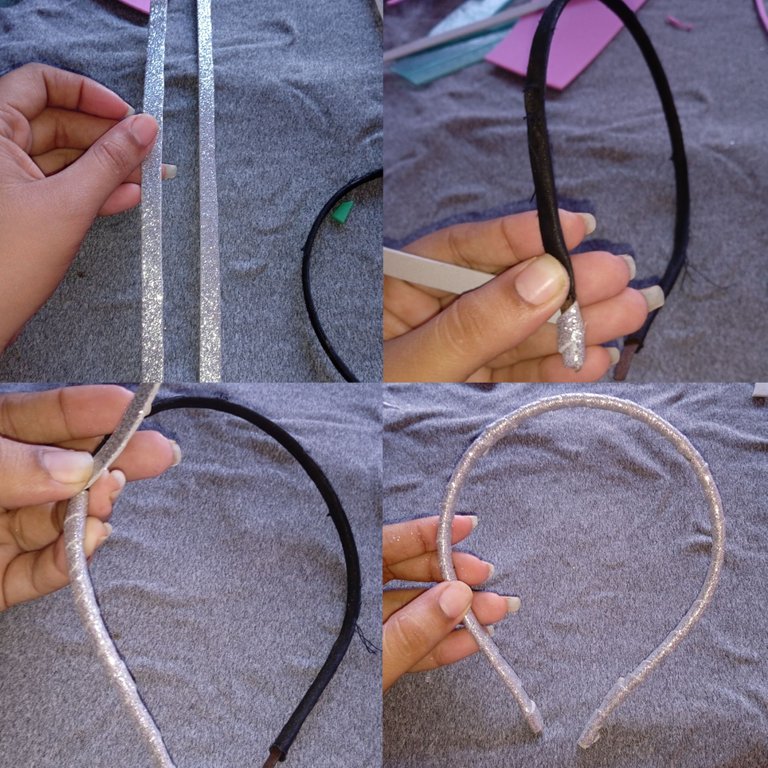
Una vez que tengamos todas las piezas para decorar nuestro cintillo listas,vamos a proceder a realizar la primera restauración ,la cual es forrar el cintillo, recortaremos dos tiras de 1 centímetro cada una,de el color plateado escarchado o de el color que nos guste más y haga combinación con los demás colores ,añadiremos silicón en la punta de el cintillo ,doblamos el foamis y comenzamos a forrar ,iniciaremos de abajo hacia arriba hasta llegar al final de el cintillo
Once we have all the pieces to decorate our headband ready, we will proceed to make the first restoration, which is to line the headband, we will cut two strips of 1 centimeter each, of the frosted silver color or the color that we like more and make combination with the other colors, add silicone at the tip of the headband, fold the foamis and begin to line, start from the bottom up to reach the end of the headband.
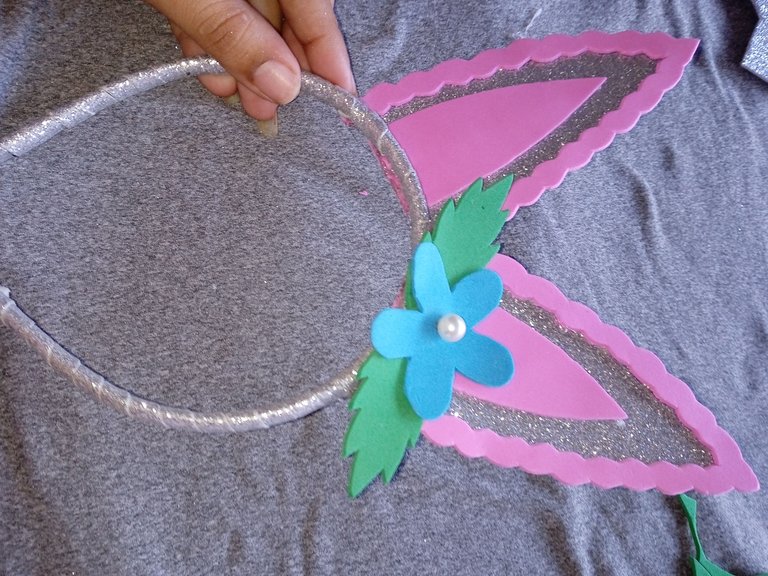
Una vez ya forrado el cintillo ,vamos a continuar en este siguiente paso pegando las orejas de conejo en todo el centro de nuestro cintillo
Once the headband is lined, we will continue in this next step by gluing the bunny ears all around the center of our headband.

Por último tomaremos la hermosa y delicada flor de cinco pétalos y la pegaremos en una esquina de el cintillo dobladas ,específicamente de lado terminando de este modo nuestra hermosa creación
Finally we will take the beautiful and delicate flower of five petals and glue it in a corner of the headband folded, specifically sideways, finishing this way our beautiful creation.
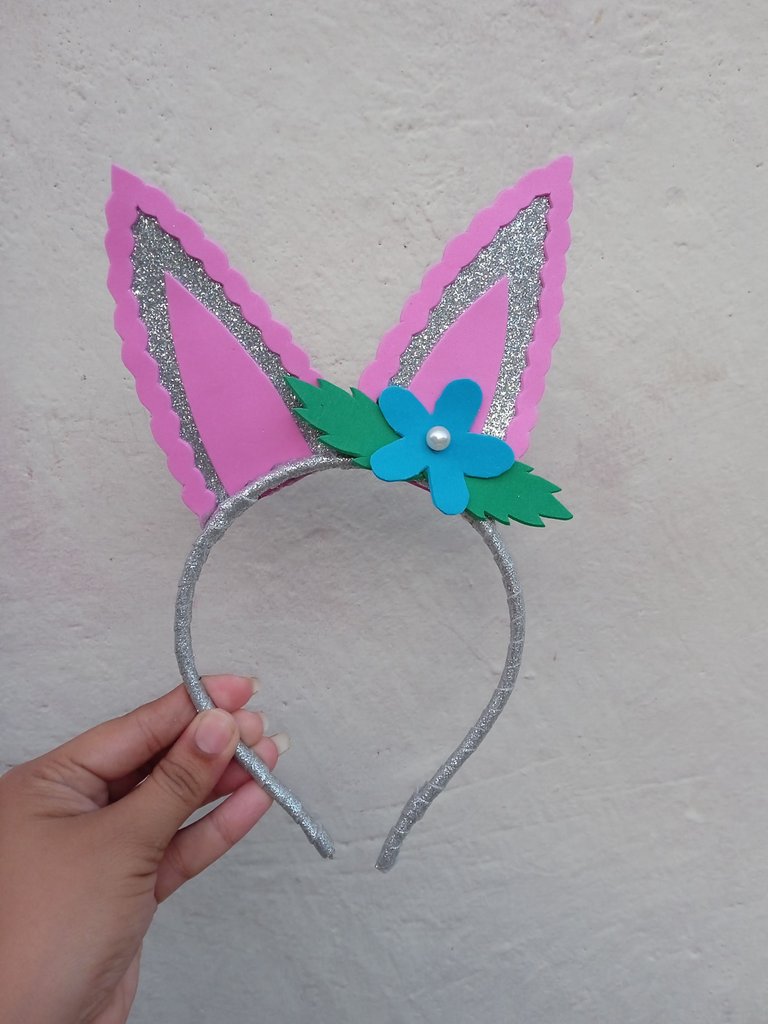
Cómo pueden apreciar ,este es el resultado final de mi hermosa creación ,un cintillo de orejas de conejo ,ideal para las consentidas de el hogar ,una restauración sencilla ,delicada y hermosa para toda niña que le guste lucir estás preciosas creaciones ,las fotos las tomé desde mi teléfono Redmi 9C y los textos los traduje con el traductor DeepL ,que tengan una bella noche
As you can see, this is the final result of my beautiful creation, a headband of bunny ears, ideal for the spoiled of the home, a simple restoration, delicate and beautiful for every girl who likes to wear these precious creations, the photos were taken from my phone Redmi 9C and the texts were translated with the translator DeepL, have a nice evening.
Están de moda. De u tiempo para acá a todas las niñas les gusta usar este tipo de cintillos.
Las orejas de conejo lucen muy bien @jorgelissanchez
Si se ven coquetas
Thank you for sharing this post on HIVE!
Your content got selected by our fellow curator sharminmim & you just received a little thank you upvote from us for your great work! Your post will be featured in one of our recurring compilations which are aiming to offer you a stage to widen your audience within the DIY scene of Hive. Stay creative & HIVE ON!
Please vote for our hive witness <3