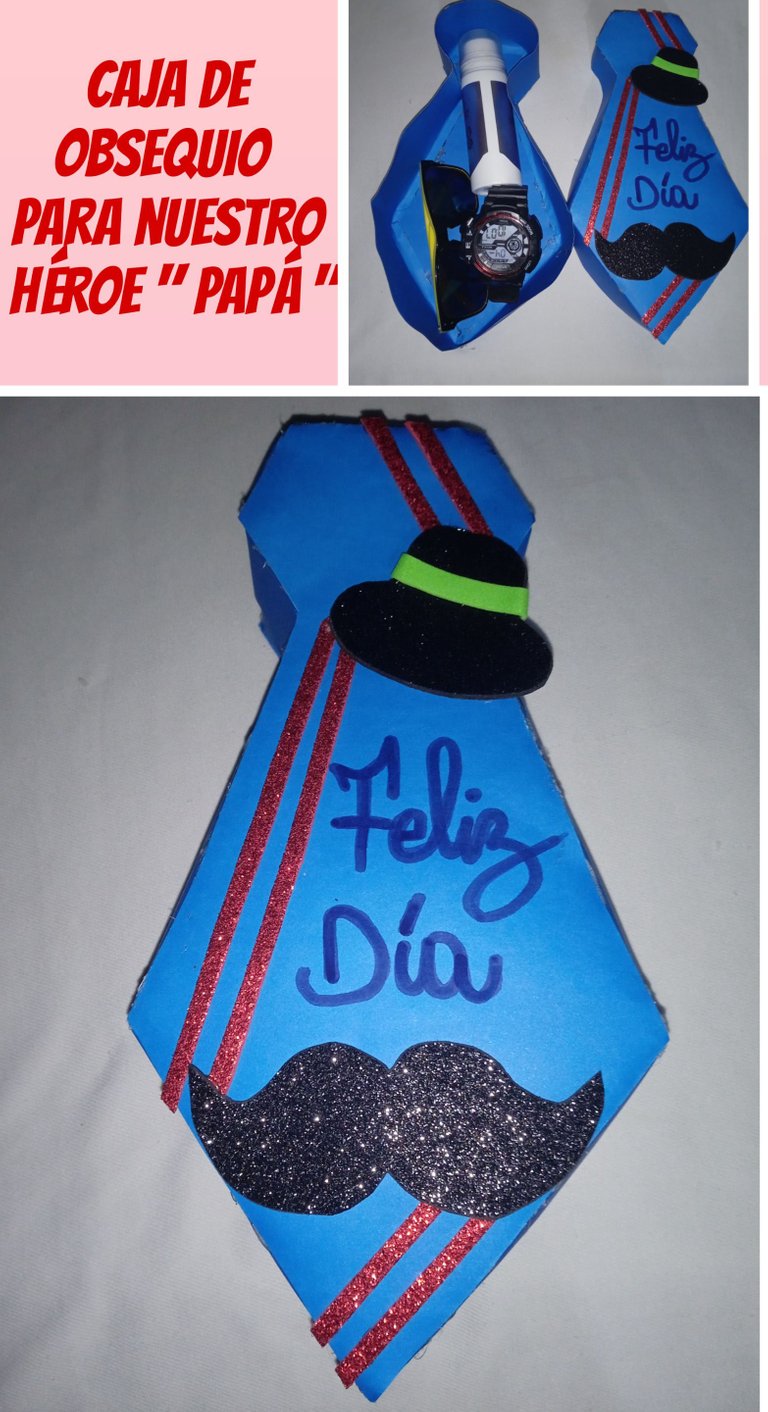
Tutorial: Caja de obsequio para mí Héroe ( Papá ) / Tutorial: Gift Box for Me Hero( Dad )
Hola amigos feliz noche para todos, deseo que tengan una noche maravillosa y un lindo despertar ,positivos y confiando siempre en Dios, les quiero compartir un tutorial para realizar una caja en forma de corbata para nuestro amado padre , o como diría yo ,nuestro héroe ,la verdad que me siento muy orgullosa del padre que me tocó , y ellos se merecen un buen detalle , todo lo que hago lo realizó con amor ,sin embargo este lo hice con mucho más amor , ya que es para un ser que me a dado todo desde niña y que si fuera por el diera aún más
Hello friends happy evening to all, I wish you have a wonderful night and a nice wake up, positive and always trusting in God, I want to share a tutorial to make a tie shaped box for our beloved father, or as I would say, our hero, the truth that I am very proud of the father who touched me, and they deserve a good detail, everything I do is done with love, however this I did it with much more love, because it is for a being who has given me everything since childhood and if it were for him I would give even more.
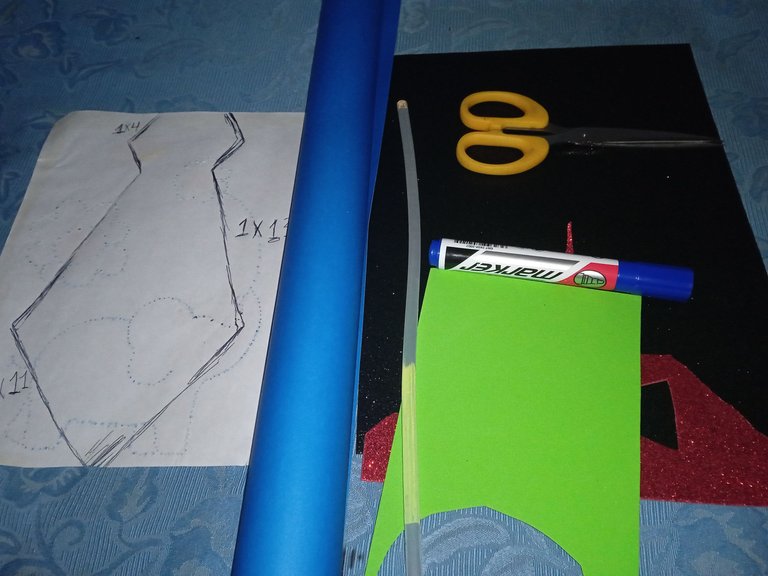
Materiales para nuestra caja(Corbata):
-Cartulina
-Foamis
-Tijera
-Silicon
-Marcador
-Patron de corbata
Materials for our box (Tie):
-Cardboard
-Foamis
-Scissors
-Silicon
-Marker
-Tie pattern
Pasos a seguir:
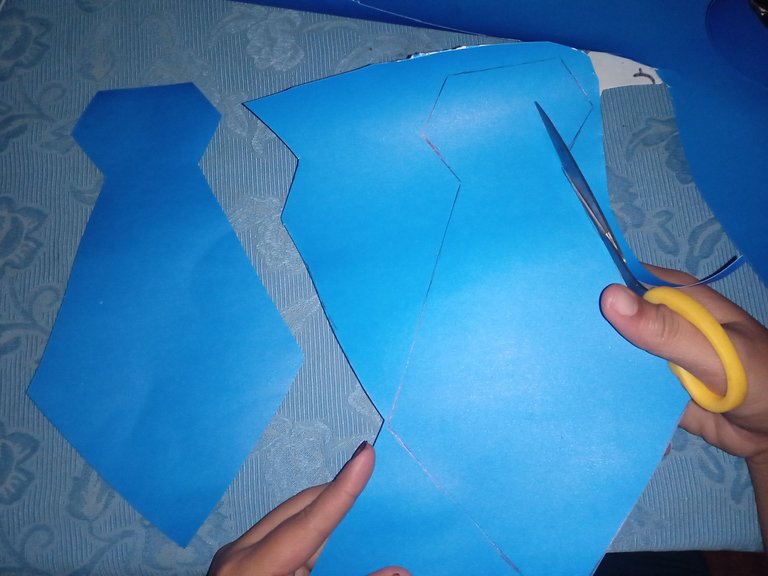
En nuestro primer paso iniciamos marcando en la cartulina el patrón que realice en forma de corbata,(son dos corbatas que hay que marcar ,la base y la tapa) ,iniciando en la parte de arriba de la corbata ambas esquinas tienen 1x4 cm de altura , y del extremo de la parte de arriba a la otra esquina que va hacia el triángulo de la corbata hay una separación de 1x13 cm , finalizando la punta triangular de la corbata con un largo de 1x11 cm
Steps to follow:
In our first step we start by marking on the cardboard the pattern that we will make in the form of a tie, (there are two ties to be marked, the base and the top), starting at the top of the tie both corners are 1x4 cm high, and from the end of the top to the other corner that goes to the triangle of the tie there is a separation of 1x13 cm, ending the triangular tip of the tie with a length of 1x11 cm.
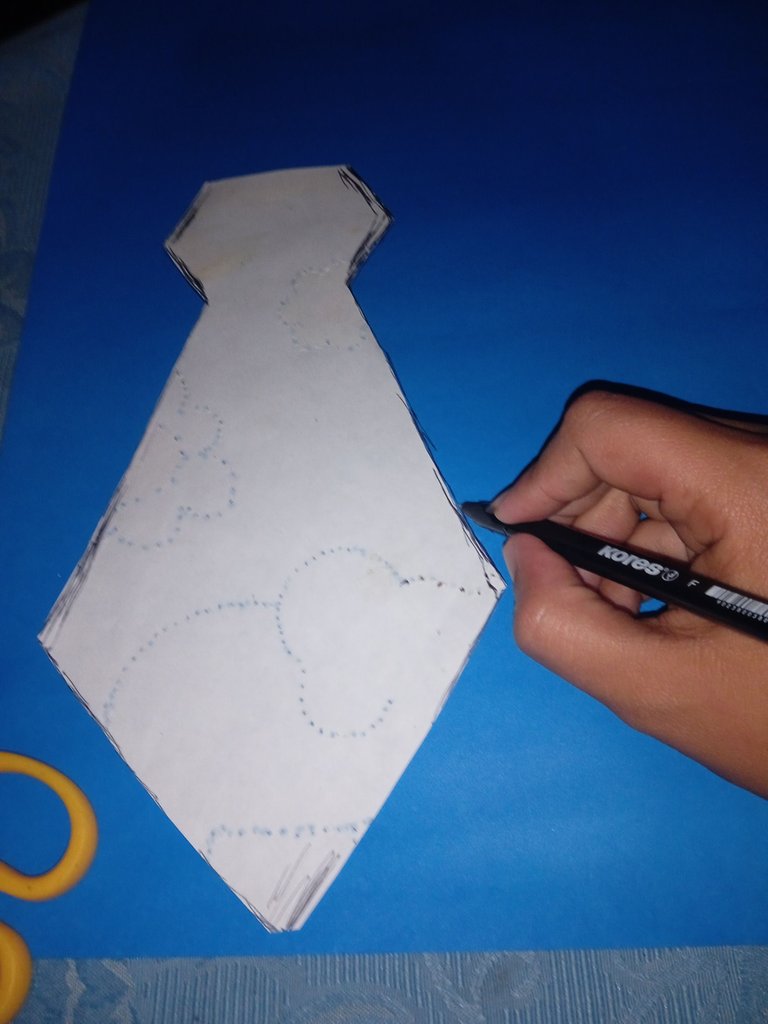
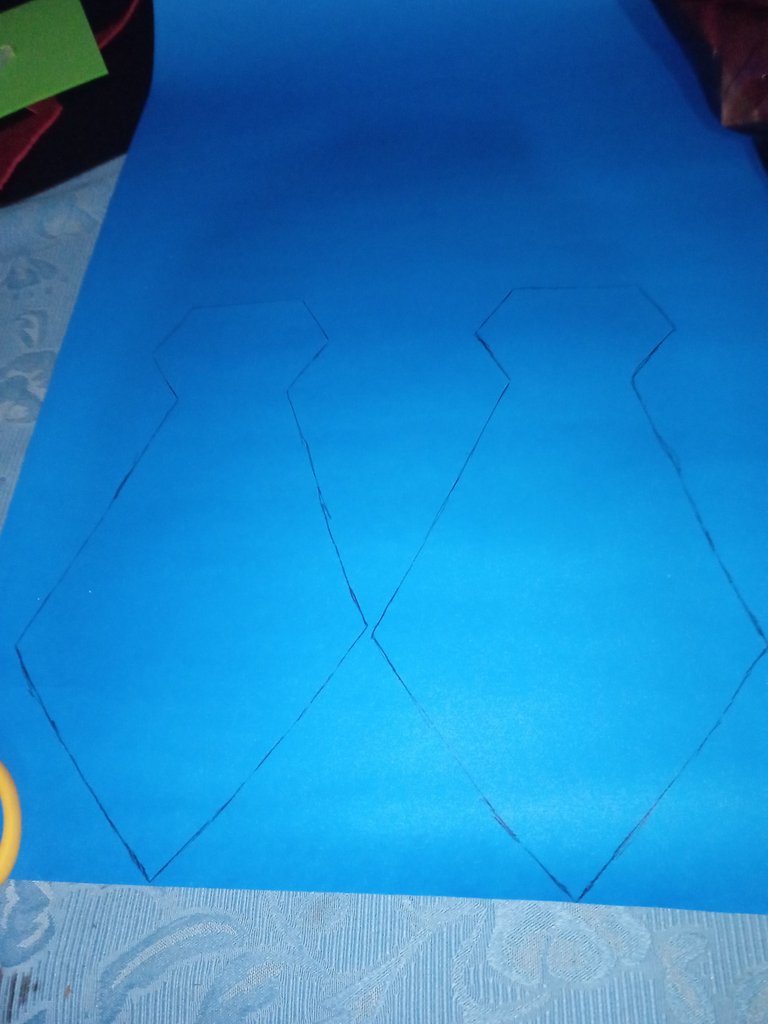
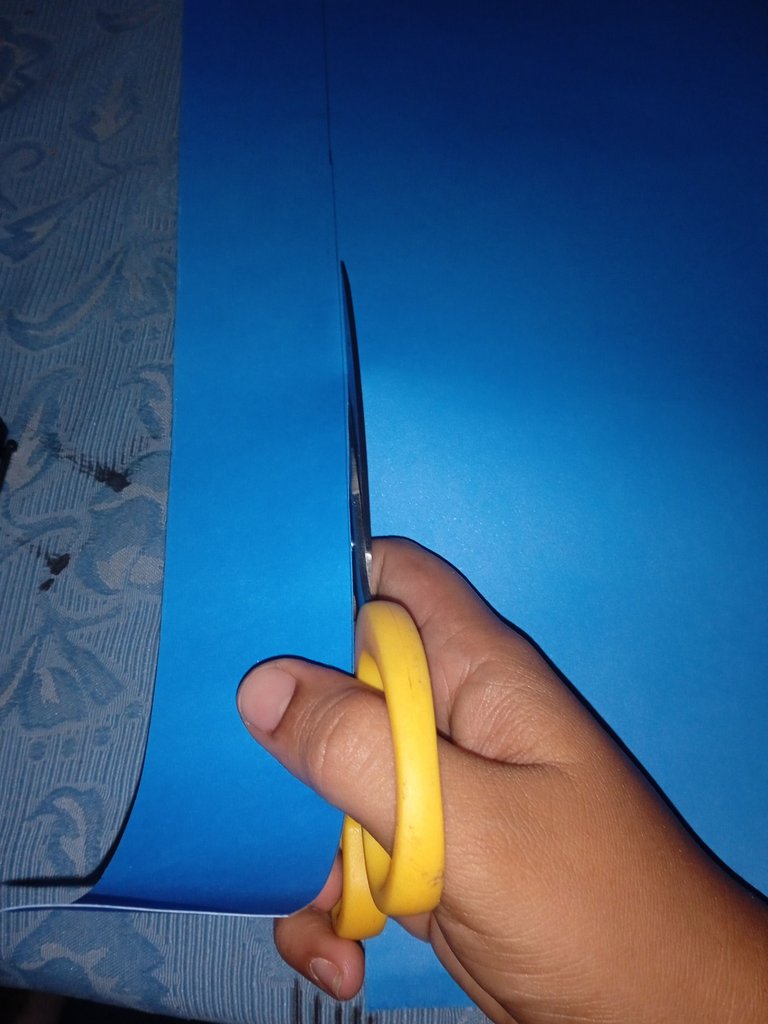
Luego continúe recortando las dos corbatas que marque en el paso anterior con la ayuda de mi tijera
Then continue cutting out the two ties that I marked in the previous step with the help of my scissors.
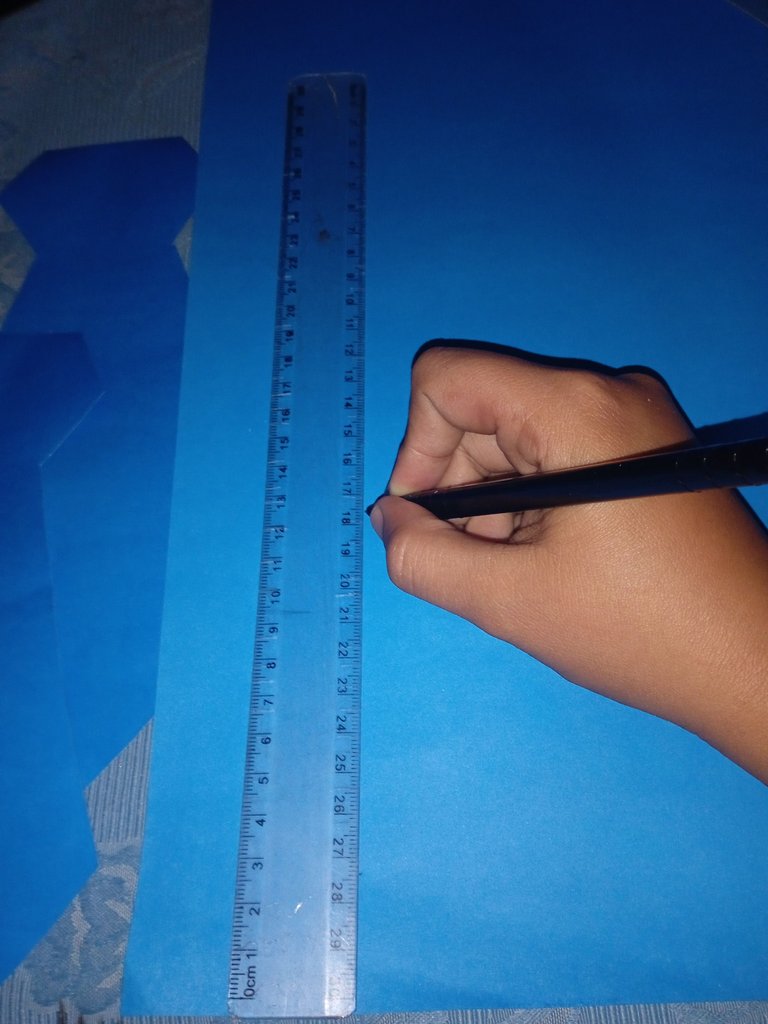
Continúe recortando una tira de la misma cartulina de 1x30 cm de altura y 1x 9 cm de ancho para más adelante pegar por todo el borde de la base
Continue cutting a strip of the same cardboard 1x30 cm high and 1x 9 cm wide to later paste around the edge of the base
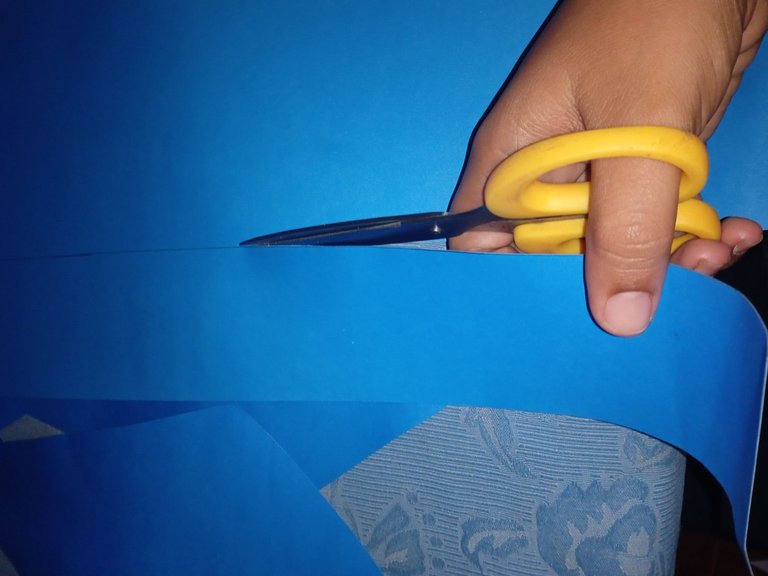
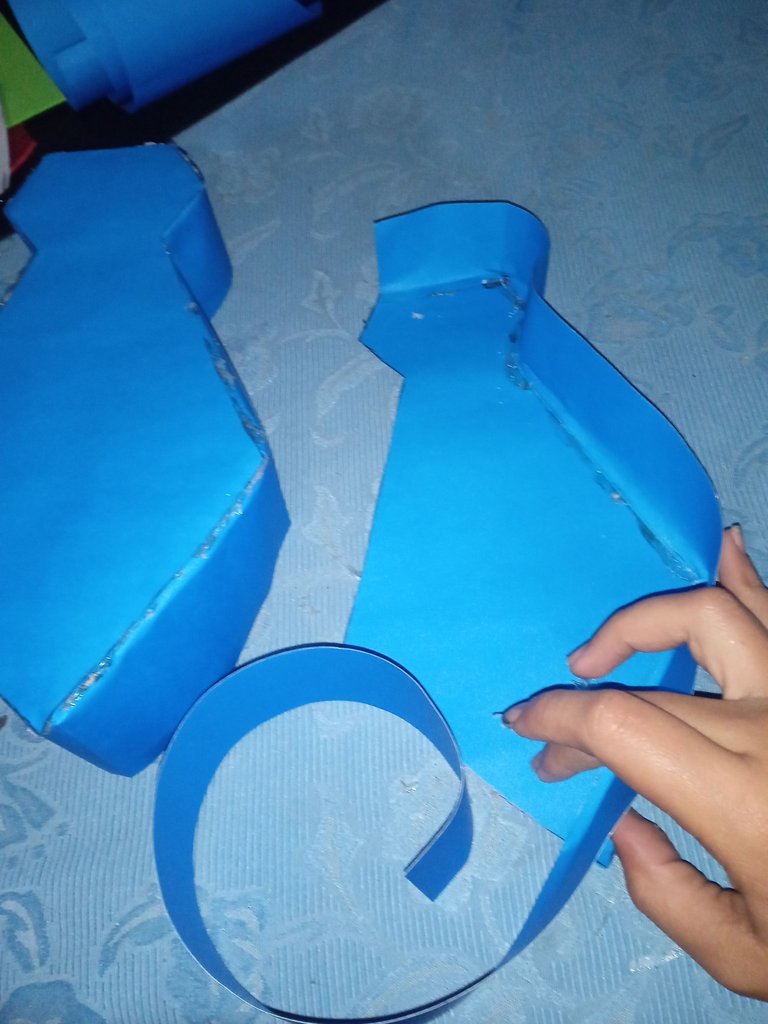
Una vez lista la base y la tira que necesitábamos ,comenzamos a armar nuestra caja ,para que se nos haga más fácil a la hora de pegar , tomamos la tira con la que vamos a realizar la caja y doblamos un centímetro hacia adentro y comenzamos a pegar por todo el borde
Once the base and the strip that we needed are ready, we begin to assemble our box, so that it becomes easier for us when it comes to gluing, we take the strip with which we are going to make the box and bend an inch inwards and begin to stick around the edge.
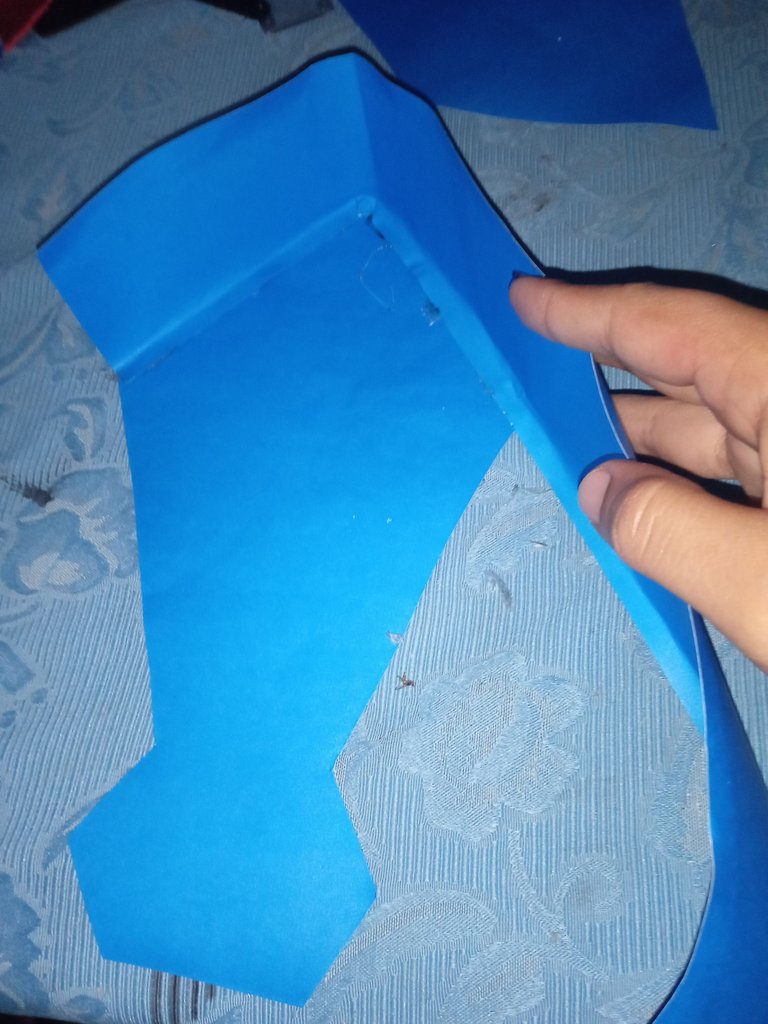
Continuaremos con realizar la tapa de la caja, para eso vamos a cortar nuevamente una tira ,pero más delgada(1x6) que la de la base para pegar por todo el borde también
We will continue with making the lid of the box, for that we are going to cut a strip again, but thinner (1x6) than the one of the base to stick around the edge as well
Luego continuaremos realizando la tapa de la caja de obsequio ,nuevamente doblamos un centímetro de la cartulina y comenzamos a pegar
Then we will continue making the lid of the gift box, again we fold a centimeter of the cardboard and begin to paste
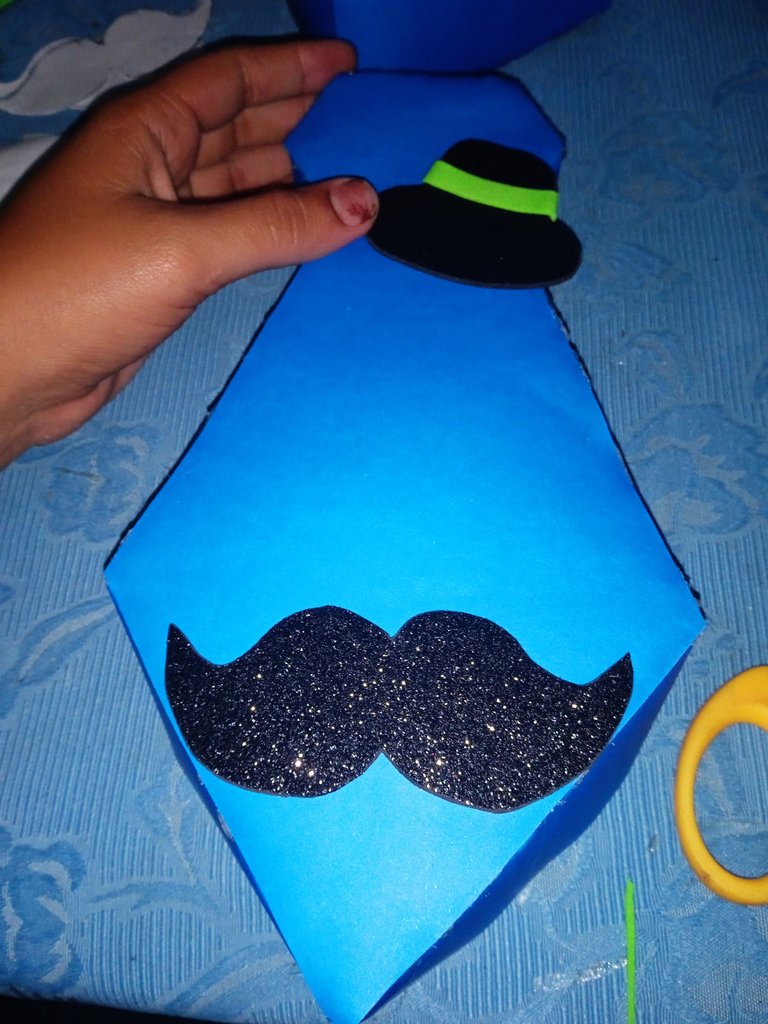
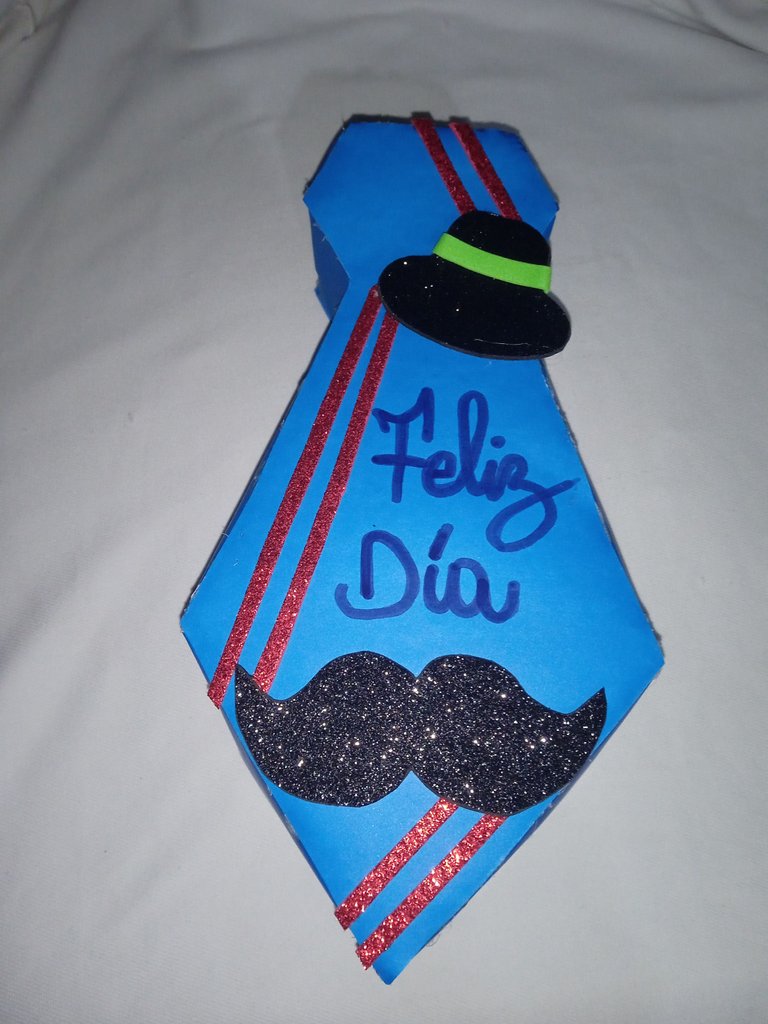
Una vez lista nuestra caja , continuaremos realizando la decoración, tomamos un patrón de bigote y sombrero y procedimos a marcar en el foamis escarchado
Once our box is ready, we will continue making the decoration, we take a mustache and hat pattern and proceed to mark on the frosted foamis
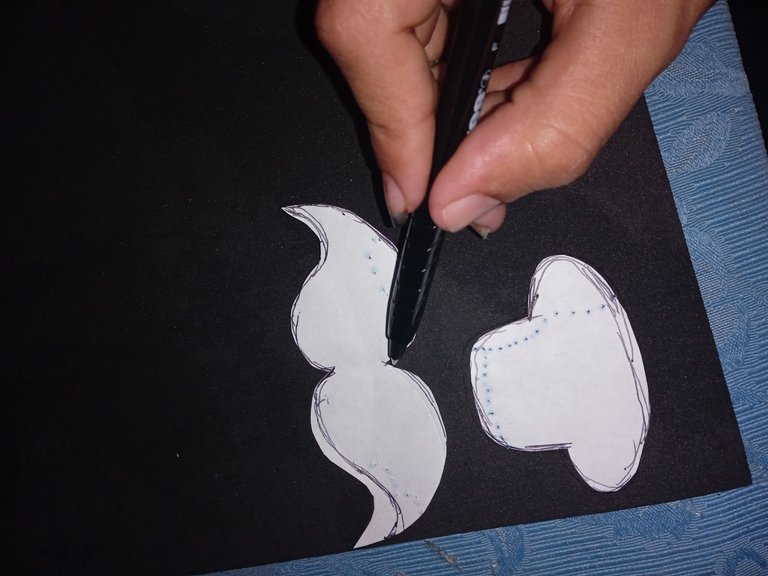
Luego que culminemos de marcar el sombrero y el bigote , continuaremos recortando ambas piezas con nuestra tijera
After we finish marking the hat and the mustache, we will continue cutting both pieces with our scissors
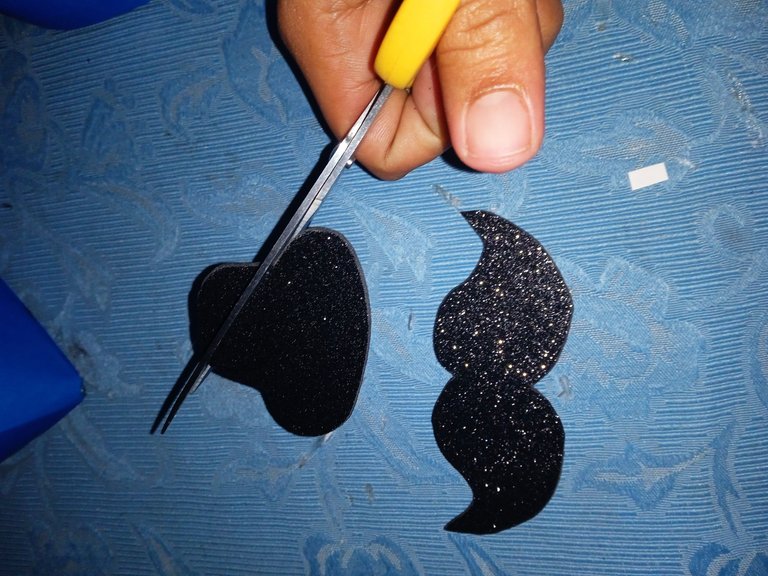
Continuamos tomando primeramente el sombrero y pegando lo en la tapa del obsequio en una esquina semi doblado con una tira por el medio color verde , luego en la parte de abajo de la corbata continúe pegando el bigote de señor
We continue by taking the hat first and sticking it on the top of the gift in a semi-folded corner with a green strip in the middle, then on the bottom of the tie continue sticking the mustache of Mr
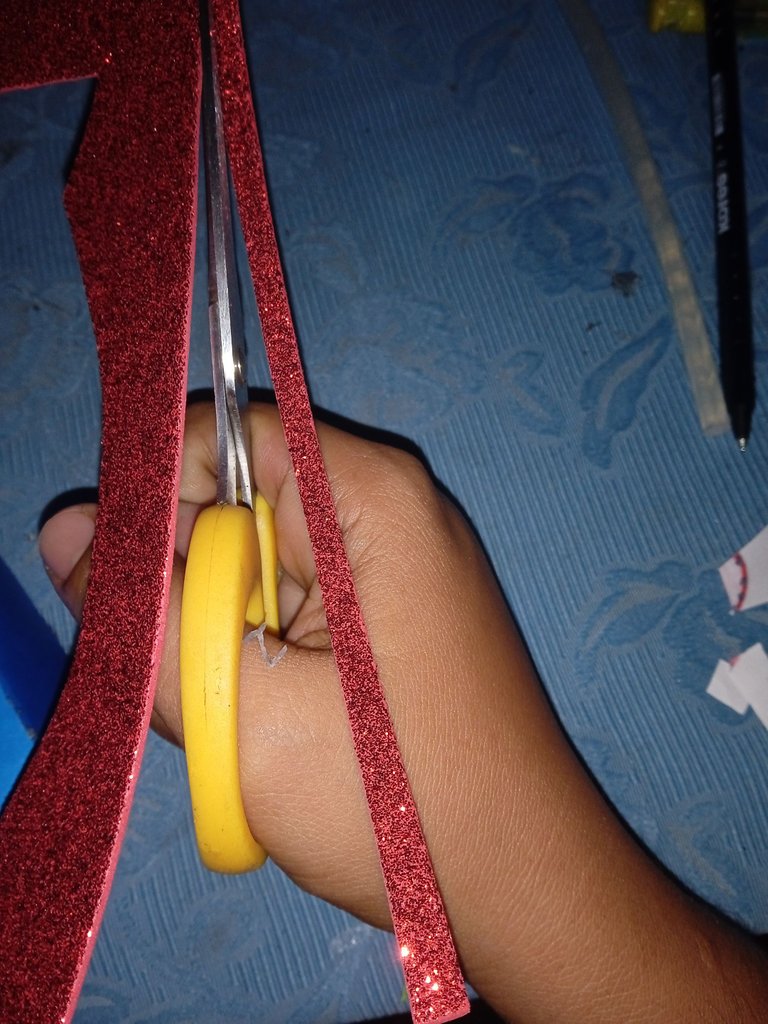
En este paso tomé el foamis escarchado y recorte varias tiras para decorar más adelante la tapa
In this step I took the frosted foamis and cut several strips to later decorate the lid
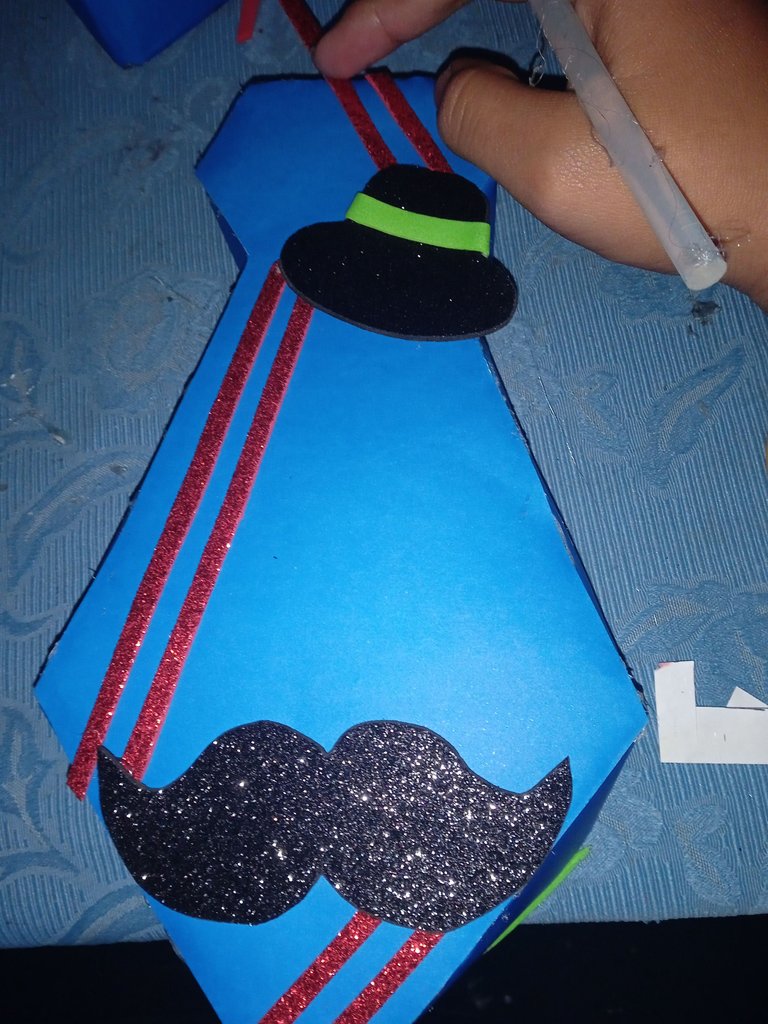
Tomé las tiras escarchadas y pegue hacia los lados de dos en dos ,si inicie pegando las primeras tiras en la parte de arriba de la derecha, las tiras siguiente las pego apuntando hacia la izquierda y por último las otras dos hacia la derecha
I took the frosted strips and glued to the sides two by two, if I start by gluing the first strips at the top of the right, the next strips I stick pointing to the left and finally the other two to the right
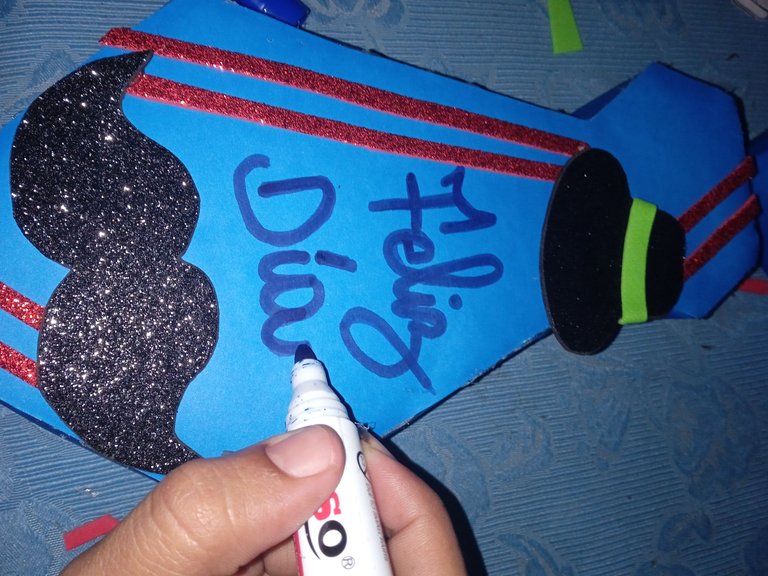
Por último escribí en el espacio sobrante de la tapa , feliz día ,con marcador azul ,un azul que es más intenso que el de la caja
Finally I wrote in the remaining space on the cover, happy day, with a blue marker, a blue that is more intense than the one on the box
De este modo finalice mi caja de obsequio en forma de corbata a mi héroe favorito (Mi papá) , tomé mis fotos desde mi celular Redmi 9C y traduci mis textos con el traductor DeepL, que descansen bien ,hasta mañana
In this way I finished my gift box in the form of a tie to my favorite hero (My dad), I took my photos from my Redmi 9C cell phone and translated my texts with the DeepL translator, rest well, see you tomorrow
Que bonita cajita.... gracias por compartir tu técnica...
🎆🎇🎉🎊🌧️💐✨🌾🌱🌹🌙🌿🍃🥀⚡🌺☘️🍀🌈🌷⭐🪴🌵🌸🌟💮🌴🌳💫☀️💮☔🌲🌳🌍🌌🌠☄️🏵️🐝🌻🌼🍄🐞🦋💙☕💜🍍🎆🎇🎉🎊
Gracias amiga