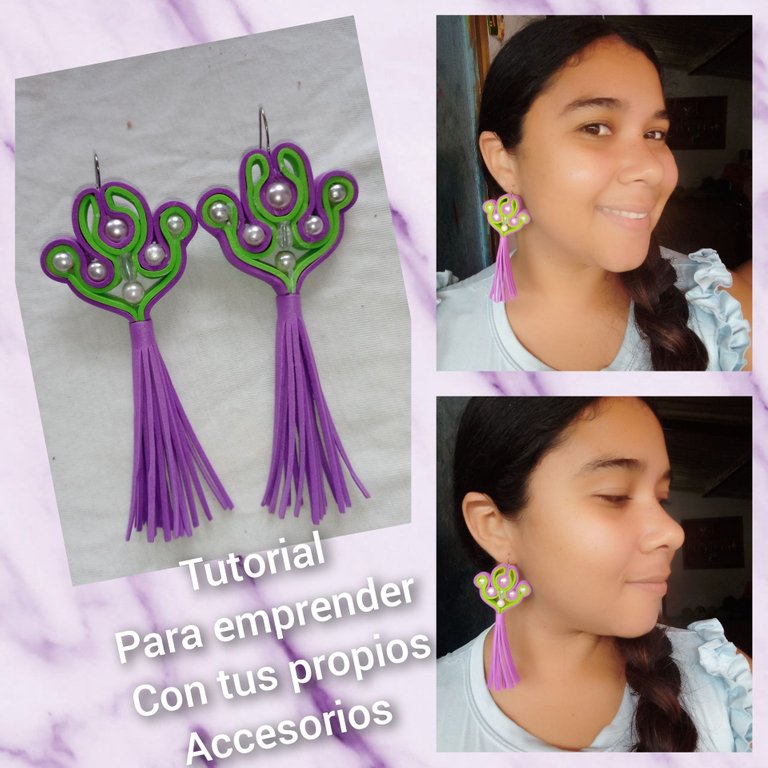
Tutorial: Emprende realizando tus propios accesorios / Start making your own accessories
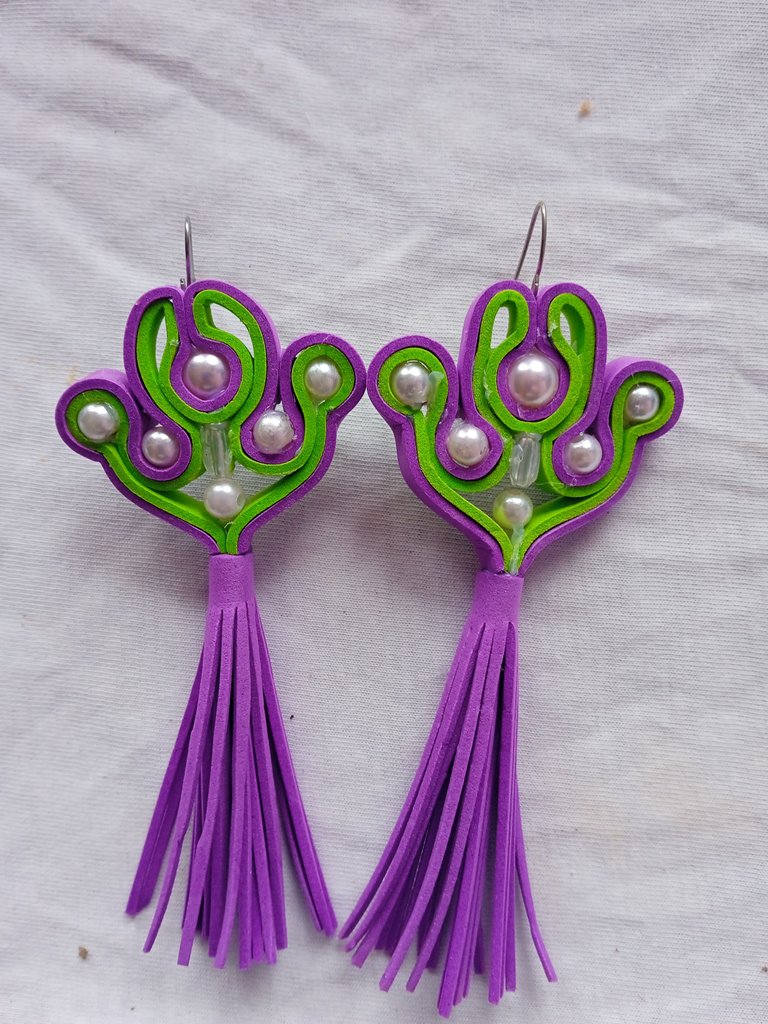
Hola feliz noche apreciados amigos , aspiro que hayan pasado un excelente fin de semana , hoy les quiero compartir unos zarcillos que realice inspirados en un( Cetro ) pero a mí estilo ,un estilo que tanto amo y es el foamis con las piedras blancas , en esta ocasión lo combine con dos hermosos tonos,muy llamativos , lo importante de este accesorio es hacer volar y crecer nuestra imaginación y creatividad
Hello happy evening dear friends, I hope you have had a great weekend, today I want to share some tendrils that I made inspired by a (Scepter) but in my style, a style that I love so much and is the foamis with white stones, this time I combine it with two beautiful shades, very striking, the important thing about this accessory is to fly and grow our imagination and creativity.
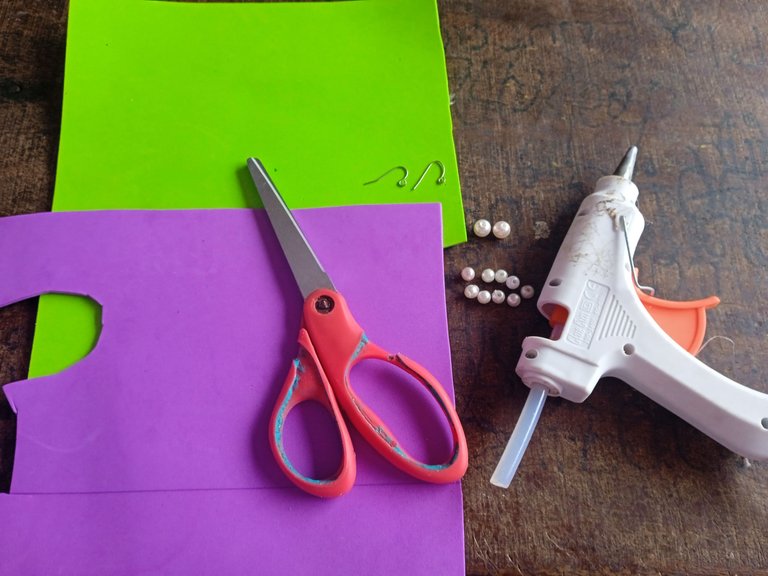
Materiales que utilice:
•Foamis
•Piedras plástica
•Silicon
•Tijera
•Zarcillos
Materials used:
-Foamis
-Plastic stones
-Silicon
-Scissors
-Trims
A continuación los pasos a seguir :
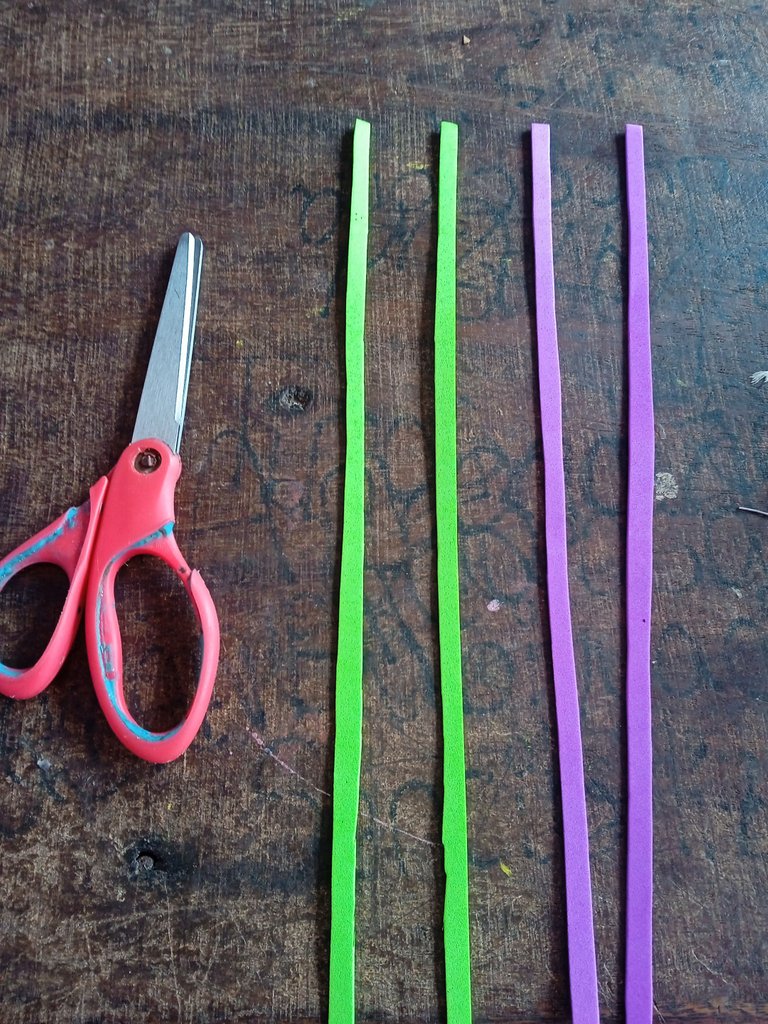
Iniciaremos tomando el foamis de nuestra preferencia ,recortaremos cuatros tiras con la ayuda de nuestra tijera , en esta ocasión utilicé dos tonos distintos ,por ello recorte dos tiras de cada color ya que utilizaremos dos por cada pieza ,el largo de las tiras no importa ,en este caso lo importante es que sobre y no falte ,el tamaño de la tira es el largo de un foamis pequeño
Here are the steps to follow:
We will begin by taking the foamis of our preference, we will cut four strips with the help of our scissors, this time I used two different shades, so cut two strips of each color as we will use two for each piece, the length of the strips does not matter, in this case the important thing is that there is enough and not missing, the size of the strip is the length of a small foamis.
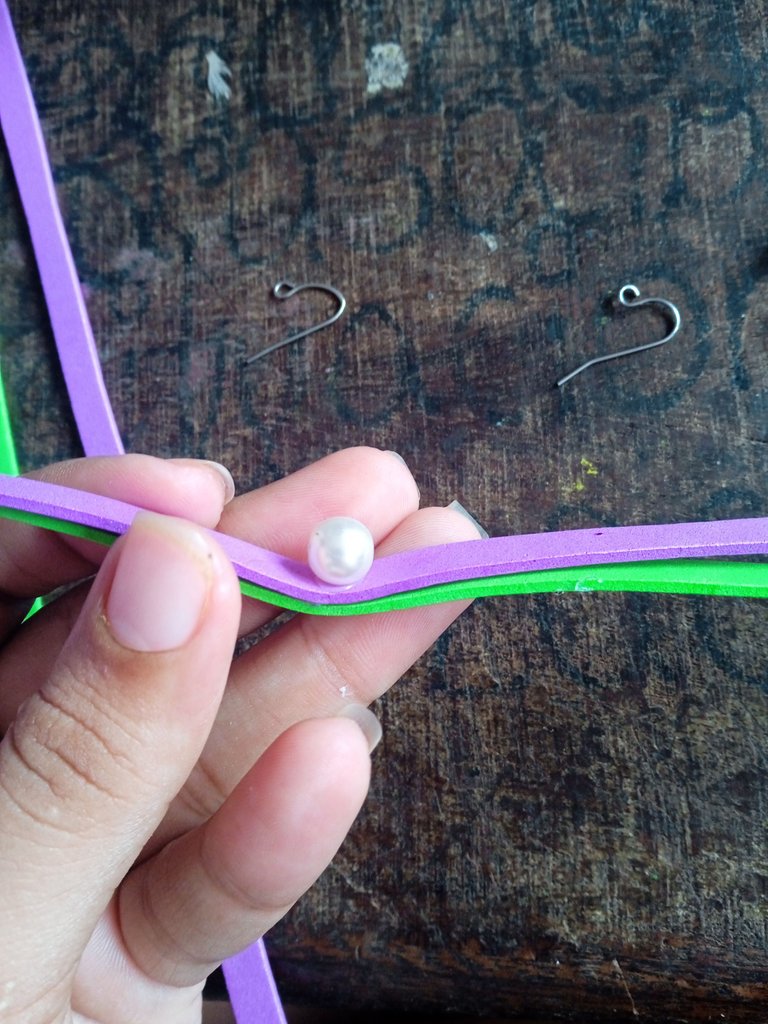
Luego que tengamos nuestras tiras listas ,vamos a continuar pegando una arriba de la otra ,la colocaremos de lado, y en el centro de ella vamos a pegar una piedra plástica que haga combinación con las tiras ,ésta piedra debe ser mediana
After we have our strips ready, we will continue gluing one on top of the other, we will place it sideways, and in the center of it we will glue a plastic stone that makes a combination with the strips, this stone should be medium size.
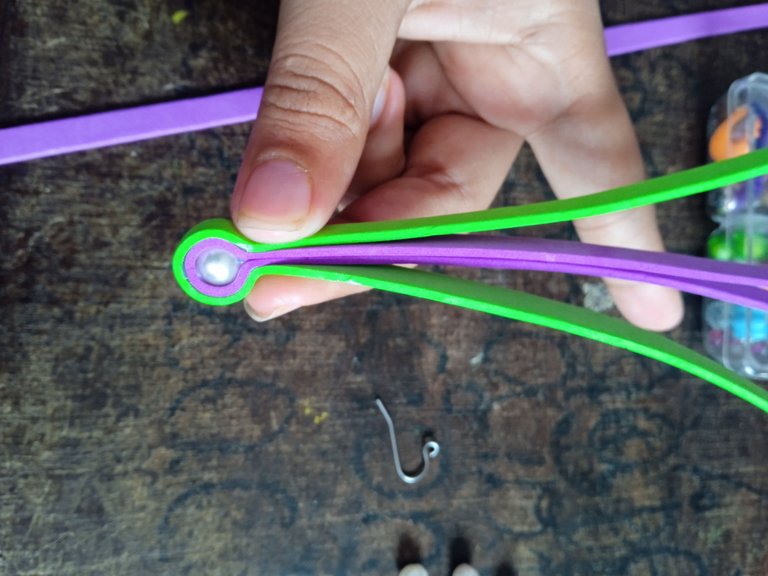
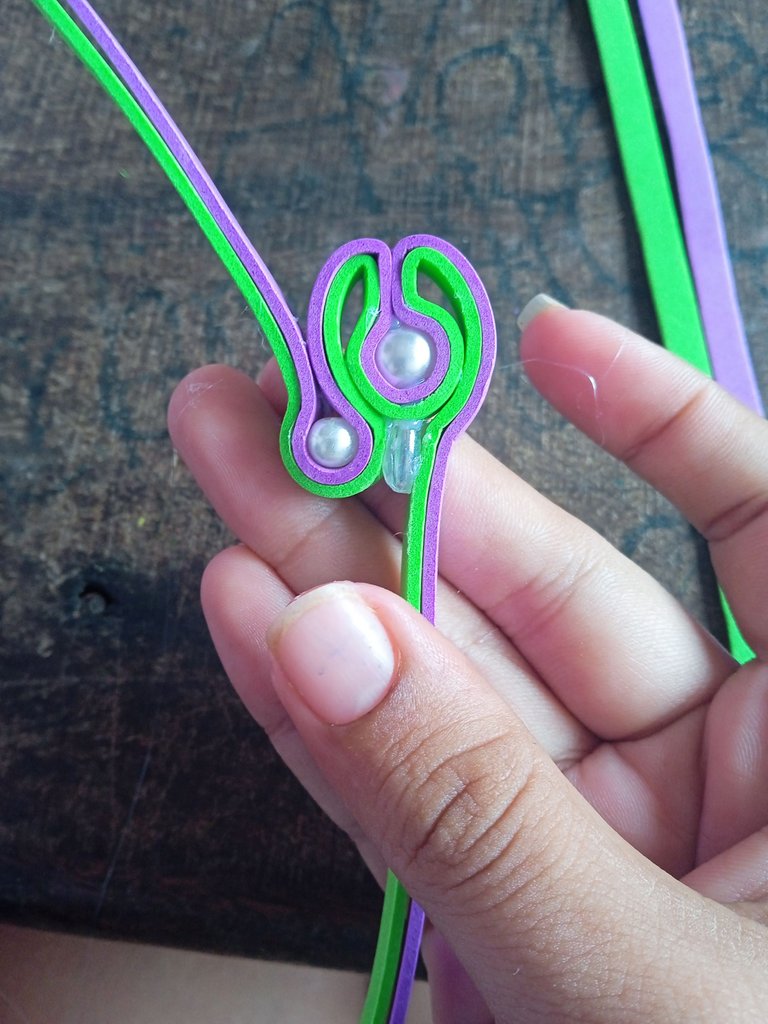
Una vez que peguemos la piedra en todo el centro , vamos a continuar añadiendo silicón por todo el alrededor de la piedra y uniremos tira con tira ,encerrando la piedra plasticas
Once we glue the stone in the center, we will continue adding silicone all around the stone and we will join strip with strip, enclosing the plastic stone.
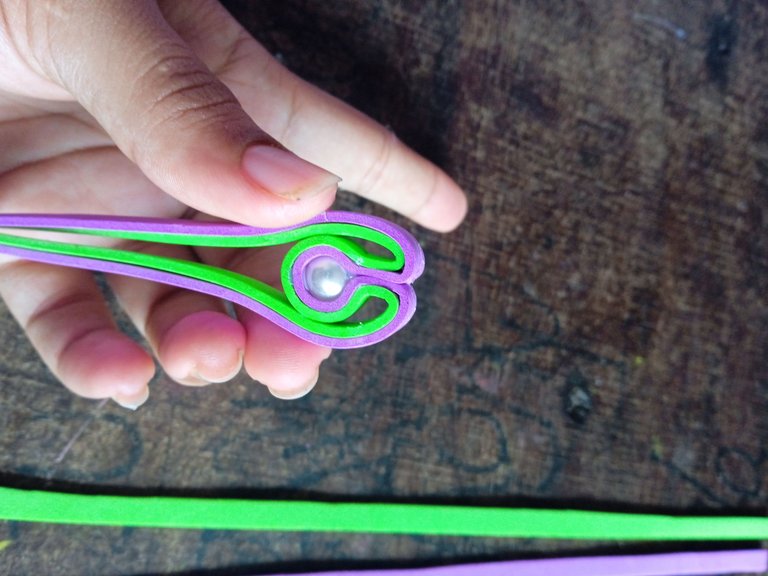
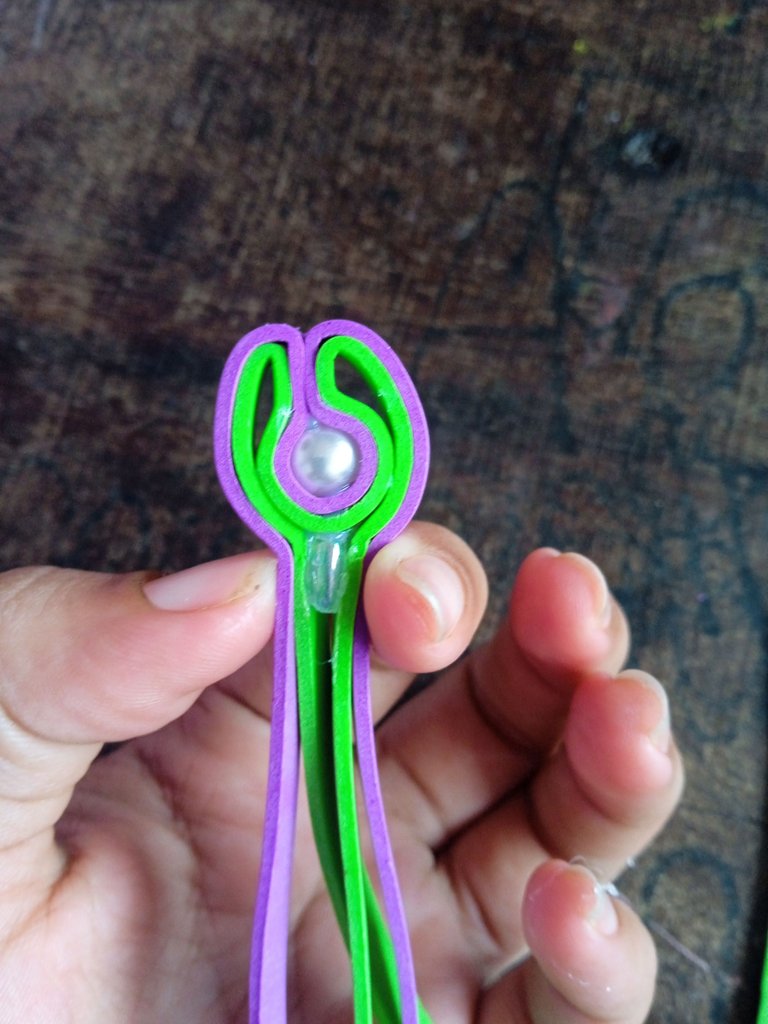
Luego continuaremos llevando nuestras tiras hacia un lado que vayan directamente hacia abajo dejando una forma similar a la letra M en la parte de arriba
Then we will continue taking our strips to one side going straight down leaving a shape similar to the letter M at the top.
Seguidamente tomaremos una piedra plástica en forma de recta color transparente ,y la pegaremos en todo del centro de la parte de abajo de nuestro diseño
Next we will take a plastic stone in the shape of a straight transparent color, and we will glue it all around the center of the bottom of our design.
Luego continuaremos pegando una piedra al lado de forma circular llevando la junto con las tiras ,seguidamente en la parte de arriba vamos a pegar una piedra plástica más ,dejando una forma de sube y baja ,el mismo procedimiento que realizamos acá ,lo vamos a realizar en el otro lado de el diseño con la tira sobrante
Then we will continue gluing a stone to the side in a circular shape taking it together with the strips, then at the top we will glue one more plastic stone, leaving a form of up and down, the same procedure that we did here, we will do it on the other side of the design with the remaining strip.
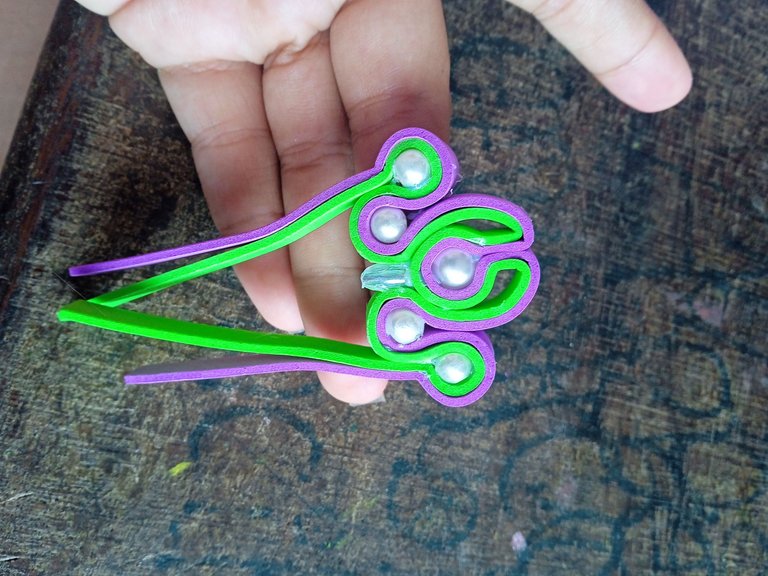
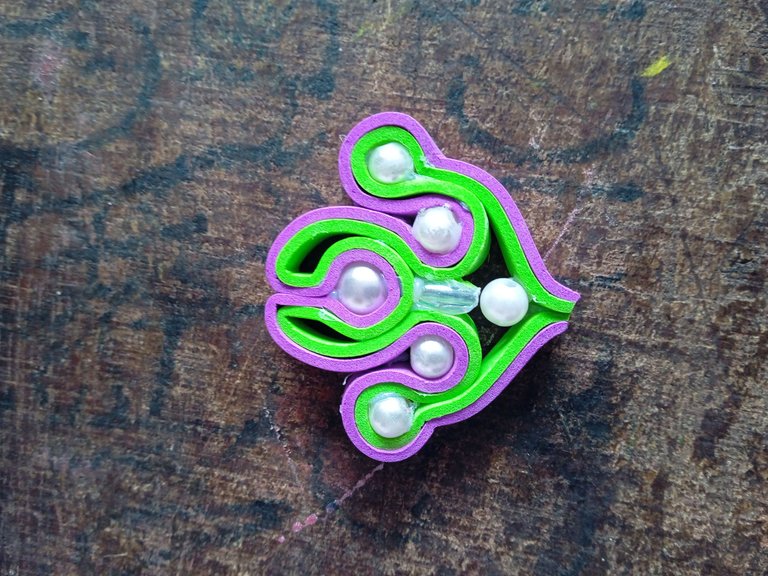
Las tiras que sobraron en la parte de abajo ,las continuaremos uniendo punta con punta hasta formar una figura similar tipo V y en el centro ubicada una piedra plástica
The strips that are left over at the bottom, we will continue joining them end to end until we form a similar V type figure and in the center we will place a plastic stone.
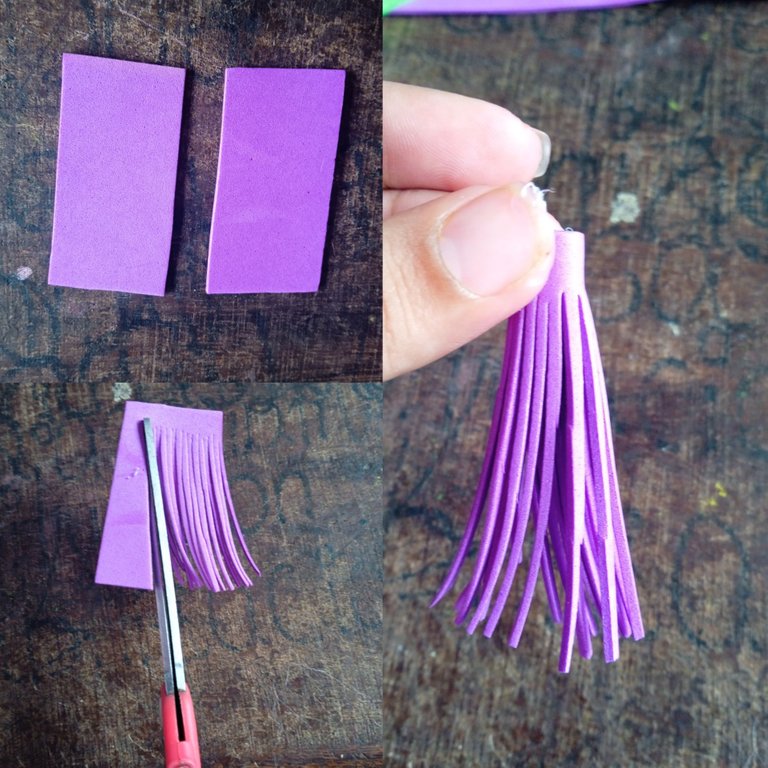
Una vez que tengamos nuestro diseño vamos a continuar realizando la parte de abajo de el cetro, esto será similar ,para eso recortaremos unos cuadros ,estos cuadros lo convertiremos en flecos con nuestra tijera ,finalmente enrollamos añadiendo silicón
Once we have our design we will continue making the bottom of the scepter, this will be similar, for that we will cut some squares, these squares will become bangs with our scissors, finally we roll adding silicone.
Para culminar con nuestros zarcillos vamos a tomar los flecos y lo pegaremos en la parte de abajo de nuestro diseño , terminando de esta manera nuestra hermosa creación
To finish with our tendrils we are going to take the bangs and glue them on the bottom of our design, finishing this way our beautiful creation.
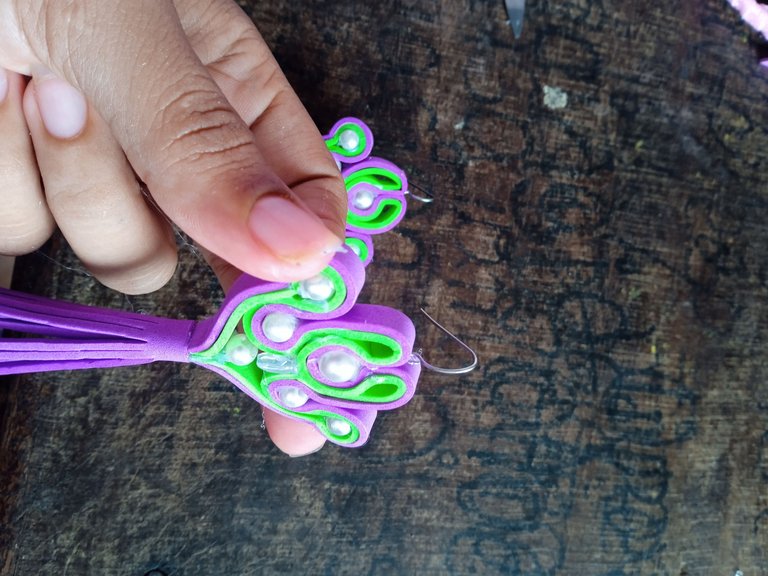
Una vez que tengamos listos nuestros zarcillos ,vamos a proceder a pegar en la parte de arriba nuestra base ,para que podamos lucir nuestro accesorio , sin ningún tipo de preocupacion ya que es un accesorio liviano y cómodo de usar
Once we have our tendrils ready, we will proceed to glue on top of our base, so we can show off our accessory, without any worry because it is a light and comfortable accessory to use.
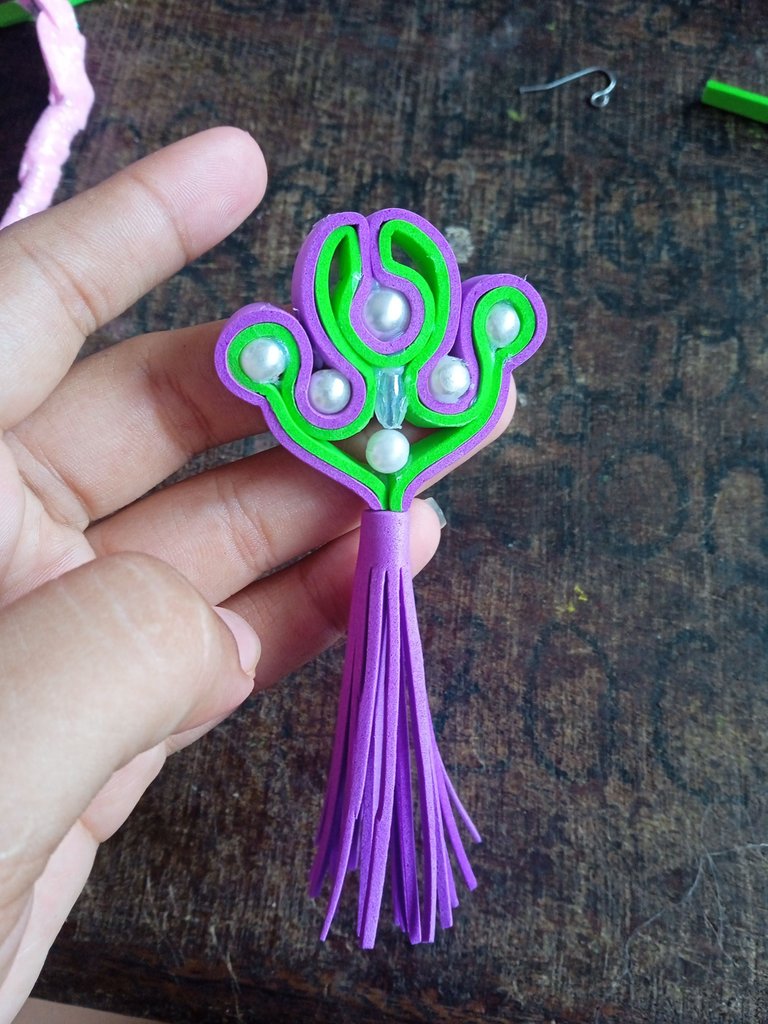
Este es el resultado final de mi hermoso accesorio en forma de cetro , listo para lucir en una noche de fiesta , renovar nuestros accesorios y lucir bellas , las fotos las tomé desde mi teléfono Redmi 9C y los textos los traduje con el traductor DeepL ,feliz noche
This is the final result of my beautiful accessory in the form of scepter , ready to wear on a night out , renew our accessories and look beautiful , the photos I took from my phone Redmi 9C and the texts I translated with the translator DeepL , happy night