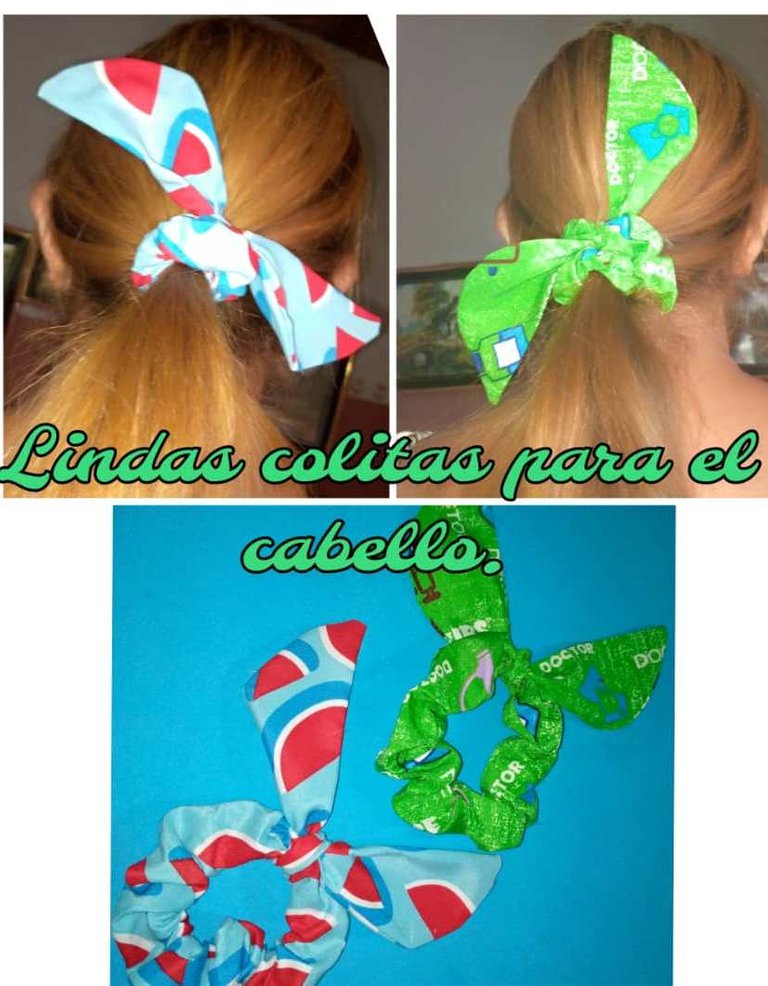
(Esp/ Eng) Hermosas colitas para lucir un cabello con estilo / Beautiful ponytails for a stylish hair look
¡Bienvenido a mi blog!
Welcome to my blog!

Hola queridos amigos de esta hermosa comunidad #needleworkmonday, espero que gocen de buena salud.Hoy quiero mostrarle cómo realizar:
Una colita de cabello muy hermosa y fácil de hacer.
Las colitas son muy útil ya que sirven para recoger los cabellos y en estos días que el calor es insoportable, en la nuca es que sentimos fuerte el calor , entonces recogerse los cabellos es una buena opción.
Además hacen lucir su cabello de una manera diferentes y cuando las colitas son de muchos colores resaltan y llaman la atención.
Hello dear friends of this beautiful community
#needleworkmonday, I hope you enjoy good health.Today I want to show you how to make:
A very beautiful and easy to make hair ponytail.
The ponytails are very useful because they serve to collect the hair and in these days that the heat is unbearable, in the neck is that we feel strong heat, then collect the hair is a good option.
They also make your hair look different and when the ponytails are in many colors they stand out and attract attention.


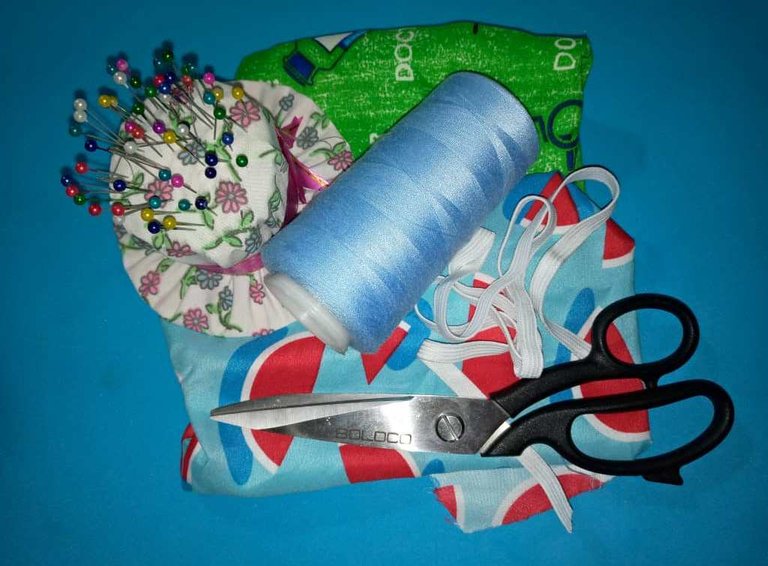
- Hilo.
- Medio metro de tela de dos colores.
- 20 cm de elástico.
- Tijera.
- Sujetadores.
- Máquina de coser.
- Regla
- Thread.
- Half a meter of fabric in two colors.
- 20 cm of elastic.
- Scissors.
- Fasteners.
- Sewing machine.
- Rule

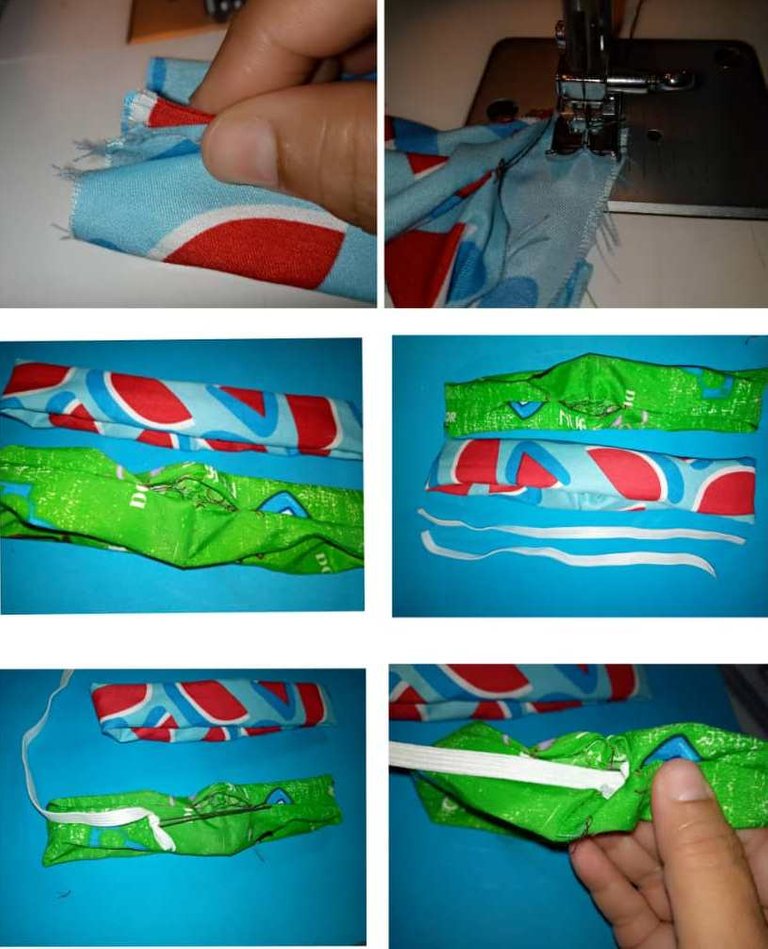
- Marca con una regla sobre la tela un rectángulo de: 40 x 10 cm y corta con una tijera.
- Ahora mide con la regla un rectángulo de: 30 x 15 cm.
- Comienza a coser la tela por la parte al revés dejando un centímetro y 3 centímetros al comenzar y 3 al terminar el rectángulo, después que se haya cosido , voltear la tela por el derecho.
- Mark with a ruler on the fabric a rectangle of: 40 x 10 cm and cut with scissors.
- Now measure with the ruler a rectangle of: 30 x 15 cm.
- Start sewing the fabric on the back side leaving one centimeter and 3 centimeters at the beginning and 3 centimeters at the end of the rectangle, after it has been sewn, turn the fabric right side out.
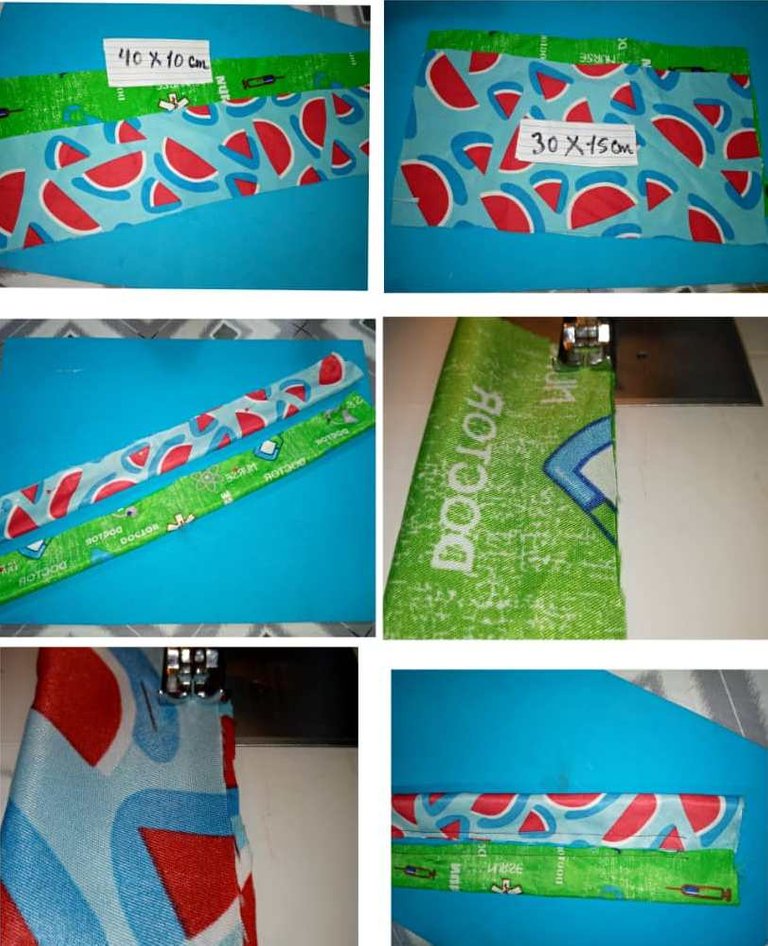
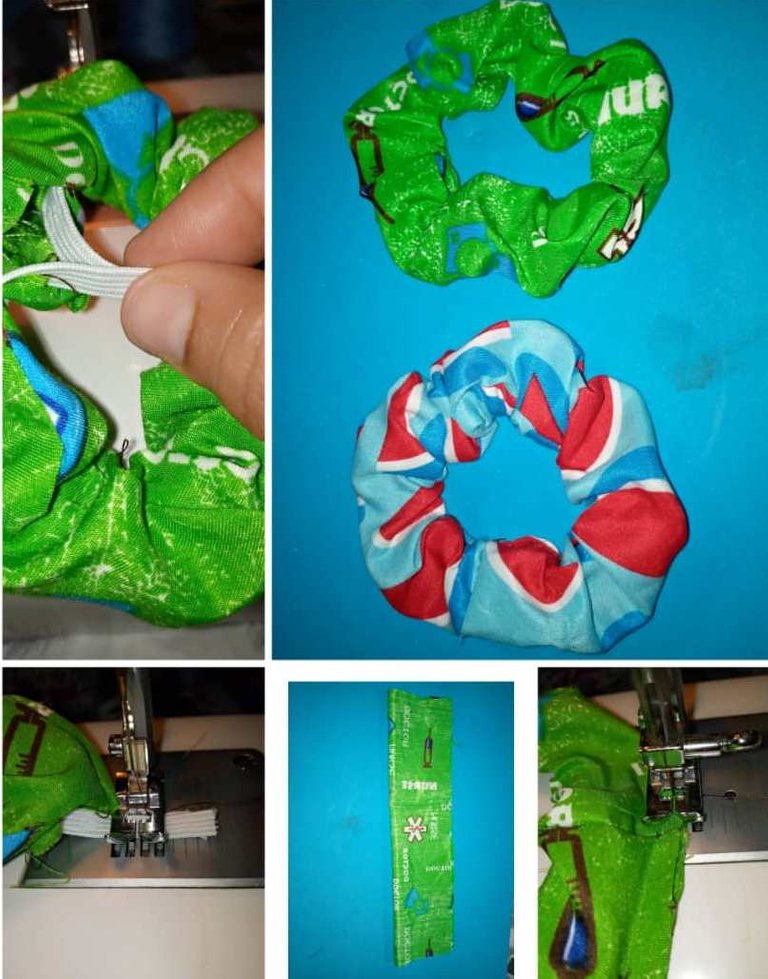
- Pegué punta con punta y cosa por todo el extremo, quedará en todo el medio un huevo para introducir el elástico.
- Pica el elástico con una tijera , debe medir 10 centímetros
- Como son dos colitas debes picar dos elásticos.
- Con un gancho de pelo introduje la elástica dentro de la colita, luego cosí con la máquina las puntas del elástico, también se puede amarrar las puntas y queda bien.
- Coser a mano la parte en donde se insertó el elástico con una aguja, aquí podemos observar las colitas sencillas.
- Sew by hand the part where the elastic was inserted with a needle, here we can see the simple tails.
- Para realizar las orejita de las colitas , dibuja con un lapicero o un marcador sobre el pedazo de tela ya cortado anteriormente de (30 x 15 cm).
- Dobla la tela por la mitad a lo largo.
- Ahora dóblalo hacia lo ancho, dibuje la forma de una orejas con un lapicero, puede guiarse por la imagen.
- To make the ears of the tails, draw with a pencil or a marker on the piece of fabric already cut out (30 x 15 cm).
- Fold the fabric in half lengthwise.
- Now fold it to the width, draw the shape of an ear with a pencil, you can be guided by the image.
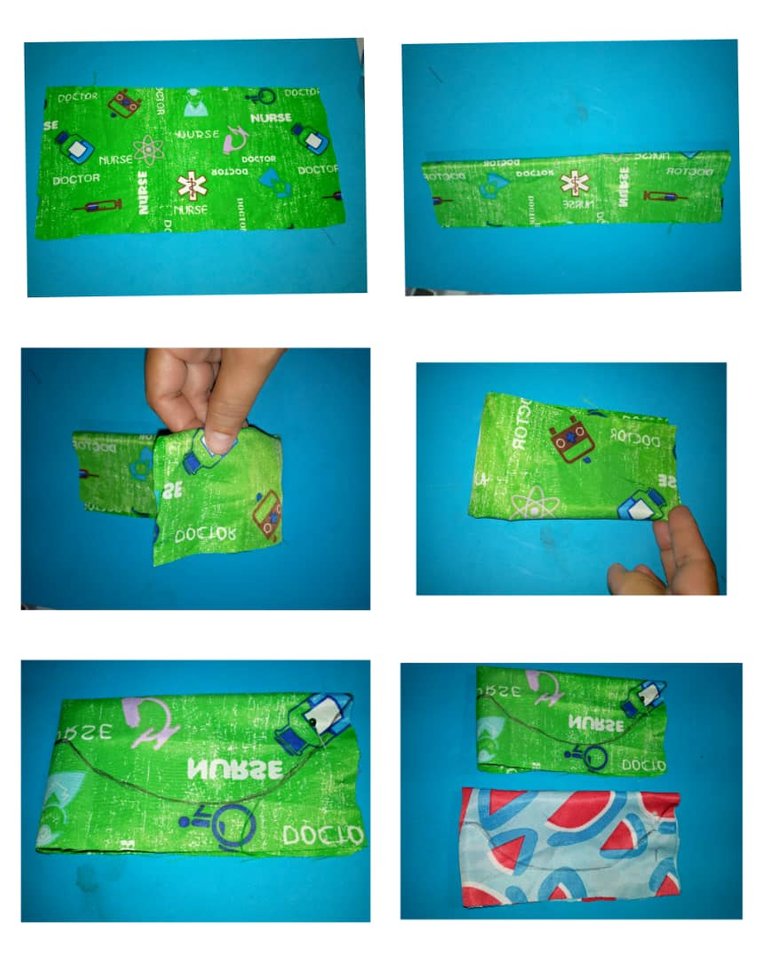
Corta la tela a lo largo de la marca con unas tijeras, dobla y cose a lo largo del borde, dejando un margen de costura de un centímetro.
Voltee la tela hacia el derecho y planche con cuidado.
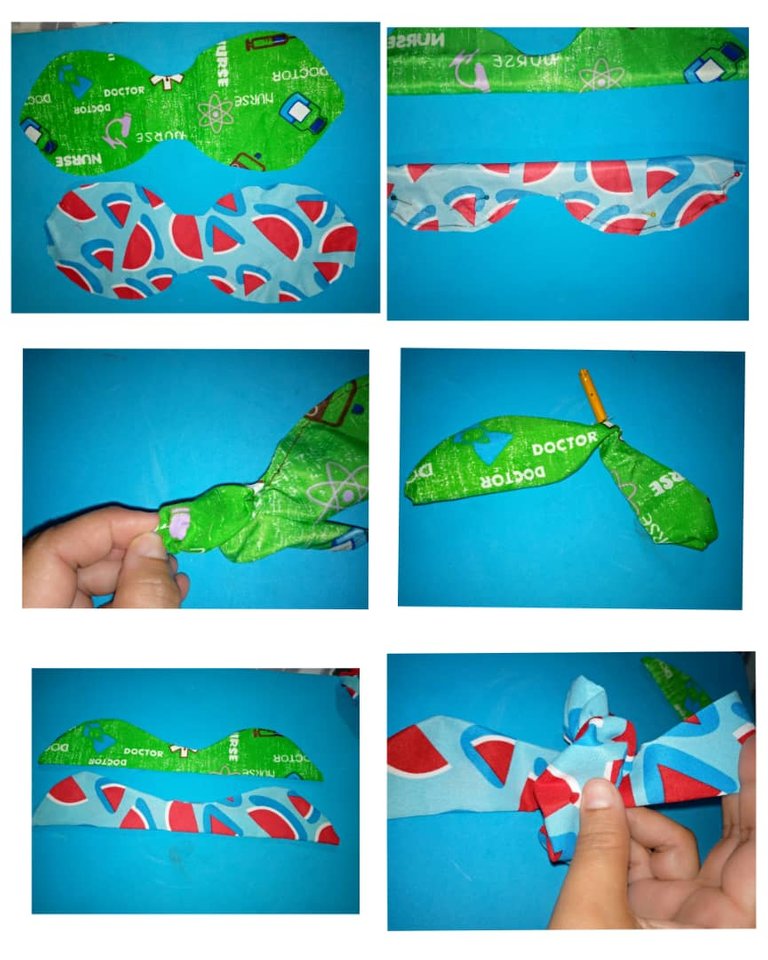
Pegas las orejas de la colita con un nudo y ya esta lista la hermosa colita.
- Cut the fabric along the mark with scissors, fold and sew along the edge, leaving a centimeter seam allowance.
- Turn the fabric right side out and iron carefully.
- Glue the ears of the tail with a knot and the beautiful tail is ready.
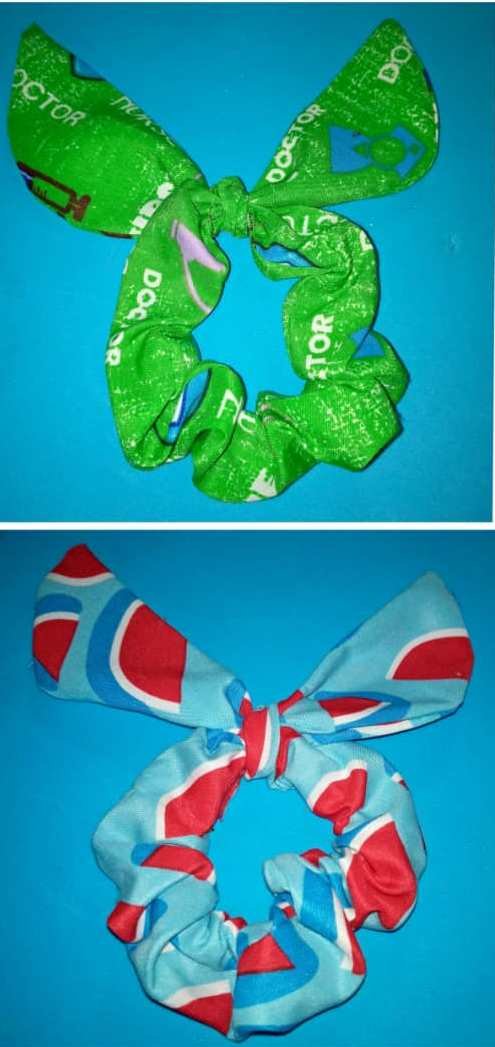
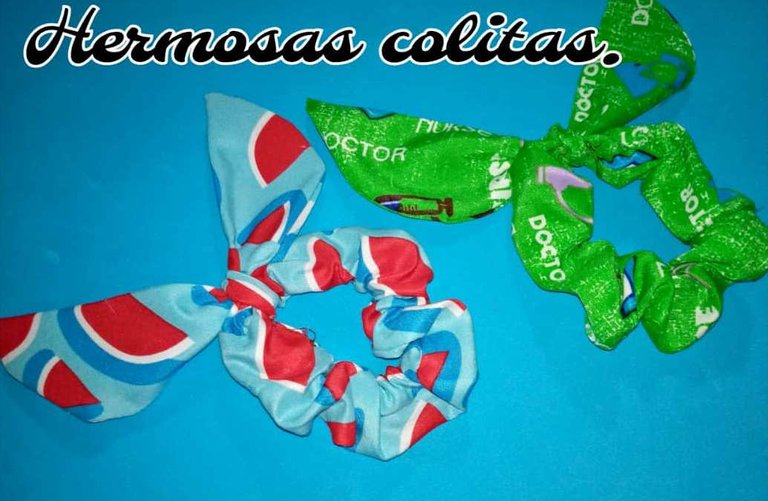
Aquí el resultado final de las lindas colitas de cabello.
Here is the final result of the beautiful ponytails.

Muchas bendiciones.
Many blessings.
   Las fotos son mías tomadas con teléfono Infinix, editadas con incollage y bitmoji, traducida con DEEPL.

     The photos are mine taken with Infinix phone, edited with incollage and bitmoji, translated with DEEPL.
Me encantan estas coletas para el pelo!! son super femeninas y puestas quedan muy lindas 😍 gracias por compartir este tutorial!!
Si amiga @imena quedan muy linda en el cabello.
Me gusta el estilo de estos moños, el estampado de la tela es muy bonito, me gusta usar esos colores porque hacen resaltar el peinado. Buen trabajo, quedaron muy bonitas.
Gracias @bleuclair , me agrada que te guste. Saludos.
Congratulations @josdelmi! You have completed the following achievement on the Hive blockchain and have been rewarded with new badge(s):
Your next target is to reach 5000 upvotes.
You can view your badges on your board and compare yourself to others in the Ranking
If you no longer want to receive notifications, reply to this comment with the word
STOPTo support your work, I also upvoted your post!
Check out the last post from @hivebuzz:
Support the HiveBuzz project. Vote for our proposal!