(Esp/Eng) Tutorial: Cómo renovar tus pendientes viejos / Tutorial: How to renew your old earrings
INGLÉS
¡Bienvenidos a mi blog, queridos amigos de esta hermosa comunidad #jewelry, deseo estén todos bien!

Feliz tarde del día lunes por la tarde casi noche, hoy les traigo una propuesta, aquellos pendientes que tenemos desde hace mucho tiempo, están viejos y estamos cansado de usarlo, te tengo la solución , se pueden renovar, cambiar de color y quedan como nuevos.
En la tarde de hoy quiero mostrar a través de un tutorial,como renovar unos aretes con hilo cola de ratón delgado, perlas chatas , brillantes, canutillos y mostacillas.
Estos pendientes lo realicé para mi, ya que me gusta este estilo, son cómodos al poner, no pesan y combinan con todo.
Así que sin mas nada que decir , a la realización de los hermosos pendientes.

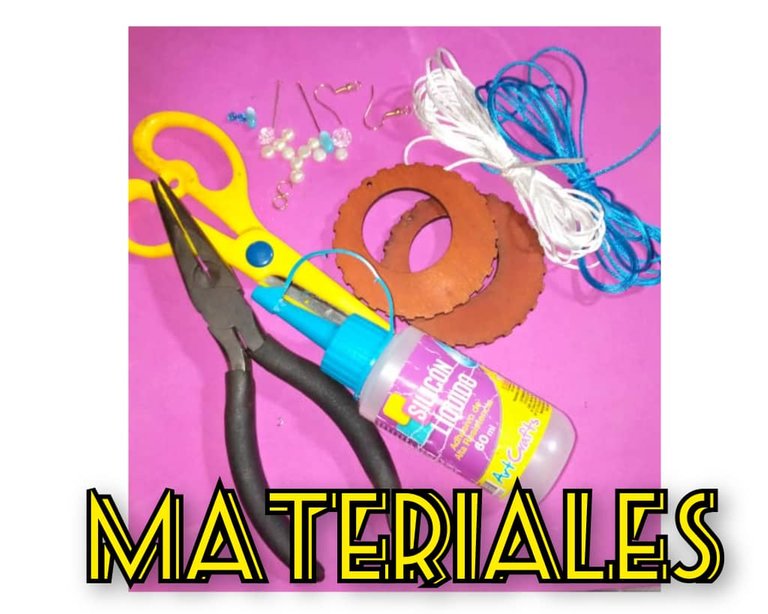
Para renovar los pendientes, utilizamos los siguientes materiales:
- 1 metro de hilo cola de ratón delgado, color blanco.
- 1 metro de hilo cola de ratón delgado, color azul.
- 1 pinza.
- Silicona líquida.
- Tijeras.
- 2 anzuelo de color dorado.
- 2 aros color dorado.
- 10 perlas blancas chatas.
- 2 palitos. color dorado.
- 2 mostacillas y dos canutillos.
- 2 brillantes transparentes en forma de rombo.
- 2 argollas de madera.
- 1 yesquero.
Paso a paso para la renovación de los aretes:
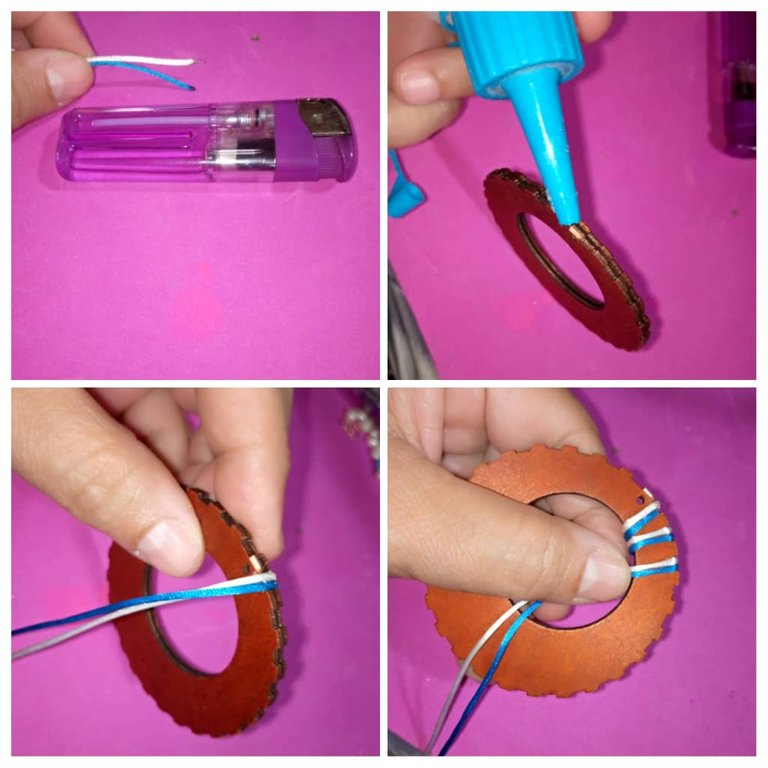
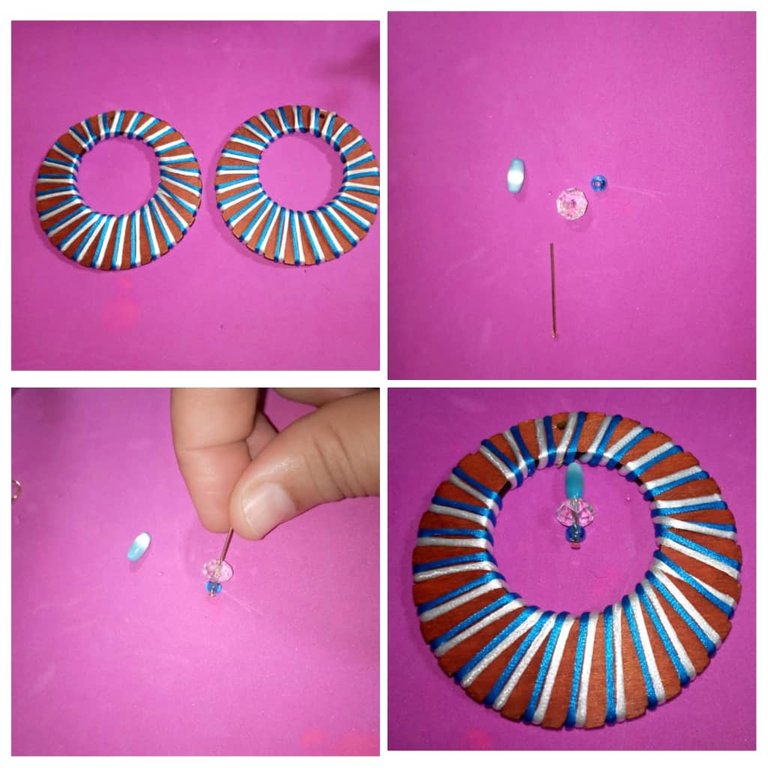
- Para la realización , comenzamos recortando el metro de hilo cola de ratón delgado color : blanco y color negro.
- Luego tomamos las puntas de los dos hilos y quemamos con el yesquero.
- Ahora agarramos la argolla de madera por un lado , echamos silicona líquida y comenzamos a colocar el hilo desde allí.
- Vamos dando vueltas y colocando los hilos de una misma manera, primero el blanco luego el azul.
- Forramos toda la argolla de madera con los hilos, al final agregamos silicona líquida en los hilos y pegamos, si sobra el hilo lo recortamos.
- Podemos ver lo vistoso que va quedando la argolla de madera.
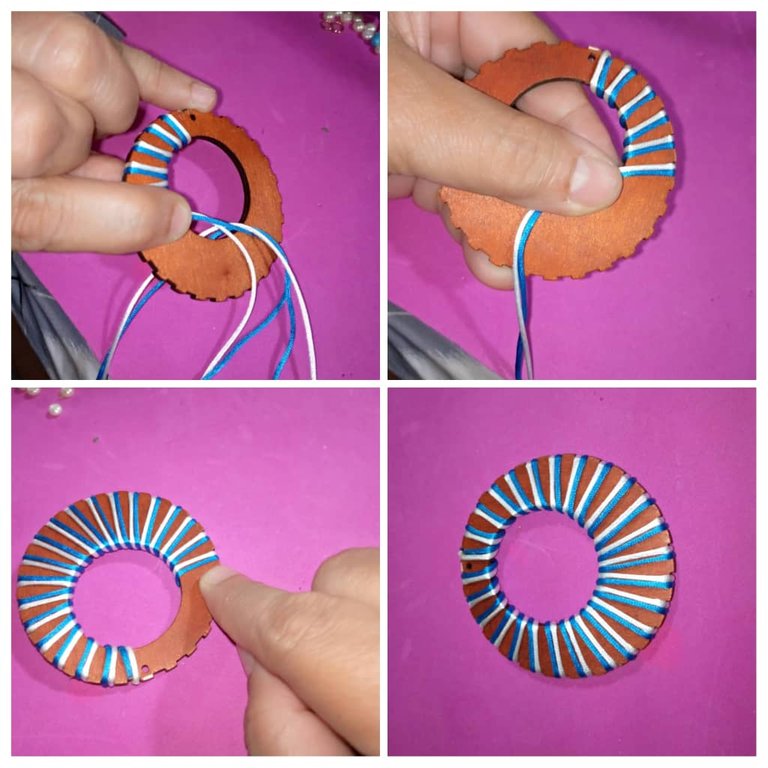
- Después que hayamos colocado todo el hilo en la primera argolla de madera, continuamos forrando la otra argolla de la misma manera que la primera, pegando las puntas con silicona líquida,colocando el hilo blanco primero luego el azul y al final , es decir en donde comenzamos allí terminamos, le echamos silicona líquida.
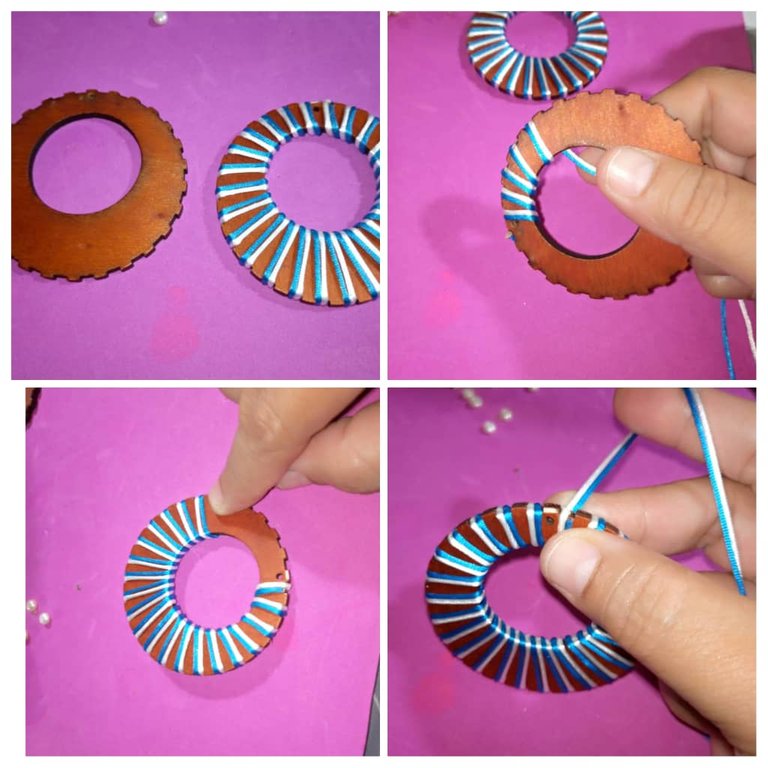
- Podemos observar las dos argollas de maderas ya lista, forradas con el hilo.
- Ahora procedemos a colocar los accesorios, los brillantes, los canutillos y mostacillas.
- Metemos dentro del palito color dorado , la mostacilla, el brillante en forma de rombo y el canutillo, con la pinza doblamos para que no se salgan.
- Luego la punta del palito doblada la introducimos dentro de los hilos y con la pinza doblamos para que no se salga.
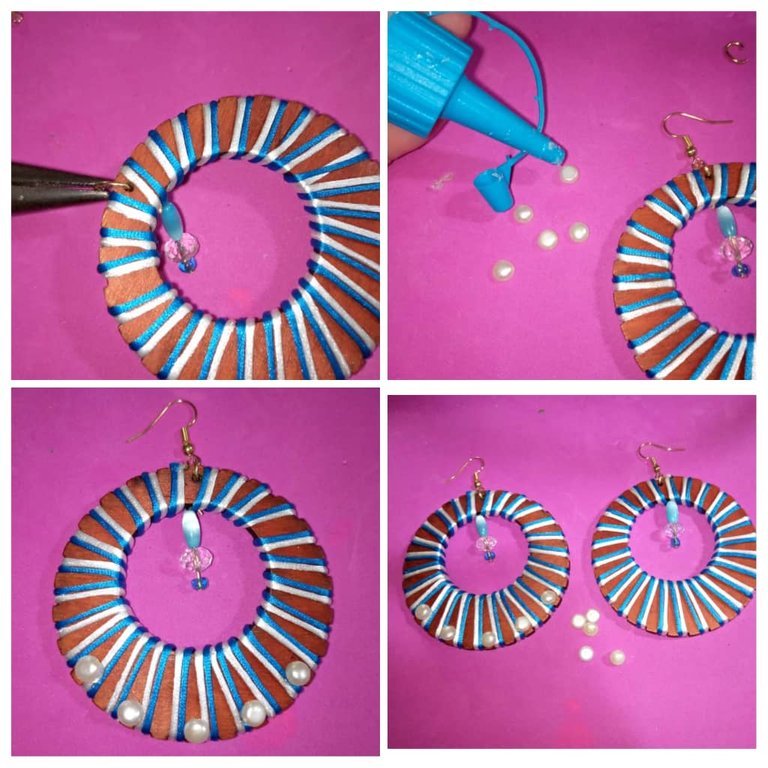
- Luego para el otro aretes hacemos lo mismo, introducimos dentro del palito dorado , la mostacilla, el brillante y el canutillo, doblamos y con la pinza colocamos dentro del hilo en la parte superior.
- Pueden guiarse con la imagen.
- Así mismo colocamos el aro dentro del hueco que tiene la argolla de madera , abrimos con la pinza , metemos el anzuelo y cerramos con la pinza.
- Para culminar con la renovación de los aretes, procedemos a pegar las perlas chatas blanca con silicona líquida.
- Pegar 5 perlas a cada arete en la parte de abajo.
Aquí el resultado final de los hermosos pendientes renovados
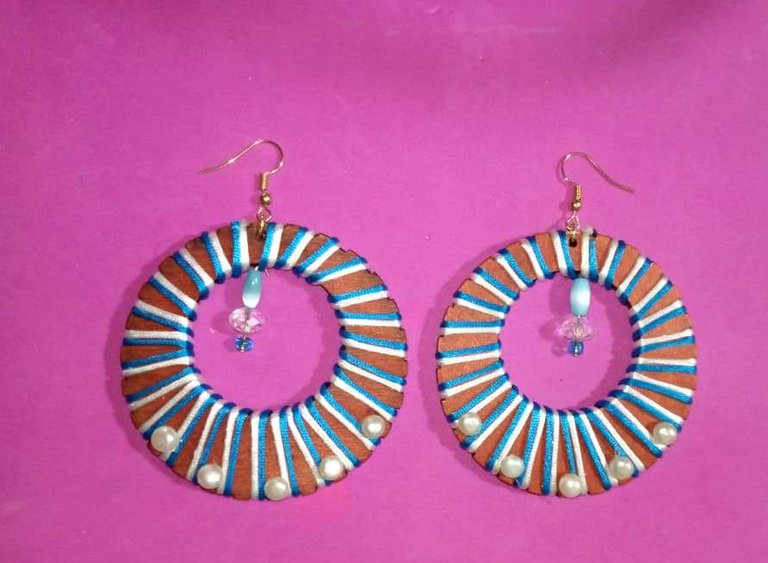
Miren lo lindo que se ven , son cómodos al poner y no pesan.

Espero que sea de su agrado, gracias por leer mi post, hasta la próxima, mucha bendiciones.

Las fotos son mías tomadas con teléfono Infinix, editados con incollage y traducido con DEEPL.
ESPAÑOL
Welcome to my blog, dear friends of this beautiful #jewelry community, I wish you all well!
Happy afternoon Monday afternoon almost night, today I bring you a proposal, those earrings that we have for a long time, are old and we are tired of using it, I have the solution, you can renew, change color and are like new.
This afternoon I want to show through a tutorial, how to renew some earrings with thin mouse tail thread, flat pearls, rhinestones, beads and beads.
I made these earrings for myself, because I like this style, they are comfortable to wear, do not weigh and go with everything.
So with nothing more to say, to the realization of the beautiful earrings.
To renew the earrings, we use the following materials:
- 1 meter of thin mouse tail thread, white color.
- 1 meter of thin mouse tail thread, blue color.
- 1 clip.
- Liquid silicone.
- Scissors.
- 2 gold-colored hooks.
- 2 gold-colored rings.
- 10 flat white pearls.
- 2 sticks. golden color.
- 2 beads and two beads.
- 2 transparent rhombus-shaped rhinestones.
- 2 wooden rings.
- 1 tinder.
Step by step for the renovation of the earrings:
- For the realization , we start by cutting the meter of thin mouse tail thread color : white and black color.
- Then we take the ends of the two threads and burn them with the tinder.
- Now we grab the wooden ring on one side, pour liquid silicone and start placing the thread from there.
- We go around and place the threads in the same way, first the white one then the blue one.
- We cover the whole wooden ring with the threads, at the end we add liquid silicone on the threads and glue, if the thread is left over we cut it.
- We can see how showy the wooden ring is getting.
After we have placed all the thread in the first wooden ring, we continue lining the other ring in the same way as the first, gluing the ends with liquid silicone, placing the white thread first then the blue and at the end, that is where we started there we end, we pour liquid silicone.
After we have placed all the thread in the first wooden ring, we continue lining the other ring in the same way as the first one, gluing the ends with liquid silicone, placing the white thread first, then the blue one and at the end, that is to say, where we started we finish there, we put liquid silicone.
- We can observe the two wooden rings already ready, lined with the thread.
- Now we proceed to place the accessories, rhinestones, beads and beads.
- We put inside the gold colored stick, the beads, the rhombus-shaped rhinestones and the beads, with the tweezers we bend them so that they do not come out.
- Then the tip of the bent stick we introduce it inside the threads and with the tweezers we bend it so that it does not come out.
- Then for the other earrings we do the same thing, we introduce inside the golden stick, the beads, the glitter and the bead, we fold and with the tweezers we place inside the thread at the top.
- You can be guided by the image.
- In the same way, we place the ring inside the hole of the wooden ring, open it with the tweezers, put the hook and close it with the tweezers.
- To finish with the renovation of the earrings, we proceed to glue the flat white pearls with liquid silicone.
- Glue 5 pearls to each earring at the bottom.
Here the final result of the beautiful renovated earrings.
Look how cute they look, they are comfortable to wear and not heavy.
I hope it is to your liking, thanks for reading my post, until next time, lots of blessings.
The photos are mine taken with Infinix phone, edited with incollage and translated with DEEPL.
Que idea tan creativa, me encantó, te quedaron preciosos. Gracias por compartir.