(Esp/Eng) Tutorial: Hermosa pulsera de mariposa 🦋🦋 / Tutorial: Beautiful Butterfly Bracelet 🦋🦋
INGLÉS
Hola mis queridos amigos de esta linda comunidad #jewelry, deseo que todos estén bien, junto a toda su familia en la comodidad de su hogar, para mañana salir bien temprano a trabajar o trabajar en casa con #hive.
Dios les bendiga.
Me gusta lo que dice esta comunidad en la descripción: somos una comunidad comprometida en compartir conocimientos y experiencias en todo lo relacionado con el arte de la joyería.
Crear es mi pasión, me divierte, desestresa, me hace olvidar de la situación económica y de todo. Aunque quisiera participar en todas las comunidades que ofrece esta plataforma, pero son muchas.
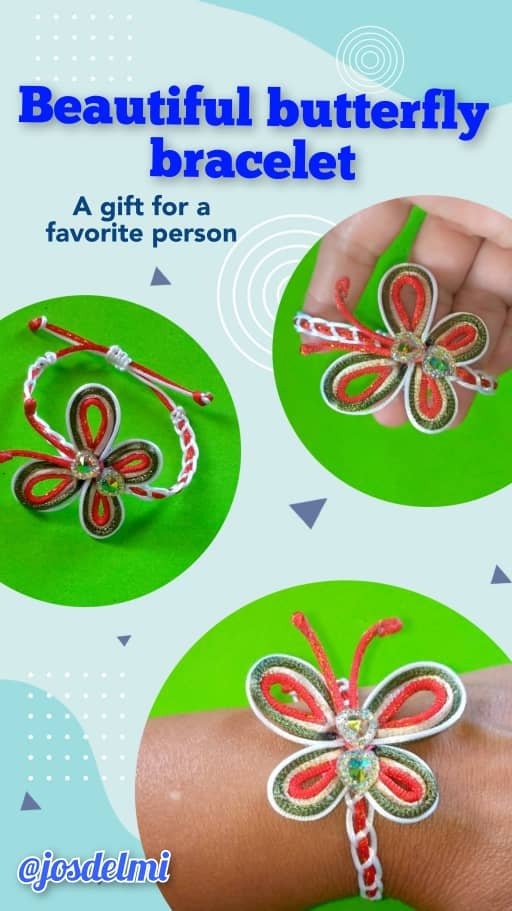
Hoy quiero mostrar a través de un tutorial como realizar una hermosa pulsera de mariposa🦋🦋🦋🦋 , hecha con hilo cola de ratón, especial para regalar al ser querido o a una amiga.
Es fácil de hacer y de bajo costo, la pueden realizar del color de su preferencia.
ENGLISH
Hello my dear friends of this beautiful #jewelry community, I wish you all to be well, together with all your family in the comfort of your home, to leave tomorrow very early to work or work at home with #hive. God bless you.
I like what this community says in the description: we are a community committed to sharing knowledge and experiences in everything related to the art of jewelry,
Creating is my passion, it's fun, it de-stresses me, it makes me forget about the economic situation and everything. Although I would like to participate in all the communities that this platform offers, but there are many.
Today I want to show through a tutorial how to make a beautiful butterfly bracelet 🦋🦋🦋🦋 , made with mouse tail yarn, especially to give to a loved one or a friend.
It is easy to make and low cost, you can make it in the color of your choice.
Hermosa pulsera de mariposa 🦋🦋🦋
Beautiful butterfly bracelet 🦋🦋🦋
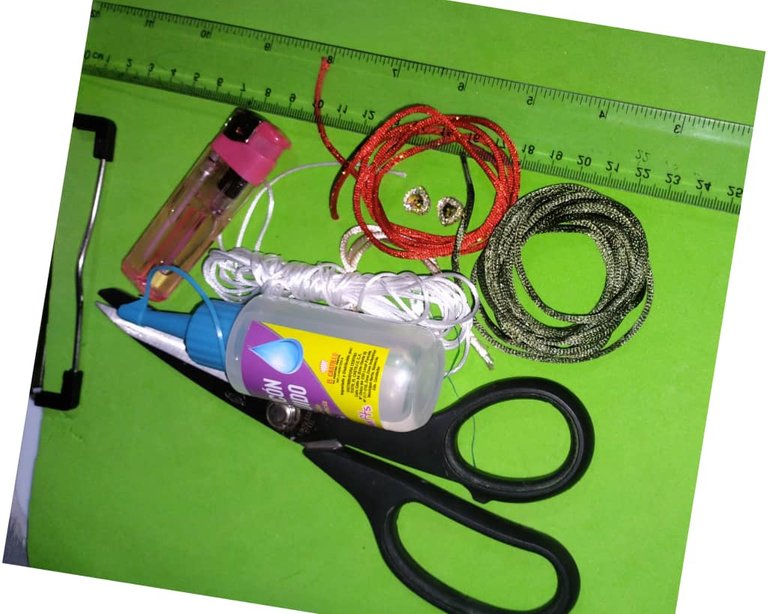
Materiales que se necesita para realizar la hermosa pulsera de mariposa:
🦋 2 metros de hilo cola de ratón blanco.
🦋 Pedazos de hilo cola de ratón de diferentes colores: rojo, verde y beige
🦋 Tijera.
🦋 Yesquero.
🦋 Regla.
🦋 Silicona líquida.
🦋 2 adornos brillantes en forma de corazón para formar el cuerpo de la mariposa.
🦋 Carpeta con gancho.
🦋Pedazo de cartulina.
Materials needed to make the beautiful butterfly bracelet:
🦋 2 meters of white mouse tail yarn.
🦋 Pieces of mouse tail yarn in different colors: red, green and beige.
🦋 Scissors.
🦋 Tinder.
🦋 Ruler.
🦋 Liquid silicone.
🦋 2 shiny heart-shaped ornaments to form the body of the butterfly.
🦋 Folder with hook.
🦋Pedazo de cartulina.
Paso a paso para la realización de la pulsera de mariposa:
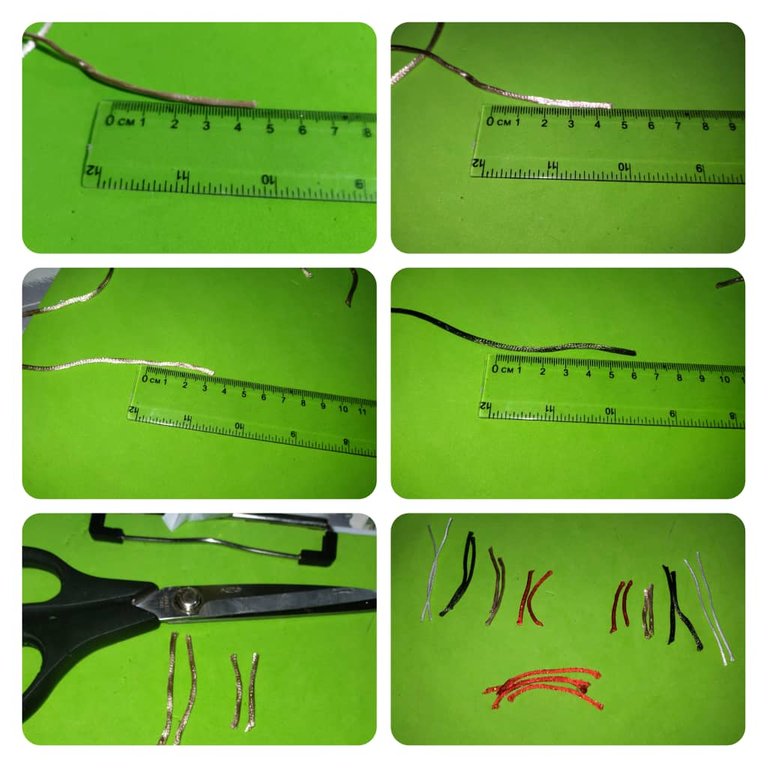
🦋Medir con la regla cada uno de los pedazos de hilo cola de ratón que vamos a realizar la mariposa.
🦋Medir 2 pedazos de hilo cola de ratón color rojo de 3 centímetros y dos pedazos de 2 centímetros , recorta con la tijera.
🦋Medir 2 pedazos de hilo cola de ratón , color beige de 4 centímetros y dos más de 3 centímetros , recortar.
🦋Medir 2 pedazos de hilo cola de ratón , color verde de 5 centímetros , dos más de 4 centímetros y recortar con la tijera.
🦋Medir 2 pedazos de hilo cola de ratón color blanco de 6 centímetros, dos más de 5 centímetros y recortar con las tijeras.
🦋Ademas recortar dos pedazos rojos de 6 centímetros cada uno
Step by step for the realization of the butterfly bracelet:
🦋Measure with the ruler each of the pieces of mouse tail yarn that we are going to make the butterfly.
🦋Measure 2 pieces of red mouse tail yarn of 3 centimeters and two pieces of 2 centimeters , cut with the scissors.
🦋Measure 2 pieces of mouse tail yarn , beige color of 4 centimeters and two more of 3 centimeters , trim.
🦋Measure 2 pieces of mouse tail yarn , green color of 5 centimeters , two more of 4 centimeters and cut out with the scissors.
🦋 Measure 2 pieces of mouse tail yarn , white color 6 centimeters, two more of 5 centimeters and cut out with the scissors.
🦋And cut out two red pieces of 6 cm each.
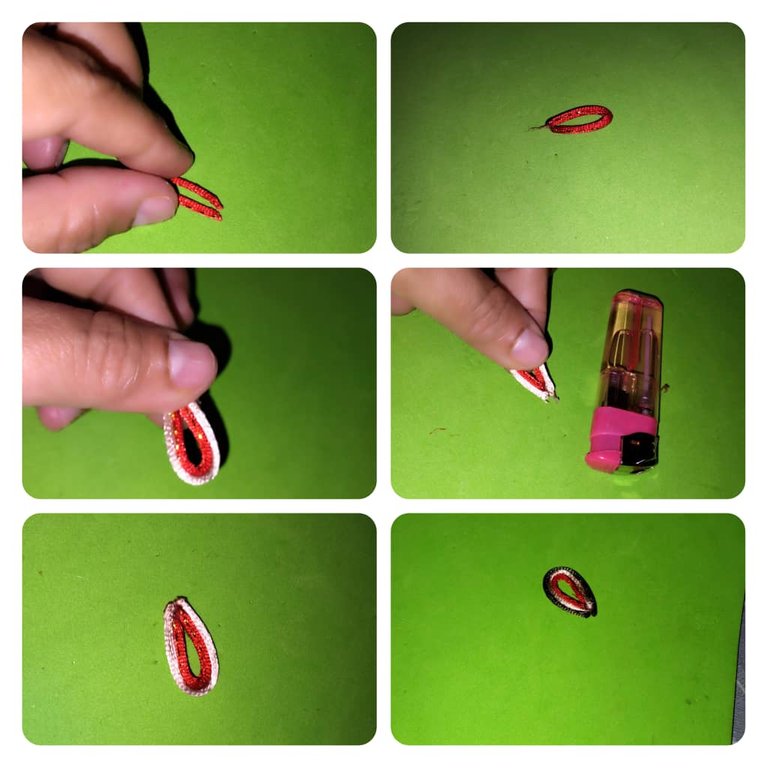
🦋Después que tengamos todos lo pedazos recortados , procedemos a formar la mariposa, comenzamos realizando las alas, pegar cada pedazo formando un pétalo,pegar con el yesquero y un poco de silicona, primero sería la roja, sobre de esa el pedazo beige, la verde y por última el pedazo blanco, queda similar a un pétalo de flor. Así mismo hacer el pétalos más pequeño, por todo debemos hacer 4 pétalos, dos grandes y dos pequeños.
🦋After we have all the pieces cut out, we proceed to form the butterfly, we start making the wings, glue each piece forming a petal, glue with the tinder and a little silicone, first would be the red, on top of that the beige piece, the green and finally the white piece, it is similar to a flower petal. In the same way make the smallest petal, we should make 4 petals, two big and two small.
🦋Ya aquí tenemos los cuatros pétalos listos para formar las alas de la mariposa, ahora vamos a realizar las antenas, con el yesquero quemamos las puntas , hacemos una bolita.
🦋Here we have the four petals ready to form the wings of the butterfly, now we are going to make the antennae, with the tinder we burn the tips, we make a little ball.
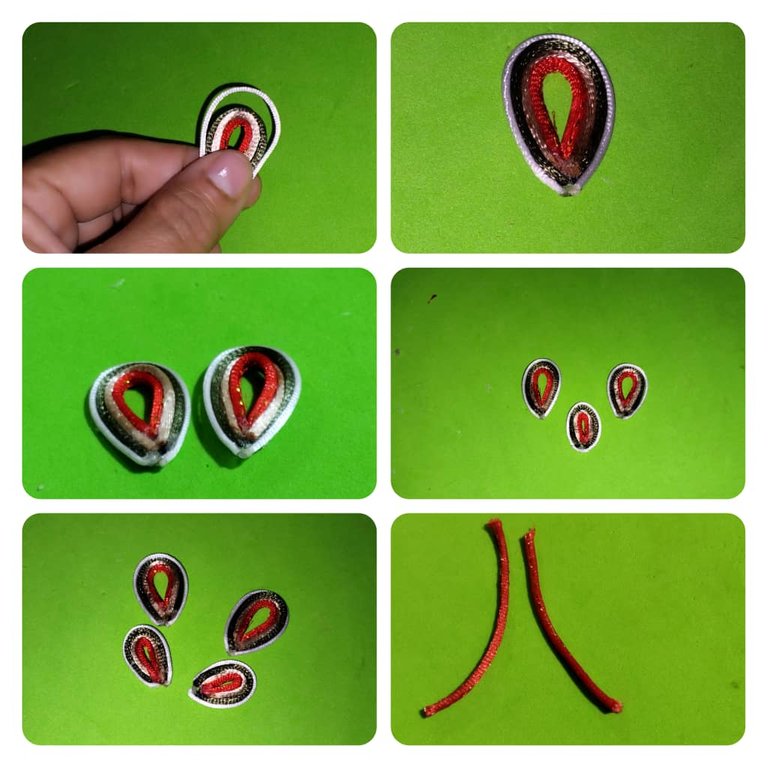
🦋Tenemos todas las piezas lista para formar la mariposa.
🦋We have all the pieces ready to form the butterfly.

🦋Tomamos el pedazo de cartulina lo recortamos de forma redondo , echamos silicona líquida, pegamos el pétalo grande y del otro lado el otro, luego en la parte de abajo el pétalo pequeño
🦋We take a piece of cardboard, cut it into a round shape, apply liquid silicone, glue the big petal and on the other side the other one, then the small petal on the bottom.
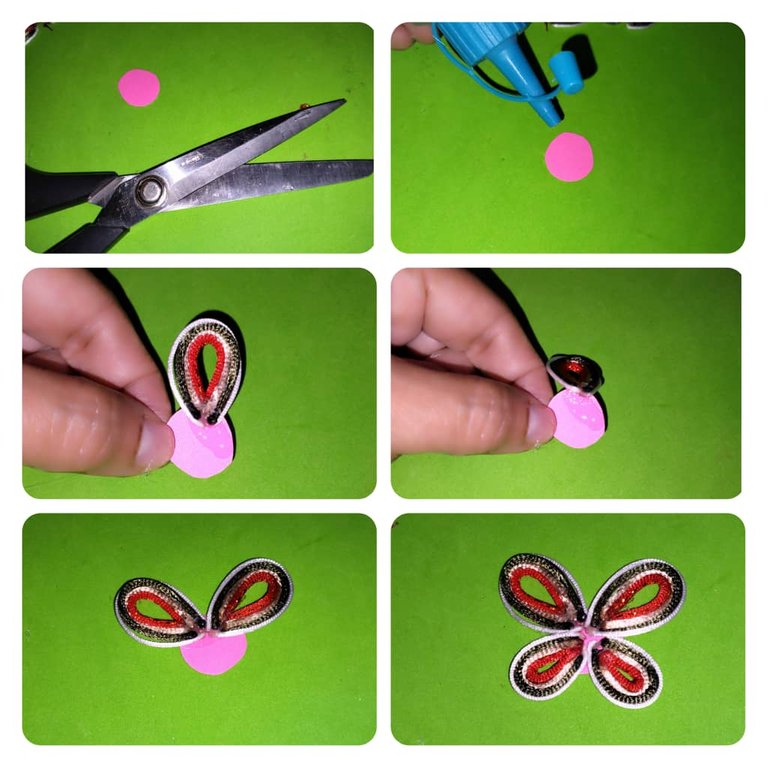
🦋Colocar las antenas y el cuerpo de la mariposa que lo forma los dos adornos brillantes en forma de corazón.
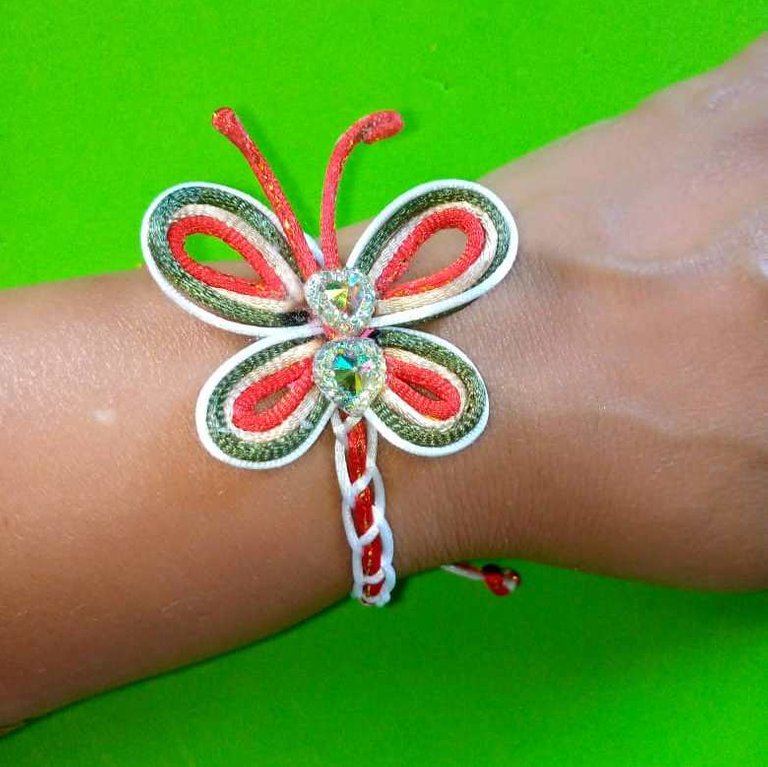
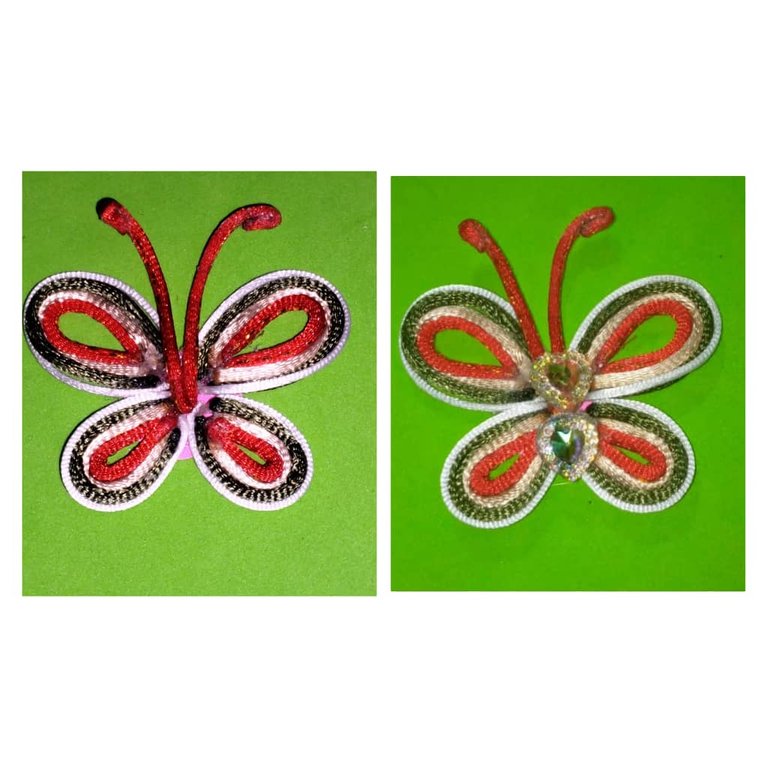
🦋Aquí ya tenemos lista la mariposa, miren lo hermosa que quedó.
🦋Place the antennae and the body of the butterfly which is formed by the two shiny heart-shaped ornaments.
🦋Here we have the butterfly ready, look how beautiful it turned out.
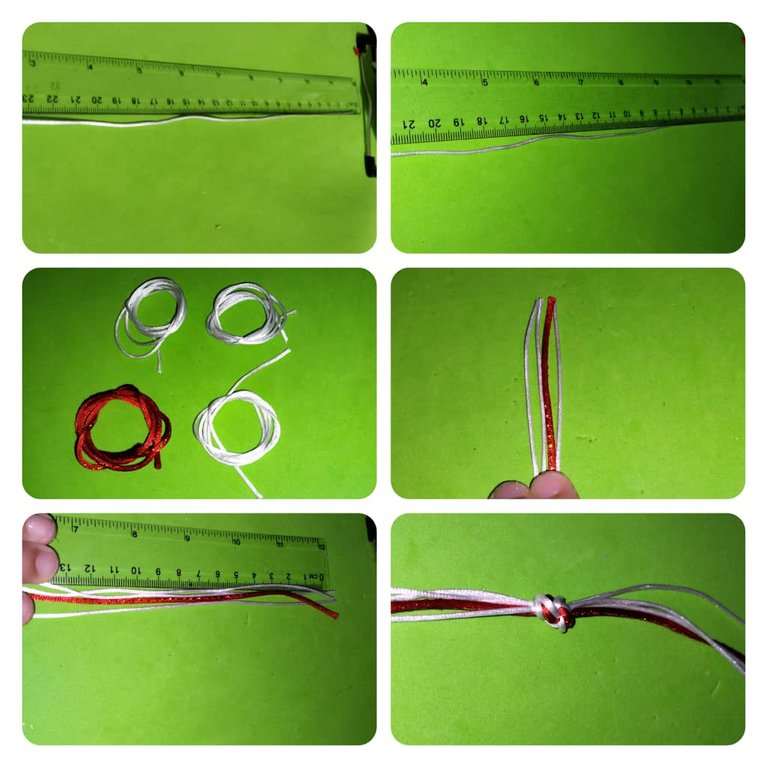
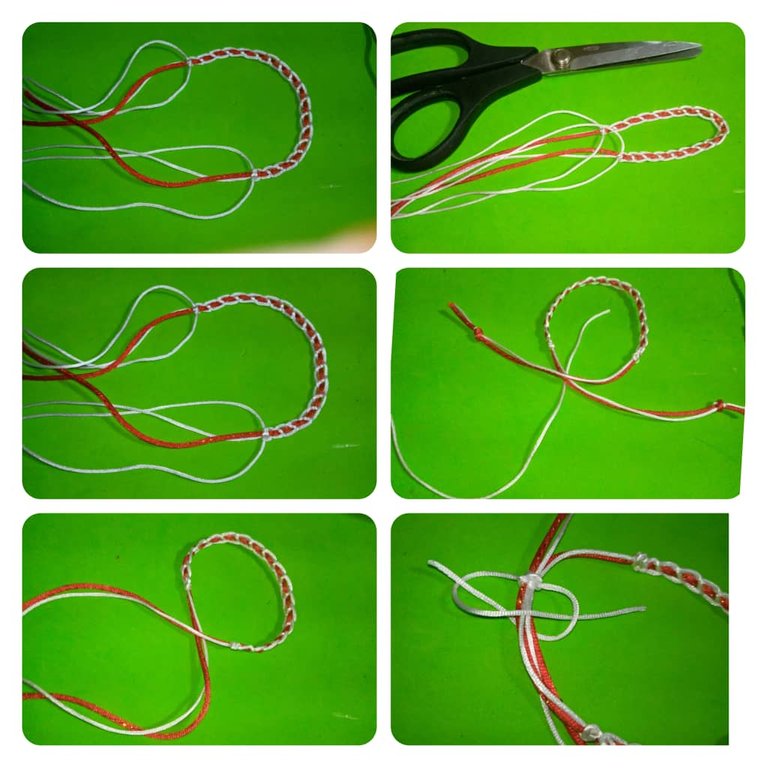
🦋Ahora realizamos la pulsera, necesitamos medir 3 pedazos de 40 centímetros de color blanco.
1 Pedazo de color rojo de 40 centímetros.
🦋Tomar las cuatro puntas de los hilos , hacer un nudo sencillo dejando de hilo 15 centímetros.
🦋Now we make the bracelet, we need to measure 3 pieces of 40 centimeters of white color.
1 piece of red color of 40 centimeters.
🦋Take the four ends of the threads, make a simple knot leaving 15 centimeters of thread.
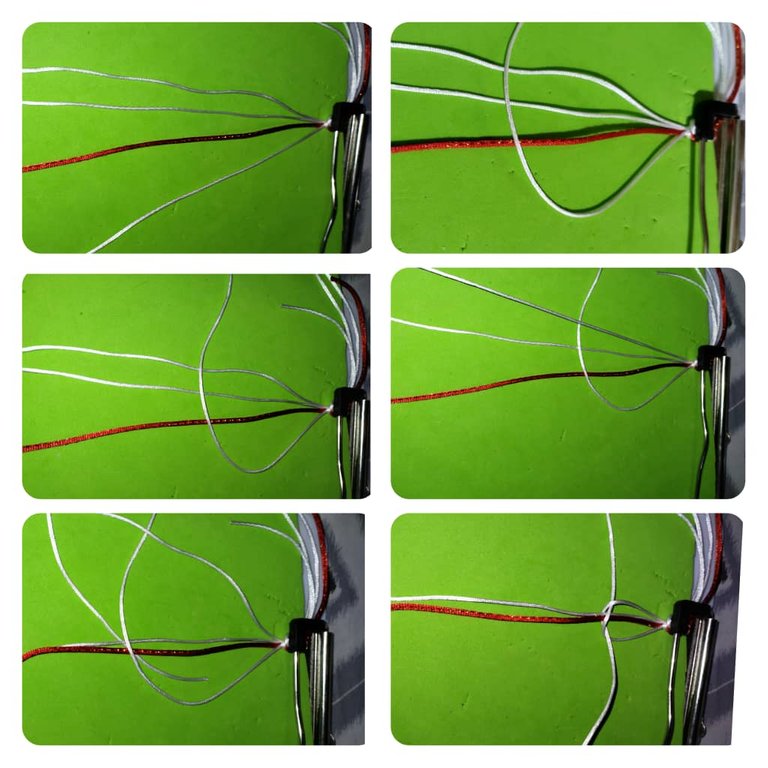
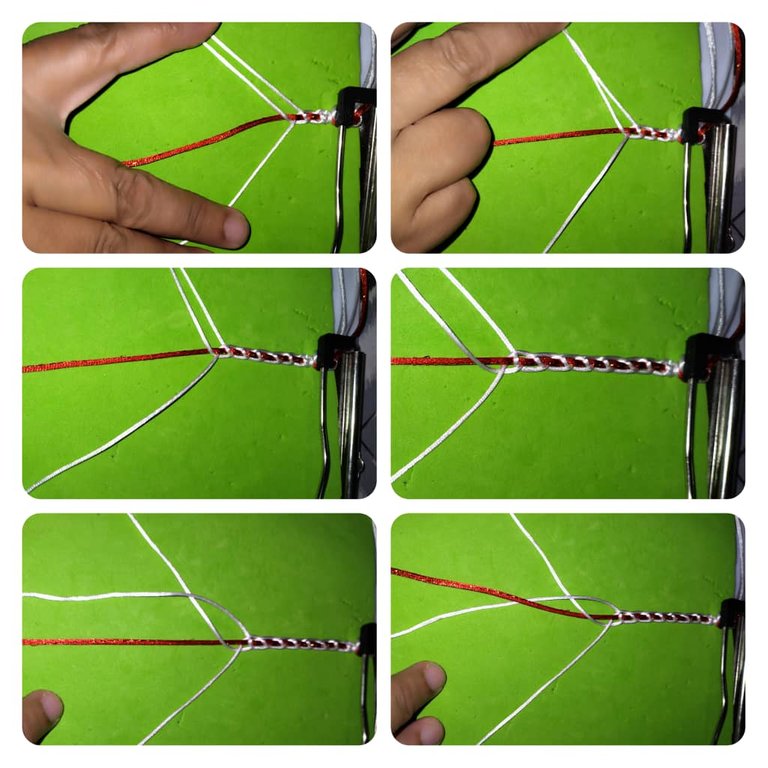
🦋Sujetar los hilos en la carpeta a partir del nudo que se hizo.
🦋Comenzar haciendo 2 nudos planos, colocar los dos pedazos blancos del lado izquierdo , en el medio el rojo y del lado derecho el otro blanco.
🦋Tomar el hilo de la derecha pasarlo por sobre el hilo central y de la izquierda, el hilo de la izquierda se pasa por sobre el hilo de la derecha y sale sobre el agujero que quedó, así van a realizar el nudo plano.Hacer dos nudos planos.
🦋Hold the threads in the folder starting from the knot that was made.
🦋Start by making 2 flat knots, place the two white pieces on the left side, in the middle the red one and on the right side the other white one.
🦋Take the thread on the right and pass it over the middle and left thread, the thread on the left is passed over the thread on the right and comes out on the remaining circle, this way you will make the flat knot.
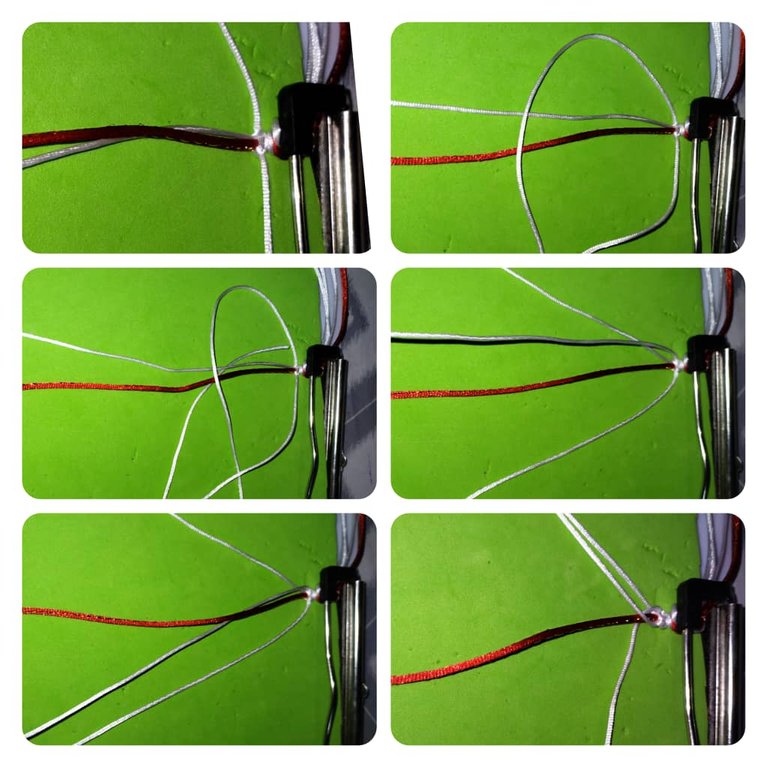
🦋Ahora realizamos el punto cordón, el hilo blanco pasa por delante del otro hilo blanco y a su vez pasa por debajo del color rojo.
🦋El hilo blanco de la derecha pasa por detrás del otro y ese asu vez pasa por encima del hilo rojo, volvemos a hacer lo mismo , el hilo blanco de la izquierda pasa por delante del hilo blanco y a su vez pasa por debajo del hilo rojo, luego el hilo blanco de la derecha pasa por debajo del otro hilo blanco y ese hilo pasa por sobre el hilo rojo y así se va hacer todo el punto cordón.
🦋Now we knit the cord stitch, the white yarn passes in front of the other white yarn and in turn passes under the red yarn.
🦋The white thread on the right goes behind the other one and that in turn goes over the red thread, we do the same thing again, the white thread on the left goes in front of the white thread and in turn goes under the red thread, then the white thread on the right goes under the other white thread and that thread goes over the red thread and so the whole cord stitch will be done.

🦋Después que tengamos el largo de la pulsera , terminamos con dos nudos planos. En las puntas hacemos nudos sencillo y quemamos el excedente el yesquero. Para colocar la tranca tomamos el hilo blanco de 20 centímetros y hacemos varios nudos planos.Recortamos el excedente y quemamos con el yesquero.
🦋After we have the length of the bracelet, we finish with two flat knots. At the ends we make simple knots and burn the excess with tinder. To place the lock we take the white thread of 20 centimeters and make several flat knots, cut the excess and burn it with the tinder.
🦋Ahora pegamos con silicona líquida la mariposa de la pulsera.
🦋 Now we glue with liquid silicone the butterfly of the bracelet.
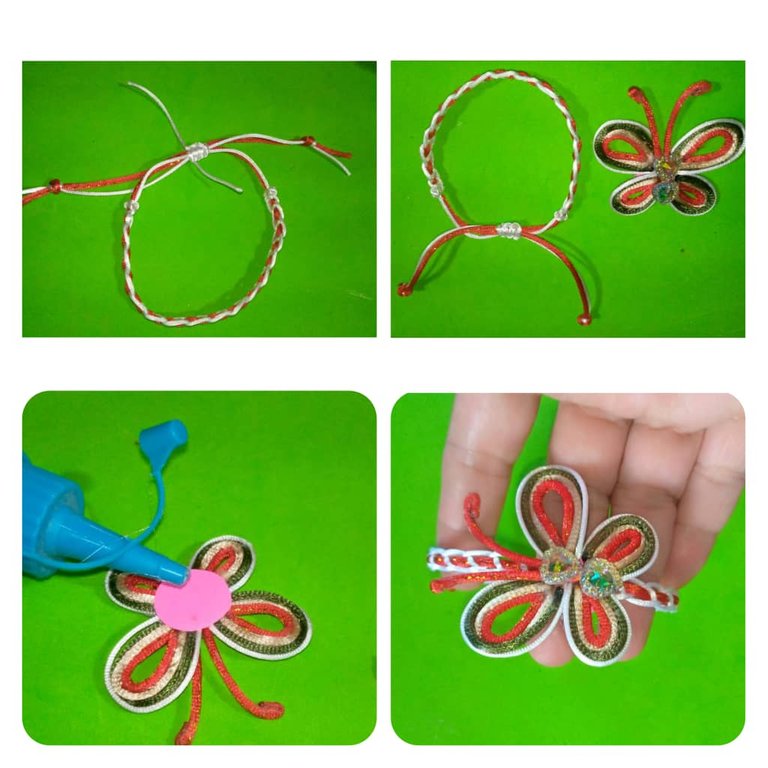
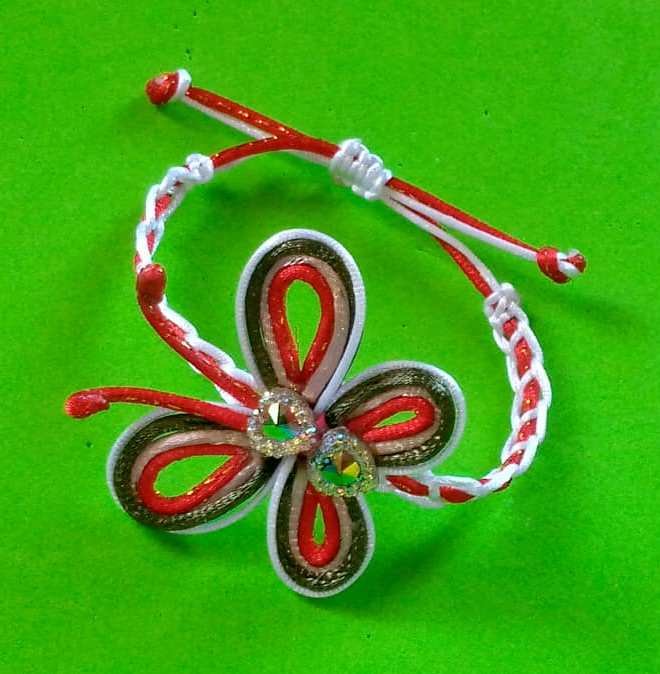
Aquí el resultado final de la pulsera de mariposa.
Here is the final result of the butterfly bracelet
Espero haya sido de su agrado.
I hope you enjoyed it.
Las fotos son mías tomadas con teléfono Infinix, editado con incollage y traducido con DEEPL.
The photos are mine taken with Infinix phone, edited with incollage and translated with DEEPL.
Preciosa pulsera, me encanta el toque de la mariposa. Gracias por compartir. Saludos.
Gracias a ti por leer mi post @emmaris
@josdelmi Hermosa 😍 y siendo de mariposa me encanta mucho más, gracias por compartir tu creación, Saludos 🤗
Me alegra que te guste @anamariag , saludos.
TE QUEDO MU BONITA. TAMBIÉN SE VERÍA LINDA EN UN CINTILLO. SALUDOS
Si, en un cintillo se verá muy linda @carolycesar15 , saludos.
Me encantan las cosas tan bonitas que se pueden hacer con hilo cola de ratón, te quedo preciosa la mariposa, saludos 🤗
Preciosa esta pulsera me gusta mucho la verdad