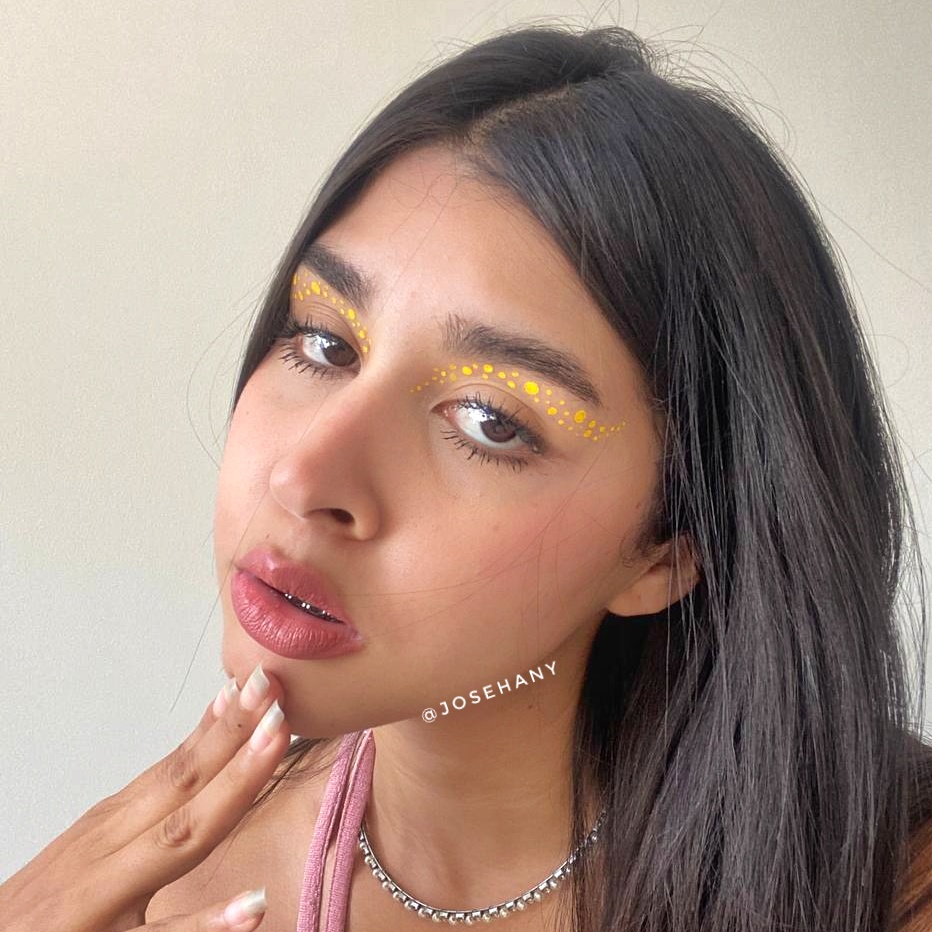
Yellow Dots #14 | 100 Eyeliners Ideas Series
Hello, today I want to add more to this series that I am doing and what I am sharing with you today is quite easy, just make dots but we will give it an orderly shape.
Hola, hoy quiero añadir más a esta serie que estoy haciendo y lo que les comparto hoy es bastante fácil, solo hacer puntitos pero le daremos una forma ordenada.
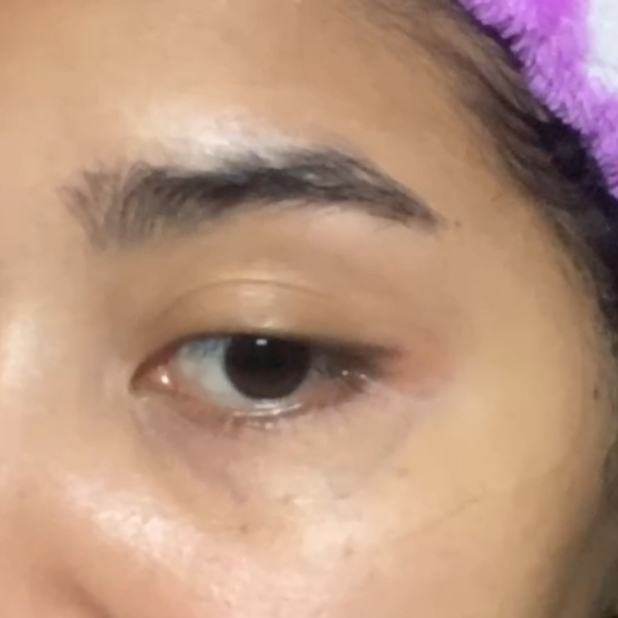
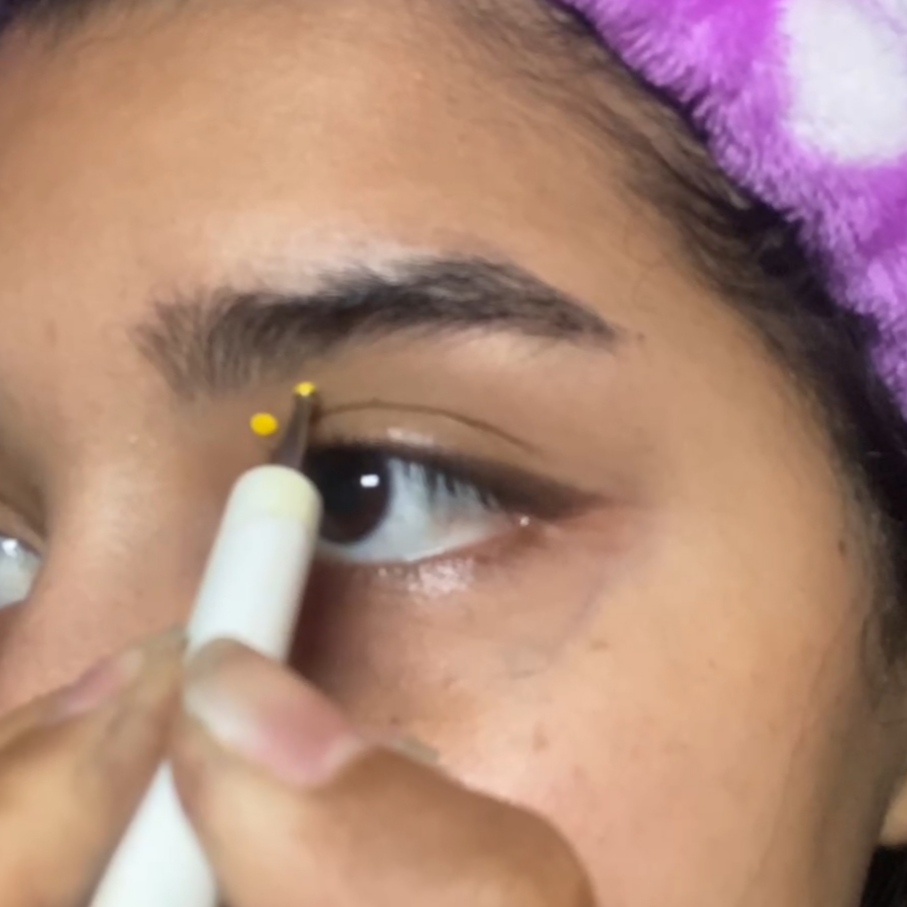
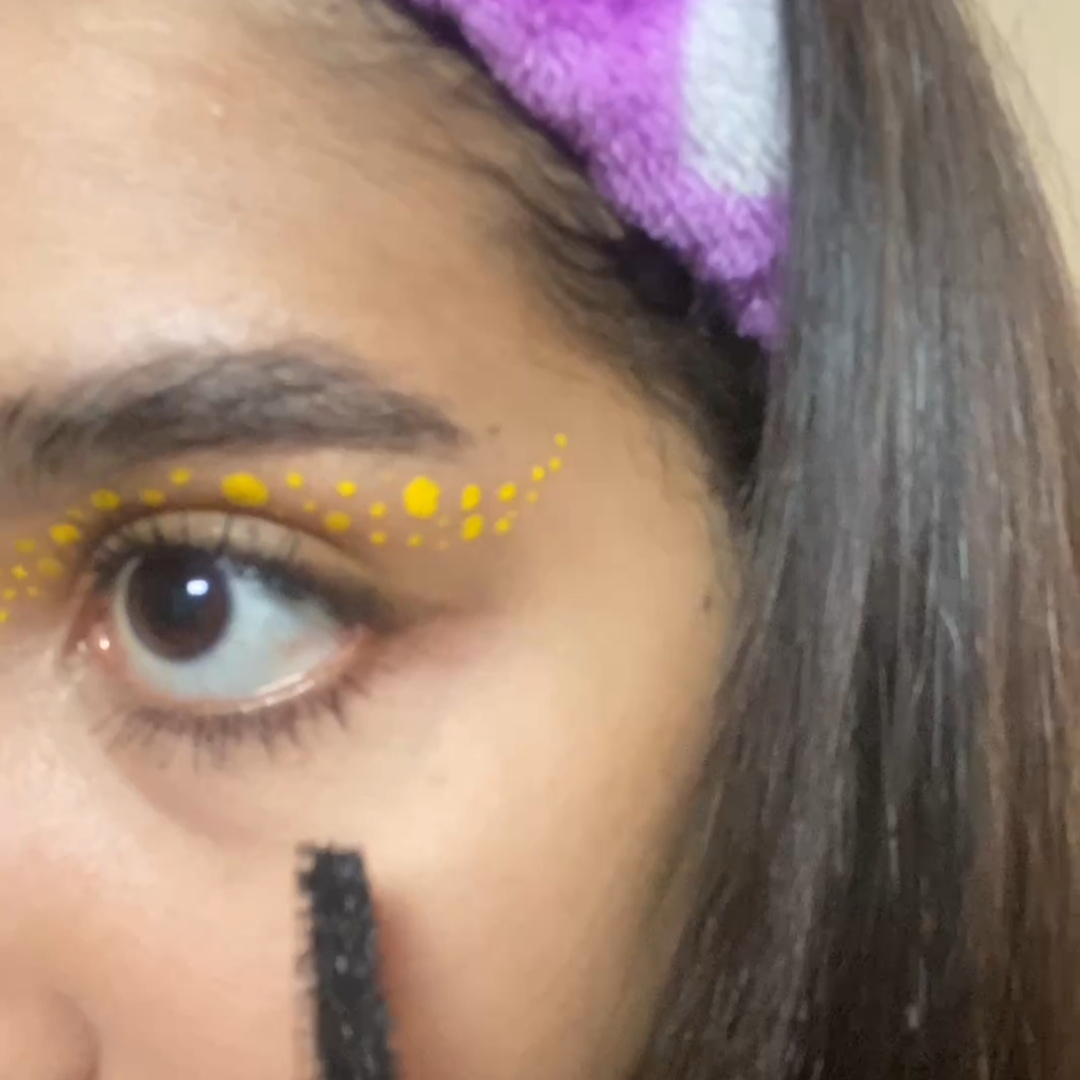
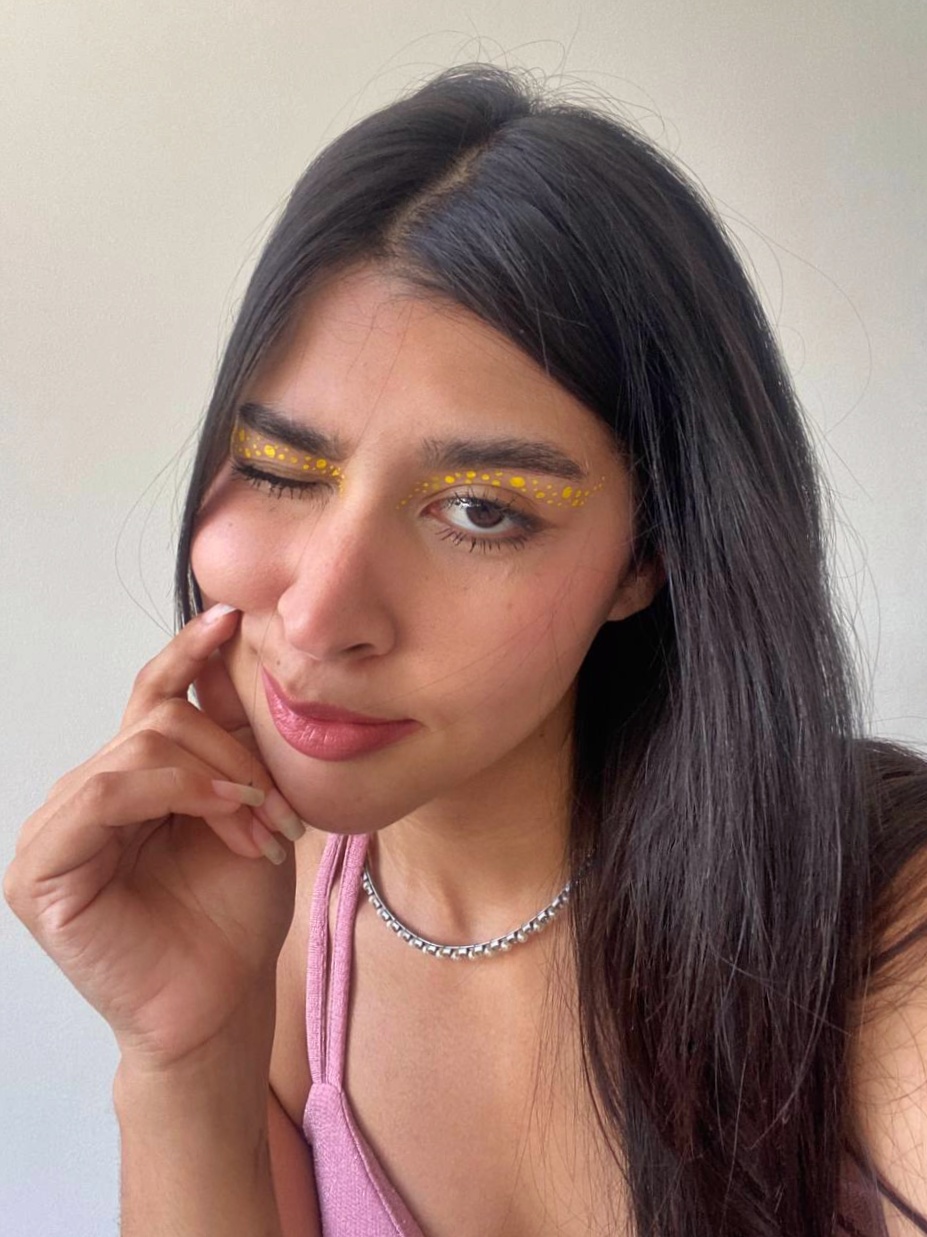
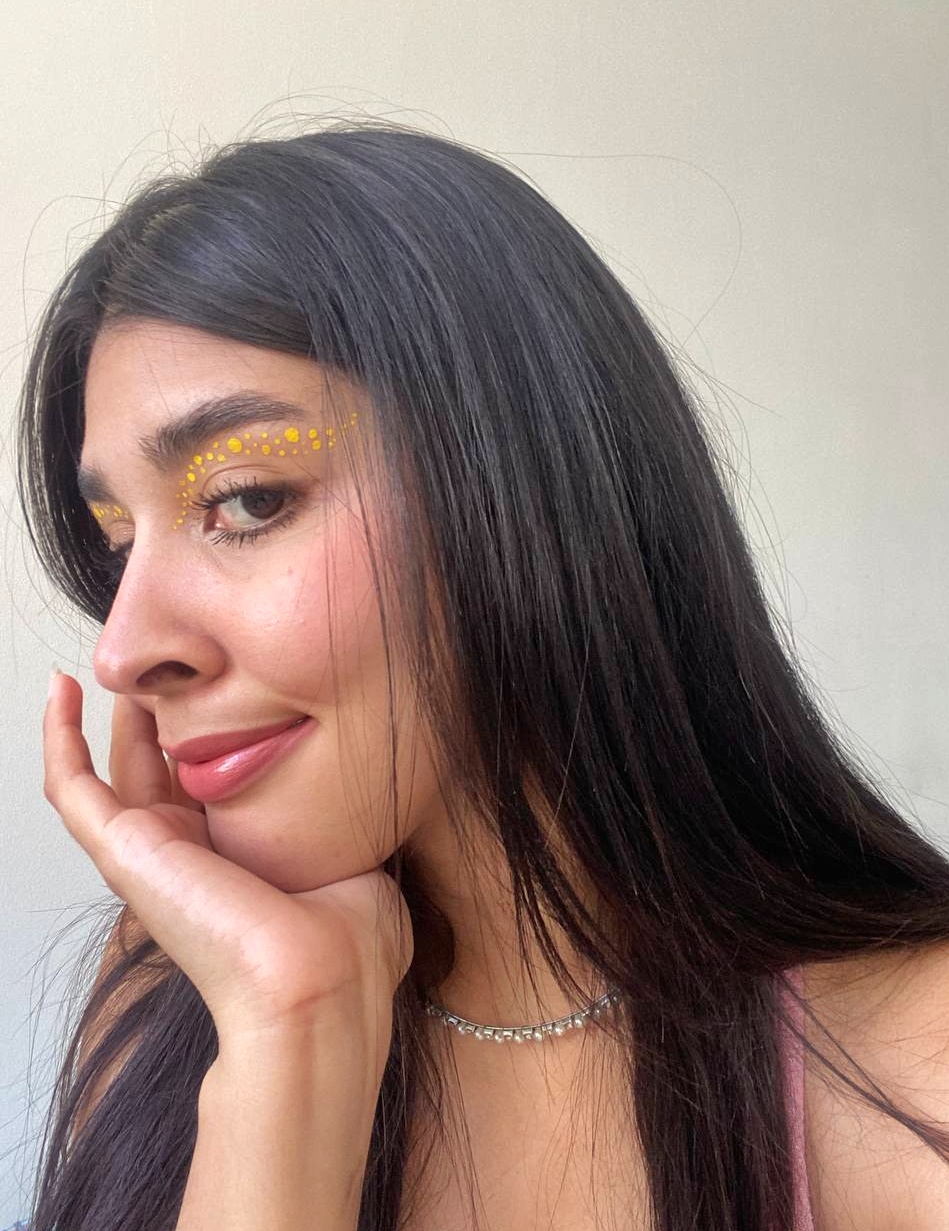
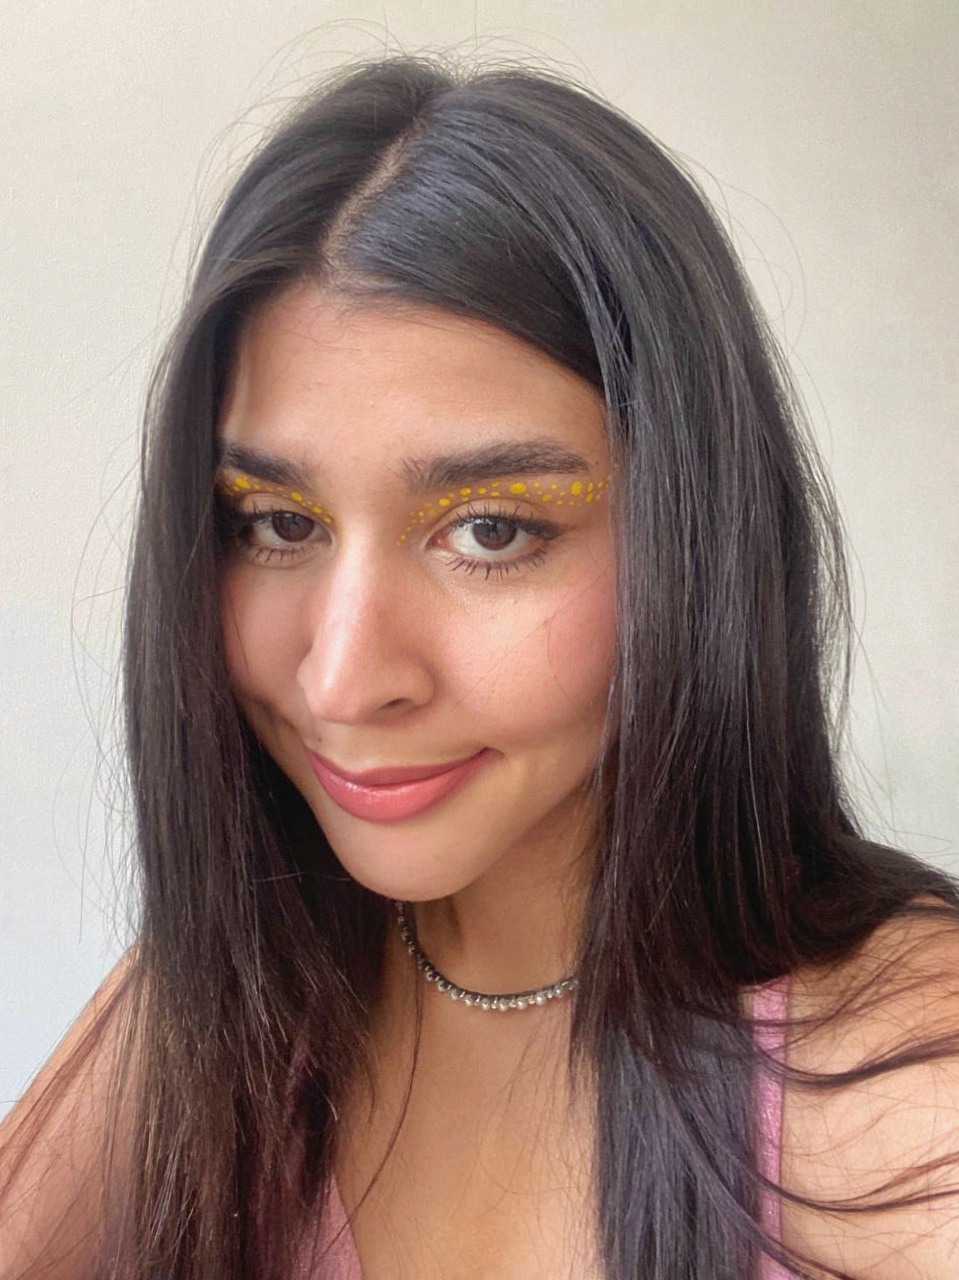
To begin with, I want to tell you that this was really only meant to be applied to the upper part of the eyelid, but my eye is very small in the corner and that makes it look as if my eyes were droopy or sad, I always do eyeliner ALWAYS, it cannot be missing, because it is my trick to open my eye. My technique is, in this case I don't want a strong liner but more like a kind of shadow there. So taking the middle of the eye as a reference, I see where the downward curve begins to be created, at the beginning of that curve is where I begin to make my eyeliner until where the eye ends, at first I follow that curved line but little by little I go raising the shading until it was slightly parallel with my eye.
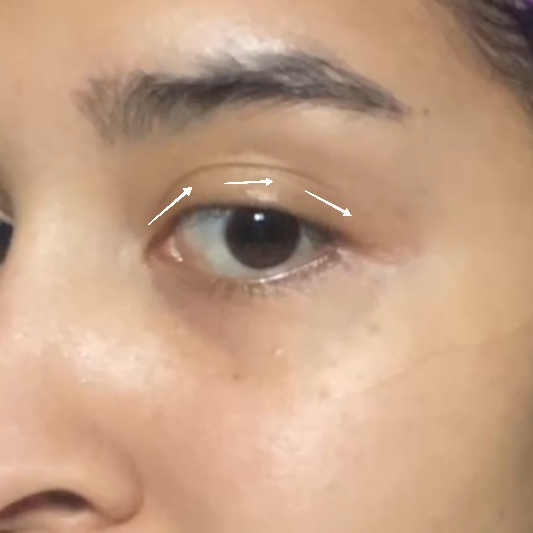
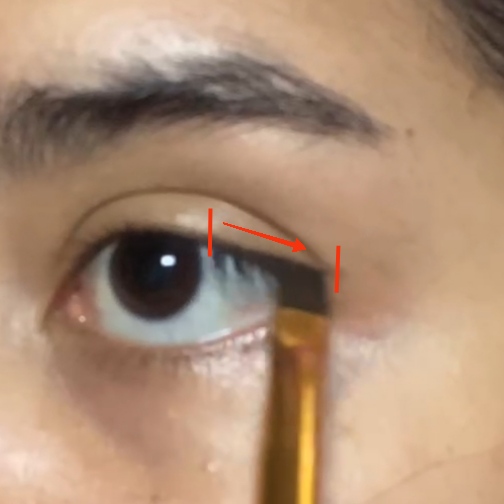
Para empezar quiero decirles que esto realmente era solamente para aplicarlo en la parte superior del párpado pero mi ojo es muy pequeño en la comisura y eso hace que se vea como si mi mirada fuera caída o triste, por siempre en todos mis maquillaje me hago un delineado sí o sí, no puede faltar, porque es mi truco para abrir mi ojo. Mi técnica es, en este caso no quiero un delineado marcado sino más como una especie de sombra ahí. Entonces tomando como referencia la mitad de ojo, veo en dónde empieza a crearse la curva hacia abajo, en el inicio de esa curva es donde empiezo hacer mi delineado hasta donde termina el ojo, al principio voy siguiendo esa línea curva pero poco a poco voy subiendo el sombreado hasta que quedé un poco paralelo con mi ojo.
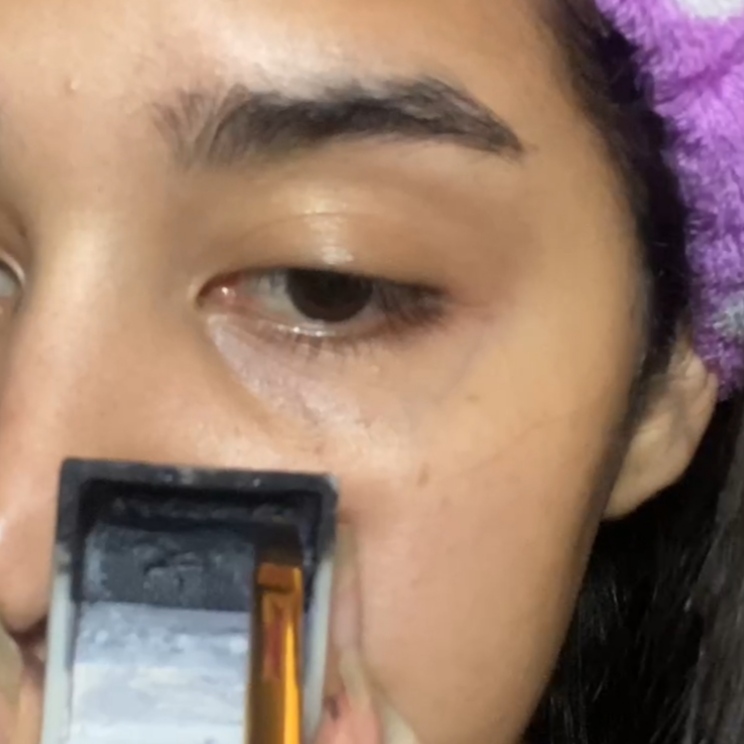
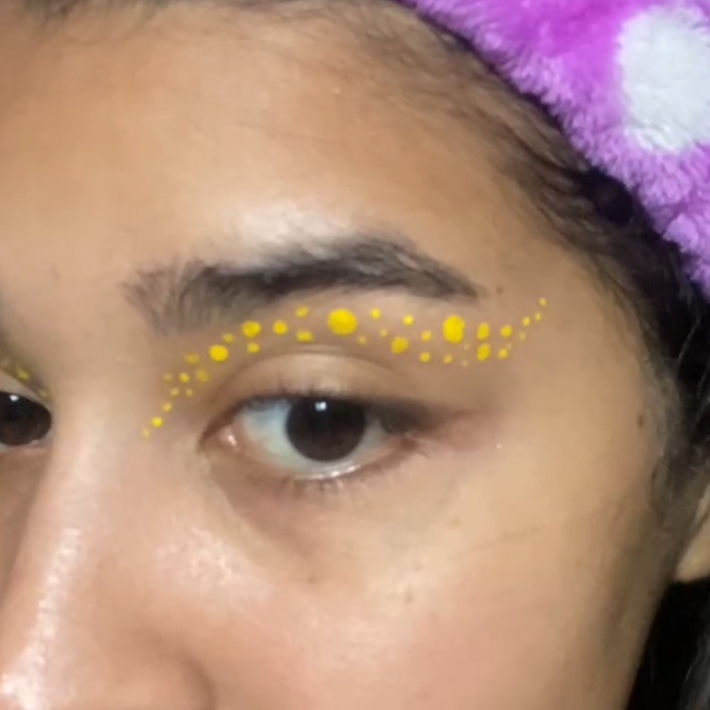
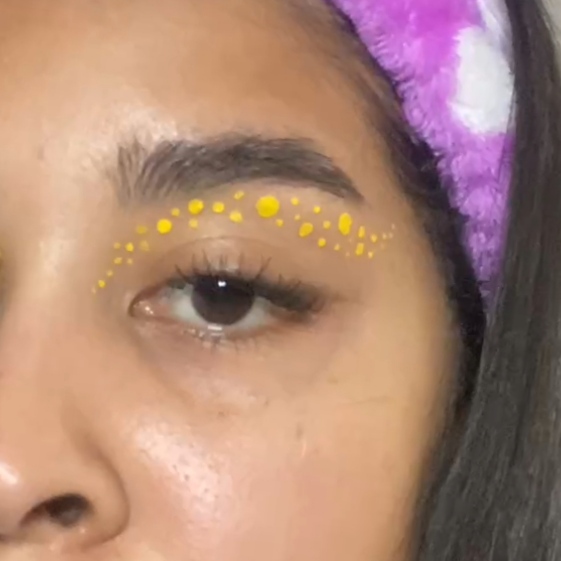
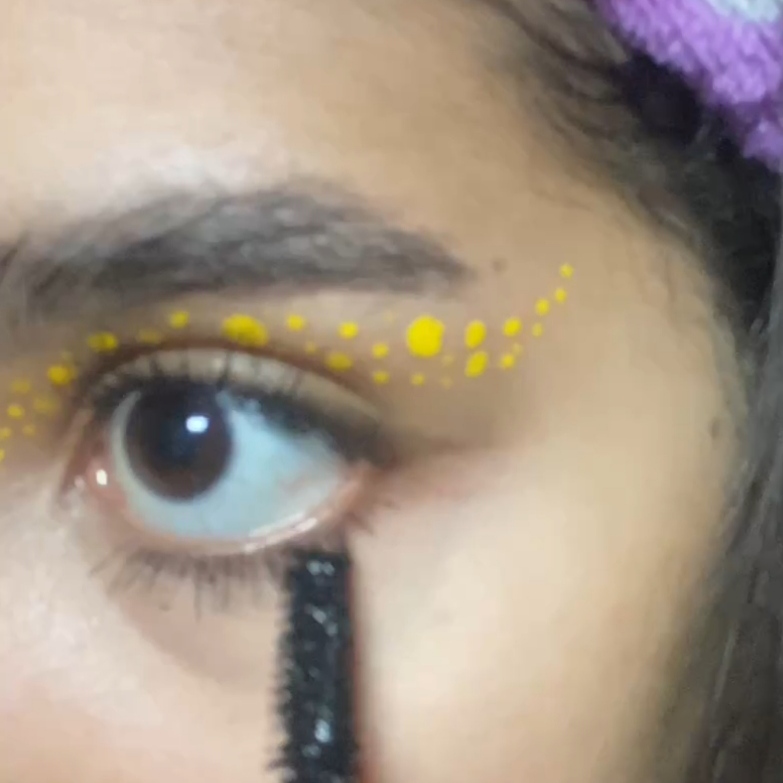
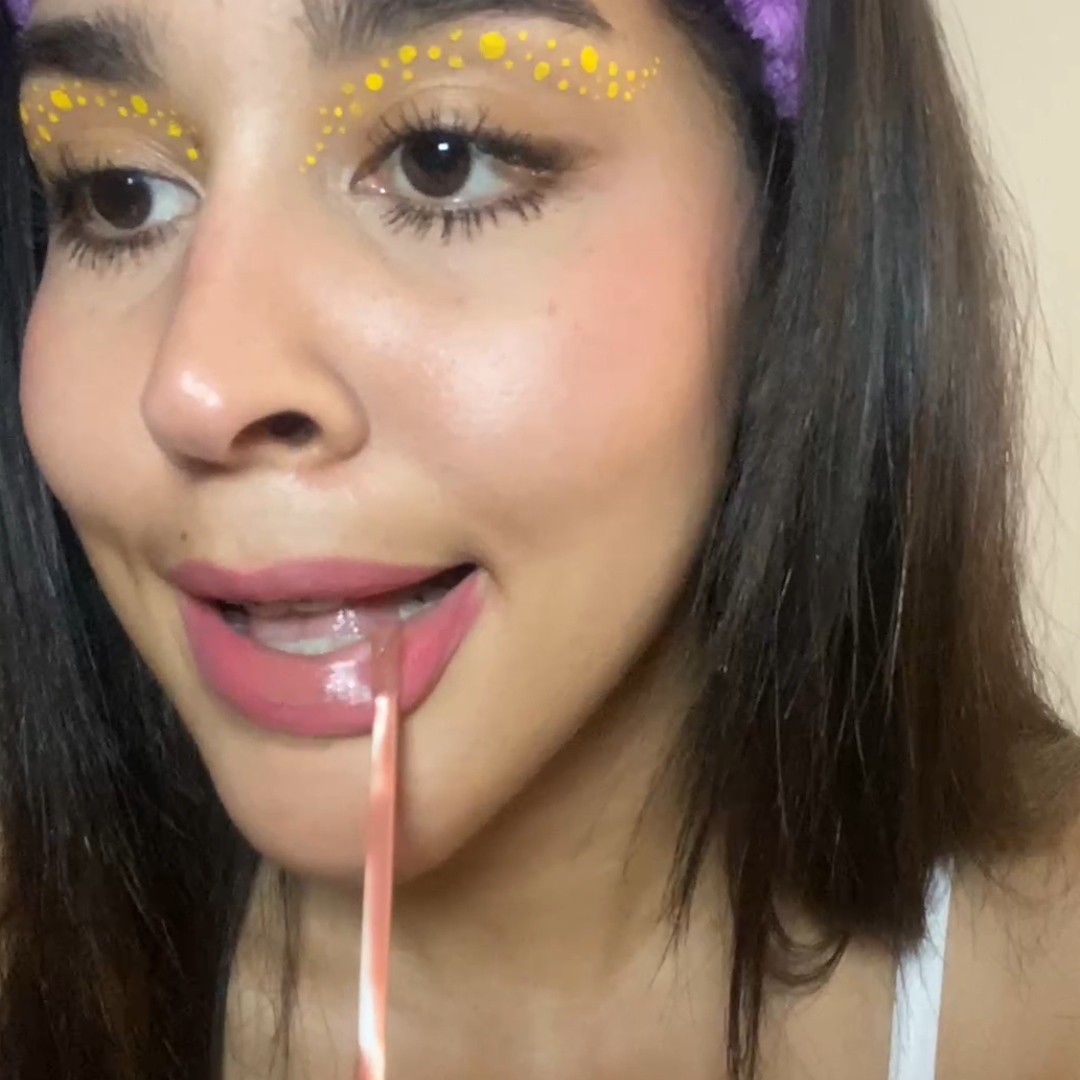
Once this effect is achieved on my eye, I continue with the graphic eyeliner. I have some nail brushes that have the shape of these circles but we can also use the back of the brushes. First I made few large scattered circles and then I made smaller circles but making the shape of an eyeliner, obviously the color I used was yellow. An interesting fact is that this color looks good for those of us who have dark eyes.


Una vez logrado este efecto en mi ojo, continuo con el delineado gráfico. Yo tengo unos pinceles de uñas que traen la forma de estos círculos pero también podemos usar la parte de atrás de las brochas. Yo primero hice varios círculos grandes esparcidos y después hice círculos más pequeñitos pero haciendo la forma de un delineado, obviamente el color que utilicé fue el amarillos. Un dato interesante es que este color queda bien para las que tenemos ojos oscuros.
Now it is important to mention that what will make the eyeliner stand out will be applying the "clean makeup" style to the rest of the face. That is, we will highlight our own natural eyelashes, first we will use a curler and then a lot of mascara. We will also do the same with the eyebrows, here what we will do is take a fixative and we will comb the eyebrow towards where the hairs naturally go, we will let the fixative dry and we will only fill in some gaps that are very visible, but the idea is to make it visibly natural.
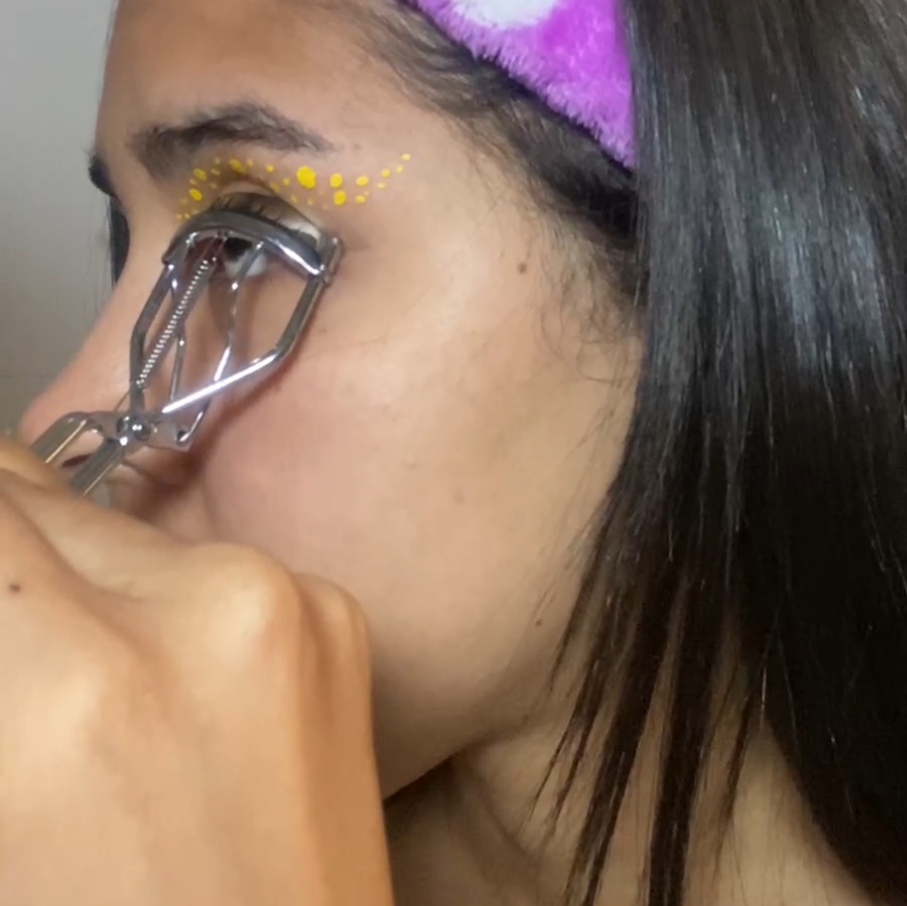
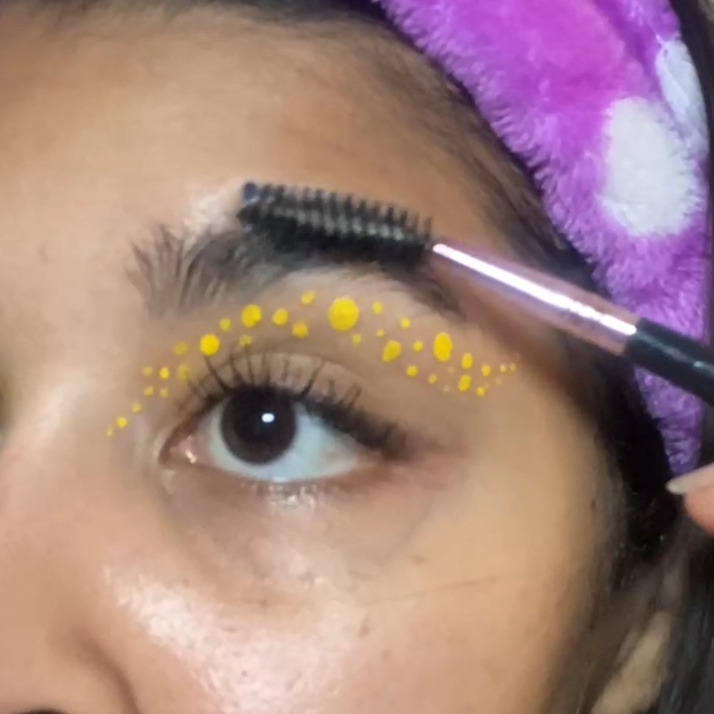
Ahora importante mencionar que lo que hará destacar el delineado será aplicar el estilo "clean makeup" al resto del rostro. Es decir, haremos destacar nuestras propias pestañas naturales, primero usaremos un rizador y luego bastante máscara de pestañas. También haremos lo mismo con las cejas, aquí lo que haremos será tomar un fijador y vamos peinando la ceja hacia donde naturalmente van los vellos, dejaremos que el fijador seque y solamente rellenaremos algunos huecos que se vean mucho, pero la idea es que se vea natural.
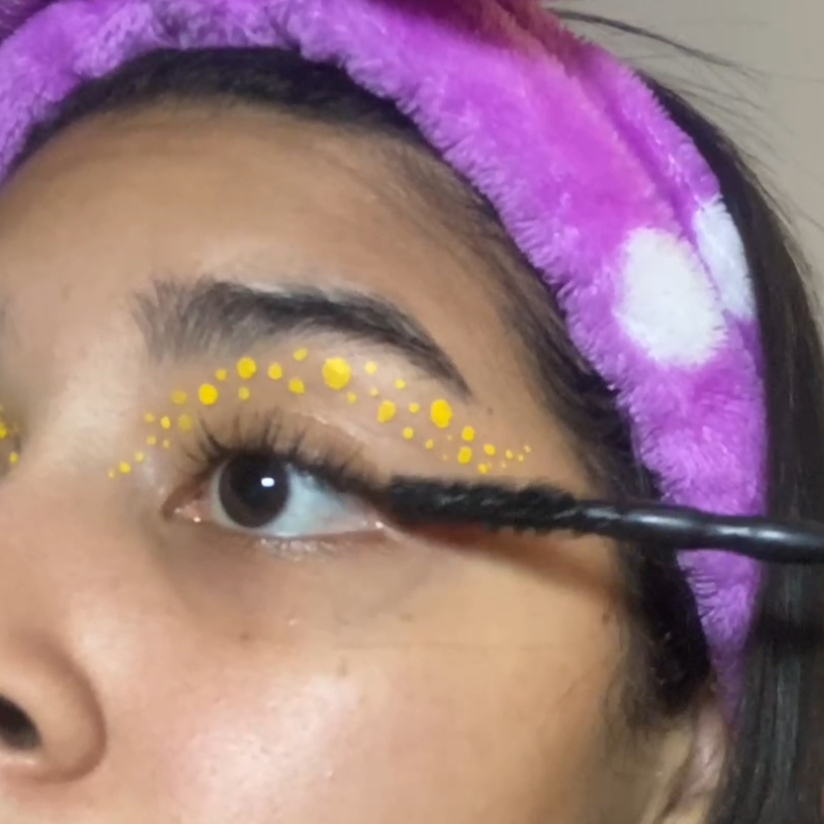
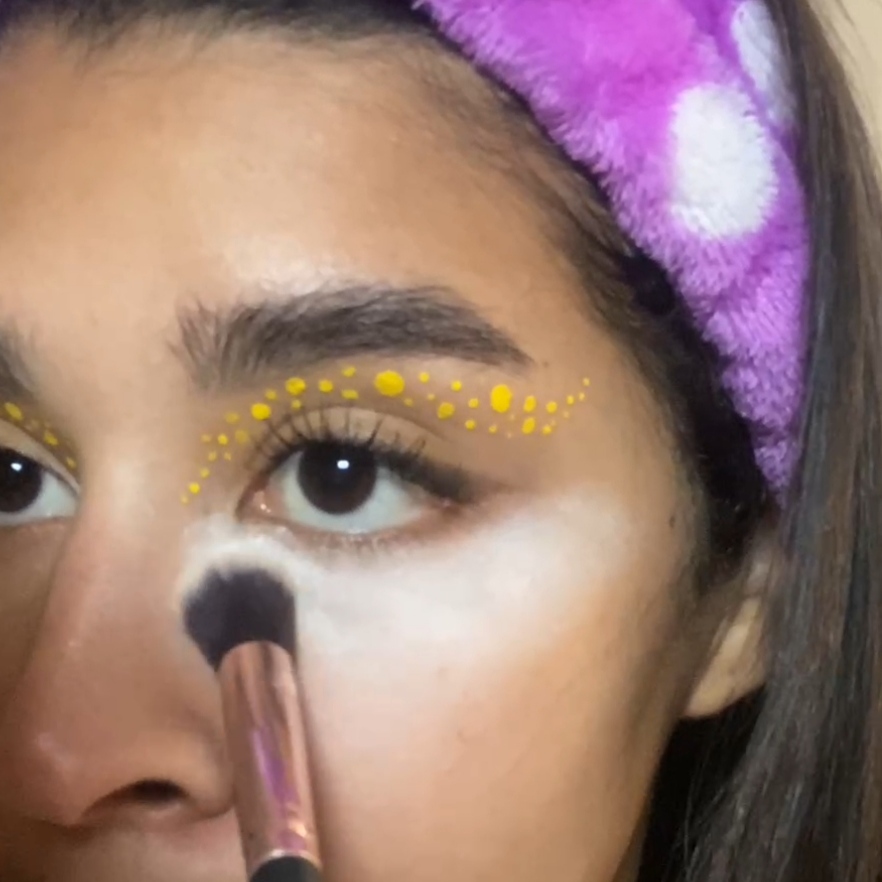
Here I needed to first cover my dark circles, so I used a concealer and then set it with loose powder. Then I continued with the lower lashes, for this I dedicated myself to making them stand out a lot, I applied 3 layers of mascara.
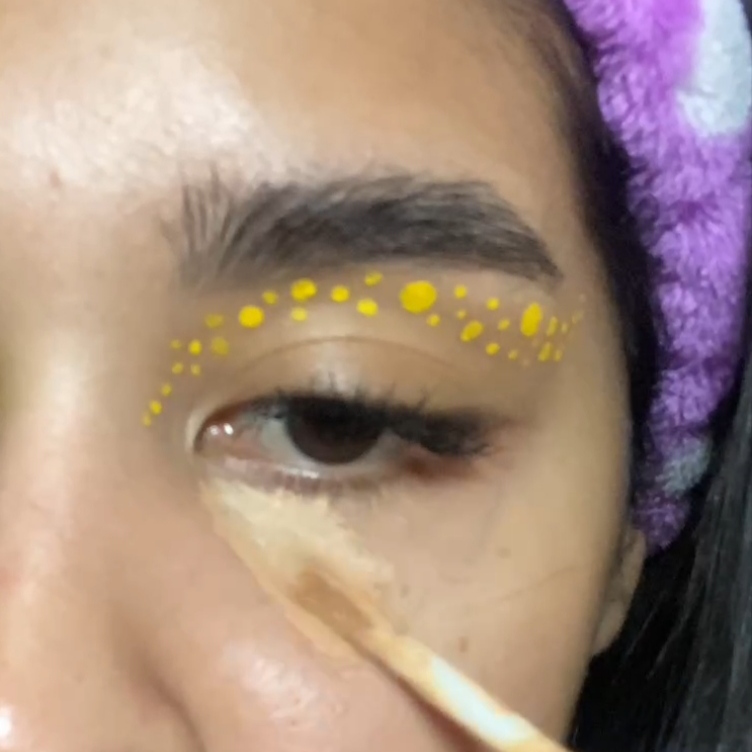
Aquí necesitaba primero cubrir mi ojeras, por lo que usé un corrector y luego lo sellé con polvos sueltos. Después continué con las pestañas de abajo para esto me dediqué a qué resaltarán bastante, apliqué 3 capas de mascara de pestaña.
I also applied blush only on the high cheekbone, that area is closest to the corner of the eye and going up as if it were going to the eyebrows but without reaching so high.
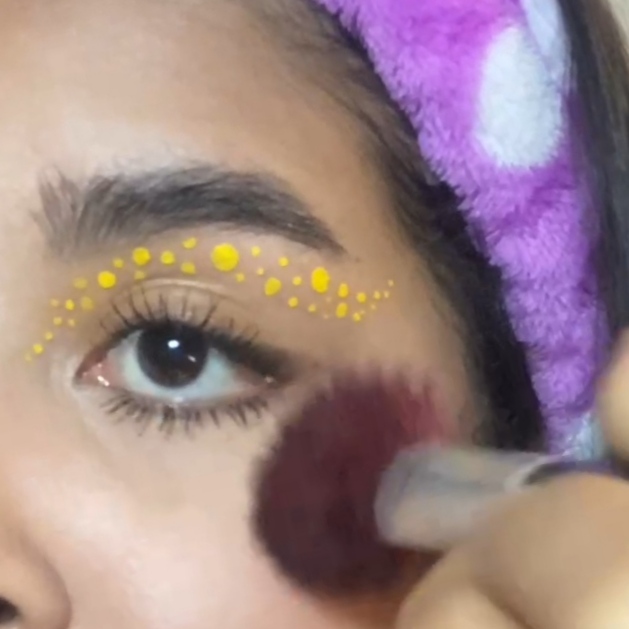
También apliqué blush solamente en el pómulo alto, esa zona es la más pegada a la comisura del ojo y subiendo como si fuera a las cejas pero sin llegar tan arriba.
Finally, a pink lipstick and with powder I tried to remove the rest of the shine from the face and that would be it, without overloading the face to highlight the eyes, so that the first thing people see are the eyes.
Por último un labial rosa y con polvos traté de quitarle el resto del brillo al rostro y eso sería todo, sin sobrecargar el rostro para destacar los ojos, que lo primero que te vean las personas sean los ojo.
I love the effect of graphic design on the eye, it’s unique
Thank you :)
Love this 💛
Oh thank you 😊