Eliminando bote de aceite Tapa válvula (ESP-ENG)
Buenos días amigos de Hive!
Hoy les comparto este último trabajo que realicé a un Dodge Neon 2000
Tenía un bote de aceite por la empacadura del tapa válvula y esté post te mostrará como eliminarlo.
estos botes son ocasionados por 2 cosas
-Mal ajuste en los tornillos del tapa válvula, al no haber suficiente ajuste el silicón no sella lo suficiente.
-Mala aplicación del silicón al tapa válvula, si el mecánico es mezquino y no aplica el suficiente silicón, va a quedar botando aceite
En el caso de éste Neón fue la número 2 no le aplicaron el silicón suficiente.
A trabajar!
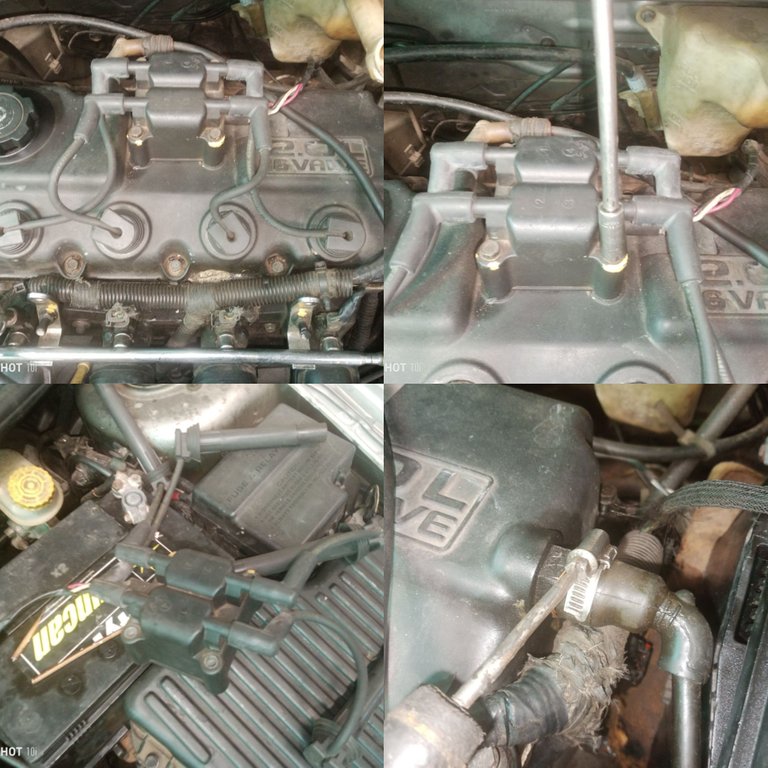
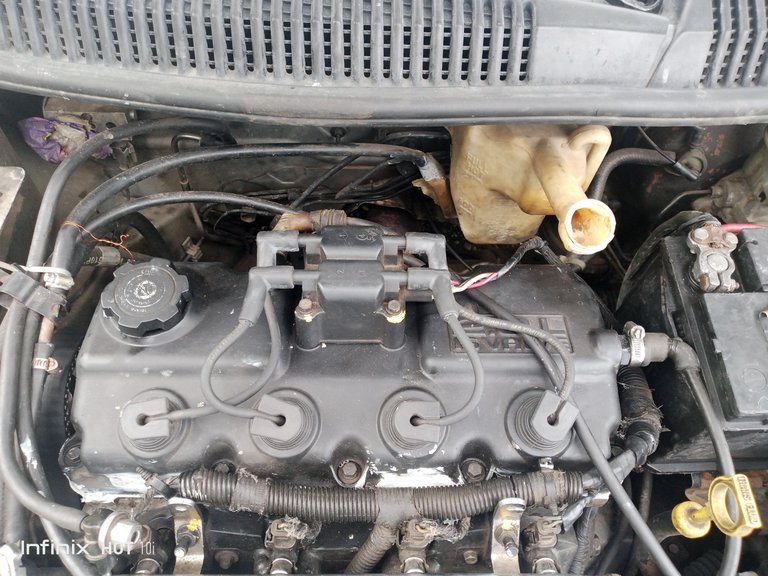
Lo primero sería quitar la Bobina captadora de la parte superior del tapa válvula, está sujeta por 4 tornillos y usaremos un dado #10 y la Palanca o Rache para removerlos.
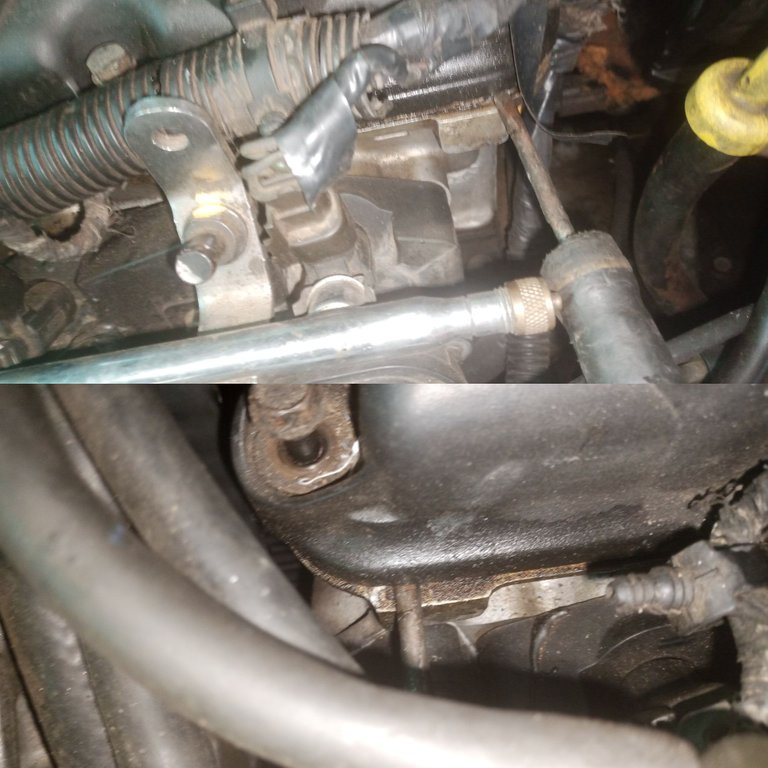
También quitaremos cualquier objeto que haga contacto con el tapa válvula como las mangueras que se muestran a continuación.
Ahora quitaremos los tornillos del tapa válvula. Usaremos el mismo dado #10 para remover los tornillos que la sujetan.
Tanto para remover los tornillos, como para ponerlos, se realiza en forma de X. Y nunca se afloja o se ajusta en su totalidad un tornillo, hasta que todos tengan la misma cantidad sea de ajuste o desajuste
Acá te muestro la imagen del como hacerlo.
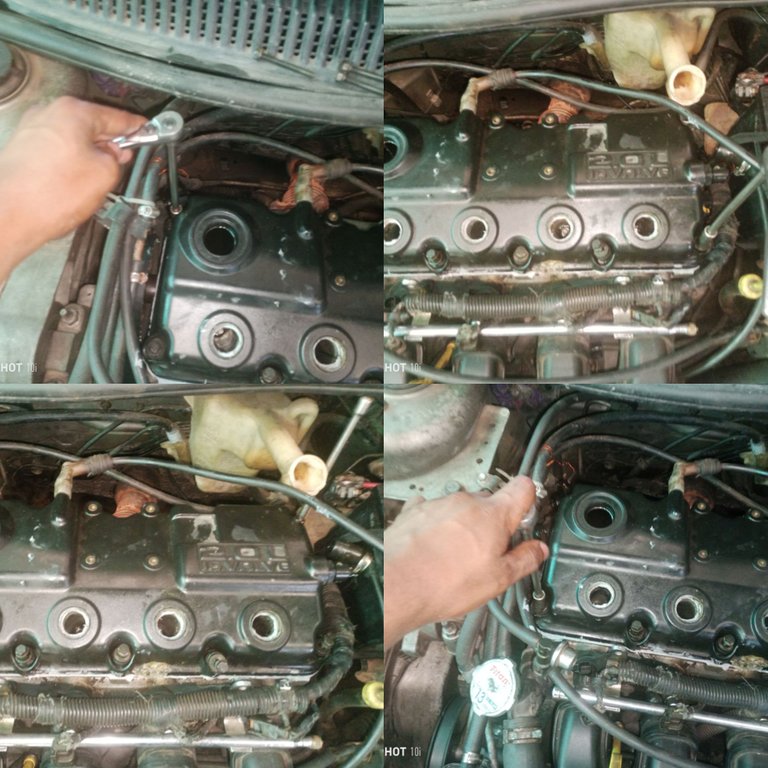
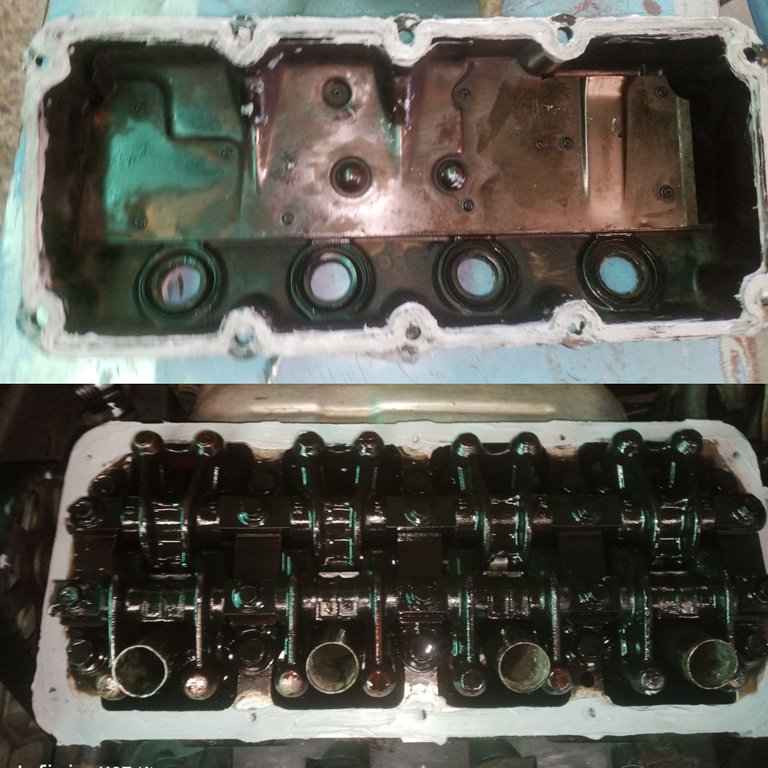
Ya después que desajustes los Tornillos, para despegar la tapa válvula de la cámara usarás un destornillador de pala para hacer un poco de presión hacia arriba y repetirás en forma de X hasta que está se despegue.
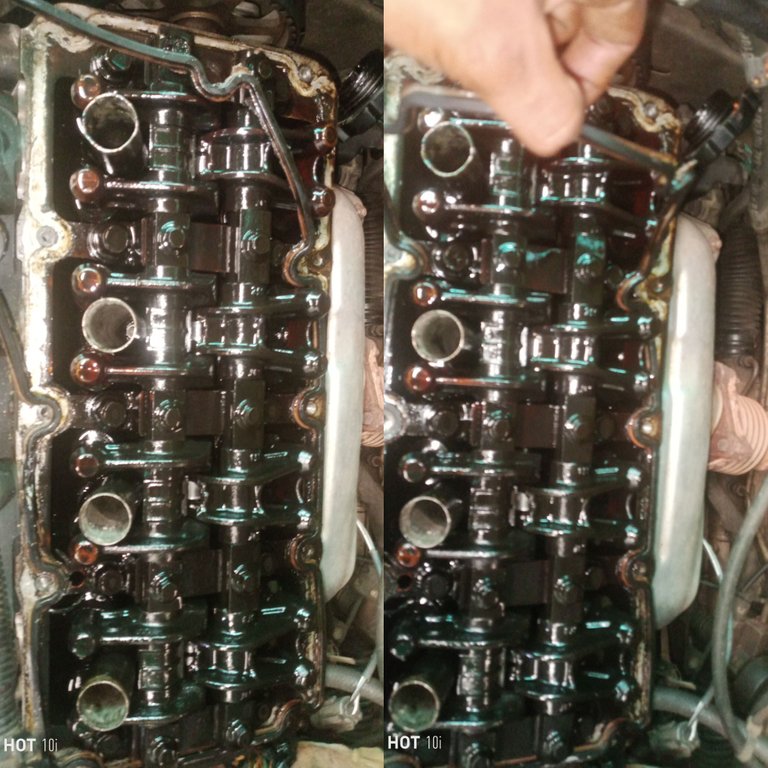
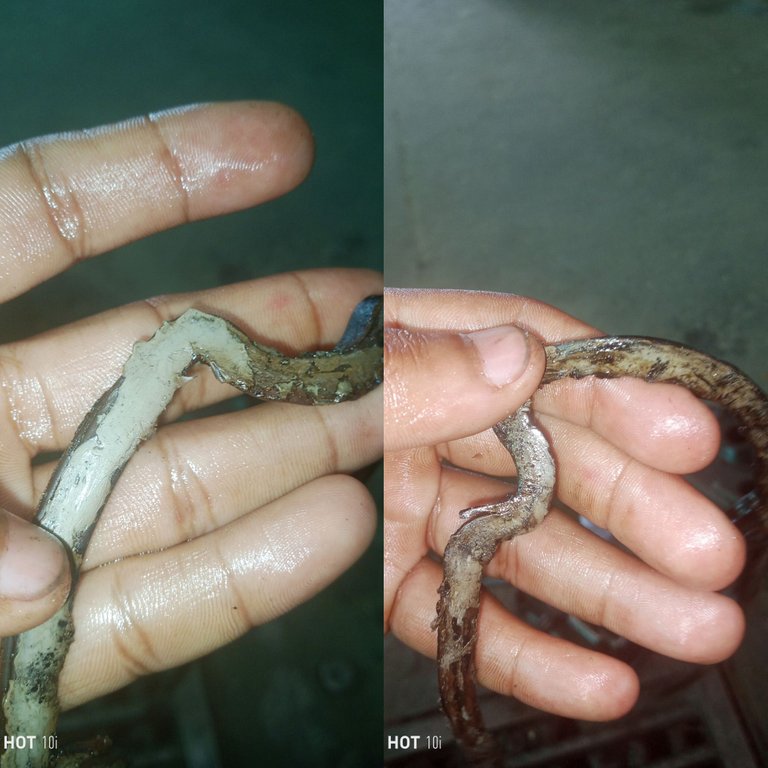
En este caso al quitar la tapa válvula, la empacadura quedó sobre la cámara. En lo personal no me gusta reutilizar las empacaduras, pero como el dueño del vehículo no tenía para comprarla nueva, la despegue con mucho cuidado para así no romperla y poder reutilizarla.
No me gusta reutilizar las empacaduras ¡Por qué no me gusta limpiarlas, es un fastidió! Se pierde demasiado tiempo.
Pero bueno, el cliente siempre tiene la razón y hay que buscar la manera de solucionarle la situación.
Si vas a reutilizar la empacadura, hay que remover con mucho cuidado todo el silicón viejo, para así ponerle nuevo a la empacadura
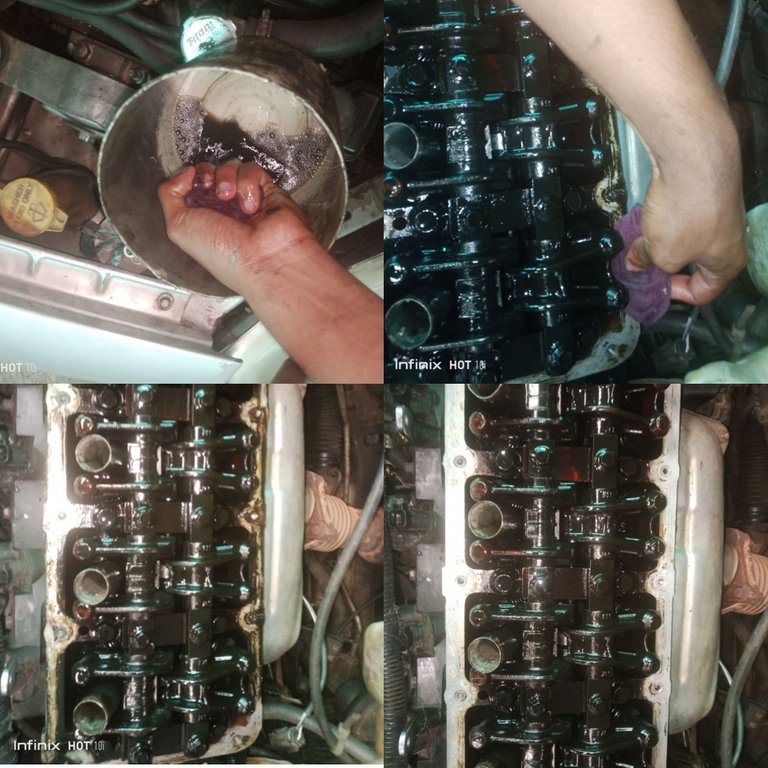
Después de perder 1 hora de nuestro hermoso y valioso tiempo en limpiar la empacadura. Limpiamos la cámara y le removemos el silicón viejo, con mucho cuidado de que no caiga nada de silicón al aceite ya que este podría llegar a tapar algún ducto de lubricación.
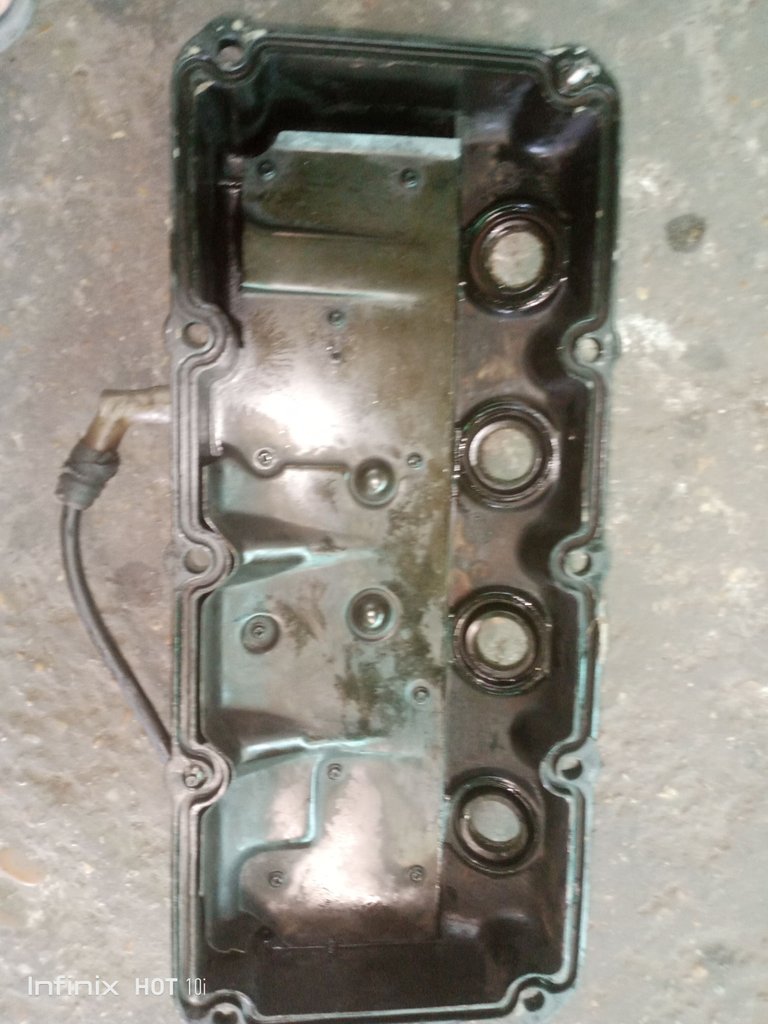
También le quitamos cualquier residuo de silicón en la tapa válvula.
Está tapa no tenía residuo de silicón, por lo que supongo qué a la hora de montarla el mecánico que lo hizo no le agrego silicón a esta parte del tapa válvula.
Pasamos ahora a montar la empacadura en el tapa válvula.
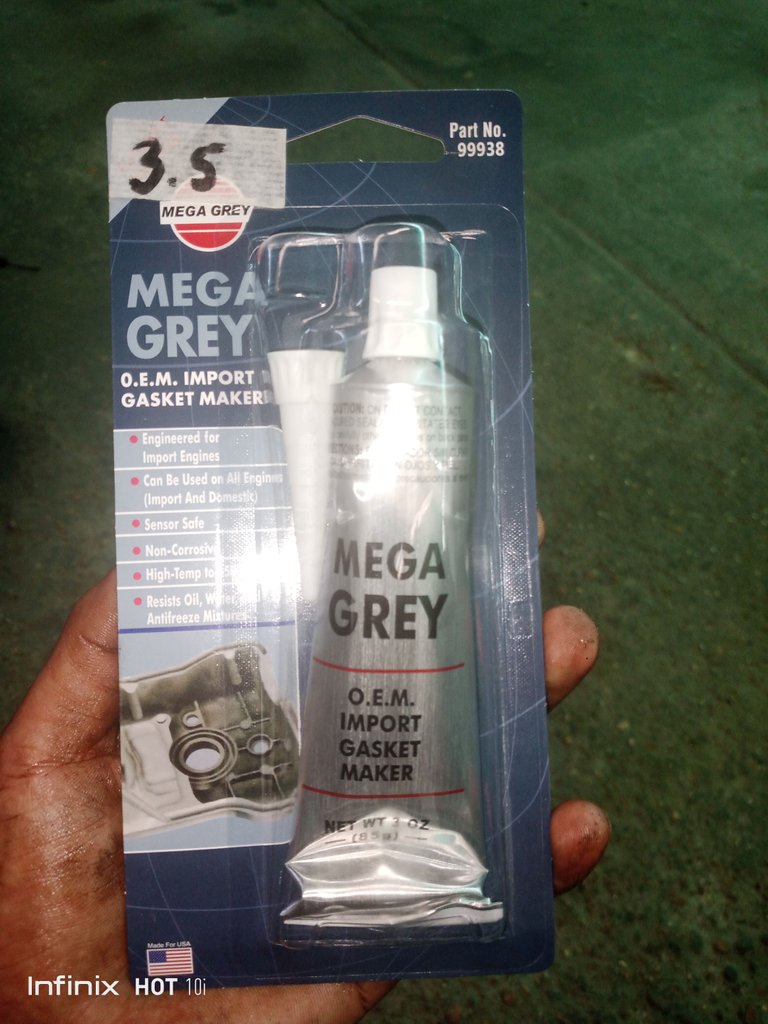
Usé el silicón de su preferencia. En mi país Venezuela esta marca es muy valorada Mega Gray por su buena calidad, en lo personal ya e trabajado con este silicón y es muy bueno, realmente no sé cuál es su tiempo de secado, pero yo lo trabajo a 1 hora y funciona muy bien.
Le agregamos un poco de silicón en el canal del tapa válvula y luego colocamos la empacadura. Le hacemos un poco de presión para que la empacadura quede bien puesta en el canal y le agregamos silicón en la parte de arriba de la empacadura.
Yo dejo reposar unos 5 minutos antes de colocarla de nuevo sobre la cámara. Y en esos 5 minutos le agregamos silicón a la cámara. Esto lo hago para así mejorar el sellado de la tapa.
Ya pasados los 5 minutos montamos.
Ahora vamos a ajustar los tornillos de la tapa válvula. Recuerda hacerlo en forma de X para que no allá una zona con más presión que otra y se valla a romper el tapa válvula.
En muchos carros es de plástico como es el caso de los Neón.
Luego de ya haber ajustado la tapa válvula. La limpieza
Le limpiamos el exceso de silicón que salió de ella por los costados para y dónde le allá colocado por accidente.
Y le colocamos la Bobina captadora y todas las mangueras que le quitamos. Esperamos el tiempo que el silicón que usaron mandé y es entonces cuando podremos encender en vehículo.
Sí sigues estos pasos no tendrás bote de aceite por el tapa válvula
A menos que el tapa válvula esté roto. Ahí si ya tendrás que comprar uno nuevo y colocarlo.
Este proceso se hace en todos los vehículos no solo en el Dodge Neón así que espero te sirva mucho está publicación.
ENGLISH TRANSLATION
Good morning friends of Hive!
Today I share with you this last job I did on a 2000 Dodge Neon.
It had an oil leak from the valve cover gasket and this post will show you how to get rid of it.
these leaks are caused by 2 things
-Poor fit of the valve cover bolts, because there is not enough tightness the silicone does not seal sufficiently.
-Poor application of silicone to the valve cover, if the mechanic is mean and does not apply enough silicone, it will leak oil.
In the case of this Neon it was number 2, they did not apply enough silicone.
Let's get to work!
The first thing would be to remove the pickup coil from the top of the valve cover, it is held in place by 4 screws and we will use a #10 die and the Rache or Lever to remove them.
We will also remove any objects that make contact with the valve cover such as the hoses shown below.
Now we will remove the valve cover screws. We will use the same #10 die to remove the screws that hold it.
To remove the screws, as well as to put them in, it is done in an X shape. And never loosen or tighten a screw completely until they all have the same amount of tightening or loosening.
Here I show you the image of how to do it.
Once you have loosened the screws, to remove the valve cover from the chamber, use a flat blade screwdriver to apply a little upward pressure and repeat in an X-shape until the valve cover comes off.
In this case, when the valve cover was removed, the gasket was left on the inner tube. Personally I don't like to reuse gaskets, but since the owner of the vehicle didn't have the money to buy a new one, I took it off very carefully so as not to break it and be able to reuse it.
I don't like to reuse the gaskets, because I don't like to clean them, it's a pain! It wastes too much time.
But well, the customer is always right and you have to find a way to solve the situation.
If you are going to reuse the gasket, you have to carefully remove all the old silicone, in order to put new silicone on the gasket.
After wasting 1 hour of our beautiful and valuable time cleaning the gasket, we clean the chamber and remove the old silicone. We clean the chamber and remove the old silicone, being very careful not to get any silicone in the oil as this could clog any lubrication duct.
We also removed any silicone residue on the valve cover.
This valve cover had no silicone residue on it, so I guess the mechanic who did it did not add silicone to this part of the valve cover when assembling it.
We now move on to mount the gasket on the valve cover.
I used the silicone of your preference. In my country Venezuela this brand is very valued Mega Gray for its good quality, personally I have worked with this silicone and it is very good, I really don't know what is its drying time, but I work with it at 1 hour and it works very well.
We add a little silicone in the channel of the valve cover and then we place the gasket. We make a little pressure so that the gasket is well placed in the channel and we add silicone on the top of the gasket.
I let it rest for about 5 minutes before placing it back on the chamber. And in those 5 minutes we add silicone to the chamber. I do this to improve the sealing of the lid.
After 5 minutes we assemble.
Now we are going to adjust the screws of the valve cover. Remember to do it in the form of X so that there is no area with more pressure than another and valla to break the valve cover.
In many cars it is made of plastic as is the case of the Neon.
After having already adjusted the valve cover. The cleaning
We clean the excess silicone that came out of it on the sides for and where it was placed by accident.
And we put the pickup coil and all the hoses that we removed. We wait the time that the silicone that they used sent and it is then when we will be able to start the vehicle.
If you follow these steps you will not have an oil leak from the valve cover.
Unless the valve cover is broken. Then you will have to buy a new one and put it on.
Tremendo trabajo de redacción pso a paso. Te felicito.
Debe ser muy útil para muchos aquí en la plataforma.
Saludos desde El Zulia, Venezuela.
Gracias por leer mi post hermano, espero les sea útil
Congratulations @josiascardenas! You have completed the following achievement on the Hive blockchain and have been rewarded with new badge(s):
Your next target is to reach 1000 upvotes.
You can view your badges on your board and compare yourself to others in the Ranking
If you no longer want to receive notifications, reply to this comment with the word
STOPCheck out the last post from @hivebuzz:
Support the HiveBuzz project. Vote for our proposal!
Muy buen trabajo en mostrarnos paso a paso el cómo vas desarmando y rearmando, pregunto, ¿Cuánto tiempo tarde la silicona en secar? Para saber cuanto tiempo se debe esperar en prender el vehículo luego de la aplicación.
Depende del silicón que uses en el trabajo. Ese que utilicé la marca se llama Mega Gray. Yo lo utilizo y lo dejo secar por 1 hora y exelente el secado.
E trabajado con uno marca Hammer. Es de secado rápido, dice el empaque si mal no recuerdo qué el tiempo de espera es de 7 minutos, yo lo deje 20 minutos y una maravilla.
Depende mucho de la marca y la calidad del silicón el tiempo que esperes, si usas Mega Gray te recomiendo que esperes 1 hora para encender.
Muchas gracias por leer mis Post.
Siempre que tenga las condiciones pasare a leer y comentar, saludos :)