Reparación Bombín clutch superior.
Reparación de bombín clutch superior.
El bombín del vehículo dejo de responder como debería hacerlo, así que fuí al taller de @Ferbu para que me prestara las herramientas para poder sacar el bombín y repararlo.
Gustoso @Ferbu me prestó las herramientas y me ayudó a liberar el aire que coge el bombín. Quise compartir este trabajo y aprendizaje con ustedes así que espero les sea de ayuda.
¿Razón de la perdida de presión en el bombín?
En este caso, lo que ocasionó la perdida de presión fue el desgaste de las gomas que lleva un pistón dentro del bombín.
Lo primero que hay que hacer es quitar la cuña de la pedalera que sostiene el lápiz que a su vez impulsa el pistón del bombín.
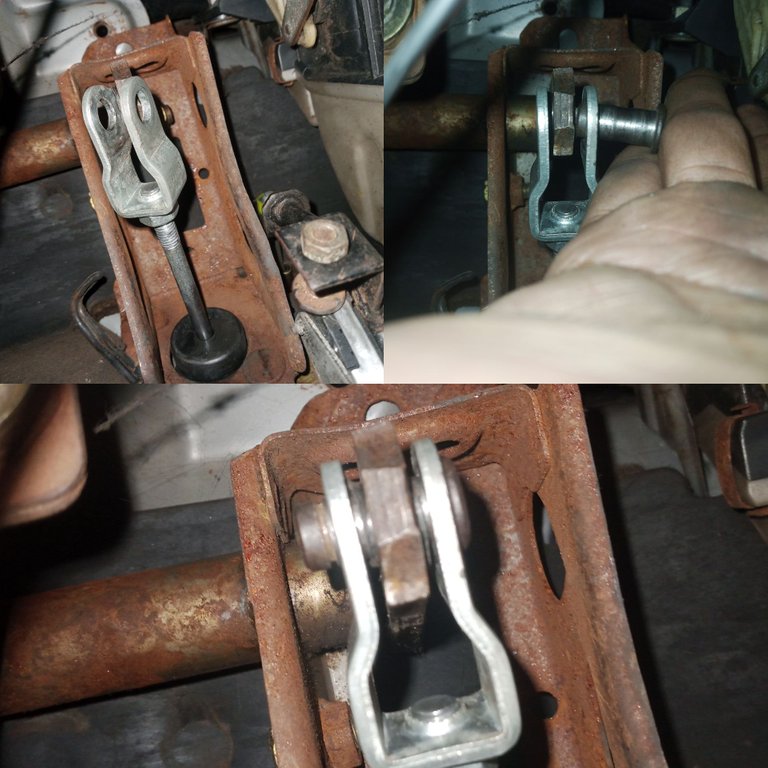
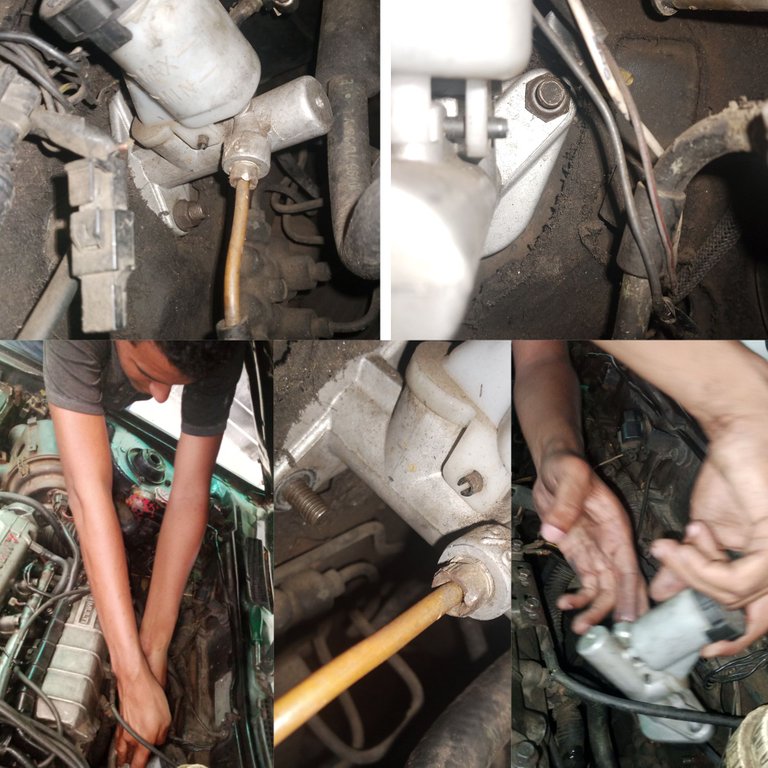
Una vez ya suelto, pasamos a quitar la tubería que lleva la liga de freno desde el bombín superior al inferior. Una ves la hayamos quitado pasamos a remover las tuercas que sostienen el bombín y lo despegamos del vehículo.
Para desarmar el bombín necesitas quitar primero un retén. Así que coloque el bombín en la prensa y quite dicho retén con la ayuda de unas piensas y un destornillador.
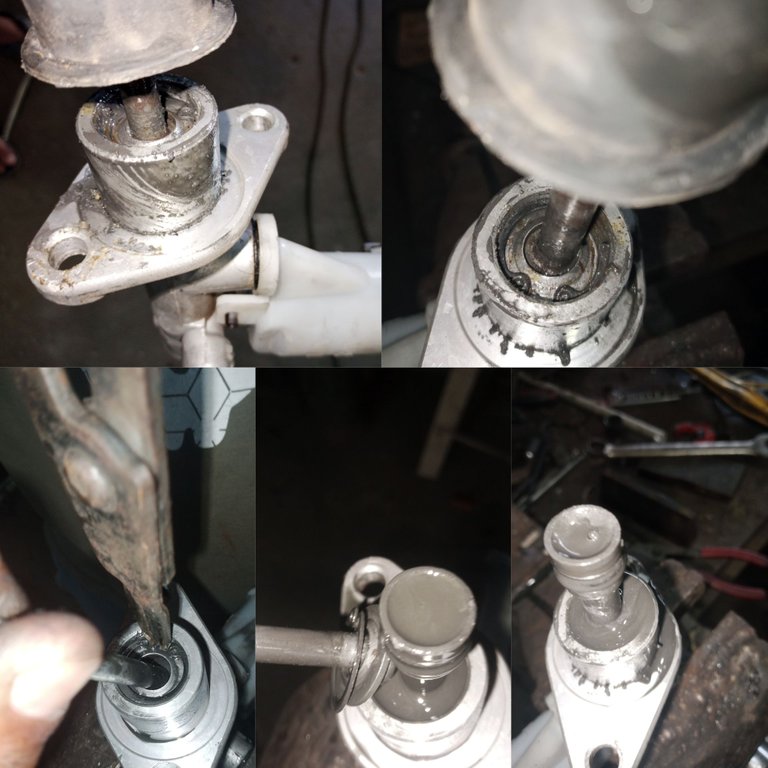
Antes de cambiar las gomas al pistón, limpiamos el bombín, ya que como se aprecia en las fotografías el bombín estaba muy sucio debido a la liga de freno que estaba en mal estado.
Al quitar el retén el pistón saldrá automáticamente y podremos reemplazar las gomas. El kit de bombín viene con un pistón con gomas nuevas, así que pudimos simplemente colocar el nuevo, pero este bombín no funcionó con el pistón nuevo, así que tuvimos que sacar la goma del pistón nuevo y colocarla en el pistón viejo.
Para sacar está goma use un destornillador de pala y con mucho cuidado para evitar romperla, la removí del pistón.
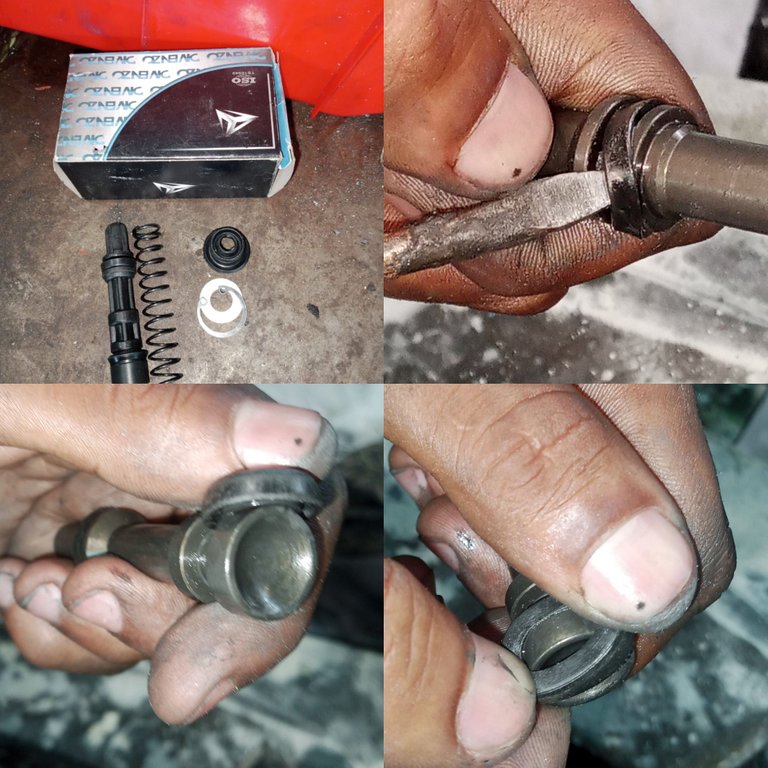
Ahora a armar. Repetimos el proceso pero en reversa. Les recomiendo untar un poco de liga de freno en el pistón y paredes del bombín para que el pistón no entre forzado.
Primero el resorte. Luego el pistón. Luego el retén.
¡Y listo a montar!
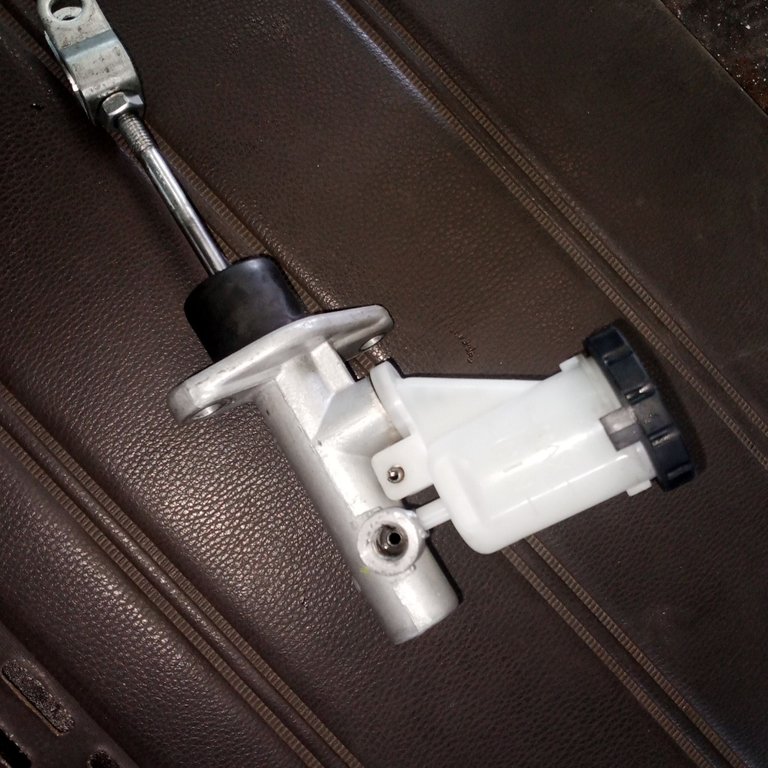
Para montar el bombín en el vehículo es exactamente igual a como lo desmontamos.
Primero colocamos el retén que quitamos de la pedalera. Luego en la parte frontal del vehículo, encajamos el bombín en la base y por último lo ajustamos con las tuercas antes removidas.
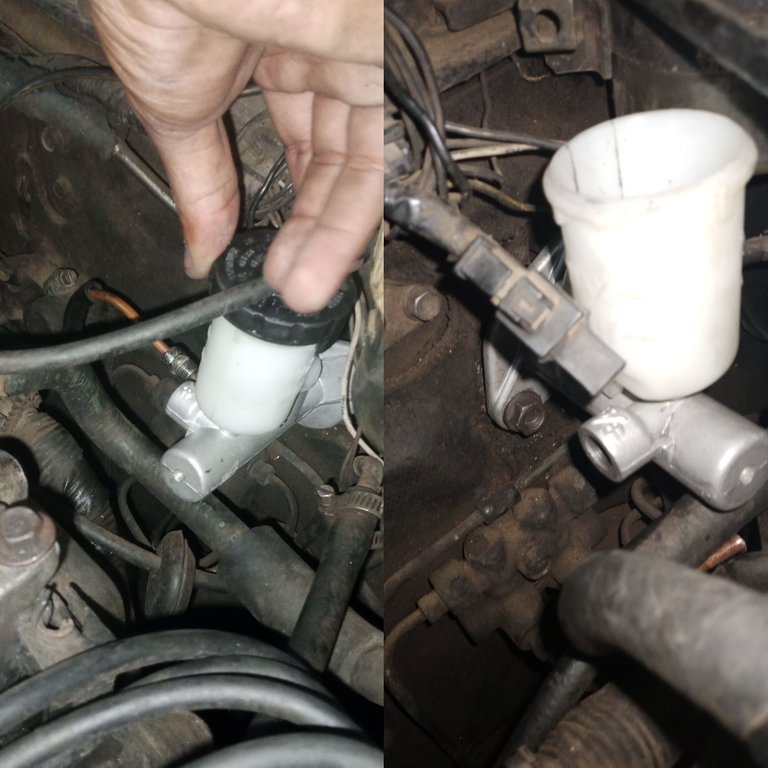
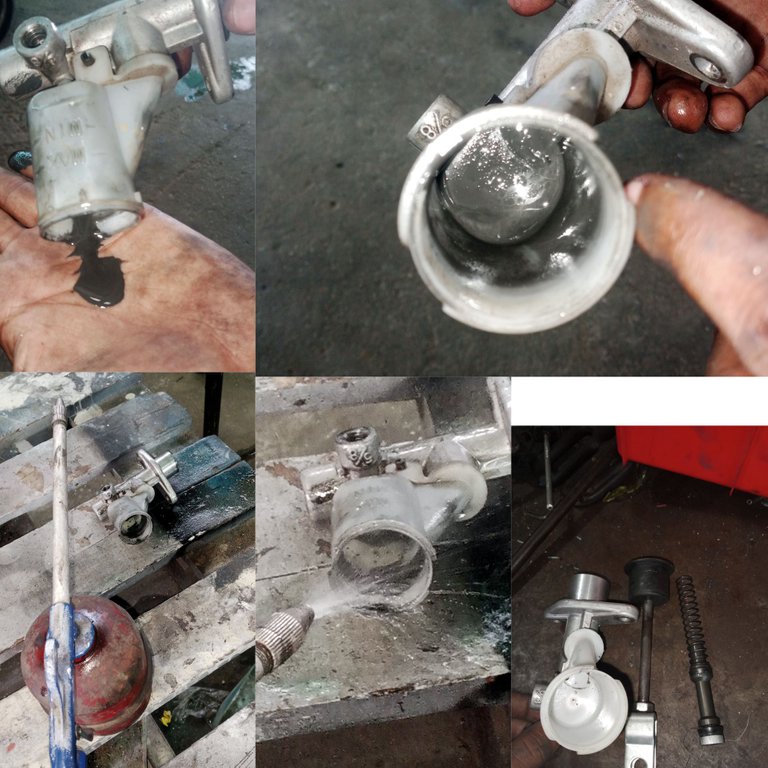
Para finalizar solo hay que colocar la línea y eliminar el aire que pudo haber agarrado la línea y el bombín. Un proceso al cual no pude fotografiar debido a que @Ferbu me pidió que bombeara el crochet.
Pero consiste en bombear el crochet de 3 a 5 veces seguidas, en la última lo dejamos pisado abajo y otra persona afloja la línea que sale del bombín.
Este proceso se hace hasta que se vea que al aflojar la línea sale liga sin aire.
Claro este proceso hay maneras más fáciles de hacerlo, de hecho @Ferbu lo hizo de otra manera pero no pude apreciarla porque estaba sentado bombeando.
Reparar o cambiar el bombín clutch superior es algo bastante sencillo solo es seguir estos sencillos pasos acá explicados.
¡Espero les sirva mi post en un futuro!
English translation of this post
Repair of upper clutch pump.
The vehicle's pump stopped responding as it should, so I went to @Ferbu's shop to borrow the tools to remove the pump and repair it.
Gladly @Ferbu lent me the tools and helped me to release the air that catches the pump. I wanted to share this work and learning with you so I hope you find it helpful.
Reason for the loss of pressure in the pump?
In this case, what caused the loss of pressure was the wear and tear of the rubber that carries a piston inside the cylinder.
The first thing to do is to remove the wedge from the pedalboard that holds the pencil that in turn drives the piston of the pump.
Once it is loose, we remove the pipe that carries the brake hose from the upper cylinder to the lower one. Once we have removed it, we remove the nuts that hold the cylinder and we take it off the vehicle.
To disassemble the cylinder you need to remove a retainer first. So place the cylinder in the press and remove the retainer with the help of a screwdriver and a screwdriver.
Before changing the piston rubber bands, we cleaned the cylinder, since, as shown in the photographs, the cylinder was very dirty due to the brake hose, which was in bad condition.
By removing the retainer the piston will come out automatically and we can replace the rubbers. The cylinder kit comes with a piston with new rubbers, so we were able to simply fit the new one, but this cylinder did not work with the new piston, so we had to remove the rubber from the new piston and fit it on the old piston.
To remove this rubber, I used a slotted screwdriver and very carefully to avoid breaking it, I removed it from the piston.
Now to assemble. We repeat the process but in reverse. I recommend you to smear a little bit of brake lube on the piston and walls of the cylinder so that the piston is not forced in.
First the spring. Then the piston. Then the retainer.
And ready to assemble!
To mount the pump in the vehicle it is exactly the same as we dismount it.
First we place the retainer that we removed from the pedal. Then in the front part of the vehicle, we fit the cylinder in the base and finally we adjust it with the nuts removed before.
To finish just attach the line and remove any air that may have grabbed the line and the pump. A process which I could not photograph because @Ferbu asked me to pump the crochet.
But it consists of pumping the crochet 3 to 5 times in a row, on the last one we leave it down and another person loosens the line coming out of the pump.
This process is done until it is seen that when loosening the line comes out the garter without air.
Of course this process there are easier ways to do it, in fact @Ferbu did it another way but I couldn't appreciate it because I was sitting there pumping.
Repairing or changing the upper clutch pump is quite simple, just follow these simple steps explained here.
I hope you find my post useful in the future!
🤩✨💖☝️✌️👌😍👋😁🖐️😉🌿🤗👈😏
Bastante curiosa la cooperación entre Ferbu y tu para reparar tu vehículo, esta genial diría yo por lo delicado que es el trabajo en equipo y lo completo que se siente en este caso, saludos y buen trabajo :)
Gracias @jesustiano por leer mi post, me alegra que te allá gustado. Ferbu es un gran amigo y colega siempre dispuesto a ayudar a los Hiver de acá en la zona en la que vivo, fue de mucha ayuda en la colaboración de este post.
hola interesante explicación, he ayudado a mi esposo solo a graduar los frenos y me trabajo es bombear 😁. Muy buena explicación. Gracias por compartir tu trabajo es muy importante tener al día los frenos. Saludos