(ESP/ENG) CONCURSO: FOAMI Y ANIME FUSIÓN/ SIMPÁTICA MARIQUITA🐞 FOFUCHA/ CONTEST: FOAMI AND ANIME FUSION/ CUTE LADYBUG🐞 FOOFUCHA
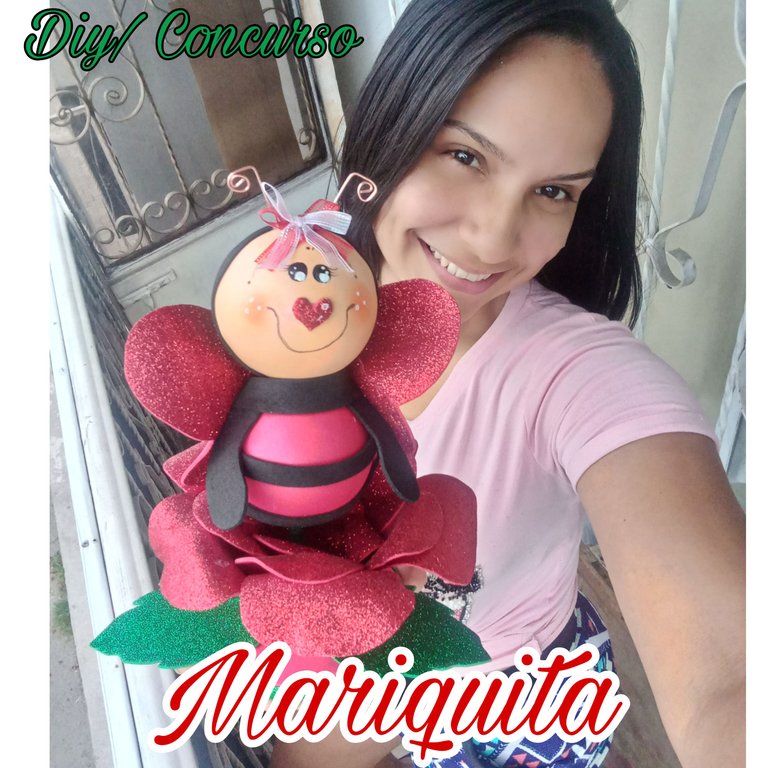
Hola que tal queridos amigos artesanos, espero estén pasando un excelente día, hoy les traigo mi participación en el concurso semanal que lleva a cabo esta creativa comunidad, ésta vez con el nombre de "Foami y Anime Fusión" el cual está a cargo de nuestra amiga @marybellrg , Les muestro la elaboración de Una Simpática Mariquita 🐞 Fofucha hecha de bolas de anime, foami y cartón, espero les guste.
Hello dear craft friends, I hope you are having a great day, today I bring you my participation in the weekly contest held by this creative community, this time with the name of "Foami and Anime Fusion " which is in charge of our friend @marybellrg , I show you the elaboration of A Cute Ladybug 🐞 Fofucha made of anime balls, foami and cardboard, I hope you like it.

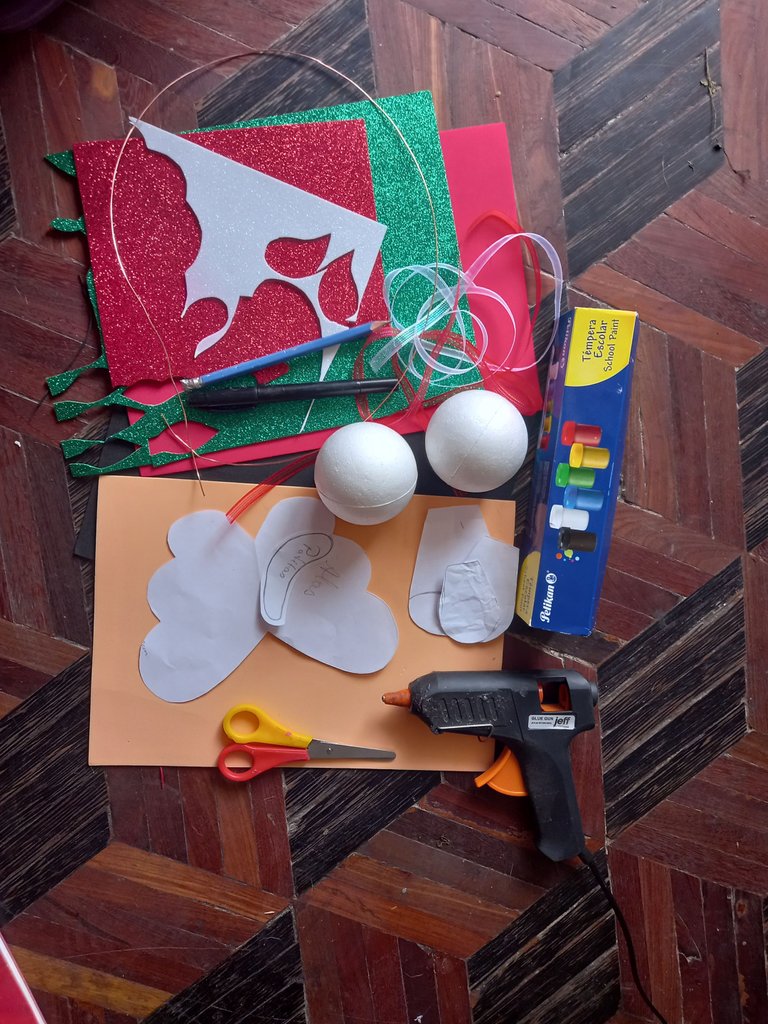
MATERIALES:
- Patrón de las alas y las patitas de la mariquita 🐞.
- Bolas de anime.
- Cinta Decorativa blanca y roja.
- Patrón de hojas
- Foami rojo, negro, verde y color piel.
- Cartón.
- Alambre.
- Témpera.
- Pincel.
- Tijeras.
- Marcador negro.
- Lápiz.
MATERIALS:
- Pattern of the ladybug's wings and little legs 🐞.
- Anime balls.
- Red and white decorative ribbon.
- Leaf pattern.
- Red, black and skin colored foami.
- Cardboard.
- Wire.
- Tempera.
- Paintbrush.
- Scissors.
- Black marker.
- Pencil.
PROCEDIMIENTO
PROCEDURE
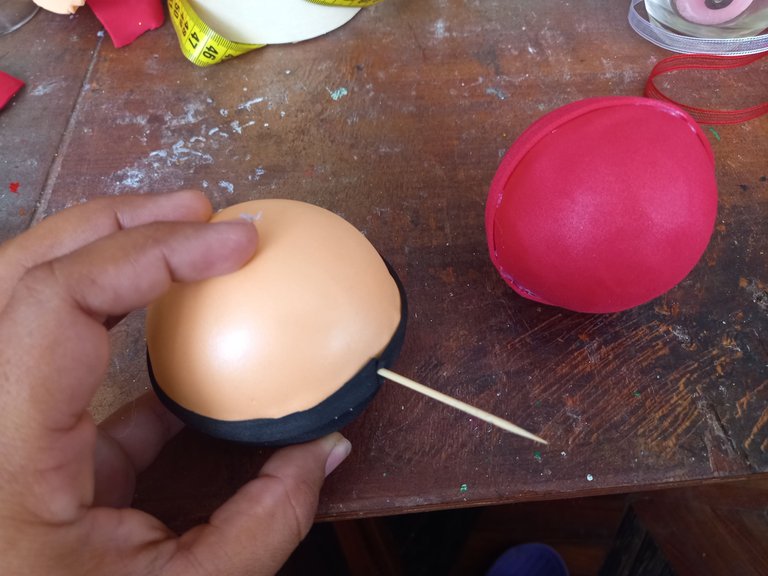
Comenzaremos recortando 2 cuadrado rojos, 1 negro y 1 color piel de aproximadamente 13×13 cm. Los colocaremos a cada uno de manera individual sobre la plancha y luego lo colocamos sobre la bola de anime y estiramos hasta cubrir la mitad de esta. Este mismo procedimiento lo haremos con todas.
We will start by cutting out 2 red, 1 black and 1 skin colored square of approximately 13×13. We will place each one individually on the plate and then we will place it on the anime ball and stretch it to cover half of it. We will do the same procedure with all of them.
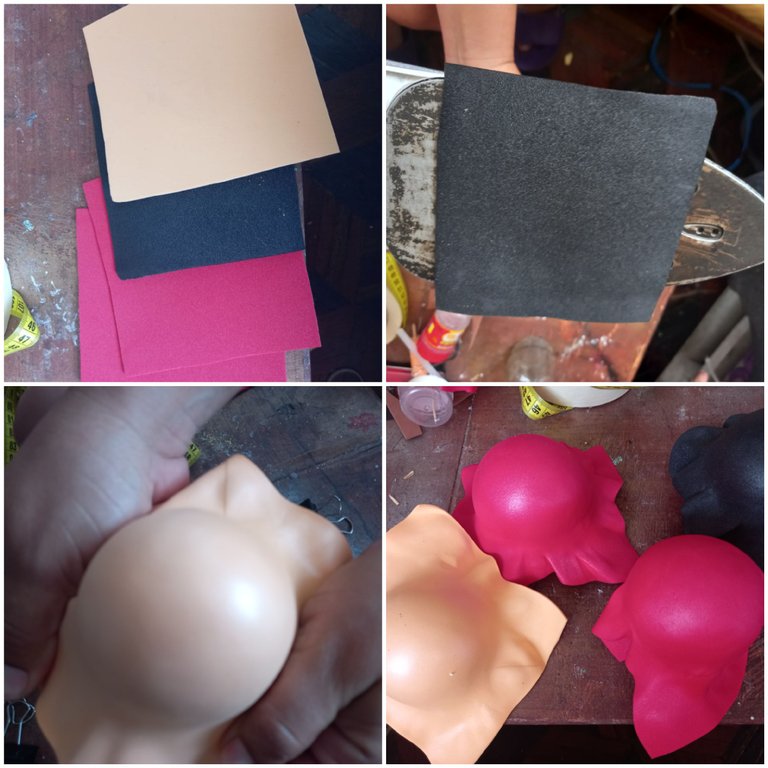
Aseguramos el foami en el anime, recortamos el excedente y pegamos una pequeña tira de foami por la unión de los colores.
We secure the foami on the anime, cut off the excess and glue a small strip of foami at the junction of the colors.
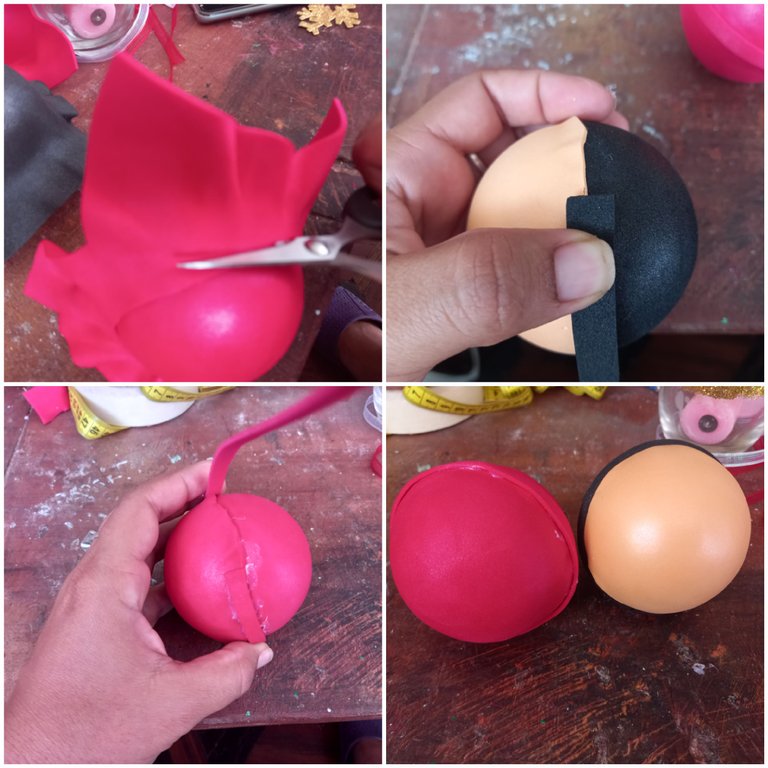
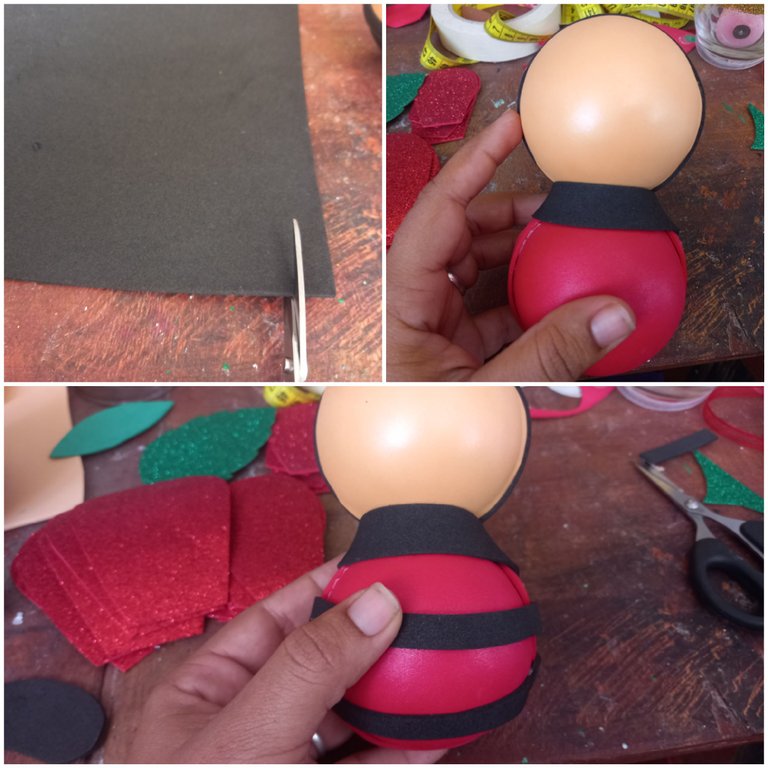
Con un Palillo mordadientes unimos las dos bolas de anime forradas.
With a toothpick we join the two anime balls.

Posteriormente hacemos unas franjas con foami negra y las fijamos sobre el cuerpo de la mariquita 🐞.
Then we make some stripes with black foami and fix them on the body of the ladybug 🐞.
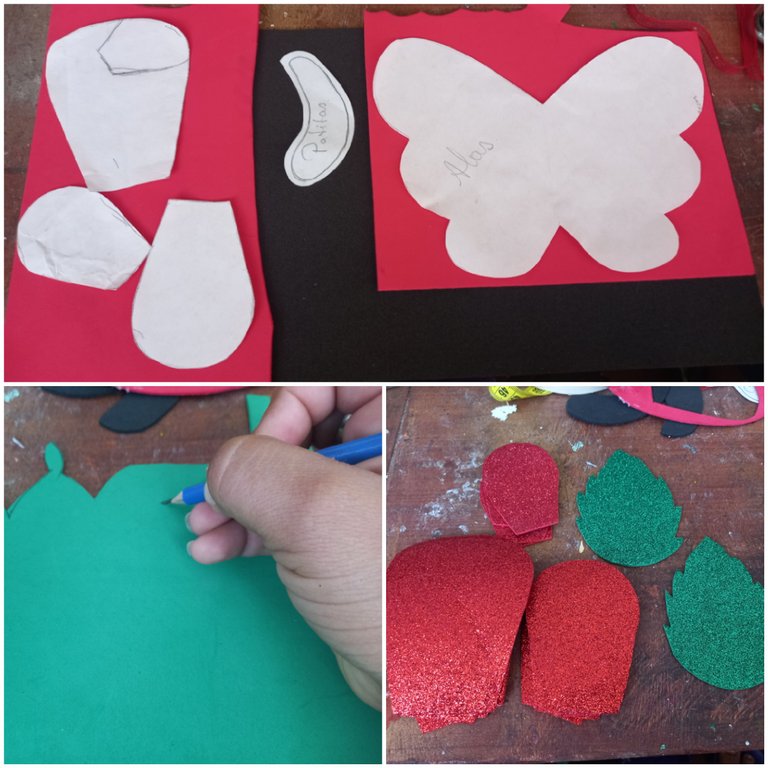
Después marcamos los patrones, el rojo escarchado para las alas y los pétalos, el negro para las líneas de la mariquita y el verde para las hojas.
Then we marked the patterns, frosted red for the wings and petals, black for the lines of the ladybug and green for the leaves.
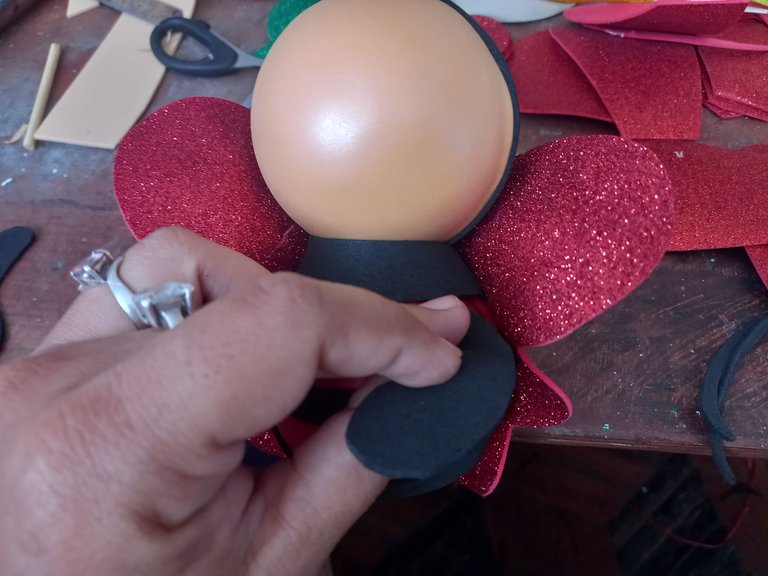
Seguidamente le pegaremos las alas a la mariquita y las patitas.
Then we glue the wings and legs to the ladybug.
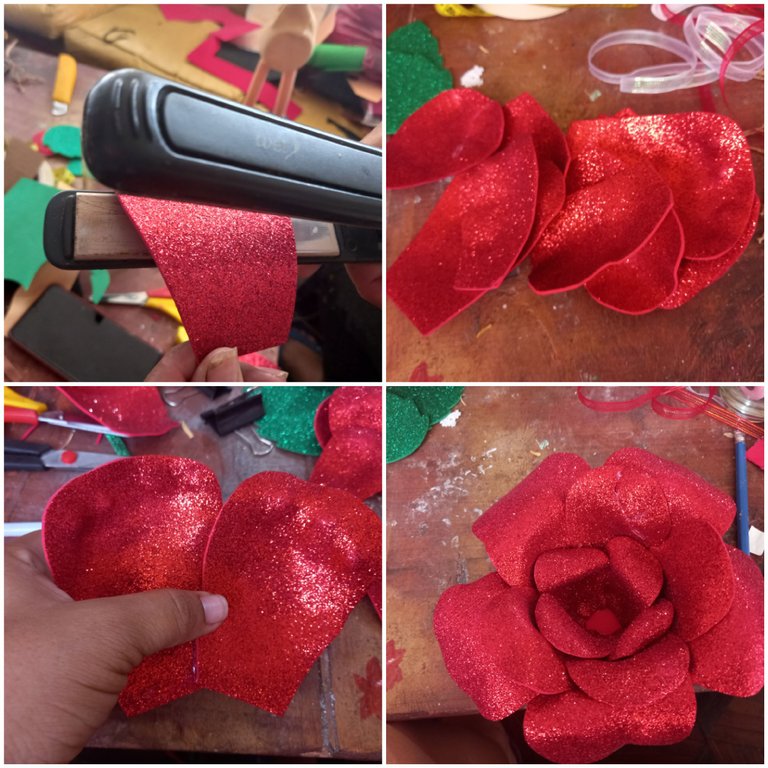
Pasamos por una plancha de cabellos los pétalos para darles forma y vamos uniendo hasta formar la rosa.
We pass the petals through a hair iron to give them shape and we join them until we form the rose.
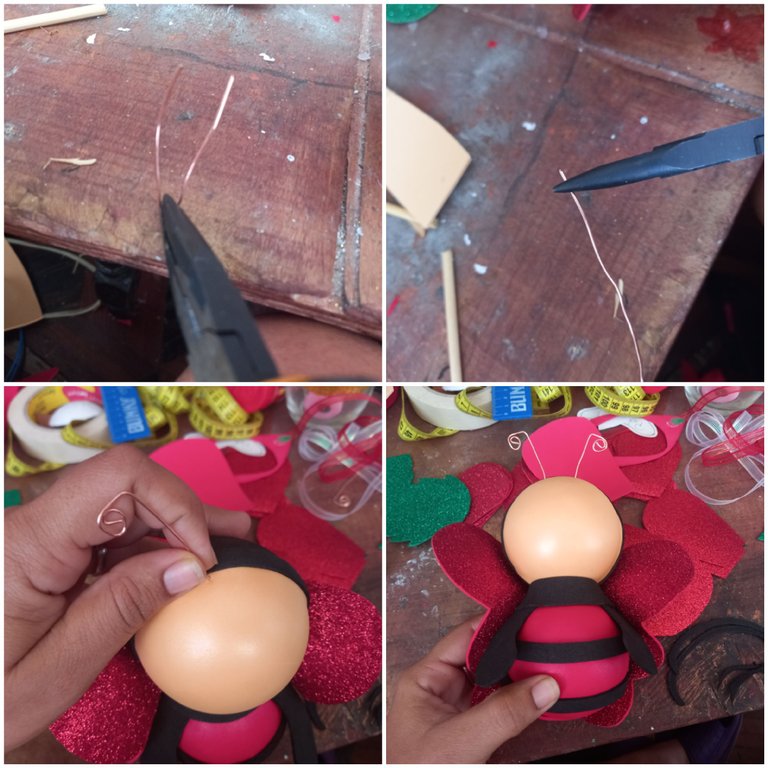
Asimismo cortaremos un pedazo de alambre para hacer las antenas y las introducimos en el anime.
We will also cut a piece of wire to make the antennas and insert them into the anime.
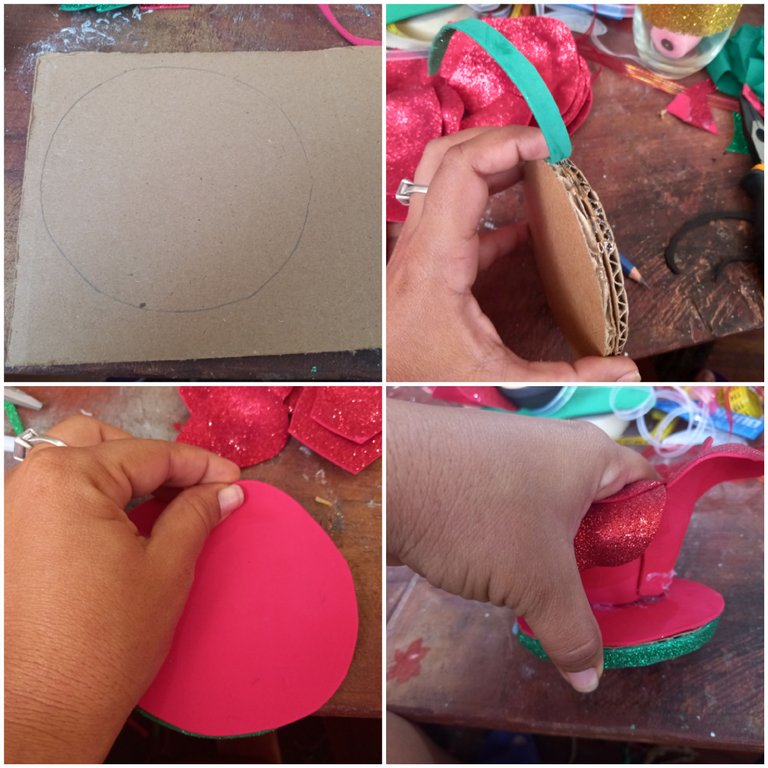
Luego recortamos dos círculos de cartón, los unimos y forramos sus bordes con foami verde y la superficie con foami rojo y fijamos la rosa sobre él.
Luego recortamos dos círculos de cartón, los unimos y forramos sus bordes con foami verde y la superficie con foami rojo y fijamos la rosa sobre ella.
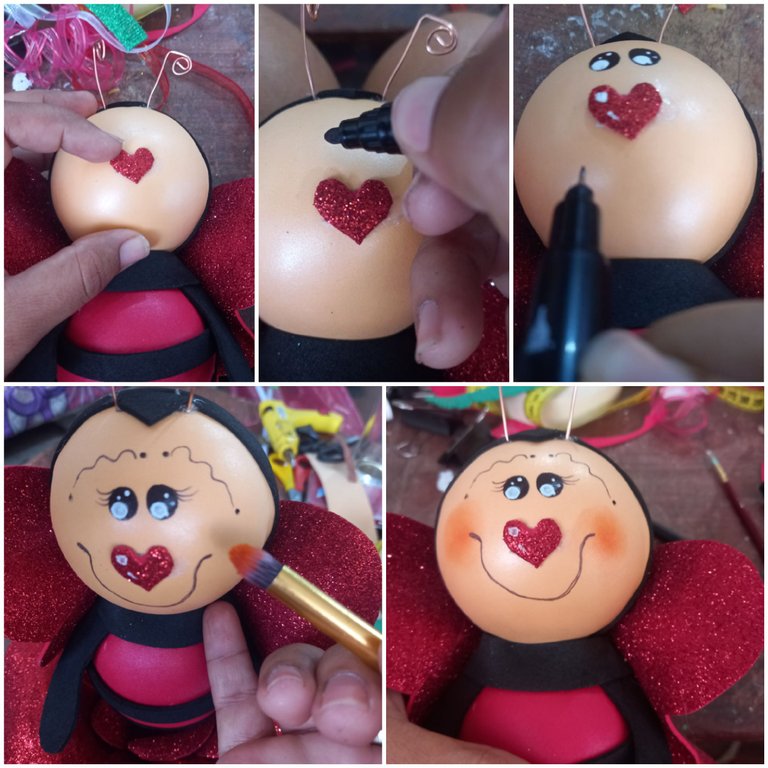
Pegamos un pequeño corazón en el centro de la cara para que sea la nariz y con un marcador negro punta fina hacemos la boca los ojos y las cejas, de igual manera aplicaremos rubor en las mejillas.
We glue a small heart in the center of the face to be the nose and with a black fine tip marker we make the mouth, eyes and eyebrows, in the same way we will apply blush on the cheeks.
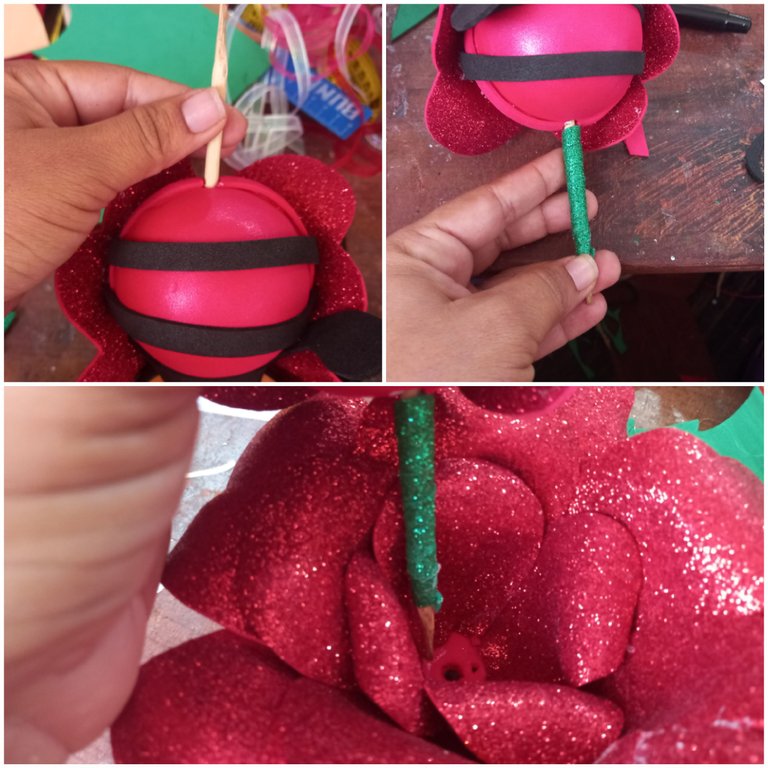
Introducimos un pequeño Palillo de altura forrado con foami verde, en la parte de abajo de la mariquita y lo fijamos en el centro de la rosa.
We insert a small high stick lined with green foami into the bottom of the ladybug and fix it in the center of the rose.
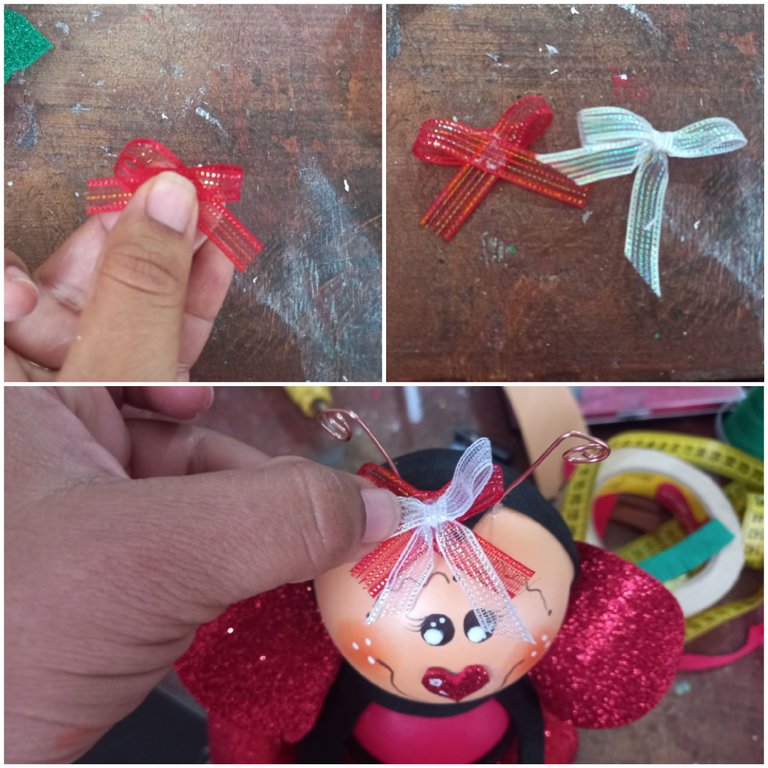
Finalizamos haciendo dos lazos y lo pegamos delante de las antenitas de la mariquita 🐞.
We finish by making two loops and glue it in front of the ladybug's antennae 🐞.
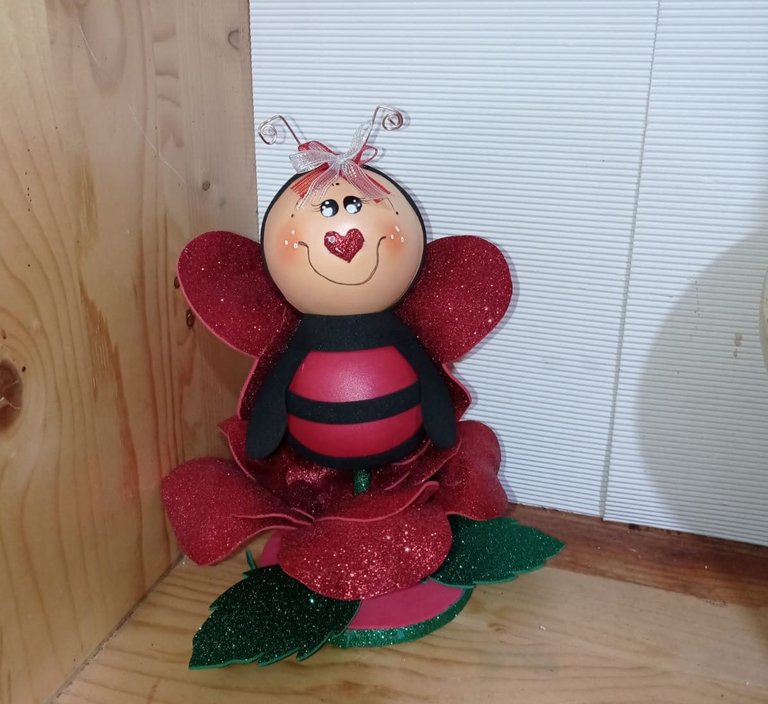
**RESULTADO FINAL **
**FINAL RESULT **
Gracias mis amigos por visitar, espero les haya gustado éste material. Aprovecho la oportunidad para extender la invitación mi amiga @gemahernandez para que participe en este creativo concurso.
*Thank you my friends for visiting, I hope you liked this material. I take this opportunity to extend the invitation to my friend @gemahernandez to participate in this creative contest *.
Una hermosa creaciòn sin duda alguna. Que bella te ha quedado esa mariquita. Hermoso el producto y tu publicaciòn bien presentada y detallada. Gracias por participar! Exitos en ek concurso! @kathelopez77
Hola querida amiga @marybellrg, de corazón gracias por tu valioso comentario y por los buenos deseos. Seguimos trabajando en el buen contenido. Saludos amiga 😊
Hermoso trabajo amiga, el trabajo en foami te quedó maravilloso y super delicado, la rosa es de un máximo nivel de acabado. Felicidades, eres una crack del modelado en foami. Muchísima suerte en el concurso.
Hola estimada amiga @aksurevm89, estamos en en el camino del buen contenido, tratando de hacer lo mejor posible cada día amiga. He visto tus trabajos y también son muy bonitos, se ve que le pones empeño. Bendiciones amiga.
Esa es la idea, crear contenido original de calidad amiga y plasmar tu personalidad en ellos, porque parece mentira pero las manualidades hablan por si solas y nos indican que tipo de persona se encuentra detrás del teclado. Muchísimas felicidades!!
Así es amiga, tienes razón 👍.
Hola @kathelopez77, Qué mariquita tan hermosa, la expresión del rostro es na ternura.
Saludos. 🤗
Feliz día amiga @adonisr, que bueno que te haya gustado esta tierna y simpática mariquita 🐞, gracias por comentar amiga. Saludos 🤗.
Muy hermoso tu trabajo amiga @kathelopez77 tiene un acabado espectacular, sus colores tan vivo transmiten vida. Me gusto mucho la mirada de la mariquita. Feliz día.
Muchas Bendiciones!
Gracias mi estimado amigo por tu lindo comentario, le puse mucho empeño y amor al trabajo realizado, y pues veo que valió la pena, gracias por comentar, saludos y bendiciones.
So cute!