(Esp/Eng) Confección de un Strapless bombacho en tela de chifón/Making of a Strapless bloomers in chiffon fabric
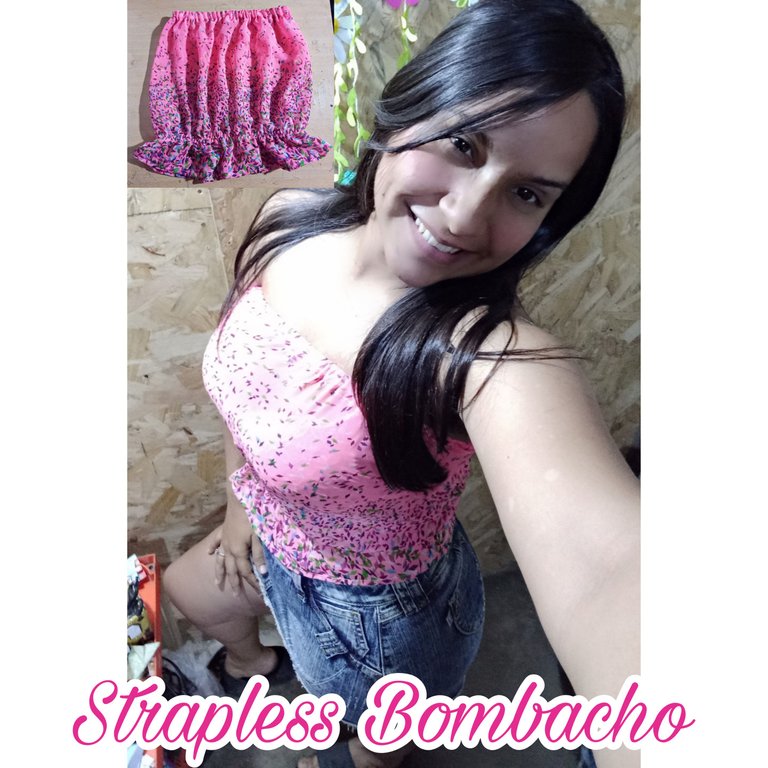
Hola qué tal mi linda Colmena #NeedleWorMonday, espero que estén pasando un lindo día, lleno de mucho éxito y mucha salud. Es un gusto saludarlos nuevamente y compartir con ustedes la confección de un Strapless bombacho , en tela de chifón estampada; está super fashion y con colores muy hermosos. Aquí te muestro cómo la hice.
Hello my beautiful #NeedleWorMonday, I hope you are having a nice day, full of success and good health. It is a pleasure to greet you again and share with you the confection of a Strapless bloomers , in printed chiffon fabric; it is super fashion and with very beautiful colors. Here I show you how I made it.

- Tela de chifón estampada.
- Elástico.
- Cinta Métrica.
- Tijeras.
- Máquina de coser.
- Printed chiffon fabric.
- Elastic.
- Tape measure.
- Scissors.
- Sewing machine.


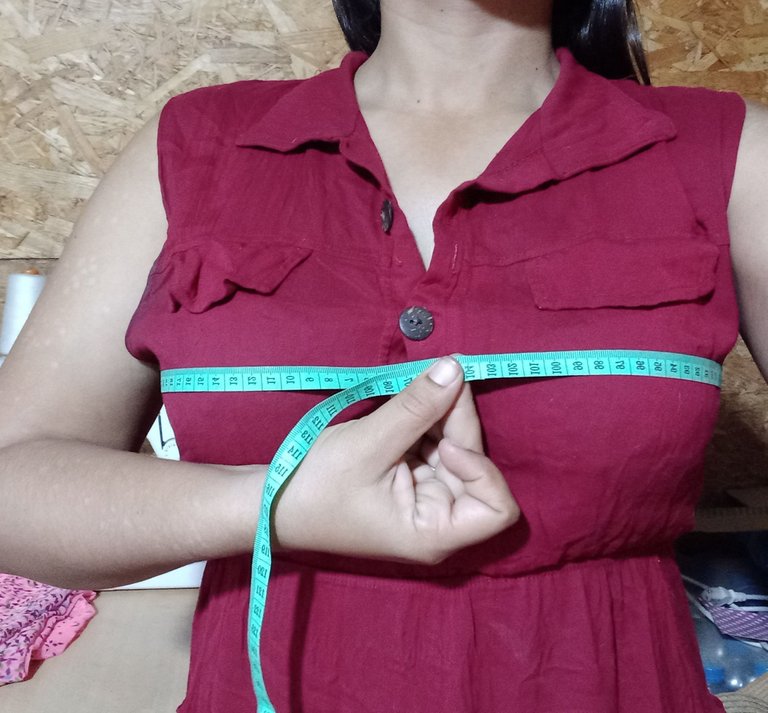
Lo primero que haremos es tomar la medida del contorno del busto, en mi caso el contorno del busto es de 98 cm, al cual le agregué 4 cm más para que no quede justo y pueda quedar abombado al momento de colocar el elástico.
The first thing to do is to take the measurement of the bust contour, in my case the bust contour is 98 cm, to which I added 4 cm more so that it is not just right and can be bulging at the time of placing the elastic.
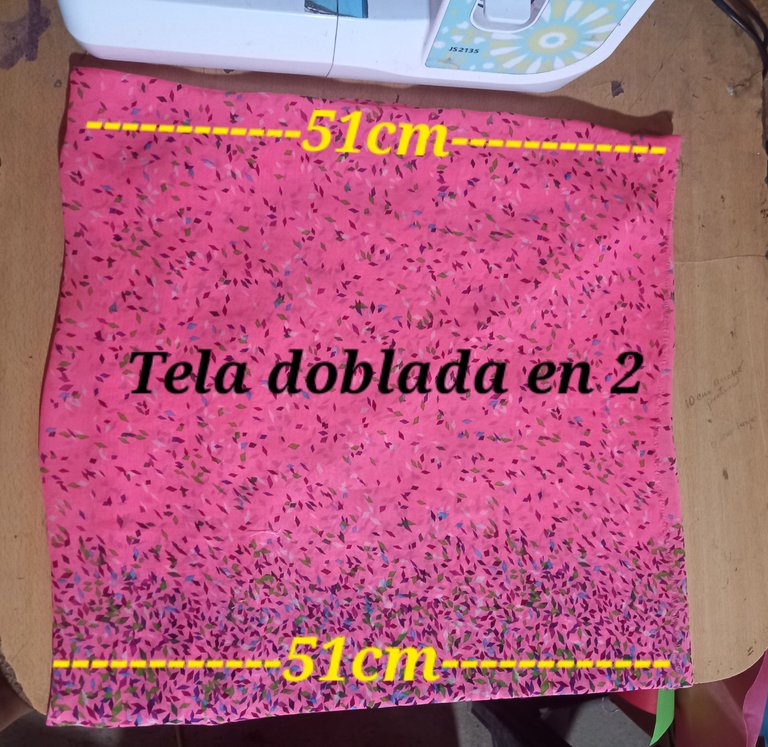
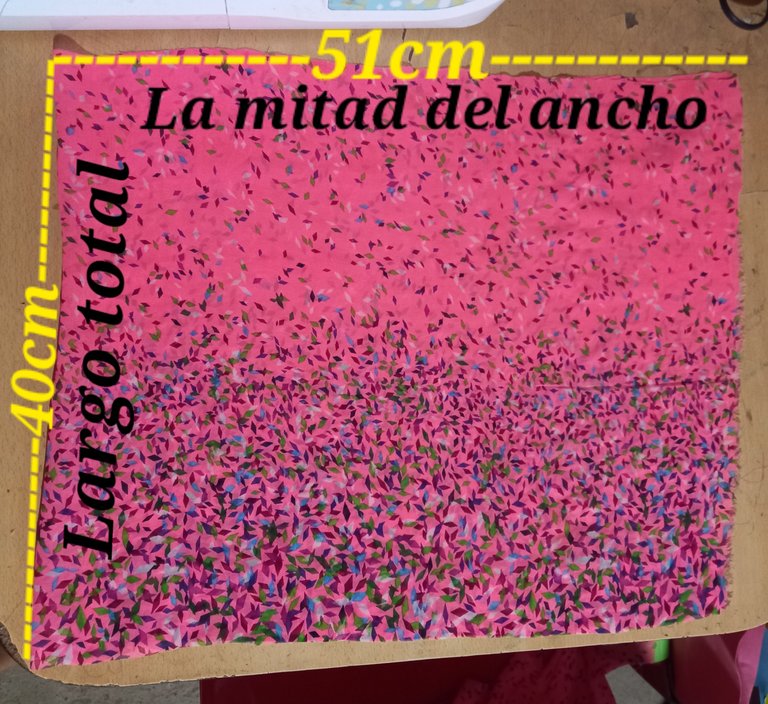
Luego de haber tomado la medida del contorno de busto, procedemos a colocar la tela en dos, siguiendo la mitad de la medida del contorno del busto, es decir, si son 102 cm, doblaremos la tela a 51cm de ancho.
After taking the measurement of the bust contour, we proceed to place the fabric in two, following half the measurement of the bust contour, that is, if it is 102 cm, we will fold the fabric to 51cm wide.
Cortamos la tela siguiendo las medidas.
We cut the fabric following the measurements.
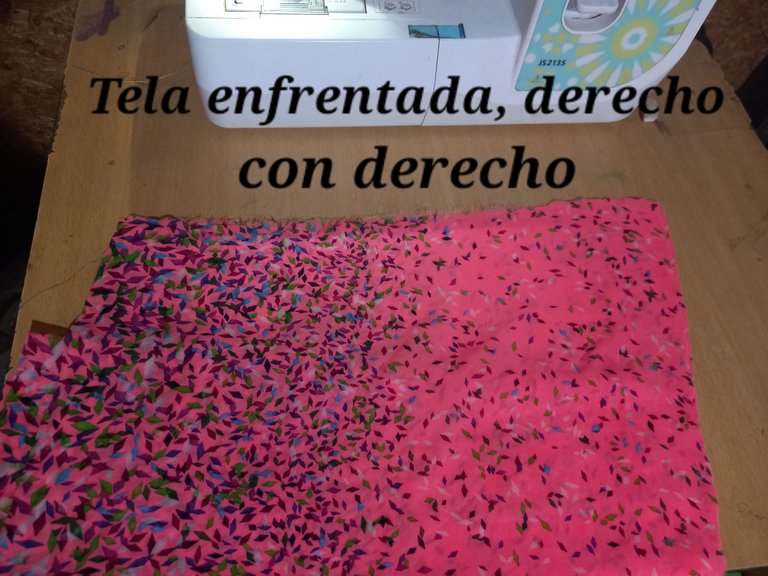
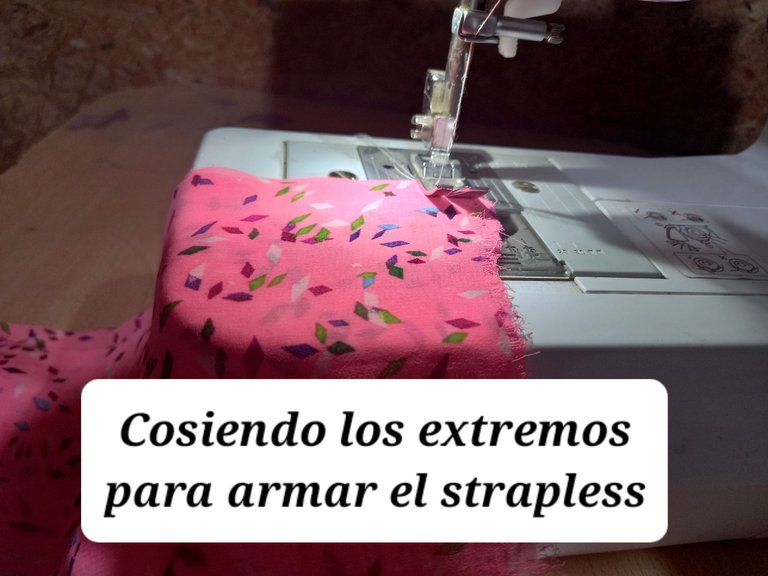
Posteriormente colocaremos nuestra tela enfrentando derecho con derecho y unimos los extremos para coserla por allí, ya que, nuestro strapless tendrá una sola costura, la cual quedará por la parte de atrás.
Afterwards, we will place our fabric right sides together and join the ends to sew it there, since our strapless will have only one seam, which will be on the back side.
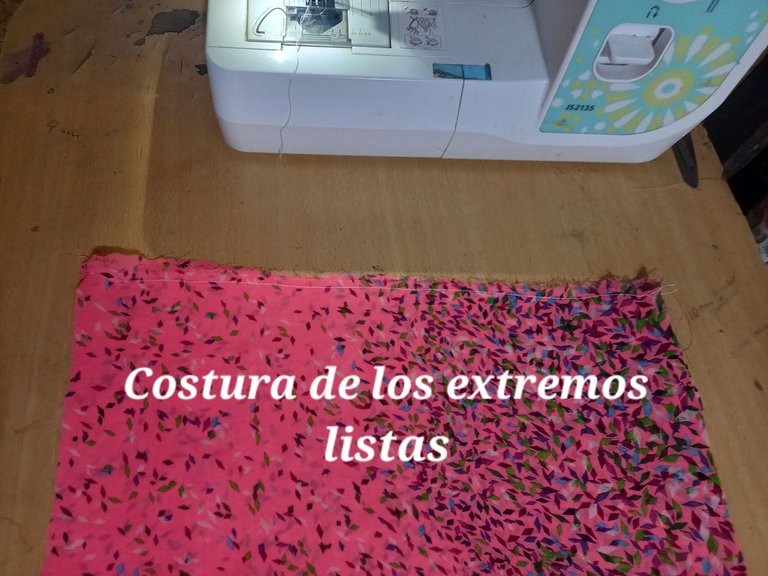
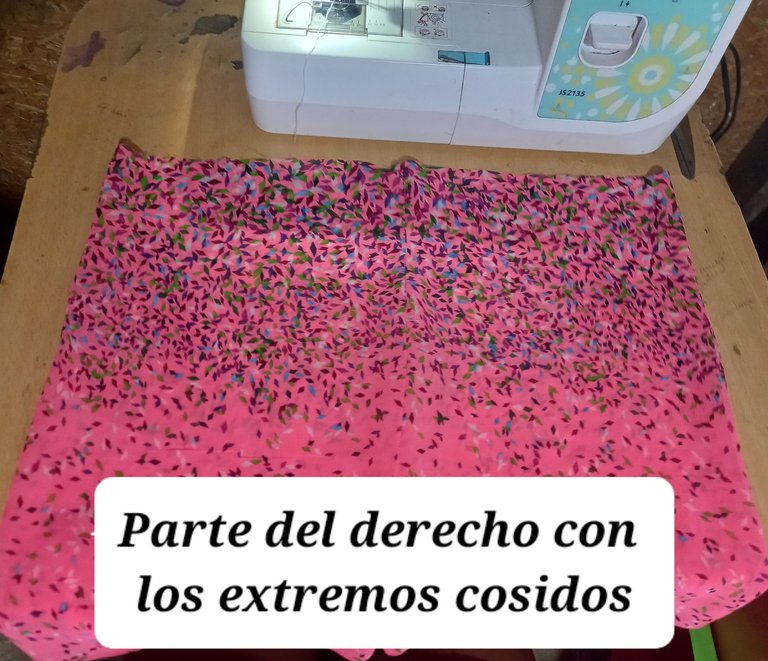
Una vez cosidos los extremos procedemos a desdoblar.
Once the ends are sewn, we proceed to unfold.
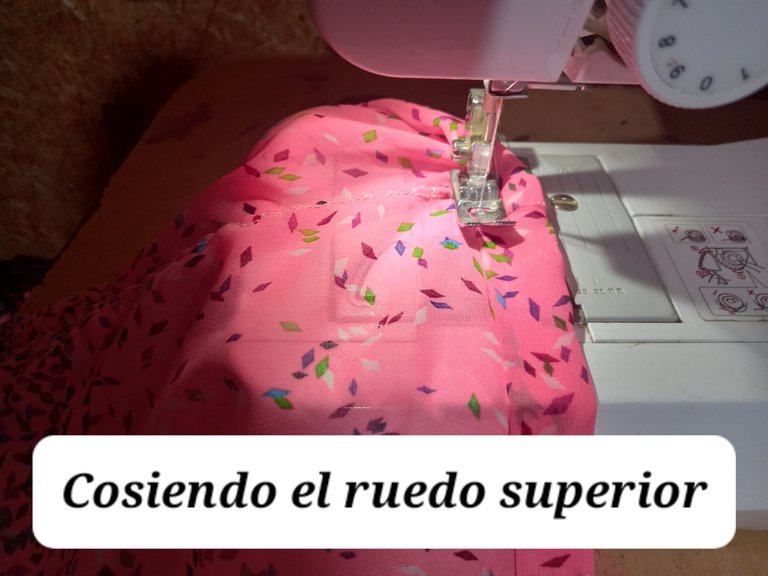
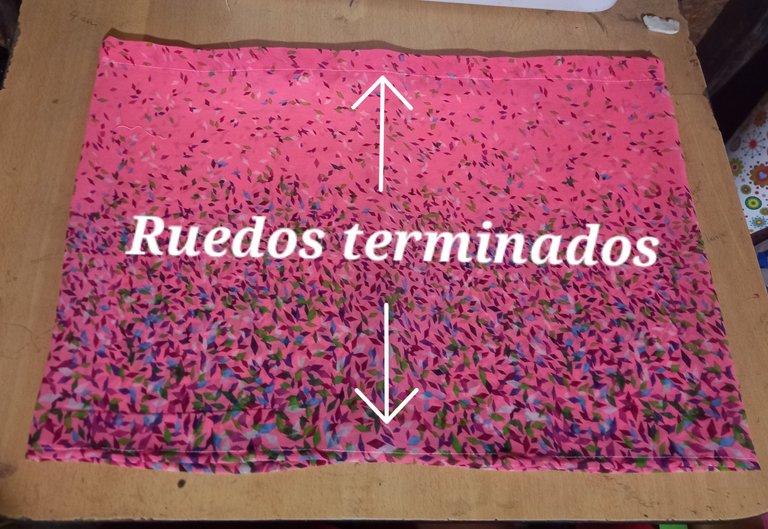
Después haremos un ruedo en la parte superior del strapless de 2 cm de ancho, vamos a doblar la orilla dos veces, ya que ésta tela tiende a deshilar.
Next, we will make a 2 cm wide ruffle at the top of the strapless, we will fold the edge twice, as this fabric tends to unravel.
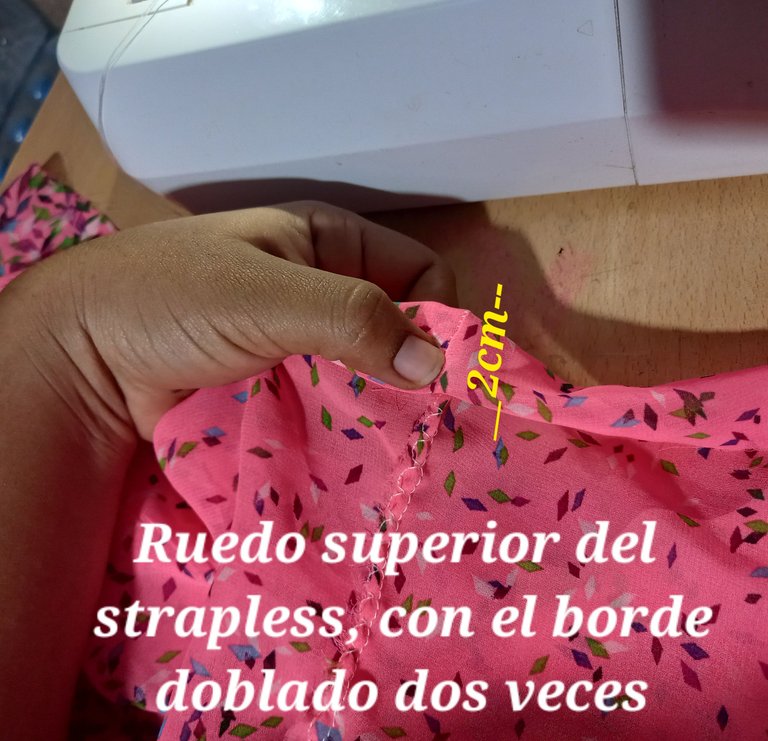
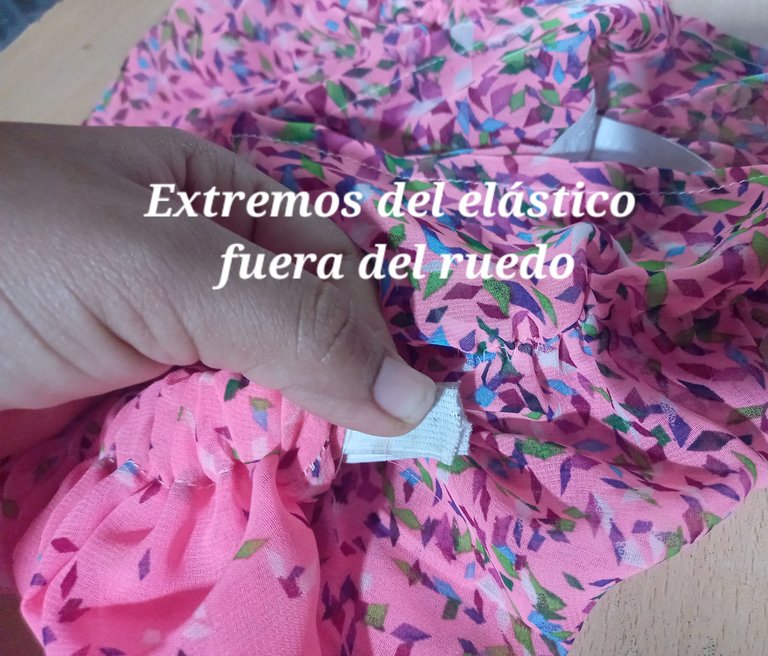
Antes de terminar la costura del ruedo, vamos a dejar un pequeño espacio para introducir por allí el elástico.
Before finishing the hem seam, we are going to leave a small space to introduce the elastic through it.

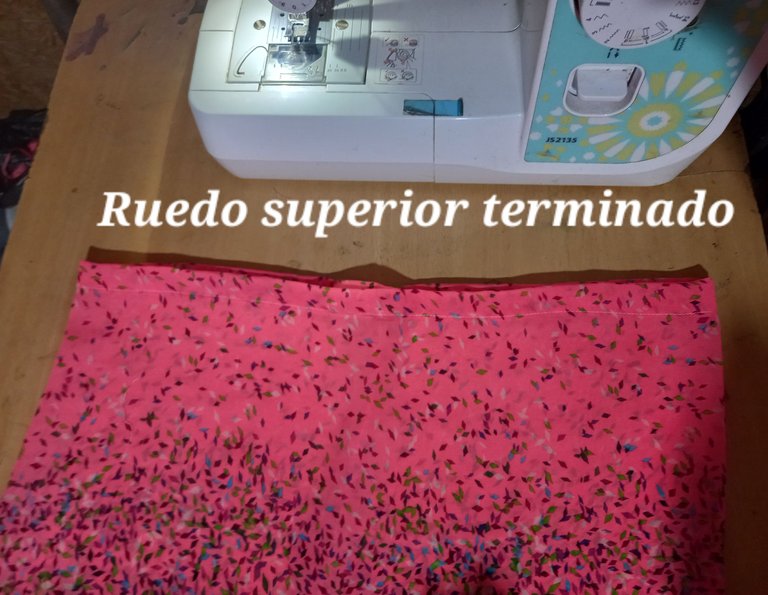
Cuándo hayamos terminado de hacer el ruedo en la parte superior del strapless, procedemos a hacer un ruedo en la parte inferior del mismo de un centímetro de ancho.
When we have finished making the ruffle at the top of the strapless, we proceed to make a ruffle at the bottom of the strapless about one centimeter wide.
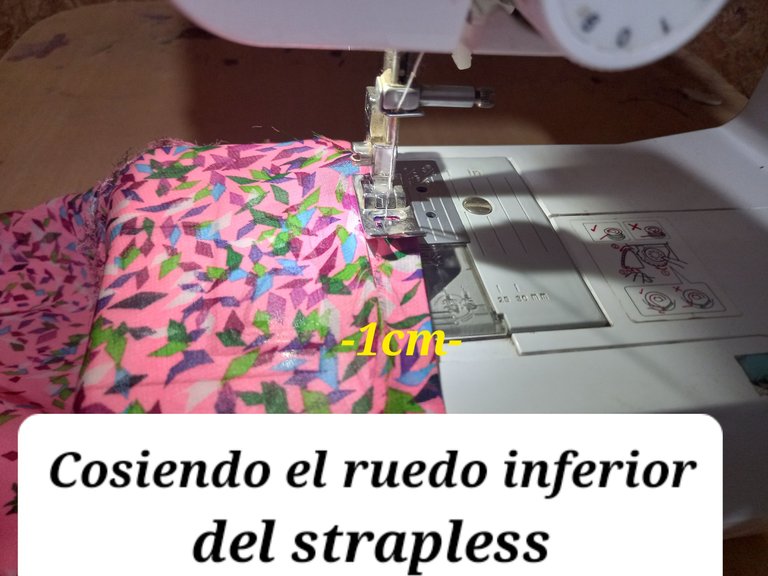
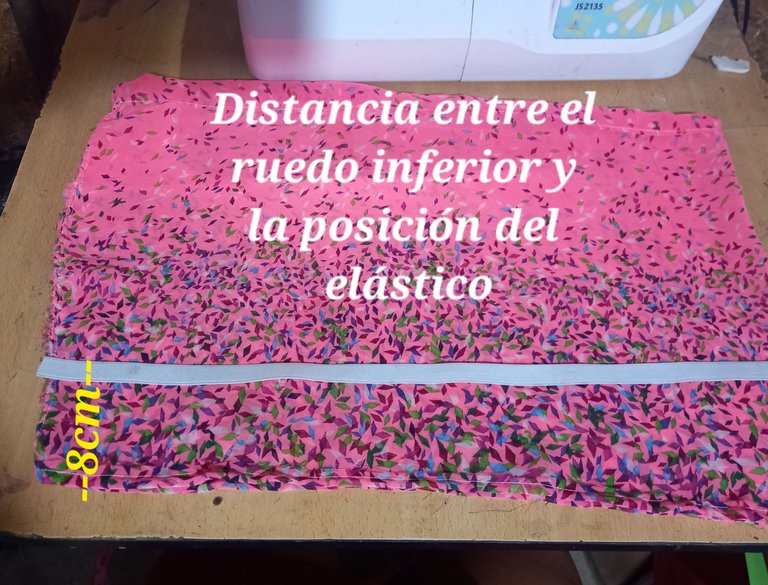
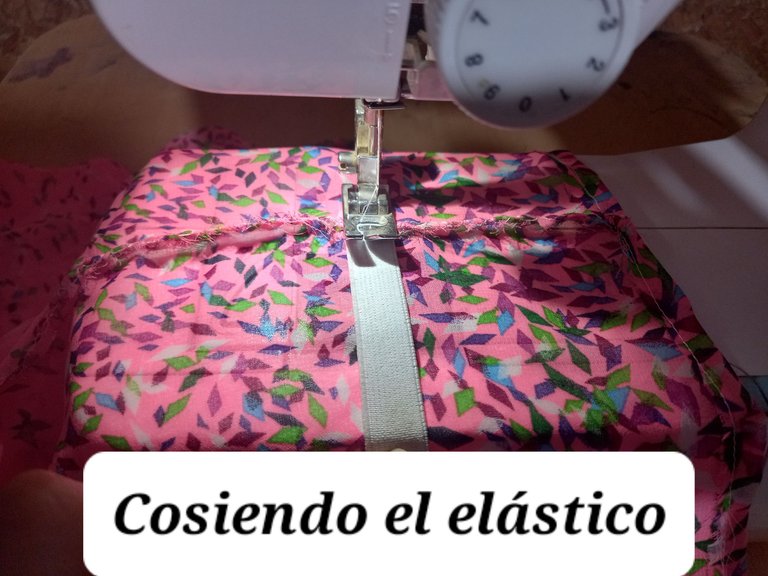
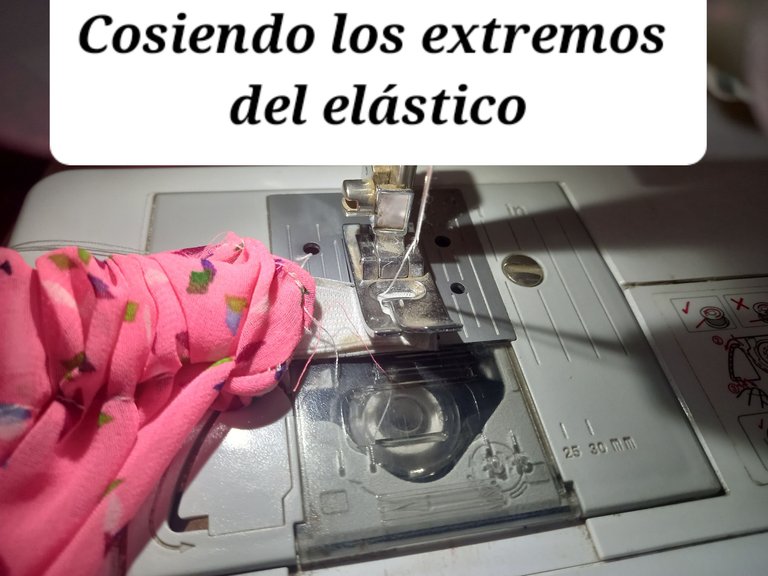
Terminado los dos ruedos, comenzaremos a coser el elástico, separado de la orilla inferior del strapless, a una distancia de 8 cm hacia arriba. Para esto aseguramos primeramente la punta del elástico sobre la tela y vamos estirando y cosiendo.(costura en zigzag).
After finishing the two rows, we will start sewing the elastic, separated from the bottom edge of the strapless, at a distance of 8 cm upwards. To do this, first secure the end of the elastic on the fabric and stretch and sew (zigzag stitching).
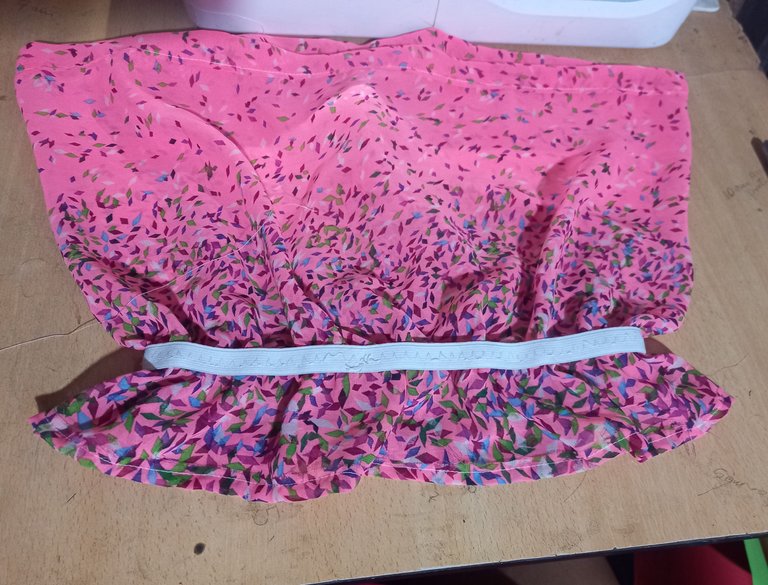
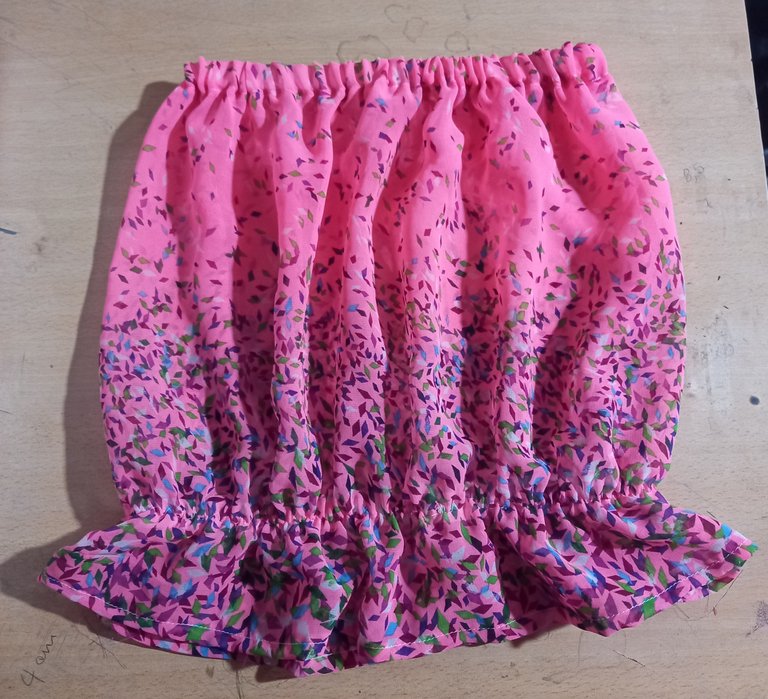
Ahora con la ayuda de un alfiler introducimos el elástico por el espacio del ruedo superior que dejamos sin costura, cuando hayamos obtenido los dos extremos ya fuera del ruedo los cosemos.
Now with the help of a pin we introduce the elastic through the space of the upper hem that we left without sewing, when we have obtained the two ends already out of the hem we sew them.

¡Listo ya terminamos el strapless, veamos el resultado.!

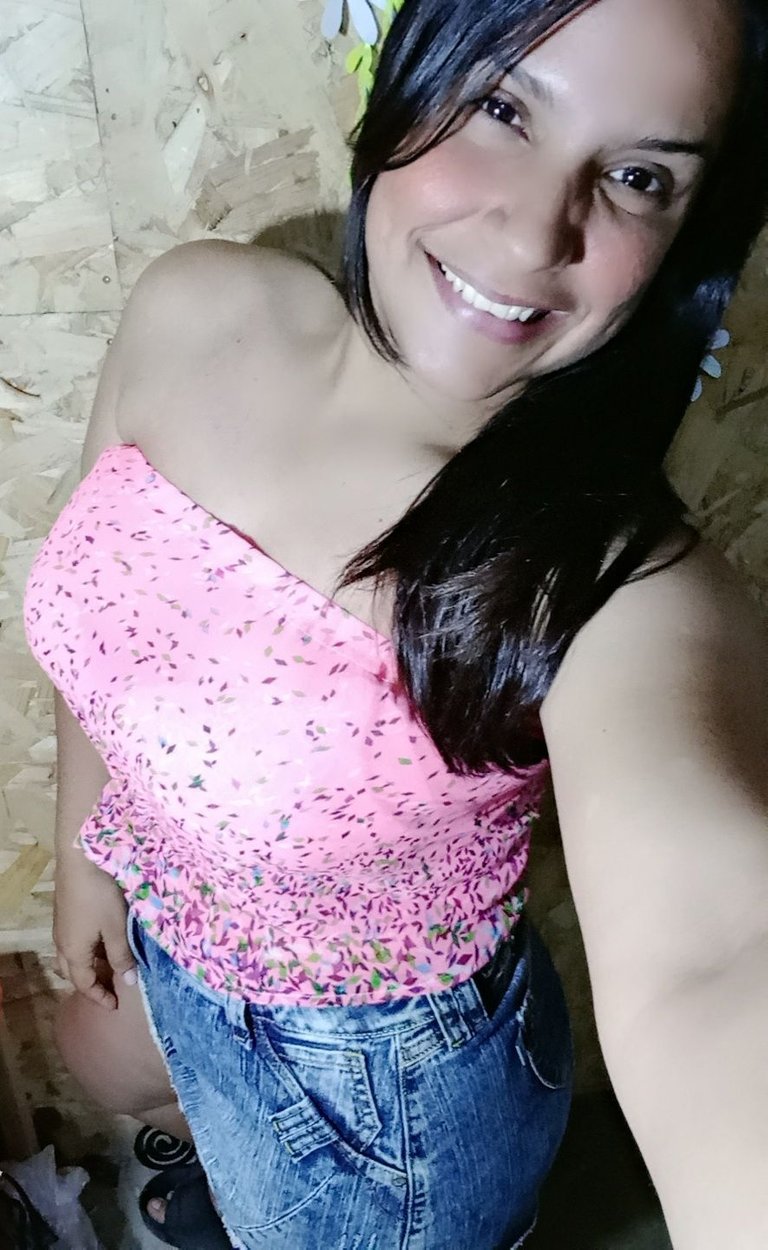
Gracias estimado amigo lector por quedarte hasta el final de este tutorial. Espero te haya gustado el resultado y lo pongas en práctica ya es una prenda que podemos lucir con falda short o pantalones. Será hasta otra oportunidad mis amigos. Muchas 🙏🏻😊.
Thank you dear reader friend for staying until the end of this tutorial. I hope you liked the result and put it into practice as it is a garment that we can wear with short skirt or pants. It will be until another opportunity my friends. Thank you very much 🙏🏻😊.
Hola amiga ❣️. Que bueno que quedó este top y muy sencillo de hacer. La toma de medidas muy sencilla y el efecto de volado es genial. También te queda muy bien.
Saludos 💕💕
Hola linda amiga, gracias por tan bonito comentario, saludos 🤗
@kathelopez77 this dress is so super beautiful and well detailed thanks for sharing
Hola estimado amigo @smilestitches, gracias a ti por comentar. Saludos 🖐🏻 😊
Hermoso Top, se ve muy juvenil y fresco, te felicito
Gracias estimada amiga @leslieq78 por tus felicitaciones. Saludos y Bendiciones 😊 🙏🏻
Congratulations @kathelopez77! You have completed the following achievement on the Hive blockchain and have been rewarded with new badge(s):
Your next target is to reach 600 replies.
You can view your badges on your board and compare yourself to others in the Ranking
If you no longer want to receive notifications, reply to this comment with the word
STOPCheck out the last post from @hivebuzz:
Support the HiveBuzz project. Vote for our proposal!
Nice meeting too. You have done nice work. Thanks for sahring.
Gracias a ti estimado amigo por comentar. Bendiciones 🙏🏻
I love these top, it's so lovely and looks good on you, I guess the Material print is beautiful.
me encanta como se ve, es un gran resultado y el patron de la tela es muy bonito :3
Gracias amiga @youyowi, saludos 🤗
Quedó muy bonito el top, me gustó mucho la tela que escogiste. Saludos 🤗
Hola mi linda amiga @irenenavarroart, gracias por comentar. 😊
Thank you for sharing this amazing post on HIVE!
Your content got selected by our fellow curator @rezoanulvibes & you just received a little thank you via an upvote from our non-profit curation initiative!
You will be featured in one of our recurring curation compilations and on our pinterest boards! Both are aiming to offer you a stage to widen your audience within and outside of the DIY scene of hive.
Join the official DIYHub community on HIVE and show us more of your amazing work and feel free to connect with us and other DIYers via our discord server: https://discord.gg/mY5uCfQ !
If you want to support our goal to motivate other DIY/art/music/homesteading/... creators just delegate to us and earn 100% of your curation rewards!
Stay creative & hive on!