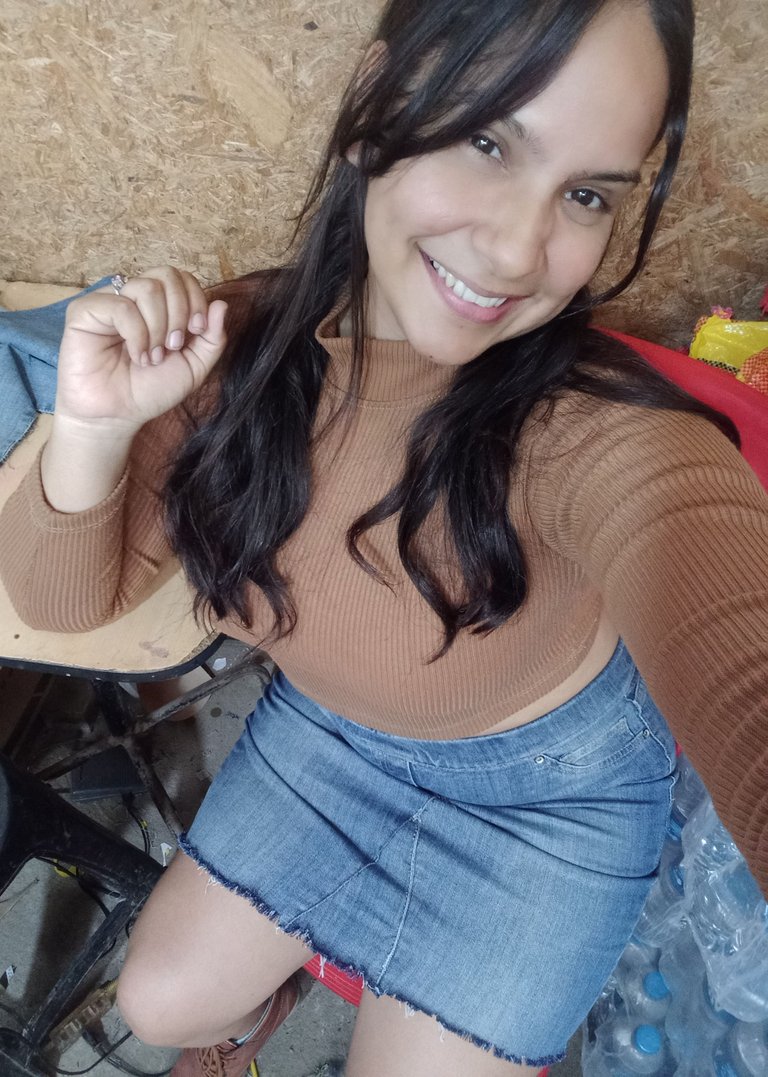
(Esp/Eng) Confección de una falda de mezclilla, con pantalón vaquero/Making a denim skirt, with denim pants
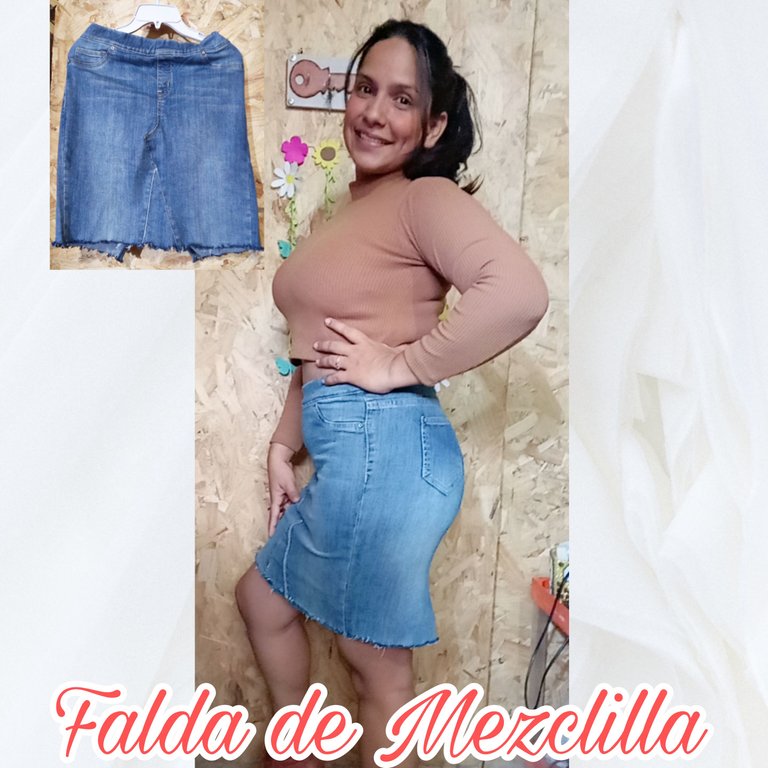
Hola mi linda familia de #hive y #NeedleWorkmonday espero que estén padando un lindo día; es un gusto volver a saludarlos y compartir con ustedes mi linda colmena, la confección de una falda de mezclilla, partiendo desde un pantalón vaquero stretch. Estos pantalones son ideales para hacer este tipo de falda por su corte y costuras. Aquí les muestro cómo la hice.
Hello my beautiful #hive and #NeedleWorkmonday family, I hope you are having a nice day; it is a pleasure to greet you again and share with you my beautiful beehive, the making of a denim skirt, starting from a stretch denim pants. These pants are ideal for making this type of skirt because of their cut and seams. Here I show you how I made it.

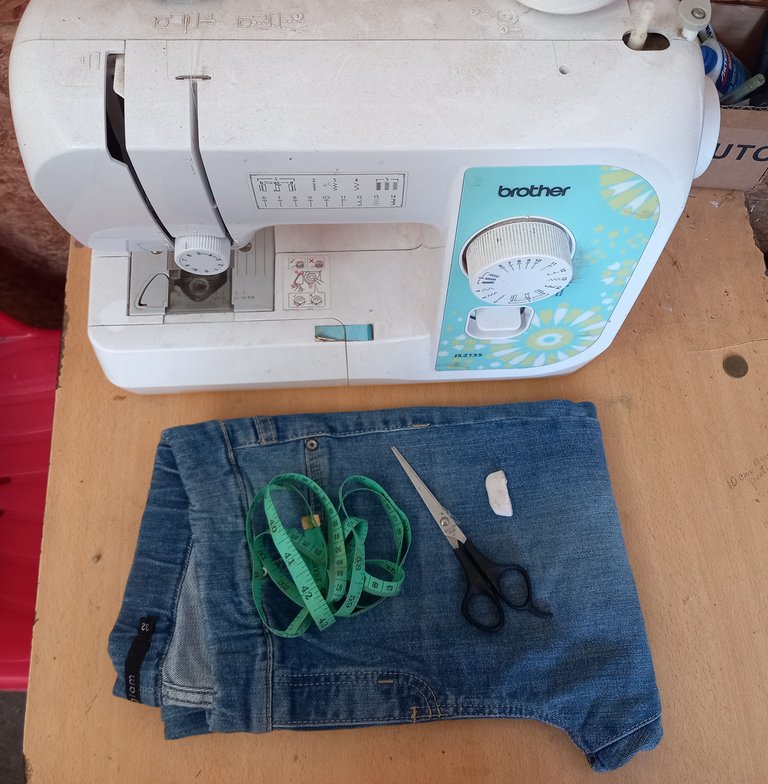
- Pantalón baquero de tiro alto.
- Cinta métrica.
- Jabonsillo textil.
- Tijeras.
- Hilo.
- Máquina de coser.
- High-waist jeans.
- Tape measure.
- Textile soap dispenser.
- Scissors.
- Thread.
- Sewing machine.

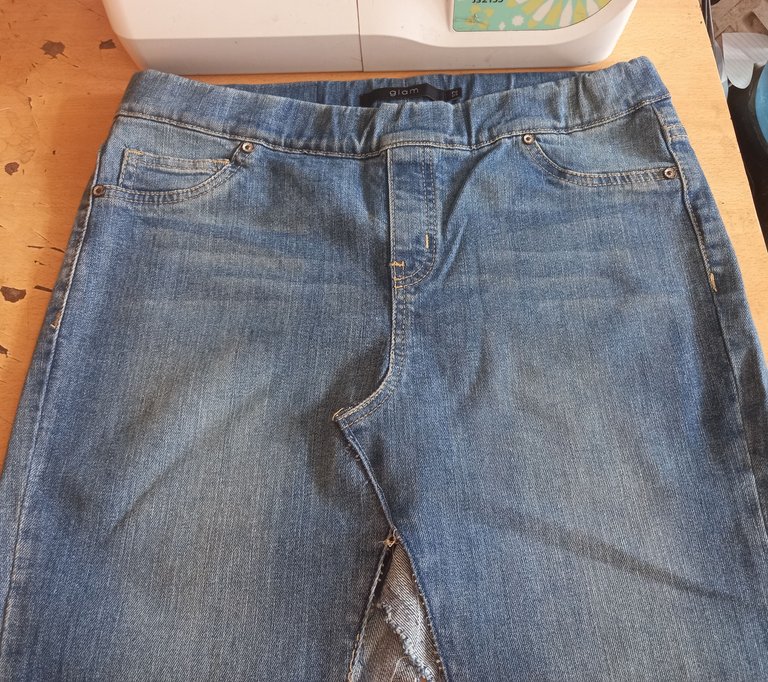
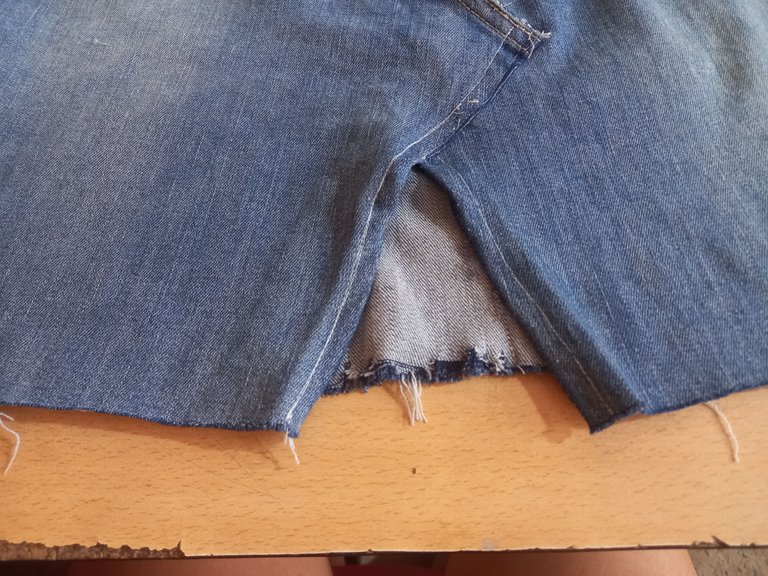
Primero comenzaremos debaratando la costura de las entrepierna.
First we will begin by discussing the crotch seam.
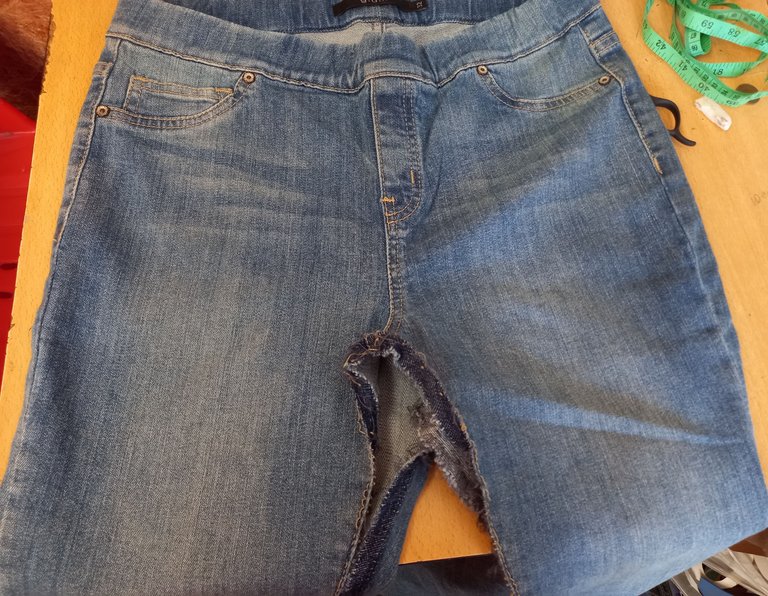
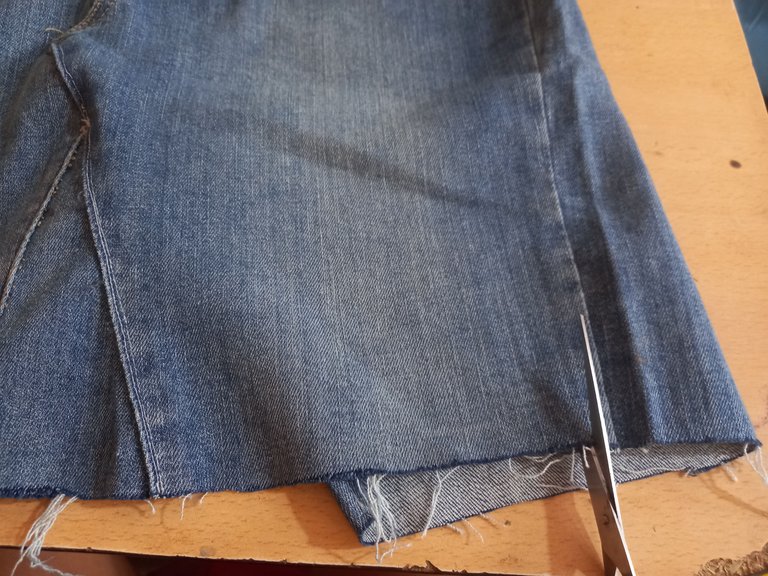
Luego medimos el largo deseado de la falda y cortamos. Ésta tiene 46cm de largo.
Then we measure the desired length of the skirt and cut. This one is 46cm long.

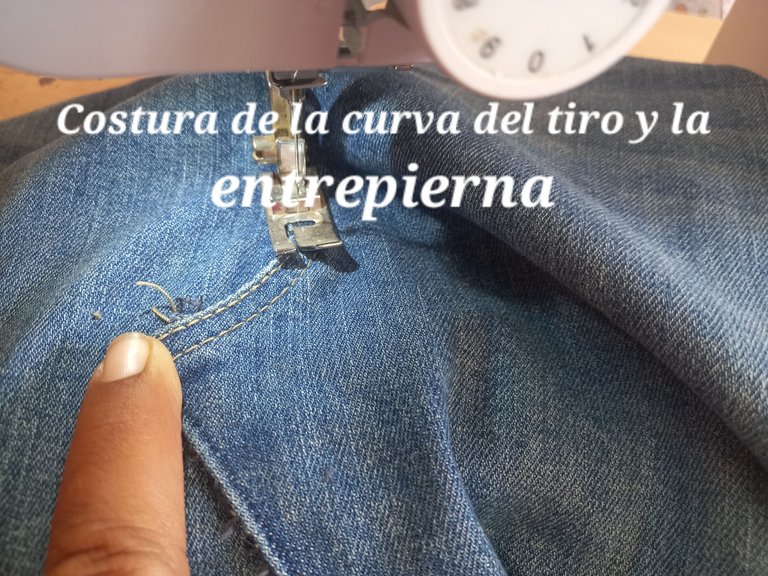
En la curva del tiro hacemos un pequeño corte, que nos permita doblar la punta de la curva hacia un lado y que la otra punta quede debajo.
We make a small cut in the curve of the shot, which allows us to bend the tip of the curve to one side and the other tip to be underneath.
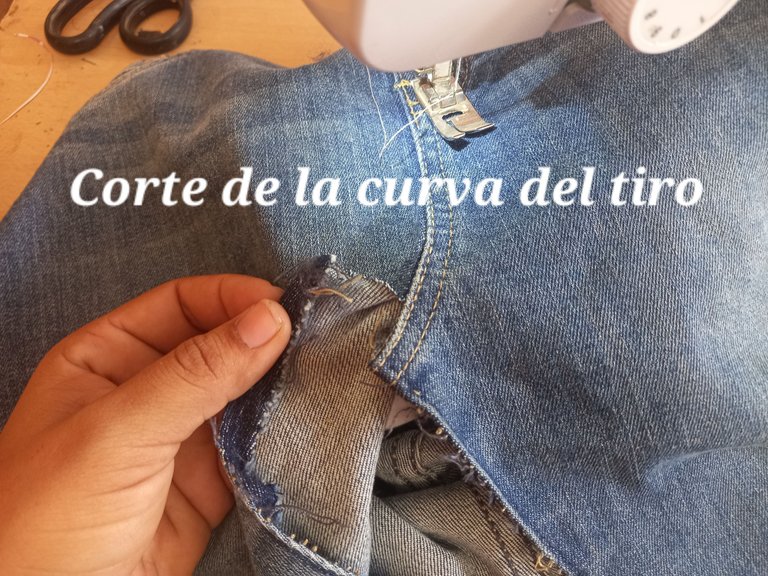
Una vez hecho el procedimiento anterior, procedemos a coser la curva del tiro y parte de la entrepierna con la otra pieza.
Once the above procedure has been done, we proceed to sew the curve of the draft and part of the crotch with the other piece.
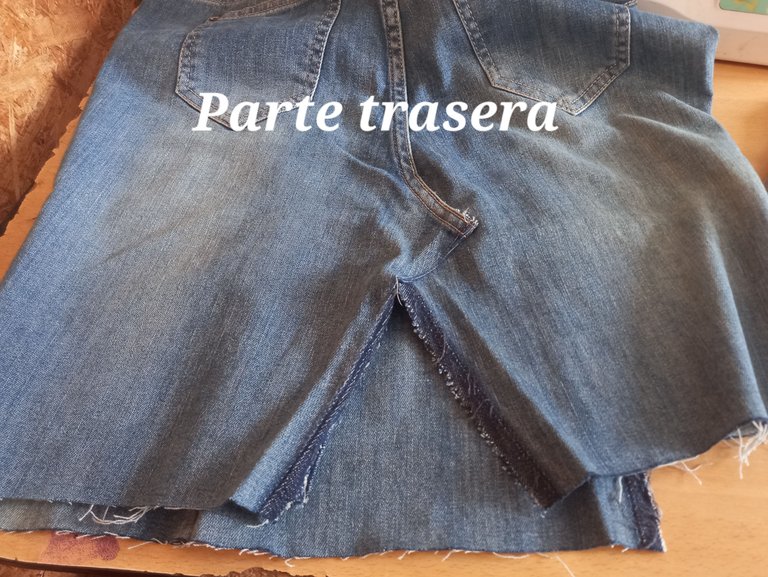
El mismo procedimiento anterior lo haremos con la parte de atrás de la falda.
The same procedure will be done with the back of the skirt.
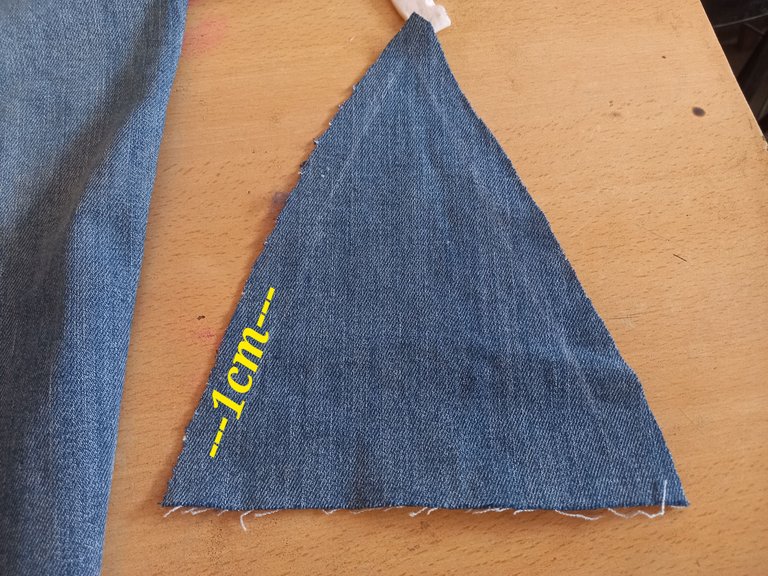
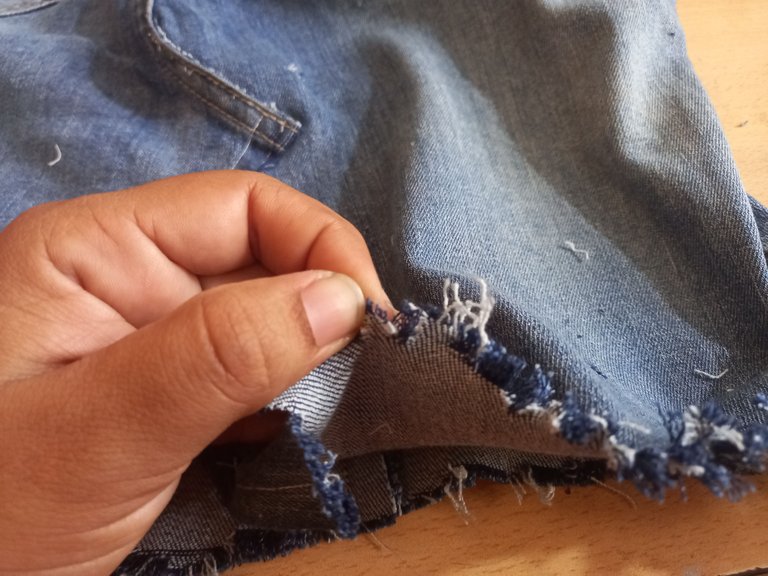
Cuándo hayamos terminado las dos partes, tanto la delantera como la trasera, tomaremos una pieza de tela del mismo pantalón que sobró y la ponemos debajo de la abertura en forma de triángulo que queda en la parte del frente, marcamos con el jaboncillo la forma del triángulo sobre la tela y recortamos 1cm después de lo que marcamos.
When we have finished the two parts, both the front and the back, we will take a piece of fabric from the same pants and put it under the triangle-shaped opening that remains in the front, we mark with the soapcillo the shape of the triangle on the fabric and cut 1cm after what we marked.
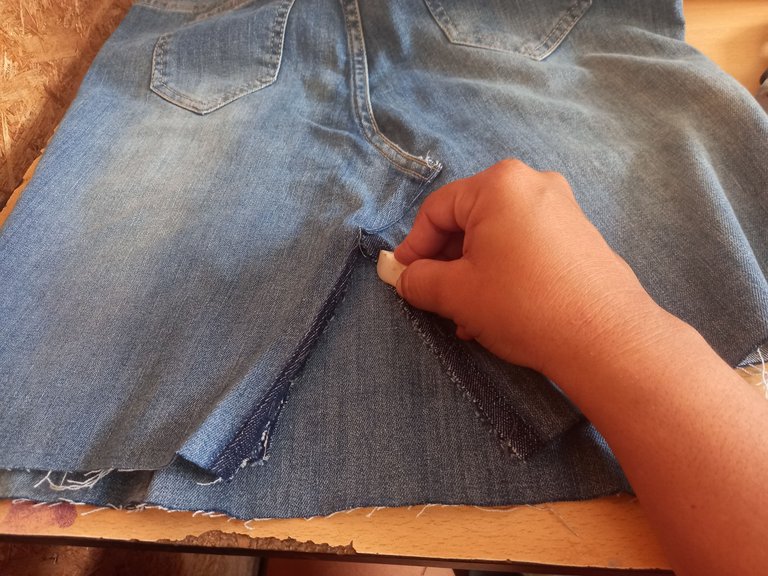
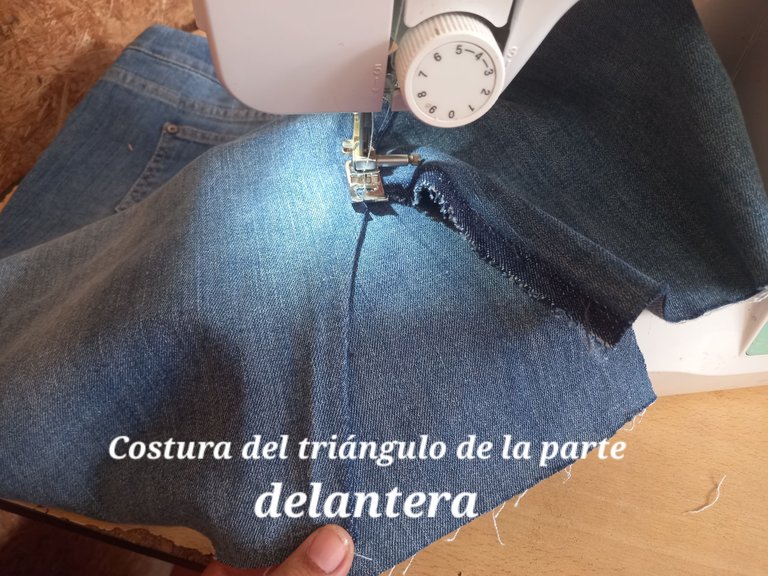
Ahora procedemos a cocer el triángulo recortado para ocupar el espacio que quedó en el frente.
Now we proceed to bake the triangle cut out to occupy the space left on the front.
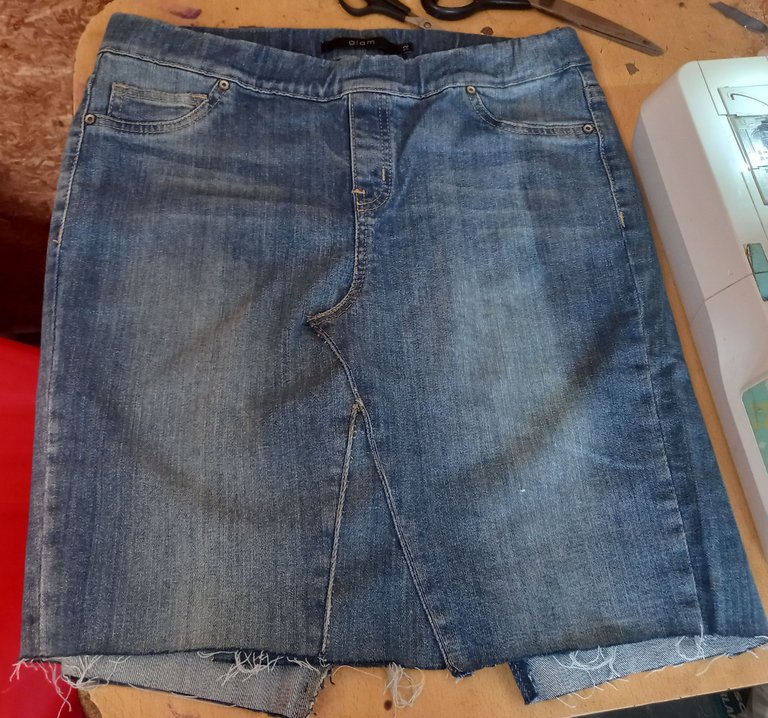
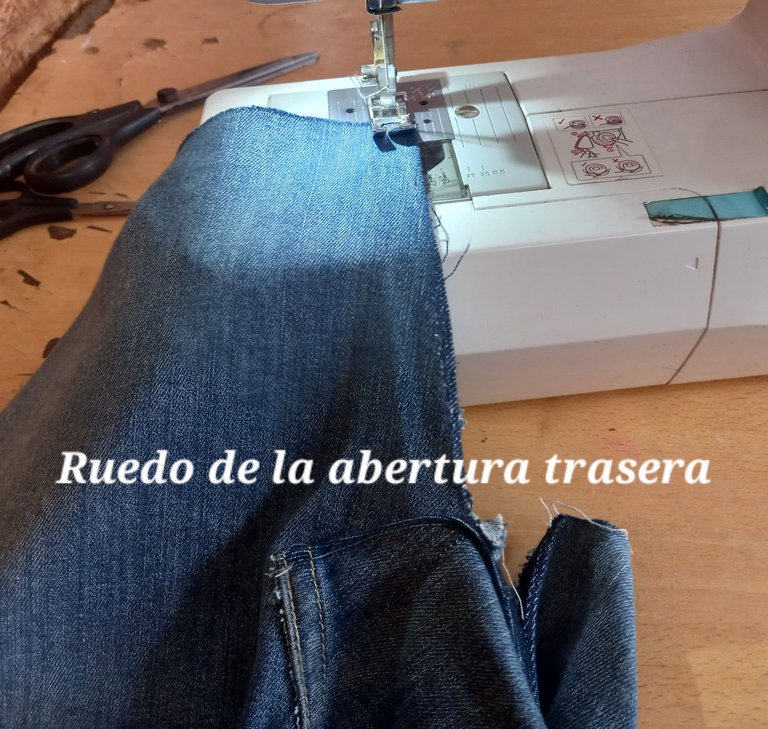
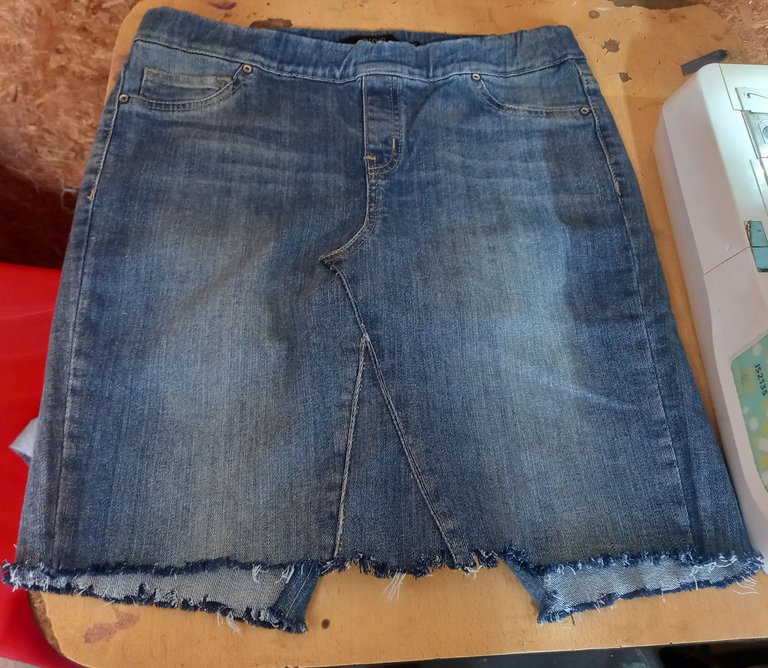
La parte trasera la vamos a dejar abierta pero le haremos en ambos lados de la abertura un ruedo.
We are going to leave the back part open but we will make a ruffle on both sides of the opening.
Con nuestra tijera haremos pequeños piquetes por todo el borde del ruedo de la falda y comenzaremos a deshilar.
With our scissors we will make small picks all along the edge of the skirt hem and begin to unravel.
¡Listo terminamos nuestra falda ahora veamos el resultado!
We have finished our skirt, now let's see the result!

Gracias mis queridos amigos lectores por quedarse hasta el final este tutorial; Espero que les haya gustado y sea de gran utilidad. Hasta otra oportunidad. Dios los bendiga.
Thank you my dear reader friends for staying until the end of this tutorial; I hope you liked it and found it useful. Until another opportunity. God bless you.
Que lindo quedó tu falda
Gracias estimada. Saludos y Bendiciones 🙏
Congratulations @kathelopez77! You have completed the following achievement on the Hive blockchain and have been rewarded with new badge(s):
Your next target is to reach 250 posts.
You can view your badges on your board and compare yourself to others in the Ranking
If you no longer want to receive notifications, reply to this comment with the word
STOPTo support your work, I also upvoted your post!
Check out the last post from @hivebuzz:
Support the HiveBuzz project. Vote for our proposal!
Muy práctico y hermoso, felicidades excelente idea, muchísima suerte con tu publicación.
Gracias por tus buenos deseos amiga linda. Bendiciones 😊
Lovely really looks great thanks for sharing @kathelopez77
Hola @smilestitches, gracias a ti por comentar 😊
A standing ovation is what you deserve for this masterpiece and innovative skill you possess.
Kudos dear, I love the skirt.
De corazón, muchas gracias estimado amigo por tan gratas palabras, me suben el ánimo para seguir creando buen contenido. Saludos y Bendiciones 😊 🙏