(Esp/Eng) DIY/ Tierno e Inquieto Gato de Papel/ DIY/ Cute and Fidgety Paper Cat.
Happy and blessed start of the week my very appreciated #Hive friends, may today be a day full of many successes. Today's DIY is about a very cute and cuddly paper kitty.

¡COMENCEMOS!
LET'S COMMENCE!
MATERIALES:
- 5 tiras de papel negro de 1cm de ancho y 27cm de largo.
- 2 tiras de papel de 1,50cm de ancho y 10cm de largo.
- 2 óvalos de papel blanco y dos más pequeños de papel negro.
- 1 círculo pequeño de papel blanco y un óvalo de papel fucsia.
- Patrón de la cabeza de un gato.
- 2 orejitas de papel fucsia.
- Pegamento en barra.
- Tijeras.
- Lápiz.
- Papel negro con figura de cola.
MATERIALS:
- 5 strips of black paper 1cm wide and 27cm long.
- 2 strips of paper 1.50cm wide and 10cm long.
- 2 ovals of white paper and two smaller ovals of black paper.
- 1 small circle of white paper and an oval of fuchsia paper.
- Pattern of a cat's head.
- 2 little ears of fuchsia paper.
- Glue stick.
- Scissors.
- Pencil.
- Black paper with tail shape.
¡MANOS A LA OBRA!
HANDS TO WORK!
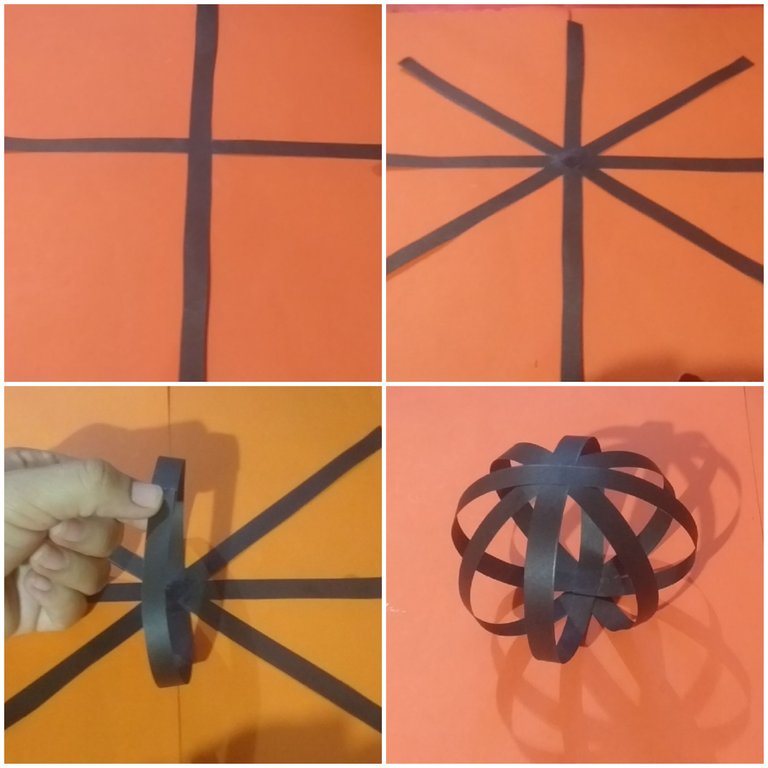
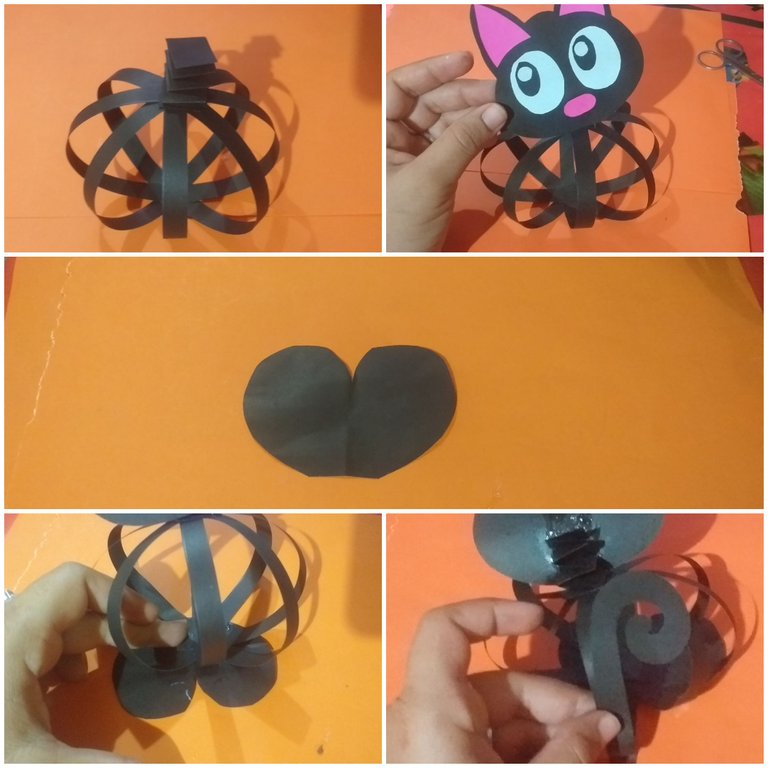
PASO 1
Realizamos un asterisco con las 5 tiras de papel negro, los cuales uniremos cada uno con sus extremos, hasta formar globo, que será el cuerpo del gatito.
STEP 1
We make an asterisk with the 5 strips of black paper, which we will join each one with its ends, until forming a balloon, which will be the body of the kitten.
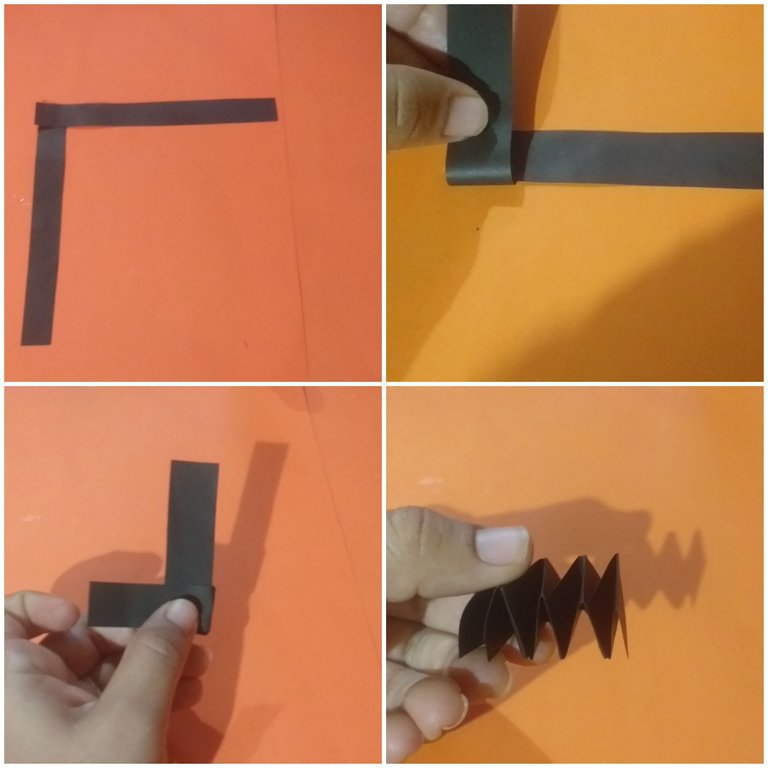
PASO 2
Haremos un resorte o tejido de papel, con las dos tiras negras de 1.50cm de ancho y 10cm de largo. (Esto lo haremos colocando las tiras en forma de (L) y vamos doblando una sobre la otra).
STEP 2
We will make a spring or paper tissue, with the two black strips of 1.50cm wide and 10cm long (we will do this by placing the strips in the shape of (L) and folding one over the other).
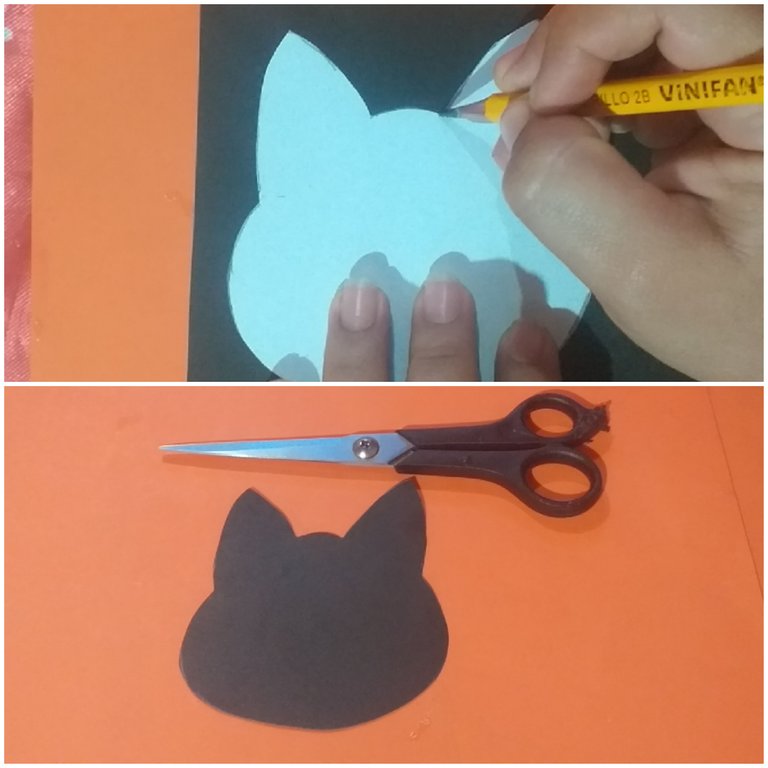
PASO 3
Luego haremos la carita del gato, colocando el patrón sobre el papel negro, marcamos y recortamos.
STEP 3
Next we will make the cat's face, placing the pattern on the black paper, mark and cut out.
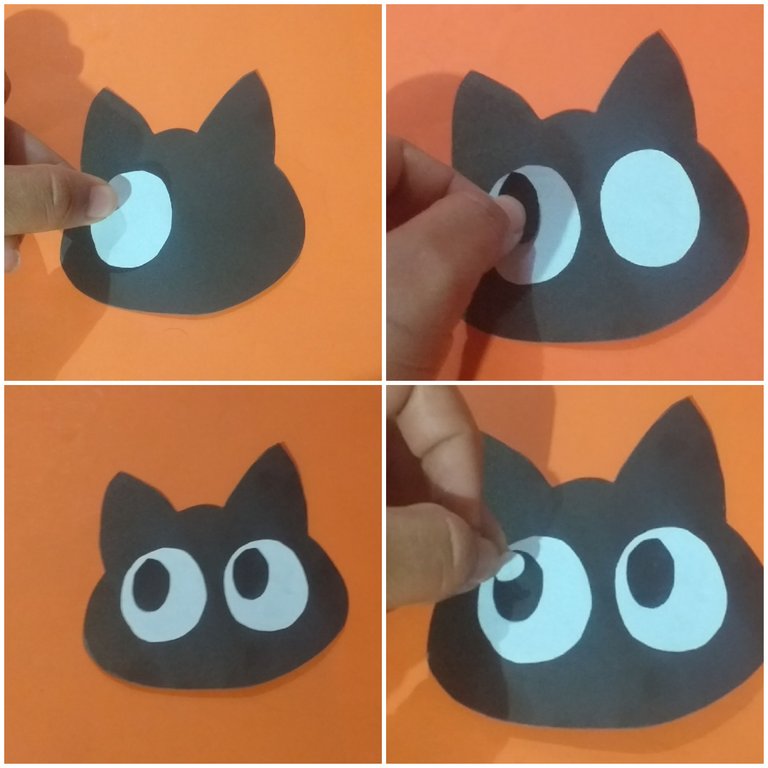
PASO 4
Con los óvalos de papel blanco, negro y el círculo pequeño de papel blanco hacemos los ojos del gato y pegamos.
STEP 4
With the white and black paper ovals and the small circle of white paper we make the cat's eyes and glue.
PASO 5
Después pegaremos el pequeño óvalo fucsia bajo el centro de los ojos para hacer la nariz, seguidamente pegamos las orejitas de papel fucsia sobre las orejas del gato.
STEP 5
Then we glue the small fuchsia oval under the center of the eyes to make the nose, then we glue the little fuchsia paper ears over the cat's ears.

PASO 6
Por último, fijamos todas las piezas en el cuerpo del gato, de la siguiente manera:
STEP 6
Finally, we attach all the parts to the body of the jack, as follows:
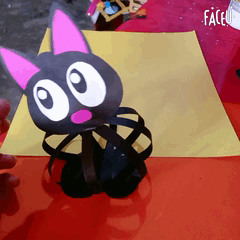
RESULTADO FINAL
FINAL RESULT
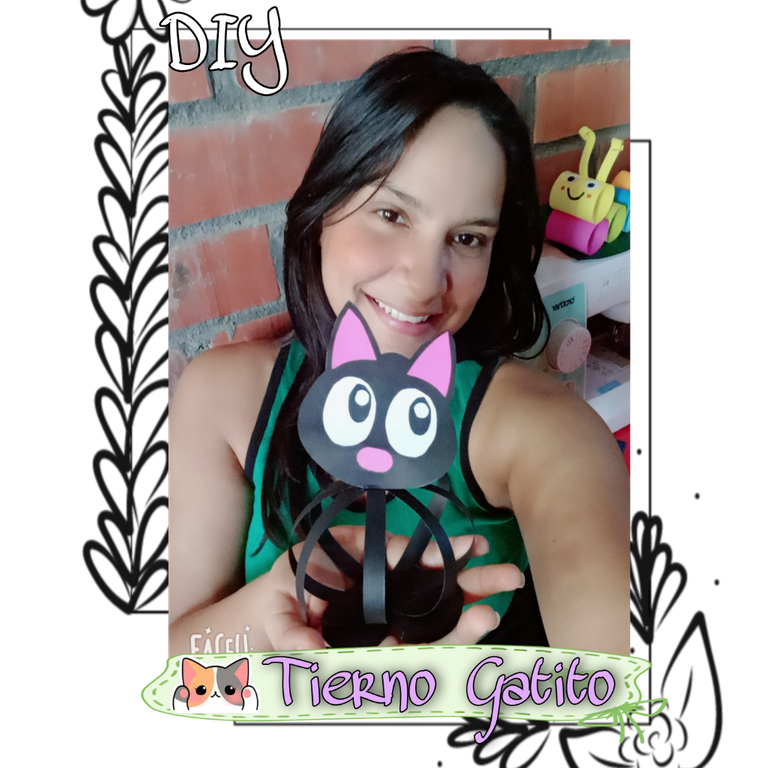
Espero les haya gustado y se animen a hacerlo
¡DIOS LOS BENDIGA MUCHO!
I hope you liked it and I encourage you to do it
GOD BLESS YOU VERY MUCH!
www.DeepL.com
PicsArt.
Hola @kathelopez77, ¡Qué belleza de gatito!
Hola amiga, de corazón muchas gracias, me alegra que te haya gustado. Bendiciones.