(Esp/Eng) Tutorial/ ¿Cómo adornar nuestras libretas con hermosos resultados?/ Tutorial/ How to decorate our notebooks with beautiful results?
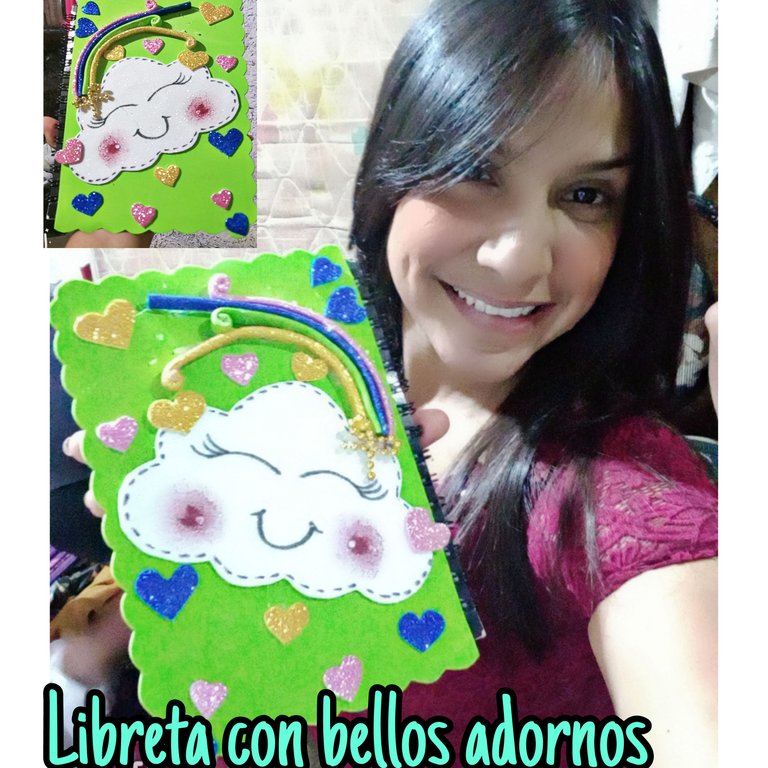
Bienvenidos a mi blog amigos de la colmena, que hoy sea un gran día para todos. Les traigo un pequeño tutorial de cómo darle color y brillo a nuestras libretas en pocos pasos y desde la comodidad de nuestro hogar.
Welcome to my blog friends of the hive, may today be a great day for everyone. I bring you a small tutorial on how to give color and shine to our notebooks in a few steps and from the comfort of our home.

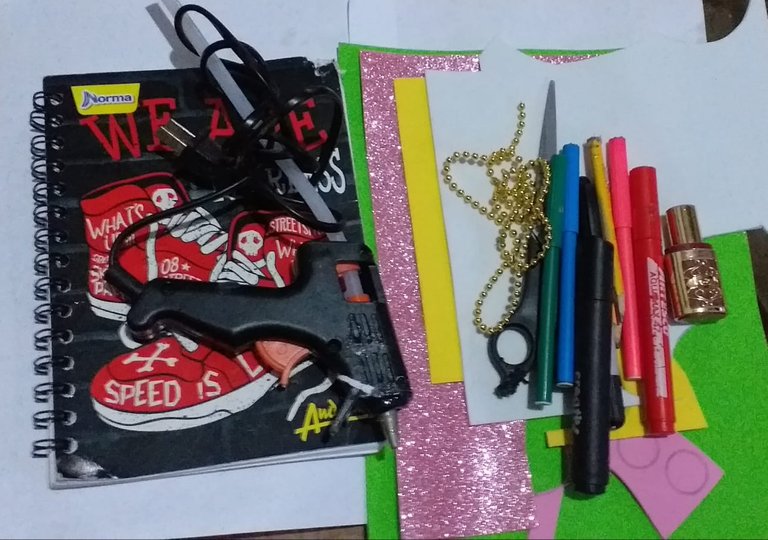
- Goma Eva verde, blanca, amarilla, azul, rosada y dorada.
- Tijeras.
- Lapiz.
- Pistola de silicón.
- Silicón en barra.
- Libreta.
- Perla corrida dorada.
- Lápiz labial
- Green, white, yellow, yellow, blue, pink and gold eva rubber.
- Scissors.
- Pencil.
- Silicone gun.
- Silicone stick.
- Notebook.
- Gold-colored pearl.
- Lipstick

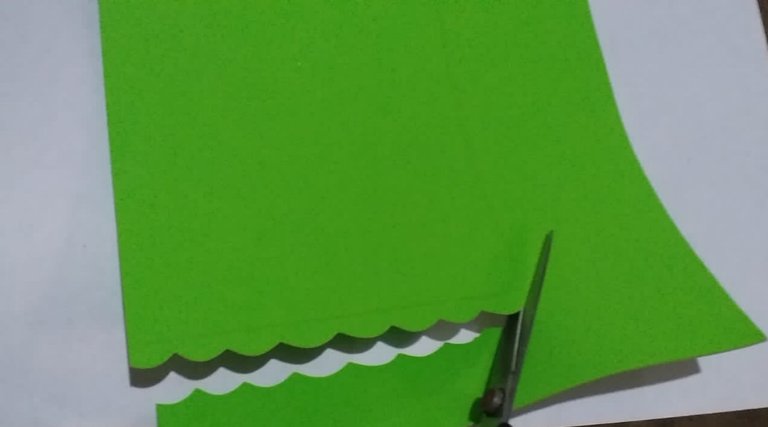
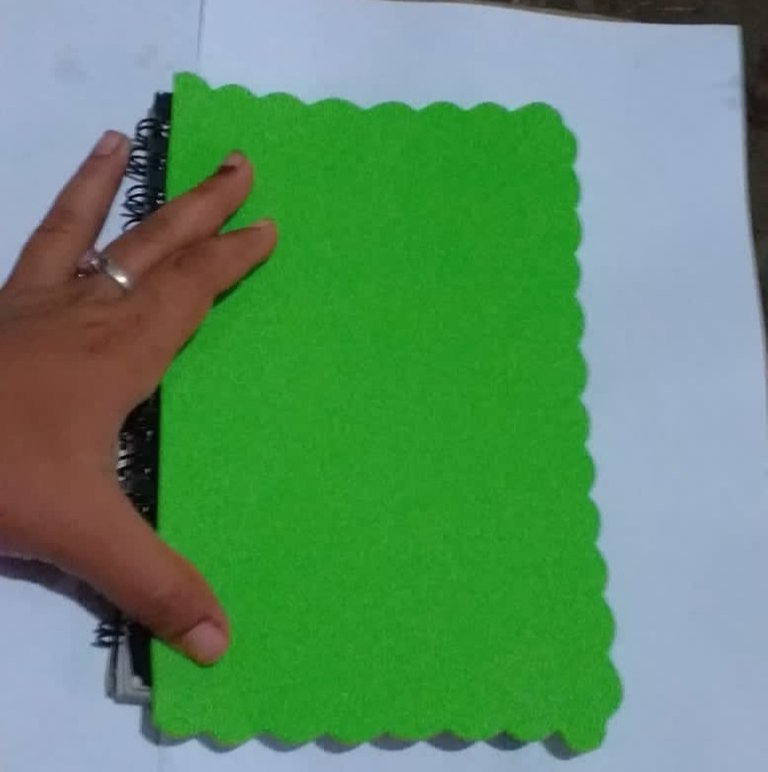
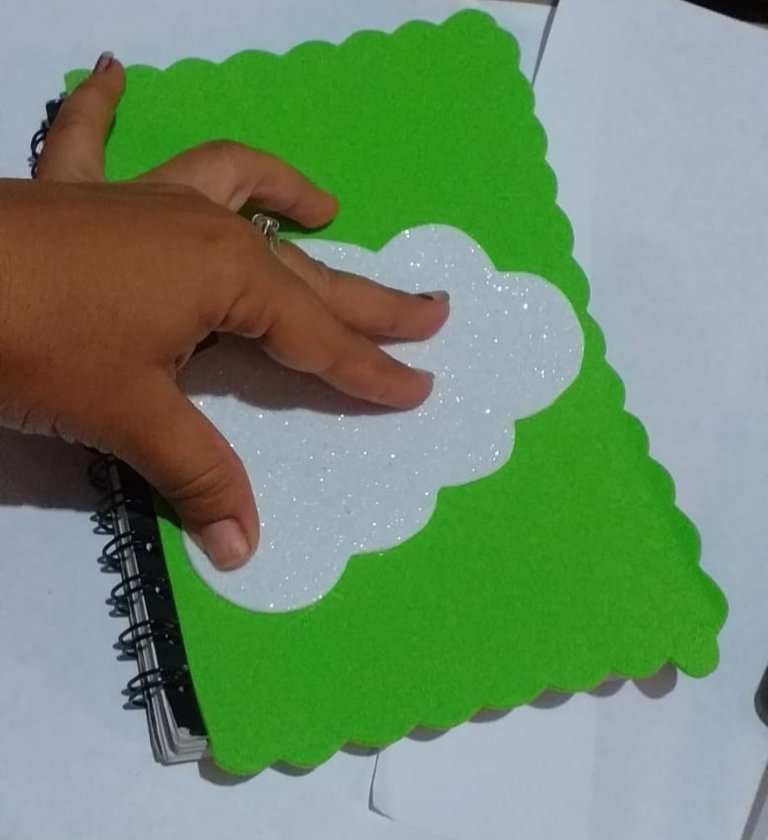
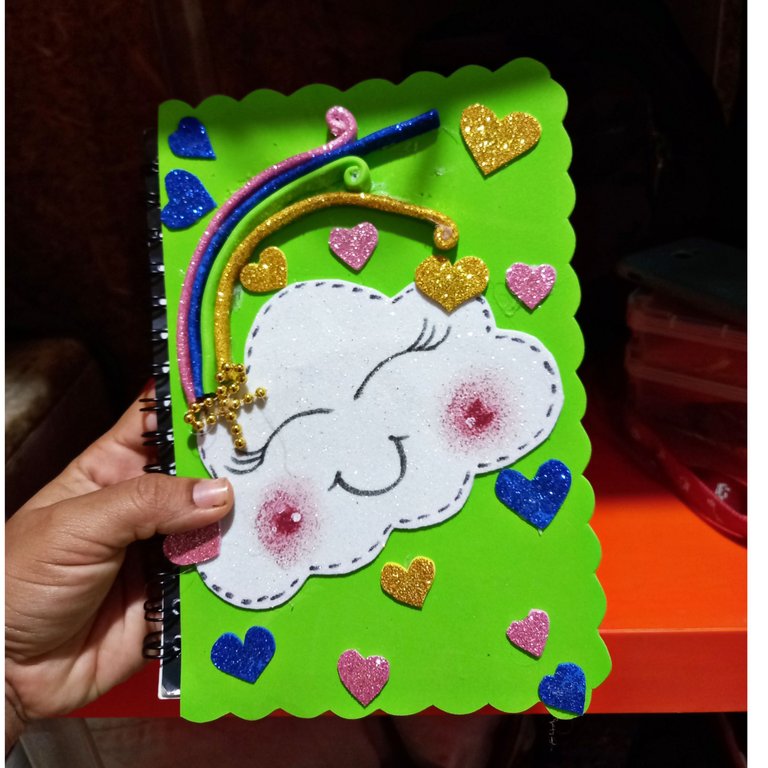
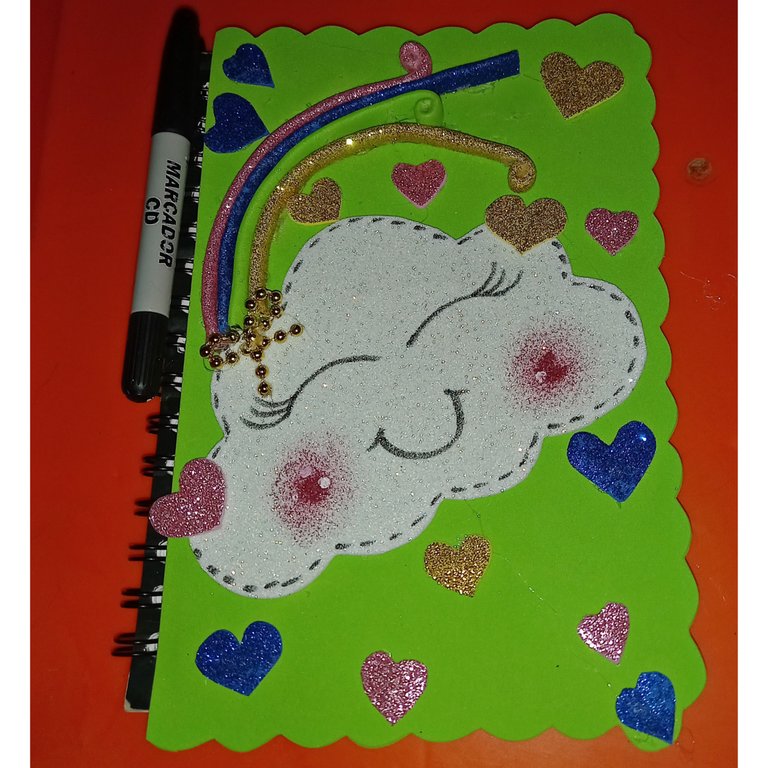
Para comenzar, colocamos la goma Eva verde debajo de la caratula de la libreta, marcamos 1cm después de cada lado para hacerles pequeños semicírculos y forrar.
To begin, we place the green Eva gum under the cover of the notebook, we mark 1cm after each side to make small semicircles and line them.

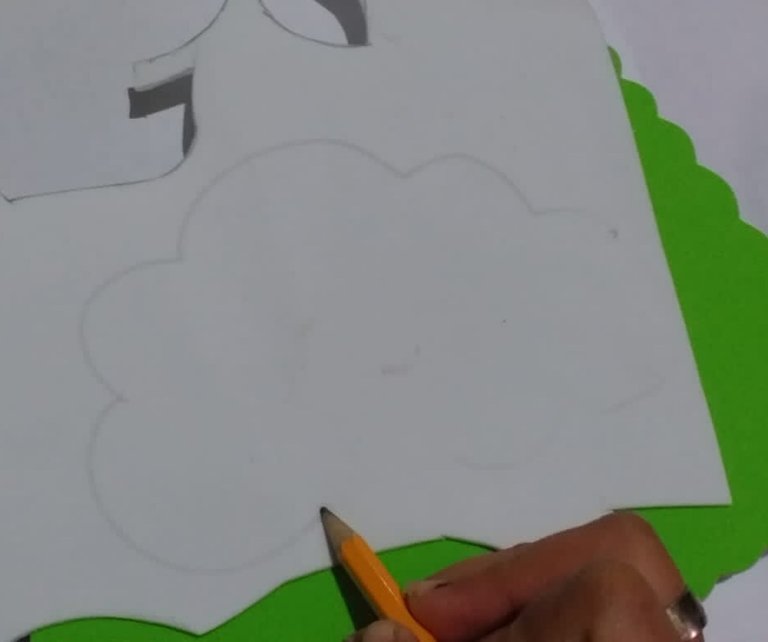
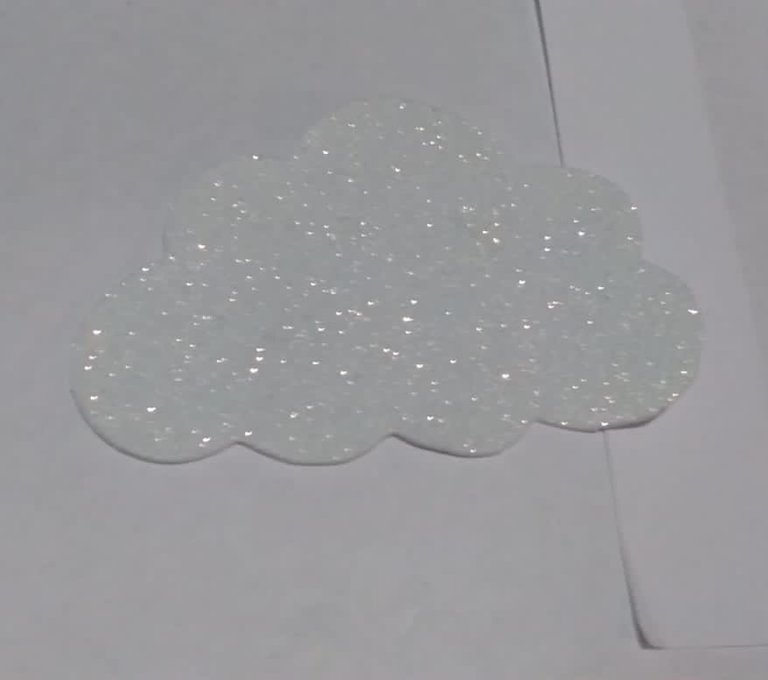
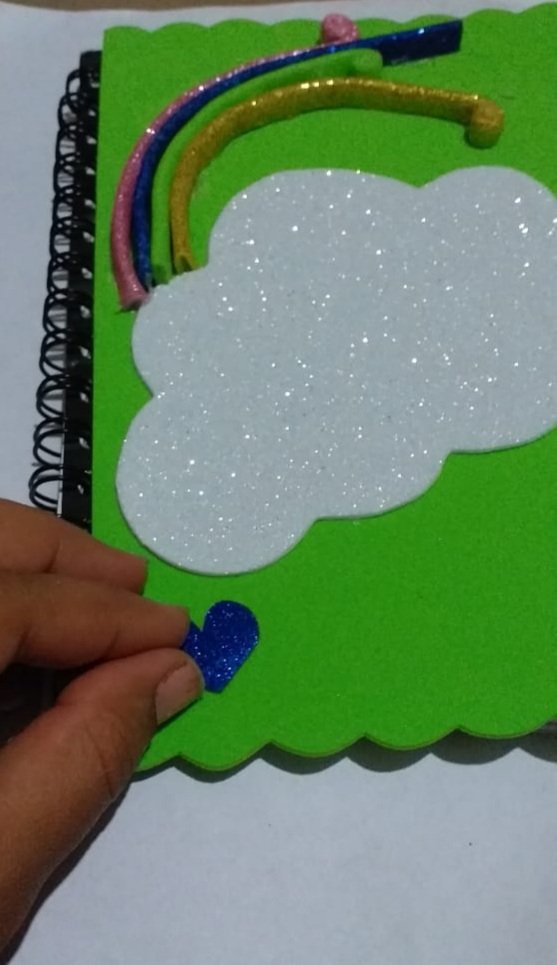
Una vez que hayamos forrado la caratula de la libreta, dibujamos una nube del tamaño que más nos convenga en la goma Eva blanca, la recortamos y la pegamos sobre la caratula.
Once we have lined the cover of the notebook, we draw a cloud of the size that suits us best on the white Eva rubber, cut it out and glue it on the cover.
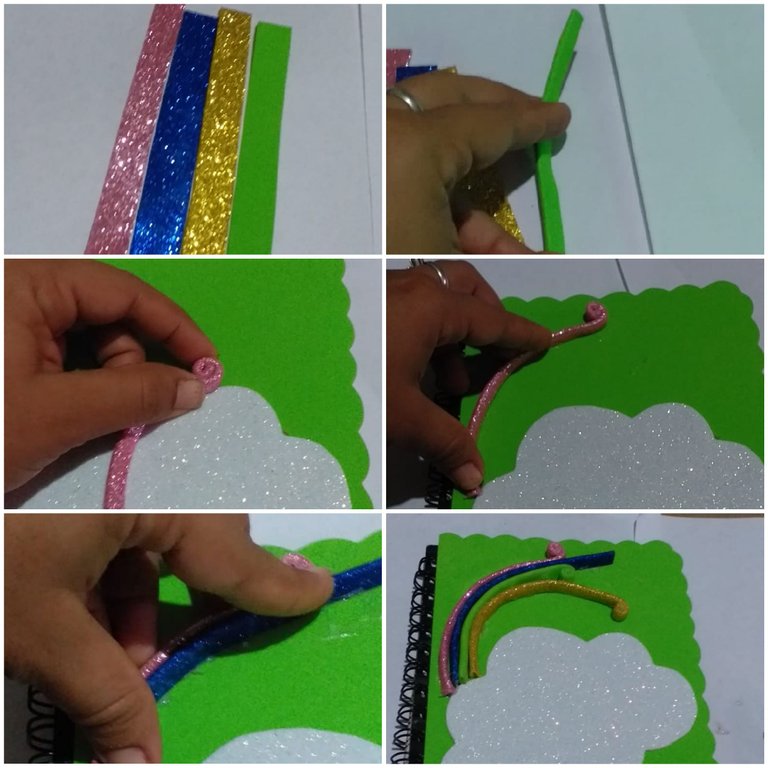
Después cortaremos pequeñas tiras de los distintos colores de goma Eva que tenemos para hacer el arcoiris, las doblamos en dos a lo largo para que sobresalgan más y las fijamos desde un extremo de la nube hasta el otro. Para que se vean más bonitas les haremos un pequeño rollito en las puntas finales.
Then we cut small strips of the different colors of Eva rubber we have to make the rainbow, we fold them in two lengthwise so that they protrude more and we fix them from one end of the cloud to the other. To make them look prettier, we will make a little roll at the ends.
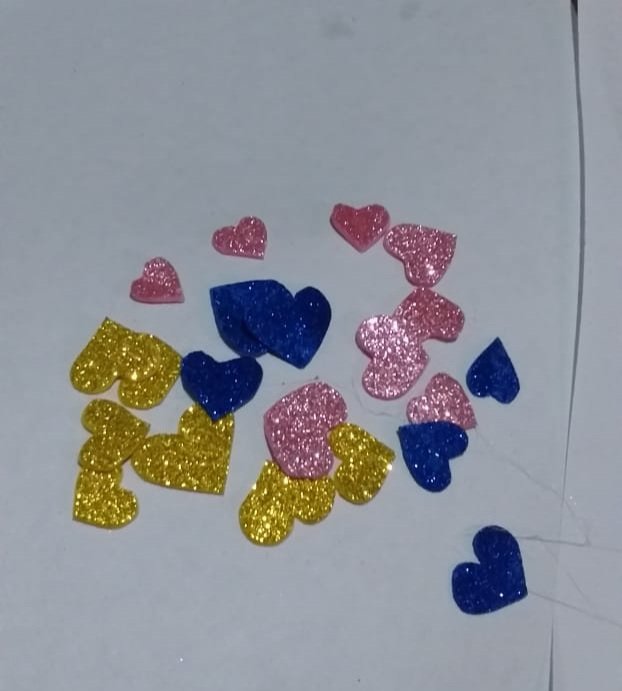
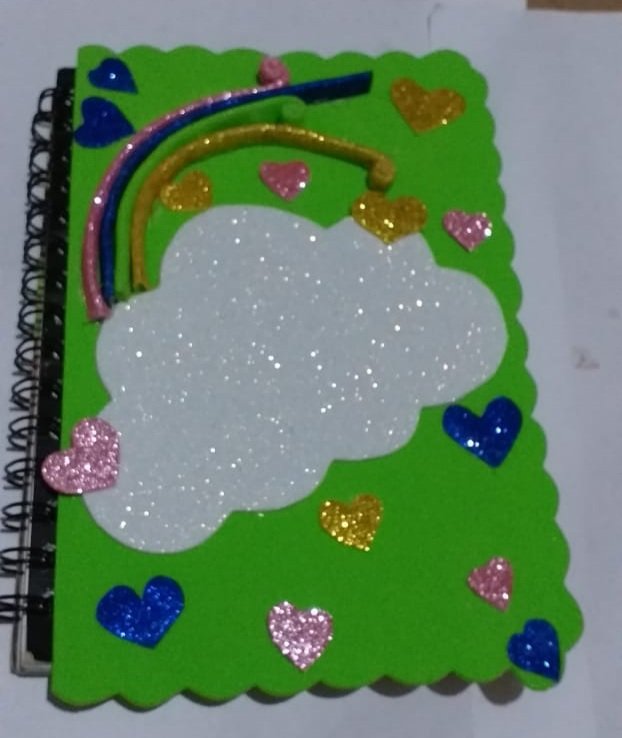
Luego recortamos pequeños corazones de distintos colores de goma eva y los fijamos sobre toda la caratula.
Then we cut out small hearts of different colors of eva rubber and we fix them on the whole cover.
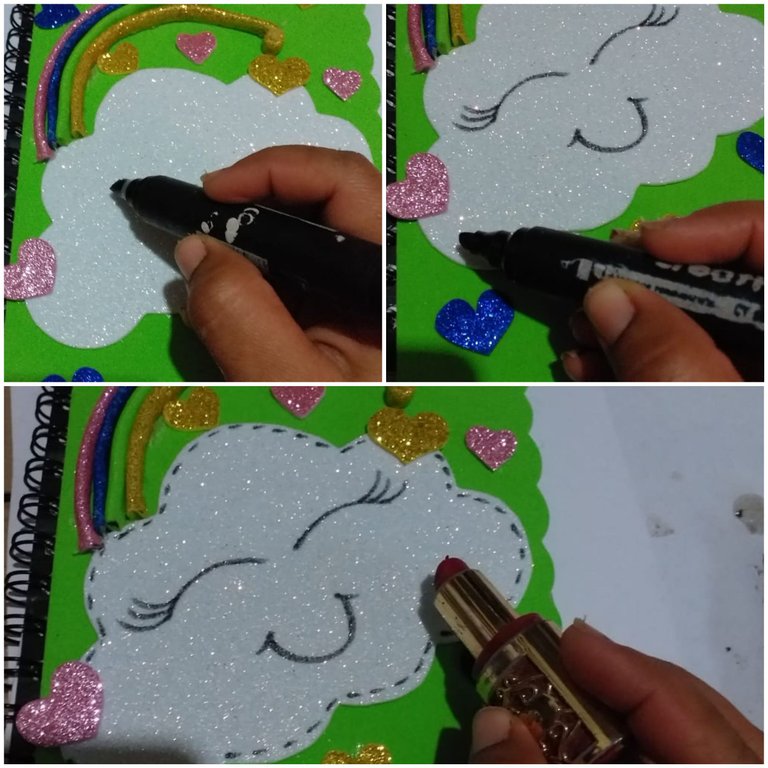
Finalizamos pintando los ojos y la boca de la nube, además el rubor de las mejillas que lo podemos hacer con labial y con el mismo marcador negro que pintamos los ojos y la boca, haremos pequeñas rayas en los bordes de la nube.
We finish painting the eyes and the mouth of the cloud, besides the blush of the cheeks that we can do with lipstick and with the same black marker that we painted the eyes and the mouth, we will make small stripes on the edges of the cloud.
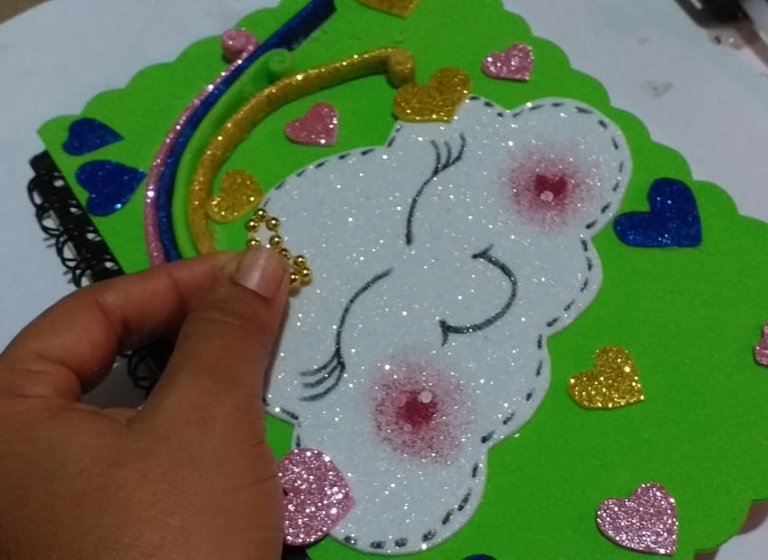
Puedes agregarle, como hice en éste caso, un pequeño lazo de perla corrida o cinta.
You can add, as I did in this case, a small pearl ribbon or ribbon.

Éste fue el Diy de hoy, está muy fácil de hacer y el resultado es muy lindo. Espero les haya gustado tanto como a mi queridos amigos. Saludos y Bendiciones 😊 😘 🙏
This was today's Diy, it is very easy to make and the result is very nice. I hope you liked it as much as my dear friends. Greetings and Blessings 😊 😘 🙏.