(Esp/Eng)DIY/HERMOSO Y SIMPÁTICO TIGRE DE CARTULINA/DIY/BEAUTIFUL AND CUTE CARDBOARD TIGER.

Feliz día amigos de la colmena, espero se encuentren gozando de buena salud, hoy les mostraré la elaboración de un Hermoso y Simpático Tigre de cartulina, espero les guste.
Happy day friends of the hive, I hope you are enjoying good health, today I will show you the elaboration of a beautiful and nice cardboard tiger, I hope you like it.

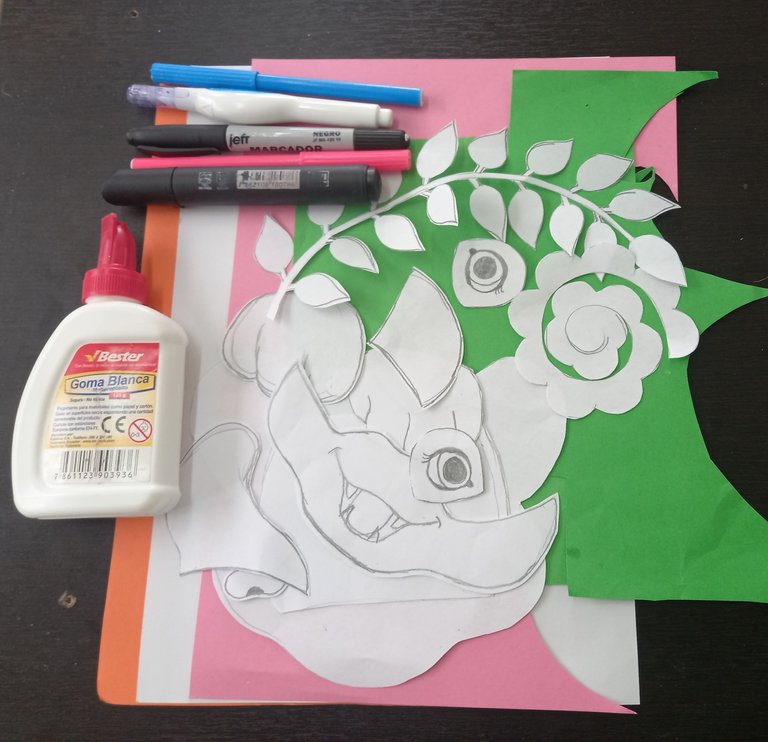
MATERIALES:
- Cartulina anaranjada, blanca, rosada y verde.
- Patrones del tigre, flores y ramas.
- Marcadores.
- Lápiz.
- Tijeras.
- Corrector blanco.
- Cola blanca escolar.
MATERIALS:
- Orange, white, pink and green cardstock.
- Tiger patterns, flowers and branches.
- Marker pens.
- Pencil.
- Scissors.
- White corrector.
- White school glue.
PROCEDIMIENTO
PROCEDURE
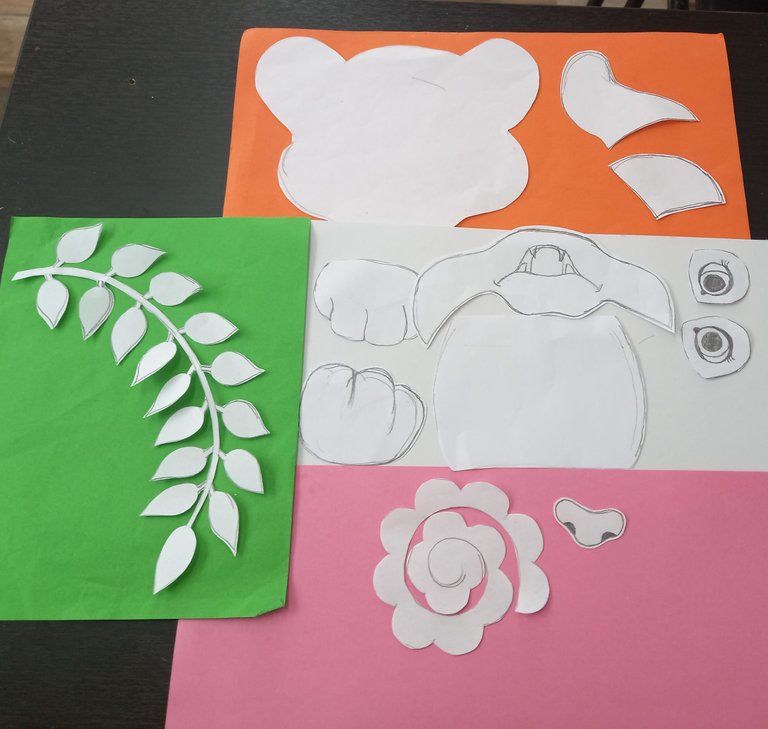
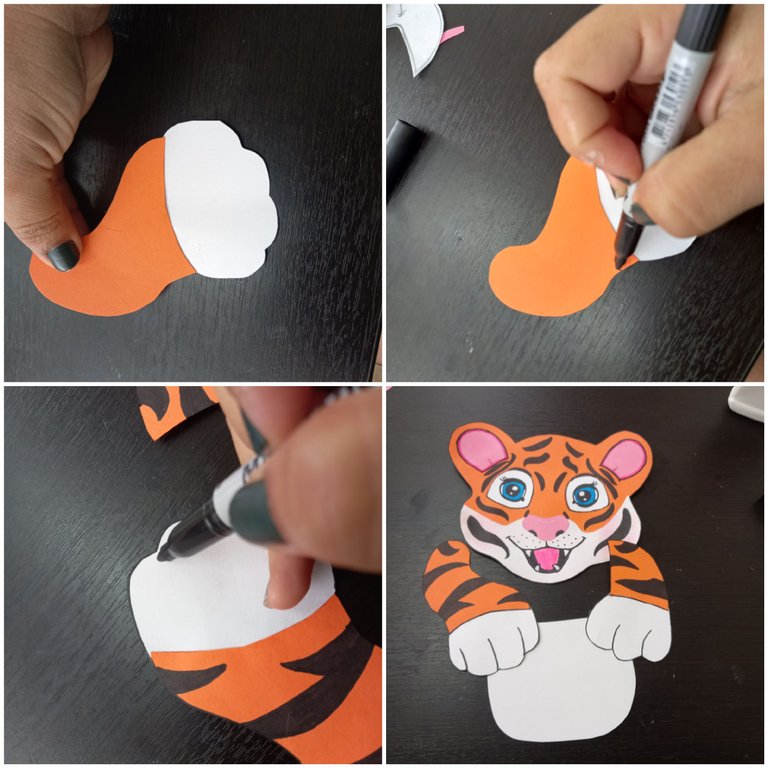
Comenzaremos marcando los patrones sobre las cartulinas, en éste caso, naranja para la cara y las patas, blanco para el cuerpo, la trompa, las garras y los ojos, rosado y verde para las flores y las ramas y recortamos.
We start by marking the patterns on the cardboard, in this case, orange for the face and legs, white for the body, trunk, claws and eyes, pink and green for the flowers and branches and cut them out.
Después pegamos la trompa, la nariz, pintamos la boca y los detalles de la nariz.
Then we glue the trunk, the nose, paint the mouth and the nose details.
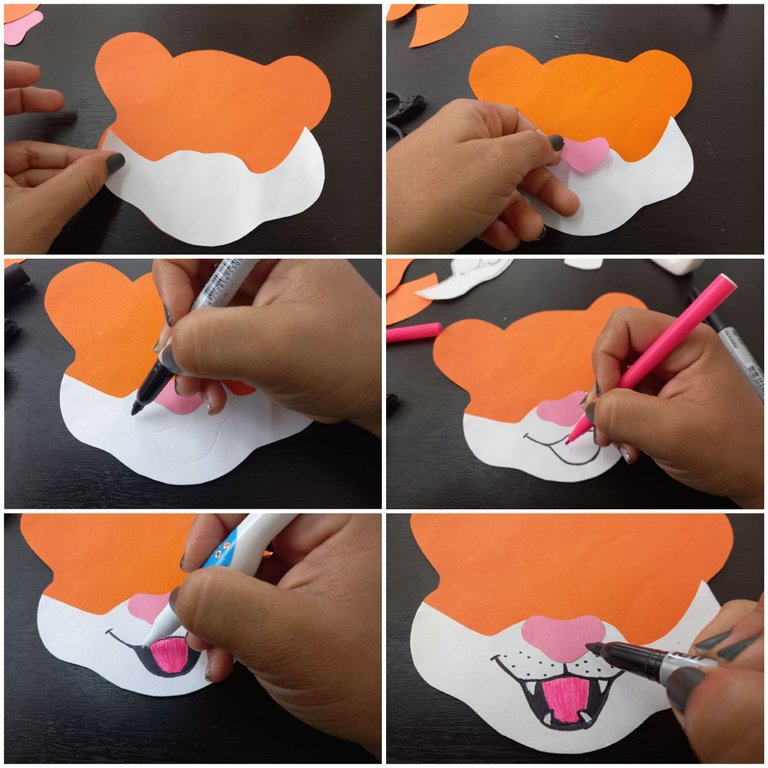
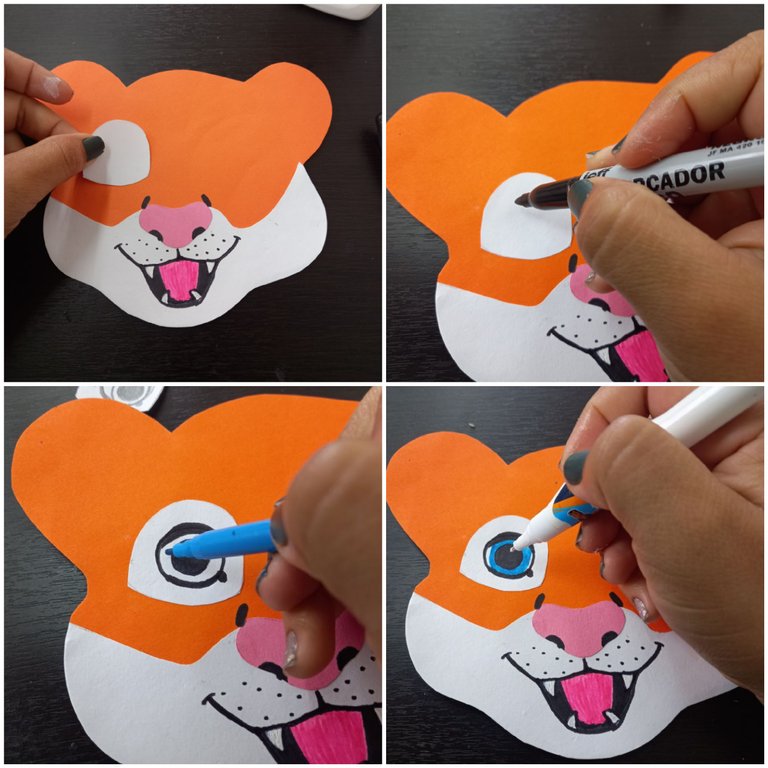
Luego pegamos la parte blanca de los ojos y pintamos el resto con marcador negro, azul y corrector blanco.
Then we glue the white part of the eyes and paint the rest with black and blue marker and white concealer.
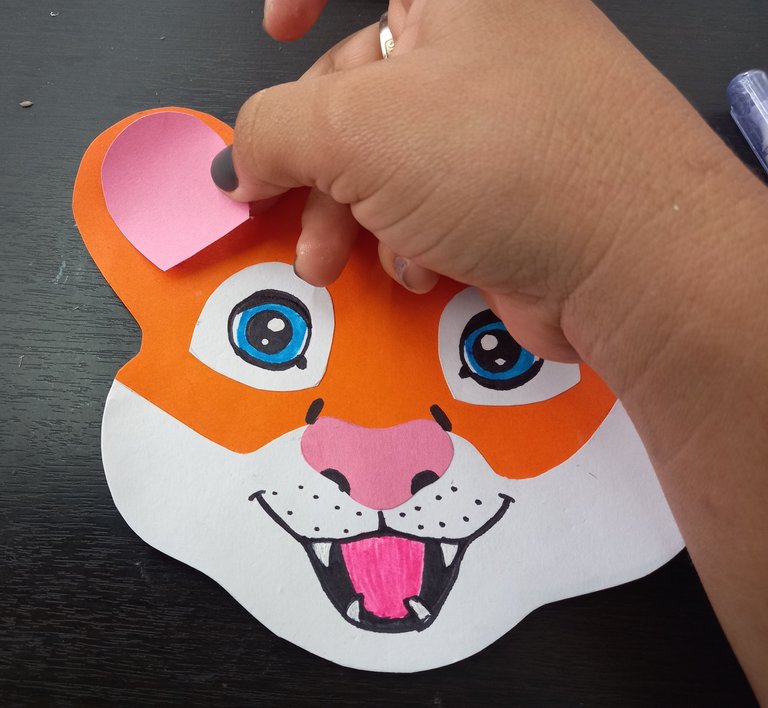
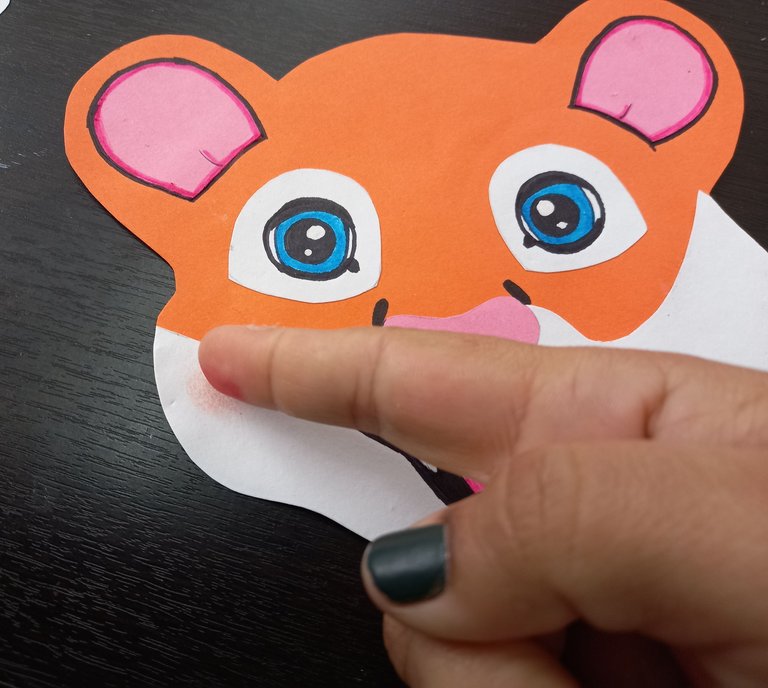
Posteriormente pegamos el detalle rosado de las orejas y aplicamos rubor en las mejillas.
Then we glue the pink detail on the ears and apply blush on the cheeks.
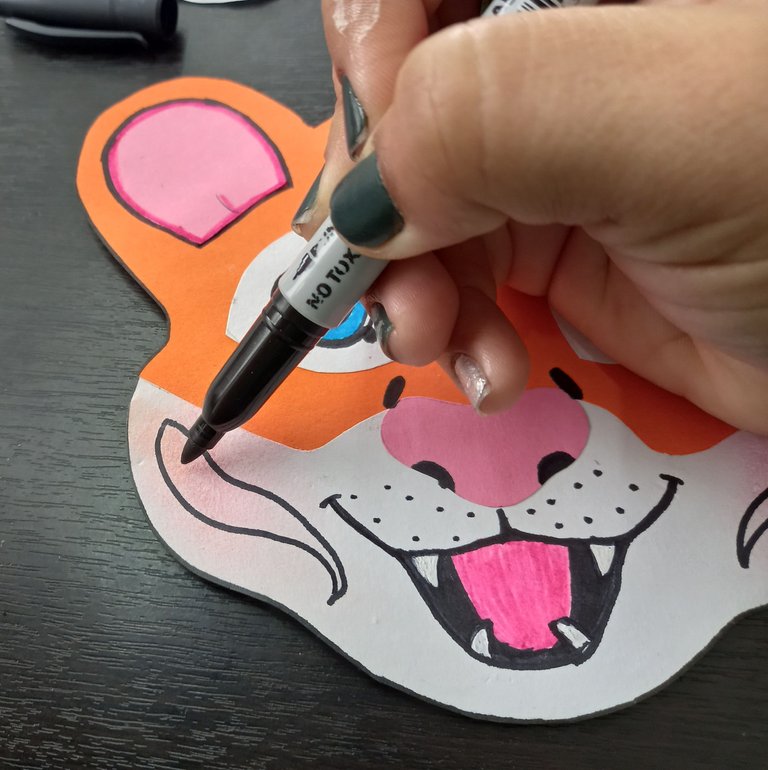
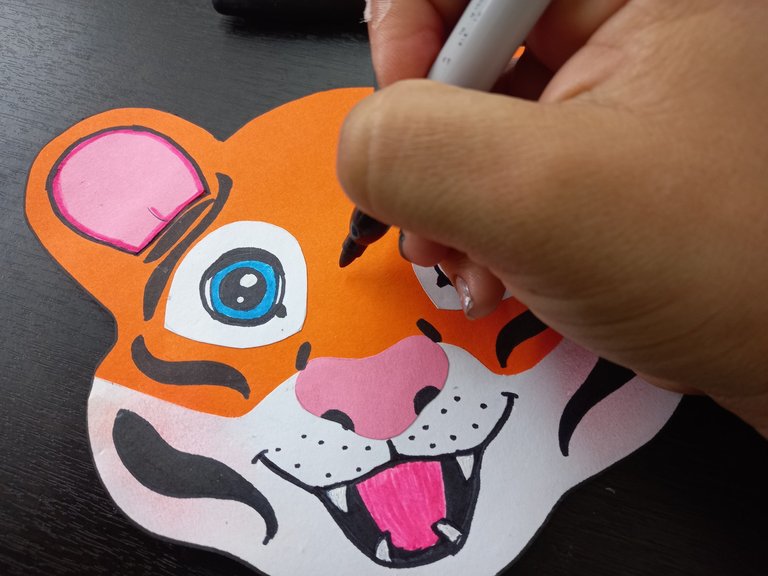
Seguidamente pintamos las franjas negras del tigre con marcador.
Then we paint the black stripes of the tiger with marker.
Luego unimos las patitas con las garras blancas y le pintamos las franjas negras con marcador.
Then we join the legs with the white claws and paint the black stripes with marker.
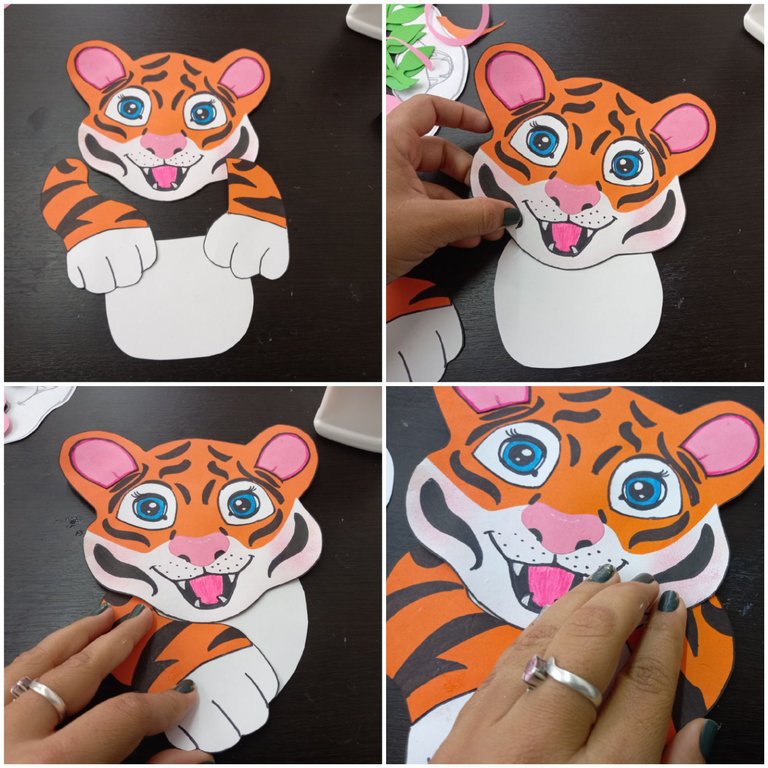
Unimos todas las piezas terminadas, hasta formar el tigre.
We join all the finished pieces together to form the tiger.
Finalizamos fijando las hojas una a cada lado del tigre y en el centro fijamos las dos flores.
We finish by attaching the leaves one on each side of the tiger and in the center we attach the two flowers.

RESULTADO FINAL
FINAL RESULT
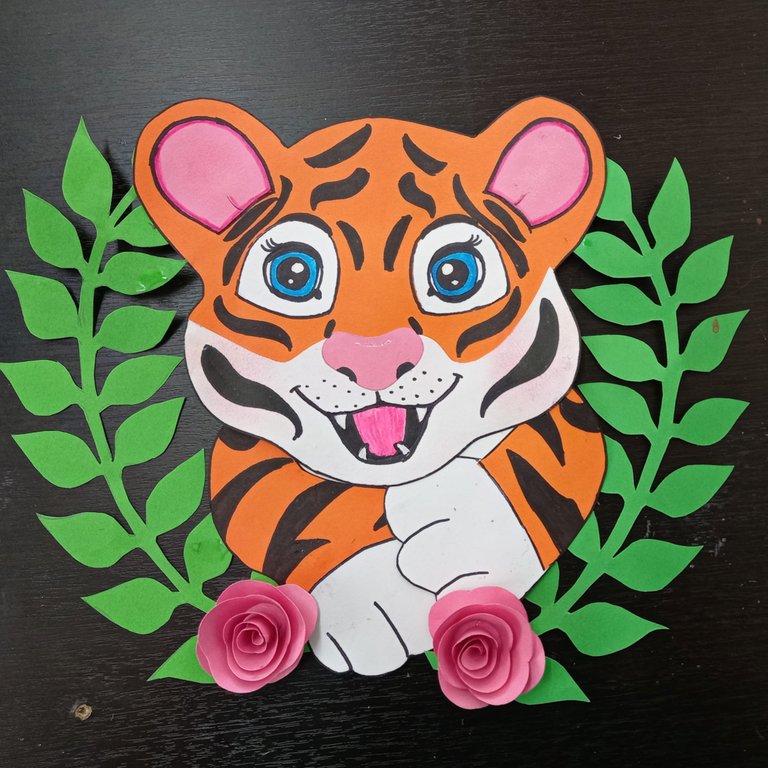
Espero que les haya gustado el resultado de éste material amigos.
DIOS LOS BENDIGA
I hope you liked the result of this material friends.