[ESP-ENG]- Elabora práctico alfiletero para tu mesa de costura. // Make a practical pincushion for your sewing table.
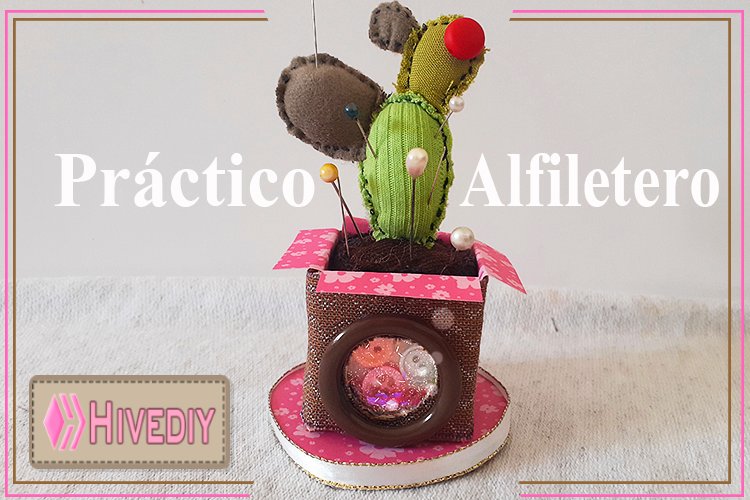
Hola mis queridos amigos, espero la estén pasando de maravilla; en esta oportunidad quiero compartirles la elaboración de un alfiletero en forma de cactus; me pareció algo irónico y gracioso este hecho; ya que, estas plantitas suelen tener espinas similares a las agujas y alfileres. Los invito al paso a paso. Espero lo disfruten.
Hello my dear friends, I hope you are having a great time; This time I want to share with you the elaboration of a pincushion in the shape of a cactus; I found this fact ironic and funny; since these little plants usually have thorns similar to needles and pins. I invite you to step by step. I hope you enjoy it.

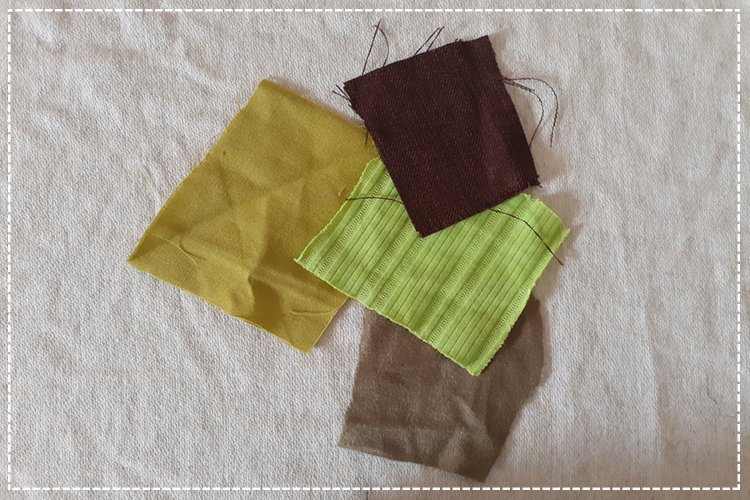
Materiales:
Trazos de tela
Cartón
Hilos
Pegamento
Felpa
Botones
Brillantina
Papel estampado
Materials:
Fabric strokes
Paperboard
Threads
Glue
Plush
Buttons
Brilliantine
Patterned paper
Proceso // Process
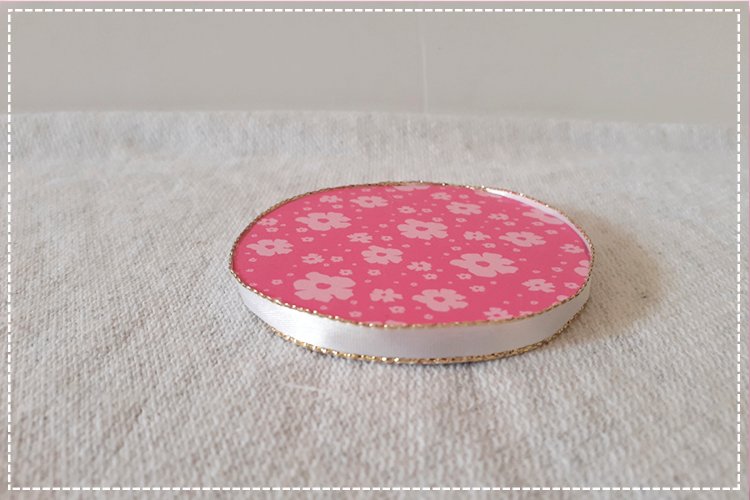
- Recortamos y pegamos el cartón y el papel estampado en forma de círculo, con una medida de 8 cm.
- Cut out and glue the cardboard and the stamped paper in the shape of a circle, measuring 8 cm.

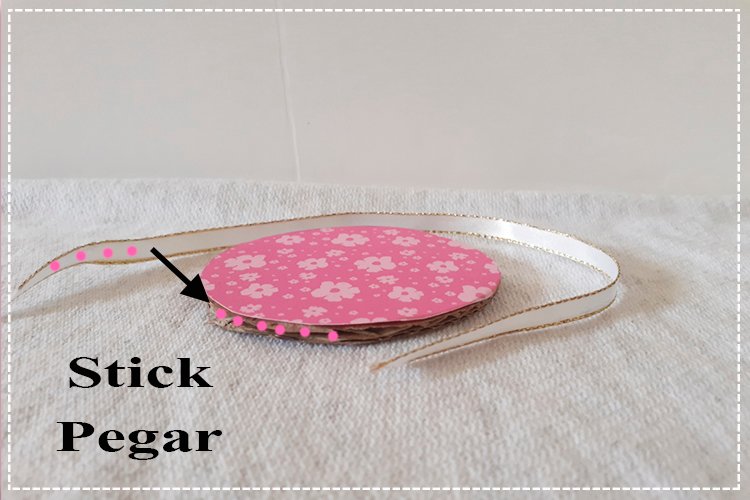
2.Con una cinta vamos a bordear nuestro círculo sellándola con pegamento.
2.With a tape we are going to border our circle, sealing it with glue.
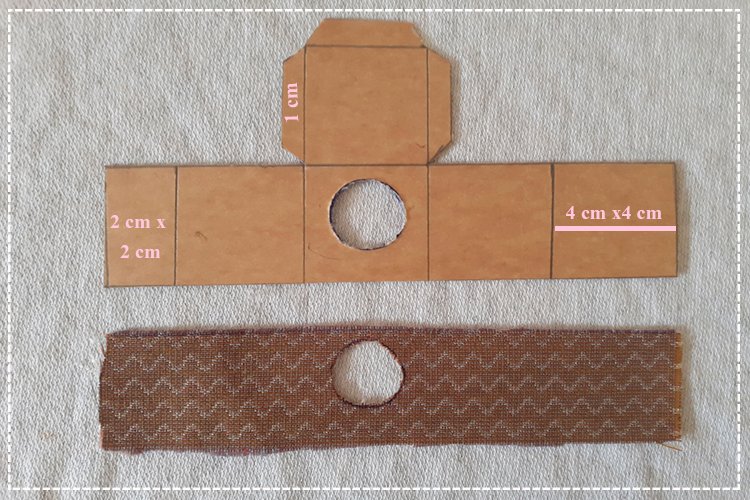
3.Para armar la maceta trazamos las medidas en un cartón con las siguientes medidas (ver foto). De igual manera en la tela con la que lo forraremos.
3.To assemble the pot, we trace the measurements on a cardboard with the following measurements (see photo). In the same way in the fabric with which we will cover it.
4.Doblamos los pliegues del cartón sellando con pegamento; las pestañas deben quedar hacia dentro de la cajita.
4.We fold the folds of the cardboard sealing with glue; the tabs should face inside the box.
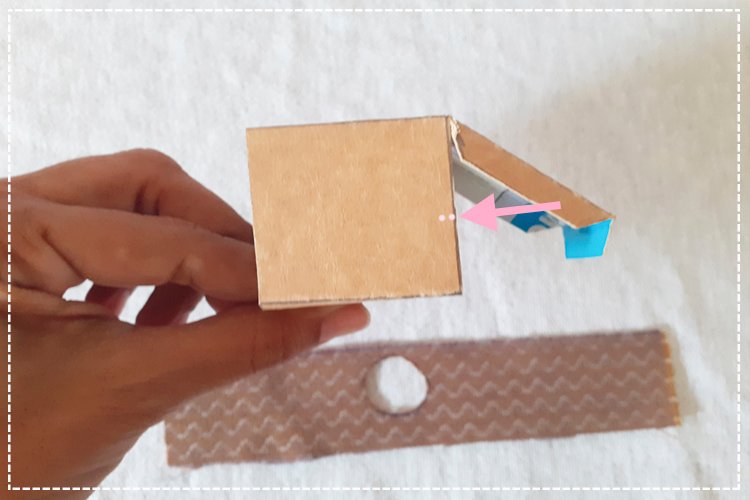
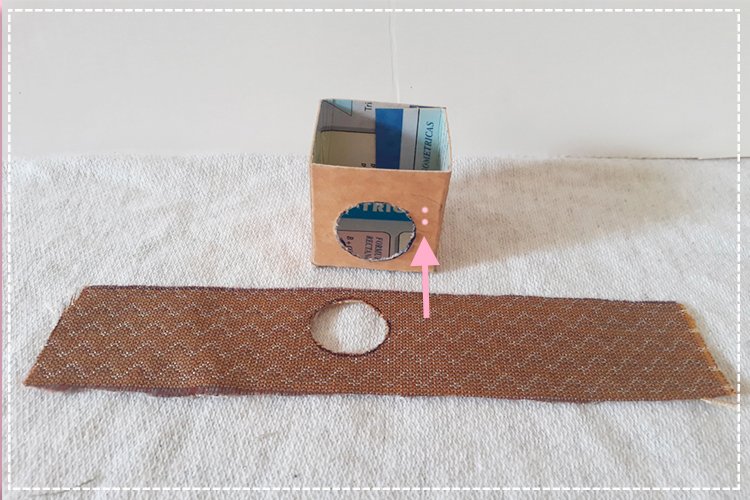
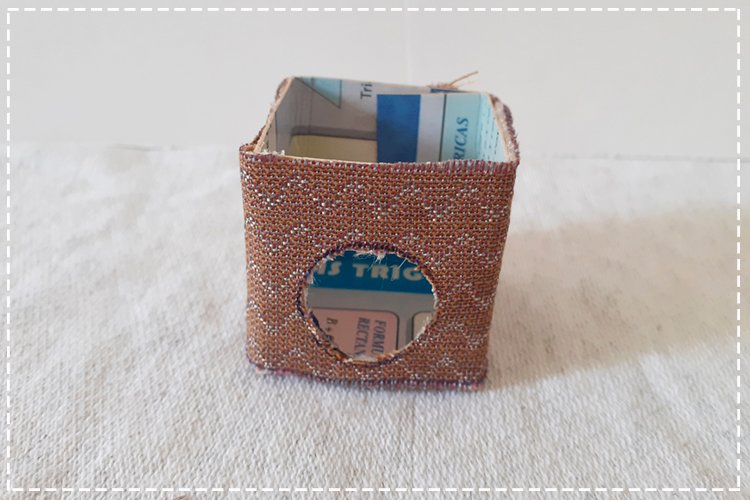
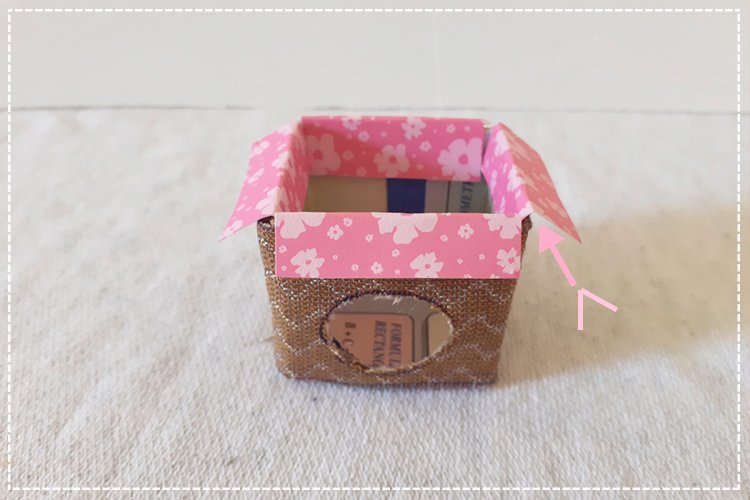
5.Luego pegar la tela de la caja cuidando dejar libre el agujero.
5.Then stick the fabric of the box taking care to leave the hole free.
6.Para dar un buen acabado a los bordes de la maceta agregué pequeños rectángulos doblados de papel estampados.
6.To give a nice finish to the edges of the pot I added small folded rectangles of patterned paper.
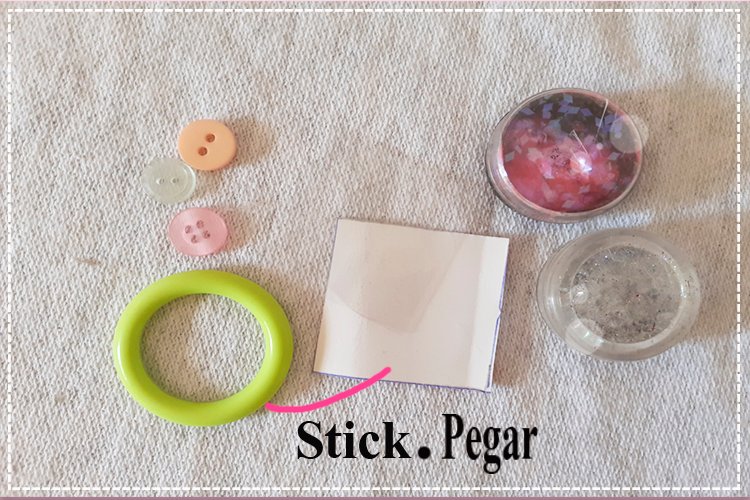
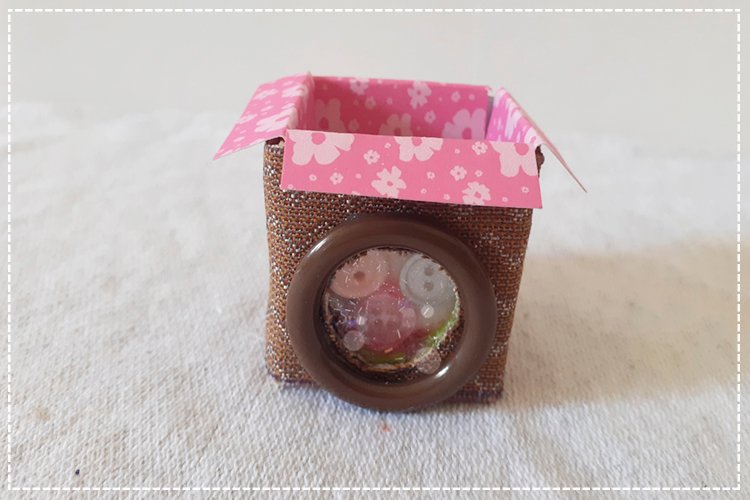
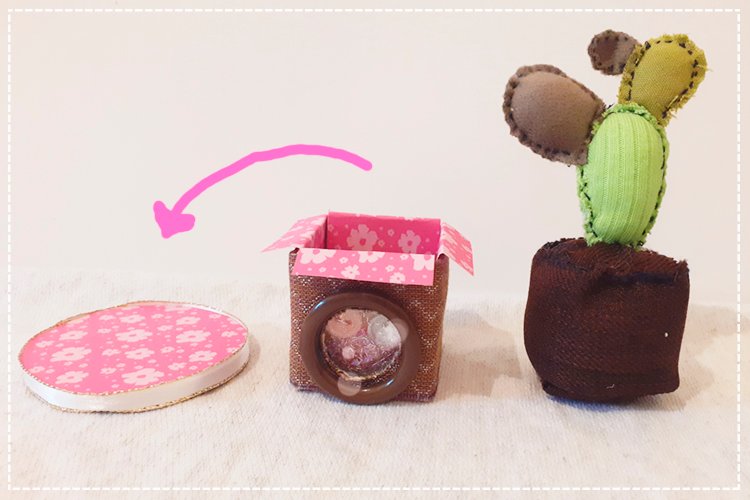
7.Para realizar la cápsula escarchada primero pegamos la cartulina debajo del aro de plástico.
7.To make the frosted capsule, we first glue the cardboard under the plastic ring.
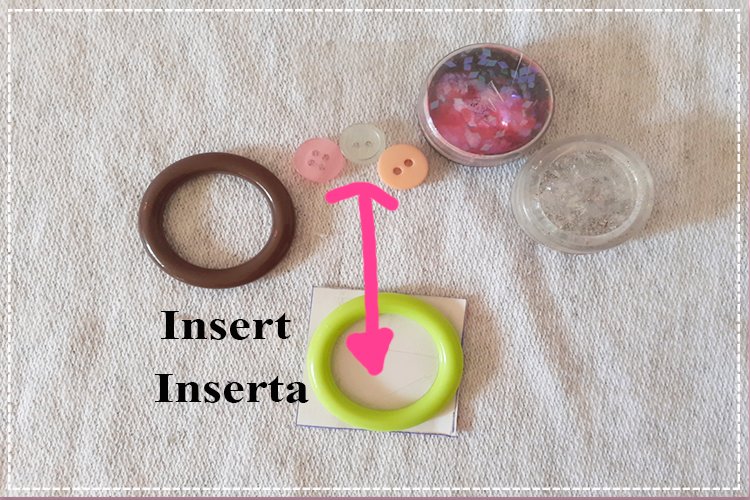
8.Insertamos los botones. ( sin pegarlos)
8.We insert the buttons. (not sticking them)
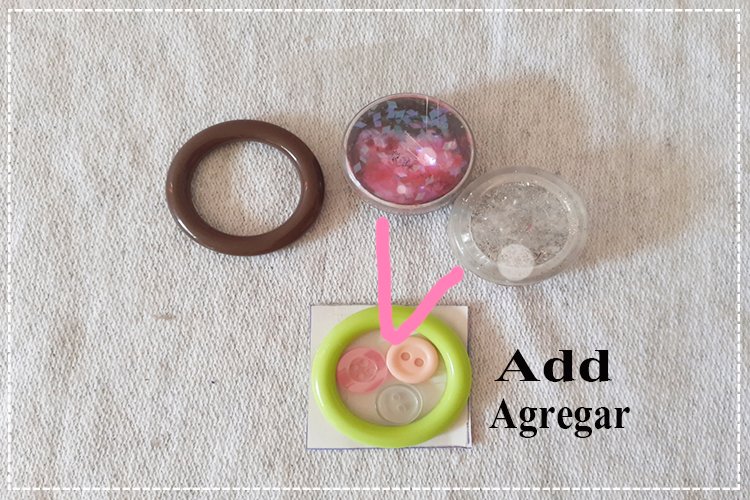
9.Agregamos un poco de brillantina.
9.We add a little glitter.
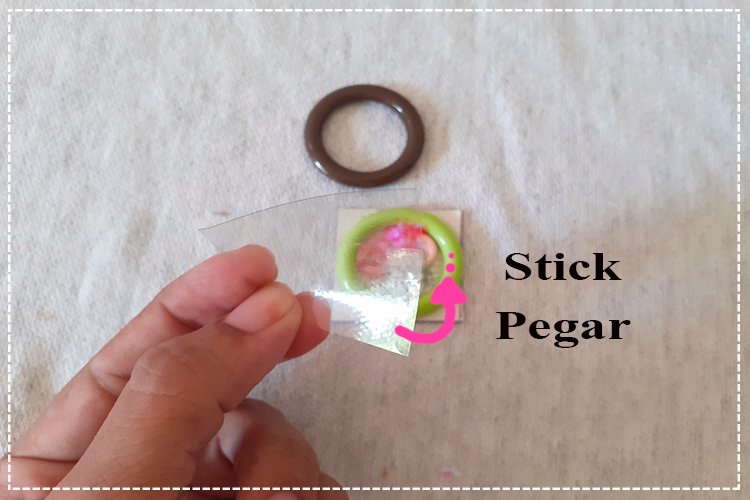
10.Y tapamos con una lámina transparente sellada con pegamento.
10.And we cover with a transparent sheet sealed with glue.
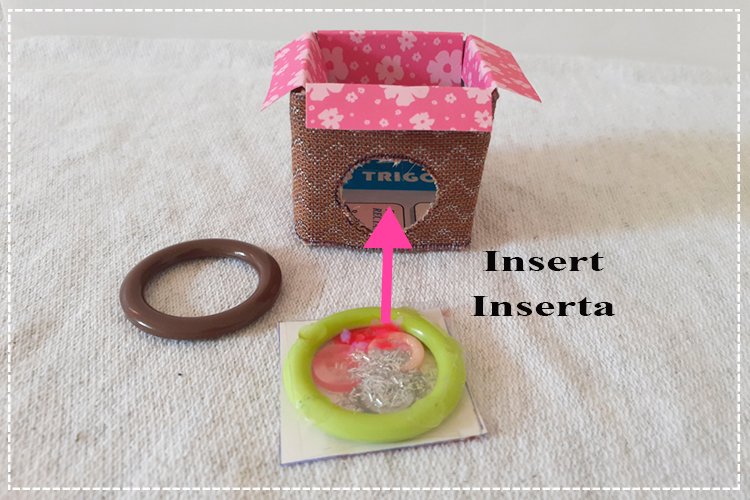
11.Cuando halla secado, lo introducimos dentro de la maceta.
11.When it is dry, we introduce it into the pot.
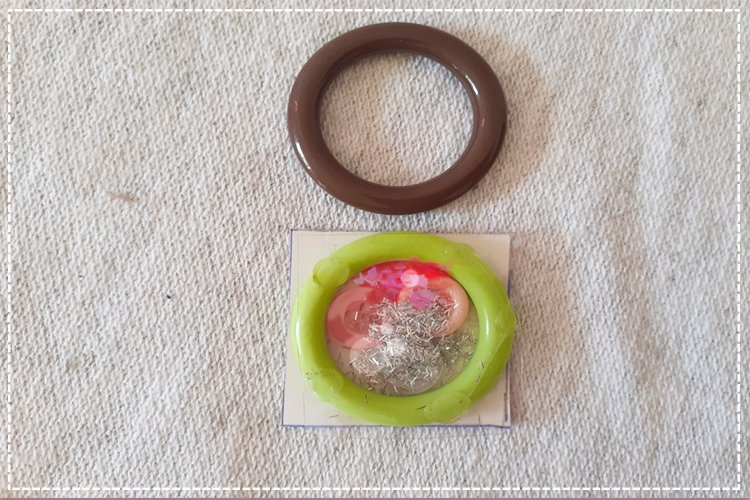
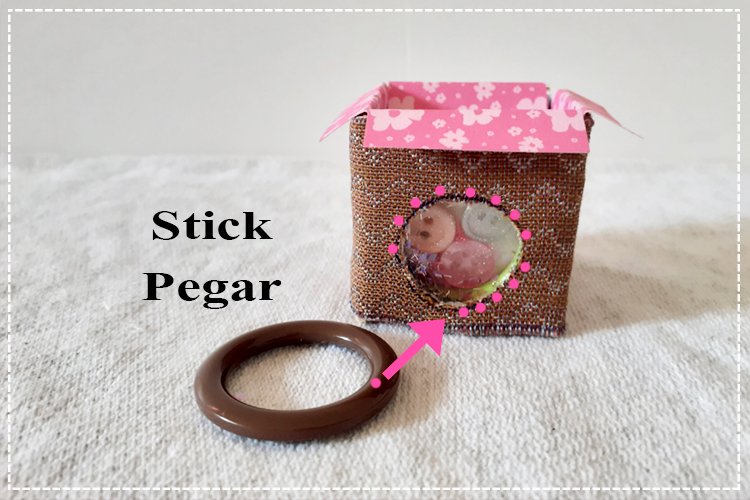
12.Para un mejor acabado pegamos un aro de plástico que bordea nuestra cápsula escarchada.
12 For a better finish we glue a plastic ring that surrounds our frosted capsule.
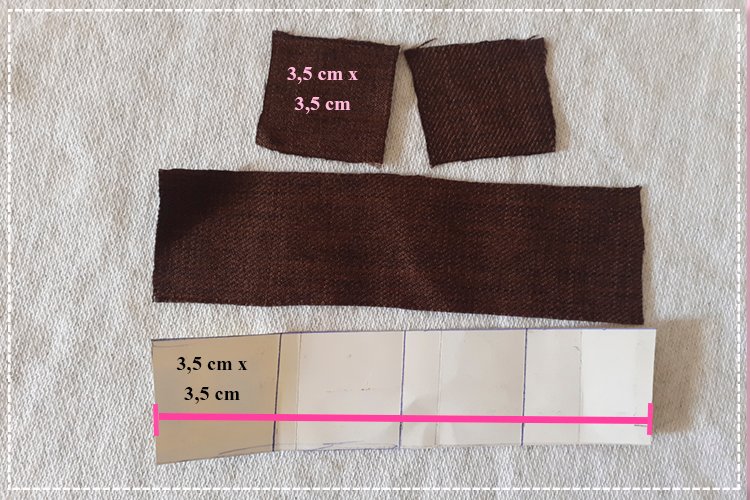
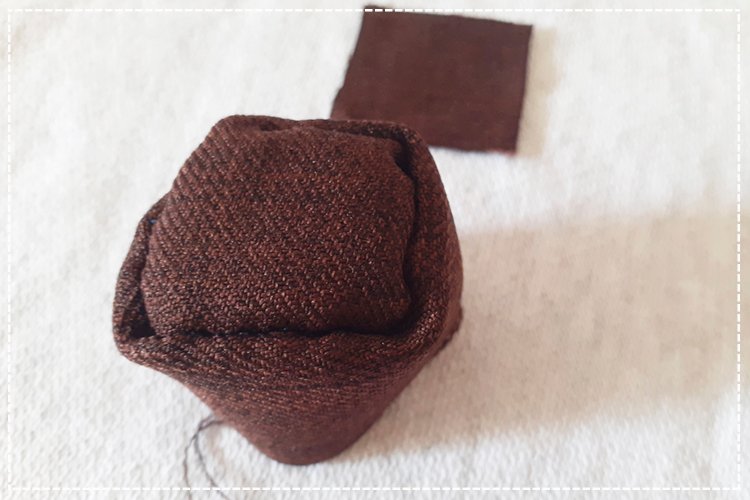
13.Para la elaboración de “la tierra” de la maceta necesitaremos las siguientes medidas. ( ver foto). Nuestra tira larga separada de las dos tapas de nuestro cubo de tela.
13.For the elaboration of "the kand" of the pot we will need the following measures. ( view photo). Our long strip separated from the two lids of our cloth bucket.
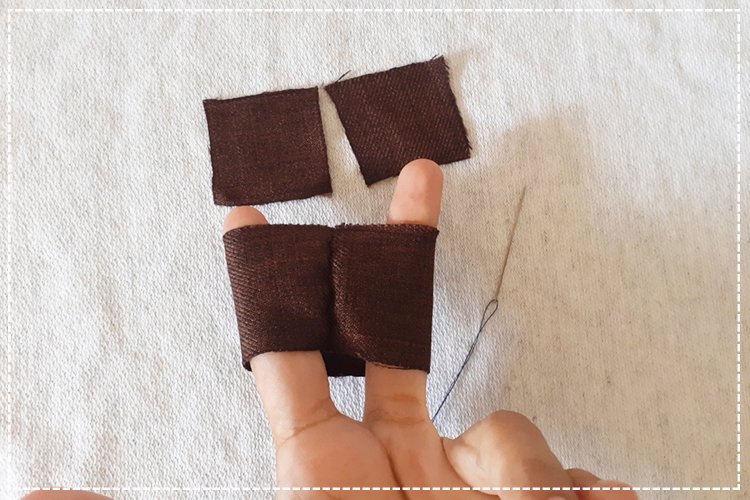
14.Cocemos los extremos de la tira.
14.We cook the ends of the strip.
15.Sellamos una de las tapas del cubo de tela.
15 We seal one of the covers of the cloth bucket.
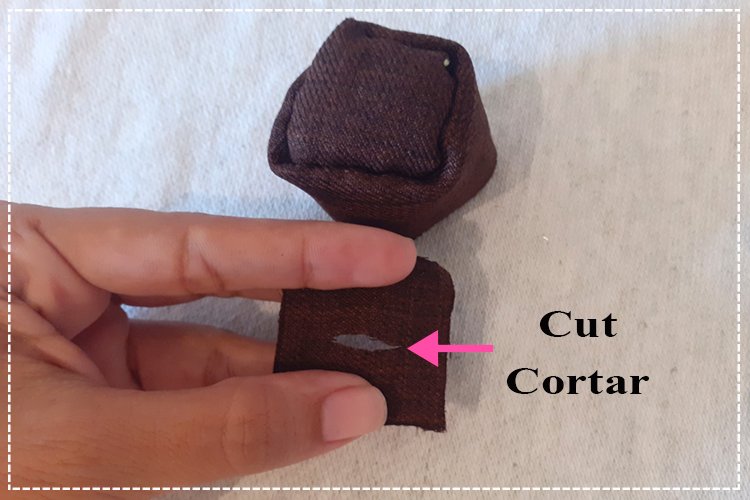
16.Y una le hacemos una pequeña rajita aproximadamente de 1 cm.
16.And one we make a small slit approximately 1 cm.
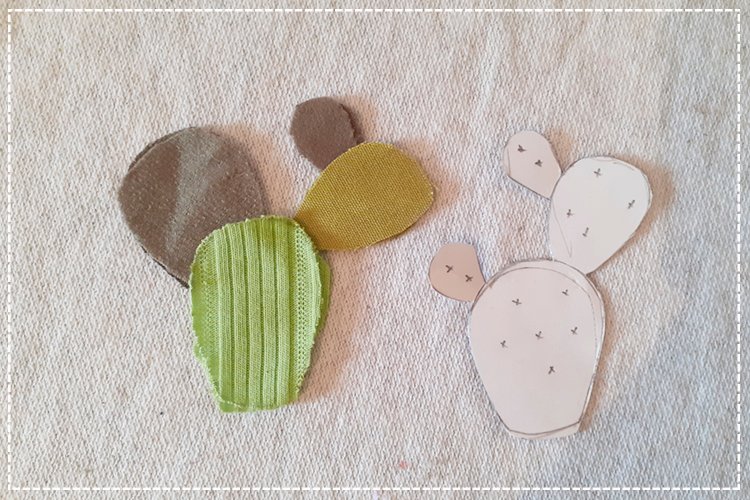
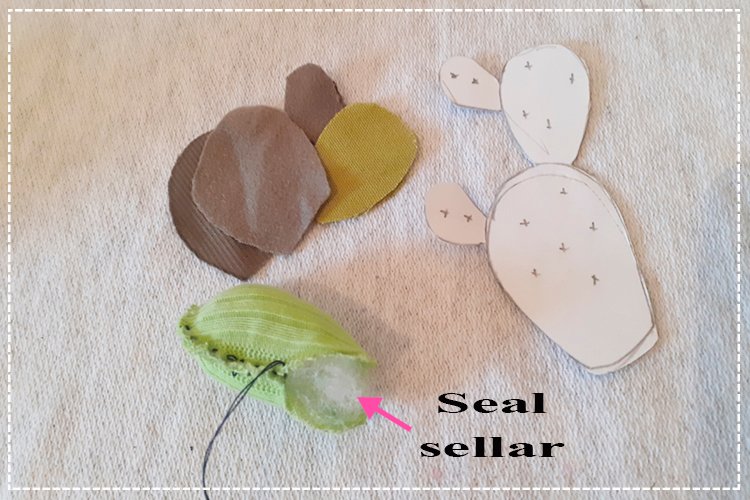
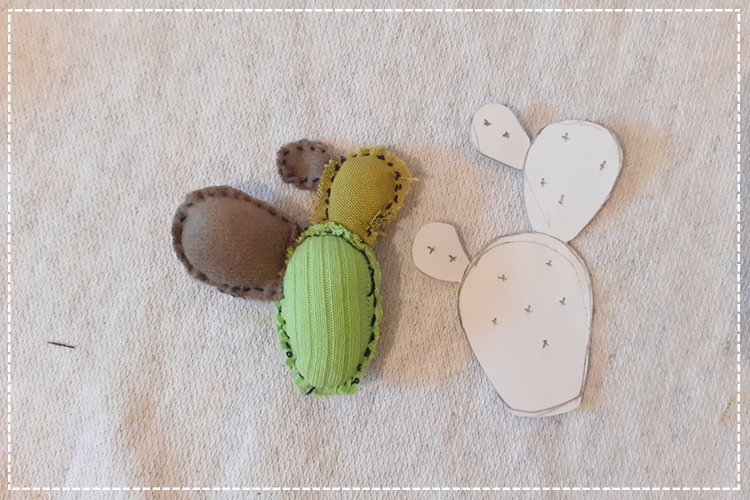
17.Para la elaboración del cactus necesitaremos cortar el patrón en telas verdes en diferentes tonos para un aspecto más viscoso.
17.For the elaboration of the cactus we will need to cut the pattern in green fabrics in different tones for a more viscous appearance.
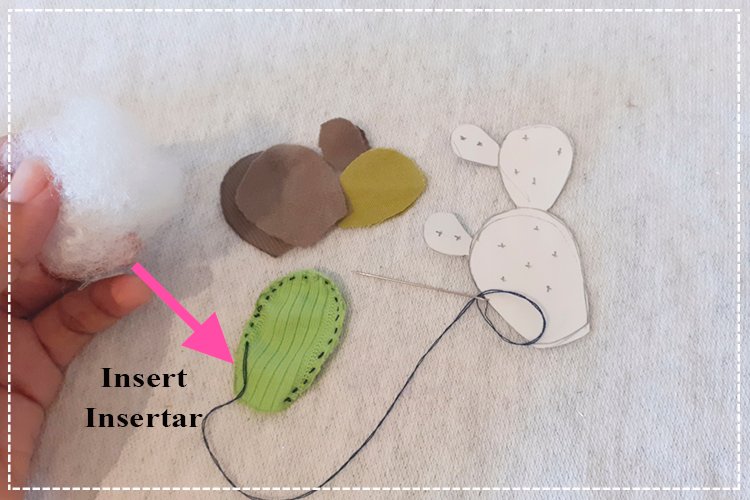
18.Bordeamos con aguja e hilo y antes de sellar completamente el cactus colocamos la felpa dentro.
18.We border with a needle and thread and before completely sealing the cactus we place the plush inside.
19.Una vez relleno el cactus finalizar el sellado.
19.Once the cactus is filled, finish the sealing.
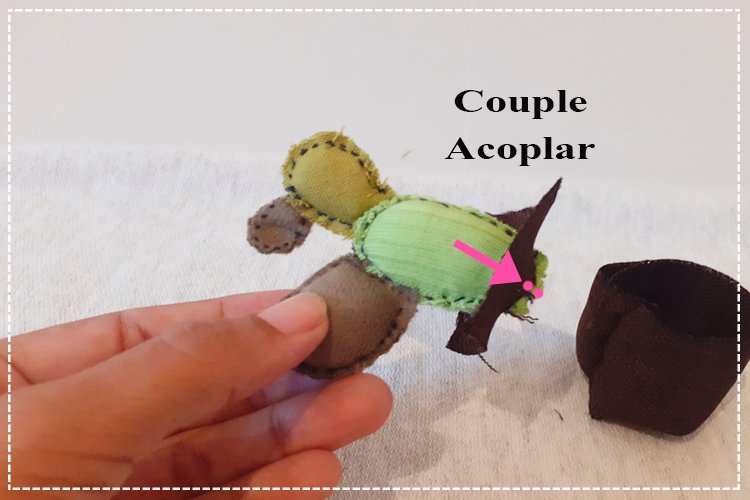
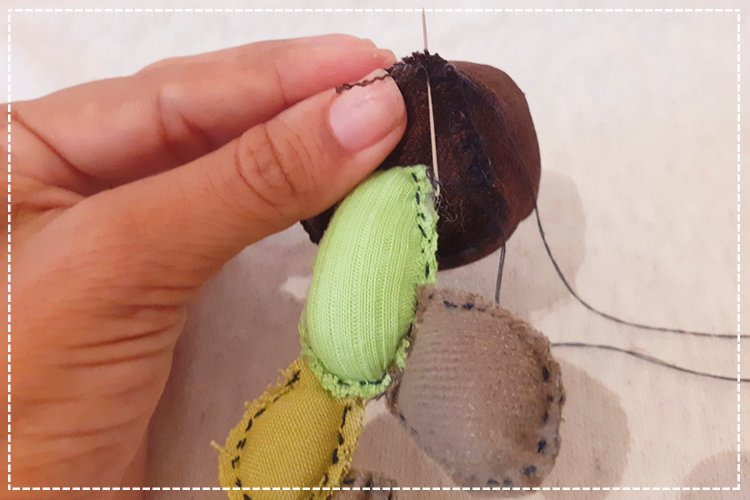
20.Terminado el cactus lo acoplamos y cocemos a la tapa del cubo de tela que previamente cortamos.
20.Once the cactus is finished, we attach it and we cook it to the top of the cloth bucket that we previously cut.
21.Rellenamos de felpa el cubo.
21.We stuff the bucket with terrycloth.
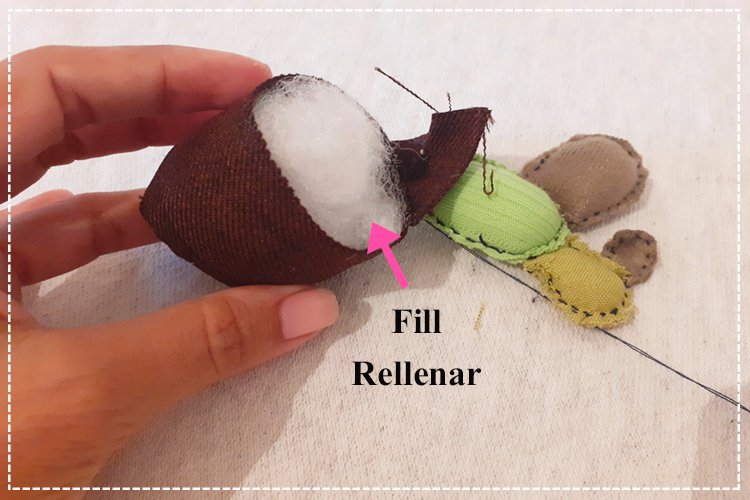
22.Y cocemos la tapa.
22.And we cook the lid.
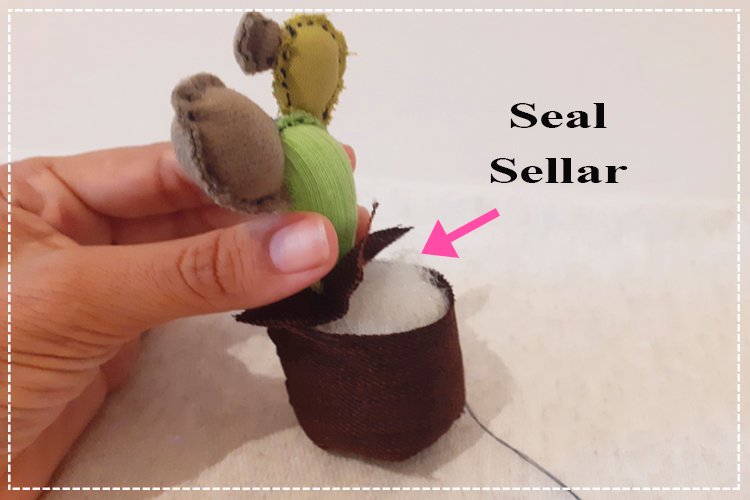
23.Para finalizar unimos con pegamento la maceta en la base.
23.To finish we glue the pot at the base.
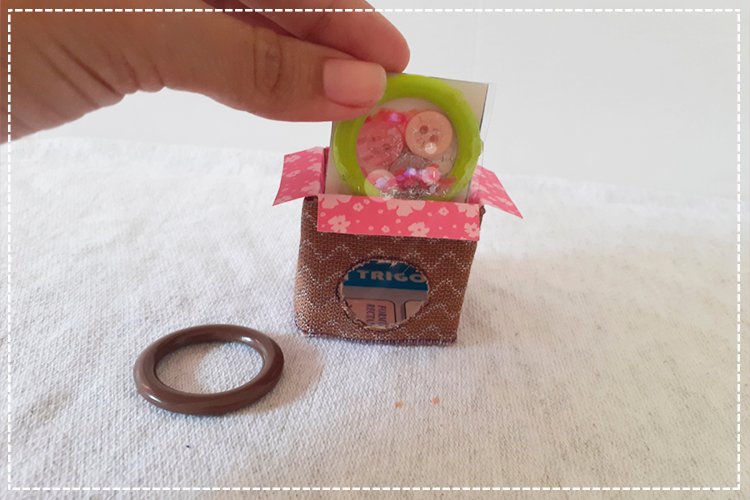
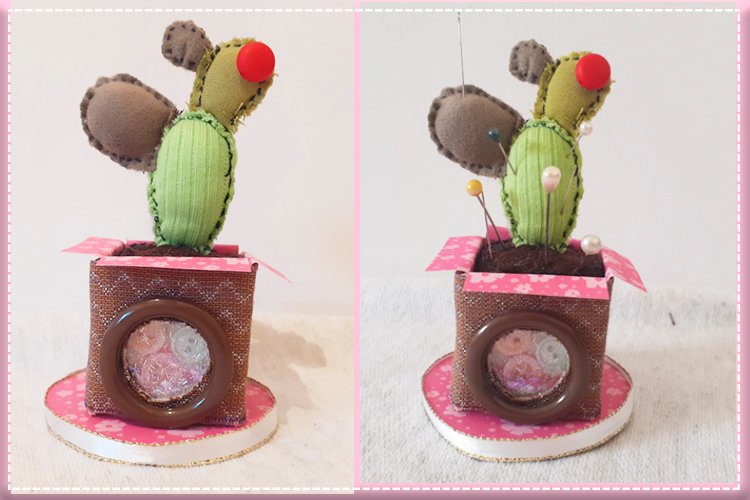
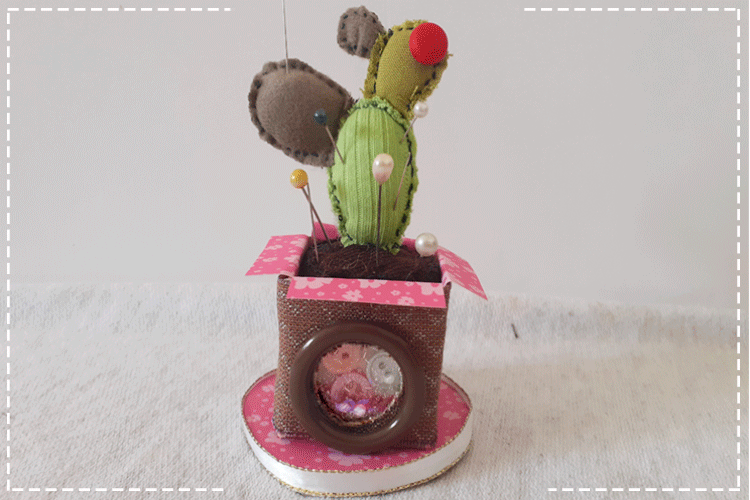
24.Y luego introducimos la almohadilla completa dentro de la maceta (sin pegamento).
24.And then we introduce the complete pad into the pot (without glue).
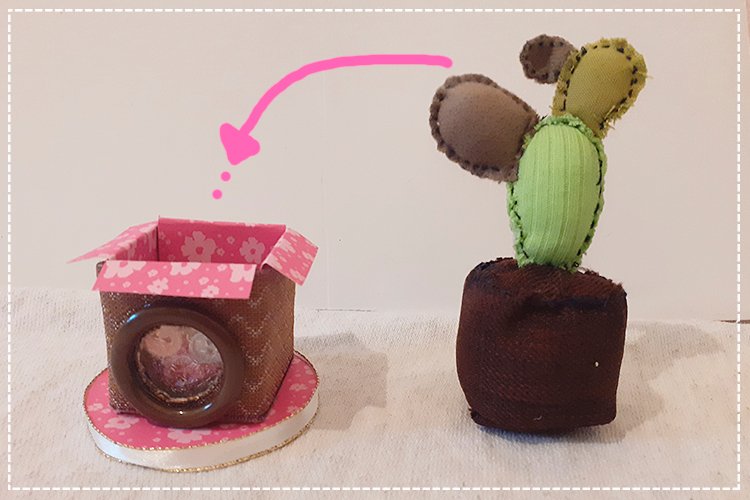
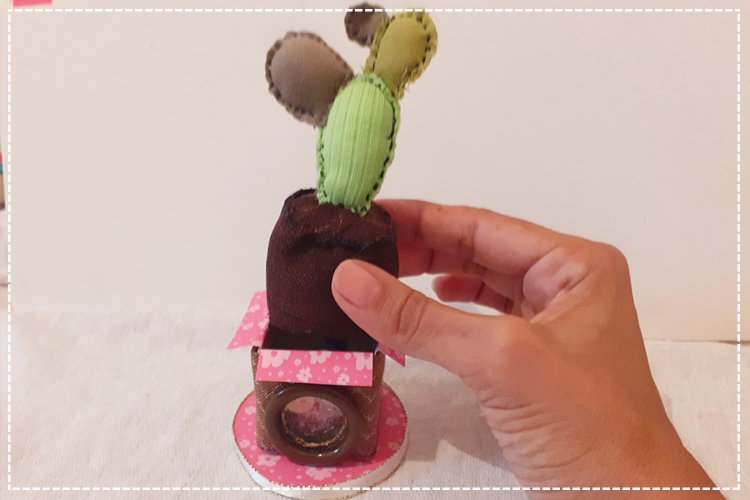
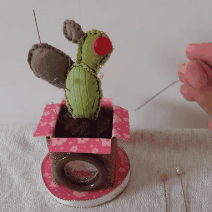
De esta manera queda nuestro práctico cactus alfiletero!
In this way it is our practical pincushion cactus!
Esto ha sido todo por hoy mis queridos amigo, espero les haya gustado; siempre con mucho cariño, gracias por el apoyo. Bendiciones!
This has been everything for today my dear friend, I hope you liked it; always with a lot of affection, thanks for the support. Blessings!


Fotografía por | Photography by: @kathysteele, Android A10.
Edición por | Edition by: @kathysteele, Photoshop.
Separador y stikers| Separator and stikers: Pinterest, Photoshop.
Translated with www.traductorgoogle