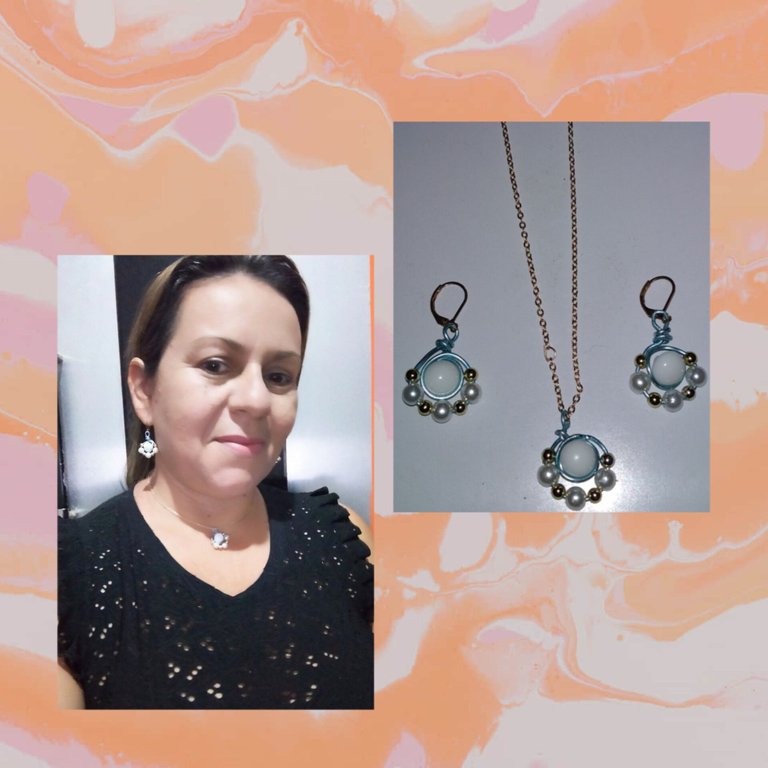
(ENG/ESP) TUTORIAL: SET OF ACCESSORIES MADE WITH PEARLED BUTTON.
Have a nice sunrise everyone at @jewelry, I hope you had a good weekend. Hoping in God that this week is full of great ideas to show us and share. On this occasion, I bring you a very simple tutorial, which consists of very easy and few steps, on how to make a beautiful and elegant set of accessories, using pearl buttons, wire and a great touch of jewelry, ideal to wear at any time and occasion. , making them look radiant. For this reason, I invite you to follow me until the end, I hope you like it and enjoy it.//
Lindo amanecer tengan todos en @jewelry, espero hayan tenido un buen fin de semana. Esperando en Dios, que esta semana, este llena de ideas geniales para mostrarnos y conpartir. En esta oportunidad, les traigo un muy sencillo tutorial,el cual consta de muy fáciles y pocos pasos,de cómo hacer un lindo y elegante juego de accesorios, usandobotones perlados, alambre y gran toque de bisutería, ideal para lucir en cualquier momento y ocasión, haciéndolas ver radiantes. Por está razón, Les invito a seguirme hasta el final, espero les guste y disfruten.
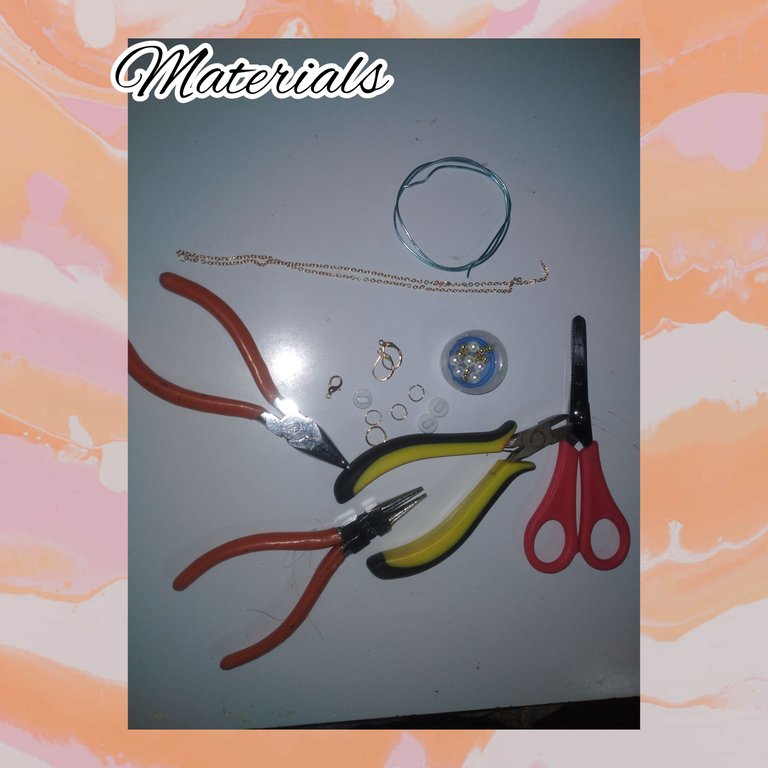
Materials.
. Three medium pearlized buttons, white
. Wire n16, blue colour.
. Bases for earrings
. Medium white pearls.
. golden pearls
. 45cm of thin gold chain.
. Jewelry earrings.
. chain pin
. Jewelery tweezers.//
Materiales.
. Tres botones perlados medianos, color blanco
. Alambre n16, color azul.
. Bases para aretes
. Perlas medianas color blanca.
. Perlitas doradas
. 45cm de cadena dorada delgada.
. Aritos de bisutería.
. Pasador para cadenas
. Pinzas de bisutería.
Step/ Pasos.
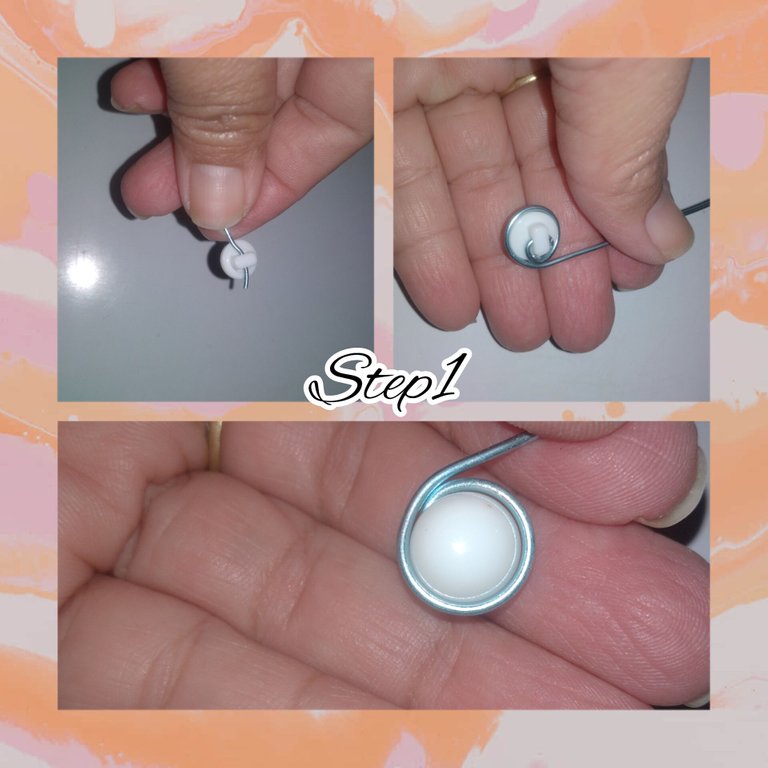
1.) I will start by introducing the wire through the hole, which brings the button in its lower part, I secure the wire with the jewelry pliers, then adjusting it as much as possible, I turn the, around the button, making about sticking out the wire at the front of the button.
1.) Comenzaré introduciendo, el alambre por el orificio, que trae el botón en su parte inferior, aseguro el alambre con las pinzas de bisutería, luego ajustando lo más que me sea posible, doy una vuelta al, alrededor de el botón, haciendo sobre salir el alambre en la parte delantera de el botón.
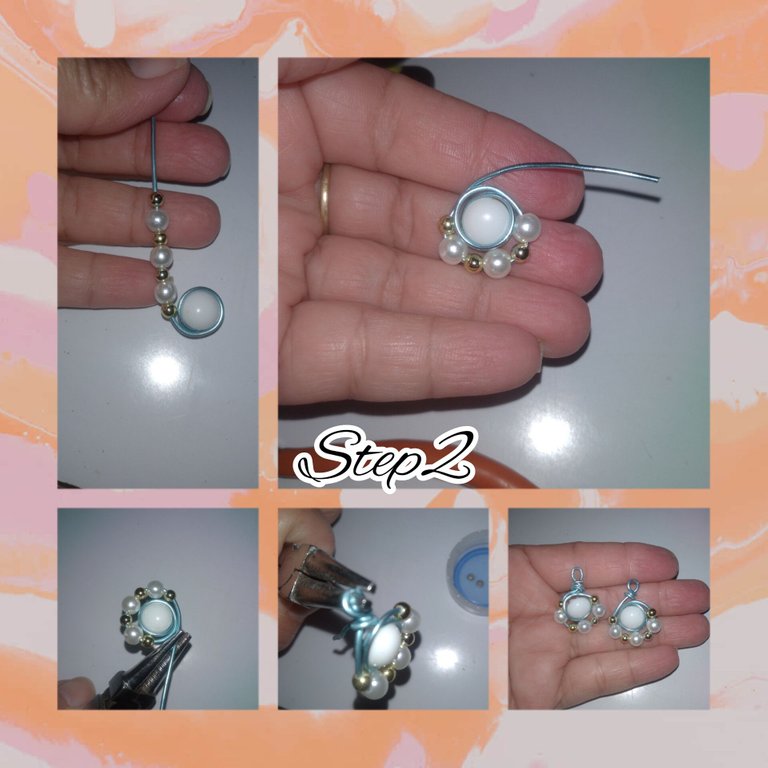
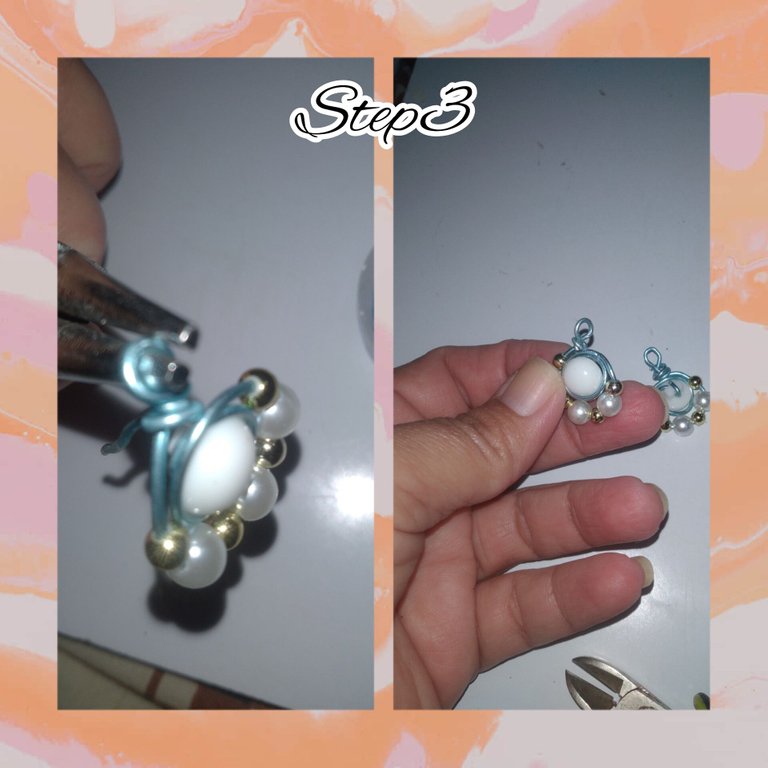
2.) I place a golden pearl on the wire, followed by a white one, a good golden one, a white one, and in this way, I will introduce three white pearls into the wire, separated by golden pearls. Introduced, I will turn around the button, until I locate myself, in what will be the upper part of the first pendant.
With the help of the round nose pliers, I will make a small ring, and the residual wire, I will turn around the bottom of the ring, when I finish turning I extract the round nose pliers. In this way I repeat and obtain the two pendants, which I will use for the earrings.
2.) Coloco en el alambre una perlita dorada, seguida de una blanca,buena dorada, una blanca y de esta manera, introducire al alambre tres perlas de color blanca, separadas por perlitas doradas. Introducidas dare vuelta al alrededor de el botón,hasta ubicarme, en lo que será la parte superior de el primer dije.
Con ayuda de la pinza punta redonda, haré un pequeño arito, y el alambre residual, le daré vueltas al alrededor de la parte inferior de el arito, al terminar de dar las vueltas extraigo la pinza punta, redonda. De esta manera repito y obtengo los dos dijes, que usaré para los aretes.
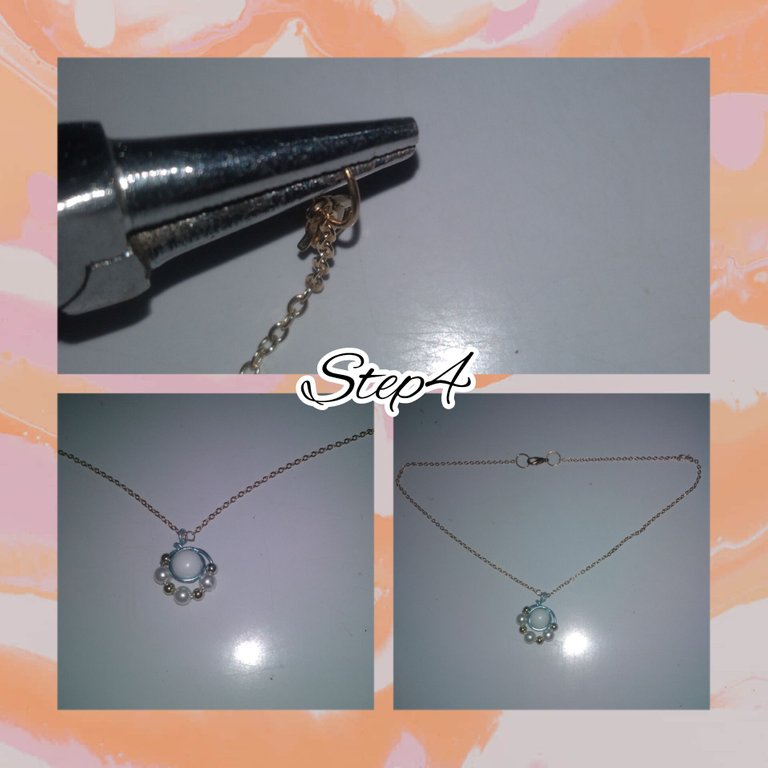
3.) For the pendant, of the chain, I will repeat it as it is, I did it in previous steps, they will only differ, in that the earring at the top, I will not do it from the front, but rather, it will be on the side, so that easier to appreciate when placed on the chain.
3.) Para el dije, de la cadena, repetire tal cual, lo hice en pasos anteriores, solo se diferenciaran, en que el arito de la parte superior, no lo haré de frente si no que, este quede de lado , para que sea más fácil apreciar al ser colocado en la cadena.
4.) I will place the chain at one end, a ring and the pin, opening and closing with the corresponding jewelry pliers, I continue introducing the charm made for the chain, then I continue, placing a ring at the other end of the chain. chain, which will allow it to match and hold both ends.
4.) Colocare a la cadenas en uno de sus extremo, un arito y el pasador, abriendo y cerrando con las pinzas de bisutería correspondiente, continuo introduciendo el dije hecho para la cadena, seguidamente continuo, colocando un arito en el otro extremo de la cadena,lo que permitirá hacer juego y sostener ambos extremos.
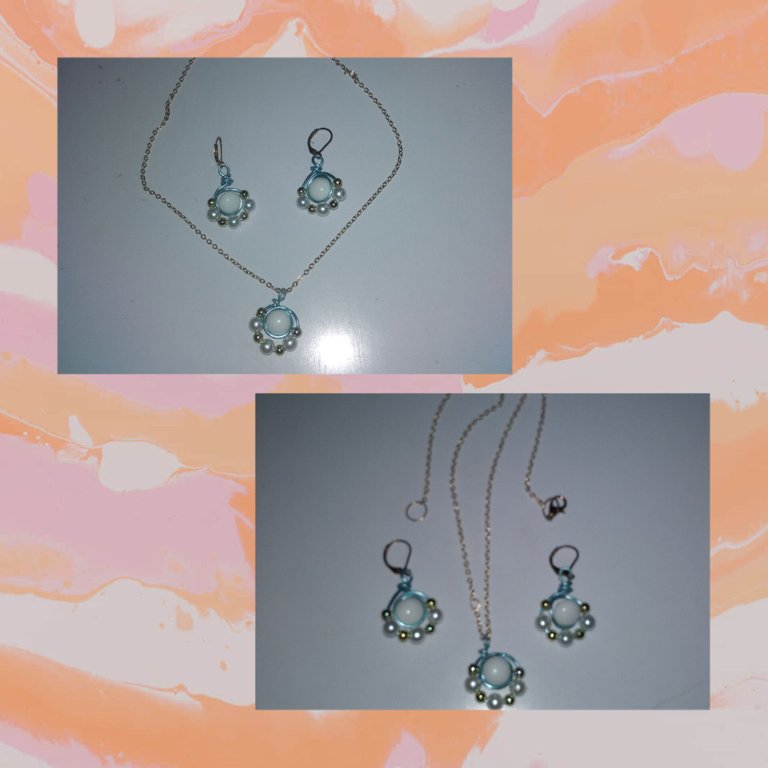
5.) In this step I will place the pendants of the earrings to the base, for this I will open the earrings that bring the bases of the earrings and I introduce and close with the jewelry tweezers.
In this way, I conclude this simple and very practical tutorial, wishing you liked the final result, just like me.
5.) Colocare en este paso los dijes de los aretes a las base, para ello abriré los aritos de traen las bases de los aretes e Introduzco y cierro con las pinzas de bisutería.
De esta forma, doy culminación a este sencillo y muy práctico tutorial, deseando le hay agustado el resultado dinal, igual que a mí.
. All photos were taken with my smartphone.
. Use InShot to show the steps.
. Use Google translate.
Thank you for having followed me to the end, it is always my pleasure to show you my most recent idea made projects. It will be until a close opportunity, hoping these days to come are full of great things, health and family unity.
. Todas las fotos fueron tomadas con mí teléfono inteligente.
. Use InShot para mostrar los pasos.
. Use traductor Google.
Gracias por haberme seguido hasta el final, siempre es de mí agrado mostarles, mí más reciente idea hecha proyectos. Será hasta un aproxima oportunidad, esperando estos días por venir estén llenos, de grandes cosas, salud y unión familiar.
!discovery 38
This post was shared and voted inside the discord by the curators team of discovery-it
Join our Community and follow our Curation Trail
Discovery-it is also a Witness, vote for us here
Delegate to us for passive income. Check our 80% fee-back Program
Hola @discovery-it, agradecida por su apoyo.
Están muy lindos y creativos estos accesorios, al usar estos botones que no son tan comunes para elaborarlos, es una bonita idea. Me gustó la combinación de colores que seleccionaste ✨💮✨💮✨Saludos 🤗
Hola @marigerp88, que bueno le haya gustado. Gracias por comentar cariño.
Usar botones para un juego de accesorios es totalmente creativo, innovador y auténtico. El color del alambra hace un gran trabajo en cada pieza ya que le da ese toque especial.
Fabuloso.
Hola querida @artsugar, gracias cariño, que gusto le haya gustado. Abrazos
Hermoso trabajo amiga, me encanto el color del alambre que utilizaste, el diseño y las perlas combinaron muy bien.
Saludos @katiuskamata ✨
!DIY
Hola @dayadam, que placer te haya gustado cariño..gracias
Nice set of earrings, nice colors that stand out a lot. Thank you for sharing your step by step @katiuskamata. // Un lindo juego de aretes, bonitos colores que resaltan mucho. Gracias por compartir tu paso a paso @katiuskamata
Agradecida por su apoyos @diyhub.
esto está muy bonito