[ESP/ENG] Galletas de colores para Hive. Con sabor a mantequilla, decoradas con chocolate para untar casero. 😋
¡Hola amigos foodies! 😊
En esta, mi receta del día, les vengo a mostrar la preparación de unas deliciosas galletas, crujientes. De un sabor predominante a mantequilla.
Decoradas con un chocolate que me encanta preparar para este tipo de recetas, al cual puedo dejar tan espeso como quiera, dependiendo de la finalidad, además, cabe destacar que a pesar de ser con pocos ingredientes, el sabor es bastante intenso, perfecto para rellenar o decorar.
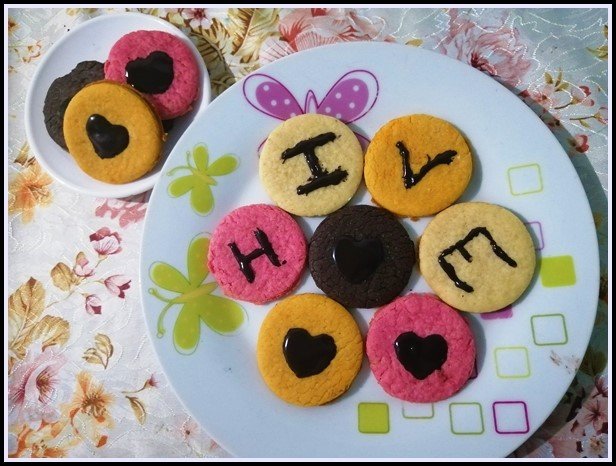
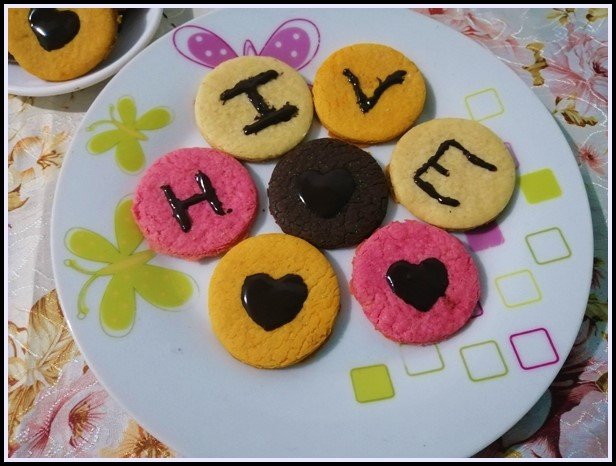
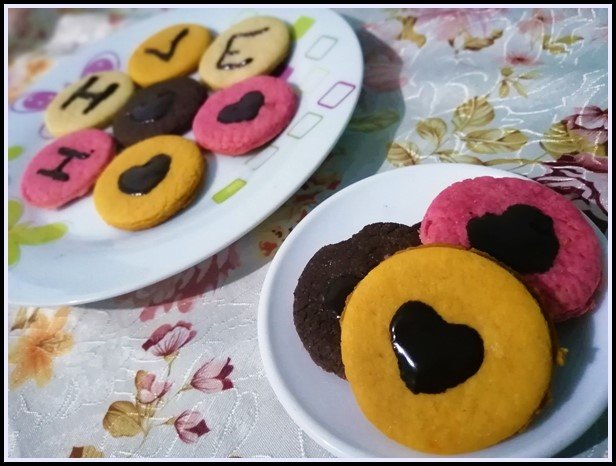
En las galletas plasmé a "HIVE", siendo esta una excelente idea para decorar con cualquier mención, un regalo a un ser querido, retratando cualquier nombre o palabra.
Hello friends foodies! 😊
In this, my recipe of the day, I come to show you the preparation of some delicious, crunchy cookies. Of a predominantly buttery flavor.
Decorated with a chocolate that I love to prepare for this type of recipe, which I can leave as thick as I want, depending on the purpose, in addition, it should be noted that despite being with few ingredients, the flavor is quite intense, perfect for filling. or decorate.
In the cookies I captured "HIVE", this being an excellent idea to decorate with any mention, a gift to a loved one, portraying any name or word.
Sin hacerlos esperar más, los dejo con el paso a paso. 😊
Without making you wait any longer, I leave you with the step by step. 😊
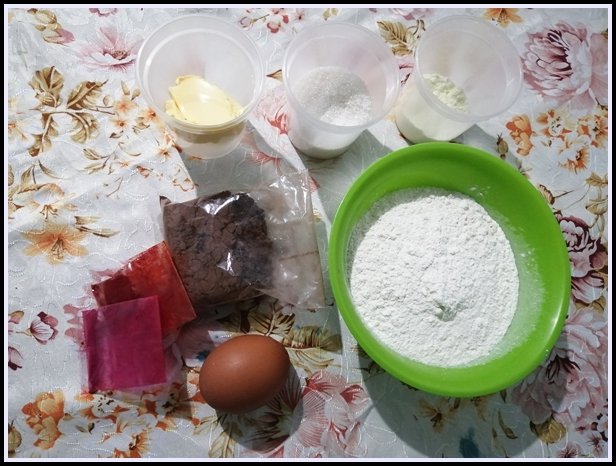
| Ingredientes | Cantidad |
|---|---|
| Harina de trigo | 250g |
| Huevo | 1 Unidad |
| Azúcar | 100g |
| Mantequilla | 2 Cucharadas |
| Cacao en polvo | 2 Cucharada |
| Leche en polvo | 2 Cucharadas |
| Colorantes amarillo y rosado | 1/2 Cucharada |
| Ingredients | Quantity |
|---|---|
| Wheat flour | 250g |
| Egg | 1 Unit |
| Sugar | 100g |
| Butter | 2 Tablespoons |
| Cocoa powder | 2 Tablespoon |
| Powdered milk | 2 Tablespoons |
| Yellow and pink colorants | 1 / 2 Tablespoon |

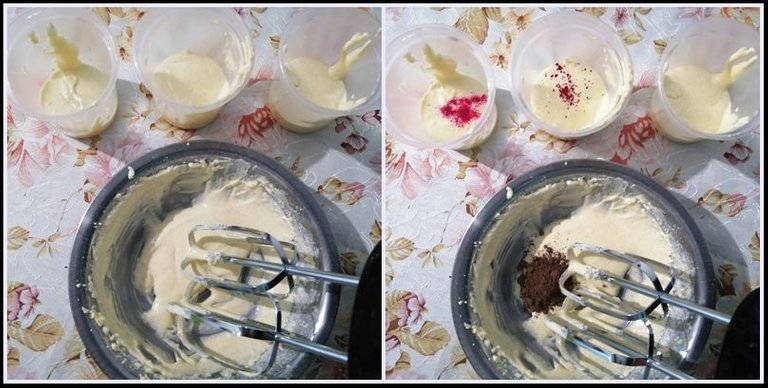
- Para comenzar, Batimos la mantequilla hasta quedar cremosa, luego le agregamos el azúcar, la leche en polvo y el huevo a medida que vamos batiendo.
- To begin, we beat the butter until it is creamy, then we add the sugar, the powdered milk and the egg as we beat.

- Ya batidos los ingredientes, separamos la mezcla en 4 partes aproximadamente iguales. Le agregamos a dos de ellas los colorantes, a otra el cacao y a la restante la dejamos igual.
- Once the ingredients have been beaten, we separate the mixture into 4 approximately equal parts. We add the colorants to two of them, to another the cocoa and to the rest we leave it the same.
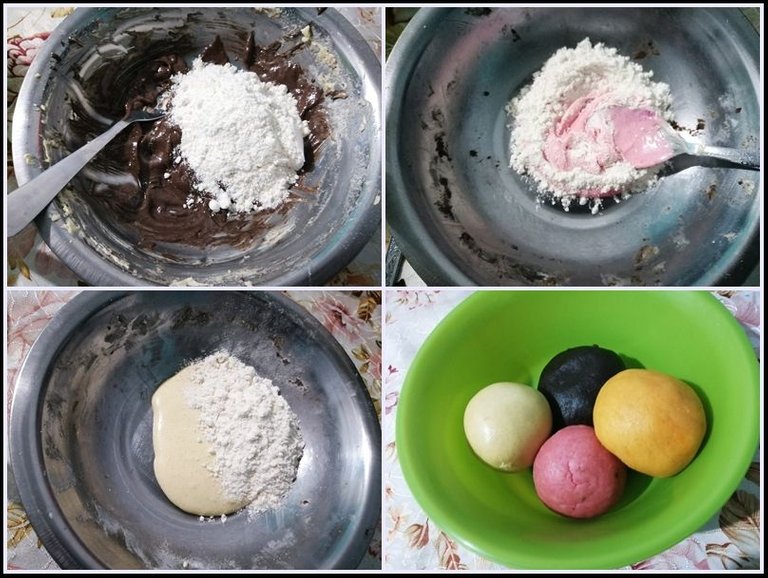
- Después de mezclar cada parte con los colorantes y el cacao, mezclamos cada una con harina de trigo hasta formar varias masas.
- After mixing each part with the colorants and cocoa, we mix each one with wheat flour to form several doughs.
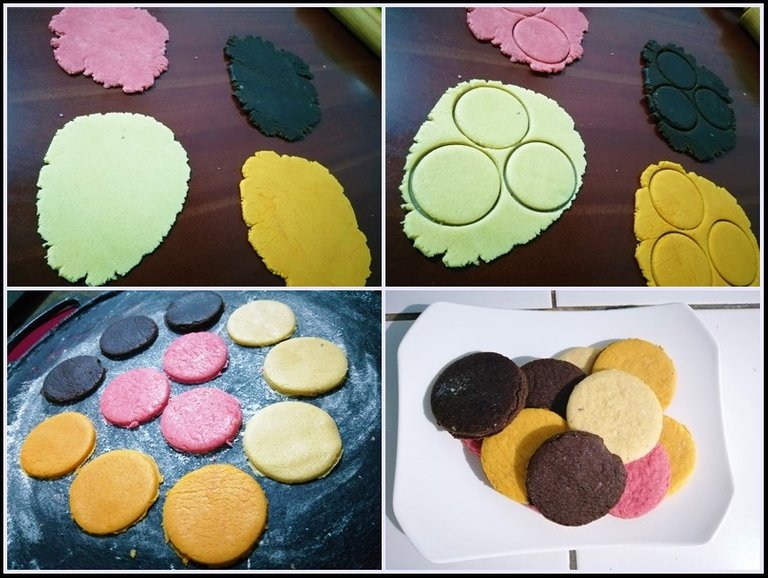
- Estiramos cada masa con ayuda de un rodillo, y con un envase redondo hacemos la forma de las galletas.
- Las colocamos en una plancha enharinada y cocinamos a fuego muy bajo por 25 minutos.
Esta vez les coloqué un envase que cubriera todas las galletas mientras se cocinaban, de manera que el calor se concentrara dentro y se cocinaran mejor; de esta manera no tuve que cocinarlas por ambos lados y así no perdieran el color que quería lograr. 😊
We stretch each dough with the help of a rolling pin, and with a round container we make the shape of the cookies.
We place them on a floured griddle and cook over very low heat for 25 minutes.
This time I put a container that covered all the cookies while they were cooking, so that the heat was concentrated inside and they cooked better; this way I didn't have to cook them on both sides so they wouldn't lose the color I wanted to achieve. 😊
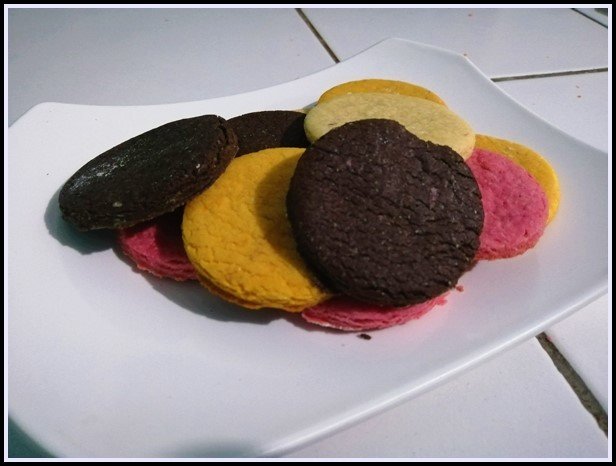
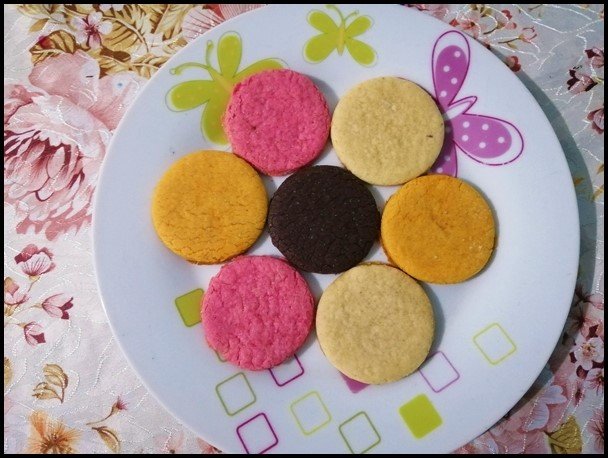
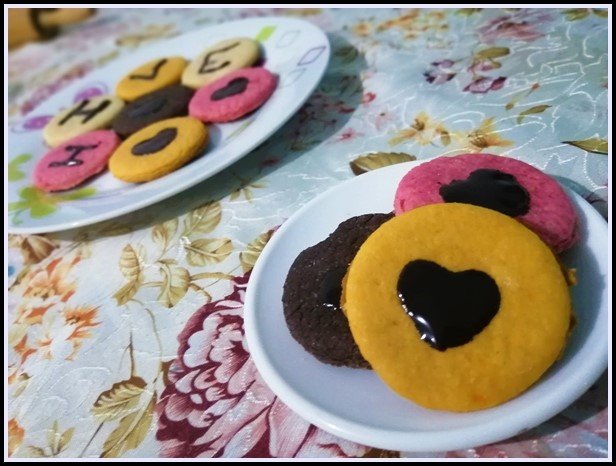
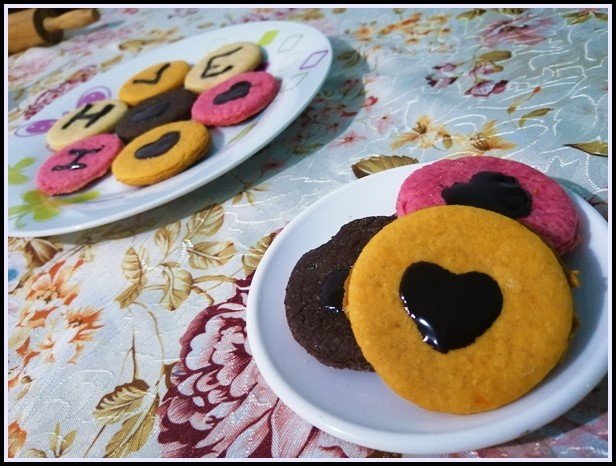
Ya cocidas, emplatamos.
Already cooked, we plate.
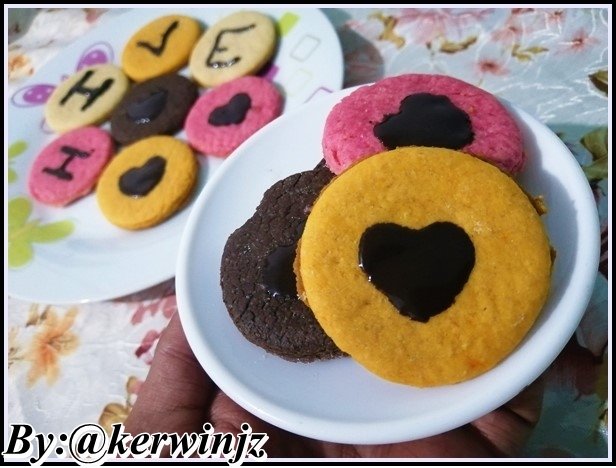
Nota: El chocolate que usé de aquí en adelante para decorar y plasmar las letras, lo preparé con 2 cucharadas de leche condensada, 1 cucharada de leche en polvo y 2 cucharaditas de cacao en polvo. De esta manera queda como una especie de pasta, o chocolate para untar bastante firme, para que no se deforme la decoración.
Note: The chocolate that I used from now on to decorate and shape the letters, I prepared it with 2 tablespoons of condensed milk, 1 tablespoon of powdered milk and 2 teaspoons of cocoa powder. In this way it remains like a kind of paste, or chocolate to spread quite firm, so that the decoration does not deform.
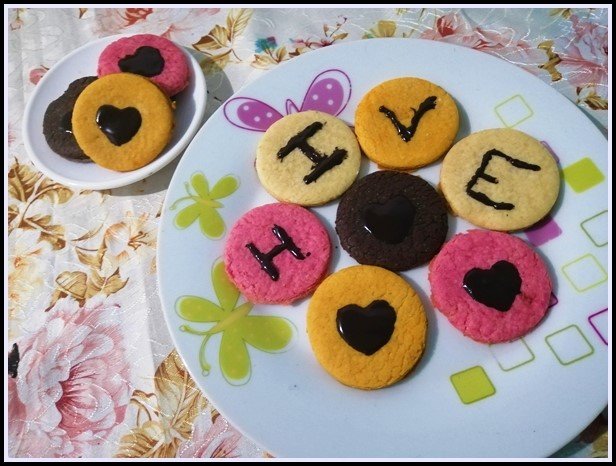
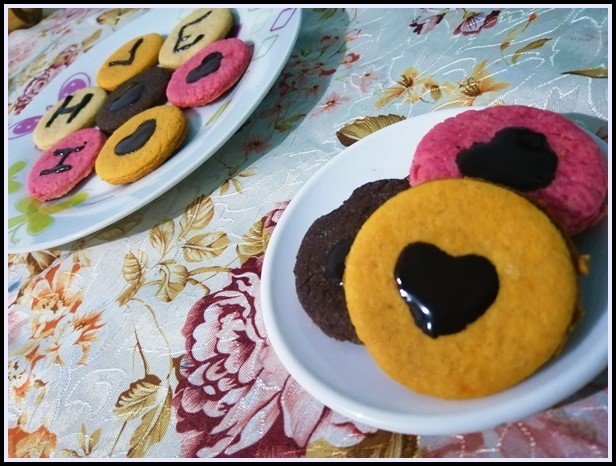
- En 4 galletas plasmé el "HIVE" con el chocolate, y el resto las decoré realizándoles un corazón a cada una. 😊
- In 4 cookies I plastered the "HIVE" with the chocolate, and the rest I decorated them by making a heart to each one. 😊
Así quedaron estas galletas amigos foodies, crujientes y deliciosas. 😋
This is how these cookies were foodies friends, crunchy and delicious. 😋
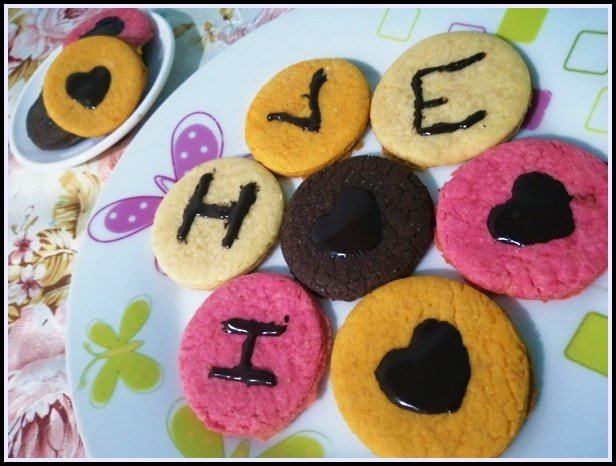
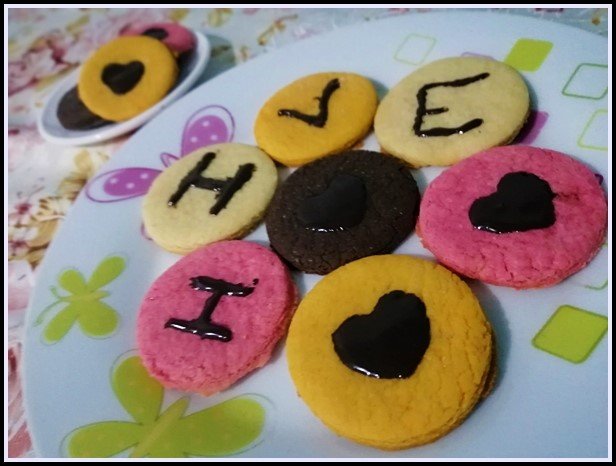
Es muy importante y valioso ser agradecido. A estas galletas les plasmé "HIVE" Porque gracias a esta familia, he tenido un crecimiento bastante importante y considerable en el mundo de la cocina, mundo que amo bastante y que gracias a Hive he puesto en práctica de una manera que no lo había hecho antes. 😊
It is very important and valuable to be grateful. I gave these cookies "HIVE" Because thanks to this family, I have had quite an important and considerable growth in the world of cooking, a world that I love a lot and that thanks to Hive I have put into practice in a way that I hadn't done it before. 😊
Hasta aquí mi aporte queridos amantes a la comida.
Espero haya sido de su agrado.
La cocina es un lugar desestresante, donde podemos poner a volar nuestra creatividad.
Todas las fotos son propias.
Banners creados en: Canva.
Será hasta una nueva oportunidad.
So far my contribution dear food lovers.
I hope you have enjoyed it.
The kitchen is a de-stressing place, where we can let our creativity fly.
All photos are my own.
Banners created in: Canva.
It will be until a new opportunity.
Bye! 😊