Sculpting Aliens From The Book I'm Writing (PART 1)
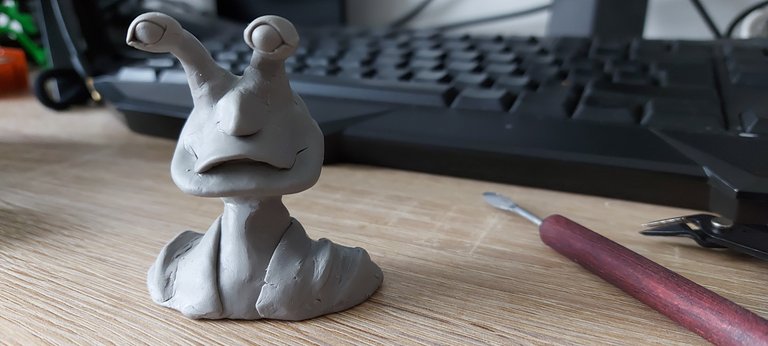
Today I decided to do a bit of sculpting and this abomination below is the "finished" piece. I decided to put inverted commas around the word finished because there's no doubt that I'll end up going back to it to add a few bits and pieces here and there.
I decided to take pictures as I went, to document the process of making it.
Getting Started
Going into this one today I had no idea what I was going to make, but I did have an idea to create something from the stories I'm writing. The novel is a sci-fi one, set in a world that I've been building for a while.
In my mind, I have a ton of different aliens created, but no references to look at them.
I have histories written, and worlds imagined, but I've wanted to draw them so I can really get an idea of what they look like. Since I'm not a good artist, the best way of getting ideas out, for me, is through sculpting.
I'm not that good of a sculptor either, but I am better at it than I am at drawing. Nevertheless, if anyone with more experience than me reads through this and sees anything I've missed or has any advice that may help me, let me know.

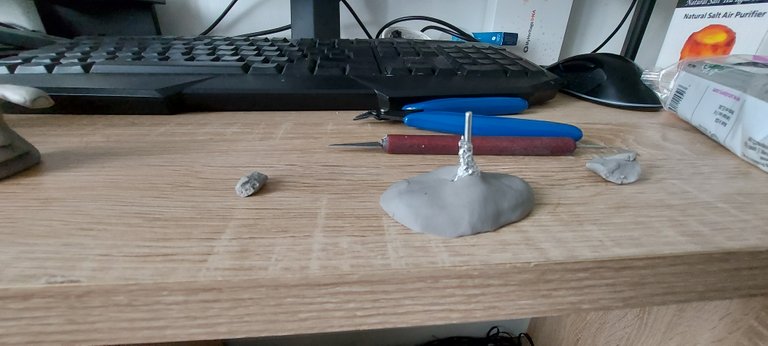
Here's what I use, these tools are pretty cool, and they were pretty cheap, I picked them up on Amazon for around a tenner.
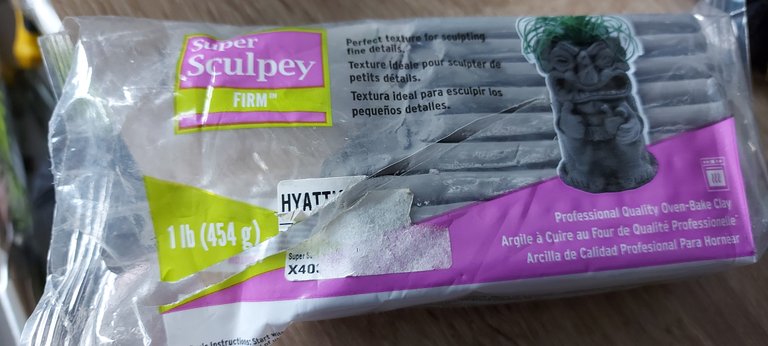
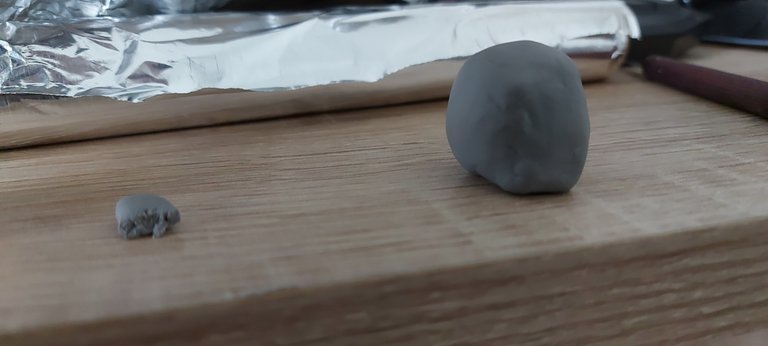
Here's the clay I use. It's called Super Sculpey and also pretty cheap, I think this was around fifteen or twenty euros. I find it easy to use as it is pretty malleable once heated, but when it goes cold it gets really firm, so I find it easy to add details to the piece without it being ruined.
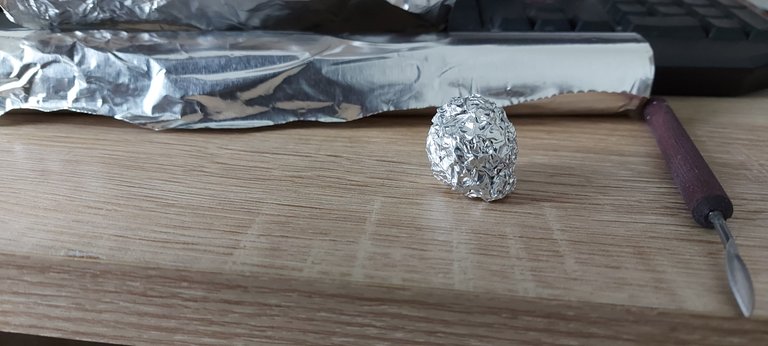
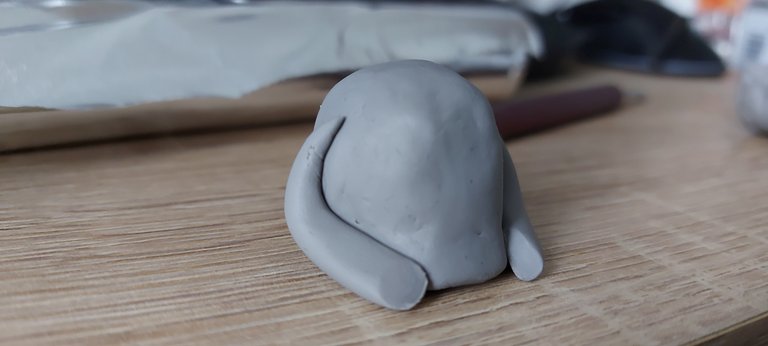
I start off by rolling some tinfoil into a ball, which is some advice I got from my uncle when I first got into making these kinds of models. Before, I would just use a ball of clay, which would always lose its shape the more I worked on it.
With the tinfoil, I'm able to save clay too.
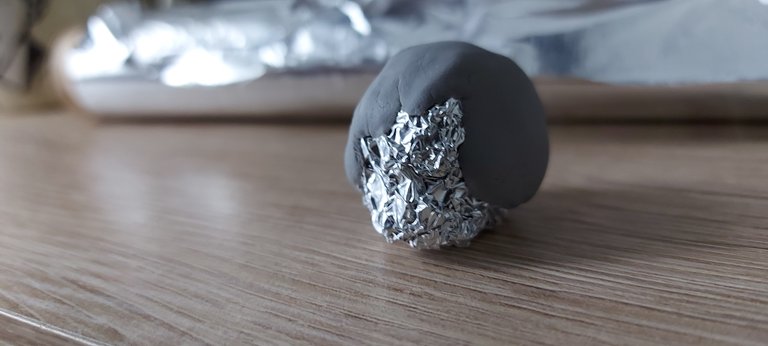
The first thing I do is cover the tinfoil in layers of clay. I go one piece at a time until it's completely covered, it's easier doing it piece by piece as I'm able to join it altogether easier.
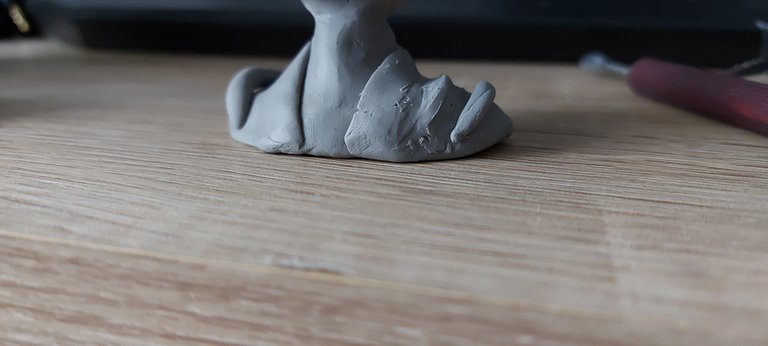
With the ball completely covered it looks like this, there is no real shape, but one side did seem more face-like so I chose that to work on.
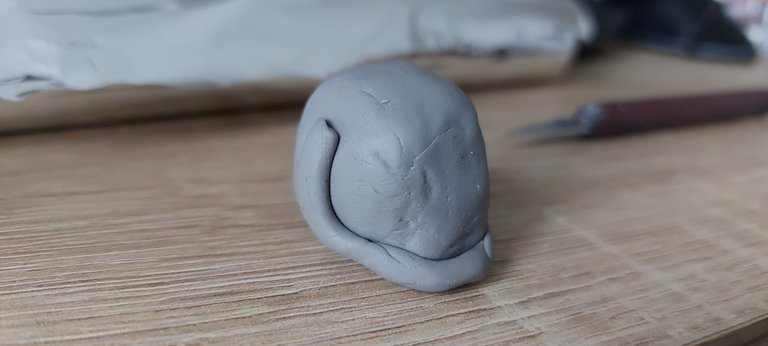
With the face identified, then it's time to work on some of the structure of the piece. I usually start with a jawline.
When I first started out modeling I would look at the ball of clay while feeling my own face. The muscles, cartilage, and skeletal structure that makes it up... I probably looked a bit mad, haha opening and closing my mouth feeling for the moving parts.
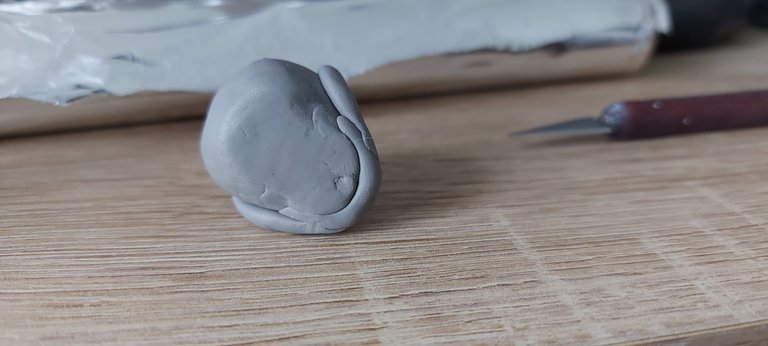
With the strips in place, it's time to start blending.
By this stage, it's taken shape, a basic shape. But, it's enough to get the mind working.
I decided that I wanted to jawline to be a bit more pronounced so decided to layer it up.
That's the second most important thing I learned from sculpting - it's all about the layers.
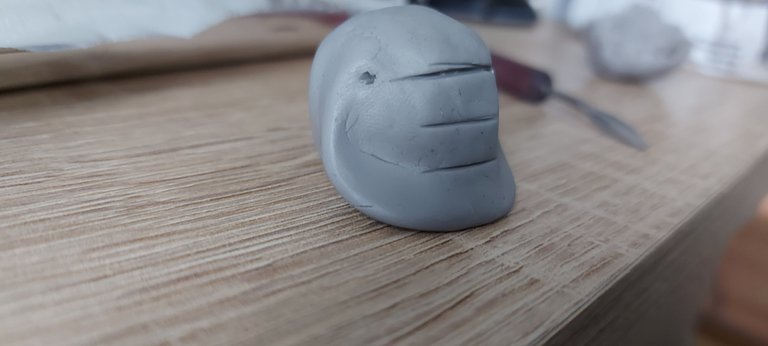
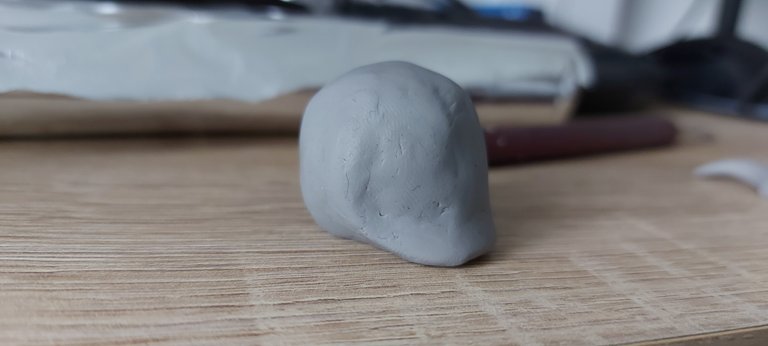
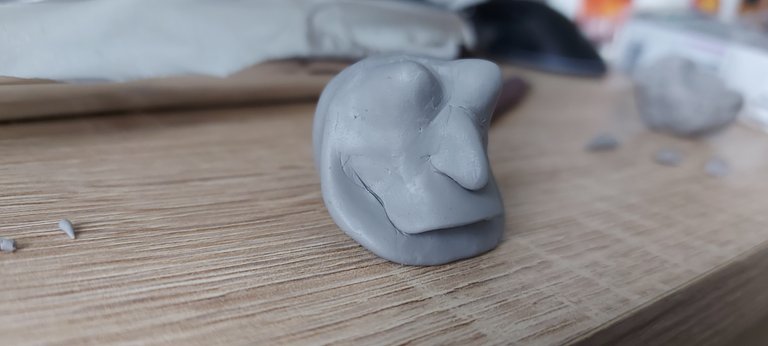
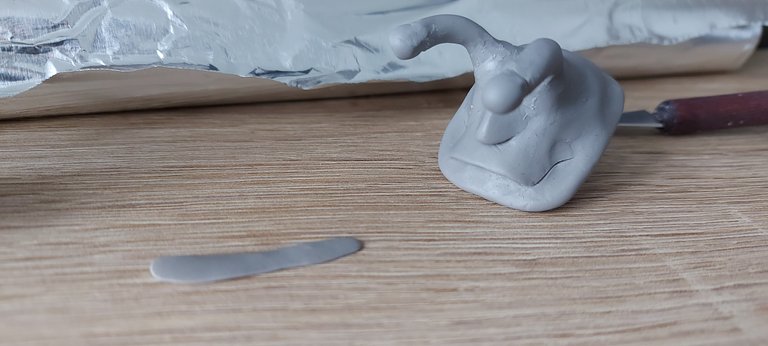
I decided to carve some lines to get a rough idea of where everything was going to go. I.E, nose, eyes, ears, mouth.
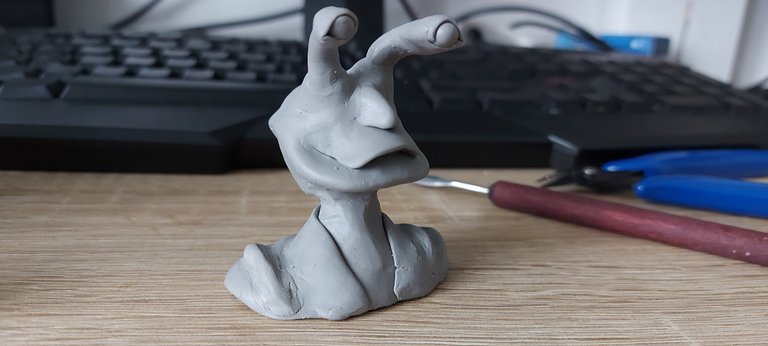
Okay, I didn't document between these pictures and the last, because I got into the zone once I worked out the mouth and nose.
For the mouth, I had this idea. I thought it would be cool if this creature only moved its top lip, kind of the opposite of a human in a way. The lower jaw would be immovable, while the top one is on an arch. Then I kind of had this idea that the top lip could be like a beak or bill.
As for the nose, I thought I wanted something a bit bulbous, kind of like a blobfish.
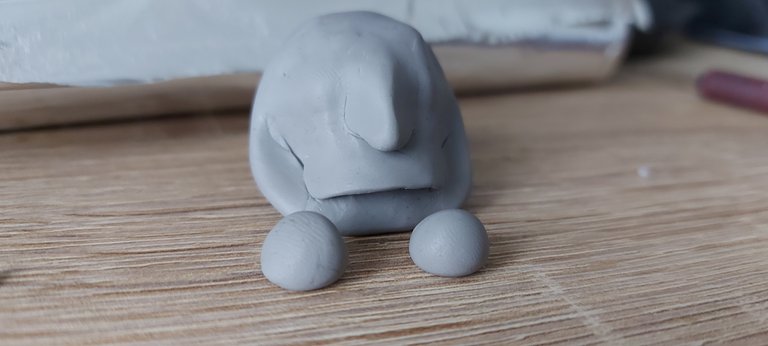
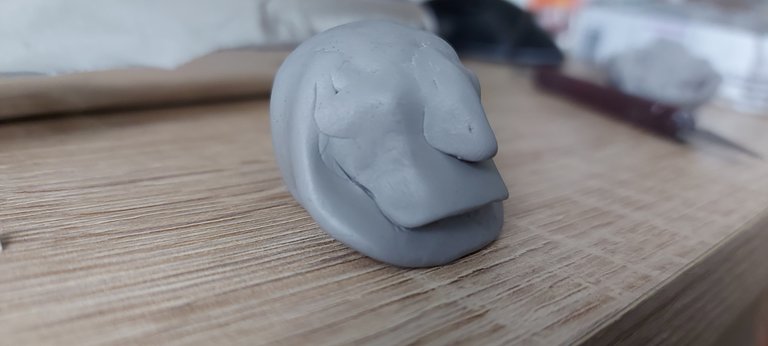
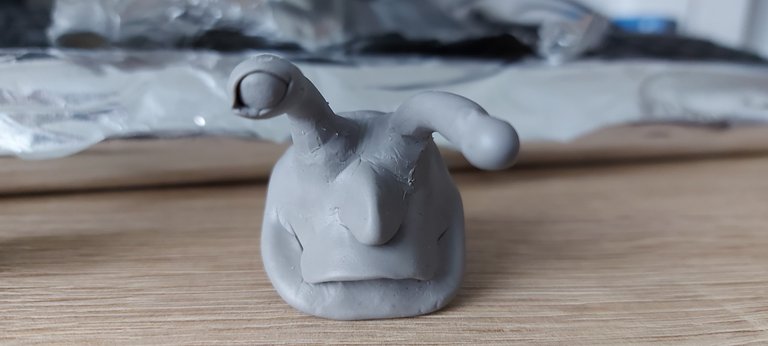
By this stage, I wanted to put the eyes in place, so I rolled out two balls roughly the same size and put them in place.
I started thinking by now that it looked kind of like a frog, which gave me an idea.
I decided I would try something different for the eyes, to change it up a bit.
I've never done eyes like this before, but it's an alien, so why not?
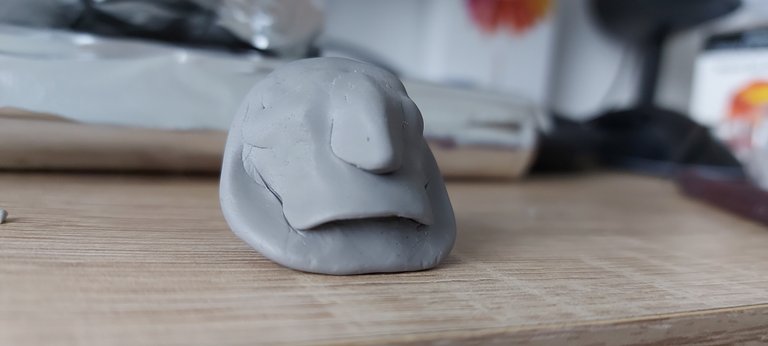
This picture looks like it's looking at a strip of clay.
When doing eyelids I roll and flatten a strip to layer over the eyeballs, it's better than trying to carve them out of the balls themselves.
Killlll meeee
lol, sometimes I feel sorry for these things I make, especially before they're finished.

One eye down, one to go.

I put one strip over the top, blended that in, and then put the other one underneath.
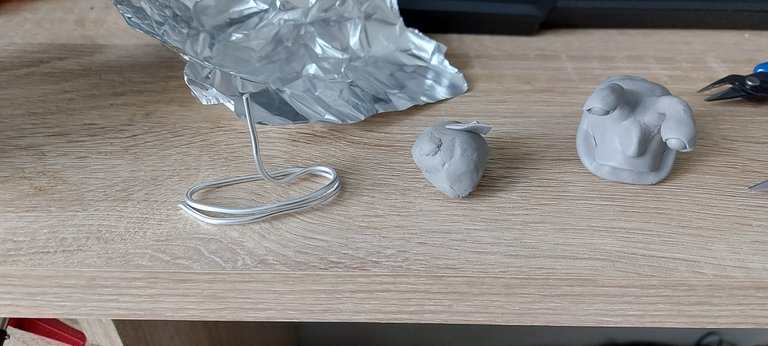
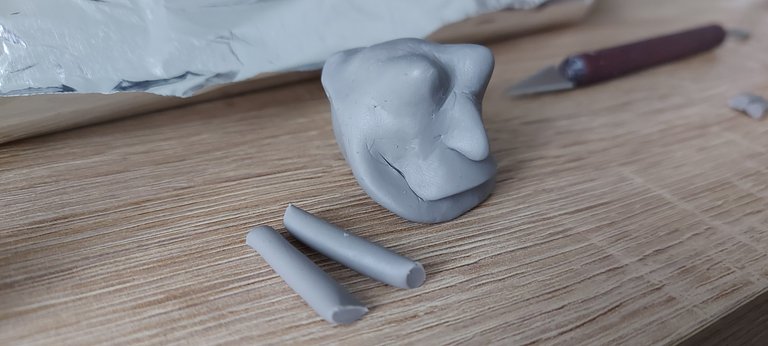
I decided to make a small bust for this one.
I wrapped some wire around, cut to size, and got some more tinfoil ready for it.

There we go, he almost has a home.
I do want to get into making full-body sculptors, but for the sake of today's one, I decided to just go with a bust.
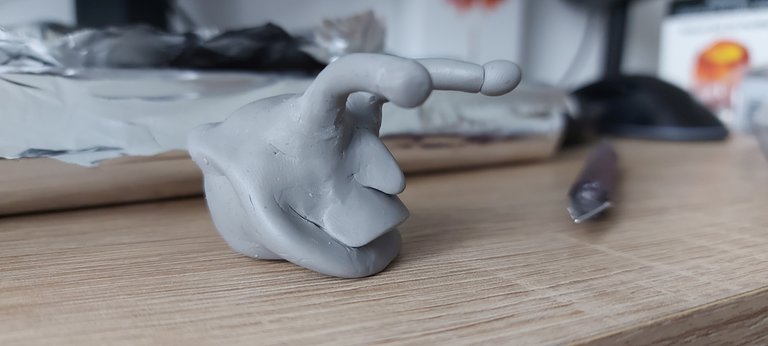
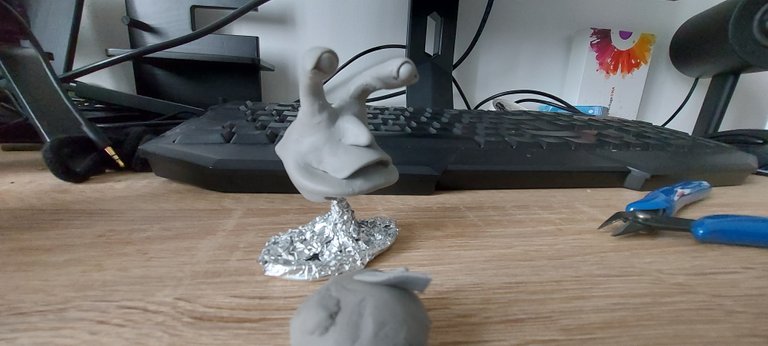
Same as before, I just layered some clay over the tinfoil to build it up gradually.
With that done, I decided to put some detailing on the jacket.
Creases are easy to give some texture to the piece. Just roll out and place some strips down and blend them in.
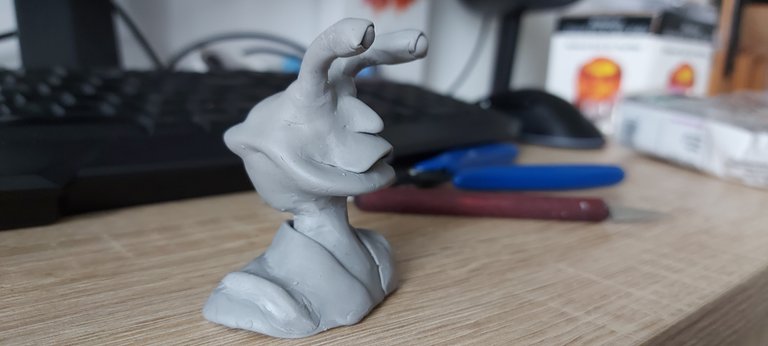
There we go, he is just about finished. I did have a few ideas to add to the piece but decided to give it a break for now.
Conclusion
I'm happy with how it turned out. I actually haven't described something like this in the books, but definitely think there would be a place for it in there.
If anyone thinks of a name for this race throw them out.
One thing I would change doing it again is - I'd put some wiring into the eyes before attaching them, also, I would maybe detail them before attaching them to the face.
All in all, it looks pretty interesting and I'm delighted with how it turned out. This is the first sculptor I've done in a while, so during this, I was almost relearning a few things.
I think sculpting creatures from the book is much better than drawing them, I like being able to have a fully 3D version of them, and while making this I had an idea for a new story to write.
Oh wow 🤩 That is pretty cool looking little alien 😎
Thanks! It's the first sculptor I've done in a while, but I had a lot of fun making this one and I'm hoping to do a few more over the next couple of weeks!
!PIZZA !LOLZ !LUV
lolztoken.com
Bartender: Are you positive?
Credit: theabsolute
@fantagira, I sent you an $LOLZ on behalf of @killerwot
Delegate Hive Tokens to Farm $LOLZ and earn 110% Rewards. Learn more.
(1/8)
@fantagira, @killerwot(1/1) sent you LUV. | tools | discord | community | HiveWiki | NFT | <>< daily
I’m sure it was fun. Another form of creative expression is always welcome 😍 When we connect with our inner child like this, he/she is a happy little monkey 🙊 😁💙
Yeah that's true haha, you can never have too many creative outlets!
I gifted $PIZZA slices here:
killerwot tipped castleberry (x1)
killerwot tipped jesustiano (x1)
killerwot tipped fantagira (x1)
@killerwot(6/10) tipped @rocksg (x1)
killerwot tipped juliakponsford (x1)
killerwot tipped riverflows (x1)
killerwot tipped wanderingmoon (x1)
Join us in Discord!
Ah that's the sweetest. Loved reading about the process too, really interesting...
Haha, I'm glad you liked it. It was a lot of fun making it and hopefully documenting the process might make it easy for someone who feels like giving it a go.
!PIZZA !LOLZ
lolztoken.com
now we just call him Phil.
Credit: reddit
@riverflows, I sent you an $LOLZ on behalf of @killerwot
Use the !LOL or !LOLZ command to share a joke and an $LOLZ
(5/8)
Yay! 🤗
Your content has been boosted with Ecency Points, by @killerwot.
Use Ecency daily to boost your growth on platform!
Support Ecency
Vote for new Proposal
Delegate HP and earn more
Interesting little sculpture, gonna vote for it :) enjoy
Thanks, I'm glad you liked it.
!PIZZA !LOLZ
lolztoken.com
At the end of the night he took her back to her place.
Credit: reddit
@jesustiano, I sent you an $LOLZ on behalf of @killerwot
(4/8)
You may not be able to change what you have done with this one but you can do a few more and add and take away as needed. That is the process of the artist is it not? One mistake could turn out to be what was needed to make it the way it was intended. 😁
Very true, I suppose nothing is ever truly finished, but everything can be an experience for next time. Also, yeah there's always room for something to happen and a direction to be found through a mistake or two haha
!PIZZA !LOLZ
lolztoken.com
The man wears an entire suit, the dog just pants.
Credit: reddit
@wanderingmoon, I sent you an $LOLZ on behalf of @killerwot
(3/8)
I think you did an incredible job and the way you documented your process was awesome too. I am good at drawing but horrible at 3d analog art. My dad was good at sculpting and used Super Sculpey all the time. You can bake it too and then paint and glaze it if it's the right kind. I am pretty sure the on you have is... but definitely read up on it first. hahaha
How about Mulu or Mulus plural for a name?
This was quite special to read just now, since today is the seventh anniversary of his passing. Don't underestimate your skills. Just keep working and creating and having fun. Besides, everyone knows Vikings can sculpt, bro!
I'm sorry to hear about your father man, that's such a coincidence though. I've wanted to sculpt some of the aliens from my writings for a while, today when I came in I was going to play some bass and get some practice in but just got straight to sculpting. First time I've done any in a couple of months.
Yeah, it's the same one, it's really handy for being able to harden it in the cooker, I haven't actually tested anything yet by cooking it, I'm not sure how it would react to the tinfoil but I'm sure it would be grand. I did have an idea to cook some intricate pieces like teeth or whatever before placing them on models. I'm not very good at painting, but my sister is, so maybe I can recruit her to do some painting for them when I finally cook them.
I'd like to work on a body for this one, it's done in a way that I would be able to remove the head of the bust and pop it onto a body if I make one. I think that might be tomorrow's project. Love the name Mulu, from now on that'll be the name for these creatures. I might get working on some backstory of their world and stuff! Haha, Vikings... In... Space...
!PIZZA !LOLZ
lolztoken.com
Because it was mugged.
Credit: reddit
@castleberry, I sent you an $LOLZ on behalf of @killerwot
Farm LOLZ tokens when you Delegate Hive or Hive Tokens.
Click to delegate: 10 - 20 - 50 - 100 HP
(2/8)
Thank bro. That means a lot. It's even more coincidental that my mom and dad were in a band together, and she played bass. So, it was bass or sculpey. hahha
Baking with the foil is fine and it might actually speed up the cook. I used to paint for my dad his details once he needed an extra steady hand. He made a story for me and my sis called the 'Mulu' trail about some weird tribe and the Mulus had to get through all the dangers of the trail to get to the other side. Many nights that was our bedtime. Essentially, it was like his version of Arabian Nights for us. That's why i proposed that name.
It is best to cook the intricate parts separately and then epoxy or glue them in before painting. I would also recommend a cheap spray primer just to give more longevity to the paint layers and seal it with clear when finished. They have matted clear sprays if you don't want gloss. You can also, get small clear gloss paint like the kinds for model cars and planes and detail some glossy areas after the fact.
Cheers my Space Viking Brother! To Valhalla, and Beyond!

This is really awesome to see the whole process here.
Thanks, I'm glad you liked it, I'l be sure to make note of any following sculpting I do, I'd really like to work on a full body for this one.
!PIZZA !LOLZ
lolztoken.com
What does alcohol do?
Credit: reddit
@rocksg, I sent you an $LOLZ on behalf of @killerwot
Use the !LOL or !LOLZ command to share a joke and an $LOLZ
(6/8)
Aww I love this, I have a huge box of unopened sculpey and I haven't touched it yet, I haven't sculpted anything for like 10 years!
I really like using this stuff, I think it works so well, I have another one I bought but found that it wasn't firm enough and seemed to loose it's shape easy.
If you feel like getting back into sculpting, feel free to tag me in the post, I'd be interested in reading about other peoples techniques, everything I learned is from watching other people do it on YouTube.
I'd really like to keep sculpting and work through some other designs for aliens from the stories I'm writing; I got a bunch of ideas but no concept designs.
!PIZZA !LOLZ
lolztoken.com
One. It's a trick question.
Credit: reddit
@juliakponsford, I sent you an $LOLZ on behalf of @killerwot
(5/8)