You can spend less time editing photographs. I edited this photograph with 2 major steps, and under 5 minutes[Tutorial video available].
A lot of photographers have this mentality that they must spend several hours editing, before they can produce great photos. I'm not against their style. I mean, I do spend time editing the photos I create, but I find it stressful sometimes. Especially when you have loads of jobs on your desk.
Some days I just stick with simple adjustments on a photo and that's it. What's editing afterall? Isn't it the process of applying adjustment settings to enhance an image? Some photographers aren't satisfied until they use every tool on the editing app they use.
In this post, I'll be showing how easy and straightforward it was for me to edit a photo.
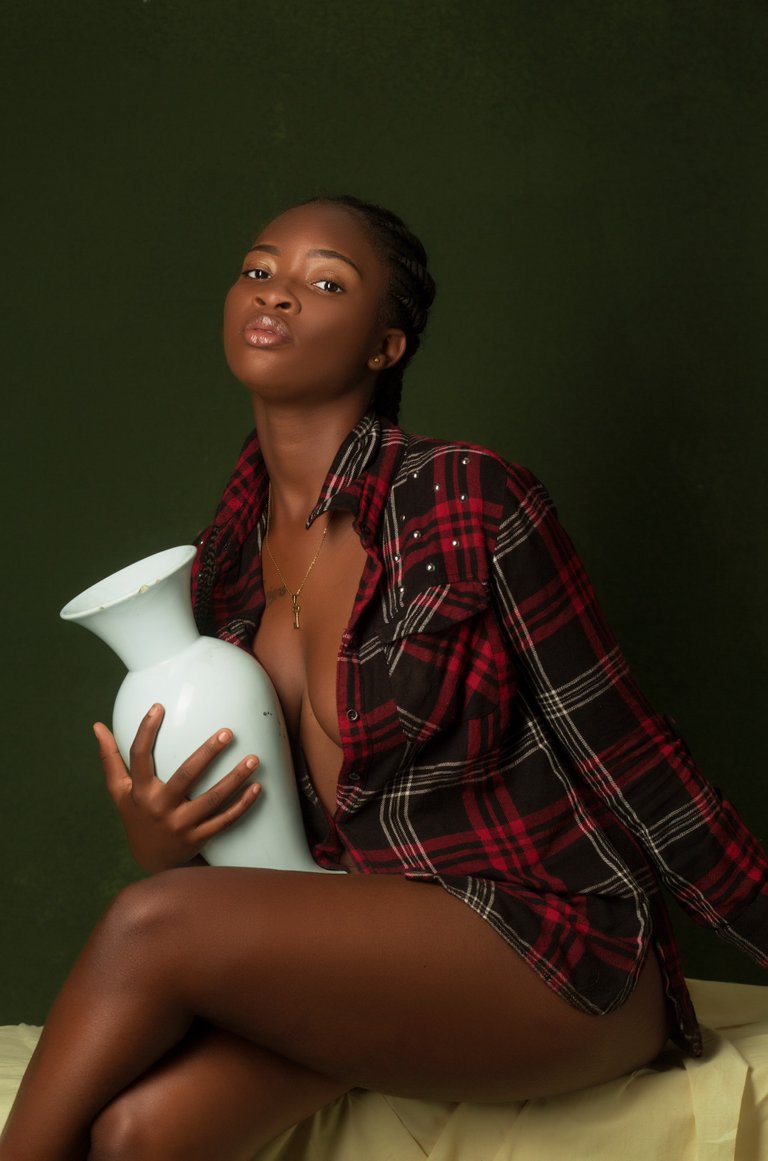
Here's the end result after all the possible tweaks;
Without further ado, let's delve into the subject of this post.
STEP ONE.
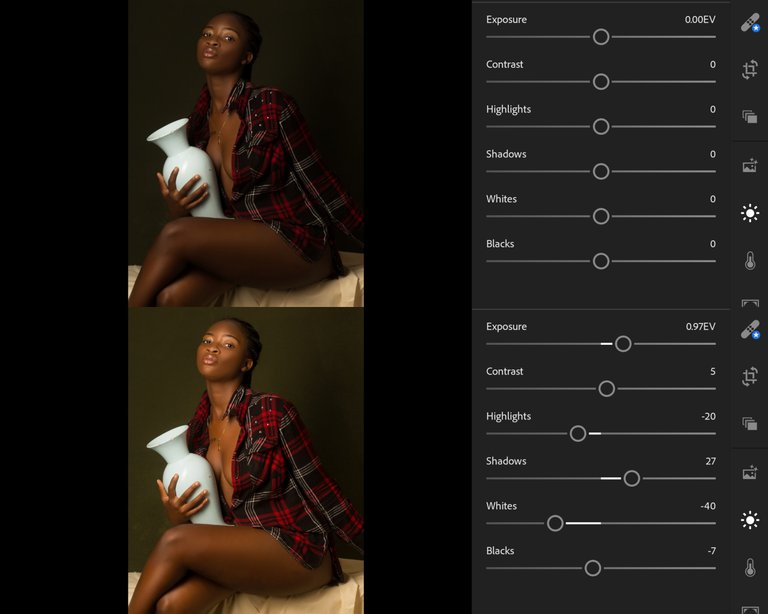
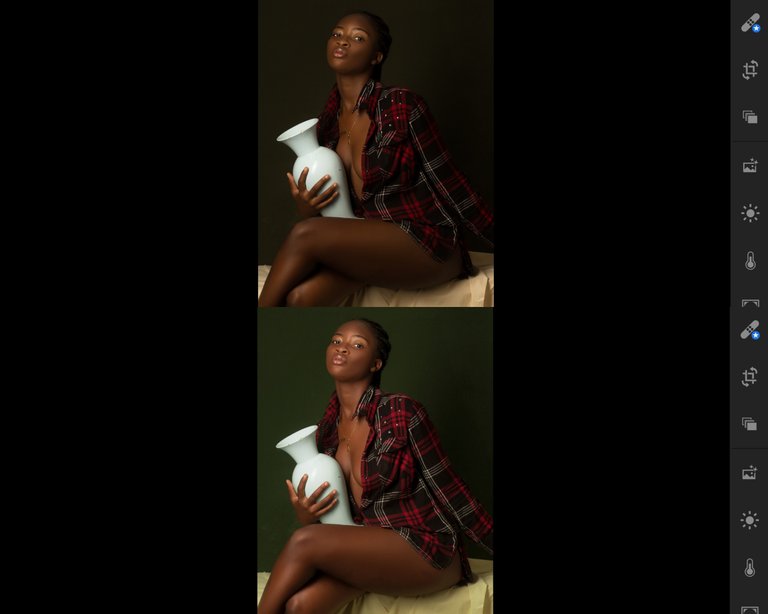
The first step for me when editing a photograph is to first balancing the exposure or lighting, or whatever you choose to call it. For this image, you can see that the original is less exposed. Some people might like the feel of the original copy, but I don't. I want the image to be bright and still pop.
For this photo, I tried the auto light tool which comes in handy sometimes. In this case, it did. But then I had to make some adjustments. I made the whites a little bit duller by adjusting it negatively. I also adjusted the highlights negatively. And I was done with light balancing.
STEP TWO.
Step two is balancing the colors or color grading[in essence].
Before I delve into adjust color sliders, I first analyze which colors are prominent in the photo. In this case, we have only 3 prominent colors; Red, Orange, and Yellow.
The red color is found on her shirt and her lips[not dominant]. The orange colors works for her skin tone. While the yellow is for the background.
See how each adjustment affects the photo;
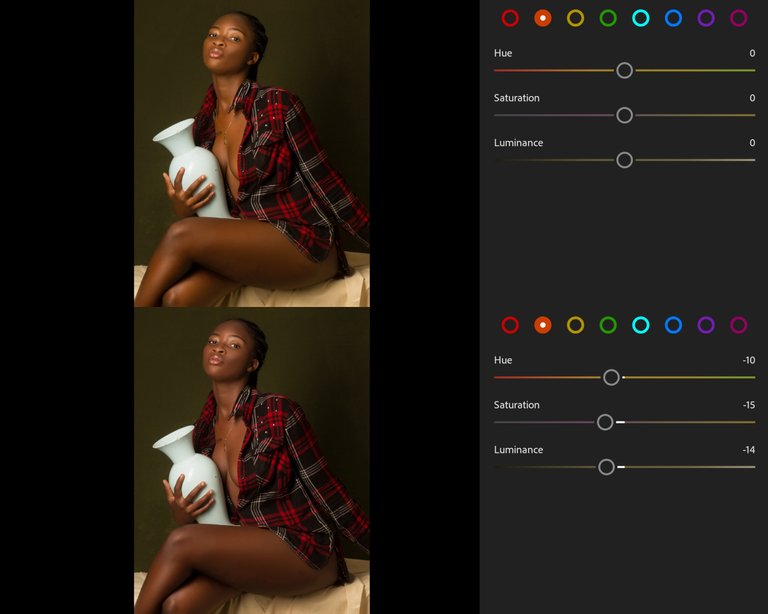
The first color I tweak when color grading is the orange color. That's because it affects the skin tone of my subject. So I try to balance the skin tone first, then every other tweak would align with it.
After working on her skin tone, I can jump on any color[so far it's in the image]. This time, I opted to tweak the reds next.
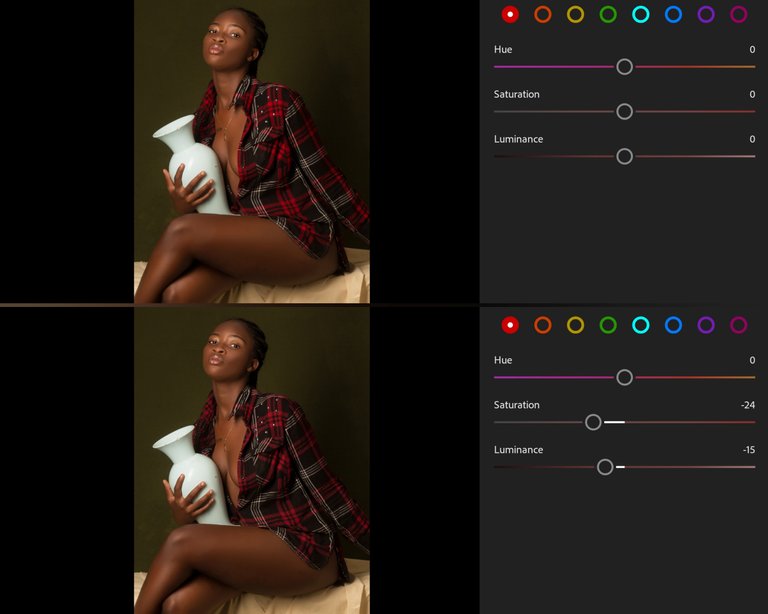
The red adjustment affected mainly her shirt. I adjusted the saturation and luminance by negative values. I did this so that the shirt will match the mood of the photo.
The last and final color I tweaked was yellow.
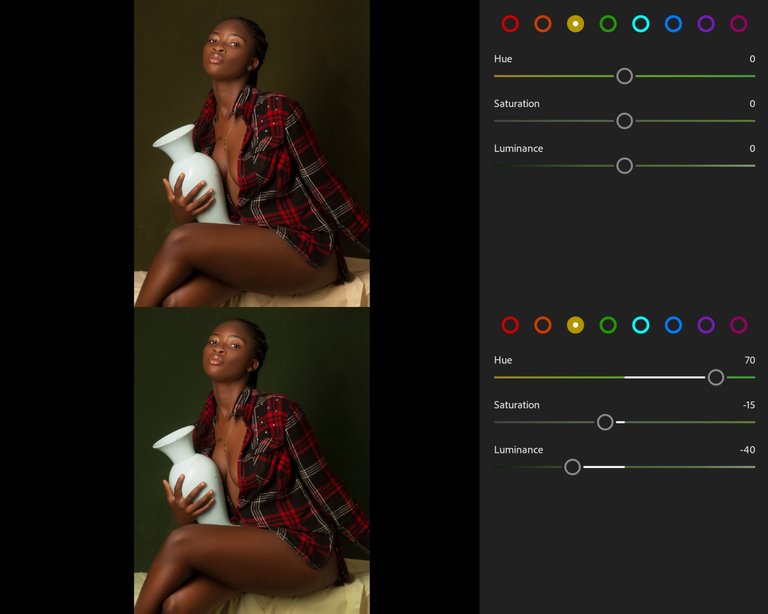
The background consisted mainly of yellow. And I tweaked it accordingly to get the subtle green that I liked.
That's the end of editing this photo. I'm pleased with the results.
Normally, if I was color grading, I'll use the curve tool, the split toning tool, dehaze, etc. All those things weren't used in the photo. But isn't the photo beautiful?
If you don't understand this post, you can watch the tutorial video;
If you found this post useful, leave a comment in the comments section. And I'll start dropping tutorials alongside the photos I share.
Congratulations @kodeblaccc! You have completed the following achievement on the Hive blockchain and have been rewarded with new badge(s) :
You can view your badges on your board and compare to others on the Ranking
If you no longer want to receive notifications, reply to this comment with the word
STOPDo not miss the last post from @hivebuzz:
Vote for us as a witness to get one more badge and upvotes from us with more power!
#posh Tweet link; https://twitter.com/kodeblacc/status/1260041422813704204?s=19