Sketching for Satisfying Proportions
Are you struggling with proportions? Do you also draw by directly copying the reference and end up with messy proportions? I was like that before so I got curious on how to correct my mistakes. I found the answer in Youtube tutorials. I learned that sketching is the way to go.
I've done 11 sketches so far for the new batch of drawings that I am preparing for both Spice project and the personal NFTs I want to mint here. Today, I'm sharing what I learned about proper sketching by showing some basic steps on how I draw the head, the body, and the pose. I divided this into three posts when I shared it in my other platform, Noise, since the site is about short microblogs. This time I will post this in full blast. I'll use one of the sketches I've done for this tutorial since it has the most basic angle which is the front view. This is applicable to both traditional and digital drawing. In this case, I am showing digital drawing. Just follow the steps written below their corresponding illustrations.
PART 1: FACE AND HEAD
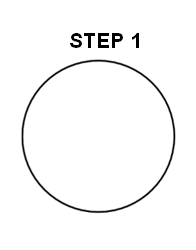
Draw a circle using the ellipse tool.
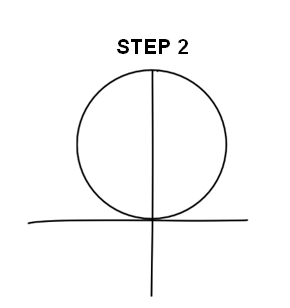
Draw a vertical line at the middle of the circle and a horizontal line below the circle.
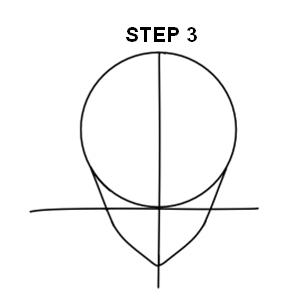
Draw the jaws slightly below the horizontal line as you desire or estimated then connect the chin.
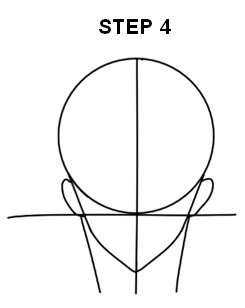
Draw the ears above the horizontal line then connect the neck to them.
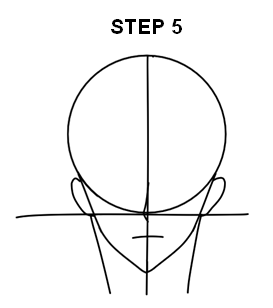
Draw the nose at the intersection of the vertical and horizontal lines then align the lips to the jaws.
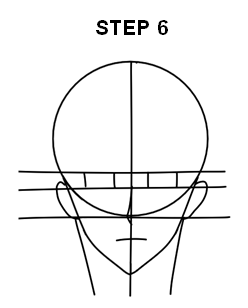
Draw a horizontal line nearly above the ears then draw another line above it depending on how big would you like the eyes be. Those are your guide lines so the eyes are aligned. Draw vertical lines to serve as your guide on where to put the eyes. The right distance between the eyes is equal to the length of one eye as you can see in the sketch.
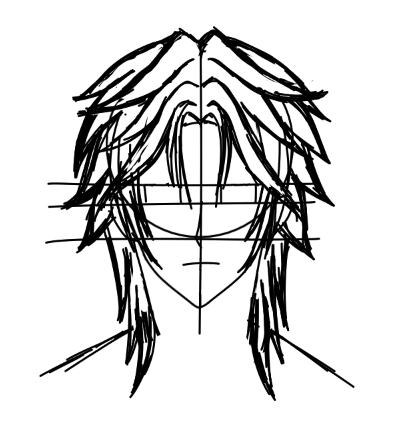
Lastly, sketch your desired hairstyle following the circle you've drawn so the head is proportion. This is my final sketch for the head. Let's proceed to the next part which is the body.
PART 2: FRONT VIEW BODY
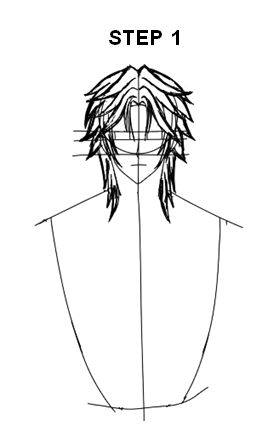
Draw the lines of the shoulder connecting to the head then draw a vertical line connecting to the one done with the head. Draw slightly curved outer lines, making the vertical line positioned at the center.
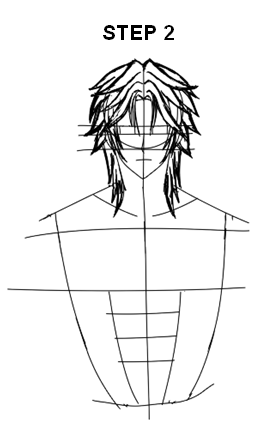
Draw the guide lines for the collar bone, chest, and abs. Draw according to your desired or estimated size.
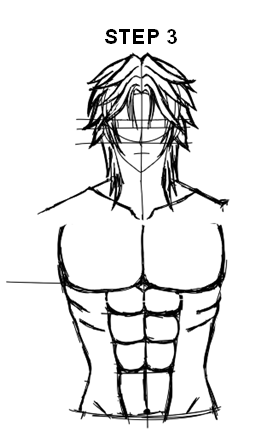
Follow the guide lines and shape the details of the body. I erase some guide lines in the body after drawing the details to make it less confusing for me and to make me see the details clearly.
PART 3: DRAWING A POSE
The last part of this tutorial is about the basics of drawing poses. The concept is actually simple. Follow the direction of your reference.
For the first two steps, I will show how to draw the basic pose of the arms.
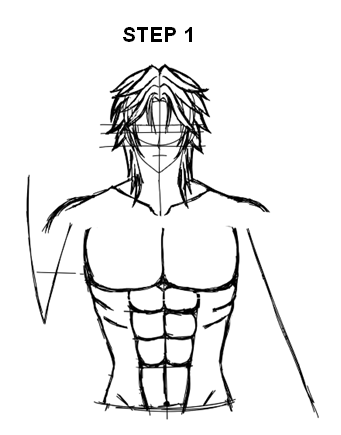
Look at the direction of the arms in the reference you picked and draw the guide lines for it.
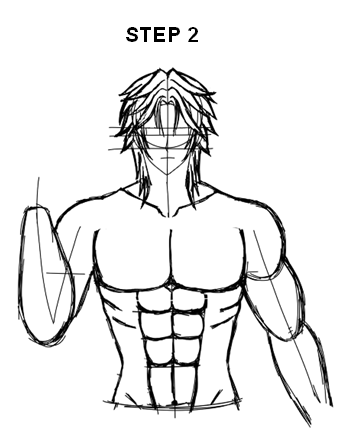
Draw basic round shapes for the arms, making the lines positioned at the center. This is the basic guide for the muscles.
In the last three steps, I focused on the details of drawing the hands as part of the pose. Some of my fellow artists say that they struggle in drawing the hands most and I feel the same before until I learned how to draw poses. Here's a simple illustration for those who struggle in drawing hands.
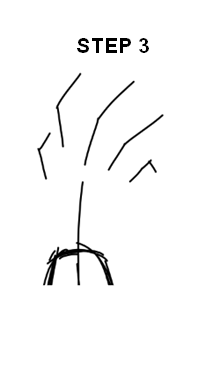
Start drawing guide lines for the direction of the hand.
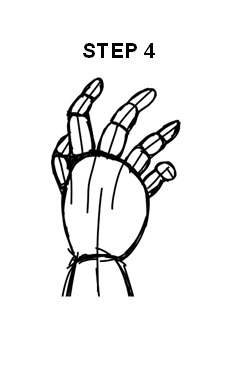
Draw the basic shapes for the palm and fingers. The fingers are always divided into 3 equal parts.
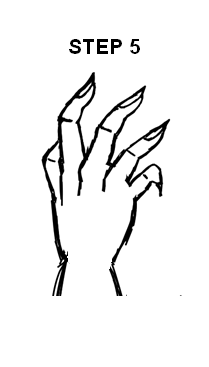
Draw the nails and all the other details then erase the guide lines so it won't look confusing. Do the same with the arms. Finalize the sketch by drawing all the other details you need for the drawing. The other details won't need guide lines since they don't need much proportions. You decide what and where to put the final details.
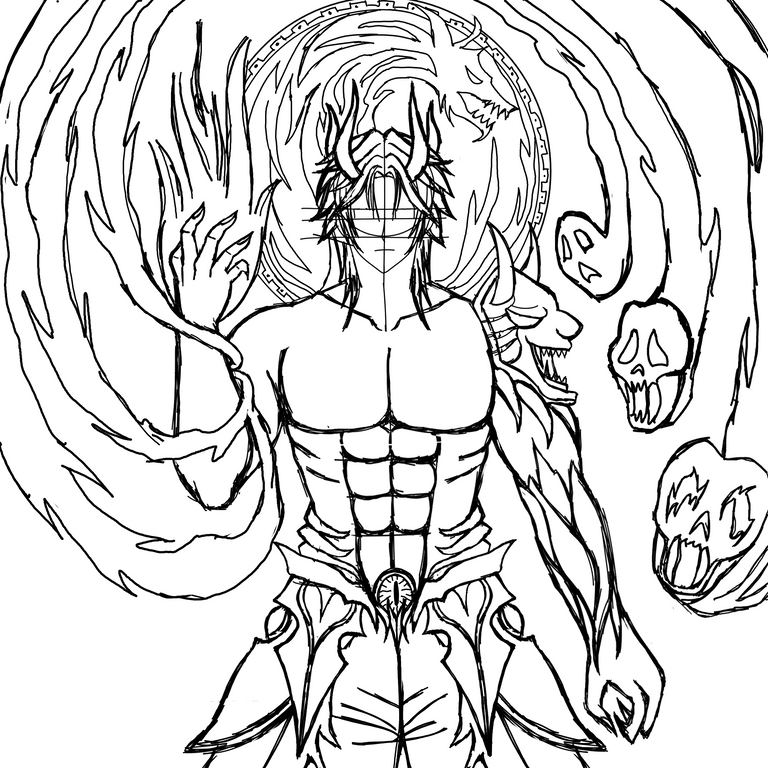
This is the final sketch. I put the demon armor and horns as well as his superpowers since this is going to be an anime style male demon/yokai. I will continue this sketch and show the next steps from lineart to the final result once I'm done with this badass demon.
Learning how to sketch properly is very helpful in making the proportions right. This will be the guide to drawing a clean lineart later. All thanks to Youtube tutorials that taught me how to do the sketching properly. I apply this to all my drawings regardless of the angle, whether the subject is a human or a mythical creature.
Stay tuned especially if you look forward to more muscles haha. I hope this helps especially to those who want to learn more about drawing. See you on my next blog with the final result of the drawing.
I usually draw the chin area first and then draw the circle above. We use the same technique to draw hands hehe. It's much easier when you have guidelines likw that.
Oh that's unusual. First time hearing someone starting to draw with chin. At least it's also effective for you. It's true that guide lines really make drawing easier. All thanks to tutorials.
Really? Maybe I feel more comfortable doing that way haha.
Congratulations @kris11! You have completed the following achievement on the Hive blockchain and have been rewarded with new badge(s):
Your next target is to reach 50 upvotes.
You can view your badges on your board and compare yourself to others in the Ranking
If you no longer want to receive notifications, reply to this comment with the word
STOPTo support your work, I also upvoted your post!
Check out the last post from @hivebuzz:
Support the HiveBuzz project. Vote for our proposal!
I got butterflies just by reading this hahaha. What app are you using on drawing this? You really did a great job.
Nakaka butterfly na pala ang pandesal hahaha. Krita ang gamit kong app. Sa laptop ako gumagawa. Papunta pa lang tayo sa exciting part haha. Mas maganda ang muskels pag nacoloran na hihi.
Waiting sa exciting part hahahaha 😆
This really helps as my guide in sketching. I do have ebbok for sketching and this tutorial is really there as a guide this is a good help.
Wow nice to know. Are there similarities between this tutorial and your ebook? Mukang mas detailed ata sa ebook ksi mas madaming contents dun.
Mas detailed nga sis, tapos nakita yan din ang training mo kaya pala nakaka sketch ka ng maayos, then talented ka talaga sis.