Origami Kusudama Flower - Paperwork.
Hi,👋
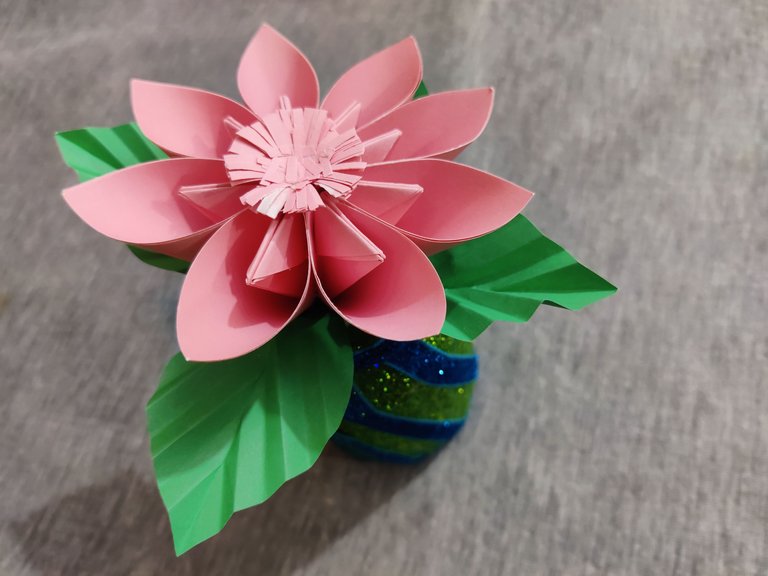
I'm back with a new post where I'll show a origami paper kusudama flower that can be a part of the house decoration.
The term kusudama originates from ancient Japanese culture, where they were used for incense and potpourri; possibly originally being actual bunches of flowers or herbs. The word itself is a combination of two Japanese words kusuri ("medicine") and tama ("ball"). They are now typically used as decorations, or as gifts. WIKI.
I followed this DIY idea from an online article and I don't credit myself for the original idea.
Let's see how I did this paperwork.
Equipment's:
.jpg)
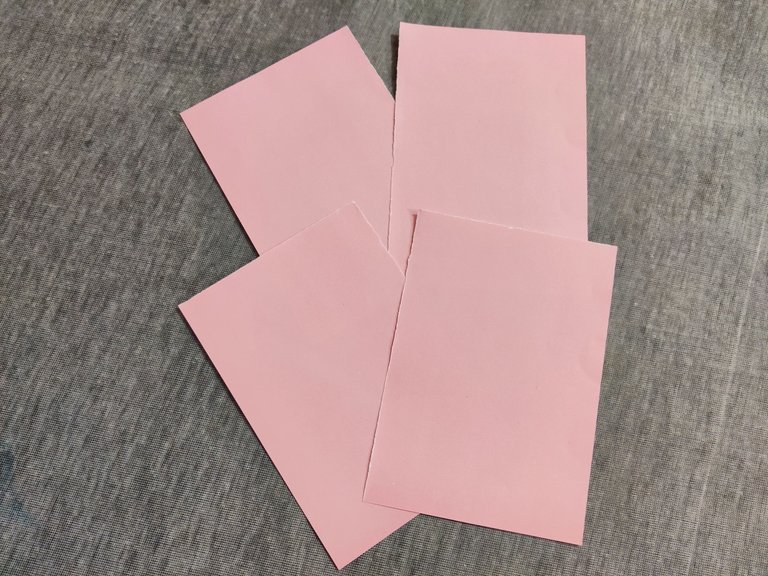
I used total 3 color papers (A4 size) where I used the pink papers for the flower and a part of a green paper for the leaves and I needed a scissor, glue, a stick and clips.
Steps to follow:
There were only two steps to follow, 1. The Flowers, 2. The leaves. I'm going to show the flowers steps first and then the leaves part.
I folded and divided the pink paper in 4 parts at first.
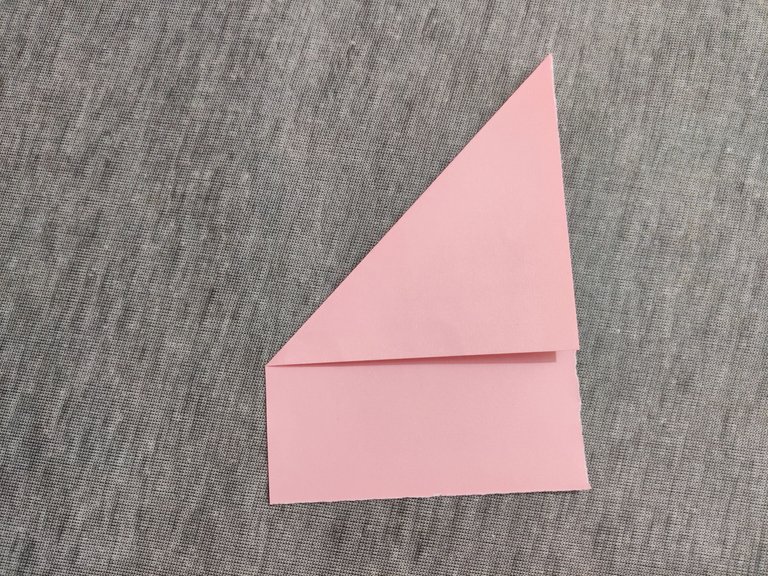
Then I needed square shapes from those parts so I folded a single part in the following way.
 |  |
|---|
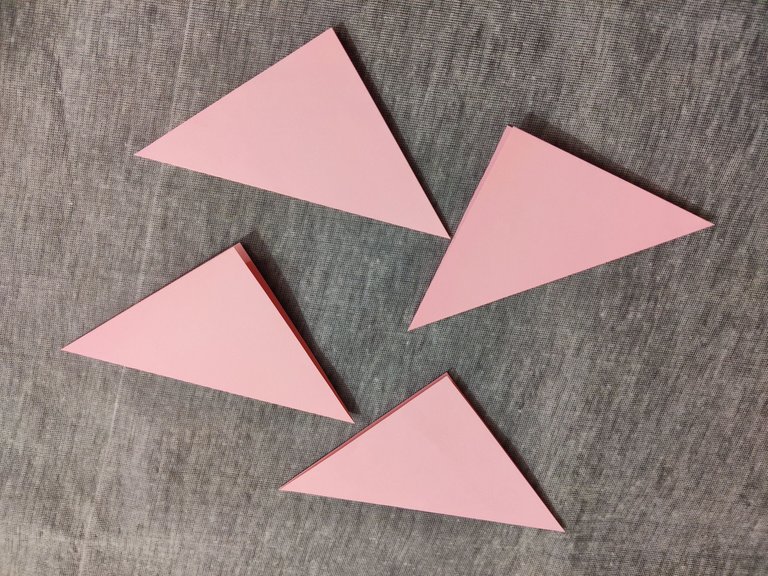
And I got 4 square shape papers although they looks triangle when they're folded.
.jpg) | .jpg) |
|---|
I didn't need to unfold from this point as I needed exactly this folding. And I folded it furthermore like above.
.jpg) | .jpg) |
|---|
.jpg)
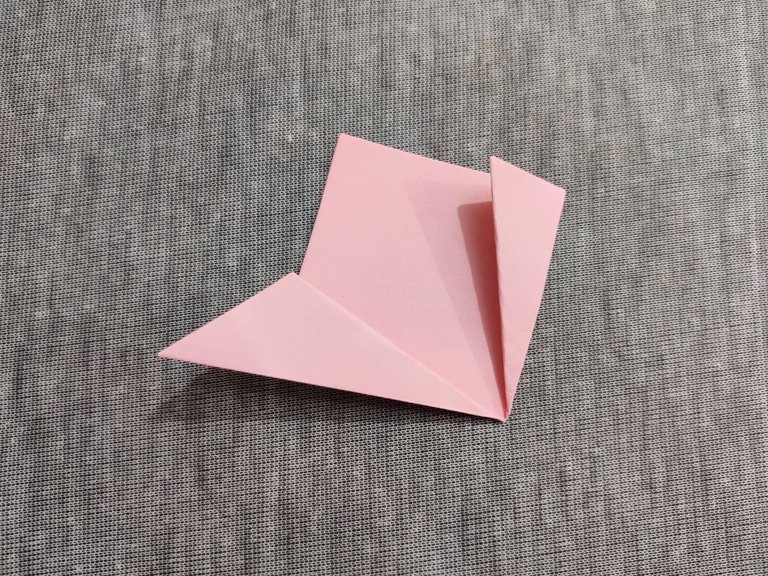
And then I folded it in the above direction got the paper in this way now. I know it looks a little complicated but when you try it, its not that hard. It just gets folded in the opposite side.
 |  |
|---|
Then I folded the extra part of the wings inside like above and repeated same for the other part.
.jpg)
And I it like this where I needed to use the glue to attach one side with the other side as you can see above.
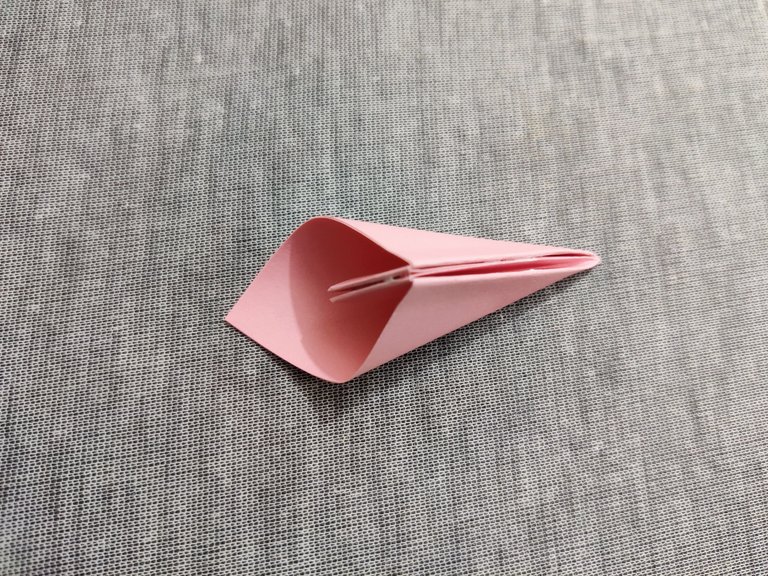
After gluing, I got this petal of the flower and this is a single petal where I needed a total of 8 petals for a single flower.
.jpg)
Then I used this clip where the glue is getting attached so that the glue is attached perfectly.
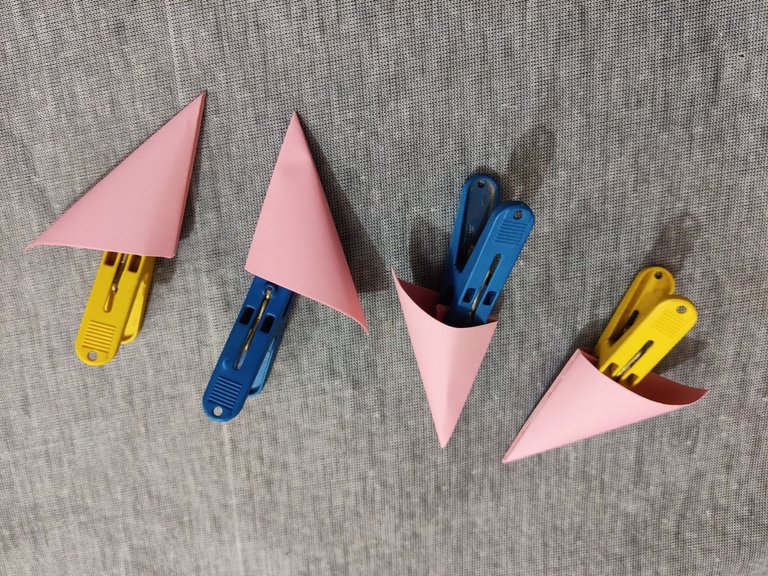
Here I did the same for a total of 4 petals that I got from a single A4 sized paper. If I wanted the flower to be bigger, then I needed to get 2 petals from a single A4 sized paper.
.jpg)
The petals are glued well and its time to go to the next step.
.jpg) | .jpg) |
|---|
Now I glued the parts of two petals that you can see above to attach them.
.jpg)
Then I used two clips in so that the glue gets attached well.
 | .jpg) |
|---|
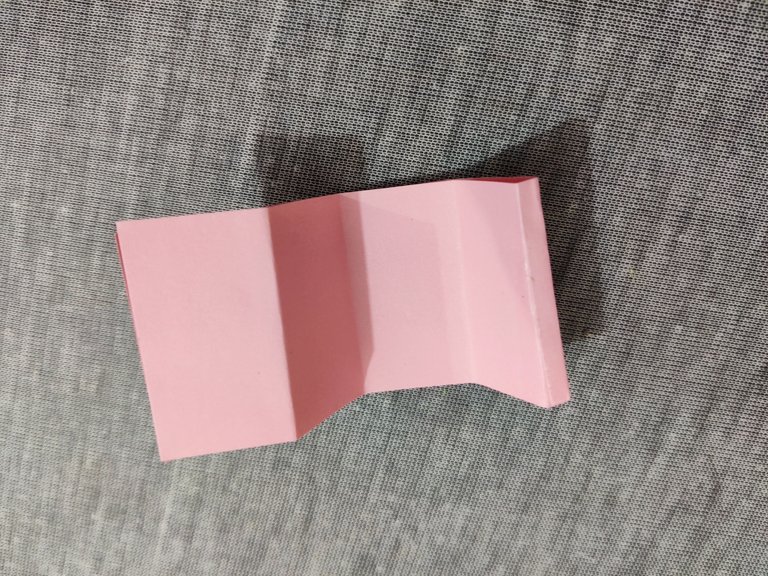
After two petals was attached perfectly, I glued one more petal and then one more that gave me half of the flower with 4 petals.
.jpg)
Then I used another A4 sized paper that gave me 4 more petals and I got the whole flower after attaching them following the same steps.
This could be the finishing of the flower part but as I wished to attach a stick inside the flower so I did something more on my own.
I took this cropped paper of same color as the flower and I folded it as further as I could.
.jpg)
Then I cut it in the above way and after I unfolded the paper, I got it as above.
.jpg) | .jpg) |
|---|
Then I attached the stick with this and made the small flower to stick into the main flower.
And I got this final flower part after attaching it.
And this is the finishing of the flower step. Now, I needed some leaves.
.jpg)
I used cropped green paper as I didn't need a whole paper for some leaves. I then cut them in almost same size.
.jpg)
Then I folded them all and I cut them in round (not whole circle though) and it gave me a leave shape as above but that's not all.
.jpg) | .jpg) |
|---|
.jpg)
I started folding them in the above way until from above to below of the paper leave.
.jpg)
And I got this shape of the paper that gives it a realistic and better look.
.jpg)
.jpg)
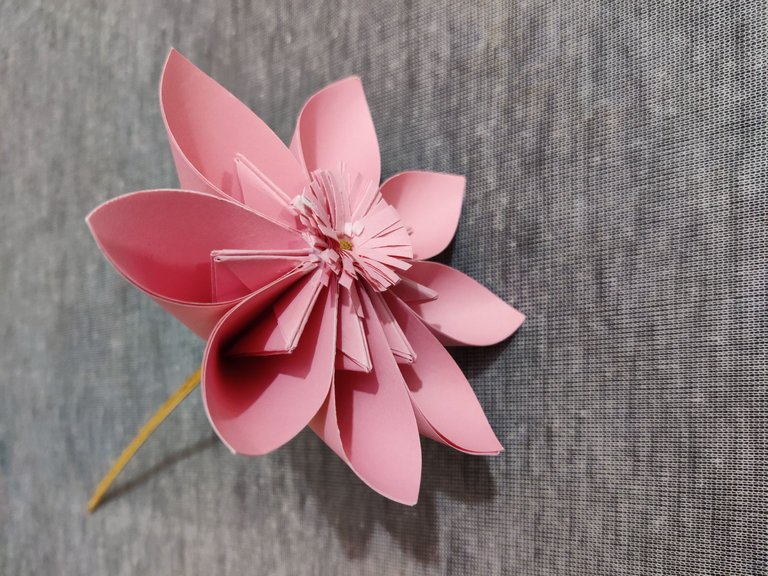
Then I attached the leaves to just below the papers on the stick and I placed the flower in the recycled flower vase that I talked in my previous post.
And it is finished.
I may show more of my paperwork later.
No more today, I'll talk more later with another craft soon.
BYE BYE.
https://twitter.com/1481662618167349252/status/1626575712592228352
The rewards earned on this comment will go directly to the people( @yessi08 ) sharing the post on Twitter as long as they are registered with @poshtoken. Sign up at https://hiveposh.com.
Thanks for the feature @yessi08.
De nada!
Yay! 🤗
Your content has been boosted with Ecency Points, by @ladychef.
Use Ecency daily to boost your growth on platform!
Support Ecency
Vote for new Proposal
Delegate HP and earn more
Your output is beautiful. I remember my students before, they made origami. ☺️
Good job👏
Thank you for your compliment. Its nice to know that you're connected to these works.
You're welcome. ☺️
Thank you for sharing this post in the DIYHUB Community!
Your content got selected by our fellow curator ashikstd & you just received a little thank you upvote from us for your great work! Your post will be featured in one of our recurring compilations which are aiming to offer you a stage to widen your audience within the DIY scene of Hive. Stay creative & HIVE ON!
Please vote for our hive witness <3
Thanks a lot.
!discovery 25
Thank you for the curation.
This post was shared and voted inside the discord by the curators team of discovery-it
Join our community! hive-193212
Discovery-it is also a Witness, vote for us here
Delegate to us for passive income. Check our 80% fee-back Program
Congratulations @ladychef! You have completed the following achievement on the Hive blockchain And have been rewarded with New badge(s)
Your next target is to reach 3000 upvotes.
You can view your badges on your board and compare yourself to others in the Ranking
If you no longer want to receive notifications, reply to this comment with the word
STOPCheck out our last posts:
Good Job.
@tipu curate 6
Upvoted 👌 (Mana: 0/55) Liquid rewards.
Thank you so much.
A pleasure.
Hola @ladychef quedó muy hermosa esa flor!!!💜🌺
Gracias por tu cumplido.