How to make a minimalist coffee table//furniture design
Hi everyone! How are you today? I hope you are fine and always enthusiastic about carrying out your daily routine...
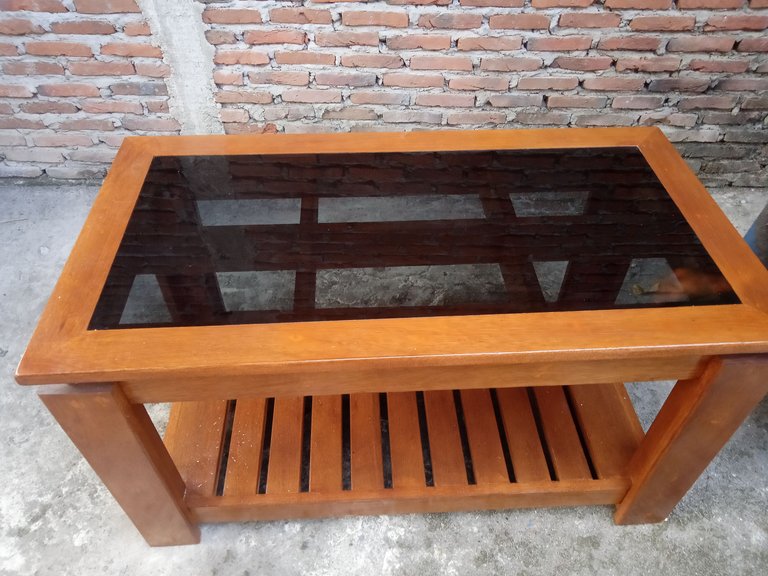
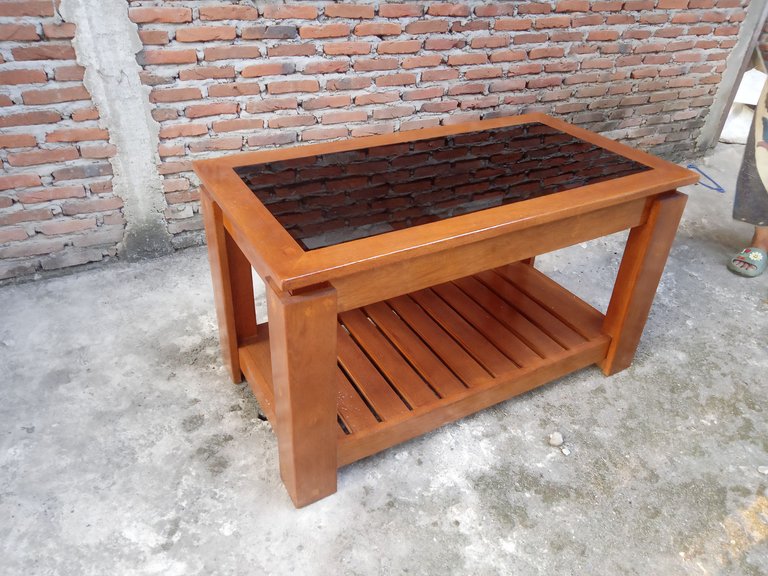
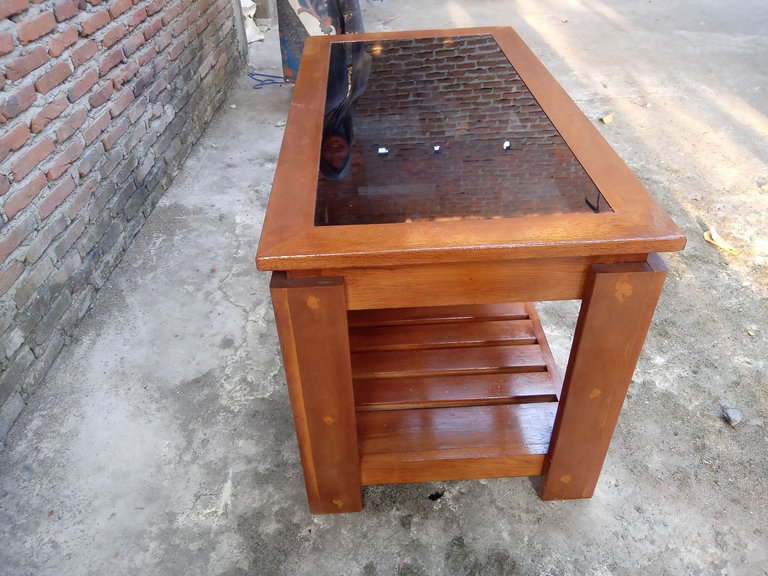
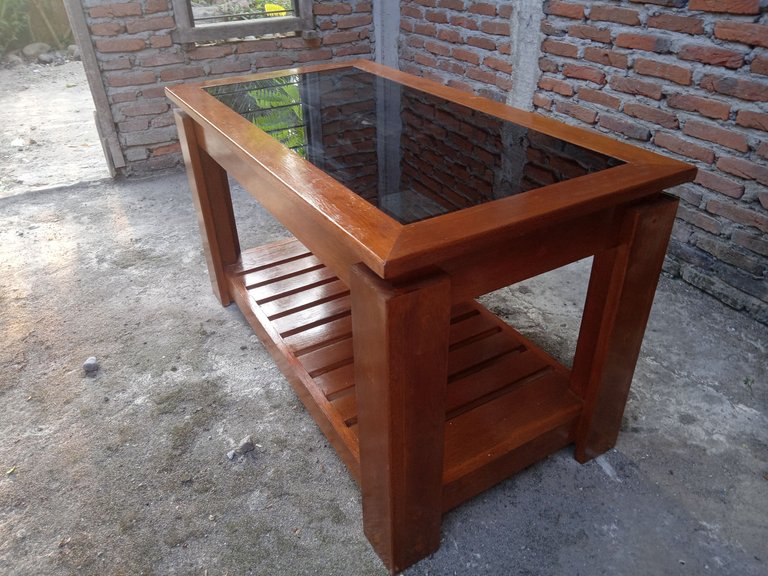
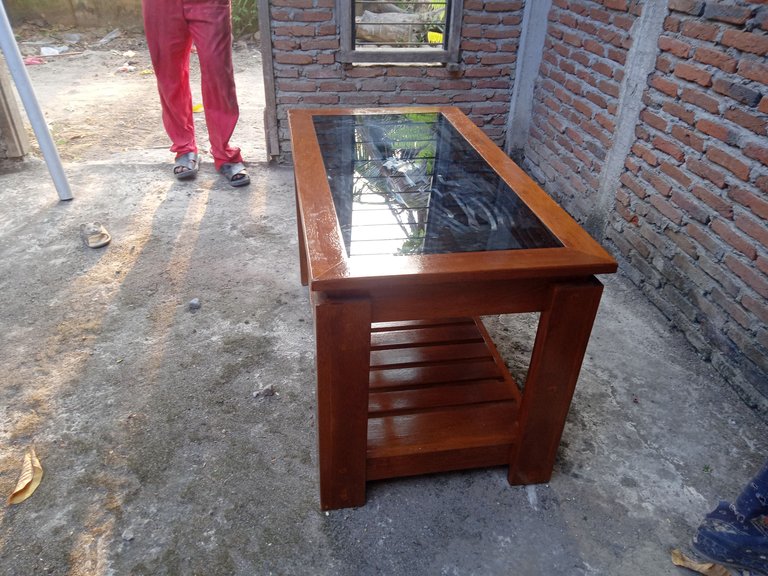
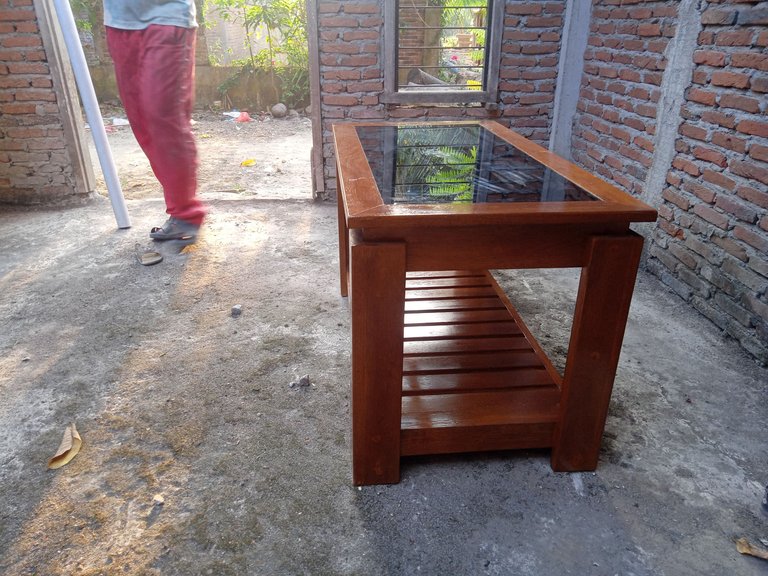
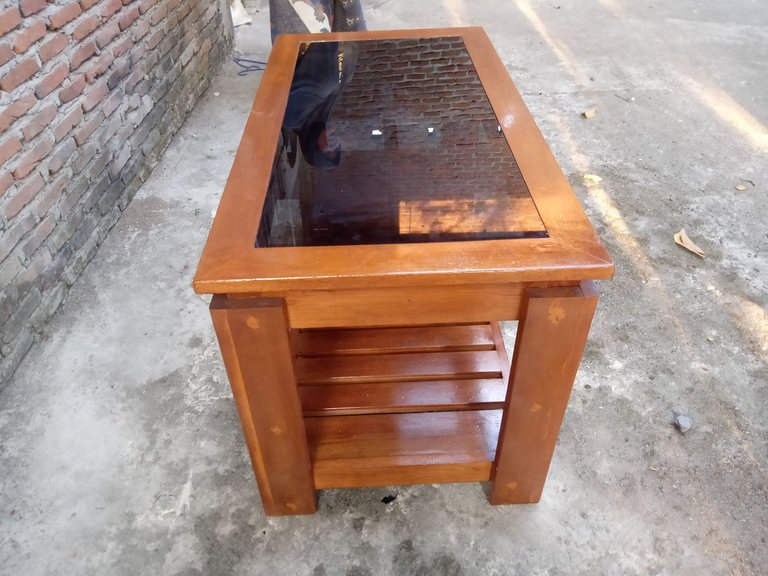
Without realizing it, it's been more than a week since my last post and today I'm going to share another furniture post, in this I show some of the steps and also explain each step in making a minimalist coffee table cabinet combined with glass at the top of the table.
There are many models and designs for coffee tables, but as a wood craftsman I certainly have my own style and model to create a work that can be enjoyed by my customers. A table like this will usually be placed in a lounge or living room and can also add to the impression. separately when combined with a sofa or other lounge chairs.
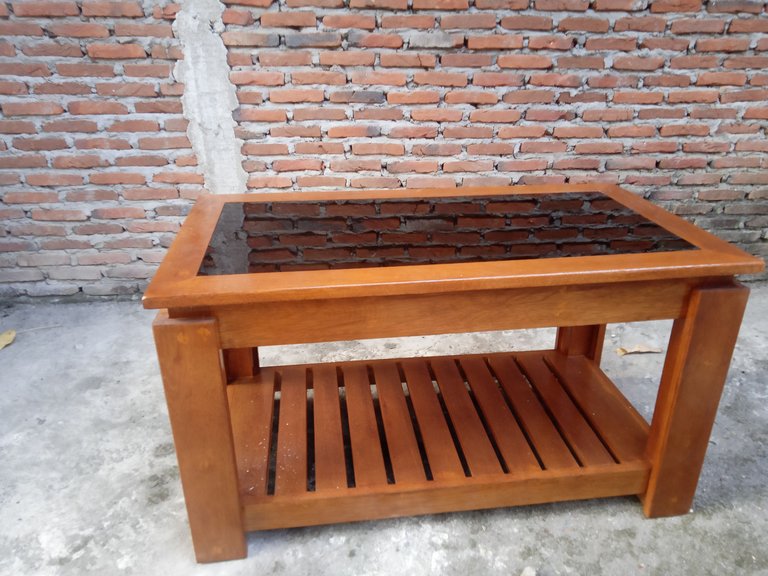
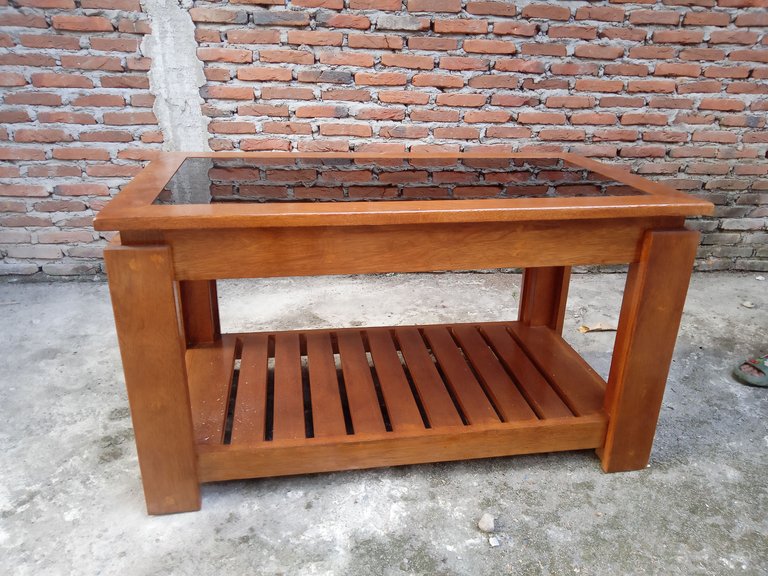
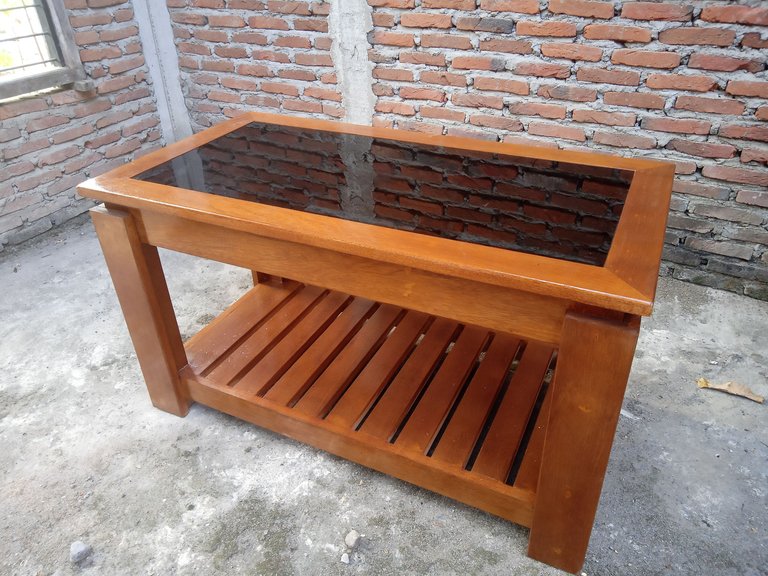
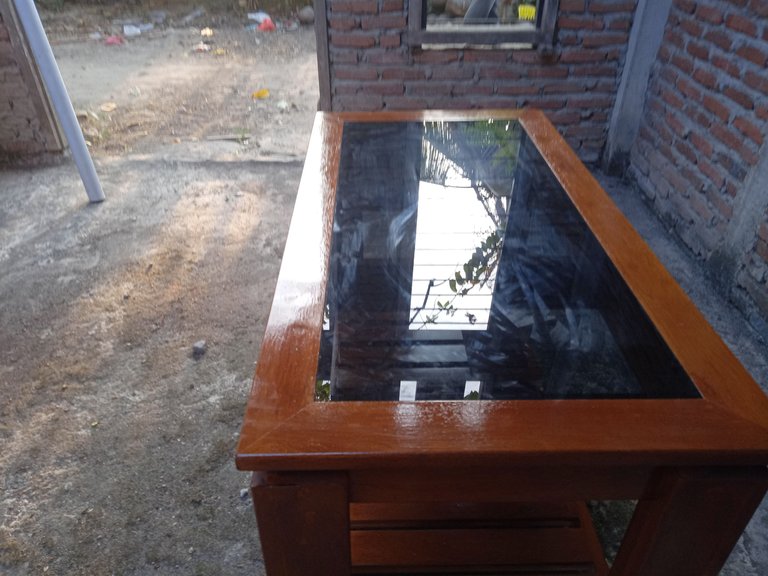
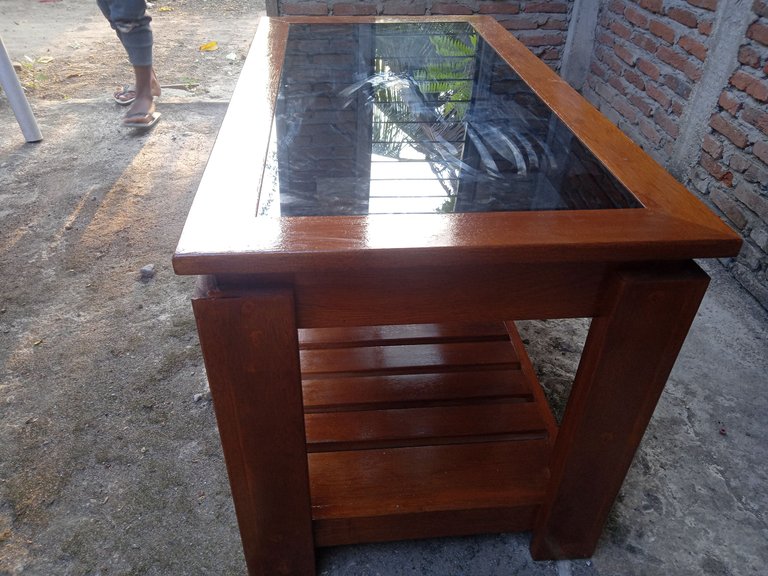
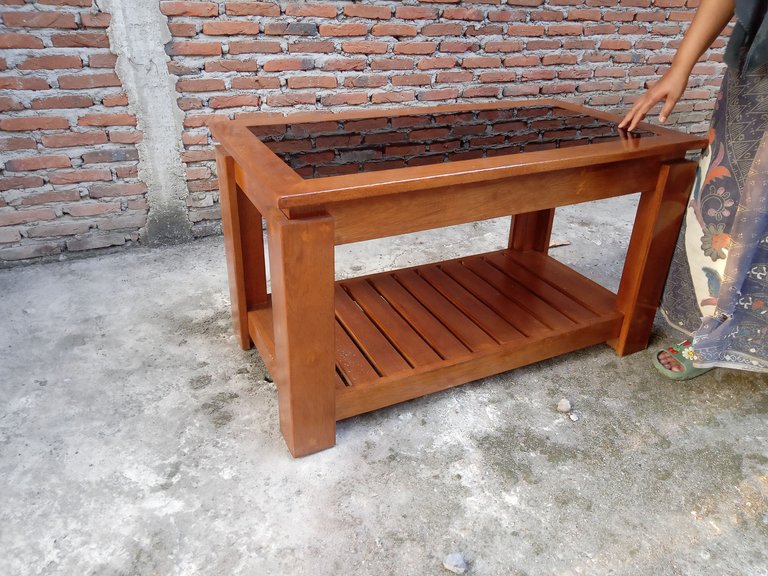
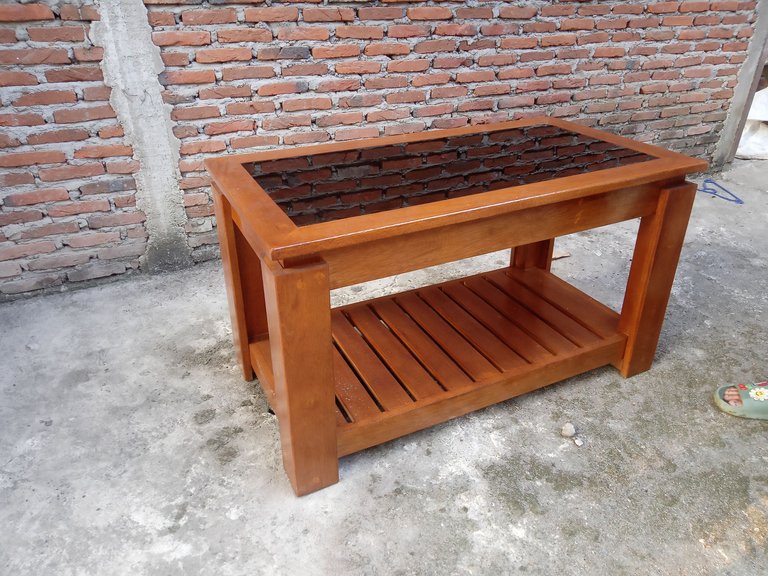
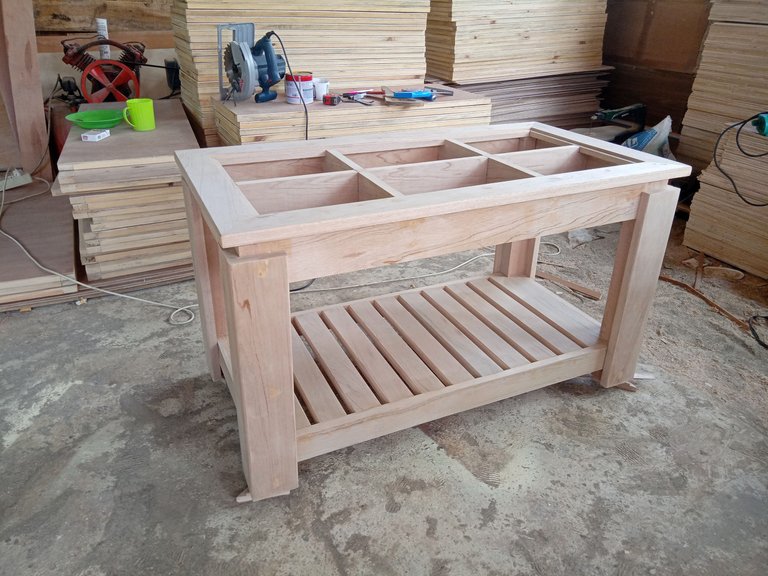
I can say that the table that I made is quite heavy because it is made from wood which is classified as hard and I also added glass to the top so it is quite sturdy and of course this is in accordance with my customers' requests.
I made this table last month in my workshop and I spent 3 days making it, usually it takes 4 or 5 days but because I work at night too so it only took 3 days, this was because there was a project the others I have to start as soon as possible to avoid deadlines.
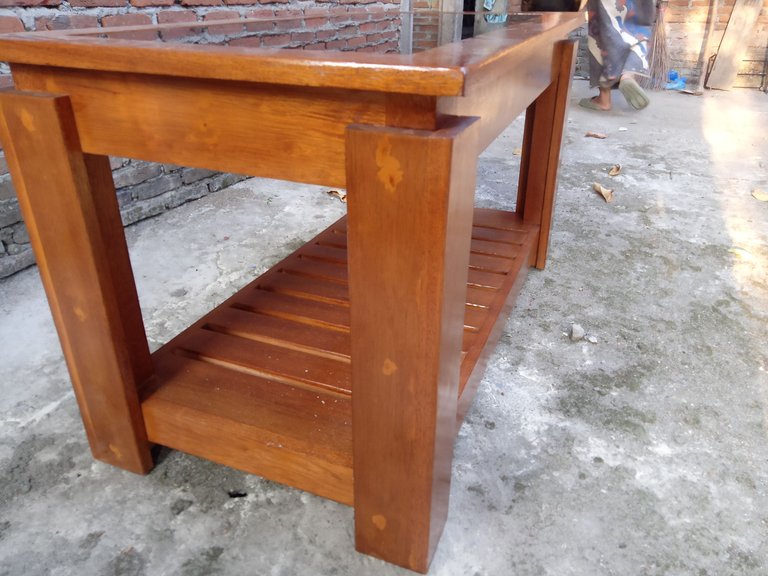
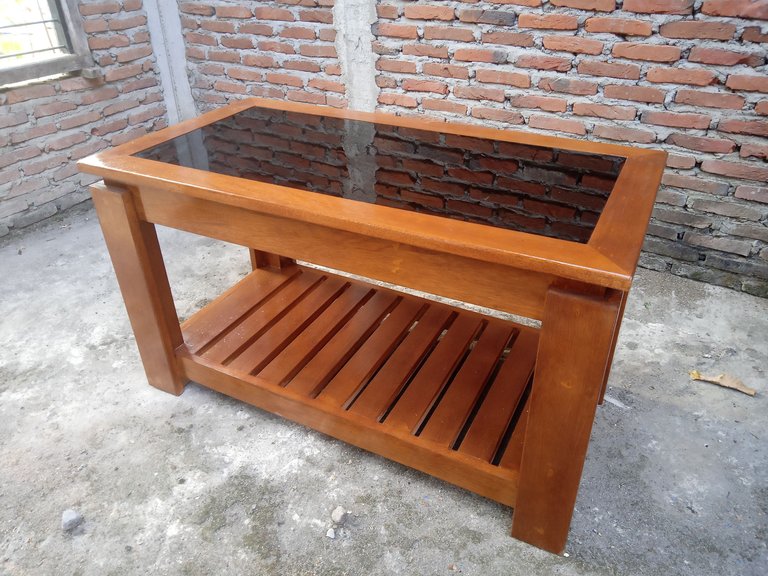
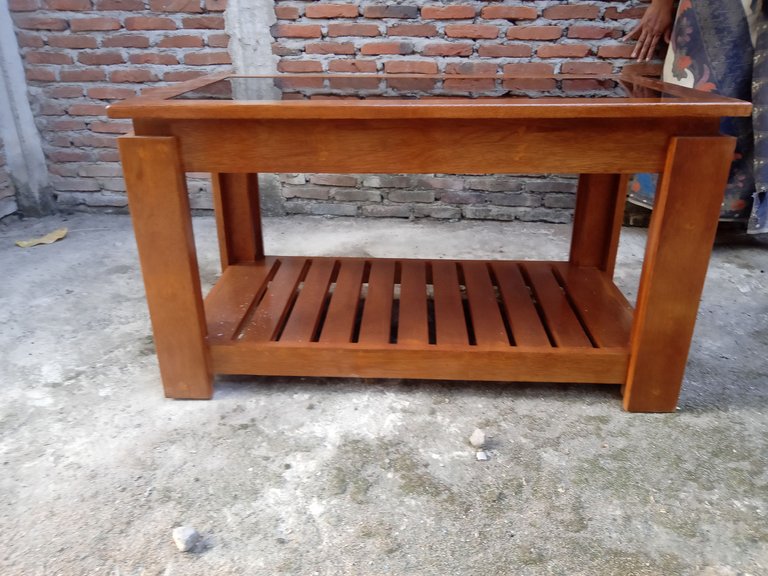
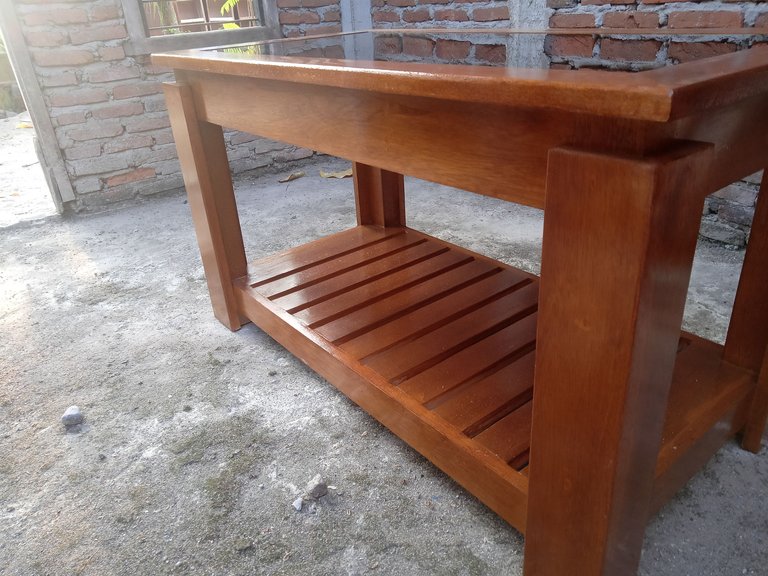
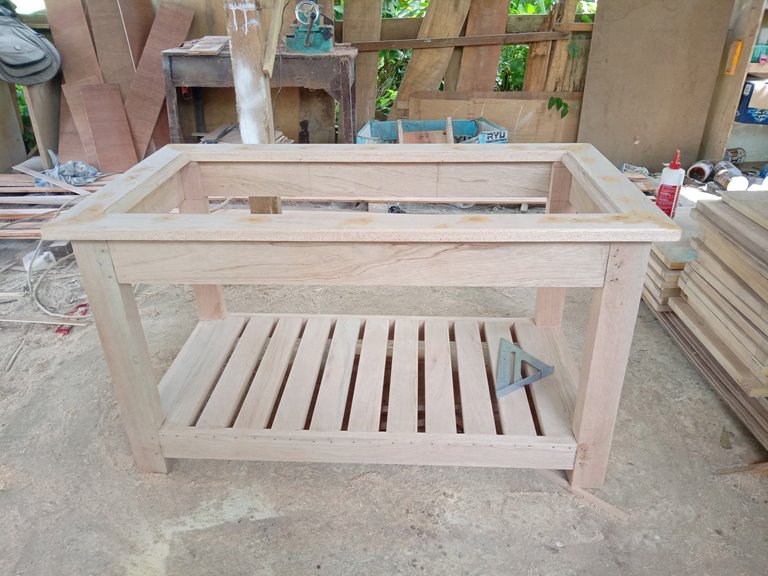
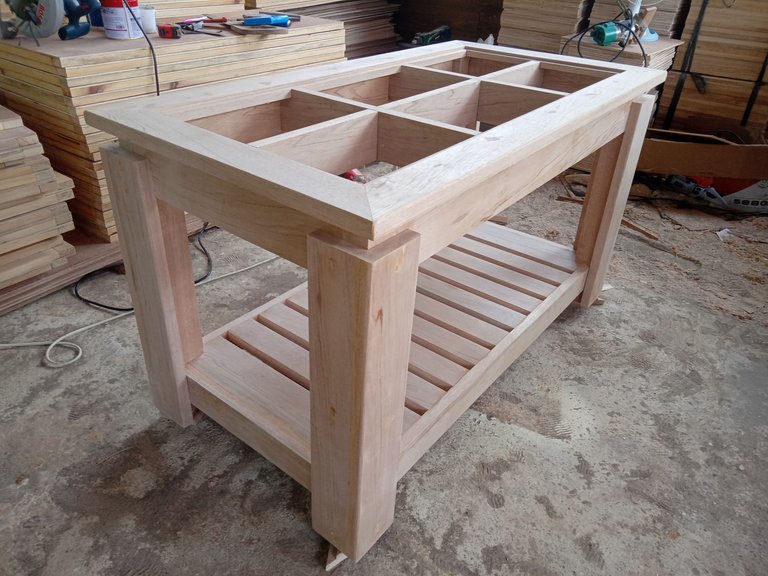
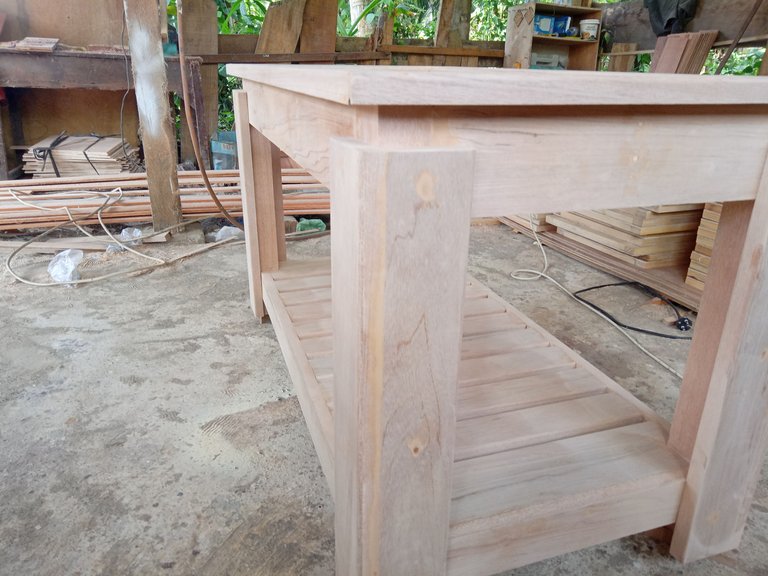
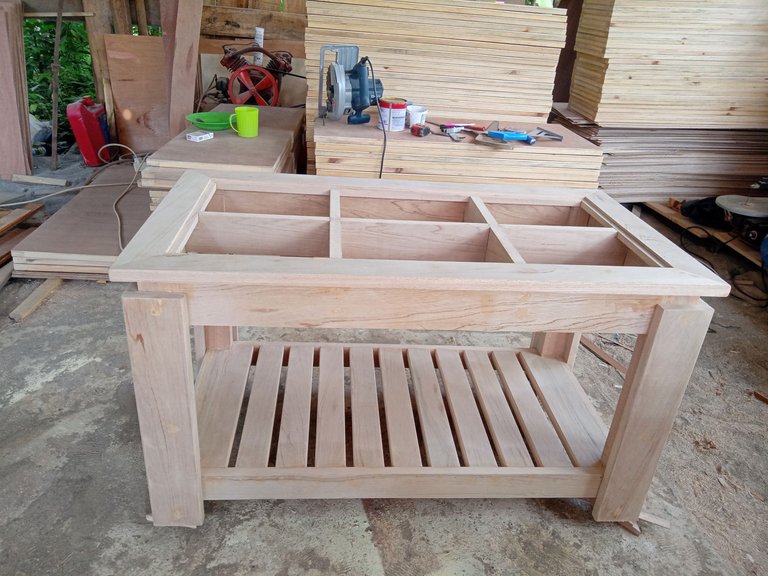
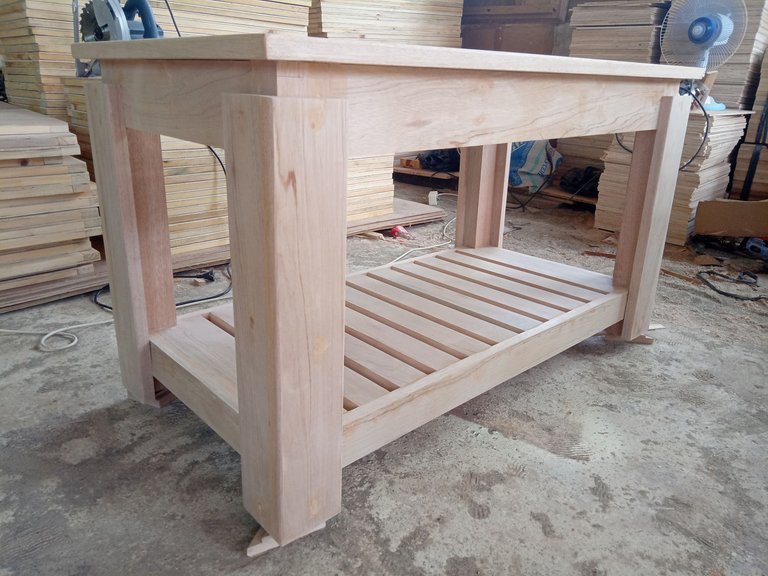
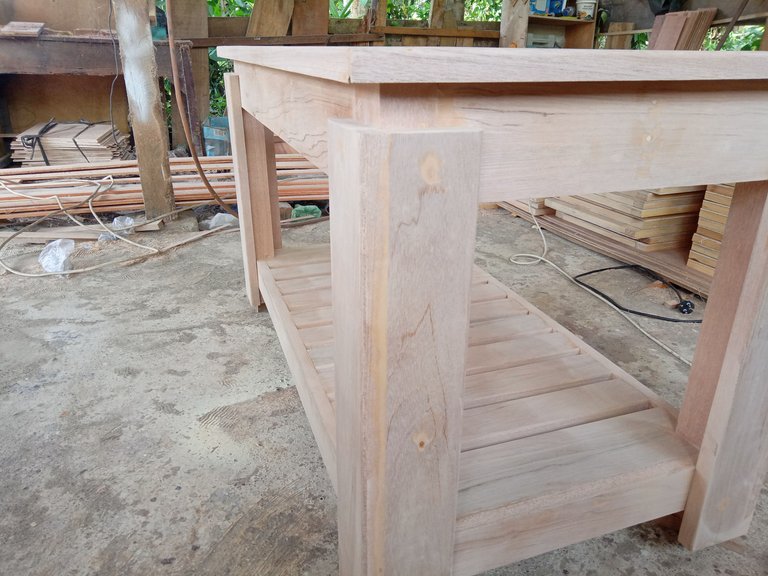
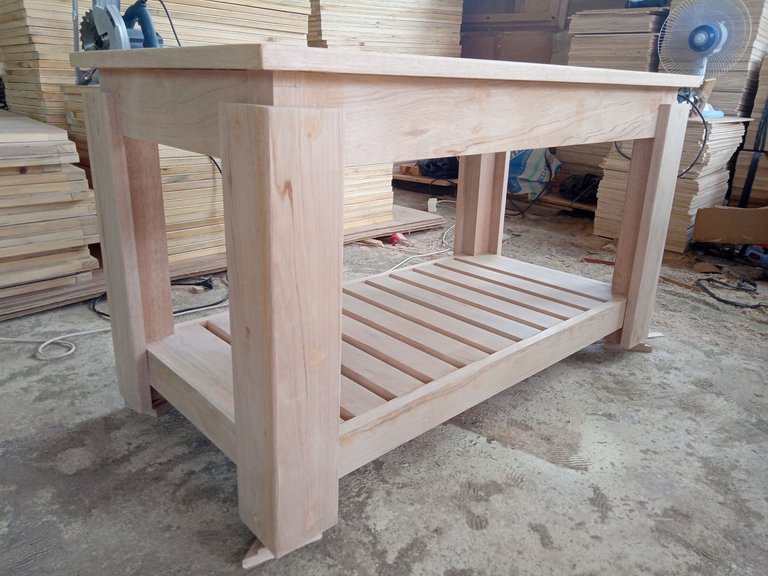
This table is shaped like a normal table, but I added a little more detail to each table leg to make it look different and also add a minimalist impression.
What do you think about the final result of this project? We can share more experiences with each other in the comments column....
The size of this table is 42.5 cm high, 55 cm wide and 105 cm long.
And now let's start with the manufacturing process, I will explain every detail of the process from start to finish and if you have difficulty understanding my explanation then you can look at each photo that I will show because I will show photos of the process first and then explain it. .
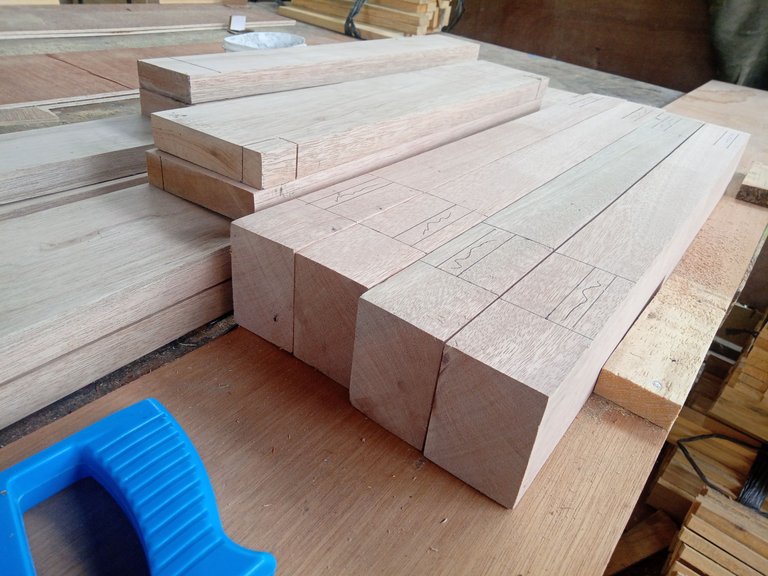
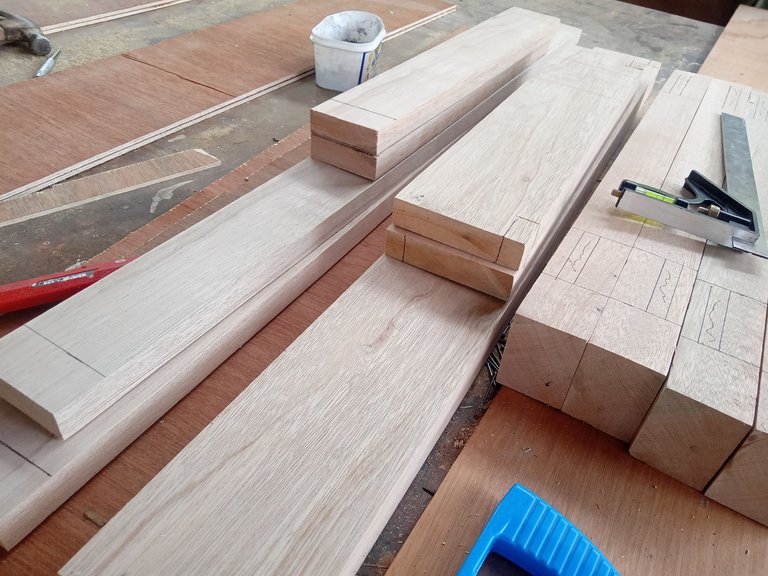
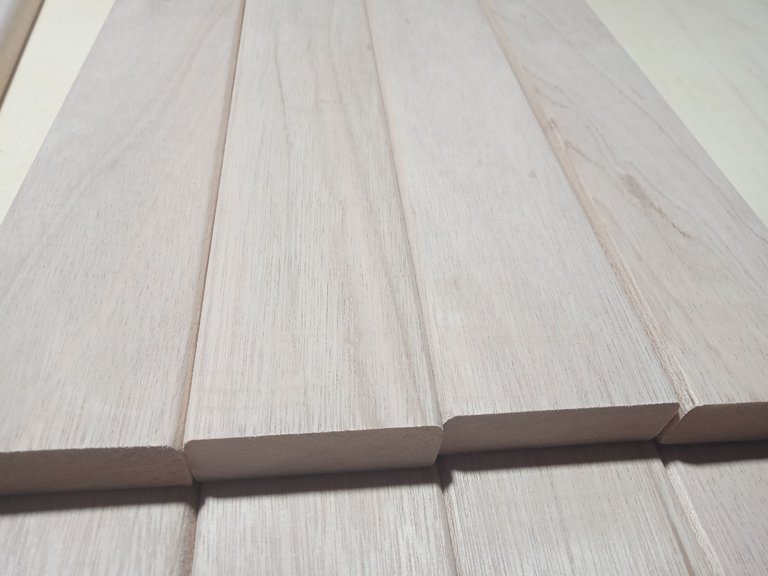
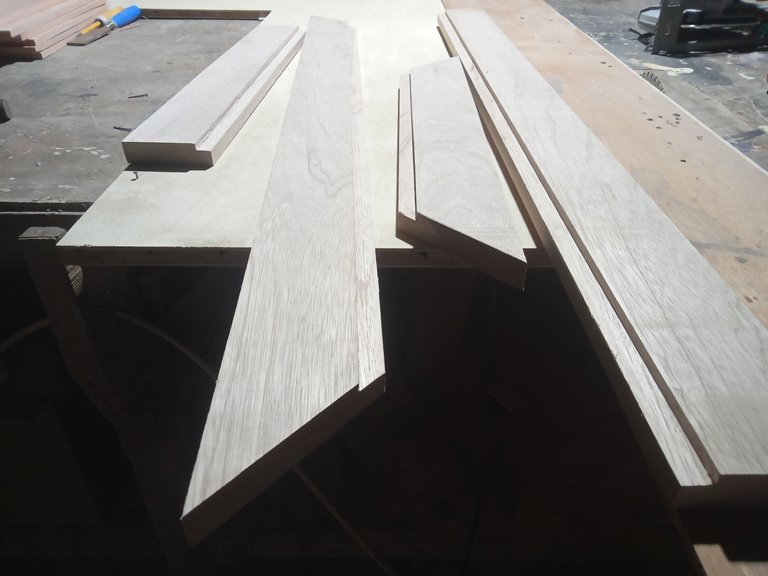
First, I prepared the wood I needed according to its size, I bought this wood at a wood shop and it was still not smooth, then I smoothed and leveled it with a planner machine, then I cut it with a circular saw machine to the following sizes:
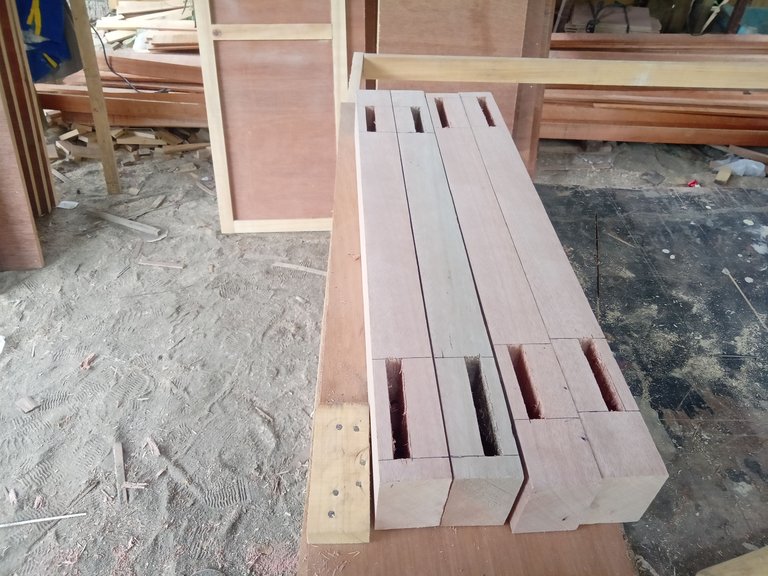
4 x 6 x 40 cm : 4 pieces (legs)
2.5 x 8 x 94 cm : 2 pieces (front and back top supports)
2.5 x 8 x 46 cm : 2 pieces (left and right top supports)
2.5 x 6 x 94 cm : 2 pieces (bottom support front and back)
2.5 x 6 x 46 cm: 2 pieces (bottom support left and right)
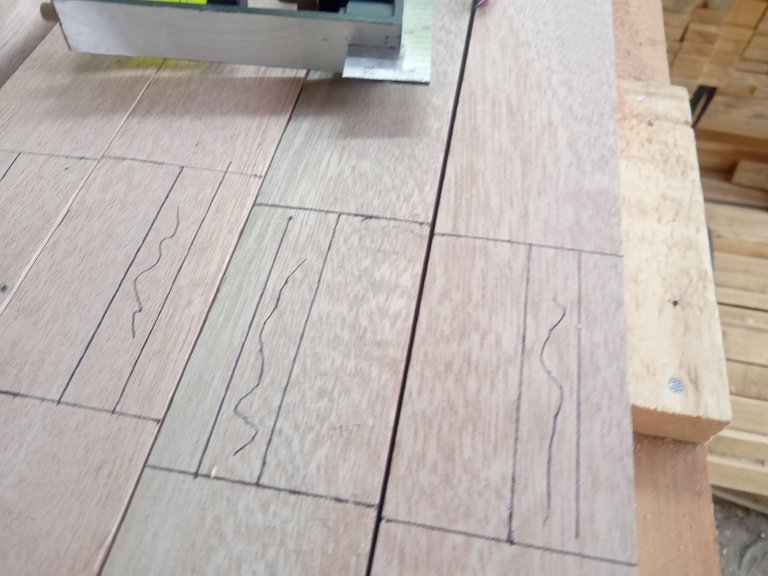
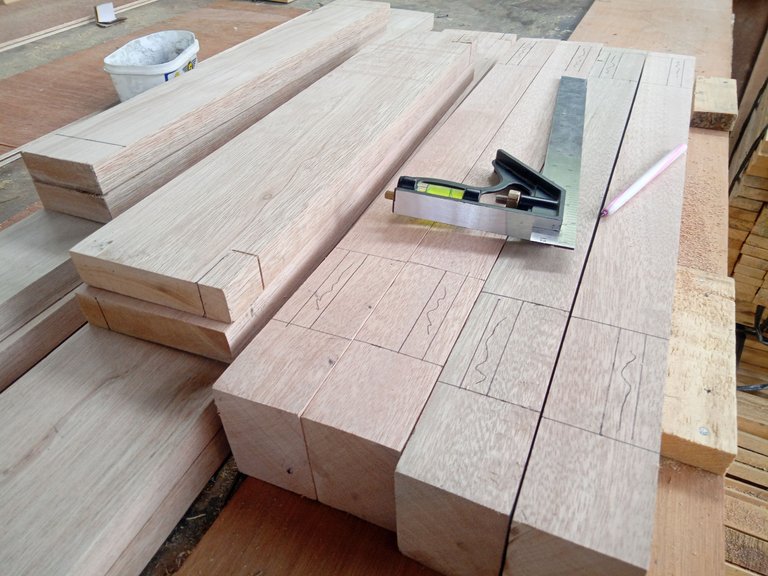
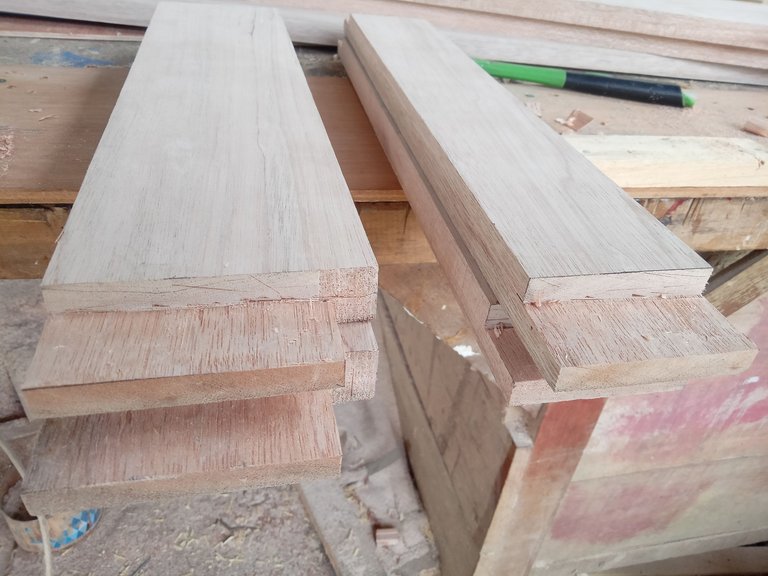
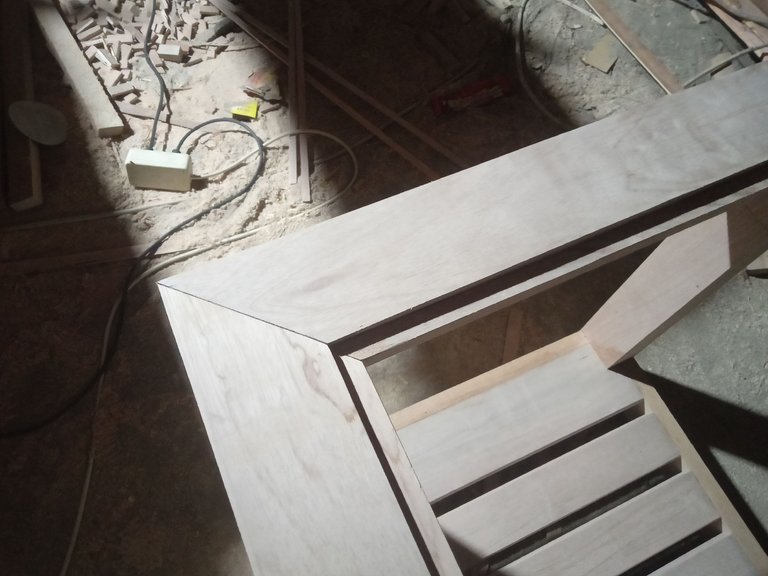
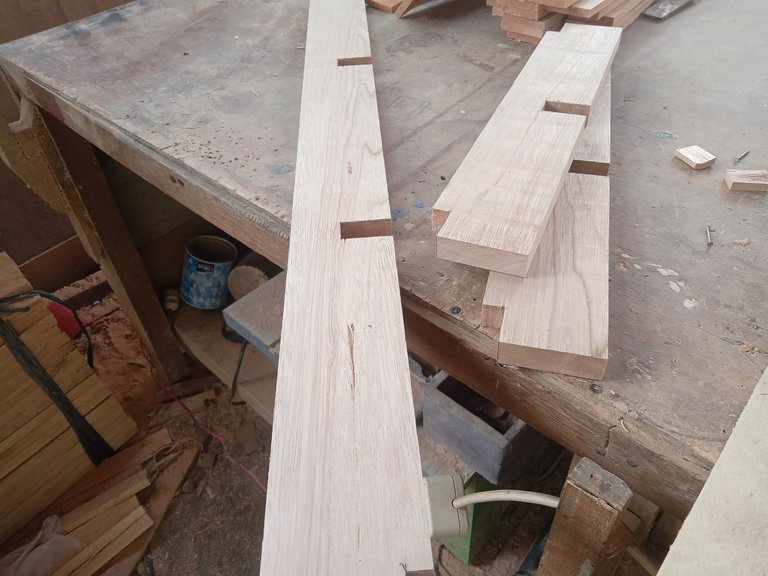
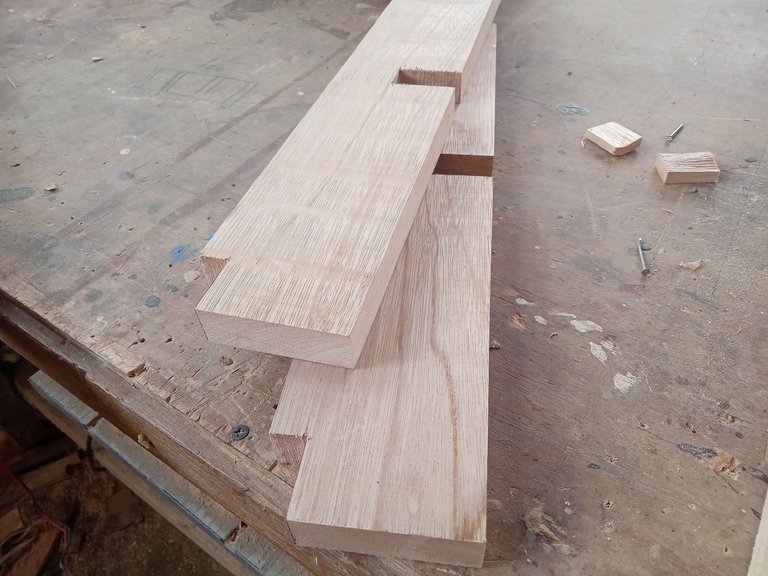
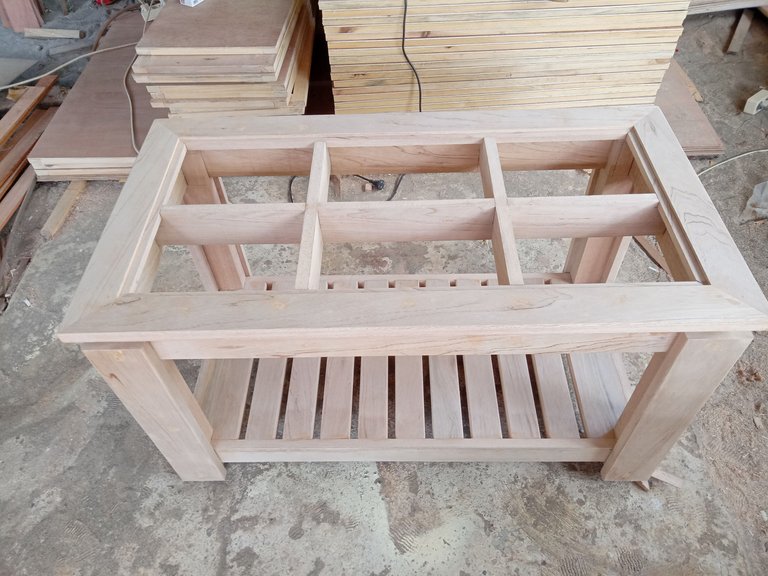
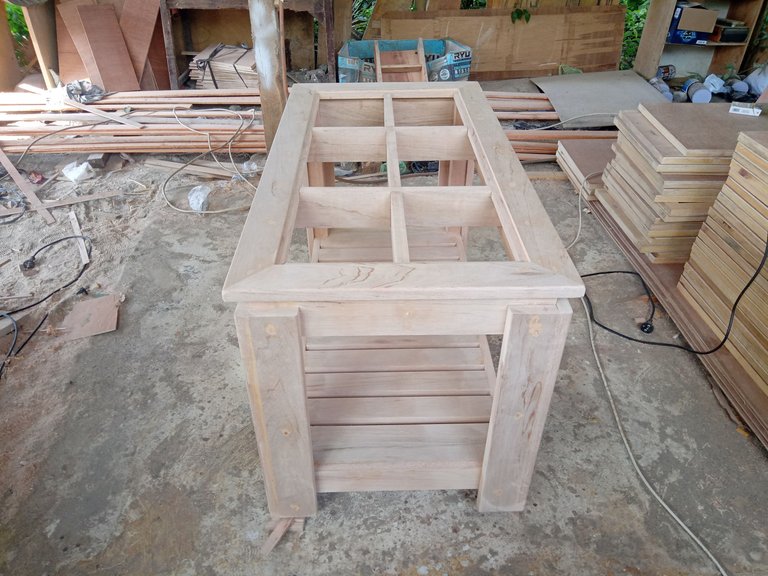
Then make a line in each leg to make a hole and also make a line in the supporting wood to cut and make a nail. This is one of the many techniques for joining wood which is called the TENON & MORTISE JOINT technique and there are still many wood joining techniques others such as DOWEL JOINT and HALF-LAP JOINT. and also MITER JOINT and I will also use this connection later when assembling the table top.
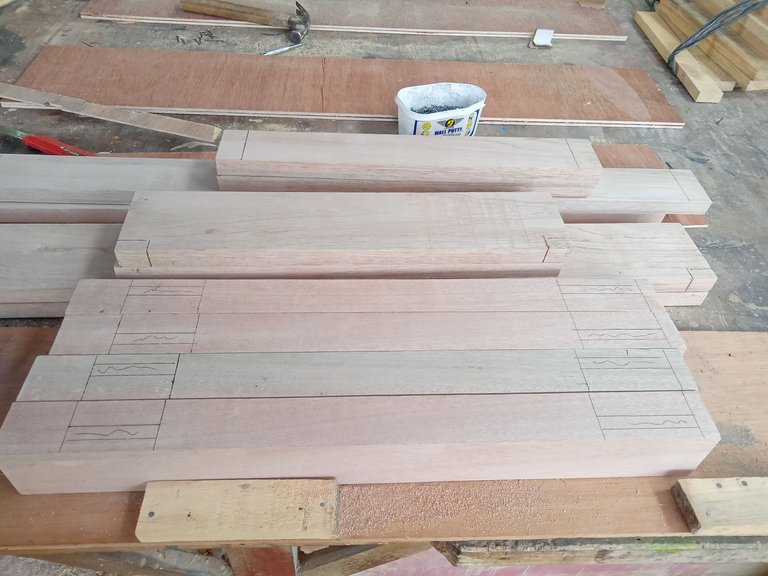
After everything was finished, I continued with the lines to make holes using a bench drill machine and also cut and made nails on the supporting wood using a table saw machine.
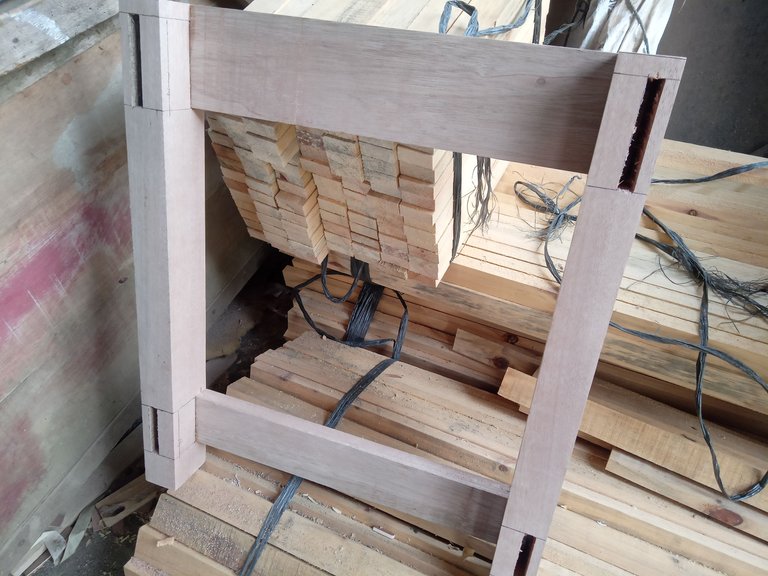
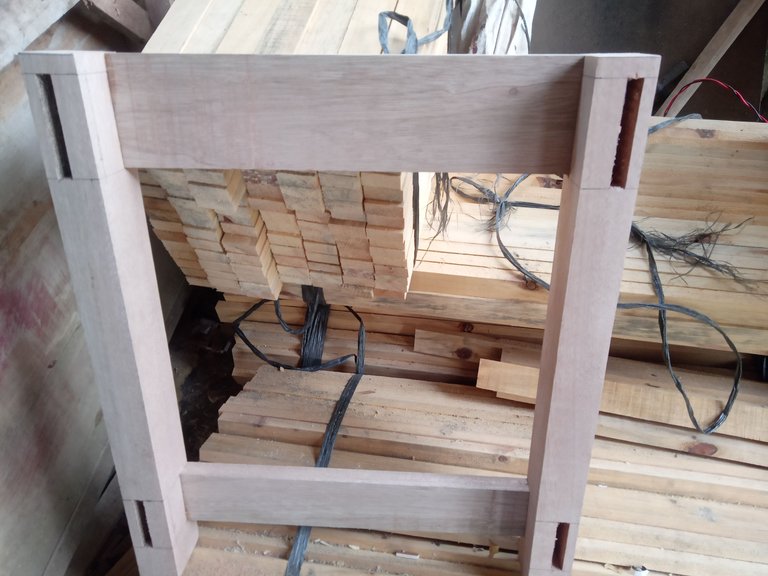
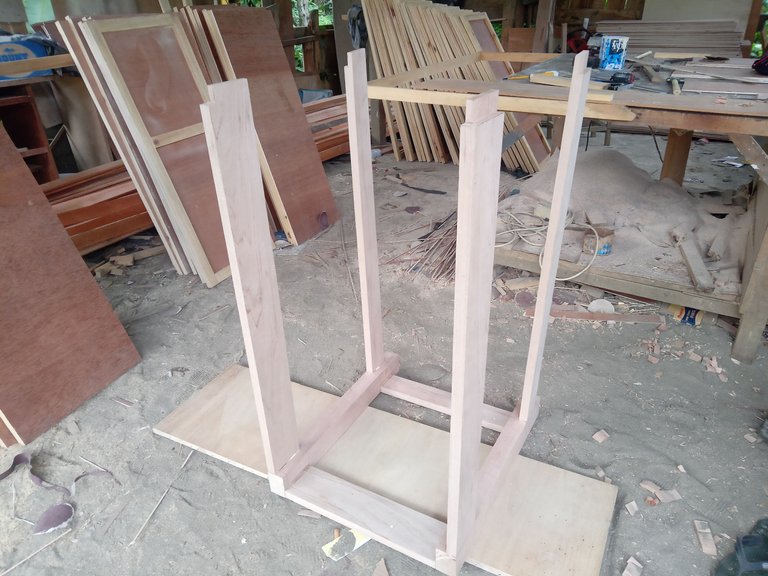
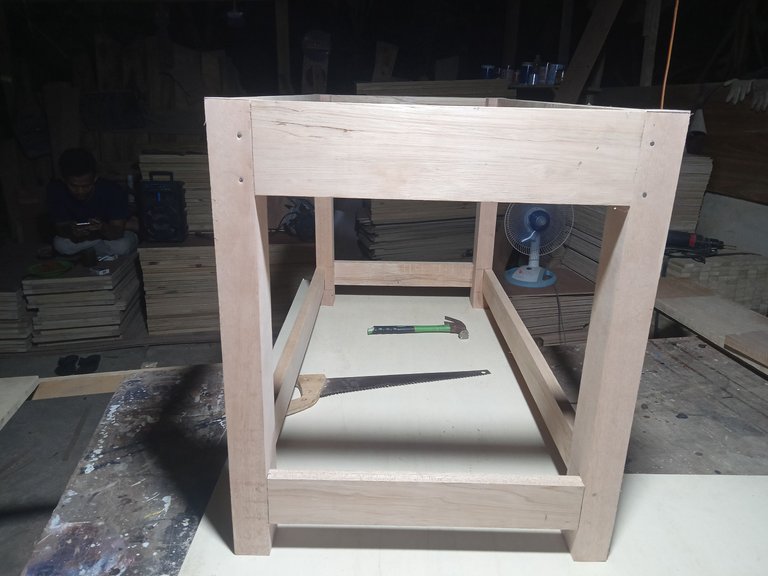
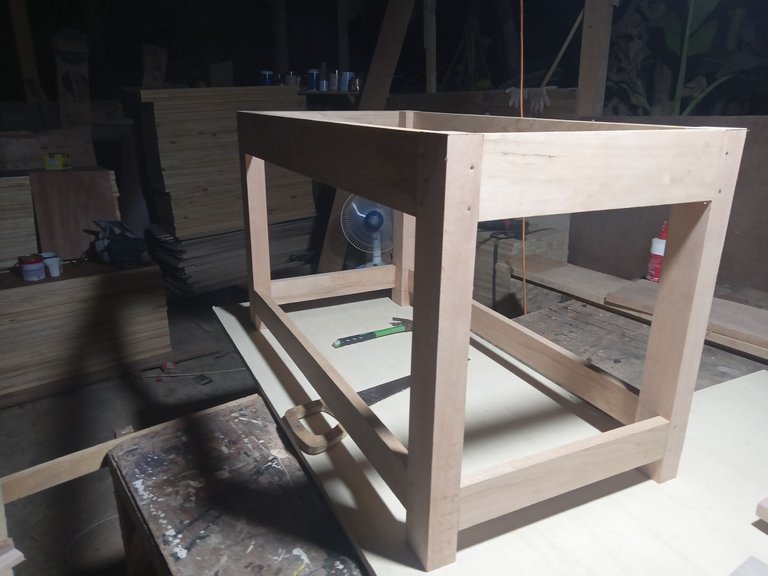

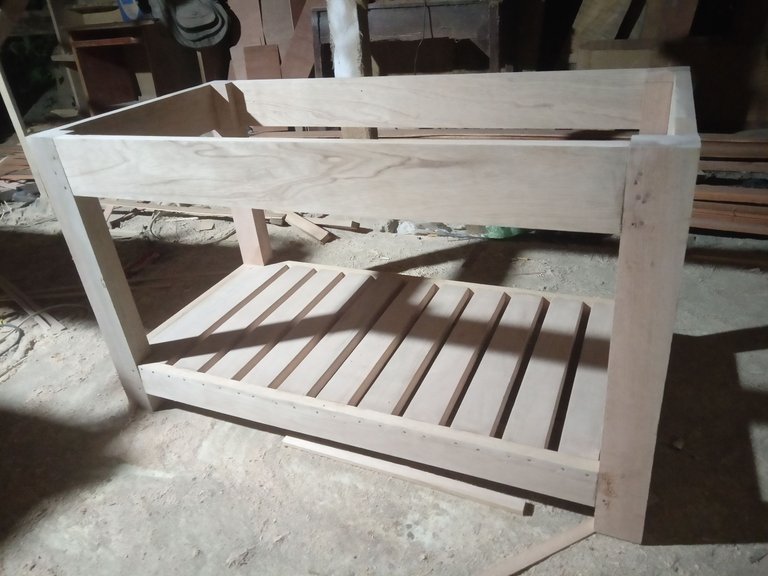
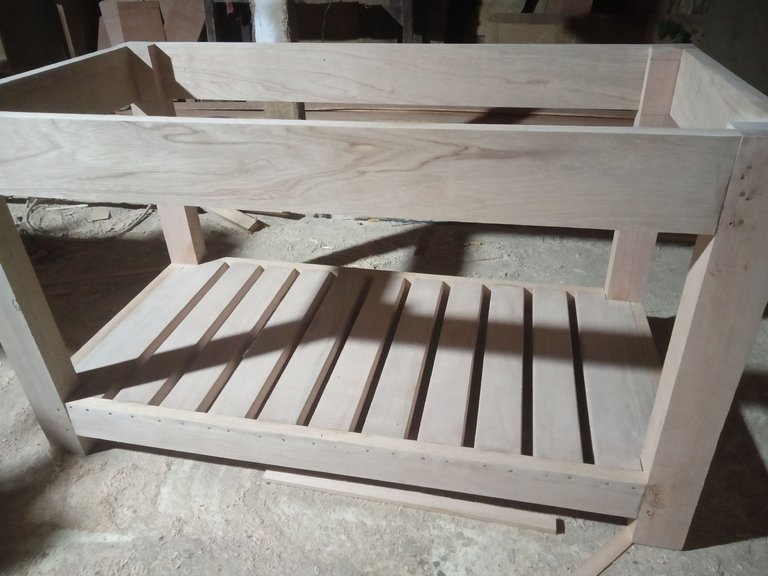
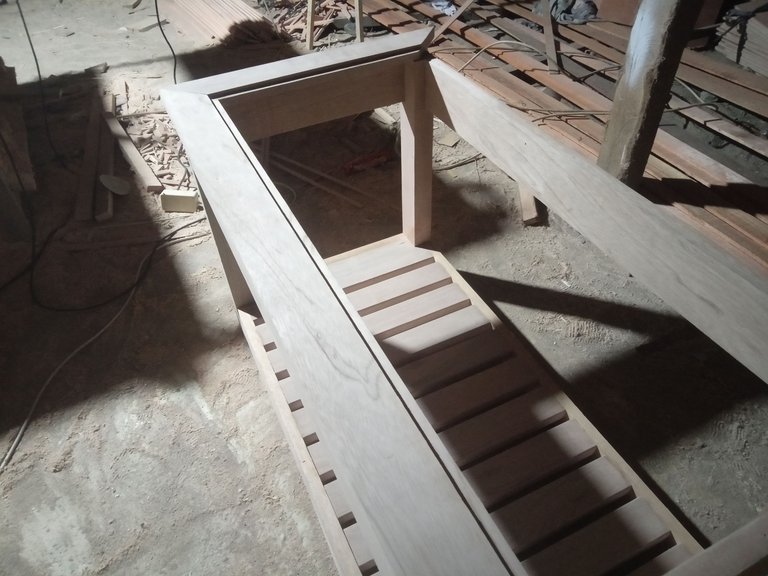
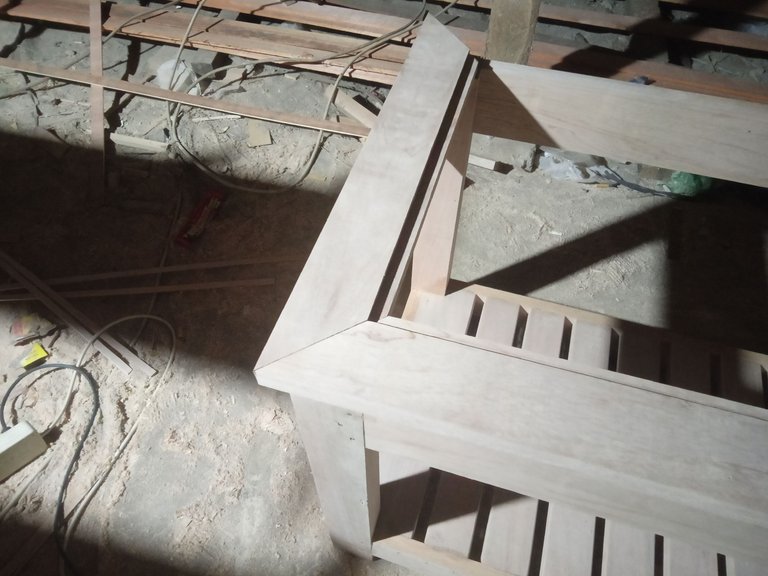
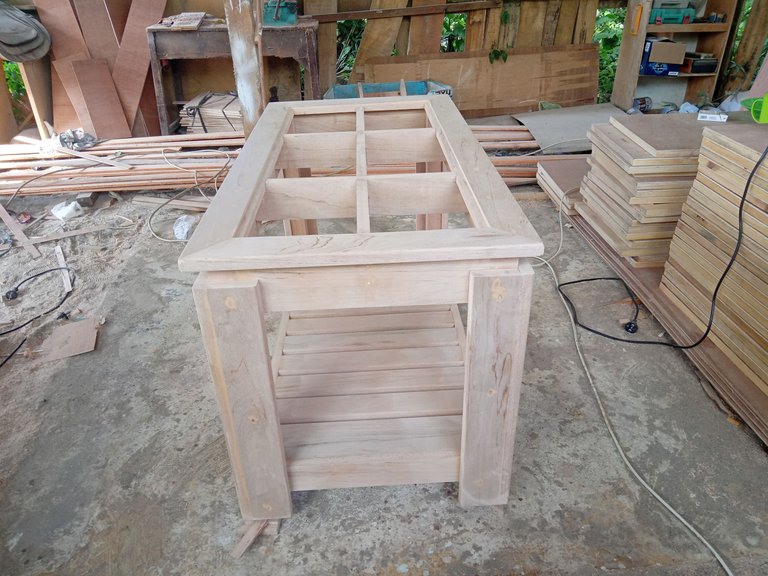
Next, I started assembling the table legs, starting by assembling the left and right parts, then joining them together to form a rectangle. In this assembly process, I didn't forget to use glue on each wooden joint and also nailed them to make them strong and sturdy.
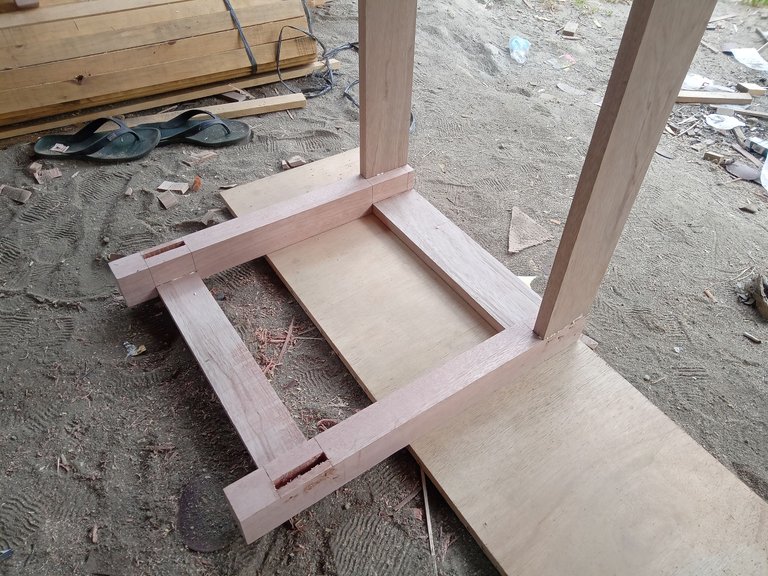
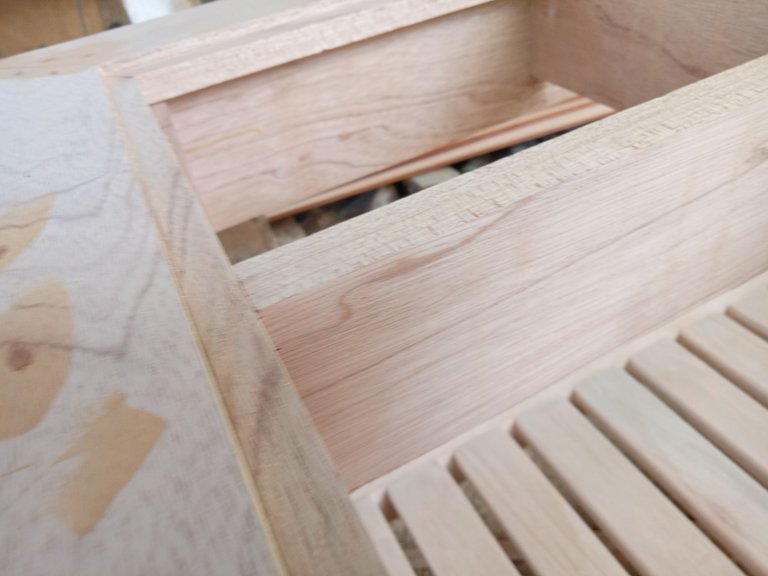
Once it was assembled, I then cut and split the wood for the floor under the table to the following sizes:
2.5 x 5 x 46 cm: 11 pieces
2.5 x 11 x 46 cm : 2 pieces
I cut two 11 cm pieces at each corner so that they were precise with the table legs and then I made each corner of the wood curved to make it look more attractive and then I attached them using glue and nails and I made a gap between each other of 2 cm.

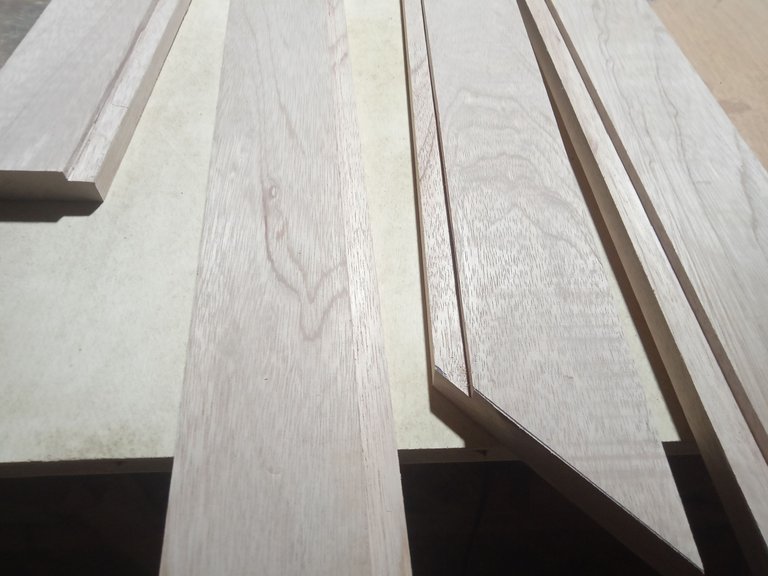
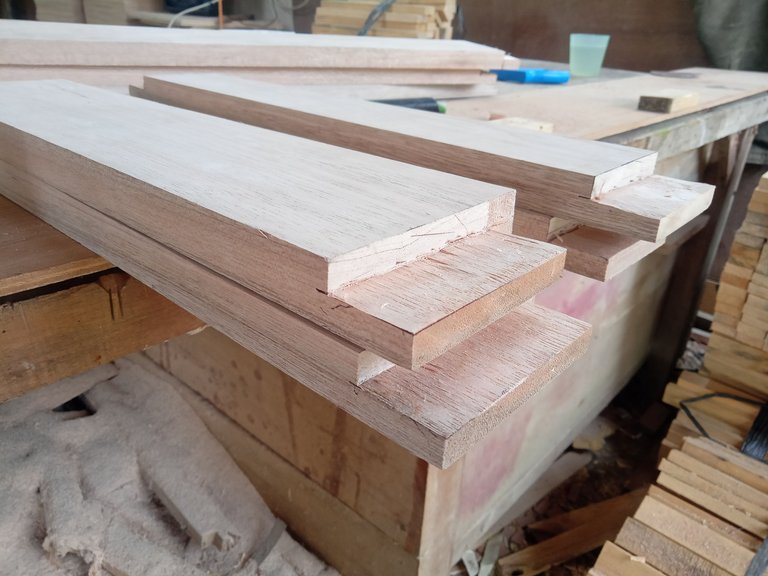
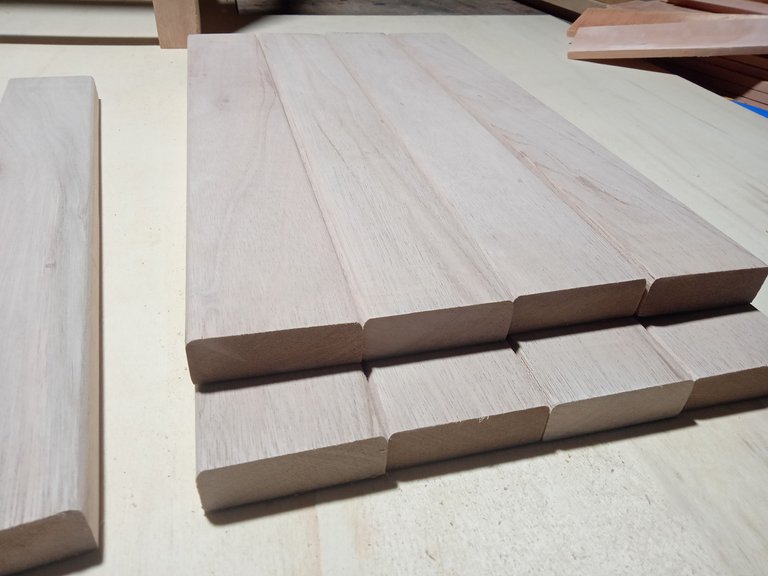
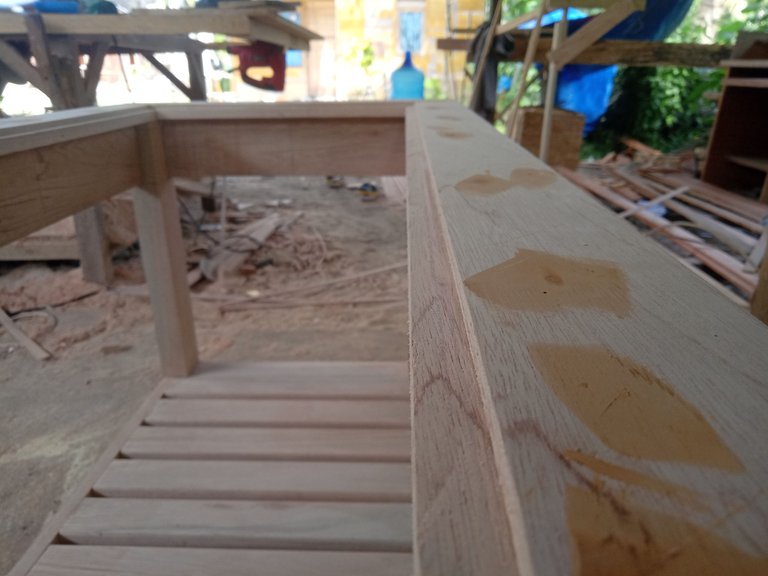
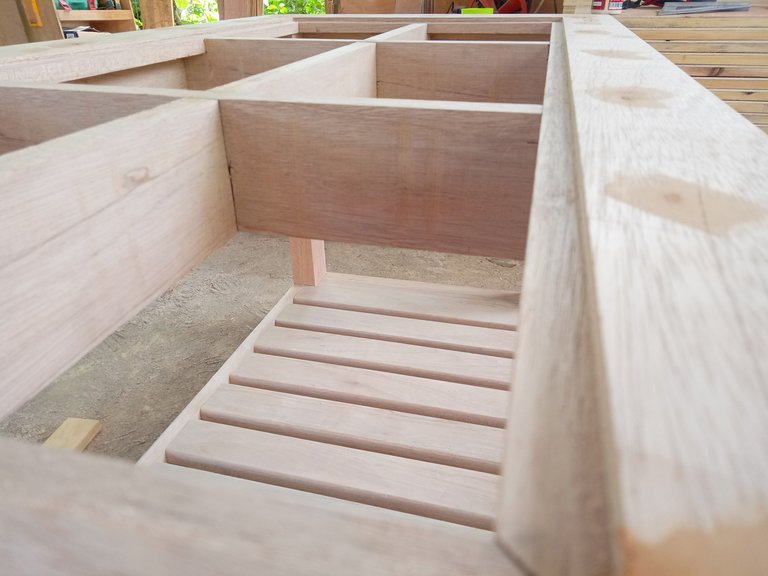
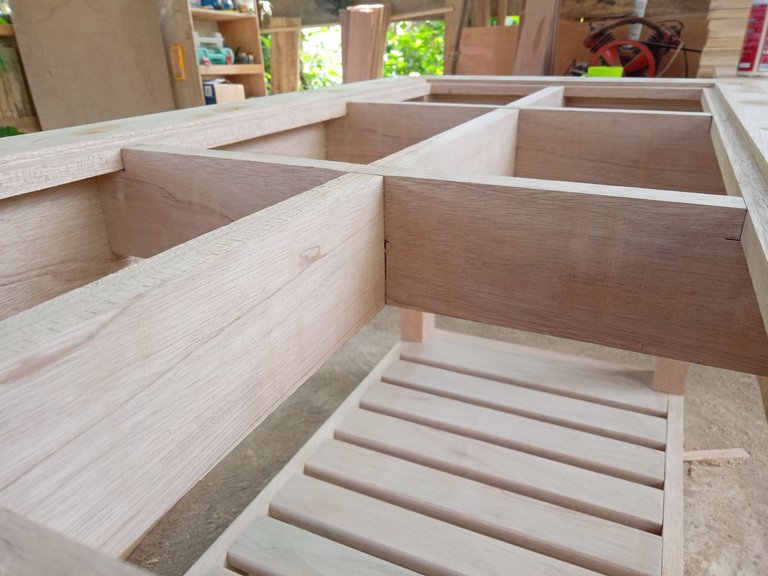
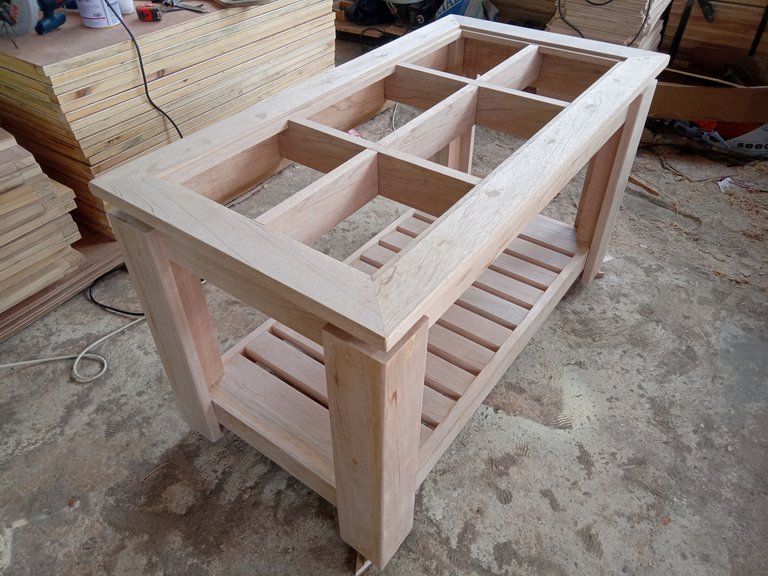
Next, I start splitting and cutting the wood for the table top, I will make each side 2.5 cm more than the surface of the table leg so that it looks better when you look at it because it is not the same as the table leg.
So I cut the wood to the following sizes:
2.5 x 10 x 105 cm : 2 pieces
2.5 x 10 x 55 cm : 2 pieces
I will make a groove on each piece of wood on the inside with a depth of 0.5 cm as a glass holder which will then be installed and the glass will then be flush with the table top. I do this using a trimmer machine using a straight bit size 8mm.
As I said above, when installing this table top, I used the MITER JOINT technique, namely cutting each side at a 90 degree angle and the results were perfect.

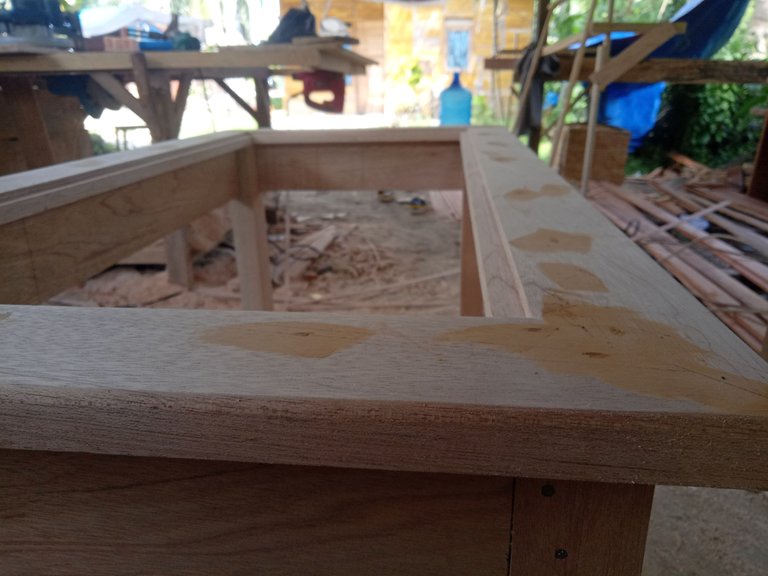
And the next morning I putty all the nail marks so that they were no longer visible and why did I do it faster even though there were still other components that had not been installed, because so that the putty was dry while I installed the other components so that when I finished installing the components they went straight into the sanding process and painting without having to wait for the putty to dry and that can save 2 hours.
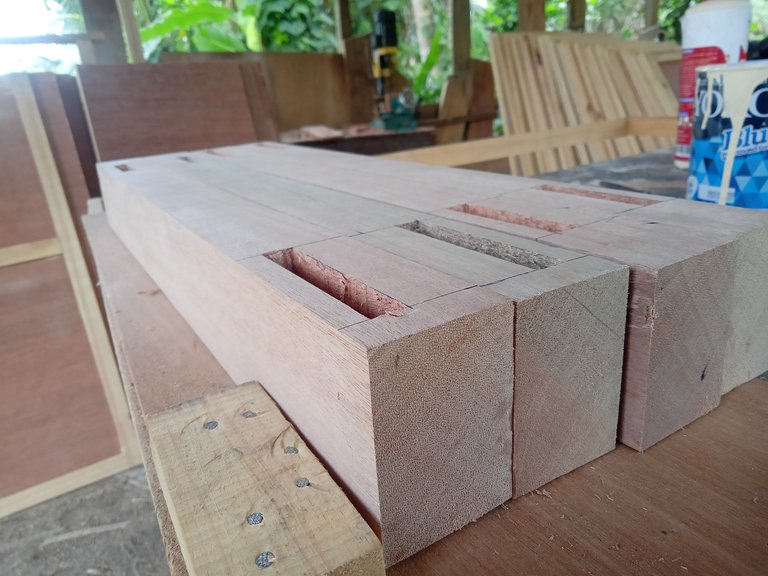
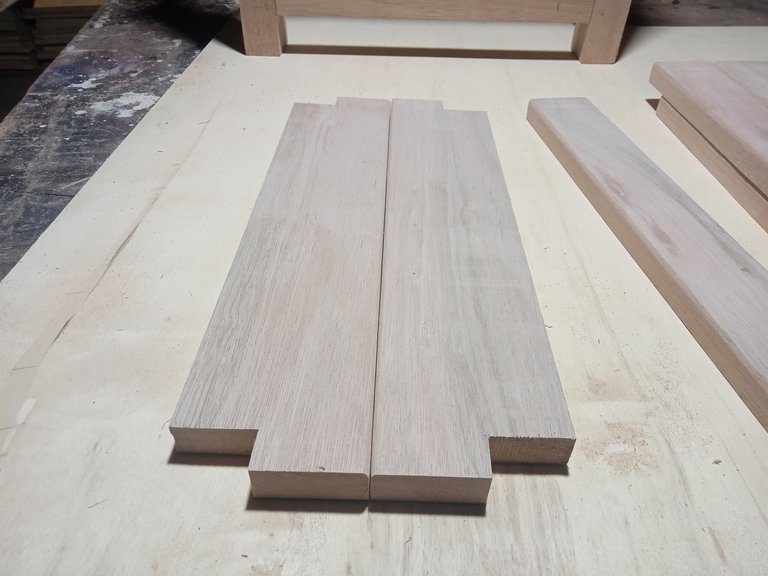
Then I started cutting wood to support the glass which I would attach to the inside of the table top. I cut this wood to the following sizes:
2.5 x 10 x 95 cm : 1 piece
2.5 x 10 x 45 cm : 2 pieces
I cut the three pieces of wood in half the width of the wood itself at each meeting so that they fit together evenly and I also cut the ends so that they fit the table top and the results were very satisfying.
And then I covered the four men's tables using wood on all sides.
Then I sanded all the wooden surfaces until they were smooth and neat before I painted them using water based wood paint with the color carapa, this time I painted them using a spray gun so that the results were more satisfying compared to using a brush.

And that is the result of working on this project and through this post I hope to increase your knowledge about furniture and I hope that you like my post, and I am also waiting for your comments. If there is something you want to ask about the world of furniture, we can share it in the comments column, ,, thank you and see you in the next post...
It look absolutly well
Thanks so much...
Congratulations @lancang! You have completed the following achievement on the Hive blockchain And have been rewarded with New badge(s)
Your next target is to reach 400 comments.
You can view your badges on your board and compare yourself to others in the Ranking
If you no longer want to receive notifications, reply to this comment with the word
STOPTo support your work, I also upvoted your post!
Thank you for sharing about how to make a minimalist table @lancang
You welcome,,,,
And thanks for reading my post...
Congratulations dear @lancang! We are delighted to inform you that your outstanding publication was specially selected as an exclusive feature for our Curated Content Catalog and was awarded RUNNER UP in Architecture Anthology™ 65. More power!
Thank you for subscribing to Architecture+Design, an OCD incubated community on the Hive Blockchain.
Thank you very much, I'm happy to be part of this weekly post again...
We are honored to have you here dear @lancang. Keep up the great A+D projects! 😀