Creating a beautiful rose craft with disposable cloth materials / (ENG/ESP)

Reciban un cordial saludo mis queridos amigos, amantes del arte y las manualidades.
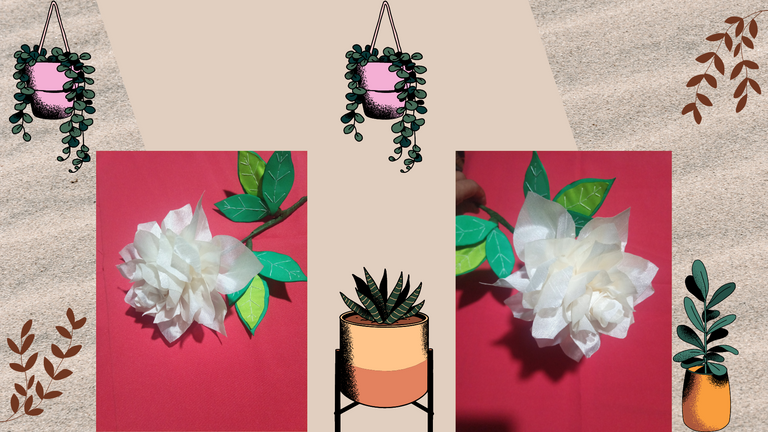
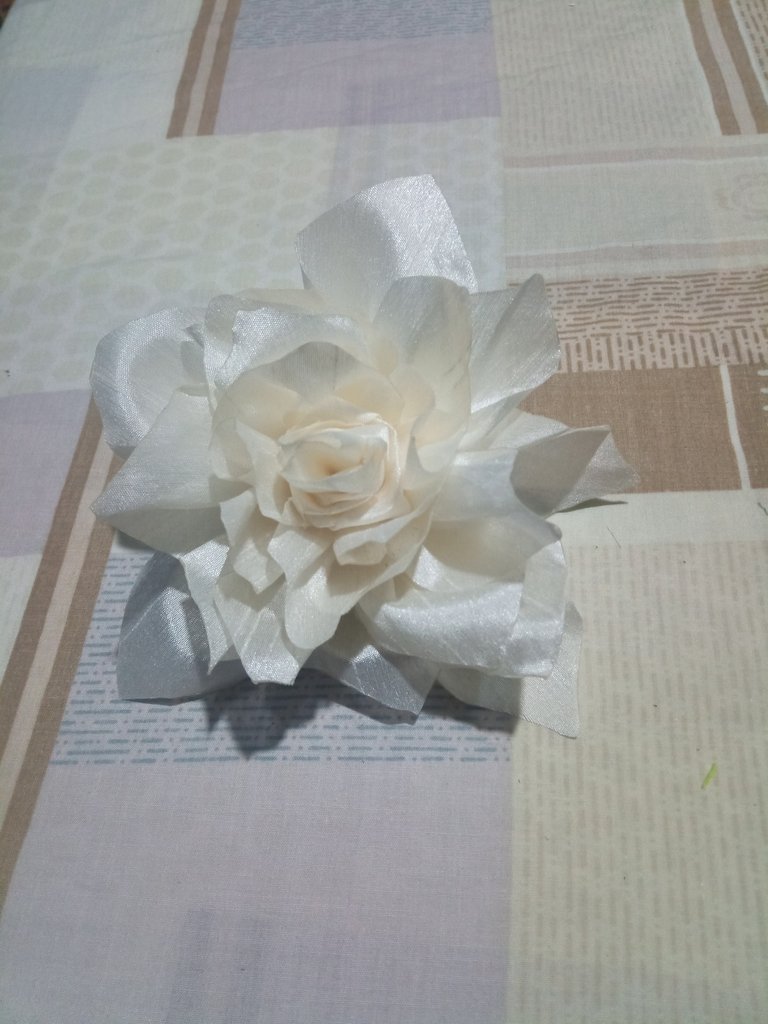
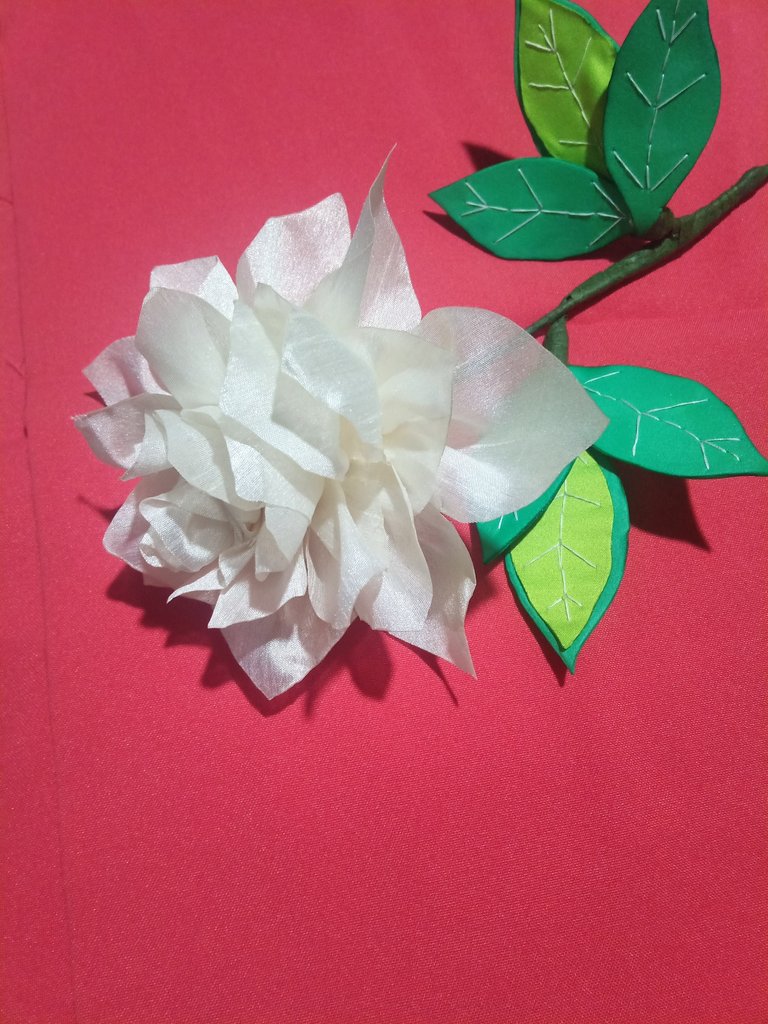
Es un placer para mí presentarles una manualidad donde realice una flor blanca con material reciclado de retazos de tela y foami.
Cabe destacar, que no use una imagen de referencia, puesto que fue una idea que me surgió de creatividad propia.
Al final de la publicación les estaré mencionando los materiales que utilice para poder crear este hermoso dibujo.
Las fotografías que verán a continuación, fueron tomadas con mi teléfono modelo Alcatel_5044R.
A continuación, les presentaré el proceso de elaboración que implemente para realizar este dibujo.

Greetings my dear friends, art and craft lovers.
It is a pleasure for me to present you a craft where I made a white flower with recycled material from scraps of fabric and foami.
It should be noted that I did not use a reference image, since it was an idea that came to me from my own creativity.
At the end of the publication I will be mentioning the materials I used to create this beautiful drawing.
The pictures you will see below were taken with my Alcatel_5044R phone.
Next, I will show you the elaboration process that I implemented to make this drawing.

Paso 1
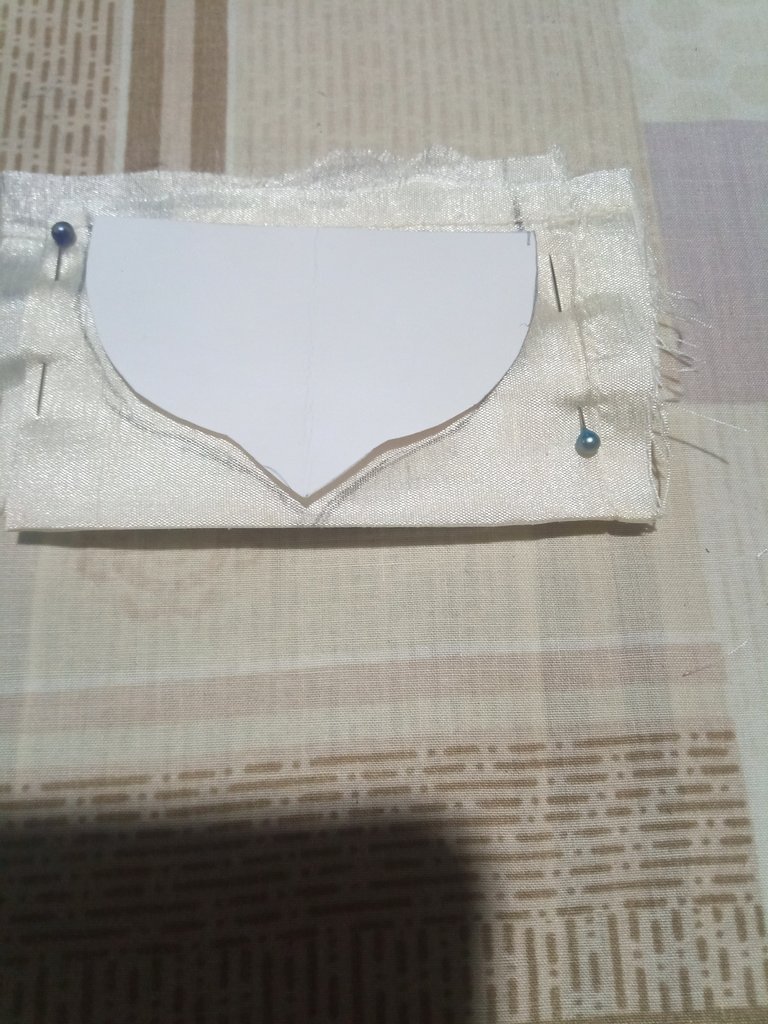
Para comenzar a trabajar en esta manualidad, vamos a utilizar un retazo de tela de aproximadamente de 60 centímetros de largo y 8 centímetros de ancho, lo que a variar en diferentes pétalos.
Doblaremos esta cinta de tela de 4 a 6 partes dependiendo del patrón que tengamos y el tamaño que le queramos dar, una vez estando doblada colocaremos el patrón sobre estos dobleces, lo sujetaremos con alfileres por los lados de la tela y luego remarcamos con un lápiz el patrón del pétalo.
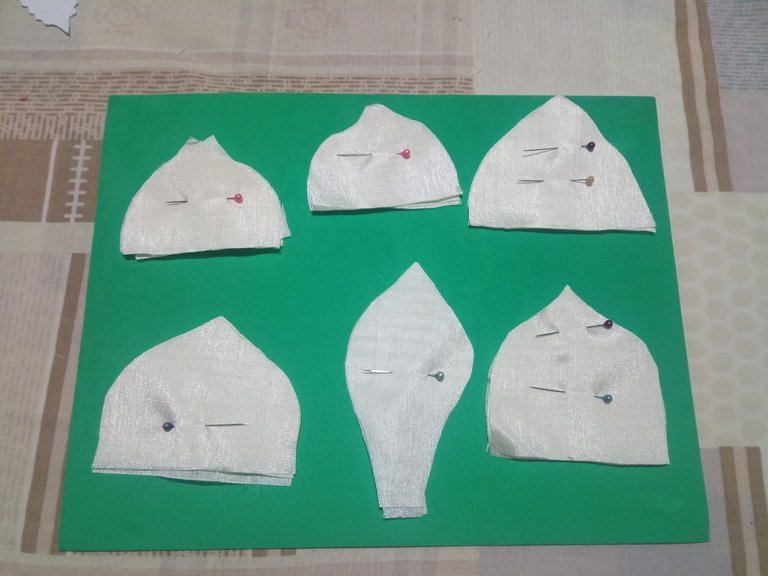
Después que tengamos todos los tipos y tamaño de pétalos remarcados, aseguraremos donde marcamos el centro del pétalo con alfileres para que al momento de cortar no se vayan a mover, después procederemos a recortar.
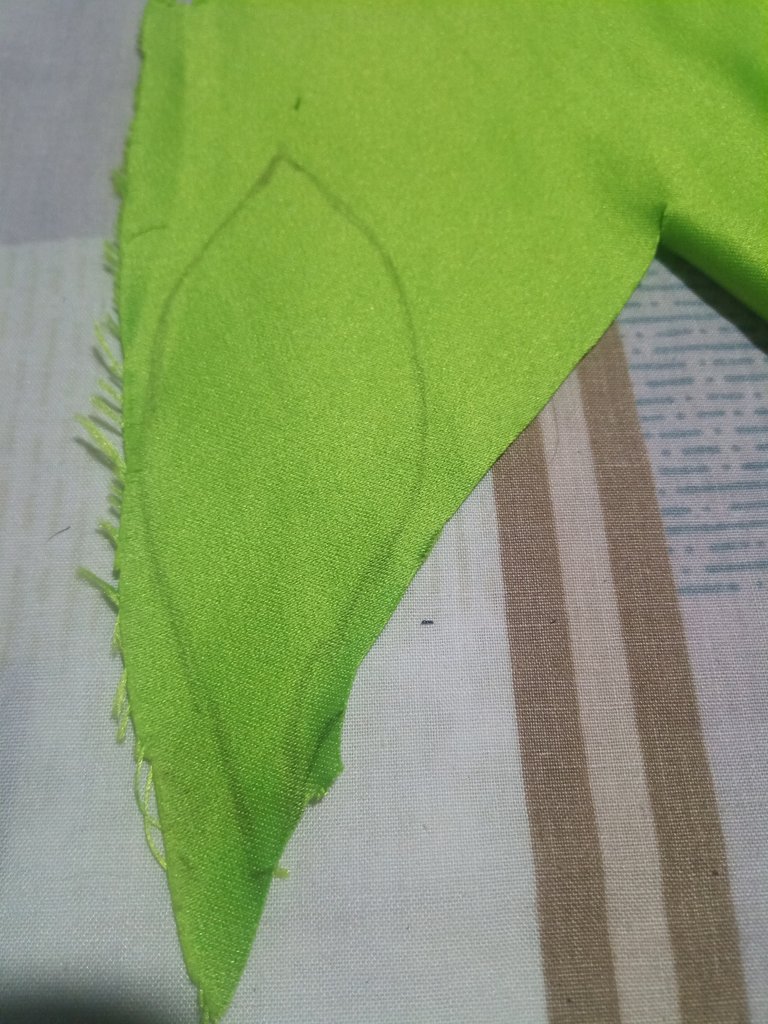
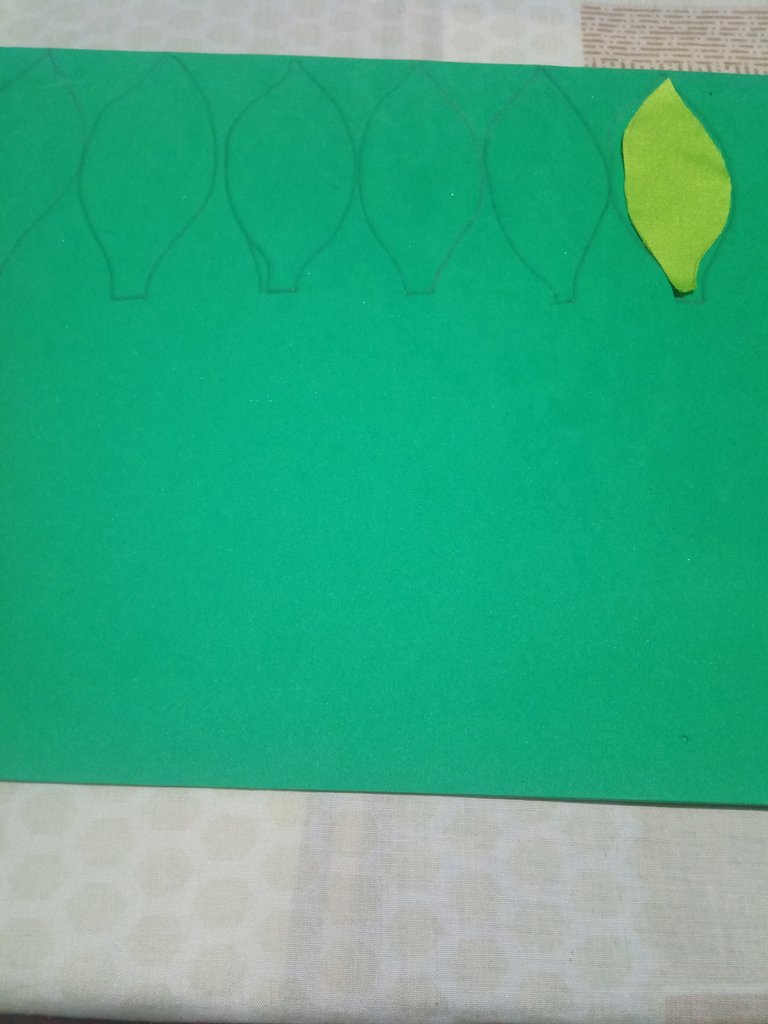
Para hacer la hoja, usaremos la tela y dibujaré sobre el mismo un pétalo de hoja, puede ser con patrón o sin él, luego recortaremos y utilizaremos este mismo para continuar recortando los demás pétalos que sacaremos en foami.
Step 1
To start working on this craft, we will use a piece of fabric approximately 60 centimeters long and 8 centimeters wide, which will vary in different petals.
We will fold this fabric ribbon from 4 to 6 parts depending on the pattern we have and the size we want to give it, once it is folded we will place the pattern on these folds, we will hold it with pins on the sides of the fabric and then we will mark with a pencil the pattern of the petal.
After we have all the types and sizes of petals marked out, we will secure where we marked the center of the petal with pins so that when we cut it, it will not move, then we will proceed to cut it out.
To make the leaf, we will use the fabric and I will draw on it a leaf petal, it can be with or without pattern, then we will cut and use the same to continue cutting the other petals that we will draw in foami.
PASO 2
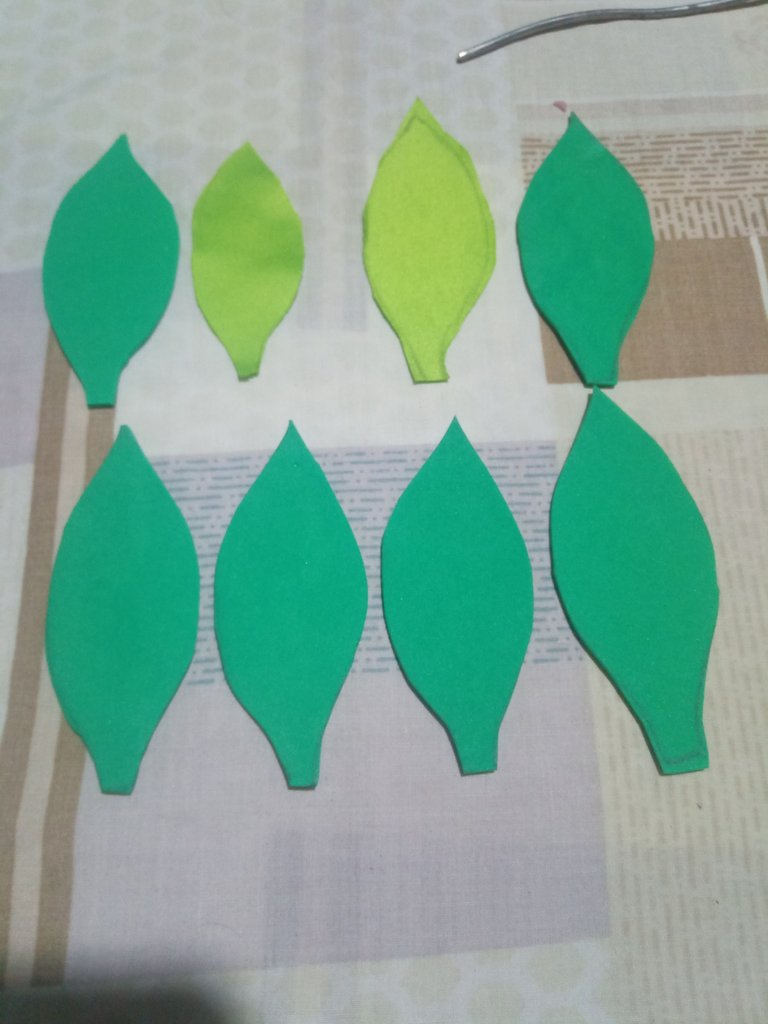
La misma hoja que recortamos anteriormente de tela, la utilizaremos de patrón para continuar sacando el resto de las hojas para luego recortar cada una de ellas.
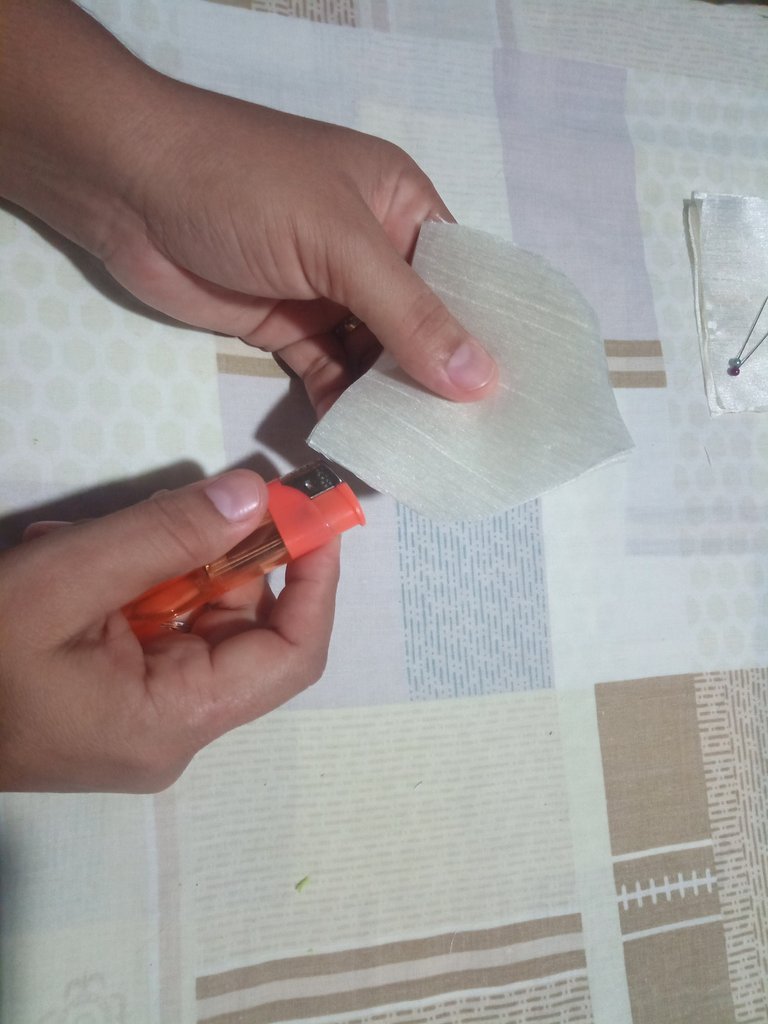
Aquí recorte 6 pétalos de foami y 2 con tela, después de tener todos los pétalos y las hojas recortados, con la ayuda de un encendedor y con sumo cuidado de no quemar, vamos a sellar todos los bordes de los pétalos y de las hojas, tanto las hojas de tela como las hojas de foami.
STEP 2
The same sheet of fabric that we cut out before, we will use it as a pattern to continue cutting out the rest of the leaves and then cut out each one of them.
Here I cut out 6 foami petals and 2 with fabric, after having all the petals and leaves cut out, with the help of a lighter and being very careful not to burn, we will seal all the edges of the petals and leaves, both the fabric leaves and the foami leaves.

PASO 3
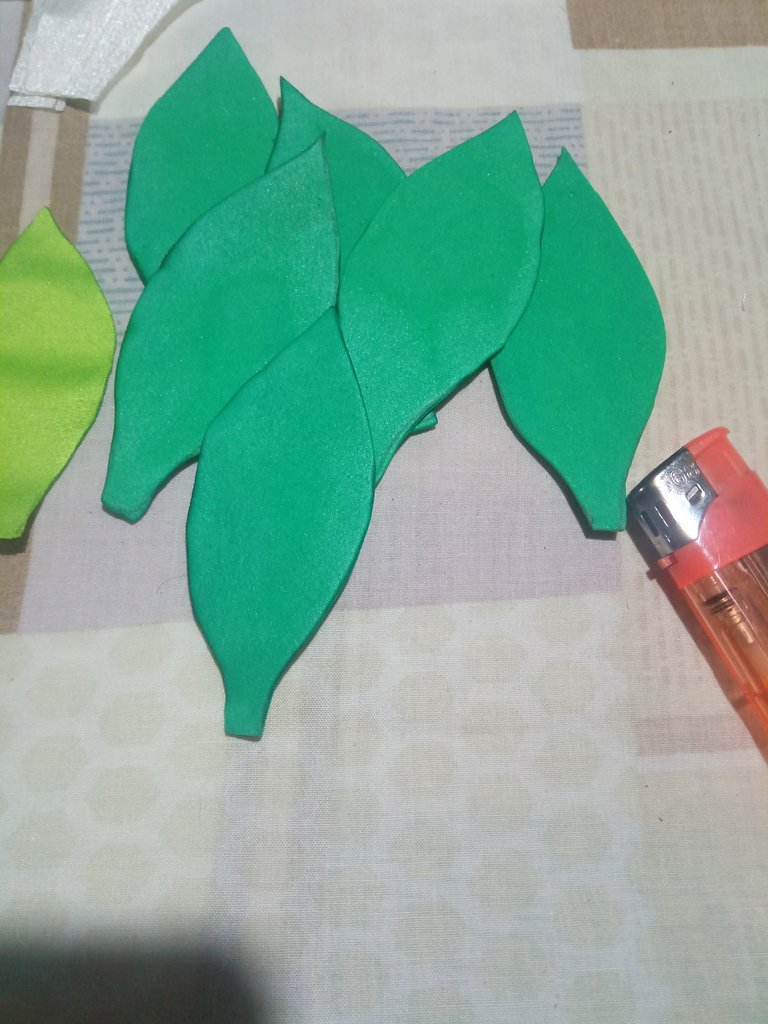
Pueden notar el resultado de luego de sellar todo el borde con el encendedor.
Luego con los pétalos de tela ya con los bordes trabajados, con la ayuda de una aguja con un hilo, vamos a cocer la parte inferior del pétalo, fruncimos y aseguramos, vamos reservando hasta completar este paso en todos los pétalos.
STEP 3.
You can see the result after sealing the entire edge with the lighter.
Then with the fabric petals already with the edges worked, with the help of a needle with a thread, we are going to bake the bottom of the petal, we pucker and secure, we are going to reserve until completing this step in all the petals.

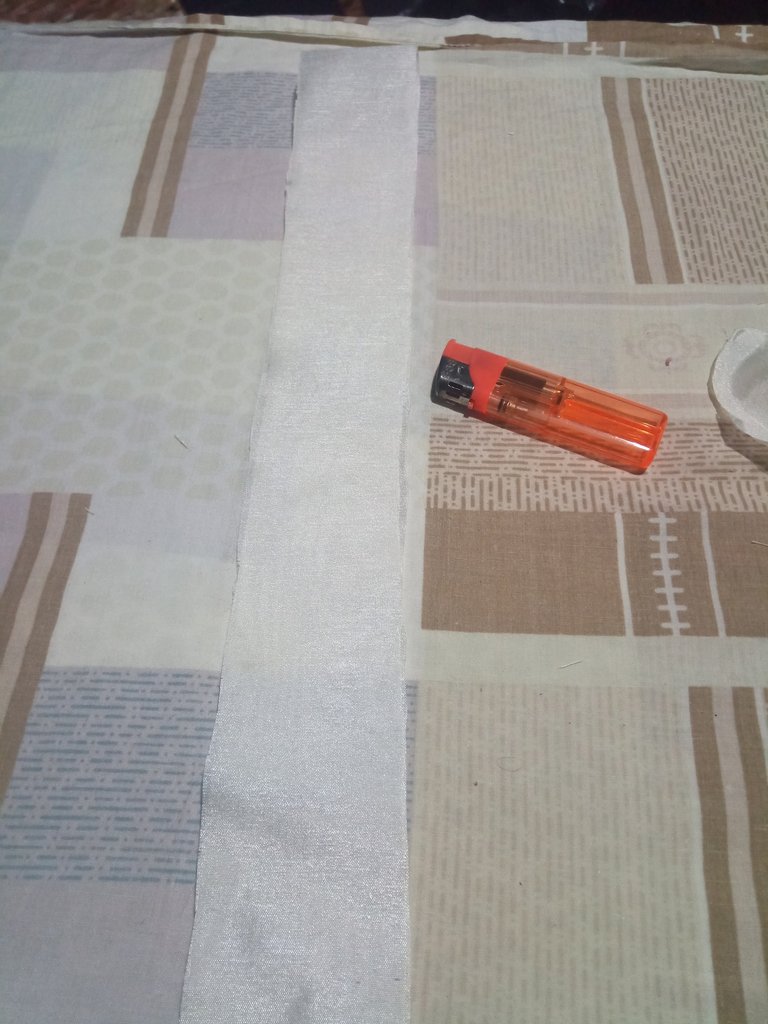
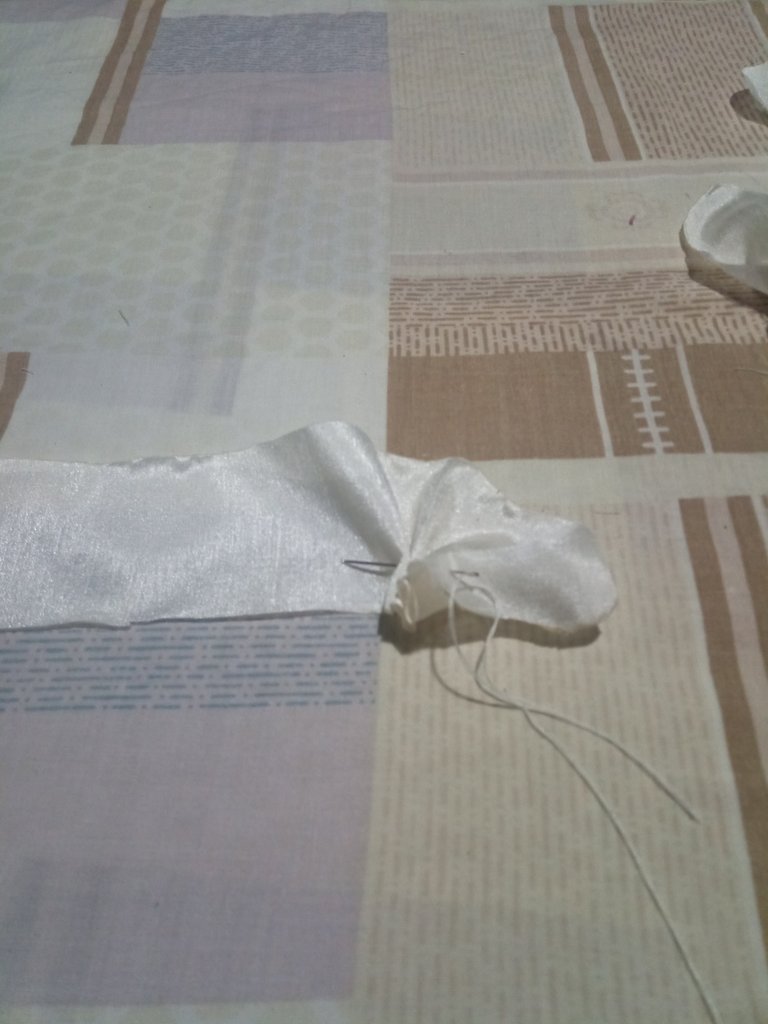
PASO 4
Para realizar el centro de la rosa, sacaremos una cinta de tela de unos 15 centímetros de largo por 6 de ancho, sellaremos todos los bordes con el encendedor y con la ayuda con una aguja frunciremos y doblaremos para hacer el centro de la rosa.
STEP 4
To make the center of the rose, we will take out a ribbon of fabric about 15 centimeters long by 6 centimeters wide, we will seal all the edges with the lighter and with the help of a needle we will gather and fold to make the center of the rose.
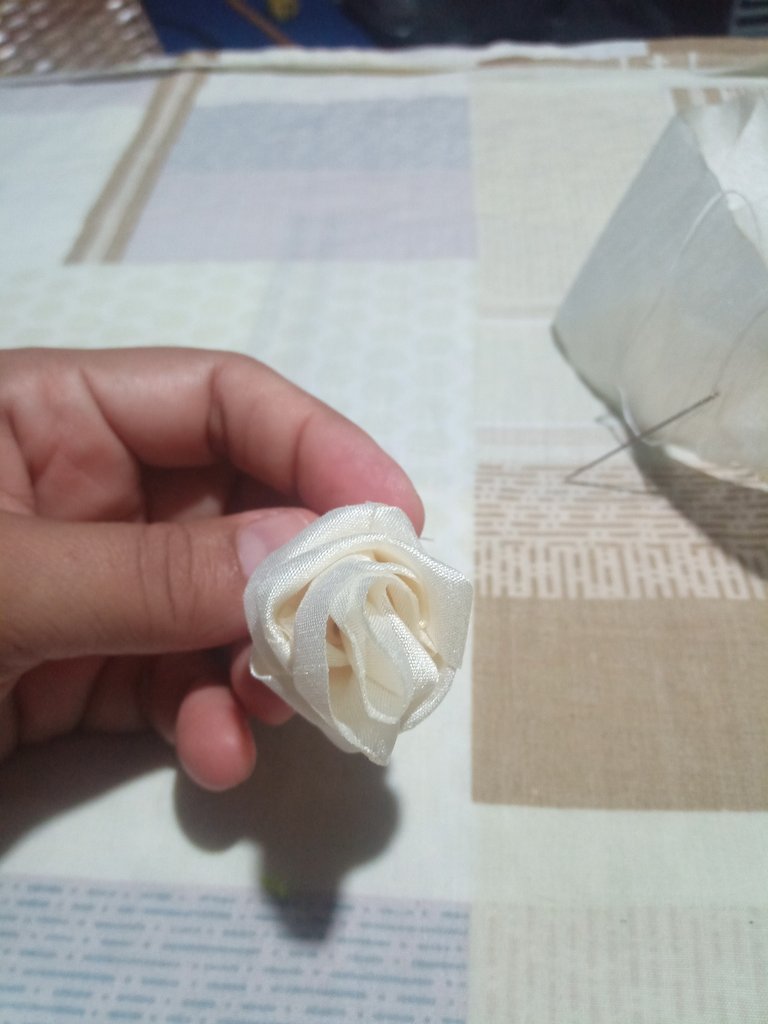
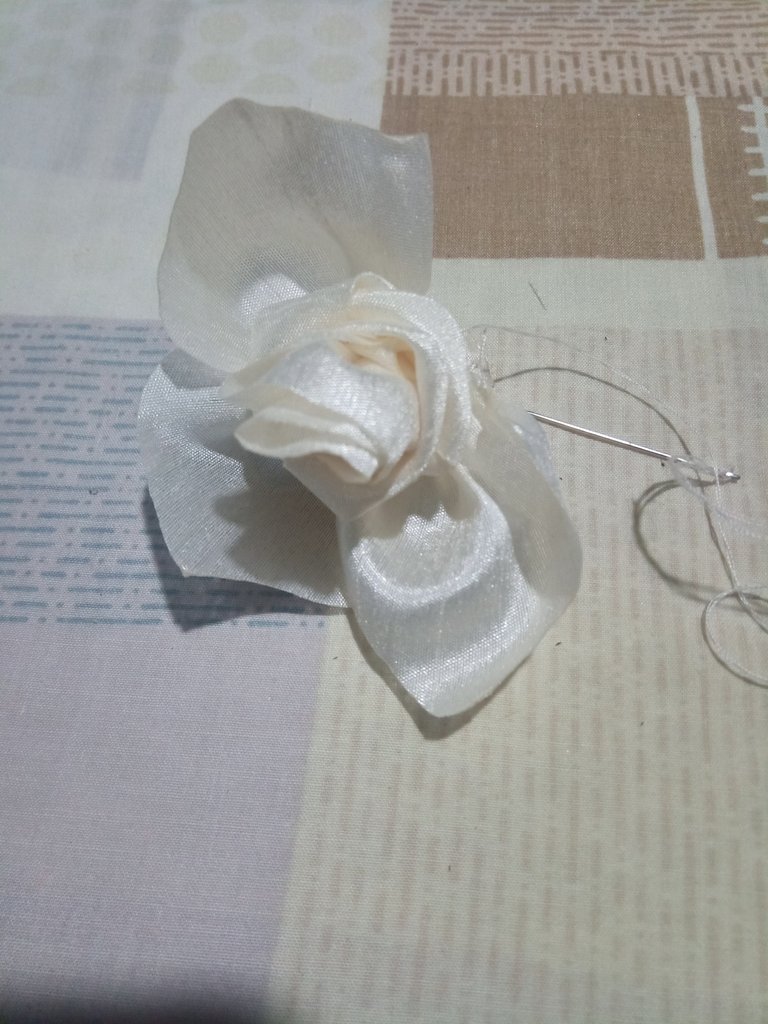
PASO 5
Luego de tener el centro de la rosa listo, empezaremos a pegar los pétalos, uno por uno empezando por los pétalos más pequeños y culminando con los más grandes, si queremos que se nos haga más fácil pegar los pétalos, le aconsejo que pueden hacer los pétalos dejándole la parte inferior más larga como algunos pétalos que recorte anteriormente, pueden notar que en la parte inferior son más largos que otros, esto lo hice para probar la habilidad al pegarlos y me dio muy buenos resultados, de lo que de ahora en adelante cada vez que vaya a ser rosas las are con ese tipo de pétalos, son muchos más fáciles al momento de montarlos y darle forma.
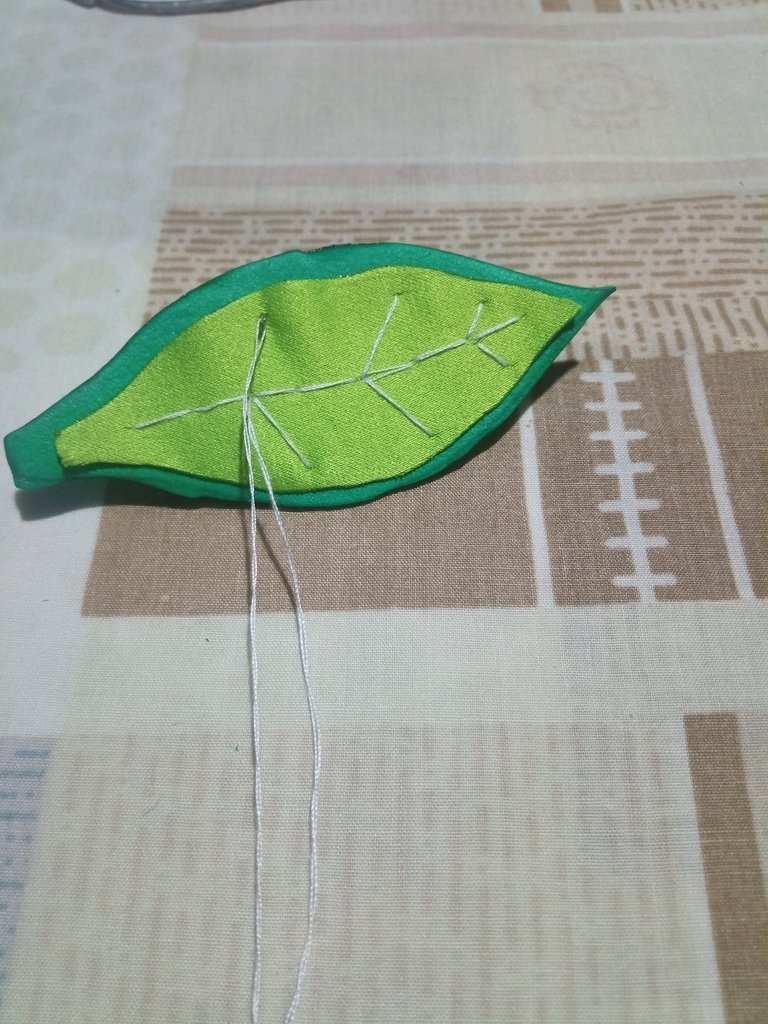
Para las hojas, tome unas de las hojas que recorte anteriormente y sobre esta coloque una de tela fijándola con hilo de color blanco para darle un efecto decorativo, simulando las venas de las hojas, las mismas son las que voy a colocar en las puntas de la hoja completa cuando arme cada una de las partes, así con este mismo proceso culmine la decoración del resto de las hojas, solo que las únicas que llevan tela son las de las puntas.
STEP 5
After having the center of the rose ready, we will begin to glue the petals, one by one starting with the smallest petals and ending with the largest, if we want to make it easier to glue the petals, I advise you that you can make the petals leaving the bottom longer as some petals that I cut previously, I did this to test the ability to glue them and it gave me very good results, so from now on every time I am going to make roses I will do them with this type of petals, they are much easier to assemble and shape them.
For the leaves, I took some of the leaves that I cut out previously and on top of it I placed a piece of fabric fixing it with white thread to give it a decorative effect, simulating the veins of the leaves, the same are the ones that I will place on the tips of the whole leaf when I assemble each of the parts, so with this same process I finished the decoration of the rest of the leaves, only that the only ones that have fabric are the ones on the tips.

PASO 6
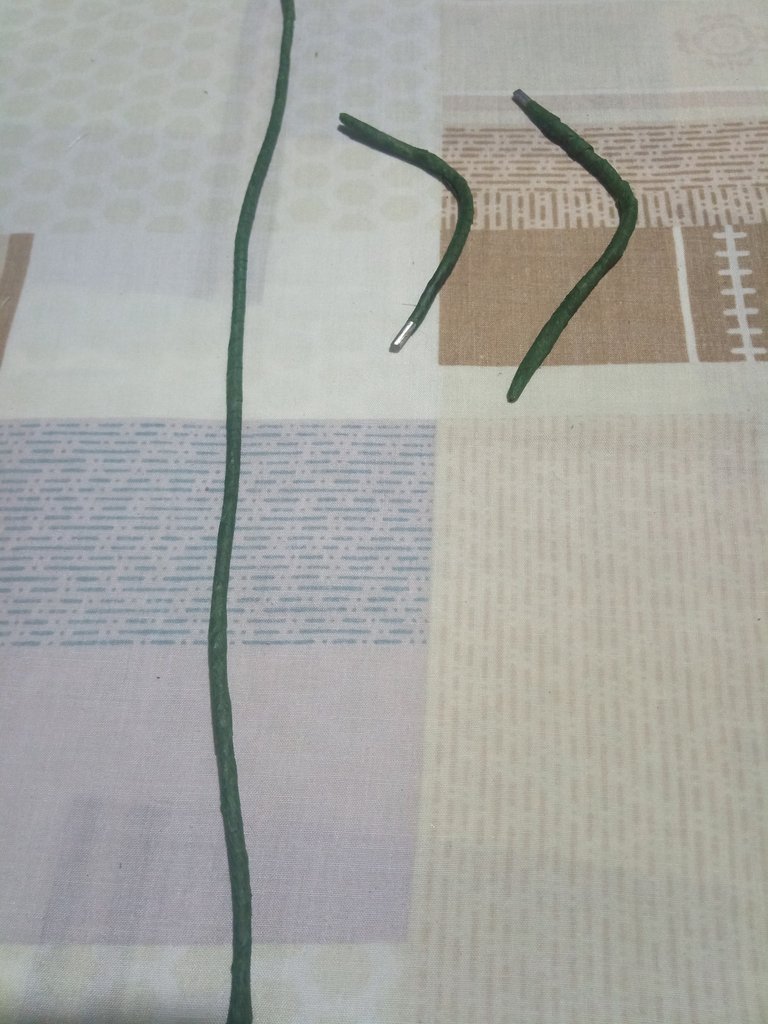
Para el tallo utilicé un alambre de aluminio de 30 centímetros de largo y dos más pequeñas, las mismas las cubrí con cinta adhesiva de color verde.
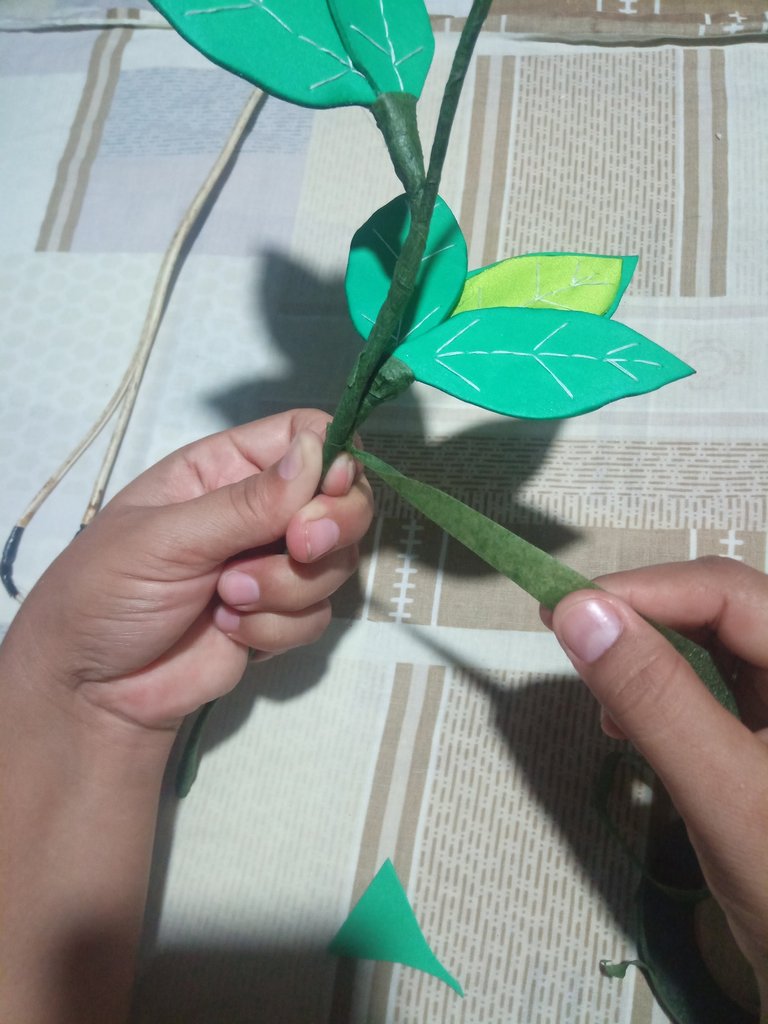
Sobre los dos tallos más pequeños, comencé a pegar con silicona, cada una de las hojas.
Y así es como va quedando esta decoración de las hojas, reservamos para luego colocarlas en el tayo con la cinta adhesiva verde.
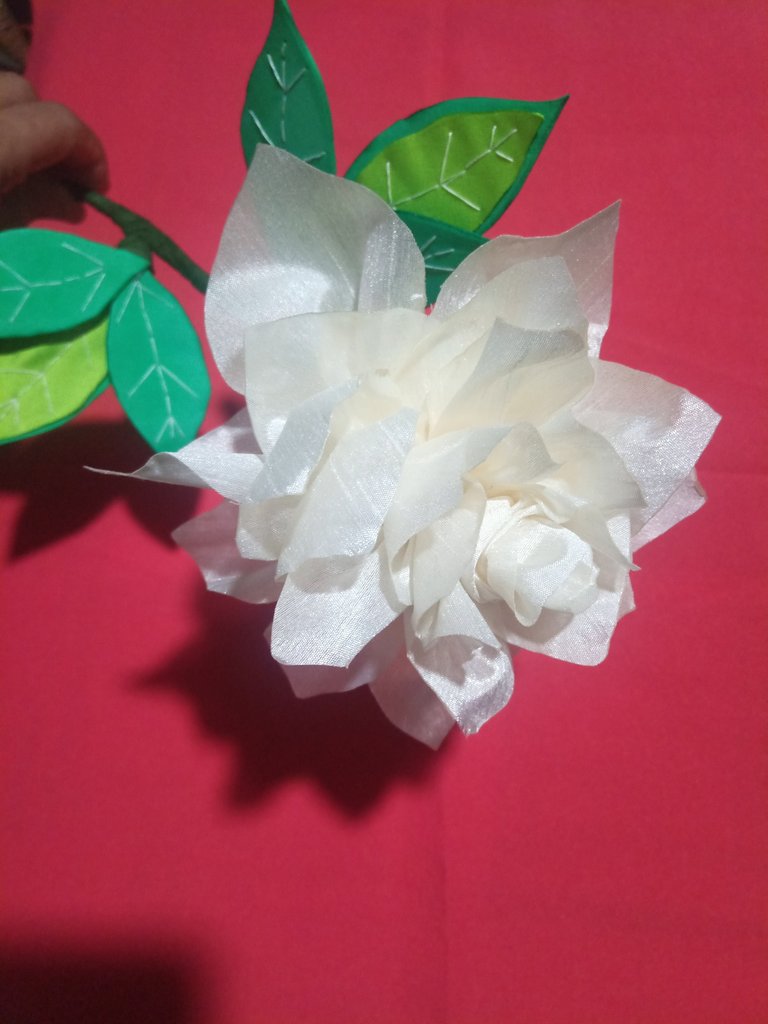
Vamos a ir sujetando con mucho cuidado cada una de las hojas y corrigiendo los detalles con las cintas adhesivas, para pegar la flor, utilice hilo y sobre este termine de asegurar la flor con cinta adhesiva.
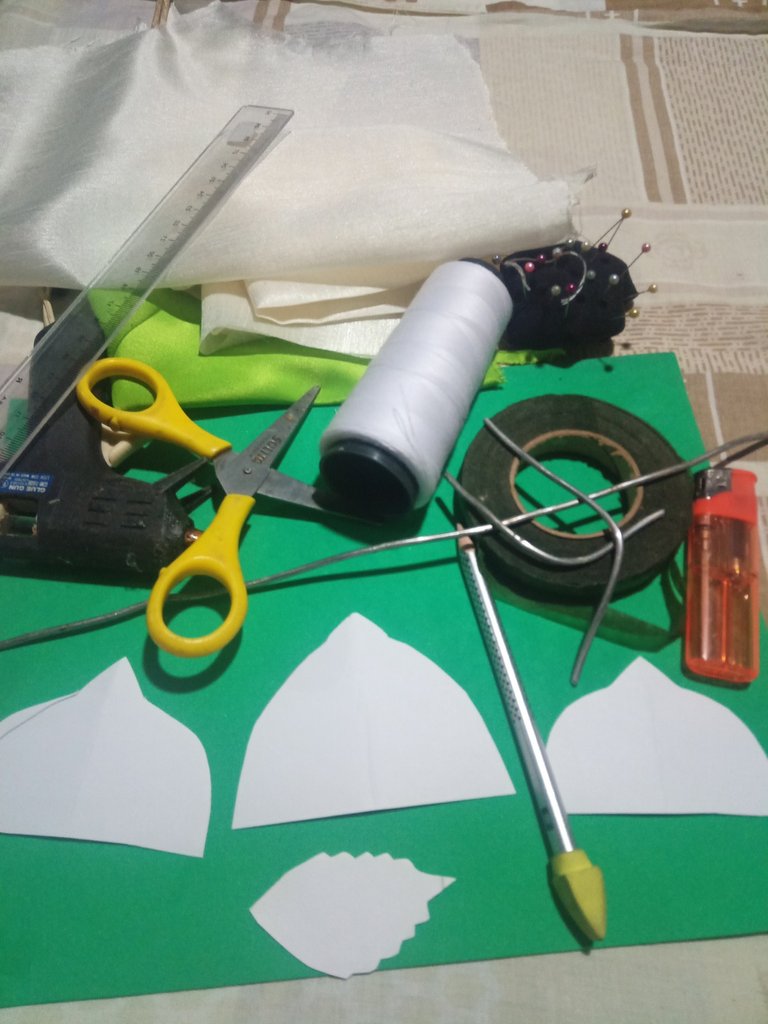
MATERIALES
Retazos de tela.
Hilo de color blanco.
Tijera.
Pistola de silicona.
Silicona.
Una regla.
Un lápiz.
Cinta adhesiva verde.
Encendedor.
Alfileres.
Aguja.
Patrones.
Foami.
Alambre grueso de aluminio.
Así culmino mi publicación amigos, espero que te haya gustado y hayas aprendido algo nuevo el día de hoy.
Nos veremos en otra publicación basada en el hermoso mundo del arte y las manualidades, donde seguiremos aprendiendo las técnicas que utilizamos en cada una de nuestras manualidades para ir cada día desarrollando habilidades útiles para el hogar y la familia, ya que esto nos ayuda a integrar a nuestros niños y abuelos que siempre se quedan en casa.
STEP 6
For the stem I used an aluminum wire of 30 centimeters long and two smaller ones, I covered them with green adhesive tape.
On the two smaller stems, I began to glue with silicone, each one of the leaves.
And this is how this decoration of the leaves is going to look like, we reserve them for later placing them on the stem with the green adhesive tape.
We are going to go carefully holding each of the leaves and correcting the details with the adhesive tapes, to glue the flower, use thread and on this finish securing the flower with tape.
MATERIALS.
Fabric scraps.
White thread.
Scissors.
Silicone gun.
Silicone.
A ruler.
Pencil.
Green adhesive tape.
Lighter.
Pins.
Needle.
Patterns.
Foami.
Thick aluminum wire.
This is the end of my publication friends, I hope you liked it and learned something new today.
See you in another publication based on the beautiful world of art and crafts, where we will continue learning the techniques we use in each of our crafts to go every day developing useful skills for home and family, as this helps us to integrate our children and grandparents who always stay at home.


social networks / redes sociales
![]()
![]()
Traductor Deepl
Translated Deepl
Ediciones Canva
Editions Canva


Hermosas para decorar... Amaría tenerlas en mi sala.
!discovery 25
gracias amiga, me alegro de que te haya gustado
This post was shared and voted inside the discord by the curators team of discovery-it
Join our community! hive-193212
Discovery-it is also a Witness, vote for us here
Delegate to us for passive income. Check our 80% fee-back Program
¡Felicidades! Esta publicación obtuvo upvote y fue compartido por @la-colmena, un proyecto de Curación Manual para la comunidad hispana de Hive que cuenta con el respaldo de @curie.
Si te gusta el trabajo que hacemos, te invitamos a darle tu voto a este comentario y a votar como testigo por Curie.
Si quieres saber más sobre nuestro proyecto, acompáñanos en Discord: La Colmena.
Your content has been voted as a part of Encouragement program. Keep up the good work!
Use Ecency daily to boost your growth on platform!
Support Ecency
Vote for new Proposal
Delegate HP and earn more
Muy muy hermosas!!!💕🌹🌹
gracias
Thank you for sharing this amazing post on HIVE!
Your content got selected by our fellow curator @rezoanulvibes & you just received a little thank you via an upvote from our non-profit curation initiative!
You will be featured in one of our recurring curation compilations and on our pinterest boards! Both are aiming to offer you a stage to widen your audience within and outside of the DIY scene of hive.
Join the official DIYHub community on HIVE and show us more of your amazing work and feel free to connect with us and other DIYers via our discord server: https://discord.gg/mY5uCfQ !
If you want to support our goal to motivate other DIY/art/music/homesteading/... creators just delegate to us and earn 100% of your curation rewards!
Stay creative & hive on!
Congratulations @lauracraft! You have completed the following achievement on the Hive blockchain and have been rewarded with new badge(s):
Your next target is to reach 400 comments.
You can view your badges on your board and compare yourself to others in the Ranking
If you no longer want to receive notifications, reply to this comment with the word
STOPCheck out the last post from @hivebuzz:
Support the HiveBuzz project. Vote for our proposal!
Muy bonitas y creativas, sin duda sirve para hacer un lindo arreglo para decorar, te felicito una gran creatividad, saludos.
Gracias amiga, me alegro que te haya gustado, saludos para ti también.