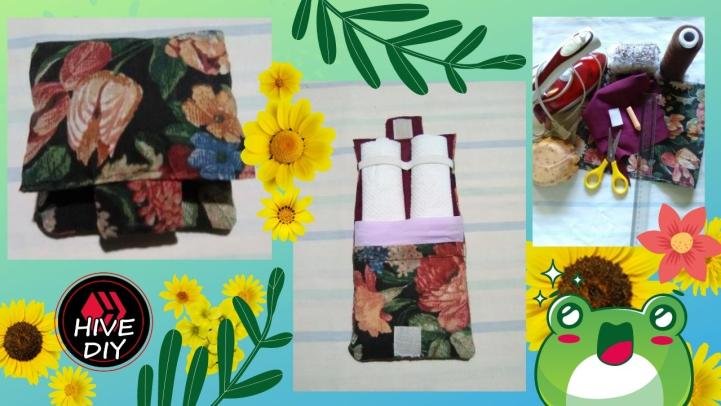
Nice and simple / Making an intimate personal utility case for women (ENG/ESP)

Saludos amigos diseñadores y artistas, sean todos bienvenidos a mi publicación.
Hoy les vengo a presentar mi participación al concurso de HiveDIY, donde les estaré mostrando un práctico estuche para guardar toallas sanitarias y papel higiénico o algún otro accesorio, es un estuche muy cómodo al momento de salir y llevar en nuestra cartera, morral entre otros, para proteger esos útiles personales tan íntimos que toda mujer en muchas ocasiones necesita llevar.
Aquí les voy a enseñar como elaborar este útil accesorio, para evitar que estos útiles personales puedan mostrarse a la hora de abrir nuestras carteras, ya que es muy parecido a un estuche de pinturas, lo que pasa desapercibido a cualquier ocasión.
Es muy lindo para regalar a nuestra mejor amiga, hija, madre.
Las fotografías que verán a continuación, fueron tomadas con mi teléfono modelo Alcatel_5044R.
Sin más preámbulos les presentó el paso a paso de como elabore este hermoso accesorio.

Greetings friends designers and artists, welcome to my publication.
Today I come to present my participation to the HiveDIY contest, where I will be showing you a practical case to store sanitary napkins and toilet paper or any other accessory, it is a very comfortable case when going out and carry in our purse, backpack and others, to protect those intimate personal items that every woman often needs to carry.
Here I am going to show you how to elaborate this useful accessory, to avoid that these personal tools can be shown at the time of opening our wallets, since it is very similar to a case of paints, which goes unnoticed to any occasion.
It is very nice to give as a gift to our best friend, daughter, mother.
The pictures you will see below were taken with my phone model Alcatel_5044R.
Without further ado I present the step by step of how I made this beautiful accessory.

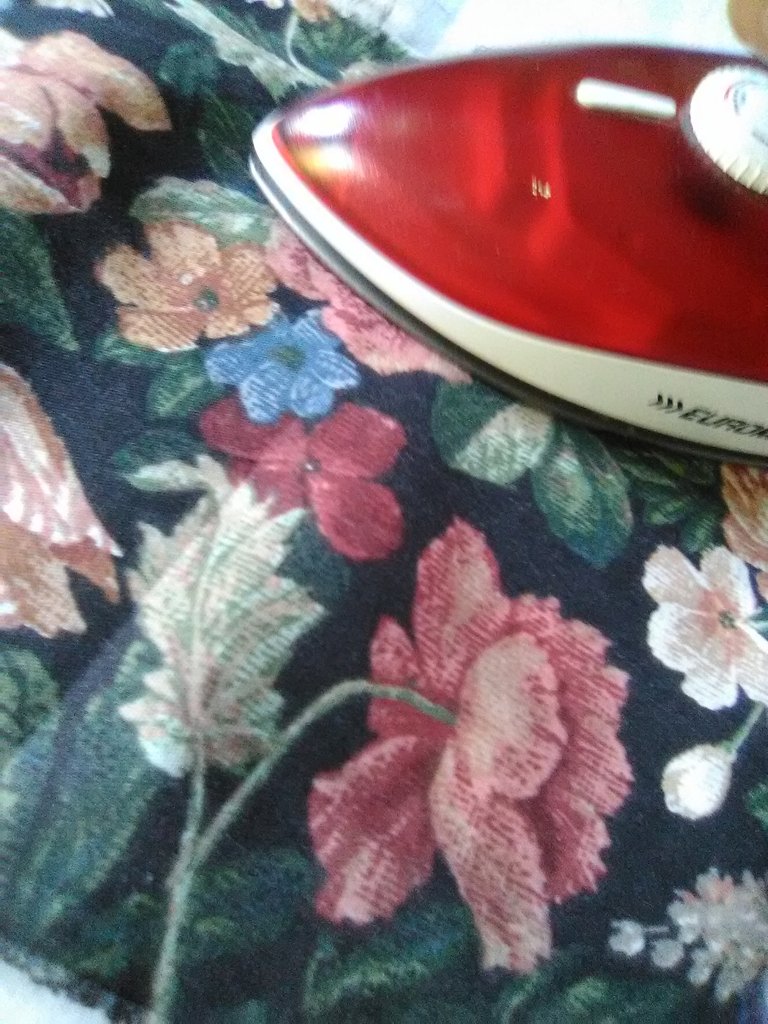
Paso 1
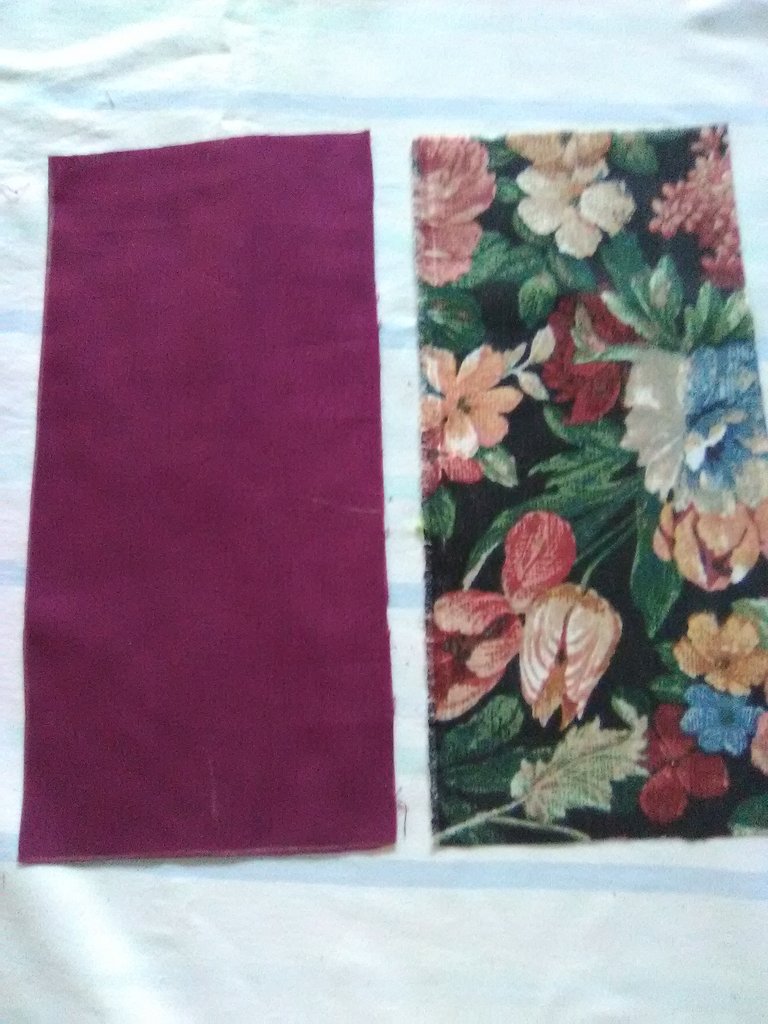
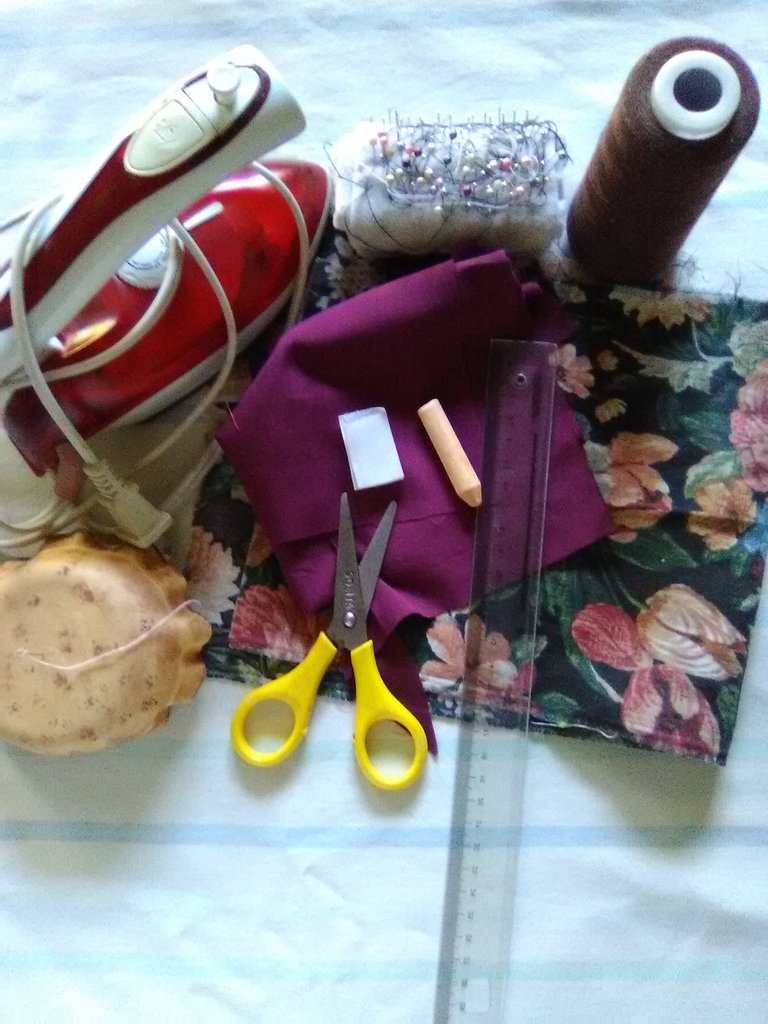
Para empezar a realizar este accesorio, es importante tener en la mesa todos los materiales que vamos a utilizar, como primer paso seleccionaremos los retazos, luego los plancharemos para poder marcar para que pueda quedar perfectamente las medidas.
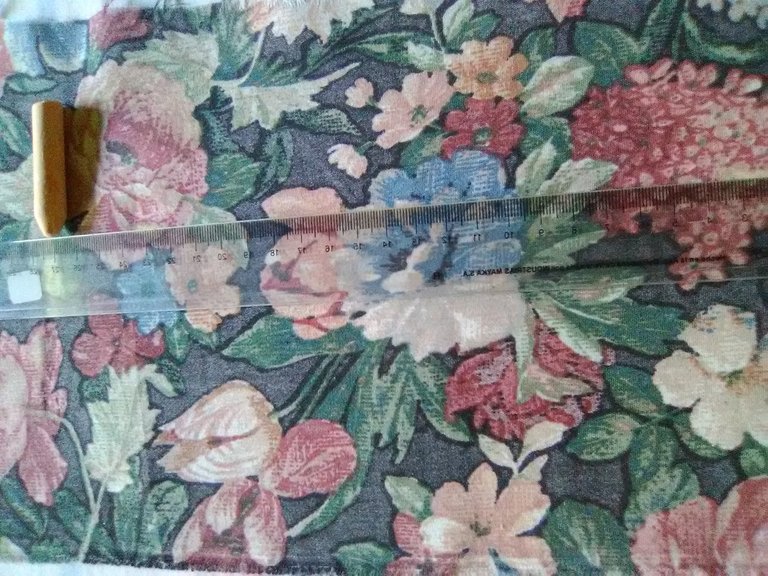
MEDIDAS
Para realizar el rectángulo, con la ayuda de una regla y una tiza, medí 14 centímetros de ancho y 27 centímetros de largo, de este será el tamaño de nuestro accesorio, si lo deseas más grande aumenta las medidas.
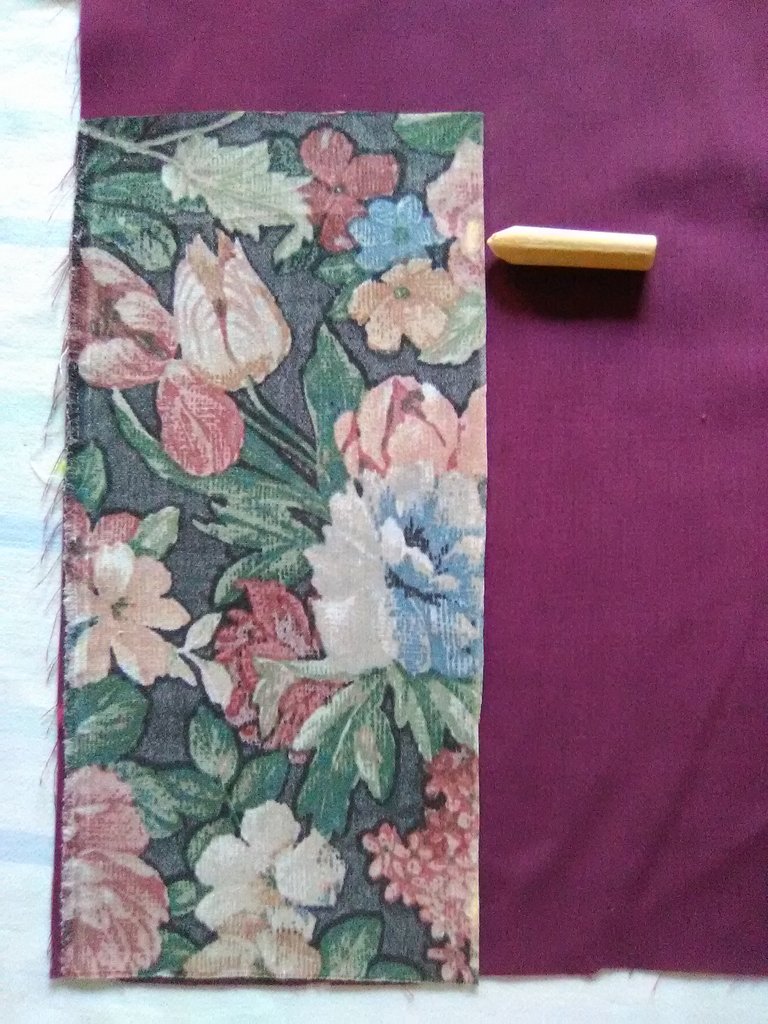
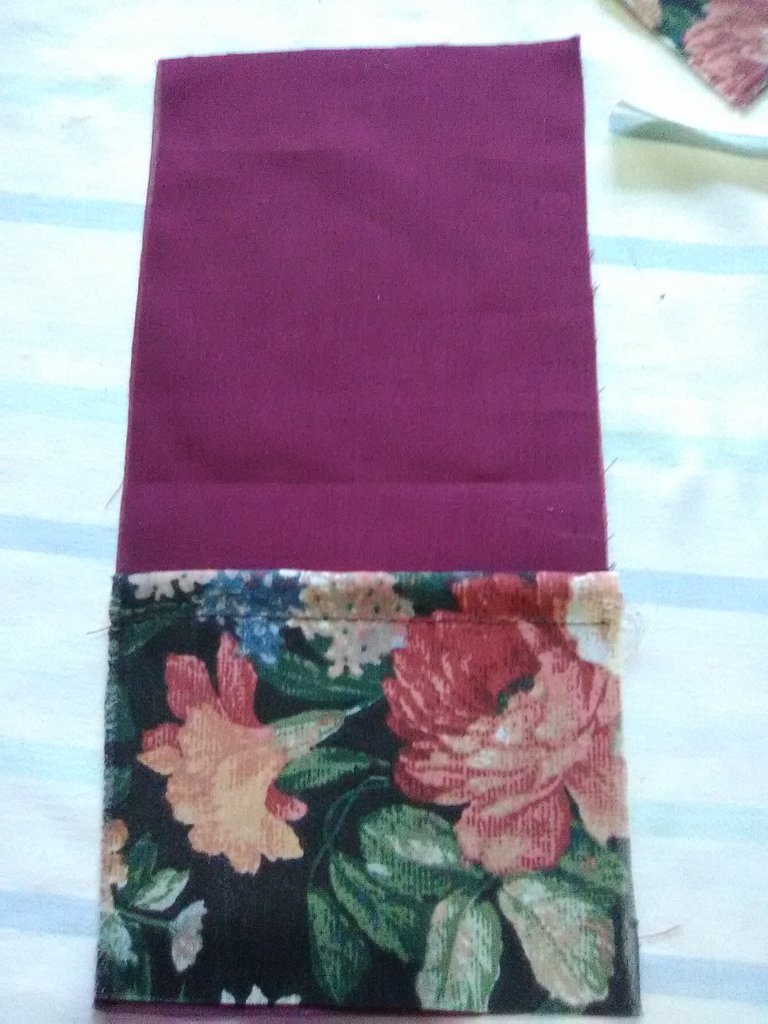
Después de tener las medidas, corte la primera capa de tela estampada, esta es la que adornara la parte de afuera del accesorio, luego utilice el corte de esta tela estampada como molde para cortar la capa que llevara la parte interna del accesorio.
Step 1
To start making this accessory, it is important to have on the table all the materials that we are going to use, as a first step we will select the scraps, then we will iron them to be able to mark so that it can be perfectly the measures.
MEASUREMENTS.
To make the rectangle, with the help of a ruler and a chalk, measure 14 centimeters wide and 27 centimeters long, this will be the size of our accessory, if you want it bigger increase the measurements.
After having the measurements, cut the first layer of printed fabric, this is the one that will adorn the outside of the accessory, then use the cut of this printed fabric as a mold to cut the layer that will be the inner part of the accessory.
PASO 2
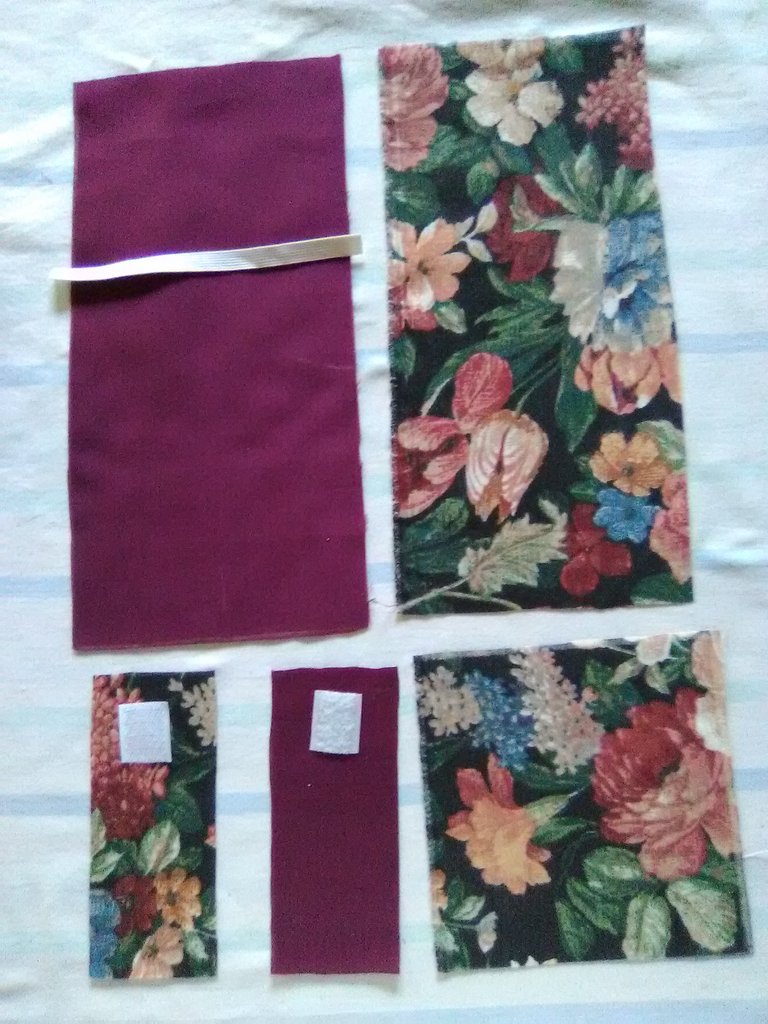
Pueden ver como se notan las dos capas después de haber cortado cada una de ellas.
Para el broche podemos aplicar las mismas técnicas que usamos anteriormente, pero con menores medidas, las cuales son: 6 centímetros de largo por 6 centímetros de ancho.
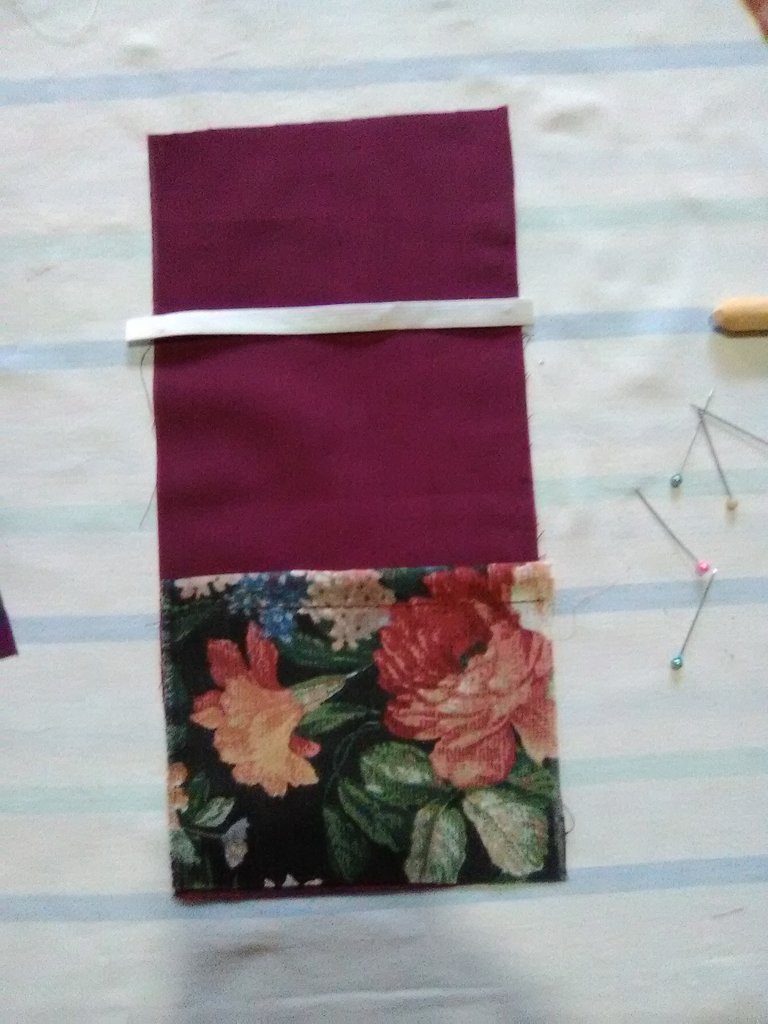
Para el bolsillo medí 14 centímetros de ancho por 14 centímetros de largo, este contiene una sola capa de tela estampada o de nuestra preferencia, ya seria cuestión de gustos.
La goma tiene las medidas de ancho del estuche de 14 centímetros, y dos pedazos de cierre mágico, que van cosidos en la haza y el otro en el bolsillo.
STEP 2
You can see how the two layers are visible after cutting each one of them.
For the brooch we can apply the same techniques we used before, but with smaller measurements, which are: 6 centimeters long by 6 centimeters wide.
For the pocket I measured 14 centimeters wide by 14 centimeters long, this contains a single layer of printed fabric or our preference, it would be a matter of taste.
The gum has the measures of width of the case of 14 centimeters, and two pieces of magic clasp, which are sewn in the hull and the other in the pocket.
PASO 3
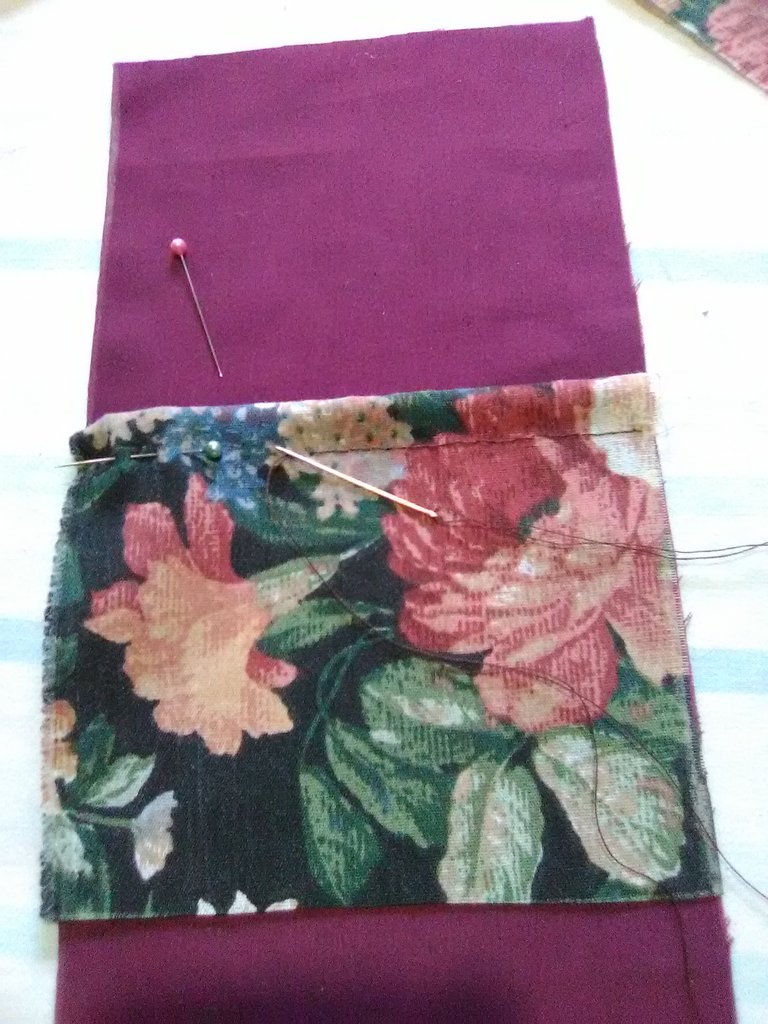
Para cocer el bolsillo, aremos un primer doble en la parte superior de 1 centímetro, luego volveremos a doblar otro centímetro, lo aseguraremos con alfileres y coceremos ese doble con la aguja, he hilo del color que no se note mucho, en mi caso utilice el color marrón oscuro.
Pueden notar como nos va quedando y en la posición de como debe ir al momento de cocerla.
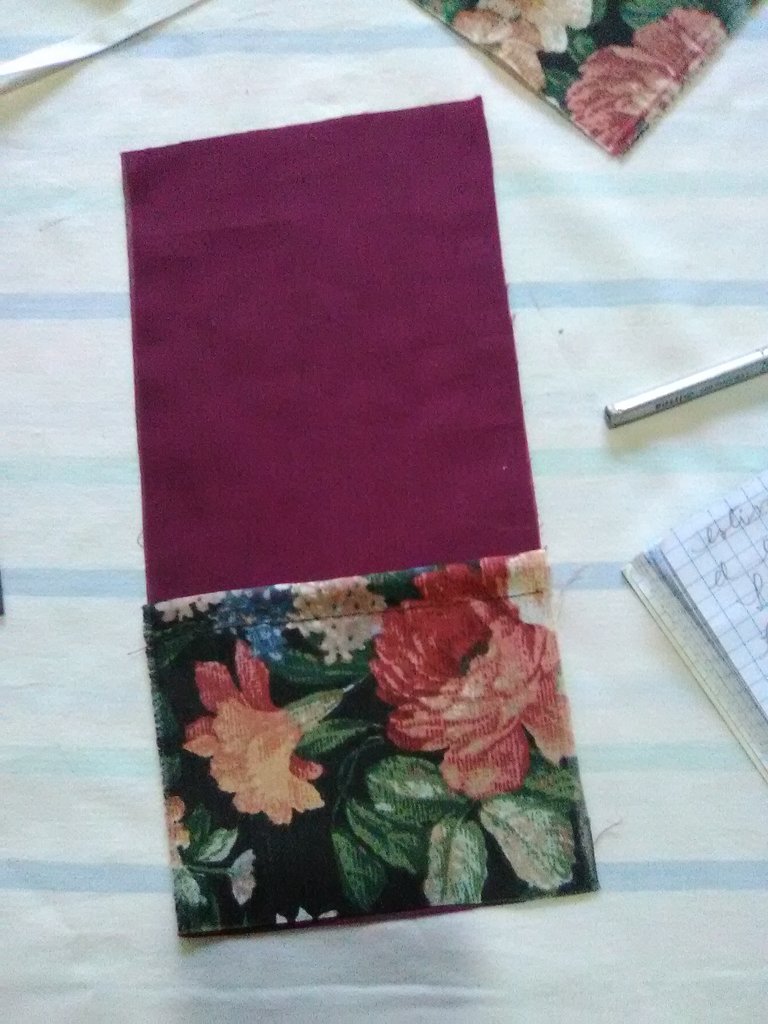
Después comenzamos a doblar por la mitad para hacer una marca por la mitad que nos indicara como va a ir cerrado este accesorio.
STEP 3
To sew the pocket, we will make a first fold in the upper part of 1 centimeter, then we will fold again another centimeter, we will secure it with pins and we will sew that double with the needle, I have thread of the color that is not very noticeable, in my case I used the dark brown color.
You can see how it will be and in the position of how it should be at the moment of sewing.
Then we begin to fold in half to make a mark in the middle that will indicate how this accessory will be closed.

PASO 4
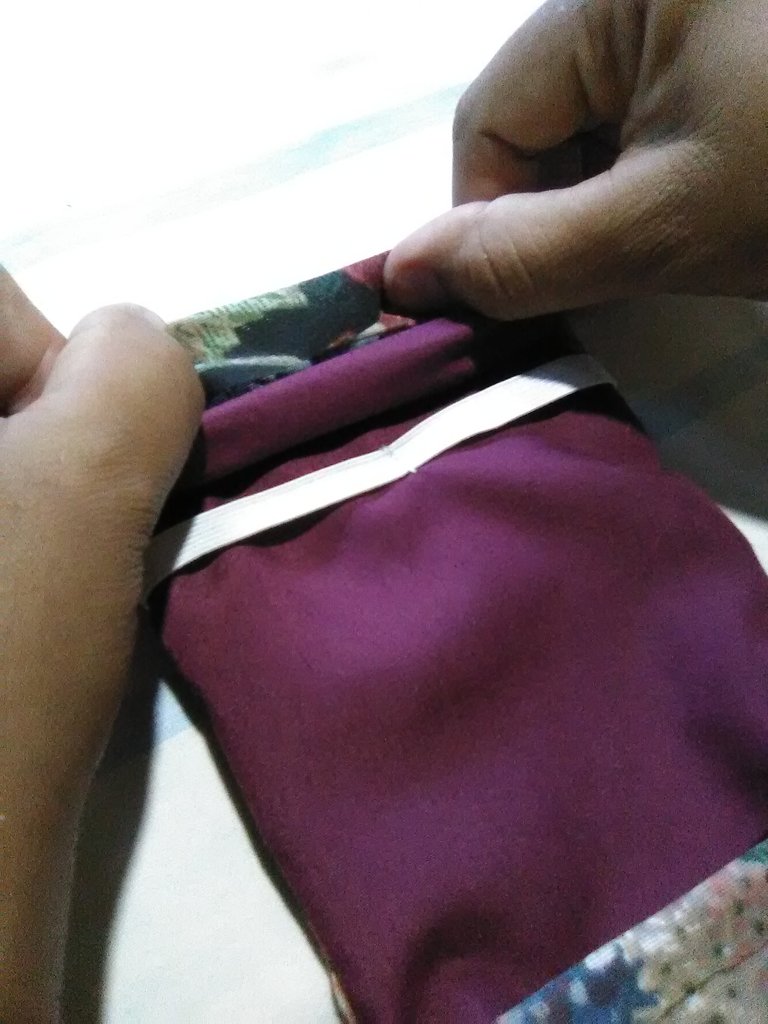
Para la goma de 14 centímetros de largo, se sujetará a ala tela unicolor con unas puntadas con la aguja para sujetarla, la goma no se estira para evitar arrugar el estuche.
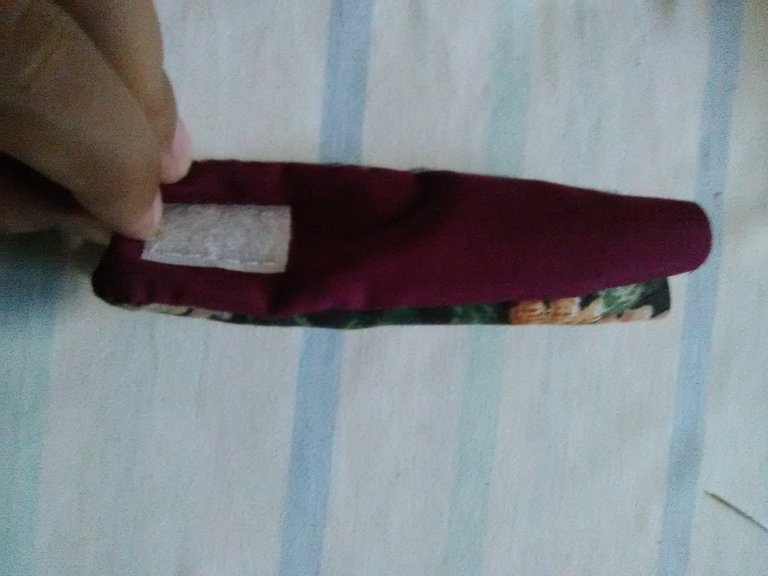
Luego de culminar con todas las piezas, vamos a armar las piezas, colocaremos primero la tela unicolor previamente con la goma cosida y el bolsillo, sobre estas colocaremos el trozo de tela estampado (o de su preferencia) con el lado derecho hacia adentro, y el lado revés hacia afuera, después con la ayuda de los alfileres iremos sujetando todo el contorno para poderlo cocer de manera cómoda y no se nos mueva para que no quede desproporcionada la costura, dejando la parte superior abierta, para voltearla y colocar la haza.
La haza la cocemos de la misma manera, un lado derecho y un lado revés para luego voltearla, pero antes de cocerla, debemos colocar primero el cierre mágico del lado derecho de la tela unicolor, para el momento de voltearla no se note la costura.
STEP 4
For the 14 centimeters long rubber band, it will be attached to the unicolor fabric with a few stitches with the needle to hold it, the rubber band is not stretched to avoid wrinkling the case.
After finishing with all the pieces, we will assemble the pieces, first we will place the unicolor fabric previously with the sewn rubber and the pocket, on these we will place the piece of printed fabric (or your preference) with the right side facing in, and the back side facing out, then with the help of the pins we will hold the entire contour to be able to bake it comfortably and not move so that the seam is not disproportionate, leaving the top open, to turn it over and place the feather.
We will sew the feather in the same way, one side right and one side backwards and then turn it over, but before sewing it, we must first place the magic zipper on the right side of the unicolor fabric, so that when we turn it over, the seam will not be noticeable.

PASO 5
Después de cocer los tres lados, volteamos por el lado superior y procederemos a cocer la haza en este lado, haciendo un doble de un centímetro hacia adentro, sosteniéndolo, colocaremos hacia el centro de la haza de 6 centímetros de largo, lo sujetaremos con los alfileres para luego cocer, tratando de que el hilo sea del mismo color o de un color que no pueda notarse mucho.
Por la parte céntrica de la goma, haremos unas puntadas para dividir dos lados donde podremos colocar el papel higiénico, pañuelo, entre otras cosas.
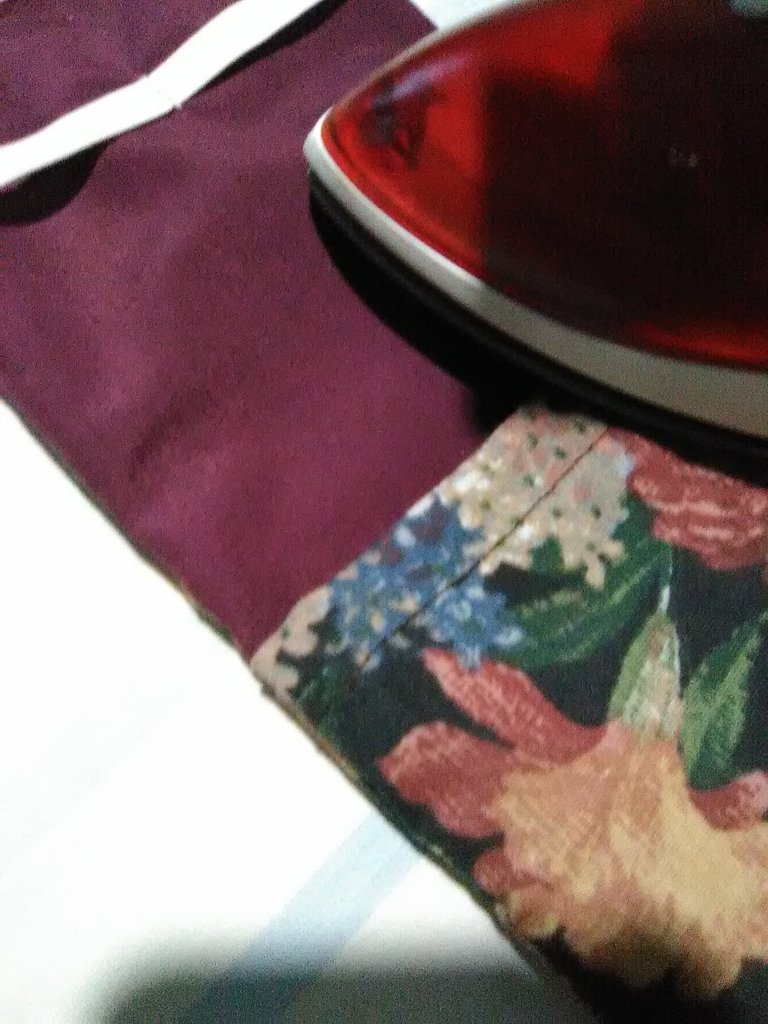
Culminando todos los detalles, pasaremos la plancha sobre este hermoso accesorio para obtener un mejor resultado.
Consejo: si deseamos podemos colocar dos láminas de cartón o plástico resistente dentro del bolsillo para hacer más resistente, este porta útiles personales y evitar deformidades en el accesorio, en este caso no lo coloque porque no contaba con el material, pero es opcional, cortas un cuadro del tamaño del bolsillo y lo introduces en el mismo para dar mayor protección.
STEP 5.
After baking the three sides, we turn over the upper side and we will proceed to bake the dough on this side, making a double of one centimeter inwards, holding it, we will place it towards the center of the dough of 6 centimeters long, we will hold it with the pins to then bake, trying that the thread is of the same color or of a color that can not be noticed too much.
On the central part of the gum, we will make some stitches to divide two sides where we will be able to place the toilet paper, handkerchief, among other things.
After finishing all the details, we will pass the iron over this beautiful accessory to obtain a better result.
Tip: if we wish we can place two sheets of cardboard or resistant plastic inside the pocket to make it more resistant, this personal tool holder and avoid deformities in the accessory, in this case I did not place it because I did not have the material, but it is optional, cut a square the size of the pocket and insert it in it to give greater protection.

PASO 6
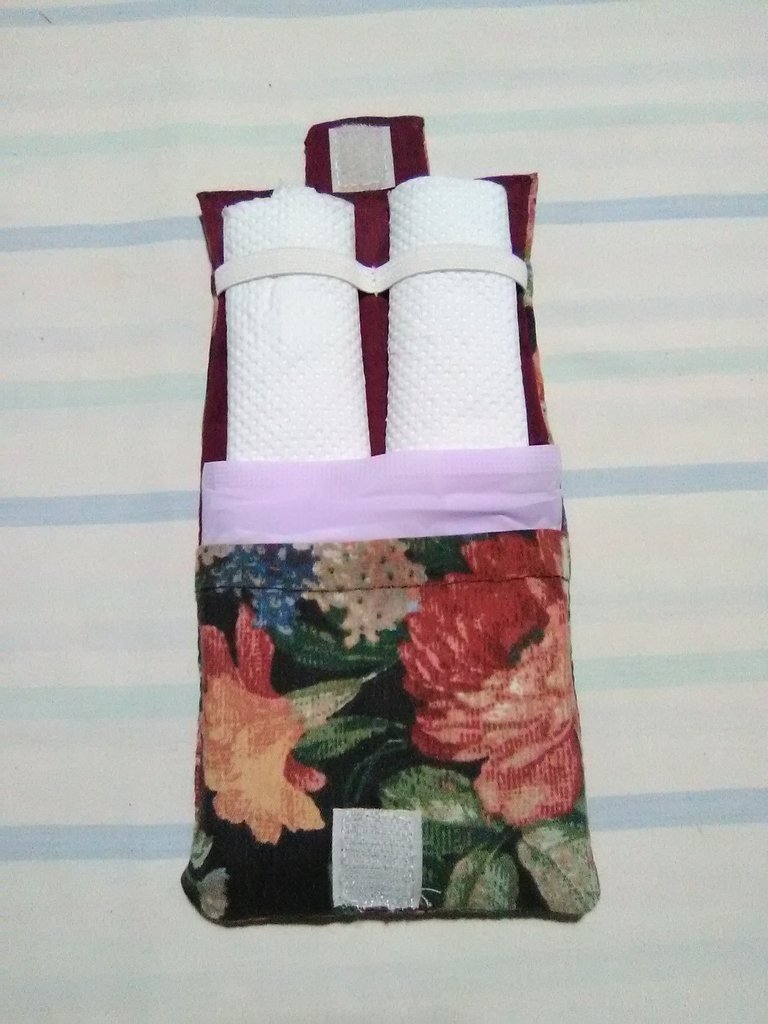
Y de esta forma pueden notar como nos quedó este hermoso accesorio de útiles personales íntimos, ha sido un placer compartir con ustedes mis conocimientos, espero que sea de su agrado y lo pongan en práctica.
Materiales:
Aguja.
Hilo blanco.
Hilo marrón.
Regla.
Plancha.
Tijera.
Tiza.
Alfileres.
Retazos de tela.
Cierre mágico.
Goma.
STEP 6
And in this way you can see how we got this beautiful accessory of intimate personal tools, it has been a pleasure to share with you my knowledge, I hope you like it and put it into practice.
Materials:
Needle.
White thread.
Brown thread.
Ruler.
Iron.
Scissors.
Chalk.
Pins.
Fabric scraps.
Magic clasp.
Rubber band.
social networks / redes sociales
![]()
![]()
Traductor Deepl
Translated Deepl
Ediciones Canva
Editions Canva

Congratulations @lauracraft! You have completed the following achievement on the Hive blockchain and have been rewarded with new badge(s):
Your next target is to reach 500 replies.
You can view your badges on your board and compare yourself to others in the Ranking
If you no longer want to receive notifications, reply to this comment with the word
STOPSupport the HiveBuzz project. Vote for our proposal!
Lindísimo, útil y no nos puede faltar en la cartera.
Gracias por dejarnos el paso a paso.
ME alegro mucho de que te haya gustado amiga, espero que te sea útil, saludos.
Te quedó muy lindo, delicado y es muy práctico. Gracias por compartir tu trabajo.
🎆🎇🎉🎊🌧️💐✨🌾🌱🌹🌙🌿🍃🥀⚡🌺☘️🍀🌈🌷⭐🪴🌵🌸🌟💮🌴🌳💫☀️💮☔🌲🌳🌍🌌🌠☄️🏵️🐝🌻🌼🍄🐞🦋💙☕💜🍍🎆🎇🎉🎊
Gracias a usted amiga por tu apoyo, Saludos.
Hermoso trabajo 👏 me gusto mucho y la utilidad que tiene . Saludos
gracias amiga, me alegro que te haya gustado