Ahorremos algo de dinero y salgamos del apuro "Cajitas Sorpresa" // Let's save some money and get out of trouble "Surprise Boxes"
¡BIENVENIDOS A MI BLOG!
No les ha pasado que quieren realizarle un detallito a alguien y no encuentran la forma de entregar el presente que no sea en una simple bolsa de papel? Pues, hoy les traigo una idea fabulosa y muy rápida de hacer en casa sin gastar mucho dinero y si tienes los materiales, muchísimo mejor. Son cajitas que las denominé Cajitas sorpresa porque a pesar de ser pequeñas puedes meter infinidad de cositas, como caramelos, zarcillos, cadenas, pulseras, entre muchas cosas más.
Próximamente celebraremos el día del padre y el día de los niños, y son muchos los padres y los niños que conocemos y a todos quisiéramos hacerle un obsequio pero nuestro poder adquisitivo no alcanza para mucho. Con estas cajitas resolvemos esta situación. Rellenamos con algunas golosinas, y listo.
Ahora, vamos a ver cómo se realizan. Acompáñame!
WELCOME TO MY BLOG! Hasn't it happened to you that you want to make a little detail for someone and you can't find a way to deliver the present other than in a simple paper bag? Well, today I bring you a fabulous and very quick idea to do at home without spending a lot of money and if you have the materials, much better. They are little boxes that I called Surprise Boxes because despite being small you can put countless little things, such as candies, earrings, chains, bracelets, among many other things.
Soon we will celebrate Father's Day and Children's Day, and there are many parents and children that we know and we would all like to make a gift but our purchasing power is not enough for much. With these boxes we solve this situation. We fill with some goodies, and voila.
Now, let's see how they are done. Accompany me!


MATERIALES
- Cartulina de colores
- Pega de silicón
- Cintas de papel
- Virutas
- Lápiz de grafito
- Regla
- Tijera
MATERIALS
- Colour cardboard
- silicone glue
- Paper tapes
- Chips
- Graphite pencil
- Rule
- Scissors

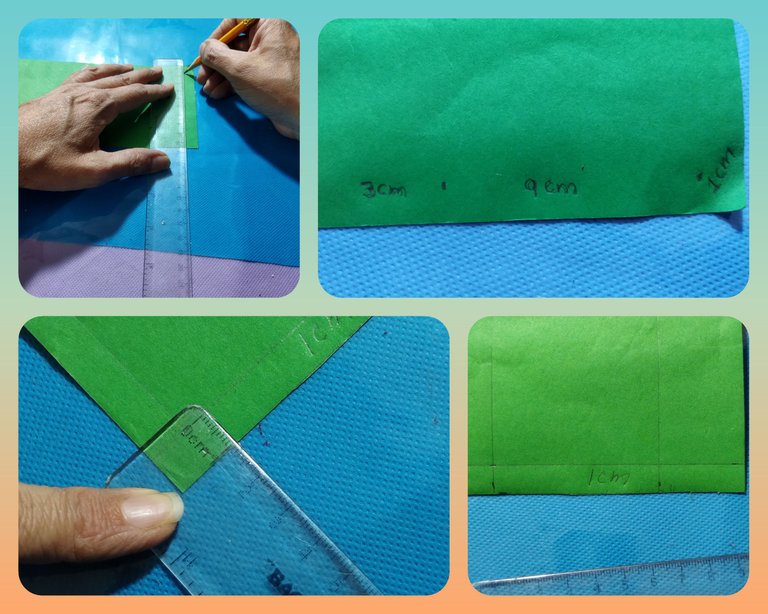
Paso 1
Trazamos un rectángulo de 10 cm x 21 cm. Una vez trazado recortamos.
> Step 1
We draw a rectangle of 10 cm x 21 cm. Once traced we cut.

Paso 2
Una vez realizado el corte, haremos una división de los 10 cm, en 1 cm, 9 cm y 3 cm y realizamos una línea en cada marca hasta el otro extremo, obteniendo así tres divisiones.
> Step 2
Once the cut is made, we will make a division of 10 cm, 1 cm, 9 cm and 3 cm and make a line at each mark to the other end, thus obtaining three divisions.
Paso 3
A continuación marcaremos en la división de 3 cm x 21cm, 10 rallas de 2 cm de ancho y doblamos para marcar las lineas de corte y de doblez.
> Step 3
Next we will mark in the division of 3 cm x 21cm, 10 stripes of 2 cm wide and fold to mark the cutting and folding lines.
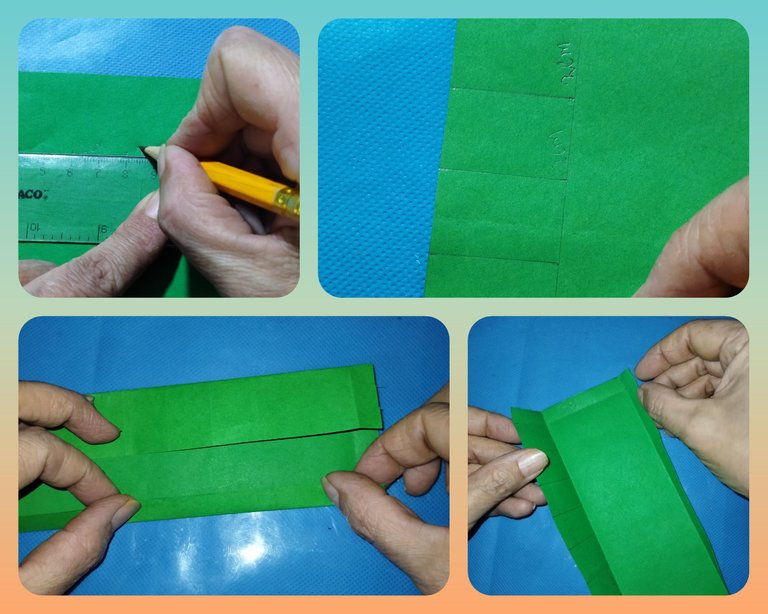
Paso 4
Haremos un corte en la unión de las líneas divisoras de 1 cm en uno de los extremos. E igualmente realizamos otro corte en la unión de los 3cm por 1 cm.
> Step 4
We will make a cut in the union of the dividing lines of 1 cm in one of the ends. And we also make another cut at the union of 3cm by 1 cm.
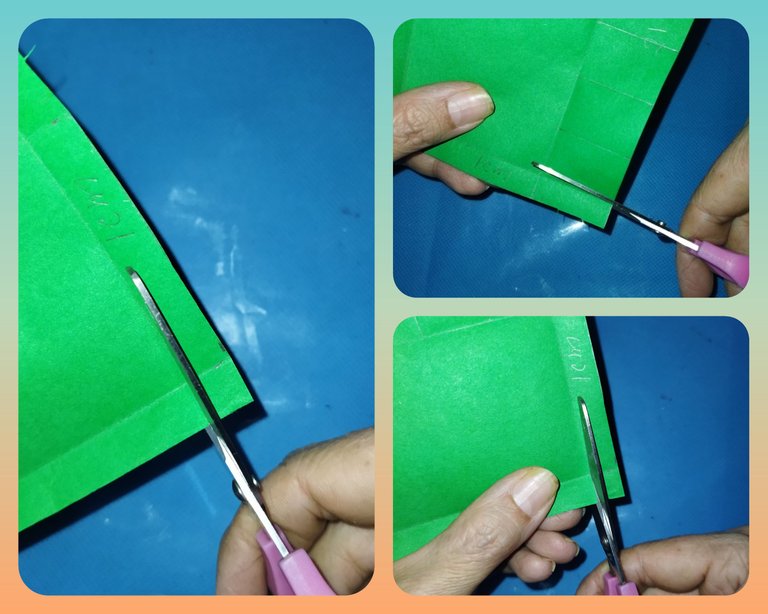
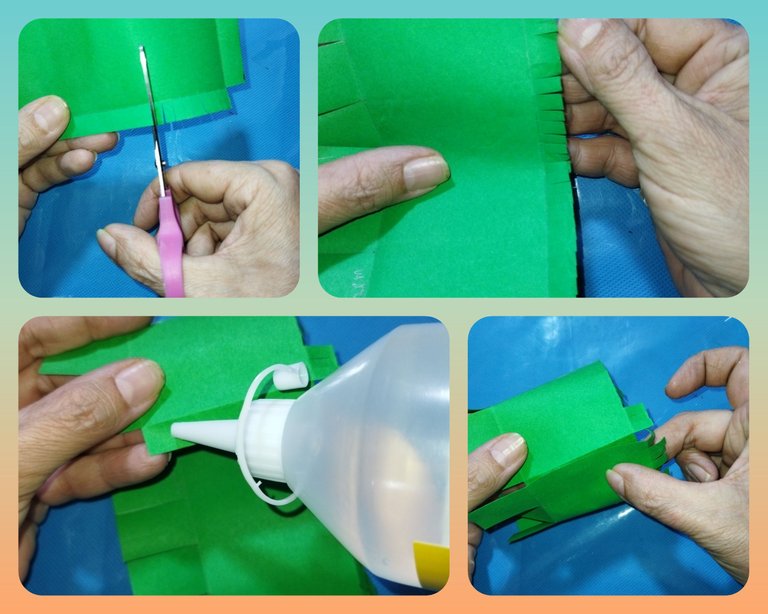
Paso 5
Realizaremos pequeños cortes en el de 5mm aproximadamente en la división sobrante de 1 cm, tratando de no sobrepasar la linea divisora.
Igualmente realizaremos los cortes en las lineas realizadas en la división de 3 cm.
Con la pega de silicón uniremos los extremos para formar un cilindro.
Step 5
We will make small cuts of approximately 5mm in the remaining division of 1 cm, trying not to exceed the dividing line.
We will also make the cuts in the lines made in the 3 cm division.
With the silicone glue we will join the ends to form a cylinder.
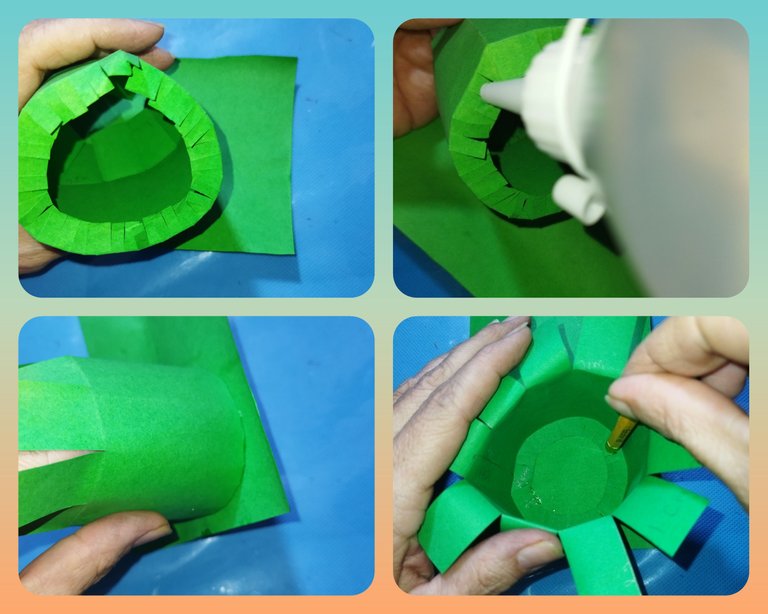
Paso 6
Una vez formado el cilindro, realizaremos la tapa trasera. Para ello, doblamos las pestañas hacia dentro y colocamos silicón en todo el contorno. Luego pegaremos en un trozo de cartulina con las medidas adecuadas para tal fin. Pegamos y hacemos presión por dentro para asegurarnos que quede bien pegada.
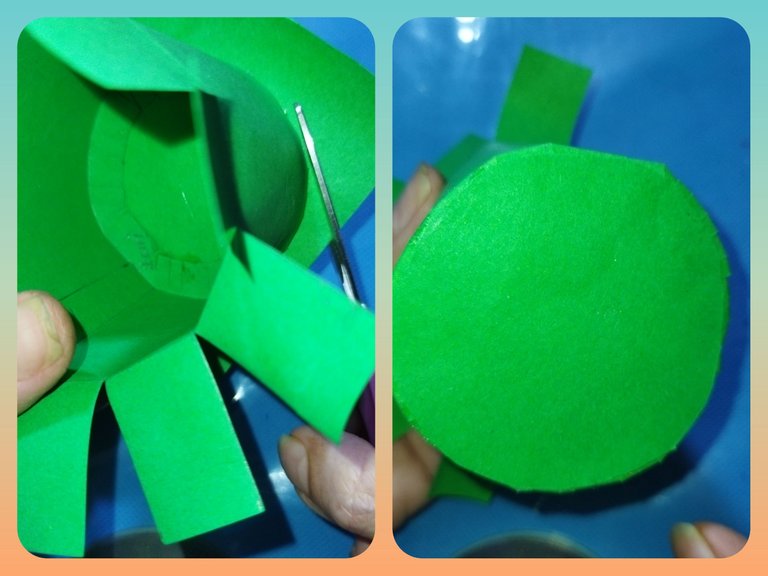
Cuando esté bien seca recortamos el exceso de cartulina.
Step 6
Once the cylinder is formed, we will make the back cover. To do this, we fold the tabs inward and place silicone all around. Then we will paste on a piece of cardboard with the appropriate measures for this purpose. We glue and press inside to make sure it is well glued.
When it is dry, cut off the excess cardboard.
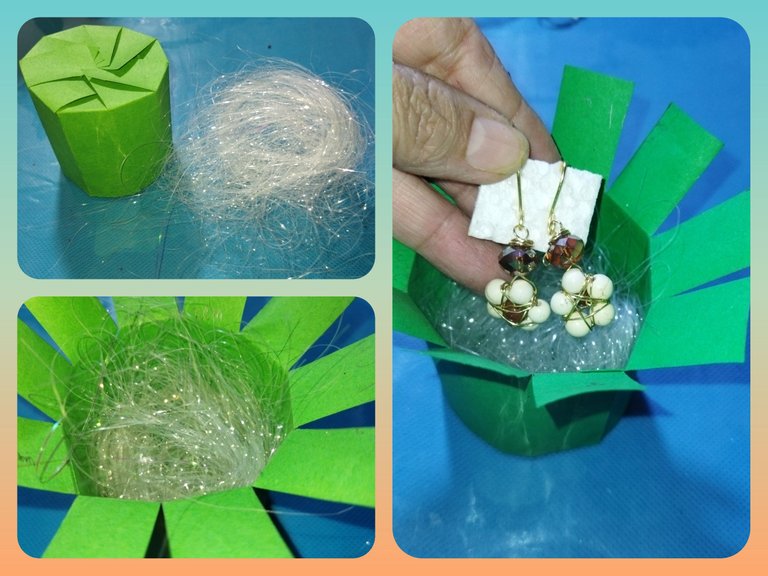
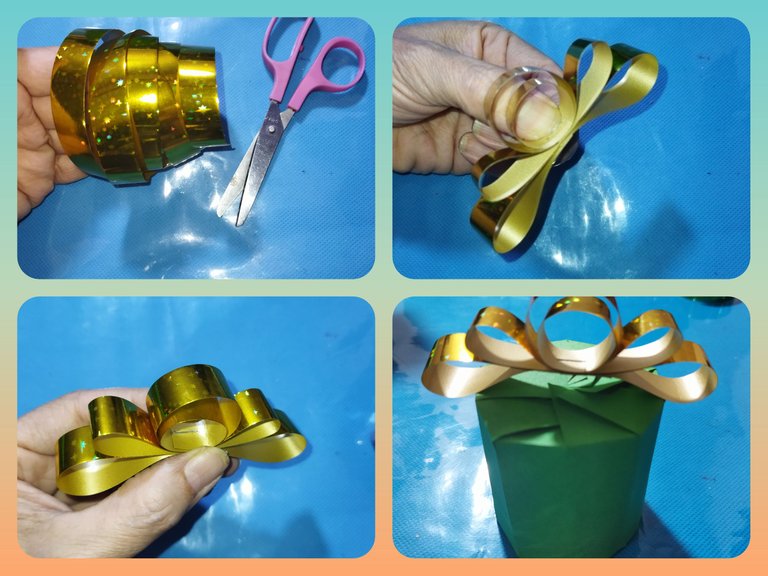
Paso 7
De esta forma hemos formado nuestra pequeña caja sorpresa. Podemos rellenarlas con virutas variadas y colocamos el detalle. Para cerrarla, lo haremos en forma de espiral, doblando una a una las pestañas, una encima de la otra y al finalizar la última pestaña hacemos una pequeña presión en el centro para cerrar.
Step 7
In this way we have formed our little surprise box. We can fill them with various shavings and place the detail. To close it, we will do it in the form of a spiral, folding the tabs one by one, one on top of the other and at the end of the last tab we make a small pressure in the center to close.
Paso 8
Para finalizar y darle ese toque personal, realizamos un lazo con cinta de papel. Podemos realizar el que más nos guste.
Step 8
To finish and give it that personal touch, we made a bow with paper tape. We can make the one we like the most.
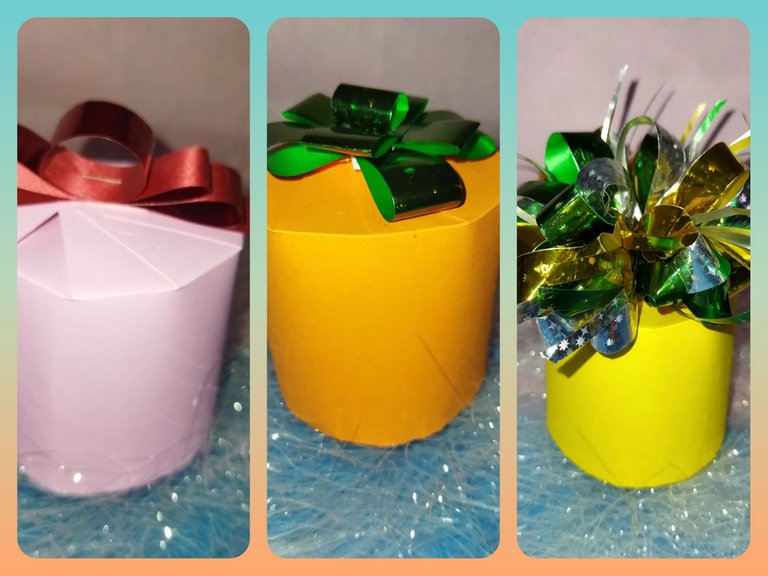
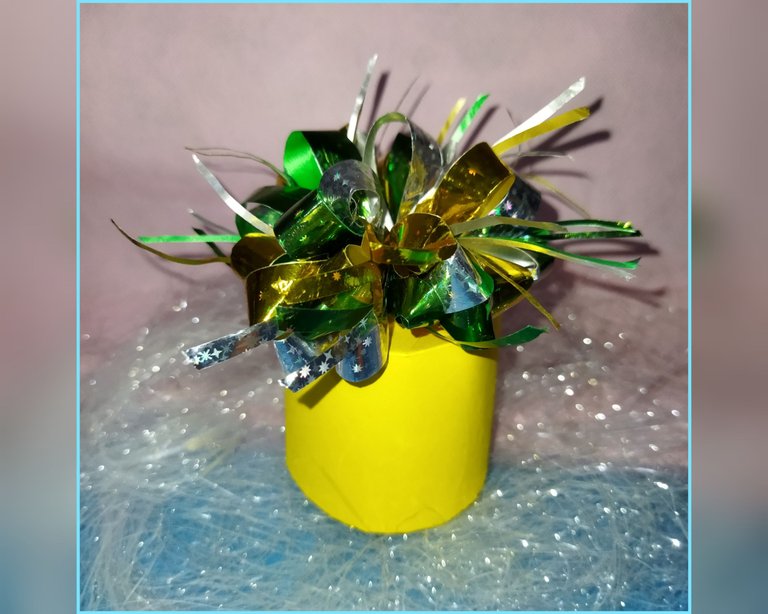
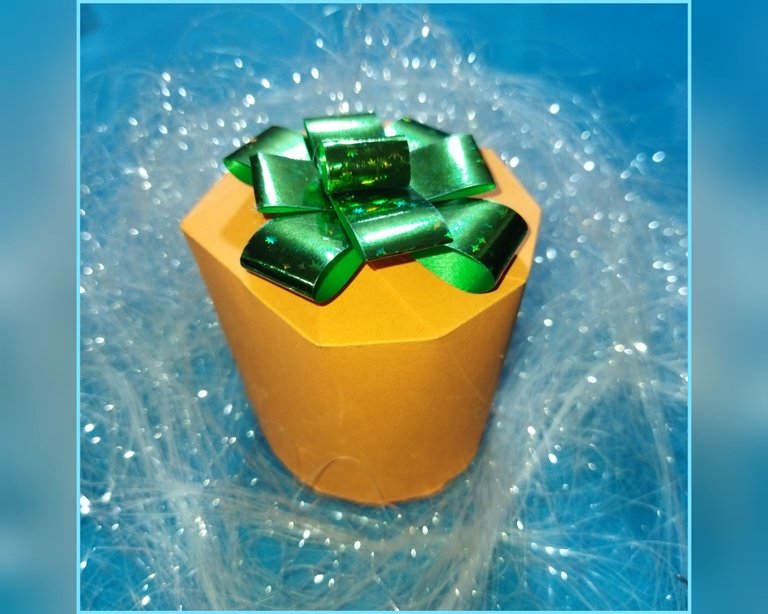
Son muy versátiles estas cajitas, la verdad que a partir de ahora me ahorraré mucho más que dinero porque puedo hacerlas con los materiales que más me gusten. Espero que les pueda servir a ustedes también de ayuda.
Tengo muchos proyectos en mente para emprendimiento, aún no me decido por cuál comenzar que pueda obtener buenos dividendos. Mientras seguiré en la búsqueda de ideas y poniendo en práctica y a la vez compartir con todos ustedes.
Nos vemos en la próxima.
These boxes are very versatile, the truth is that from now on I will save much more than money because I can make them with the materials that I like the most. I hope it can help you too.
I have many projects in mind for entrepreneurship, I still haven't decided which one to start that can get good dividends. While I will continue to search for ideas and putting them into practice and at the same time share with all of you.
See you next time.

Hola @linita este tutorial me cayó como anillo al dedo. Justo estamos necesitando unas cajitas para algunos obsequios para los padres.
Me encantan estas cajitas sorpresas, podríamos colocarles también listoncitos de papel crepé, se ven lindísimas por dentro.
Gracias por compartir con nosotros. ¡Ah! Están lindos los lazos.
Saludos 🙋🤗🎉☺️
Holaaaaa @creacioneslelys, que alegría saber que otras personas se pueden beneficiar de estas ideas. La verdad que a mí me sacó de apuro. Con el papel crepé sería para relleno porque para decorar lo veo algo difícil por la forma cómo se cierra la cajita, por lo menos como yo la imagino.
Exactamente, es para rellenar tal cual como lo hiciste con la viruta, es decir, sería una viruta de papel crepé. Es buenísimo para cuando queremos regalar piezas tejidas, de cerámicas, vidrio y otros. La idea es que se vea lindo 🤗 y proteja el obsequio.
Para piezas de vidrio y cerámica o de material frágil se debe reforzar la caja y utilizar una cartulina fuerte.
¡Así es!
Congratulations @linita! You have completed the following achievement on the Hive blockchain and have been rewarded with new badge(s):
Your next target is to reach 4000 upvotes.
You can view your badges on your board and compare yourself to others in the Ranking
If you no longer want to receive notifications, reply to this comment with the word
STOPTo support your work, I also upvoted your post!
Thank you for sharing this amazing post on HIVE!
Your content got selected by our fellow curator @hafizullah & you just received a little thank you via an upvote from our non-profit curation initiative!
You will be featured in one of our recurring curation compilations and on our pinterest boards! Both are aiming to offer you a stage to widen your audience within and outside of the DIY scene of hive.
Join the official DIYHub community on HIVE and show us more of your amazing work and feel free to connect with us and other DIYers via our discord server: https://discord.gg/mY5uCfQ !
If you want to support our goal to motivate other DIY/art/music/homesteading/... creators just delegate to us and earn 100% of your curation rewards!
Stay creative & hive on!