[ENG-ESP] PENCIL CASE MADE OF FELT
WELCOME TO MY BLOG
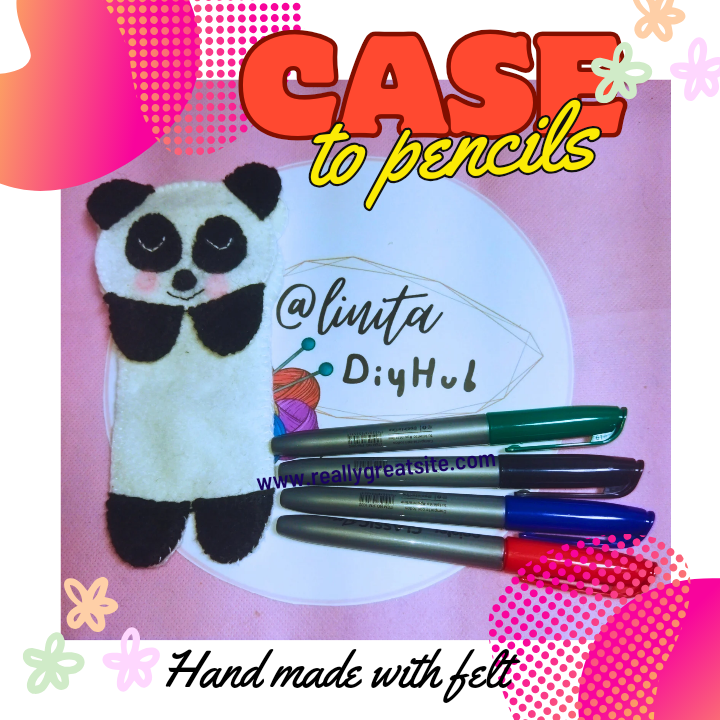
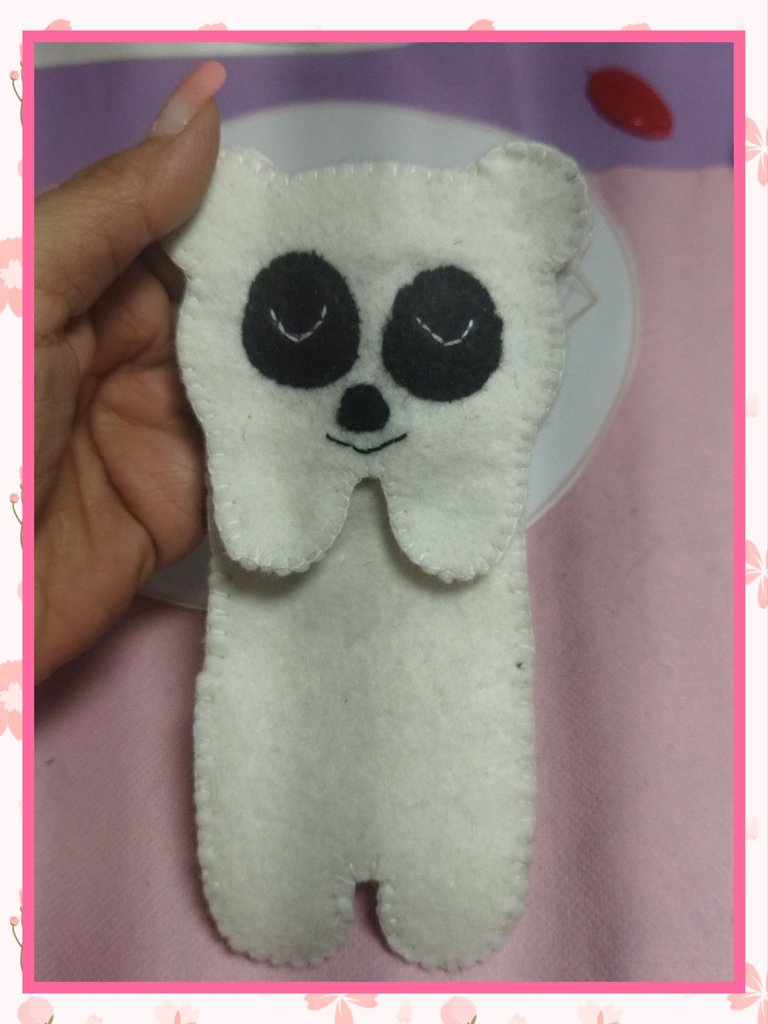
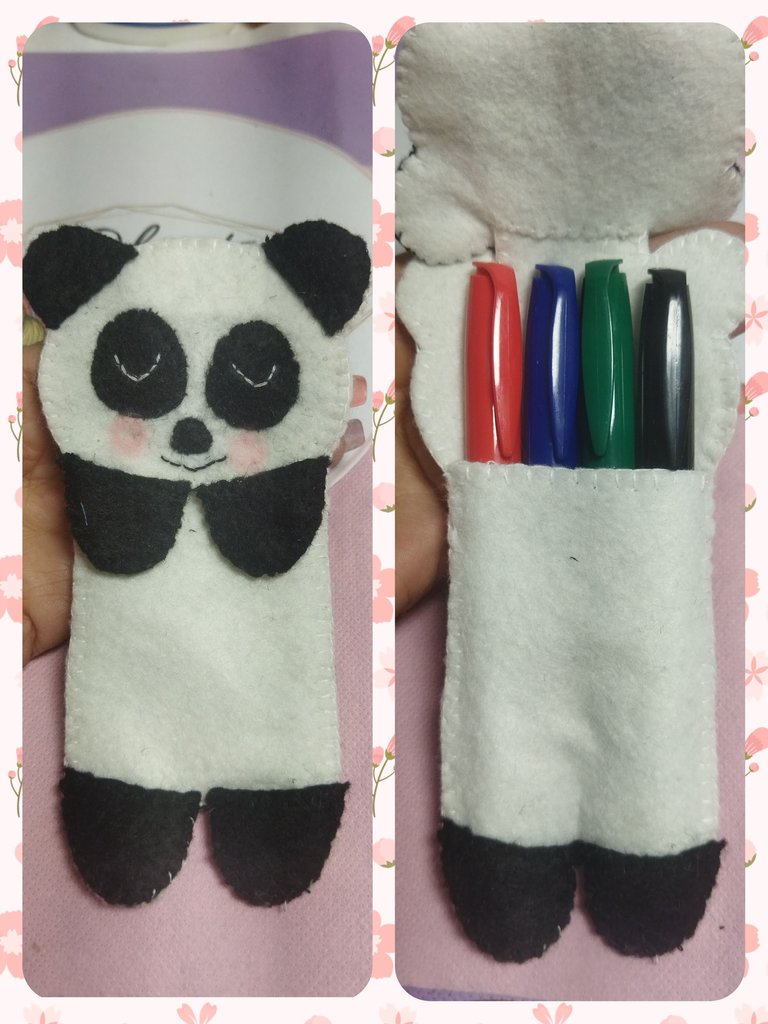
Hellooooo, hellooooooo! Greetings my dear DiyHub creatives. On this occasion I share with you the tutorial of a practical panda bear-shaped case made of felt, ideal for storing the pencils that we usually carry loose in our purses or backpacks. Many times I have found myself having to dump out the entire contents of my bag to find the pencil I have stored. Well, I hope that with this case I won't have to do it anymore. Now without further ado, let's start with the tutorial.
BIENVENIDOS A MI BLOG
¡Holaaaa, holaaaaa! Saludos mis estimados creativos de DiyHub. En esta oportunidad les comparto el tutorial de un práctico estuche en forma de oso panda realizado en fieltro ideal para guardar los lápices que por lo general llevamos sueltos en nuestras carteras o morrales. Muchas veces me he visto en la necesidad de volcar todo el contenido de mi bolso para encontrar el lápiz que llevo guardado. Pues espero que con este estuche ya no tenga que hacerlo más. Ahora sin más, comencemos con el tutorial.
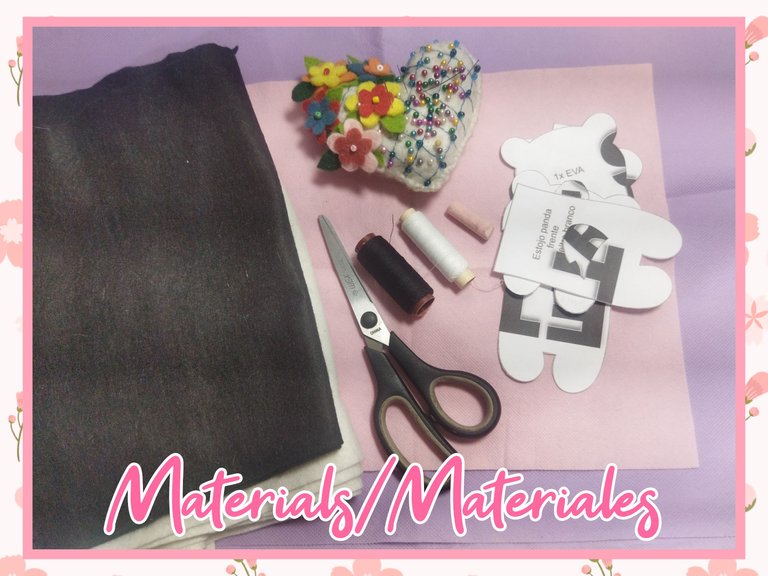
MATERIALS
- Black and white felts.
- Black and white sewing threads.
- Sewing needle.
- Scissors.
- Sewing pins.
- Pastel chalk.
- Pattern.
MATERIALES
- Fieltros de color blanco y negro.
- Hilos de coser blanco y negro.
- Aguja de coser.
- Tijera.
- Alfileres de costura.
- Tiza pastel.
- Patrón.
STEP BY STEP // PASO A PASO
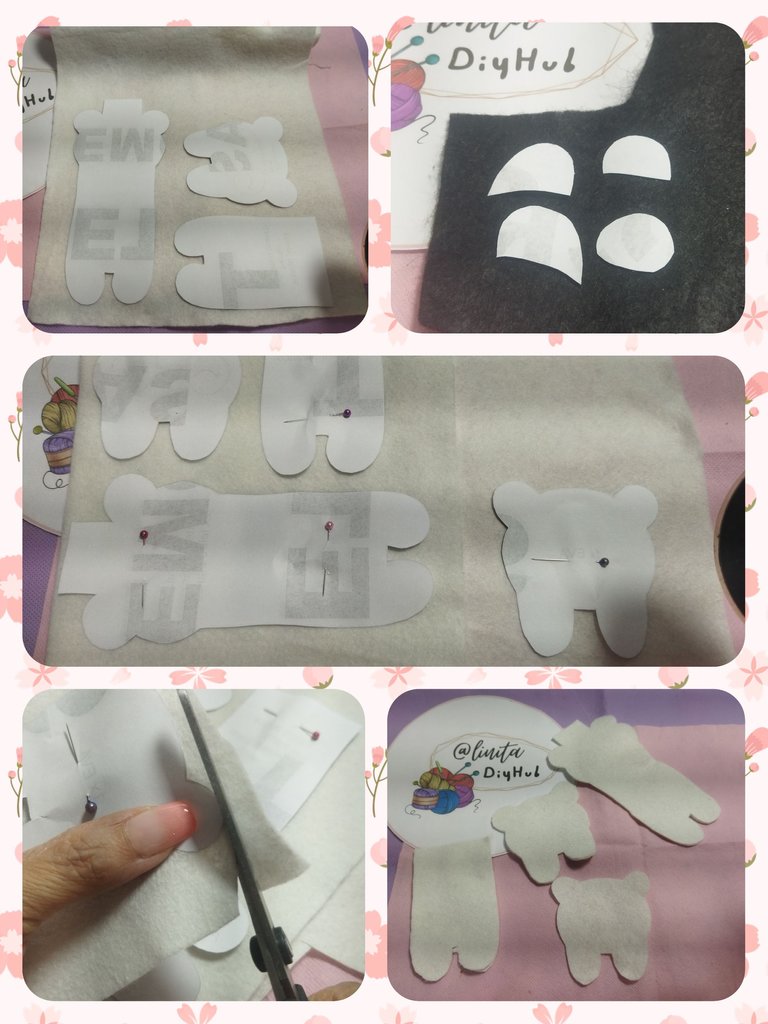
CUTTING PIECES
To make the pencil case we are going to place the pattern pieces on the piece of felt of the appropriate color and cut two pieces of each one.
CORTE DE PIEZAS
Para realizar el estuche de lápices vamos a colocar las piezas del patrón en el retazo de fieltro del color adecuado y cortamos dos piezas de cada una.
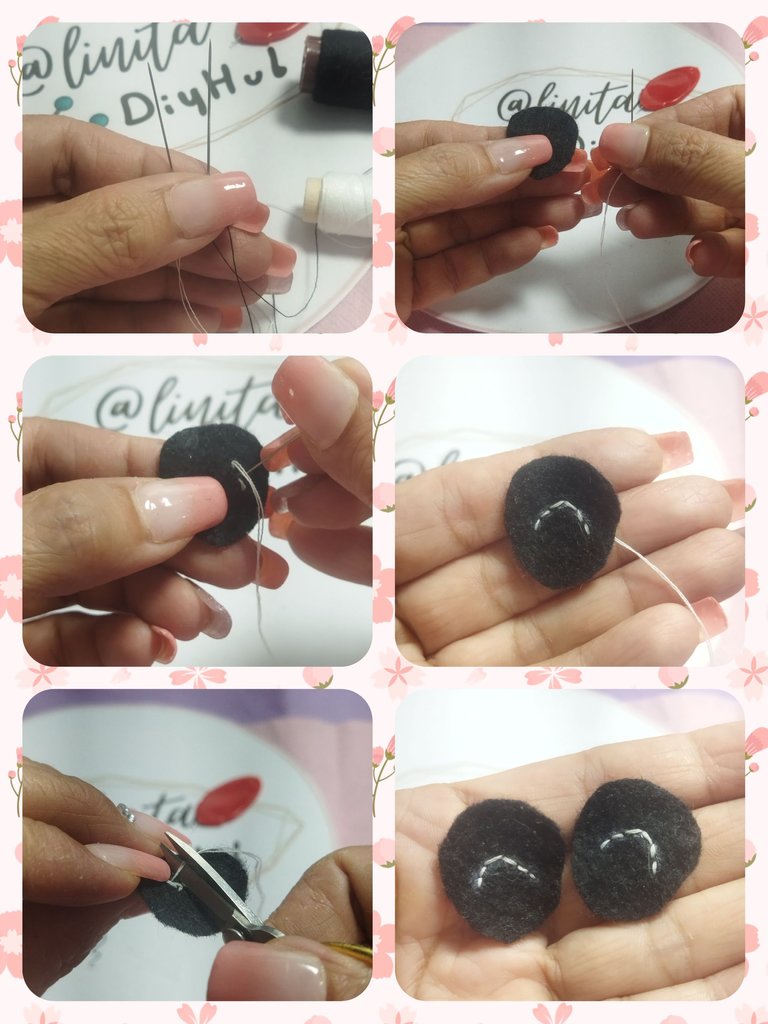
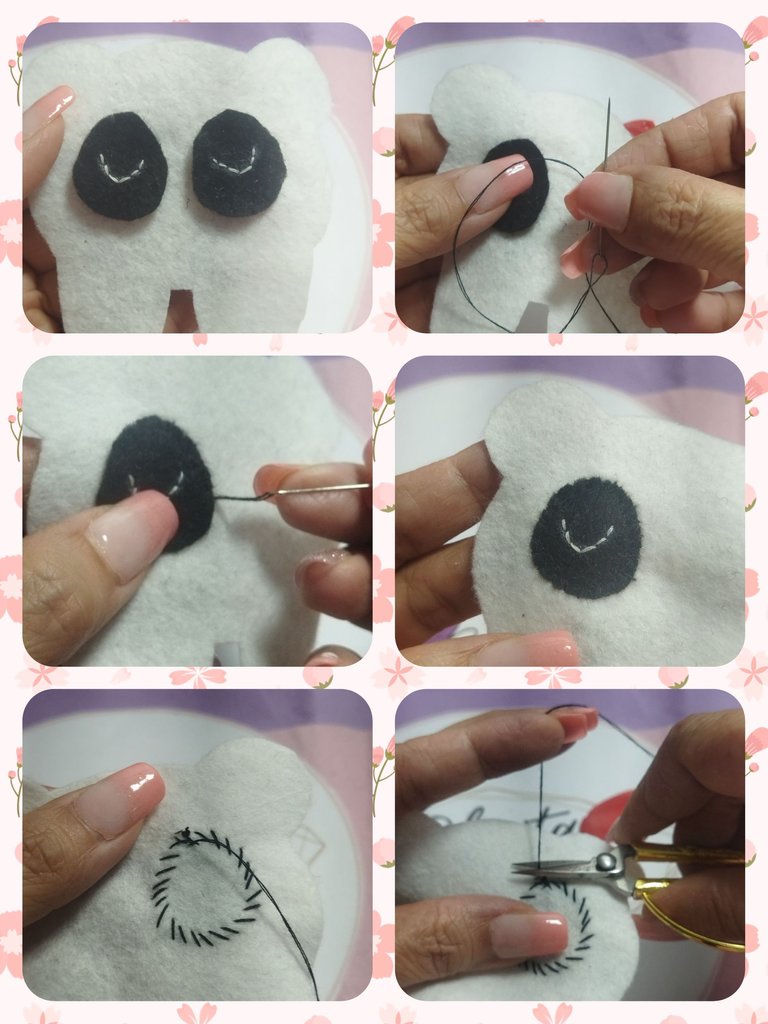
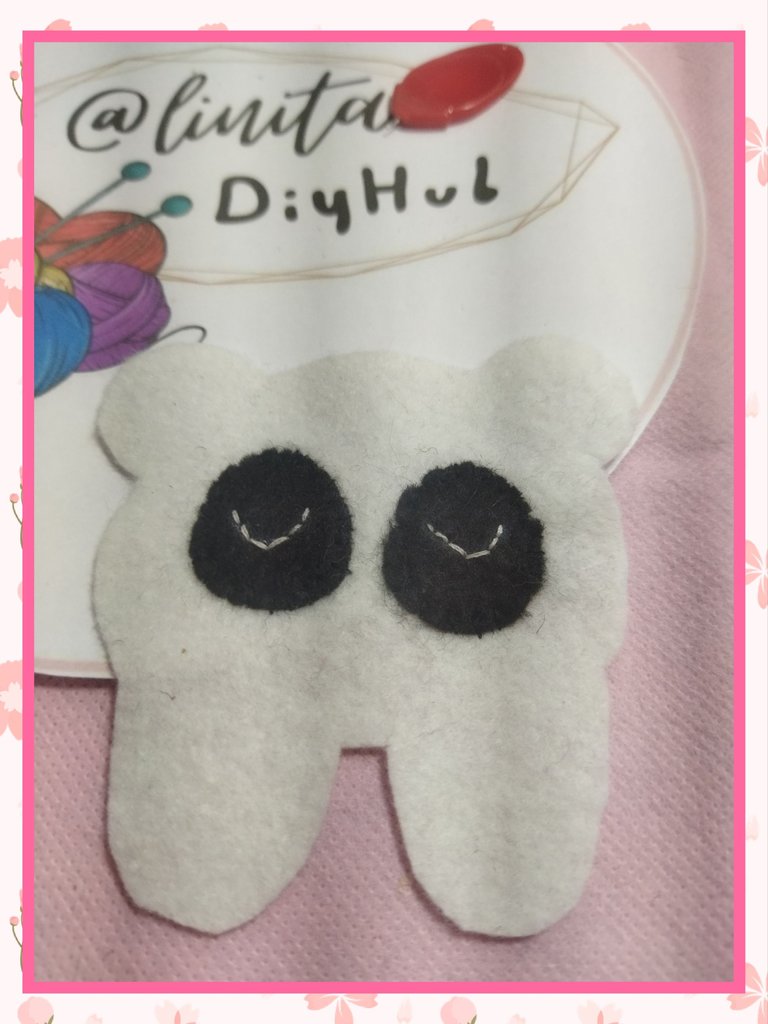
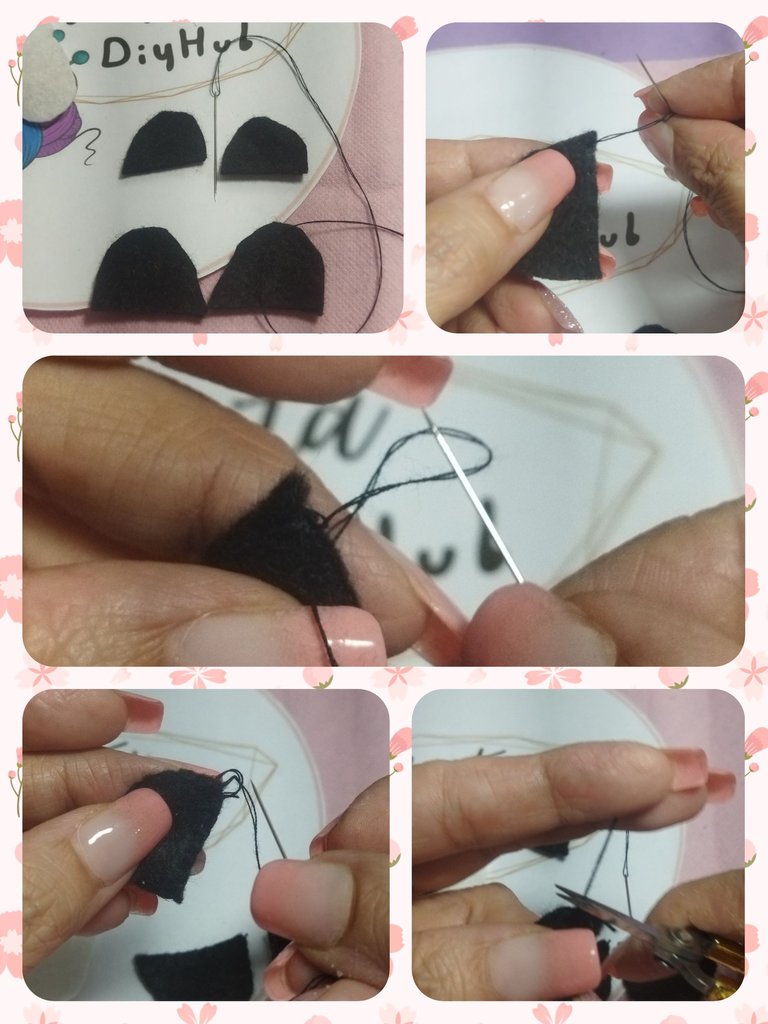
EYELINE
We take the eye pieces and with white thread we embroider the curved line in the center of the piece. We repeat on the other piece to form the two eyes.
LÍNEA DE OJOS
Tomamos las piezas de los ojos y con hilo blanco bordamos la línea curva en el centro de la pieza. Repetimos en la otra pieza para formar los dos ojos.
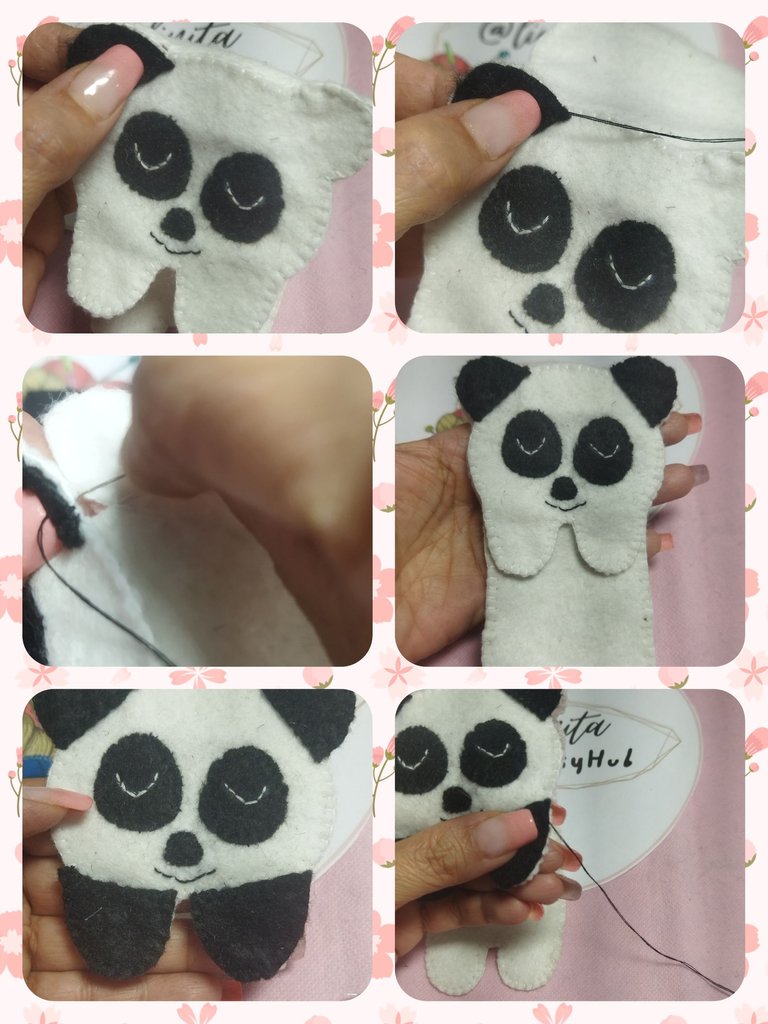
FACE FORMATION
We take one of the face-shaped pieces and place the eyes and black thread and using a basting stitch we glue both pieces together. We finish and cut.
FORMACIÓN DE LA CARA
Tomamos una de las piezas en forma de cara y colocamos los ojos y hilo color negro y realizando puntada hilvana pegamos ambas piezas. Rematamos y cortamos.
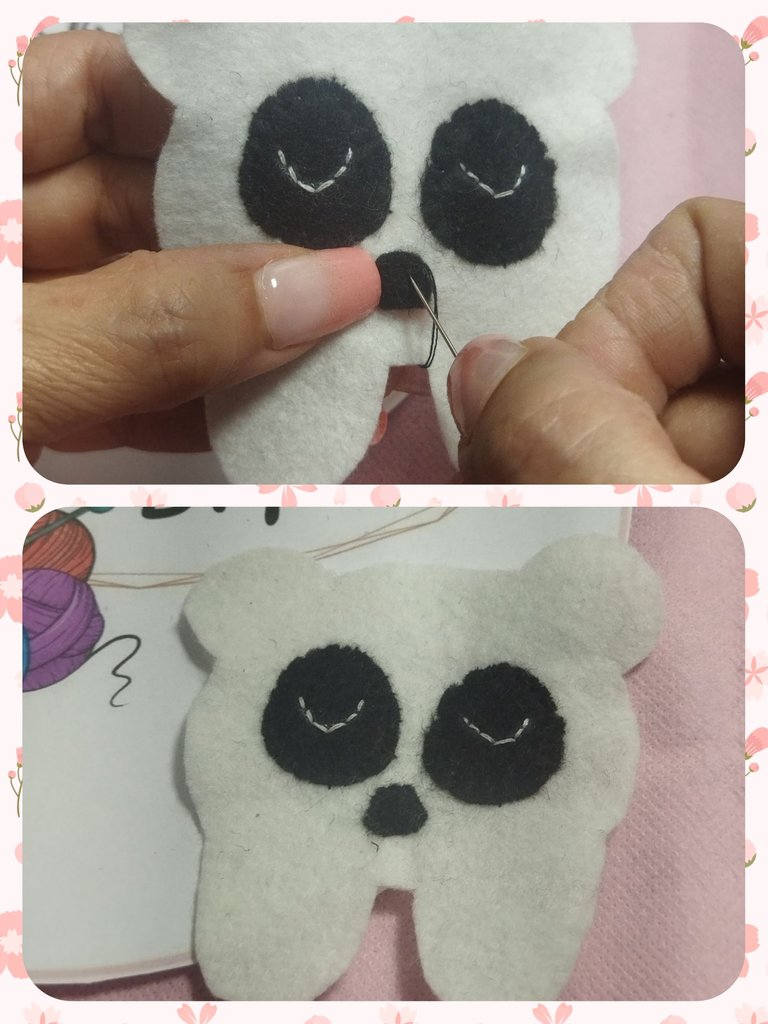
Next we place the nose and with the same basting stitch we sew to the face.
A continuación colocamos la nariz y con la misma puntada de hilvana cosemos a la cara.
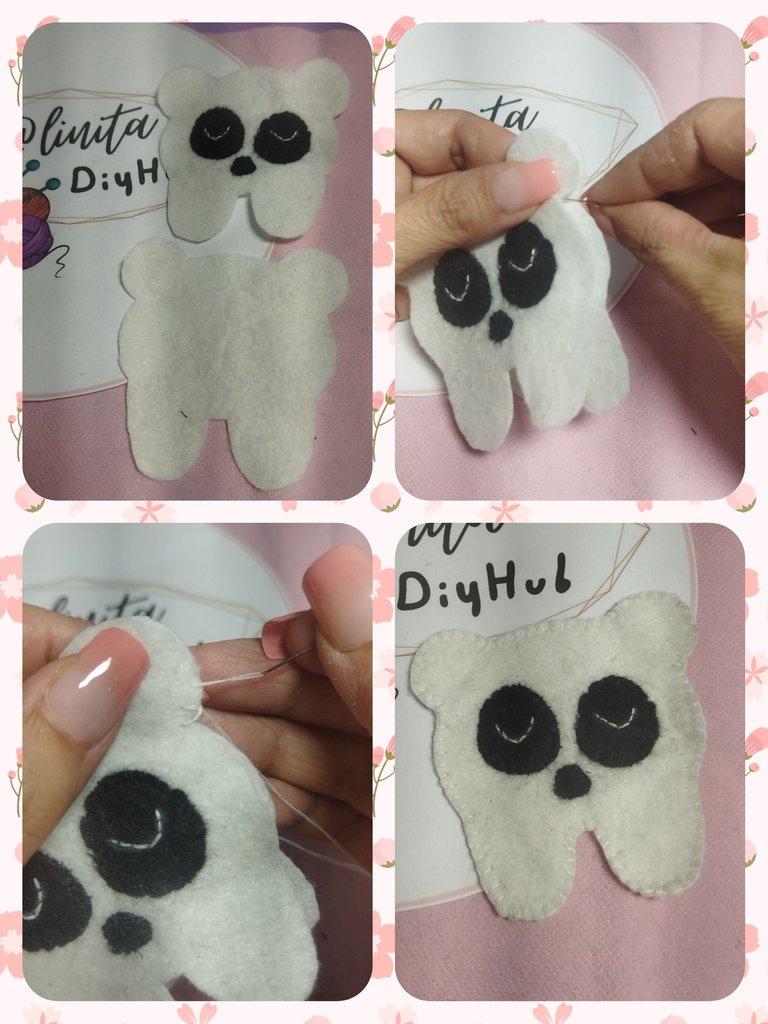
Now we join both pieces of the face with white thread, making the buttonhole stitch all around.
Ahora unimos ambas piezas de la cara con hilo blanco realizando el punto de ojal por todo el contorno.
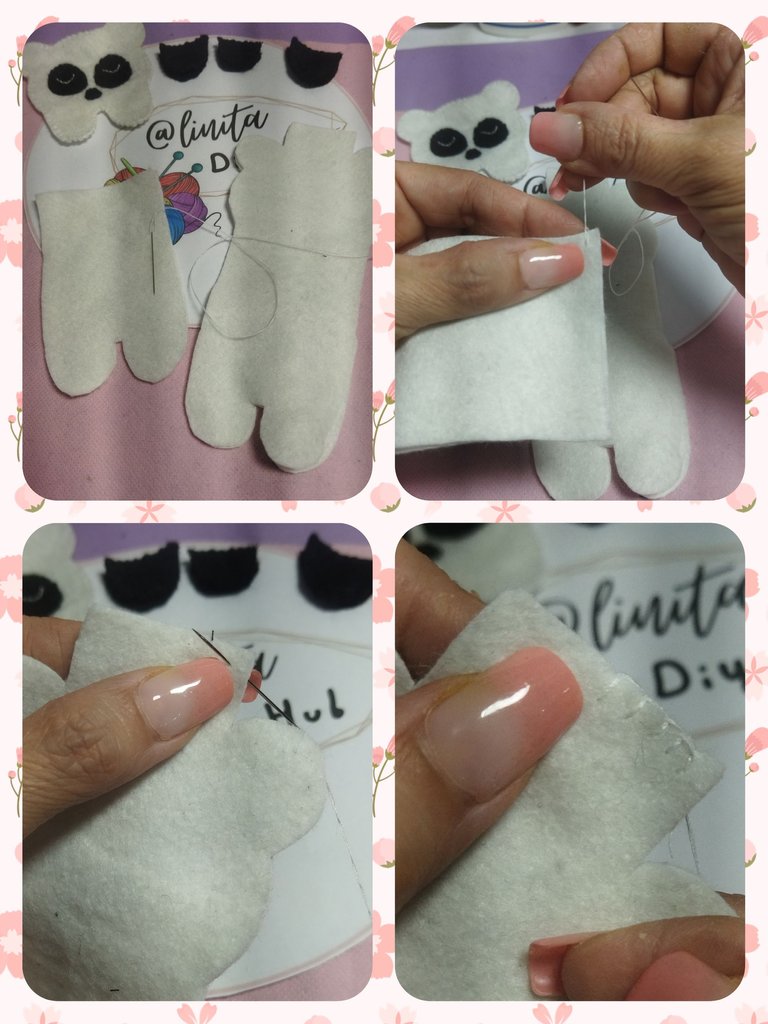
Now it is time to sew the pieces that we will place on the ears, front and rear legs. We are also going to sew it with the buttonhole stitch.
Corresponde ahora coser las piezas que colocaremos en las orejas, las patas delanteras y traseras. También lo vamos a coser con el punto de ojal.
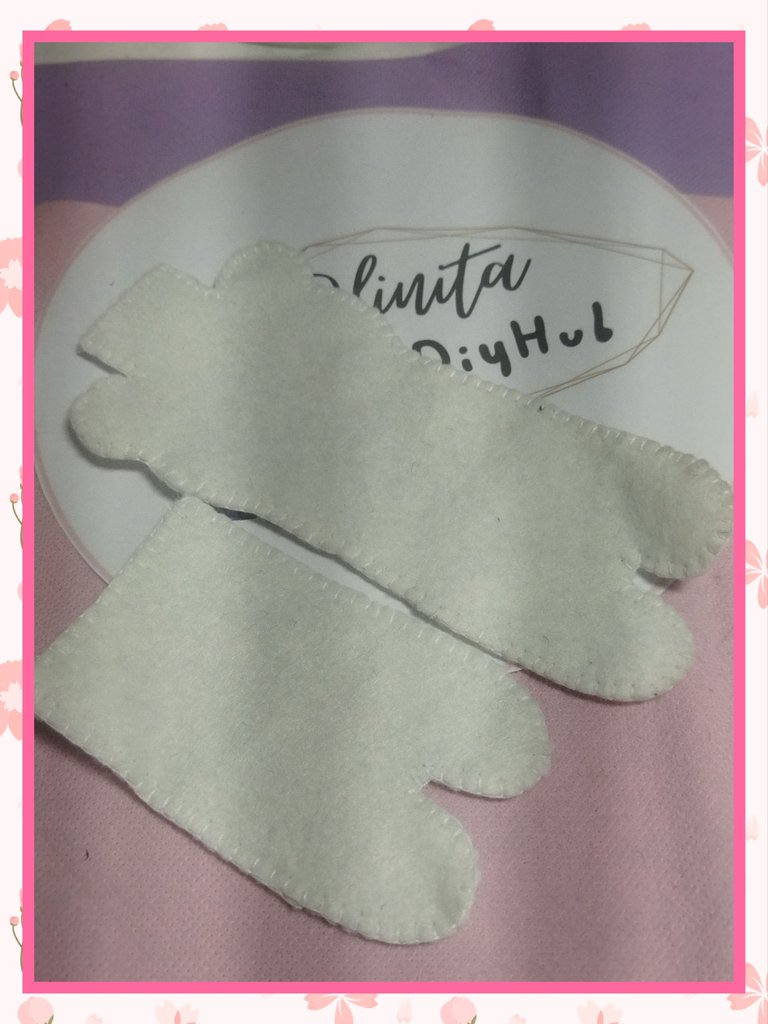
The only thing left to do is join the pieces of the body and the pocket where we will place the pencils. We take the two pieces of each set and sew with the buttonhole stitch around both pieces.
Sólo quedaría por unir las piezas del cuerpo y el bolsillo donde colocaremos los lápices. Tomamos las dos piezas de cada juego y realizamos la costura con el punto de ojal alrededor de ambas piezas.
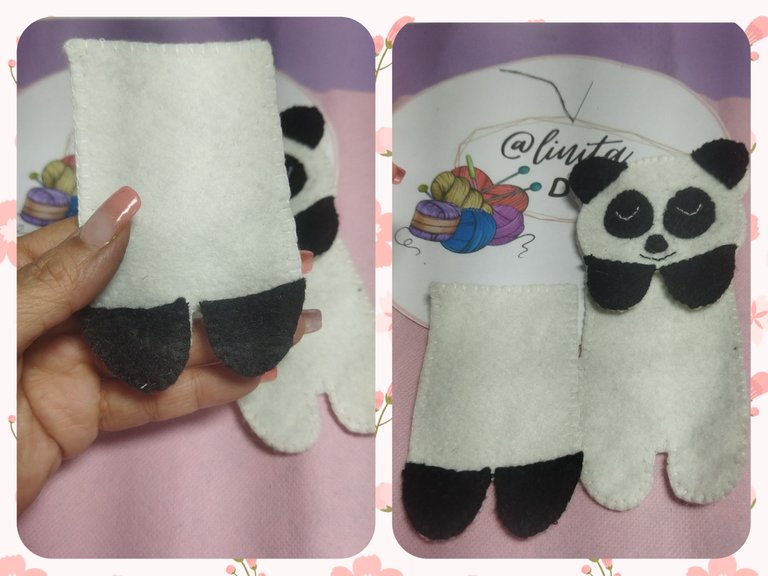
To begin assembling the case, we take the largest piece of the body and the head piece and at the back we are going to take the exact measurement that when folding the front part we will get the head on top of the body, overlapping.
We make a small opening in the head and insert the body tab and sew with white thread.
Para comenzar a armar el estuche, tomamos la pieza más grande del cuerpo y la pieza de la cabeza y por la parte trasera vamos a tomar la medida exacta que al doblar por la parte delantera nos que la cabeza sobre el cuerpo, sobrepuesta.
Hacemos una pequeña abertura en la cabeza e introducimos la pestaña del cuerpo y con hilo blanco cosemos.
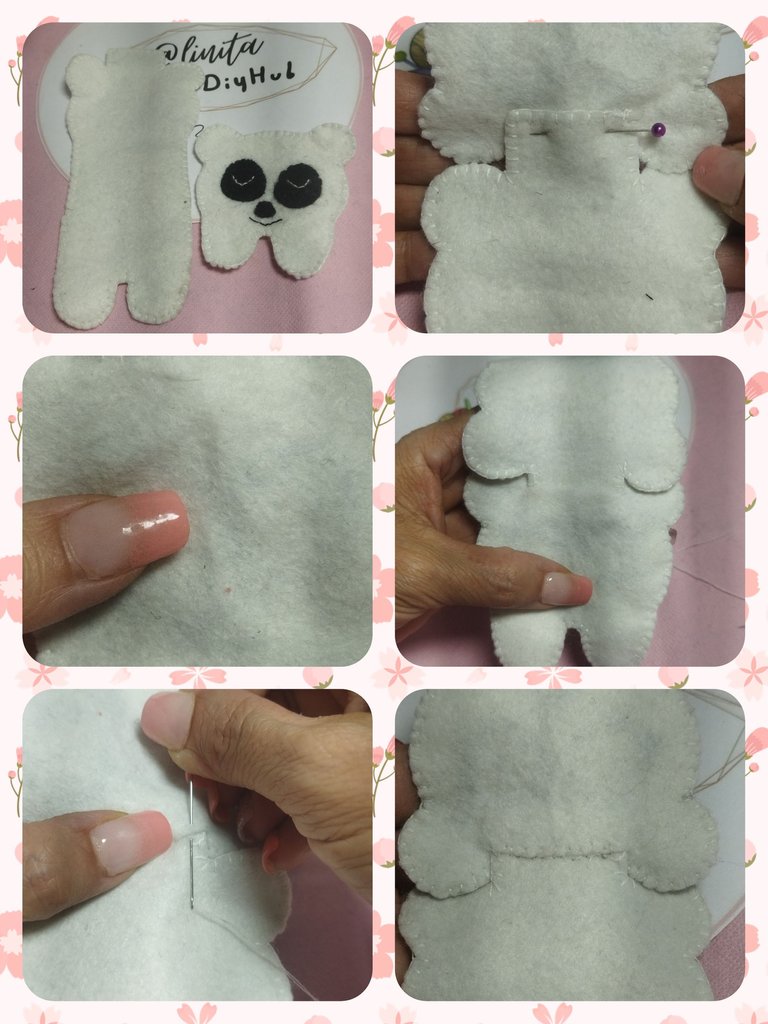
Now we are going to place the ears and front legs on the head piece. We will do this with black thread and performing the basting stitch, only on the outer contour.
Ahora vamos a colocar las orejas y las patas delanteras en la pieza de la cabeza. Ésto lo haremos con hilo negro y realizando la puntada de hilvana, sólo en el contorno exterior.
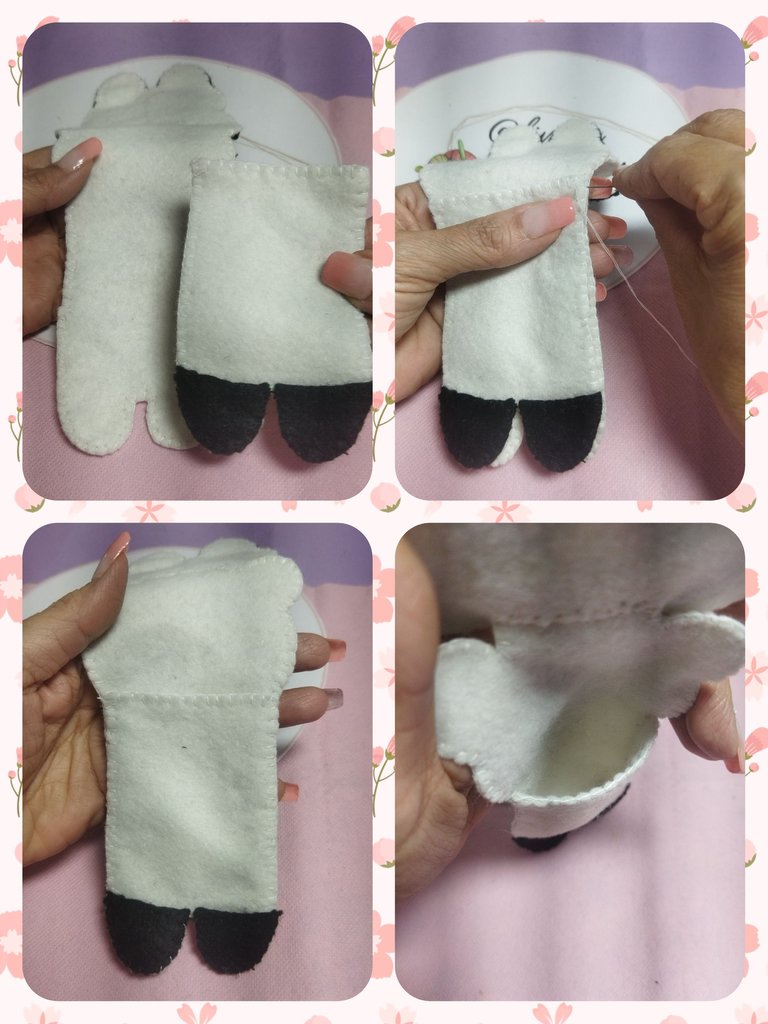
On the body piece that we will use for the pocket of the case we are going to place the other two legs.
En la pieza del cuerpo que usaremos para el bolsillo del estuche vamos a colocar las otras dos patas.
And with the two pieces finished, we only have to join them by placing the pocket piece on top of the large one and with white thread we sew from the union of the pocket all the way around, thus forming the case.
Y ya con las dos piezas terminadas, sólo nos queda unirlas colocando la pieza del bolsillo sobre la grande y con hilo blanco cosemos a partir de la unión del bolsillo por todo el contorno, formando así el estuche.
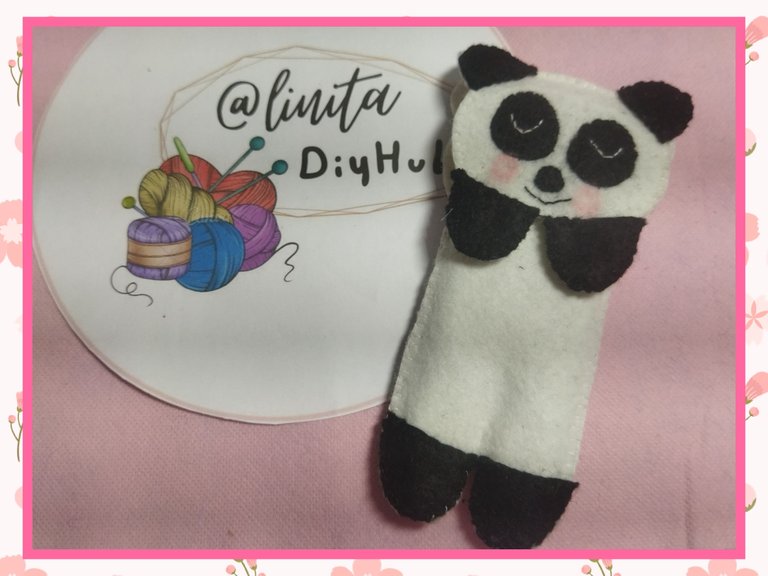
And in this way we have made a cute panda bear-shaped case that is very practical to store our pencils in our bags so that they do not misplace or spill inside them. The pocket has an approximate size for 4 or 5 pencils, depending on the thickness of each one.
I hope you like it. Greetings.
Y de esta forma hemos realizado un lindo estuche con forma de oso panda muy práctico para guardar nuestros lápices en los bolsos y que no s traspapelen o demarren dentro de ellos. El bolsillo tiene una medida aproximada para 4 o 5 lápices, dependiendo del grosor de cada uno e ellos.
Espero te guste. Saludos.
Hola 🙋🏾♀️
Está muy linda esta fundita para guardar los lápices. El proceso se entiende perfectamente. Me encantaría tener varios, de otros colores 🙏🏾😊🙋🏾♀️✅👍🏾
!Diy
You can query your personal balance by
!DIYSTATSMuy buen tutorial, bien explicado e ilustrado. Me gustó mucho el resultado.
Everyone would want to store away thier pens neatly because of this panda. Bravo
Congratulations, your post has been upvoted by @dsc-r2cornell, which is the curating account for @R2cornell's Discord Community.
Enhorabuena, su "post" ha sido "up-voted" por @dsc-r2cornell, que es la "cuenta curating" de la Comunidad de la Discordia de @R2cornell.
Hello Panda you look cute and very useful and you made this tutorial very useful. I really love this
I wish to have this for a toy 🧸
If I get this ,I’ll definitely always want to use my pen or pencils.
The result looks so cute and I love how you make the eyes,very simple.
This is something I would actually buy at the mall or bookstore for my pencils