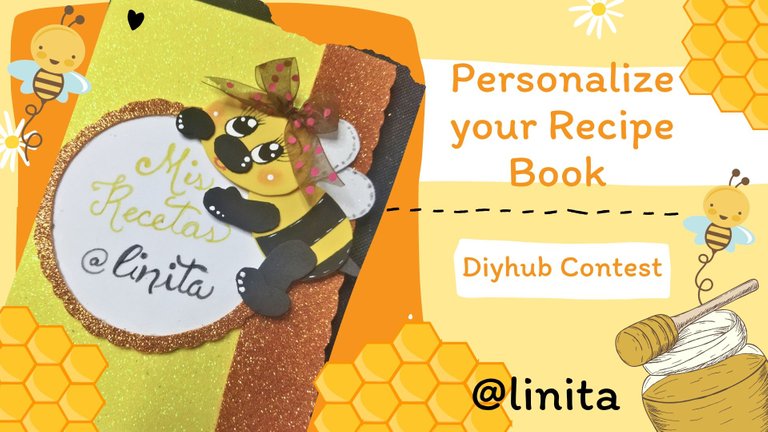
[ENG-ESP] Personalize you Recipe Book. Diyhub Contest- Bees
WELCOME TO MY BLOG
Hellooooo, hellooooo! Greetings to all. For a few months I have had the intention of preparing my cookbook and the time has come to personalize it. This contest has given me the idea to do it and share with all of you this step by step and at the same time make my participation.
BIENVENIDOS A MI BLOG
¡Holaaaa, holaaaaa! Saludos a todos. Desde hace unos meses he tenido la intención de elaborar mi recetario de cocina y ha llegado el momento de personalizarlo. Este concurso me ha dado la idea para realizarlo y compartir con todos ustedes este paso a paso y a la vez hacer mi participación.
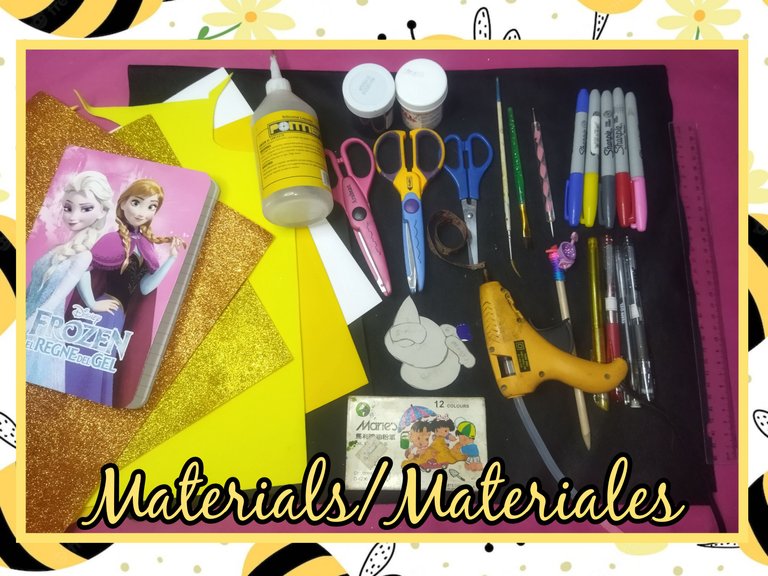
MATERIALS
- Frosted foami and normal foami, assorted colors
- Cold paints: black and white
- Brushes: flat and liner
- Shape scissors
- Scissors
- Silicone gun
- Liquid silicone
- Recipe notebook
- Graphite pencil
- Compass
- Frosty Pen
- Pastel chalk
- Bee pattern
MATERIALES
- Foami escarchado y foami normal, colores variados
- Pinturas al frío: blanca y negra
- Pinceles: plano y liner
- Tijeras de forma
- Tijera
- Pistola de silicón
- Silicón líquido
- Cuaderno para recetario
- Lápiz de grafito
- Compás
- Lapicero escarchado
- Tiza pastel
- Patrón de abeja
STEP BY STEP // PASO A PASO
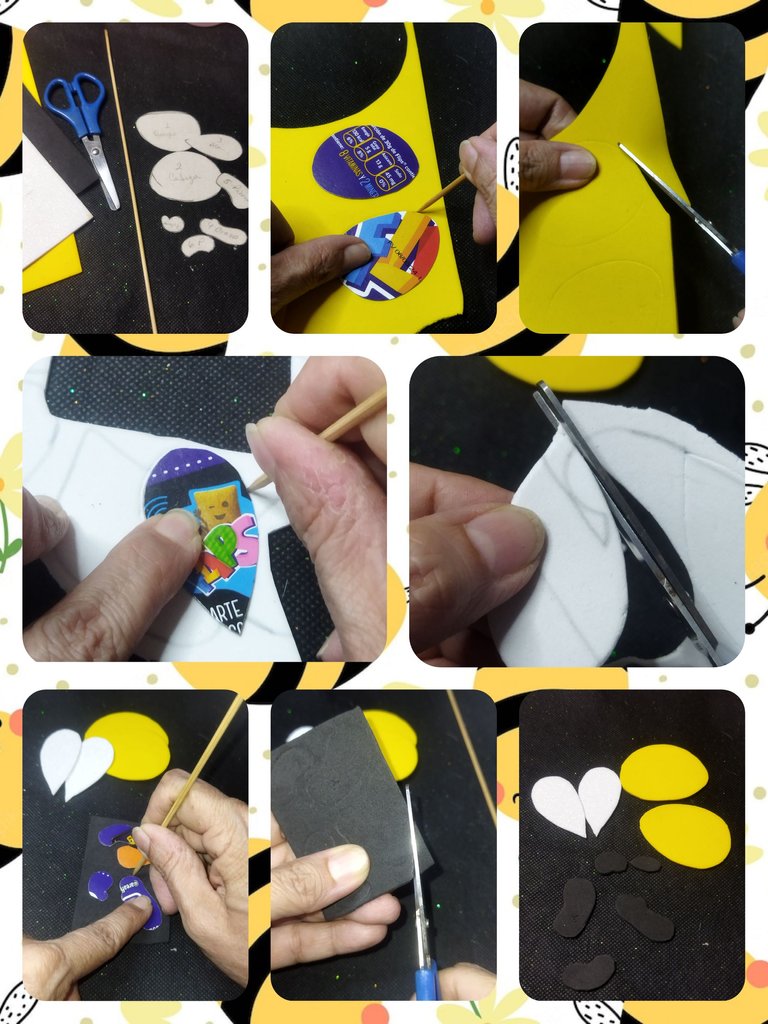
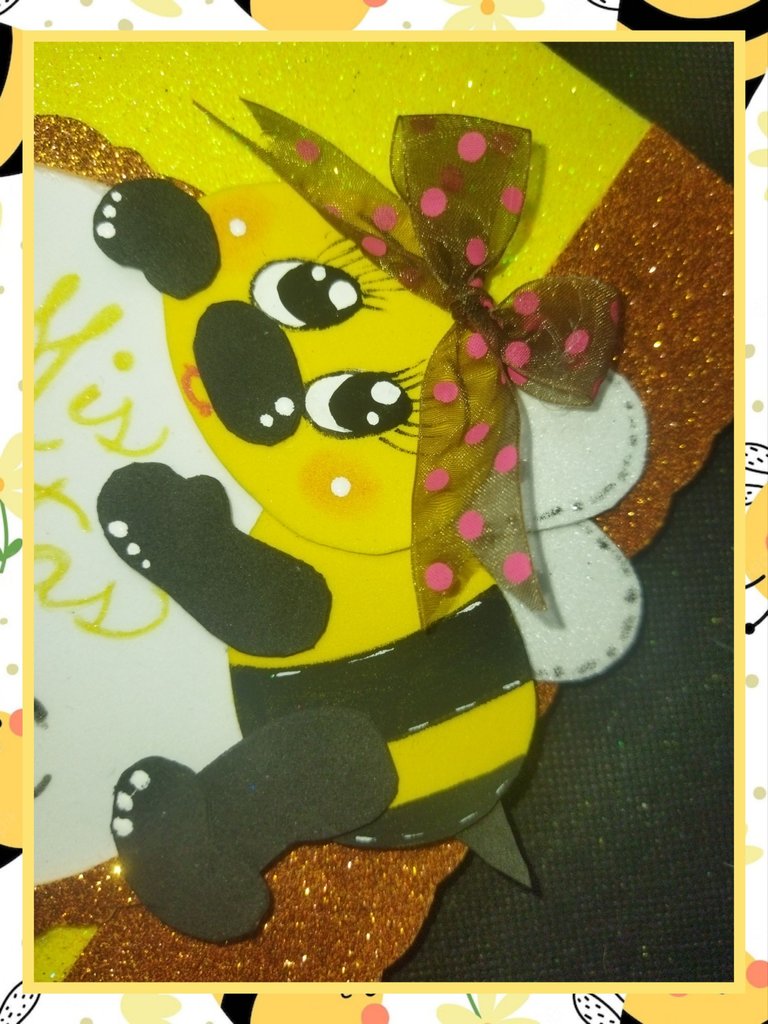
BEE
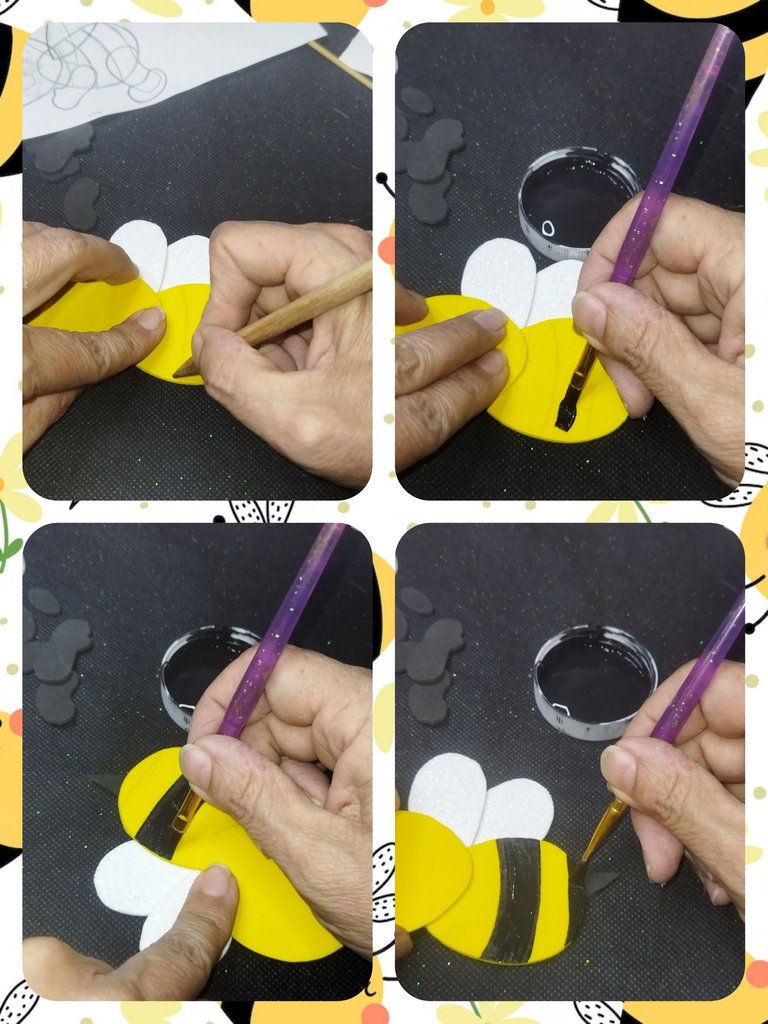
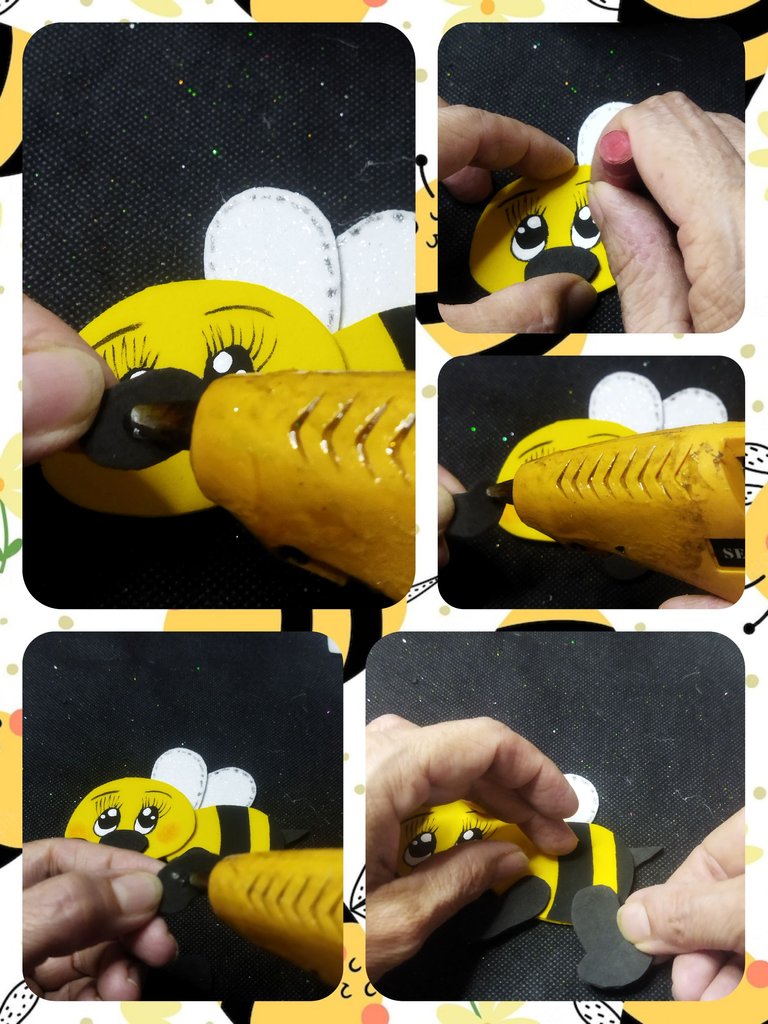
To make the bee, we begin by marking the pattern pieces on the foami according to the color of each piece. Once marked, we cut them with straight cuts so that they are not deformed.
ABEJA
Para realizar la abeja, comenzamos marcando las piezas del patrón en el foami de acuerdo al color de cada pieza. Una vez marcadas las recortamos con cortes rectos para que no queden deformes.
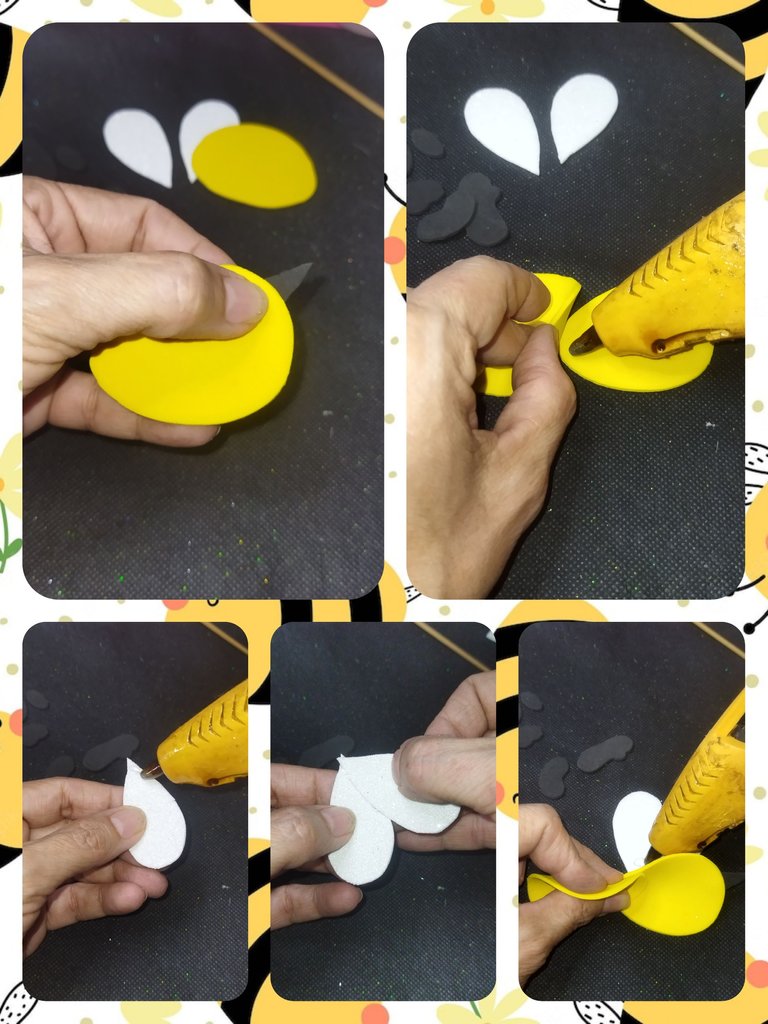
Next we join all the pieces using the silicone gun, thus forming the bees.
A continuación unimos todas las piezas utilizando la pistola de silicón, formando así la abejas.
Then we trace with the pencil, on the belly or body of the bee, the lines to paint the black farms on the body, for this we will use the black cold paint and the flat brush.
Luego trazamos con el lápiz, en la barriga o cuerpo de la abeja, las líneas para pintar en el cuerpo las granjas negras, para esto utilizaremos la pintura al frío negra y el pincel plano.
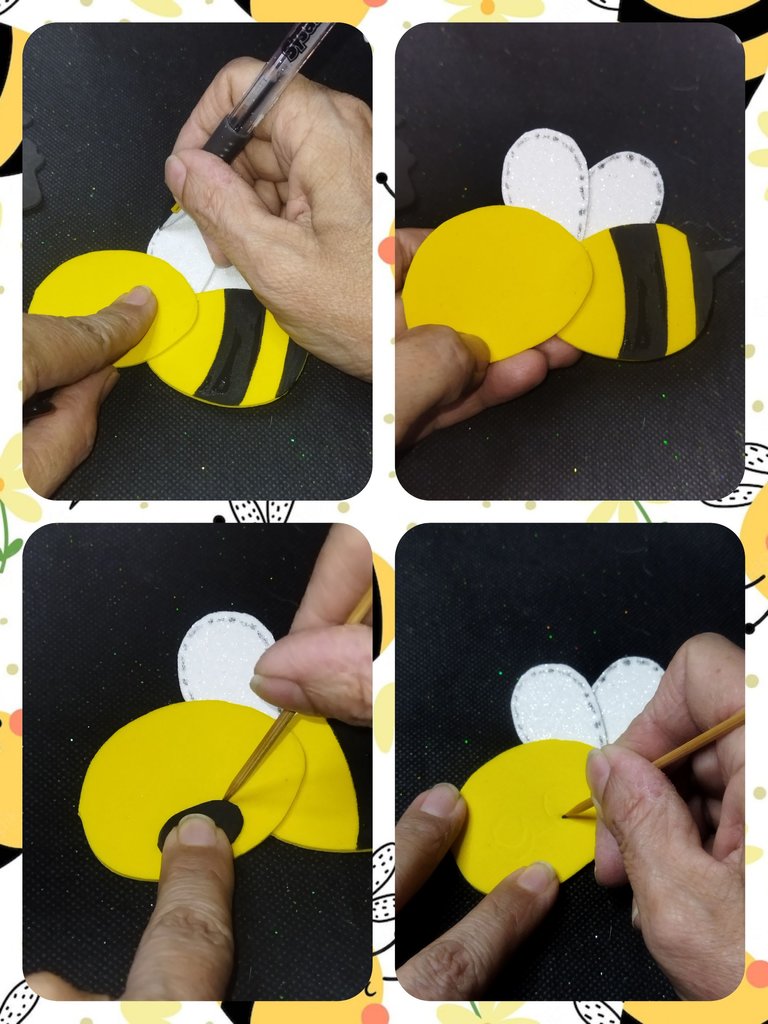
We continue to make the details that highlight this bee. In the wings, we are going to make small lines with dots interspersed around the outline of the wings using the black frosted pencil.
Then we place the nose, without gluing it, and with a toothpick we trace the outline to make the eyes, which we will also draw with the toothpick.
Continuamos realizando los detalle que resaltan esta abeja. En las alas, vamos a realizar pequeñas líneas con puntos intercalados por el contorno de las alas utilizando el lapicero escarchado negro.
Luego situamos la nariz, sin pegarla, y con un palillo de altura trazamos el contorno para realizar los ojos, que también dibujaremos con el palillo.
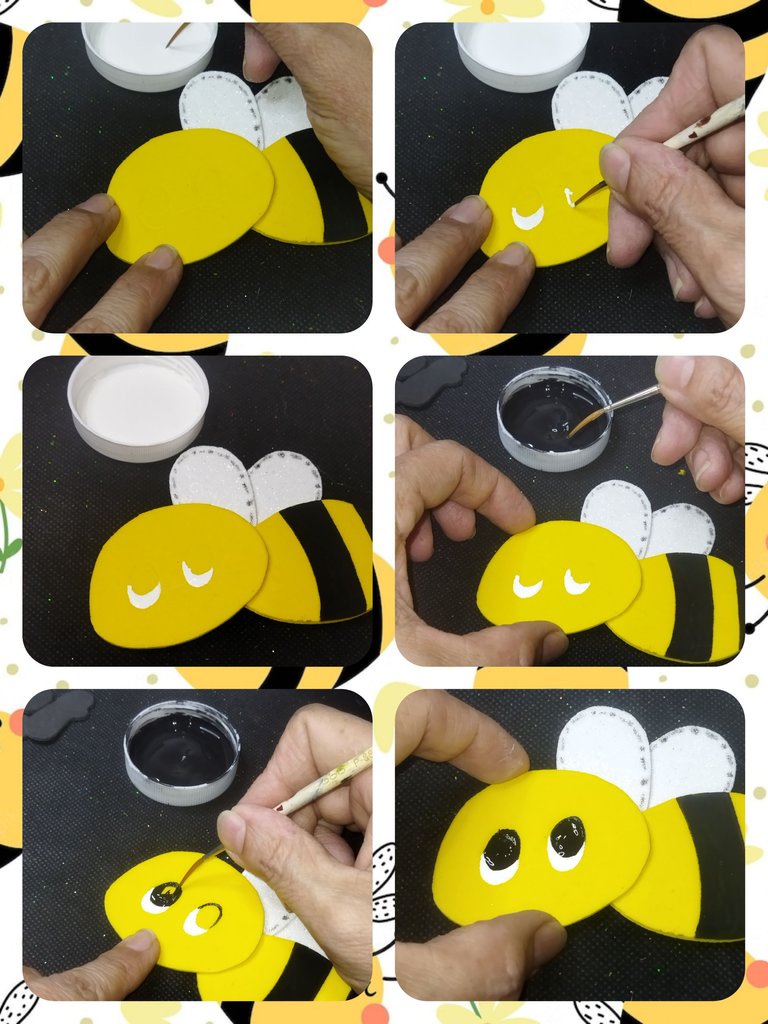
With the liner brush and the white and black paints, we paint the eyes and we also make the eyelashes and eyebrows, and with the white paint, we make two white dots in each eye to fix the gaze. We let the paint dry well to continue.
Con el pincel liner y las pinturas, blanca y negra, pintamos los ojos e igualmente hacemos las pestañas y las cejas, y con la pintura blanca, realizamos dos puntos blancos en cada ojo para fijar la mirada. Dejamos secar bien la pintura para continuar.
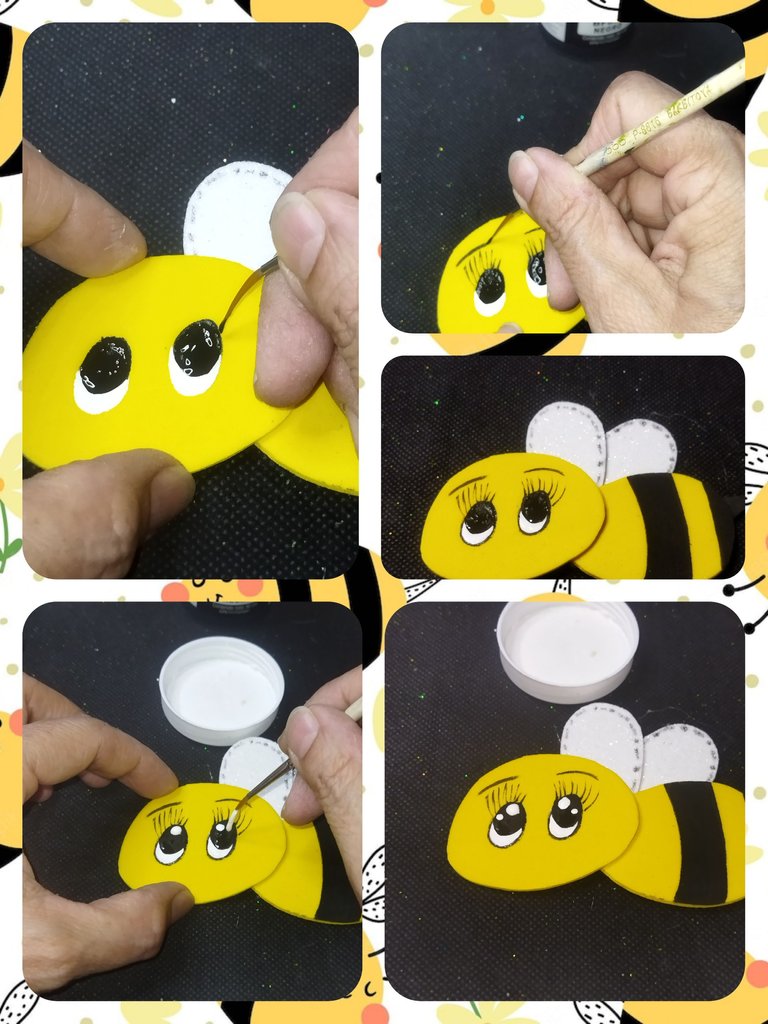
Once the paint is dry, we place the remaining pieces. We start by placing the nose and with the red pastel chalk, we make two circles on the sides to give it blush. Then we put the hand and paw.
Ya seca la pintura, colocamos las piezas restantes. Comenzamos colocando la nariz y con la tiza pastel roja, realizamos dos círculos a los lados para darle rubor. Luego colocamos la manita y la pata.
NOTEBOOK LINING
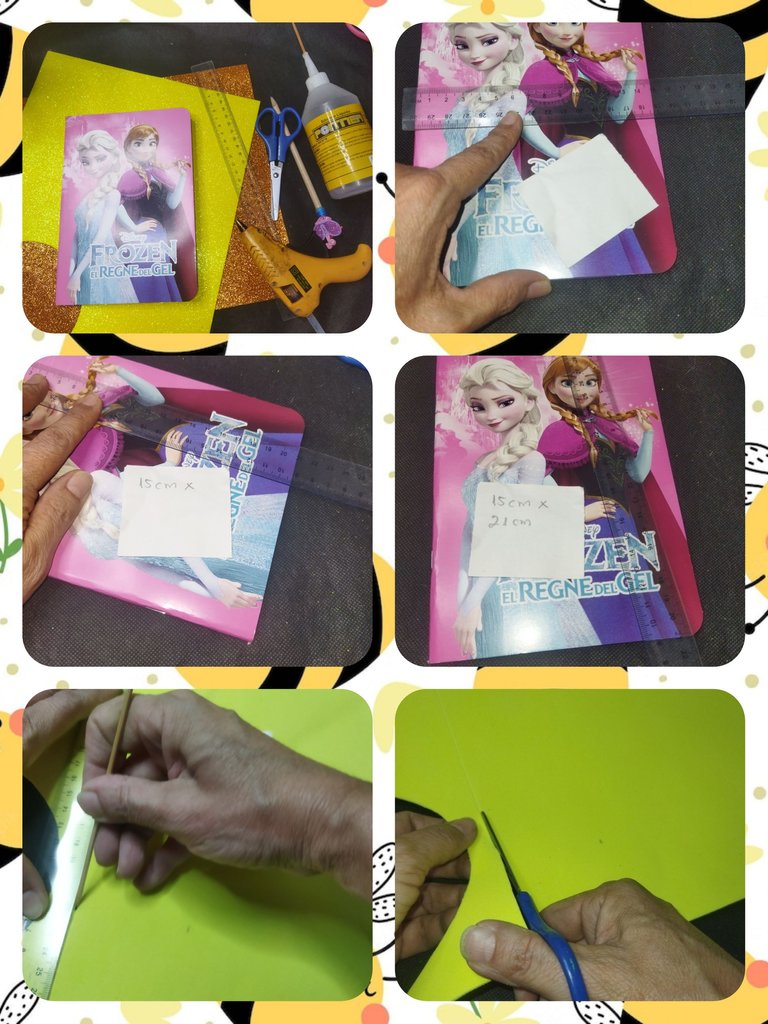
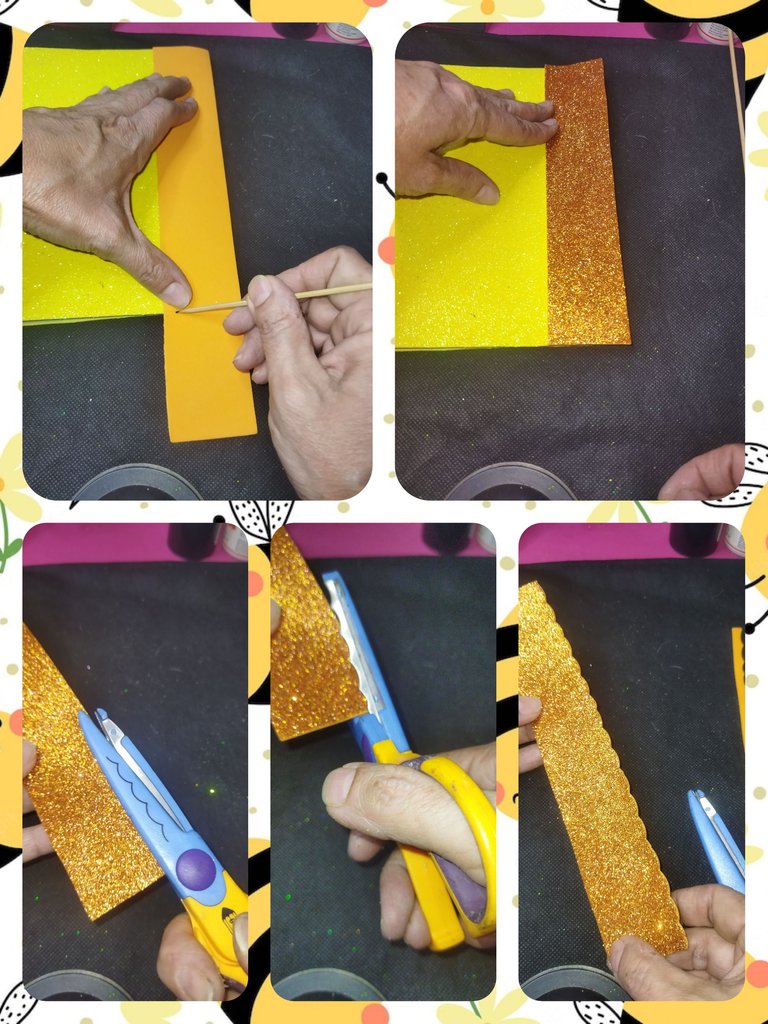
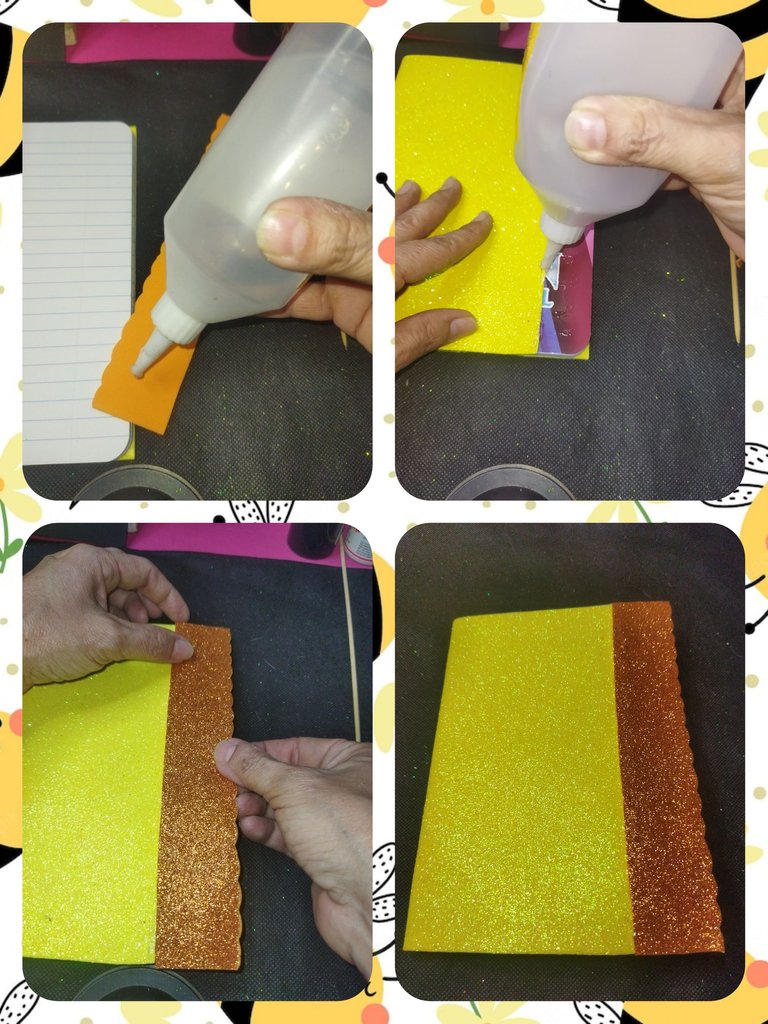
To cover the notebook we are going to use two sheets of foami, one frosted yellow and one frosted copper. We take the notebook and measure the width and length. Then in the frosty yellow foami, we mark the measurement of the notebook, and cut. Leaving 4.5 cm of it uncovered.
FORRO DEL CUADERNO
Para forrar el cuaderno vamos a utilizar dos pliegos de foami, uno amarillo escarchado y uno cobre escarchado. Tomamos el cuaderno y medimos el ancho y el largo. Luego en el foami amarillo escarchado, marcamos la medida del cuaderno, y recortamos. Dejando sin cubrir 4.5 cm del mismo.
We glue the foami to the notebook using liquid silicone.
Pegamos el foami al cuaderno utilizando el silicón líquido.
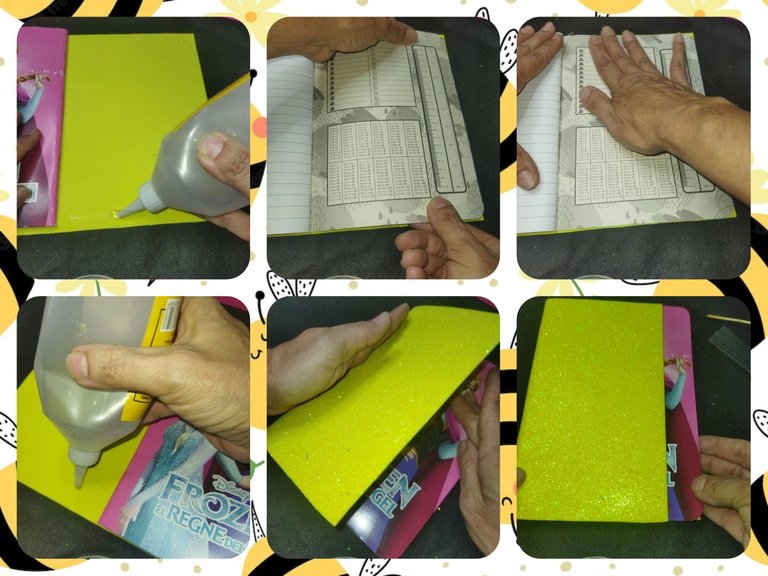
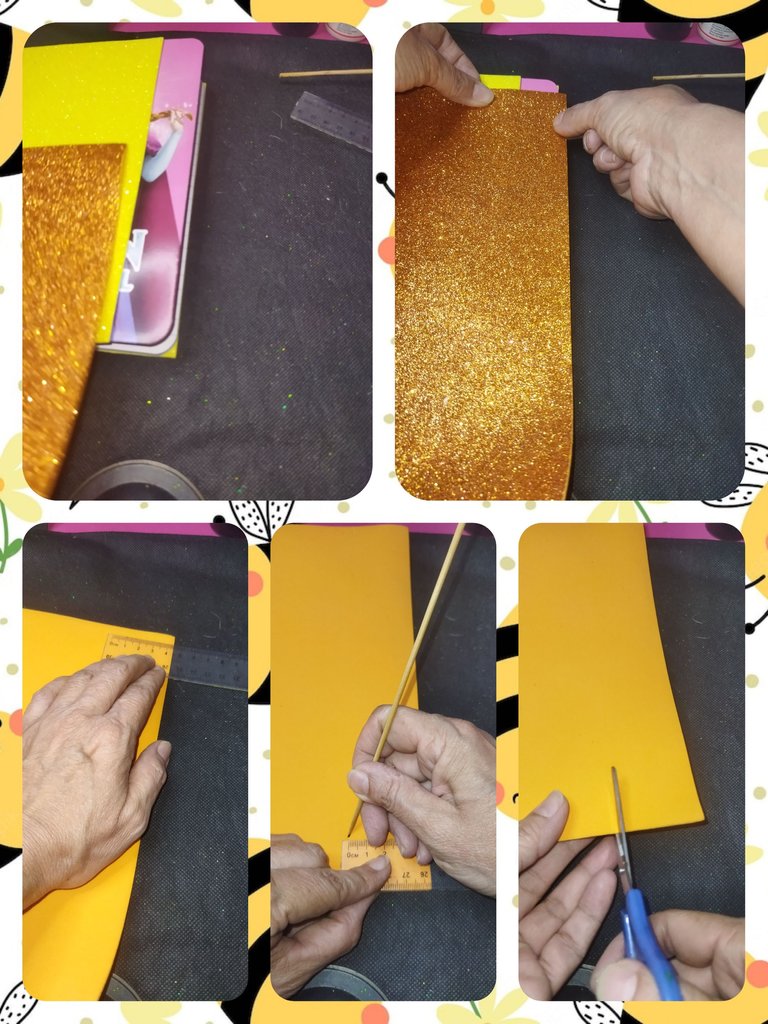
Now we trace 4.5 cm x 21 cm in the frosted copper foam to complete what remains to be lined and cut out. With the shape scissors, we will cut the right end of the foam and with the liquid silicone we will glue it to the notebook.
Ahora trazamos 4.5 cm x 21 cm en el foami cobre escarchado para completar lo que falta por forrar y recortamos. Con la tijera de formas, cortaremos el extremo derecho del foami y con el silicón líquido pegamos al cuaderno.
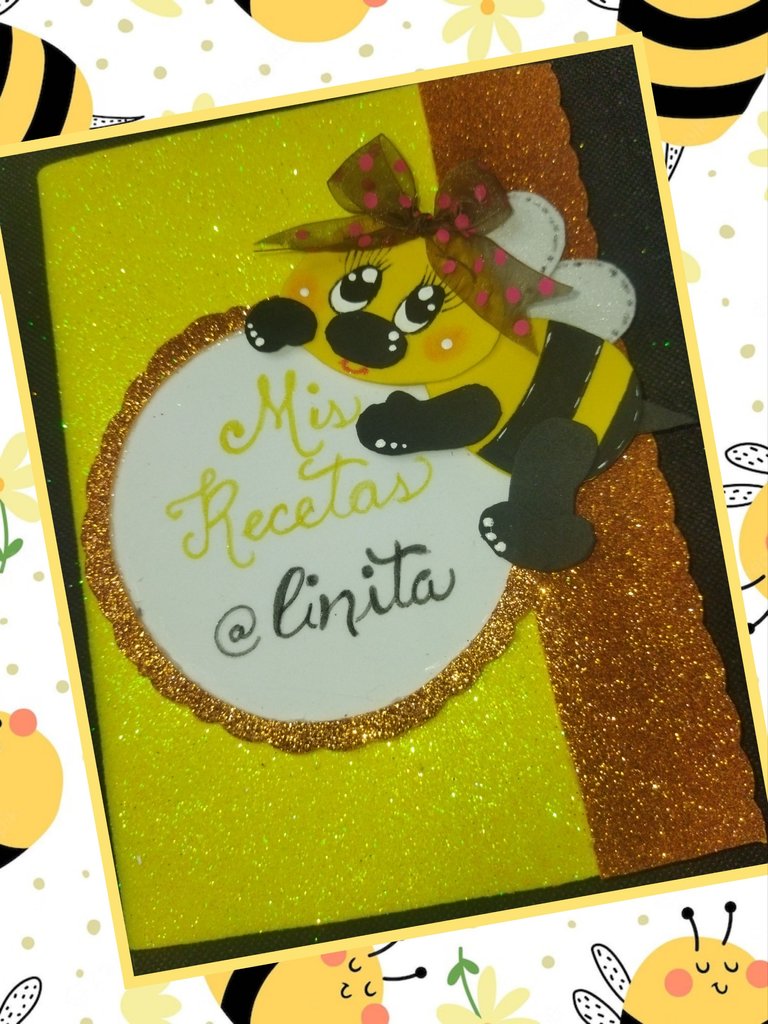
DECORATION
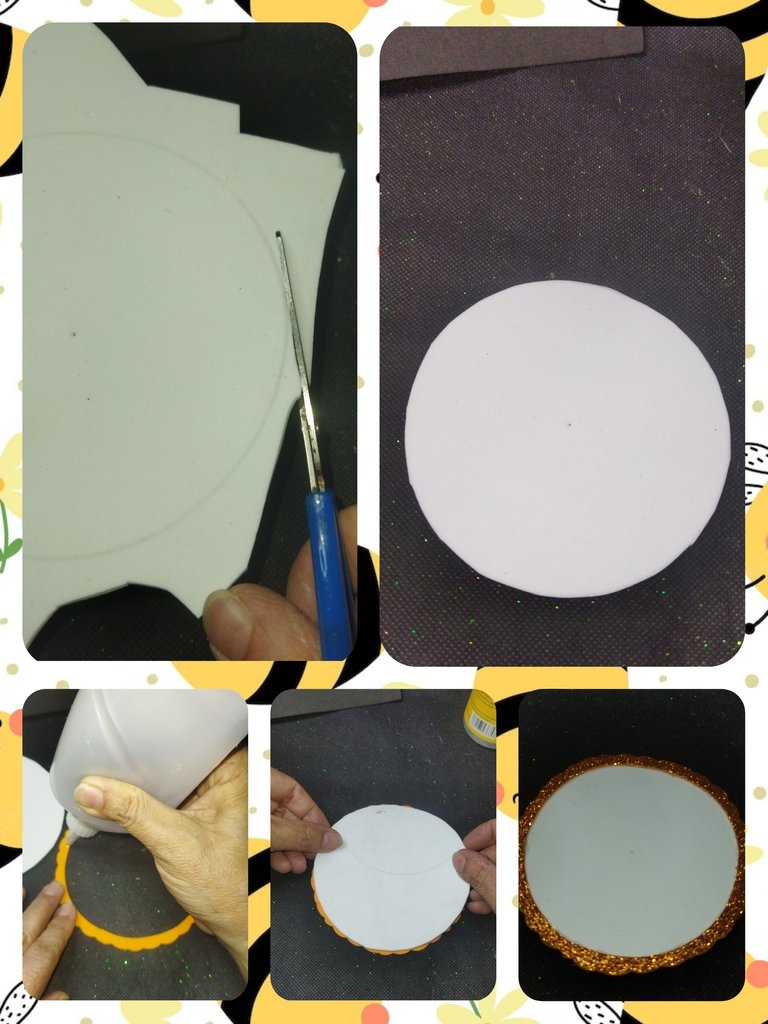
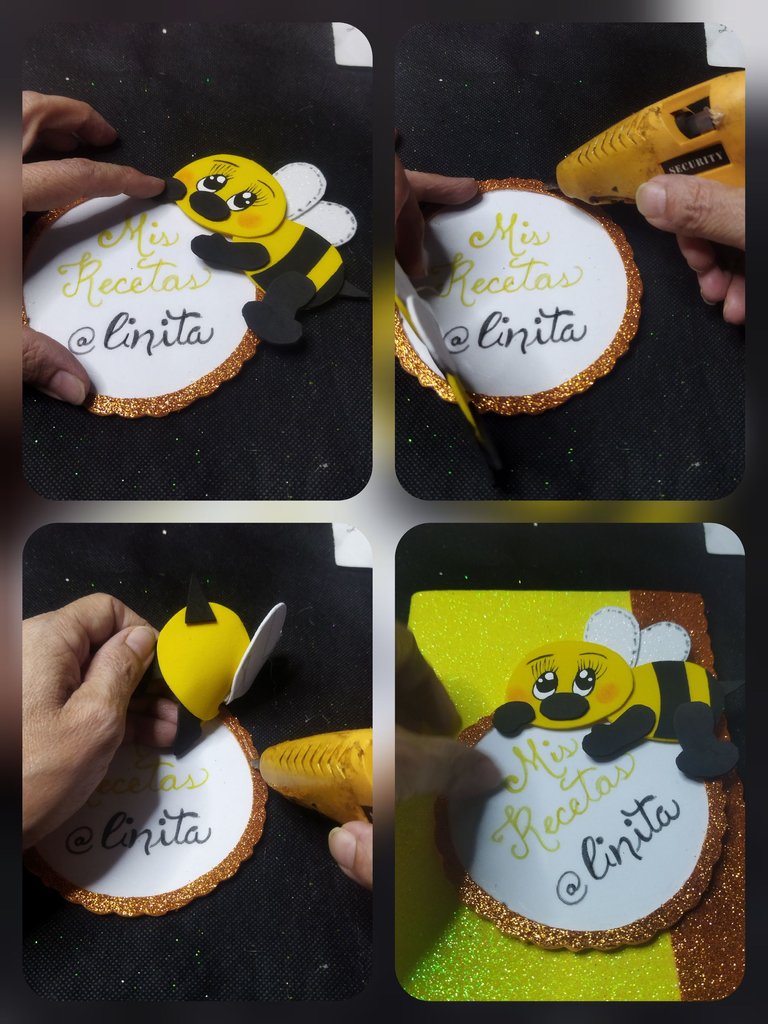
To personalize my recipe book, I made a 12 cm circle and then an 11 cm circle inside the first one, in frosted copper foam using the compass, and I cut out the outside and inside, forming a ring.
DECORACIÓN
Para personalizar mi recetario, realicé un circulo de 12 cm y luego uno de 11 cm dentro del primero, en foami cobre escarchado utilizando el compás,y recorté el exterior y el interior, formando un aro.
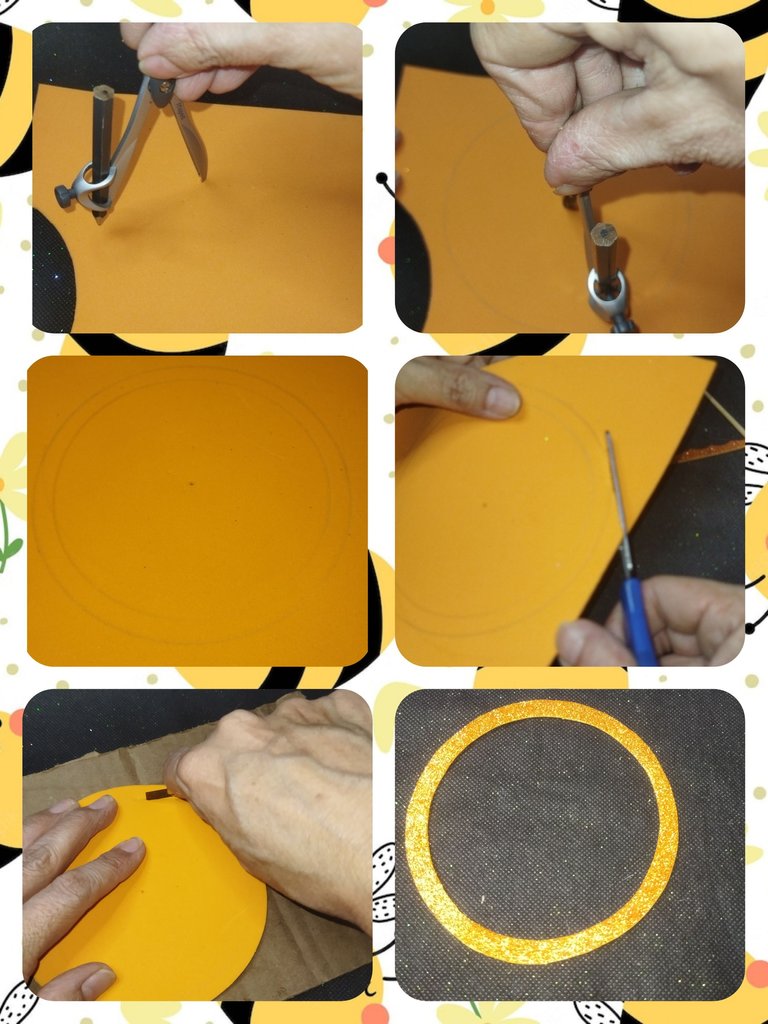
With the shape scissors I cut out the outline and in white foami I traced a circle of 5.5 cm in diameter to place as a background.
I cut and glued with liquid silicone.
Con la tijera de forma recorté el contorno y en foami blanco tracé un círculo de 5.5 cm de diámetro para colocar de fondo.
Recorté y pegué con silicón líquido.
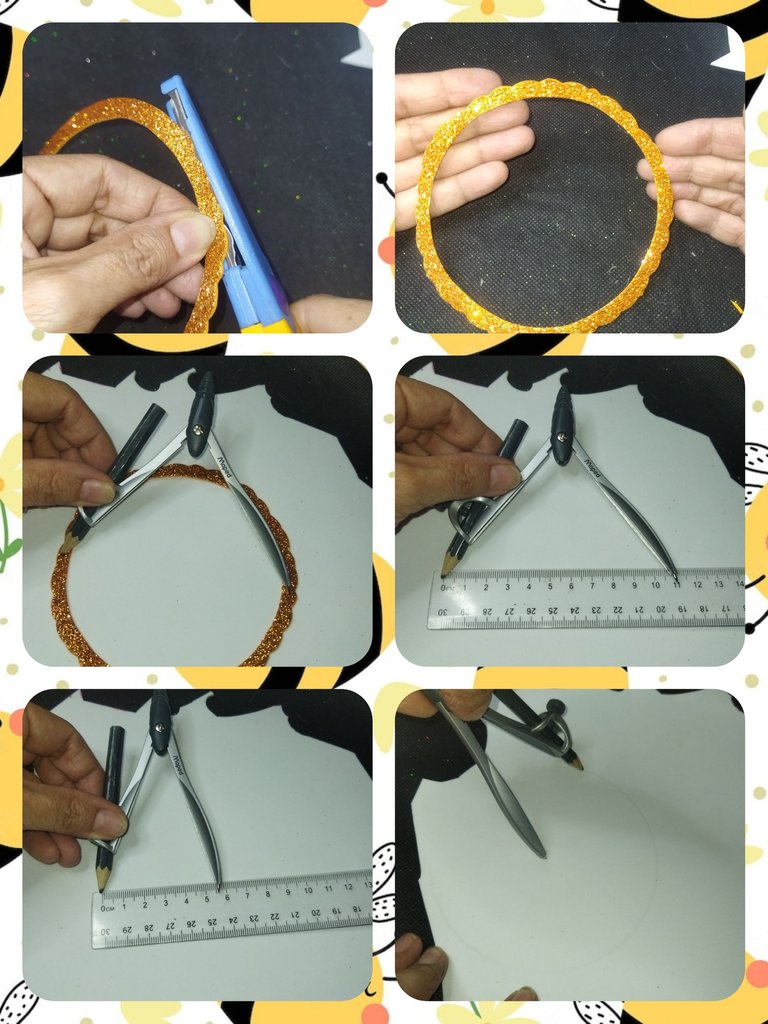
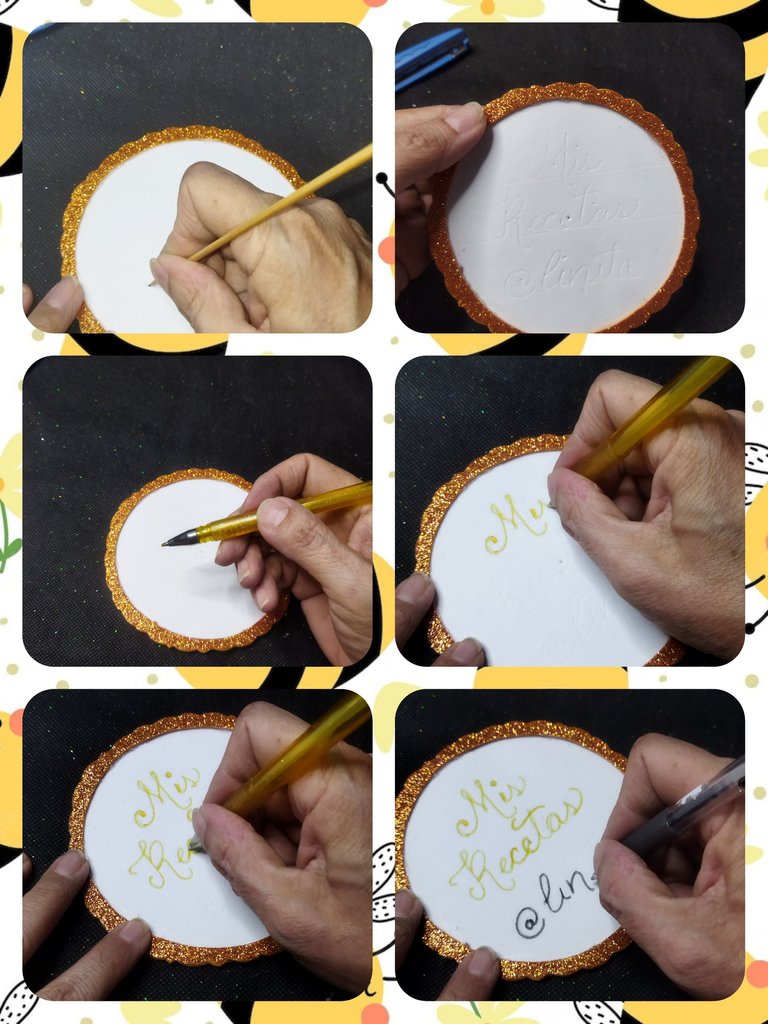
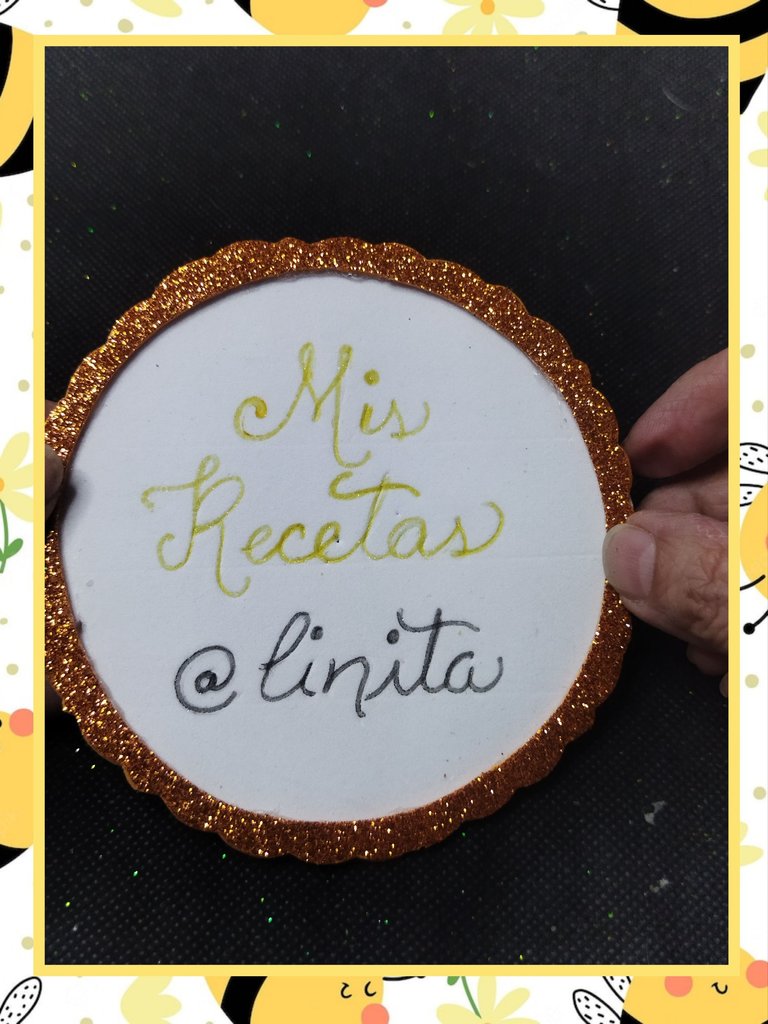
With the height toothpick, I made a few lines to write the name of My Recipe Book @linita, which I also did with the toothpick.
Then with the frosted, yellow and black pens I remarked what was previously written.
Con el palillo de altura, realicé unas líneas para escribir el nombre de Mi Recetario @linita, que también lo realicé con el palillo.
Luego con los lapiceros escarchados, amarillo y negro remarqué lo escrito anteriormente.
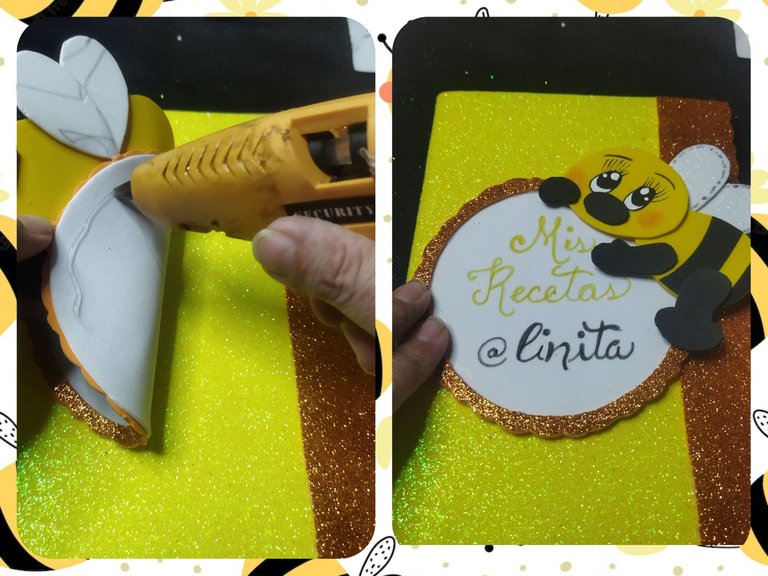
I placed the bee on the upper right hand side and glued it with silicone. Then I placed it in the center of the notebook and glued it with silicone in the same way.
Ubiqué la abeja en el lado superior derecho y pegué con silicón. Luego lo coloqué en el centro del cuaderno y de igual manera pegué con silicón.
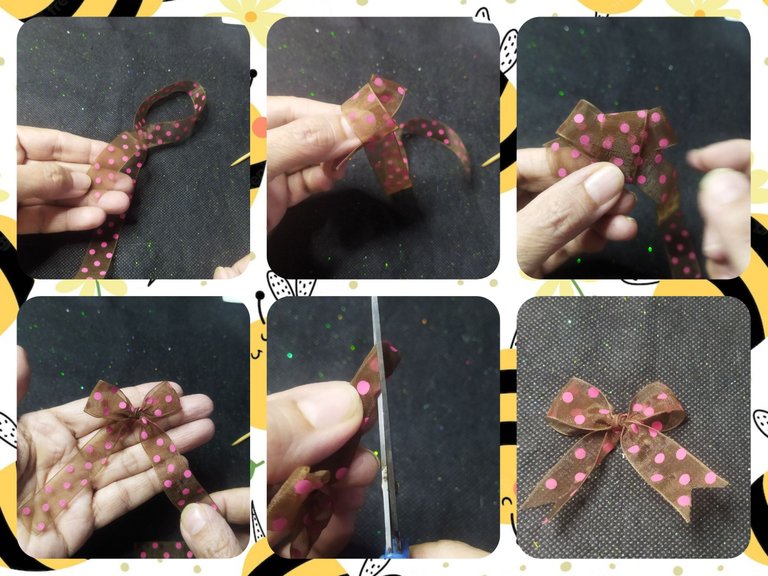
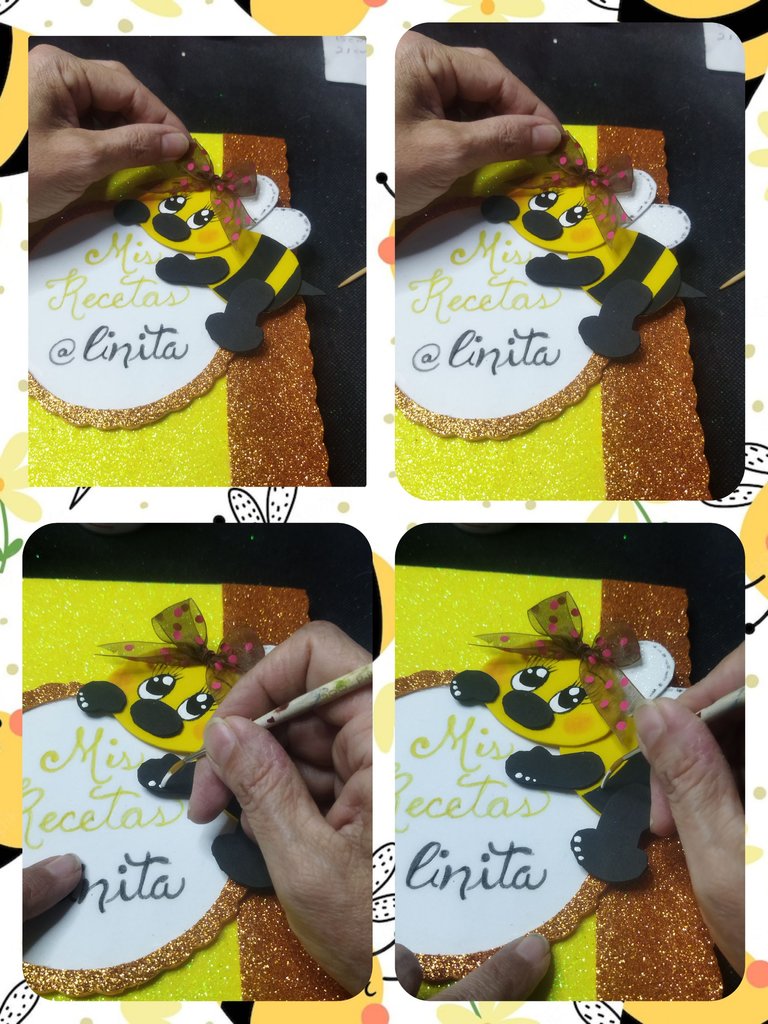
And now to culminate and finish giving the feminine touch to my recipe book, I made a bow with fabric ribbon and I glued it to the head of the bee and with the liner brush and white paint I made dots on the legs and belly of the bee.
Y ya para culminar y terminar de darle el toque femenino a mi recetario, realicé un lazo con cinta de tela y lo pequé en la cabeza de la abeja y con el pincel liner y pintura blanca realicé puntos en las patas y barriga de la abejita.
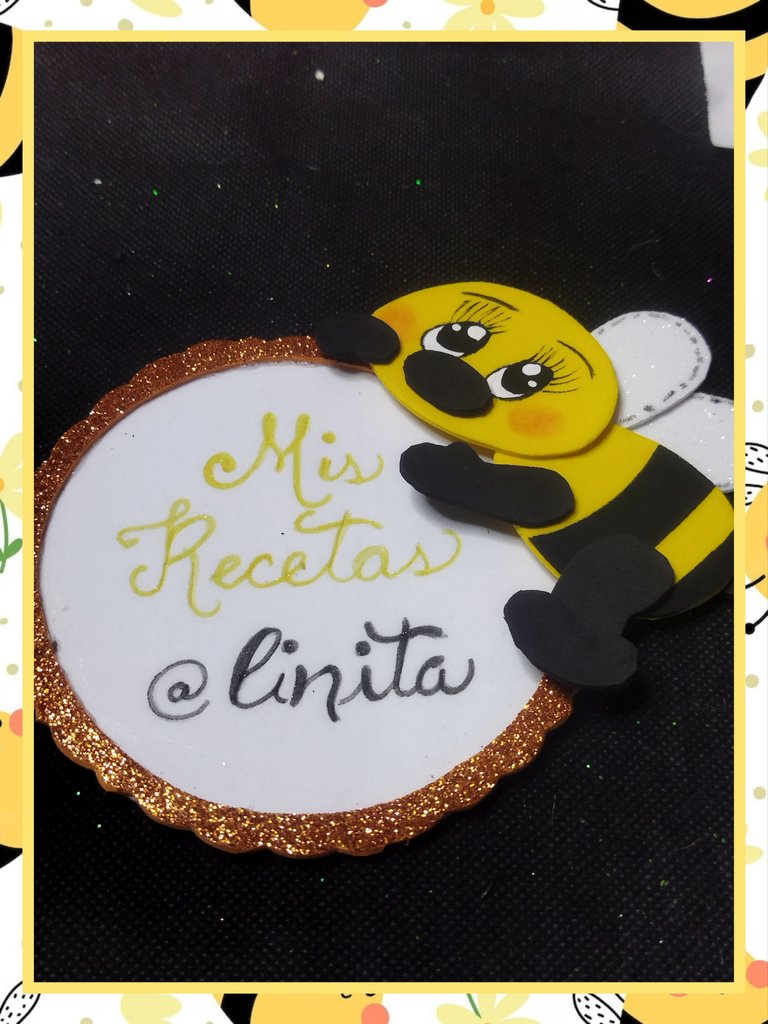
And so My Recipe Book was left, in it I will pass on all the recipes that I have accumulated throughout my experience as a lover of cooking and that I hope will pass from generation to generation. This is a nice way to transfer knowledge and be beneficial to many people in my family. I invite @vicmito and @aarolita to participate in the monthly #diyhub contest dedicated to the bees. I hope you like my content. I say goodbye, until next time.
Y así quedó Mi Recetario, en él pasaré todas las recetas que he acumulado a lo largo de mi experiencia como amante de la cocina y que espero pase de generación en generación. Esta en una linda forma de transferir conocimientos y sea provechoso para muchas personas de mi familia. Invito a @vicmito y a @aarolita a participar en el concurso mensual de #diyhub dedicado a las abejas. Espero les guste mi contido. Me despido, hasta la próxima.
Pura ternura... esta abejita está cuidando con mucho recelo tu cuaderno de recetas.
Todo el proceso creativo me encanta, es una idea muy original y bonita.
Gracias por regalarnos el paso a paso tan detallado.
Muchísima suerte en el concurso. 🐝
#hive #posh #diy #bee
https://twitter.com/obo2004/status/1677716553758801922?t=ZJJwYReKAYVAFoRXj37PIQ&s=19
Ainssss pero esto es una ternurita, que trabajo tan hermoso. Te quedo espectacular la libreta decorada con la tierna abejita. Me encanto. La mejor de las suertes en el concurso...
!DIY
You can query your personal balance by
!DIYSTATSA very beautiful decorative work. A very nice notebook. Best of luck in the contest. Thank you for giving us this excellent work. // Un trabajo decorativo muy hermoso. Una libreta muy bonita. Mucha suerte en el concurso. Gracias por regalarnos este excelente trabajo.
Quedó bello 👍
¡Felicidades! Esta publicación obtuvo upvote y fue compartido por @la-colmena, un proyecto de Curación Manual para la comunidad hispana de Hive que cuenta con el respaldo de @curie.
Si te gusta el trabajo que hacemos, te invitamos a darle tu voto a este comentario y a votar como testigo por La Colmena.
Si quieres saber más sobre nuestro proyecto, te invitamos a acompañarnos en nuestro servidor de Discord.
Te quedo precioso tu recetario @linita, la delicadeza de como trabajas con el foami y sobre todo pintar los ojitos, eso es algo que me falta aprender jajajajaja, suerte en el concurso!