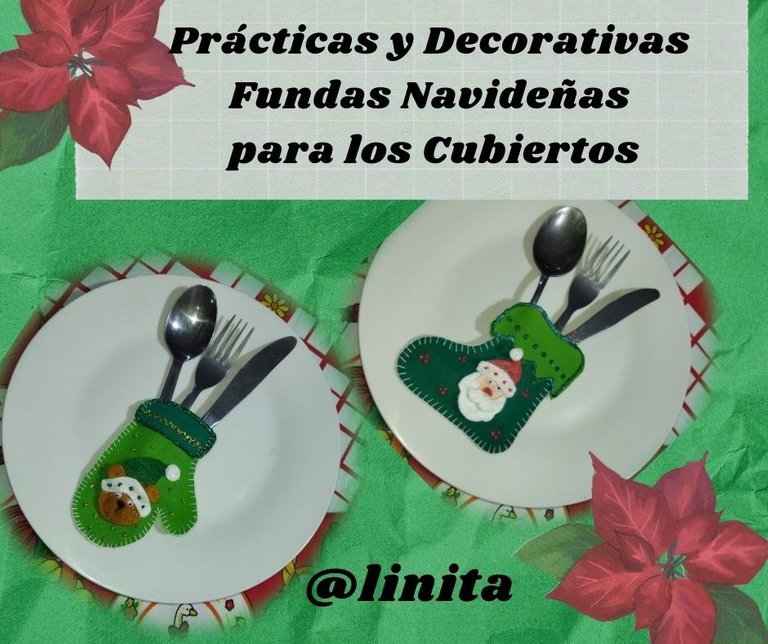
[ENG-ESP] PRACTICAL AND DECORATIVE CHRISTMAS COVERS FOR CUTLERY // PRÁCTICAS Y DECORATIVAS FUNDAS NAVIDEÑAS PARA LOS CUBIERTOS
Helloooooo! My dear NeedleWorkMonday friends
At Christmas, creativity overflows in all of us who love and enjoy it. There are many ideas that we can carry out both to brighten up our homes, to give as gifts and to obtain additional income. This season is conducive to many activities and the decoration of the Christmas table is one of them. To do this, I wanted to enhance some eco-fabric and felt covers to bring joy to my table on the day we will share this year's farewell. For many, in all the countries of the world, it has been a year that has brought us many losses, physical, economic, affective, but we will not stop thanking God for all that he has allowed us to preserve. So in my home I try to convey a little joy with how much or how little I may have so that my family feels happy.
So here I go, with great joy and desire to share with all of you this idea that will look very nice at our table to say goodbye this year.
¡Holaaaaaaaa! Mis queridos amigos de NeedleWorkMonday
En Navidad, la creatividad se desborda en todos los que la amamos y disfrutamos. Son muchas las ideas que podemos realizar tanto para alegrar nuestros hogares, como para obsequiar y para obtener un ingreso adicional. Esta época es propicia para muchas actividades y la decoración de la mesa de navideña es una de ellas. Para ello, quise realzar unas fundas en tela ecológica y fieltro para darle la alegría a mi mesa el día que compartiremos la despedida de este año. Para muchos, en todos los países del mundo, ha sido un año que nos ha traído muchas pérdidas, físicas, económicas, afectivas pero no por ello dejaremos de agradecerle a Dios por todo lo que nos ha permitido conservar. Así que en mi hogar trato de transmitir un poco de alegría con lo mucho o poco que pueda tener para que mi familia se sienta feliz.
Así que aquí voy, con mucha alegría y ganas de compartir con todos ustedes esta idea que se verá muy linda en nuestra mesa para despedir este año.
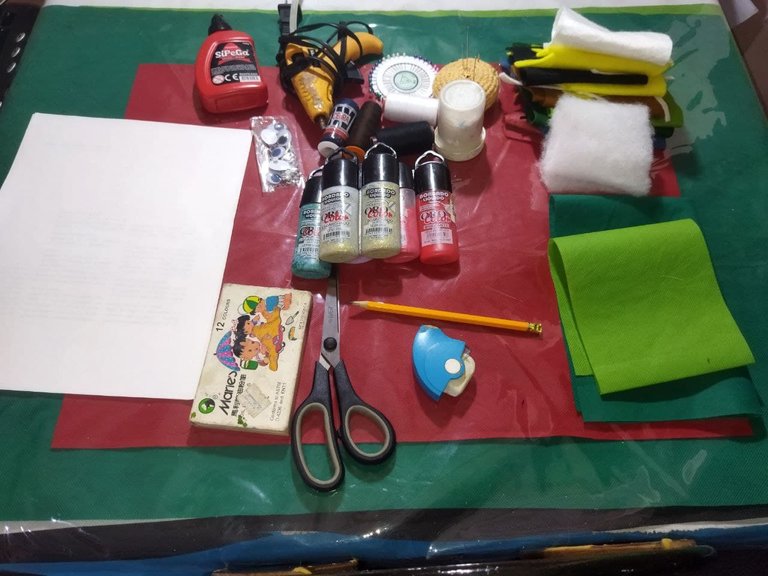
MATERIALS
- Ecological fabric patchwork (apple green and dark green)
- Patchwork of felt in assorted colors
- Black and white threads
- Sewing needle
- Pins
- Crazy eyes
- Silicone
- School glue
- Litmus frost
- Recycled sheet
- Graphite pencil
- Scissor
- Liquid embroidery various colors
MATERIALES
- Retazos de tela ecológica (verde manzana y verde oscuro)
- Retazos de fieltro de colores variados
- Hilos negro y blanco
- Aguja de coser
- Alfileres
- Ojos locos
- Silicón
- Pega escolar
- Escarcha tornasol
- Hojas recicladas
- Lápiz de grafito
- Tijera
- Bordado líquido colores varios
PROCESS
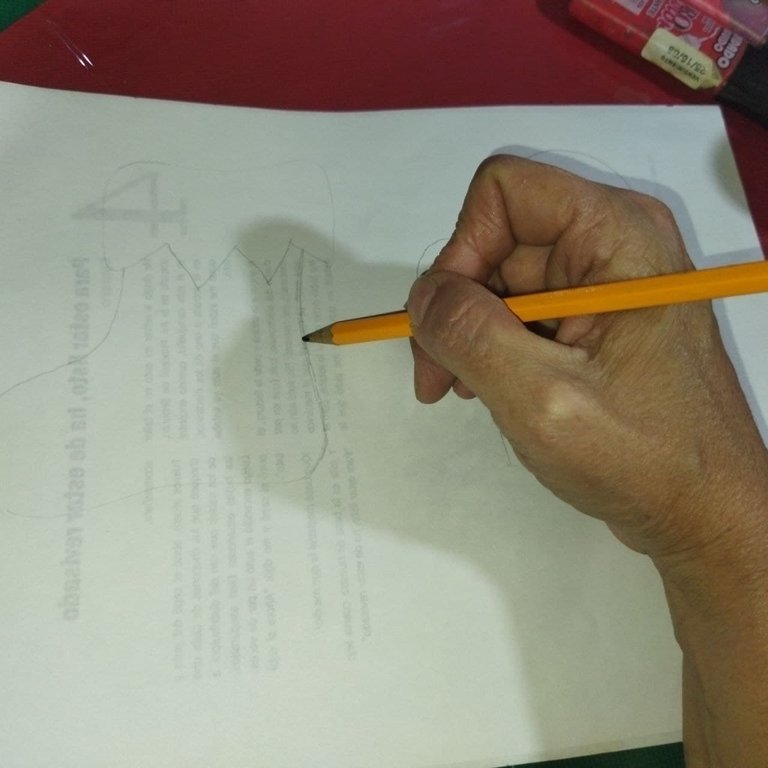
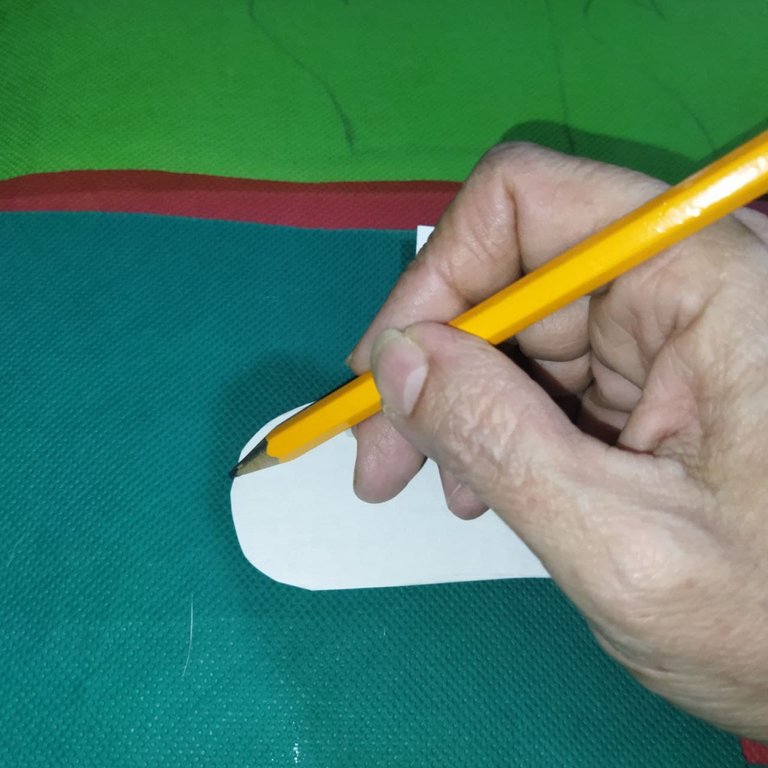
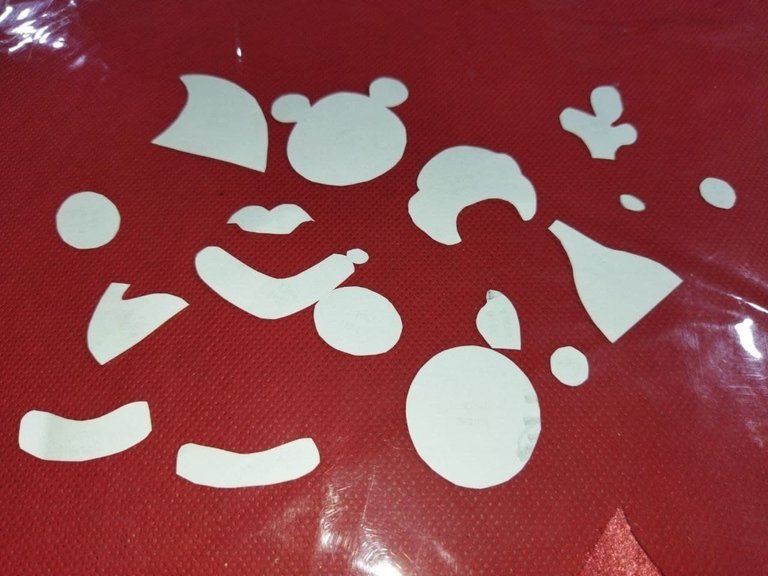
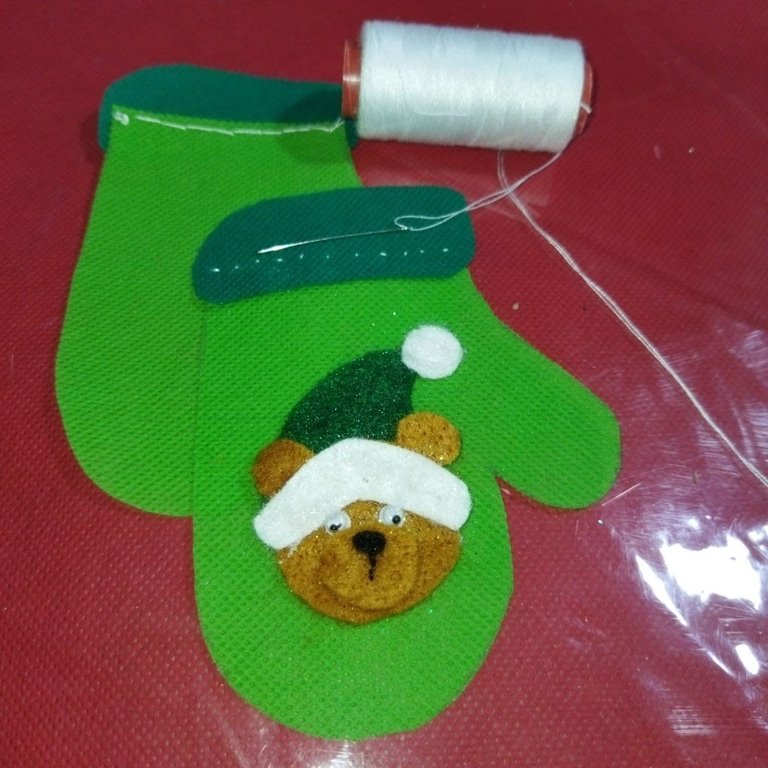
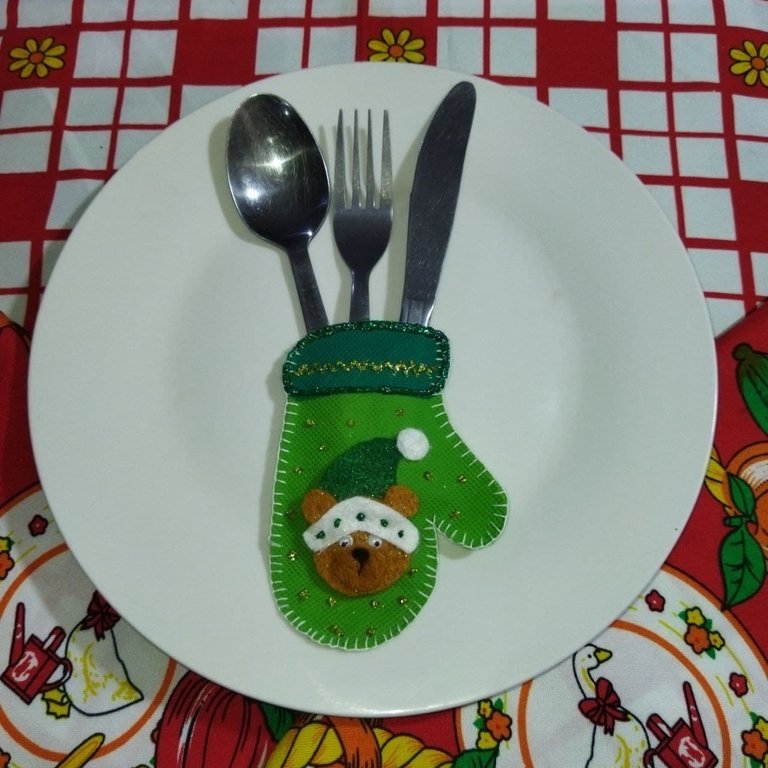
- On some sheets of recycled paper, I made the patterns for the Christmas glove and boot, which were the pieces I chose to make the covers. I also made the figure of a saint and a bear. Then I cut out each of the pieces.
PROCEDIMIENTO
- En unas hojas de papel reciclaje realicé los patrones del guante y la bota navideñas que fueron las piezas que escogí para realizar las fundas. Igualmente realicé la figura de un santa y un osito. Luego recorté cada una de las piezas.

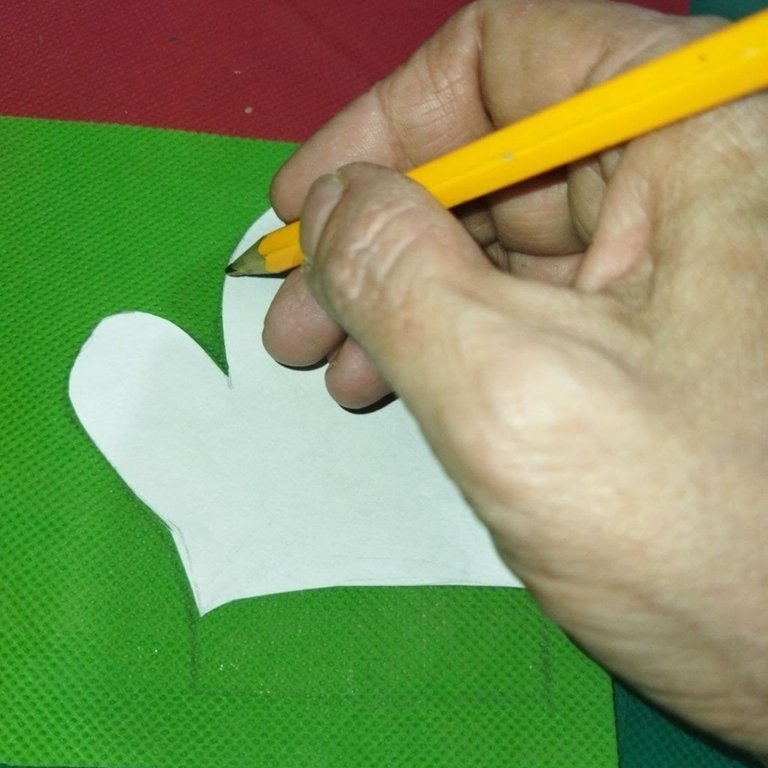
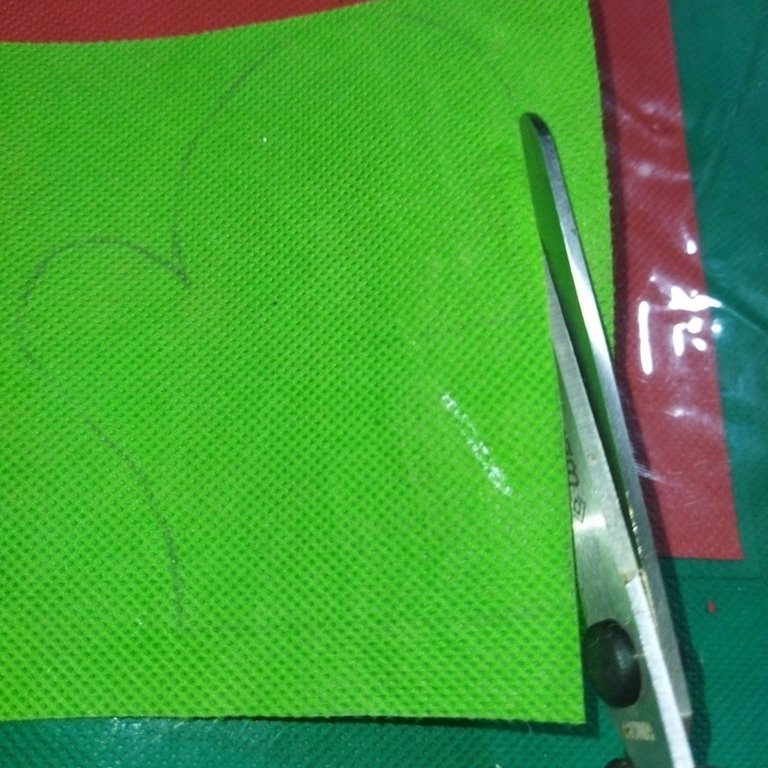
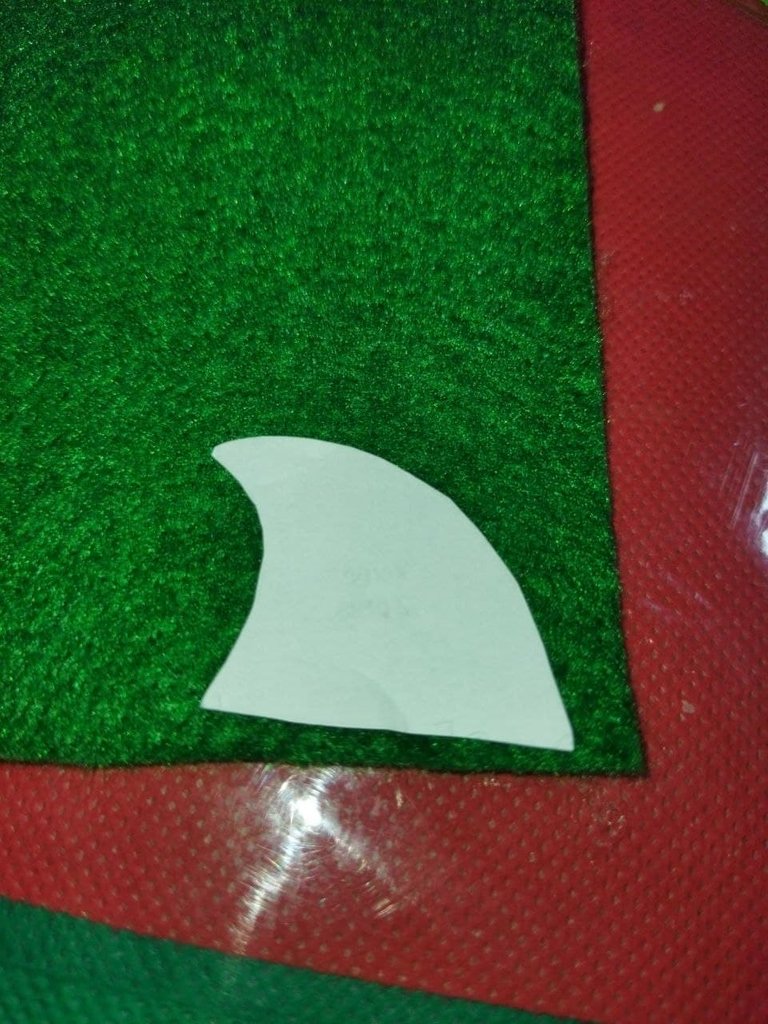
- Next, I marked with the pencil the silhouettes of the boot and the glove, two pieces of each one for the realization of the cover and I cut them.
- A continuación, marqué con el lápiz las siluetas de la bota y el guante, dos piezas de cada una para la realización de la funda y las corté.


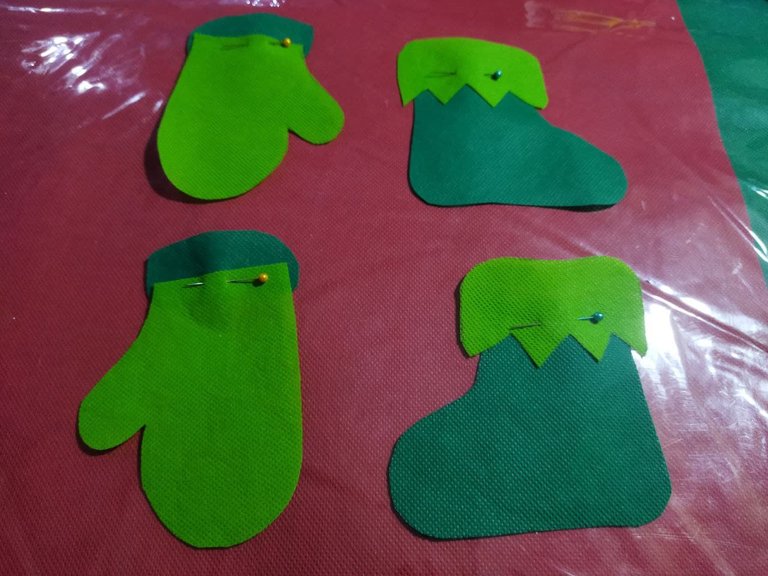
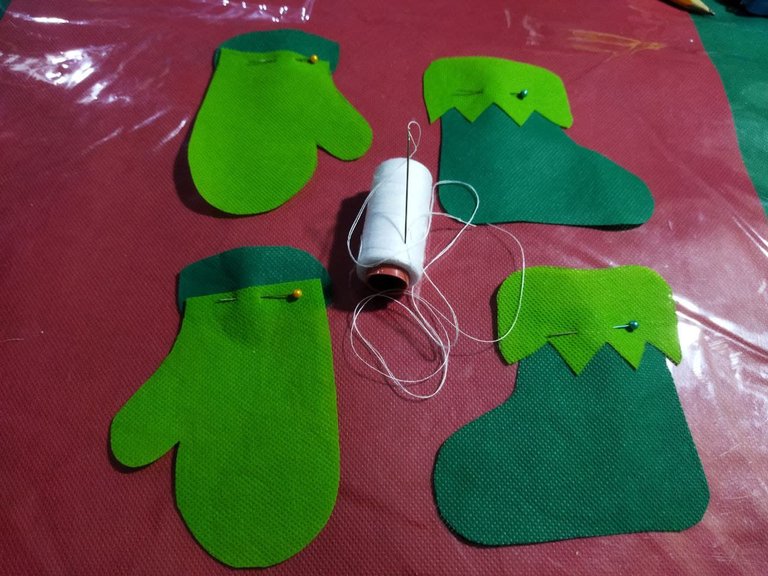
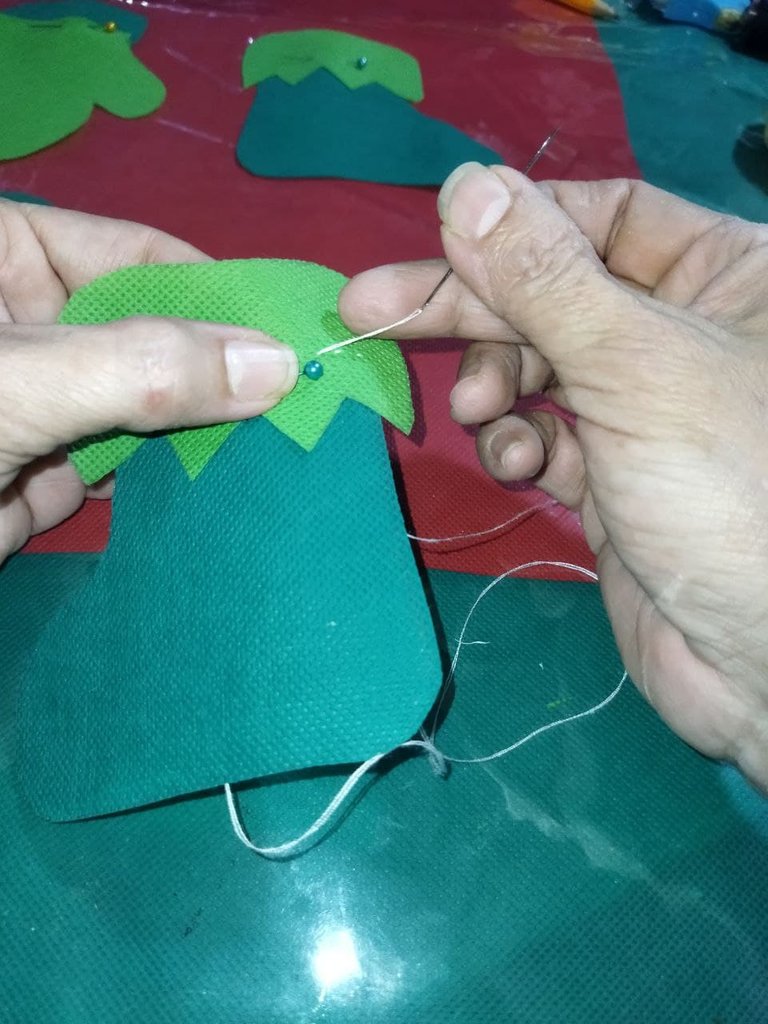
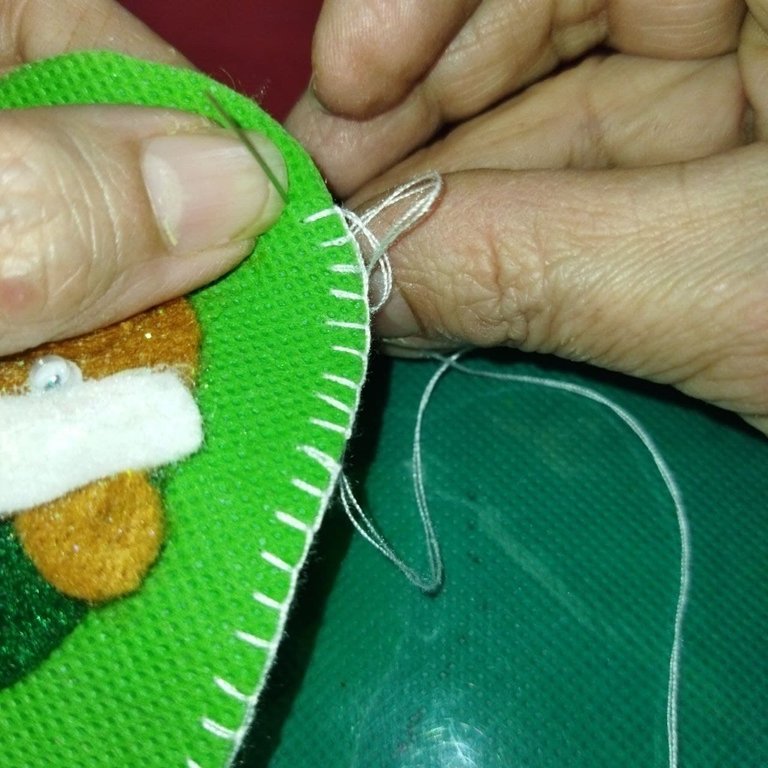
- To join each piece of the boot and the glove, I used sewing pins to hold the pieces and fix them and with a needle and white thread and made the stitch point to glue them, making short stitches. I like this point because it makes the process easier, it is done very quickly and the stitch is hardly noticeable.
- Para unir cada pieza de la bota y el guante, utilicé alfileres de costura para sujetar las piezas y fijarlas y con aguja e hilo blanco y realicé el punto pestunte para pegarlas, haciendo puntadas cortas. Me gusta este punto porque facilita el proceso, se realiza muy rápido y casi no se nota la puntada.
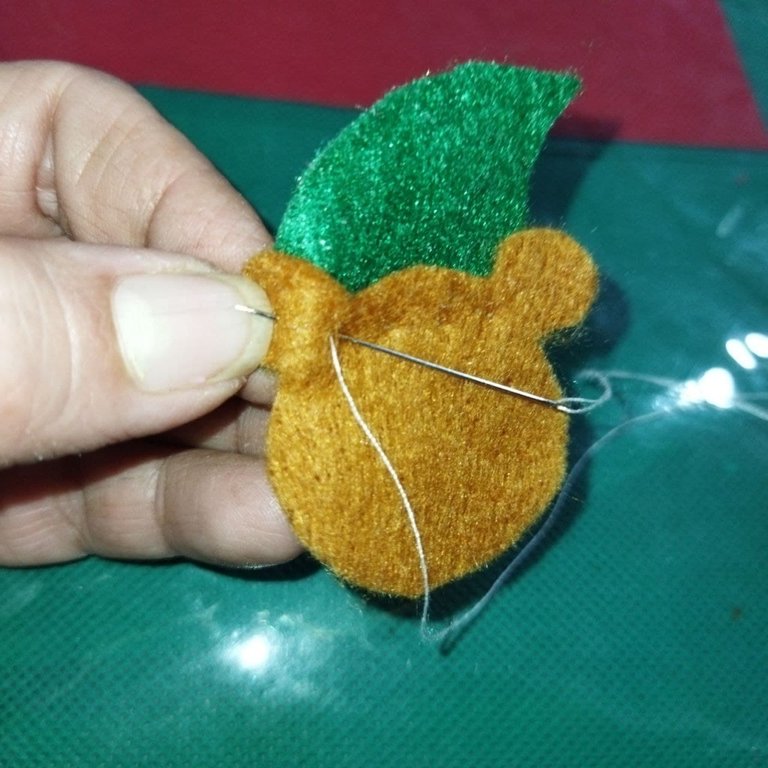
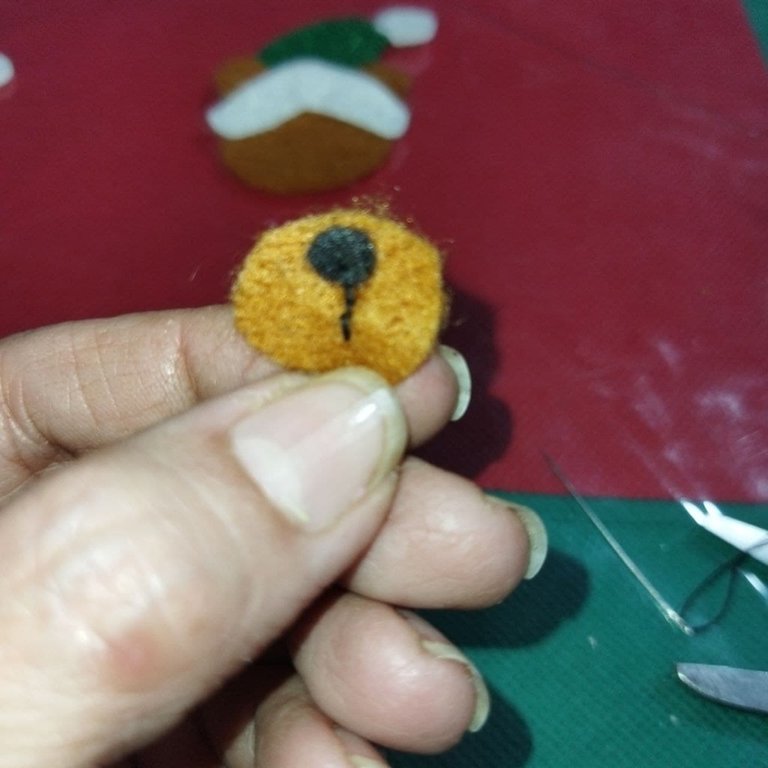
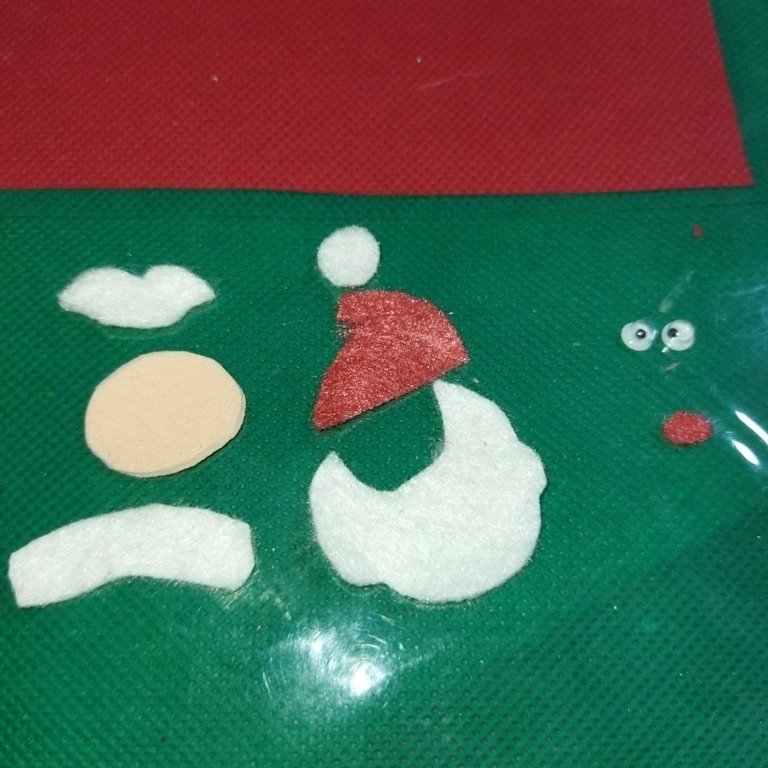
- Now the covers are ready, I started to make the appliqués to decorate the covers. With the small patterns that I made, I began to draw piece by piece on the felt with each corresponding color. I must confess that it was the process that cost me the most because working with miniatures is very difficult.
- Ya listas las fundas comencé a realizar los apliques para decorar las fundas. Con los pequeños patrones que realicé , empecé a sacar pieza por pieza en el fieltro con cada color correspondiente. Debo confesar que fue el proceso que más me costó realizar porque trabajar con miniaturas es muy difícil.
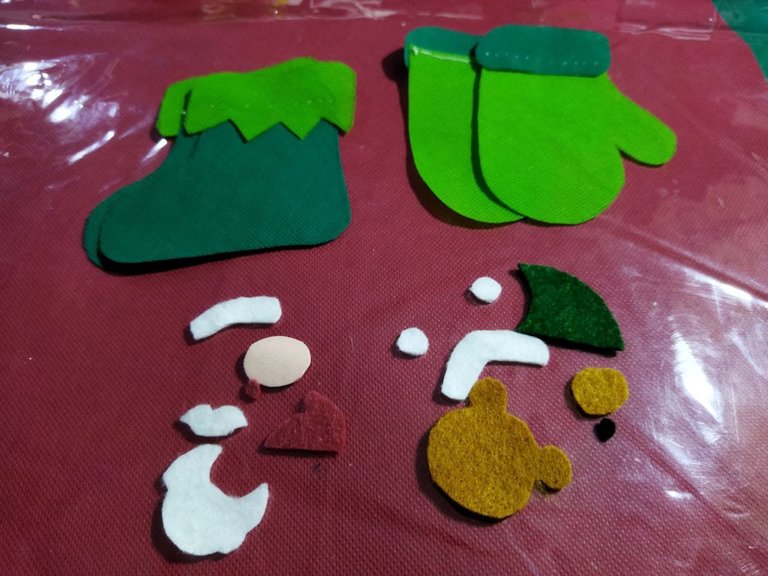
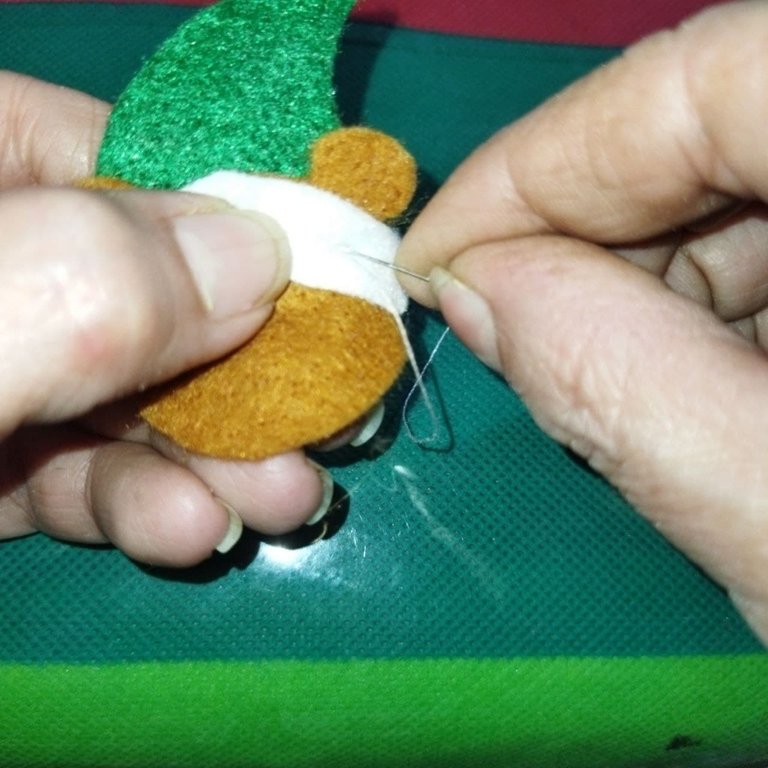
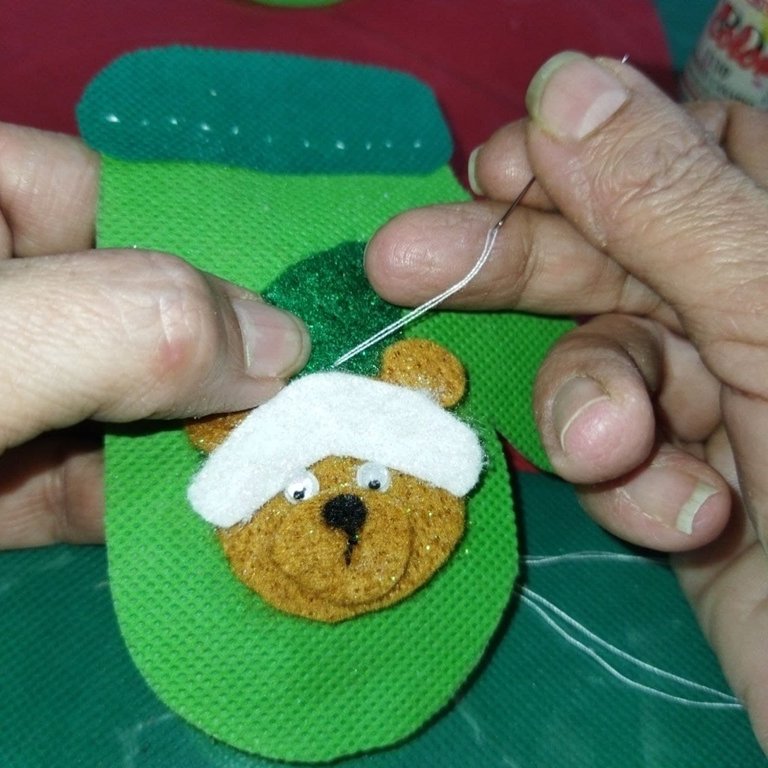
- Once all the pieces were cut, I proceeded to join them with a needle and thread, making small random stitches until they were all joined.
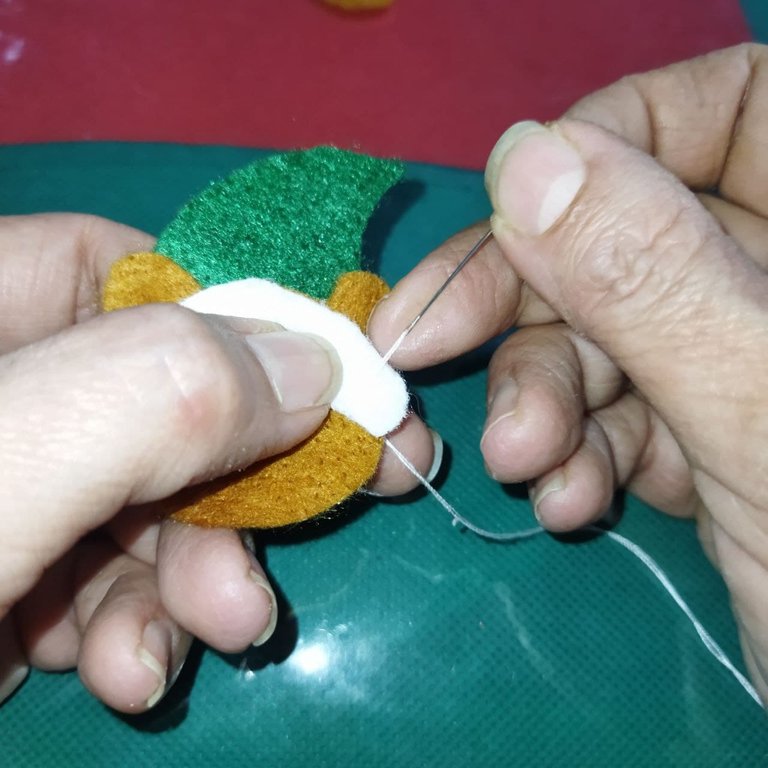
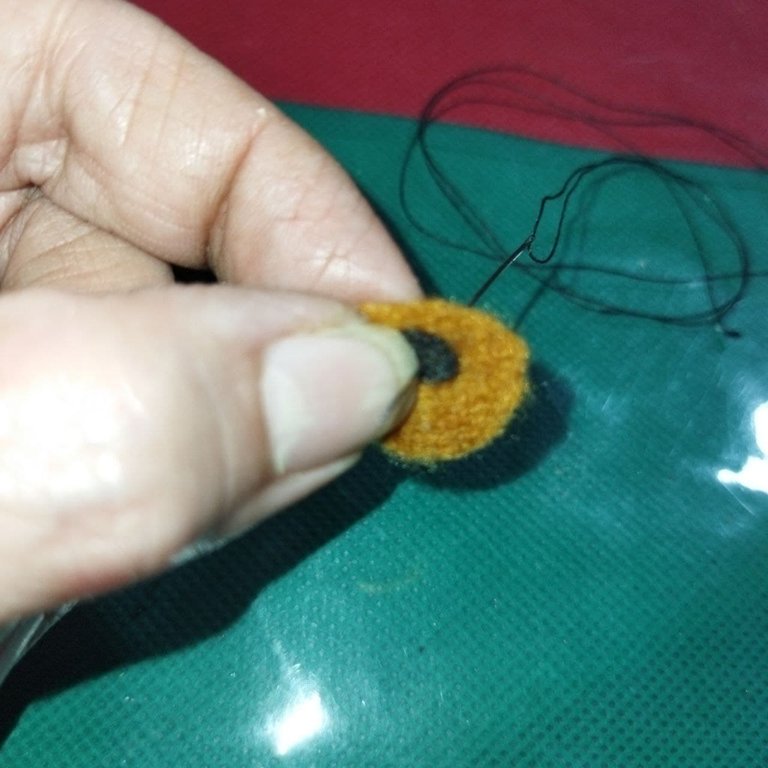
- In the bear's trunk, I sewed the nose with black thread and made a backstitch seam to make the mouth.
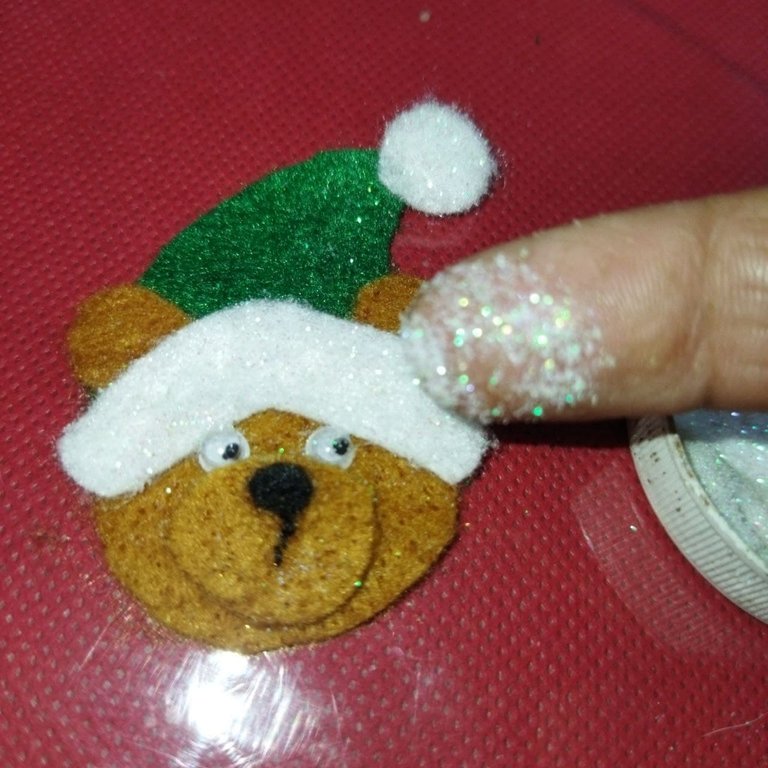
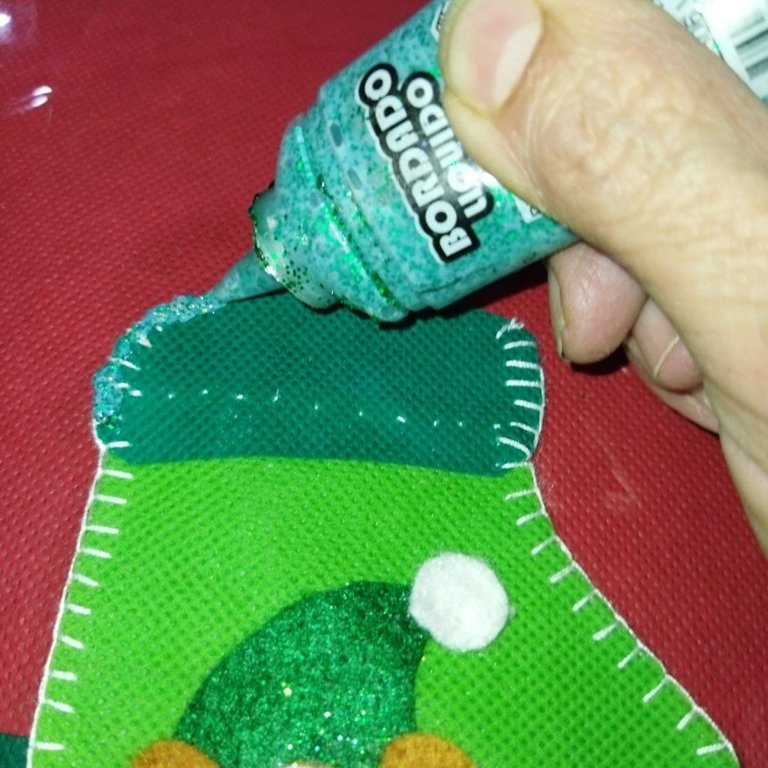
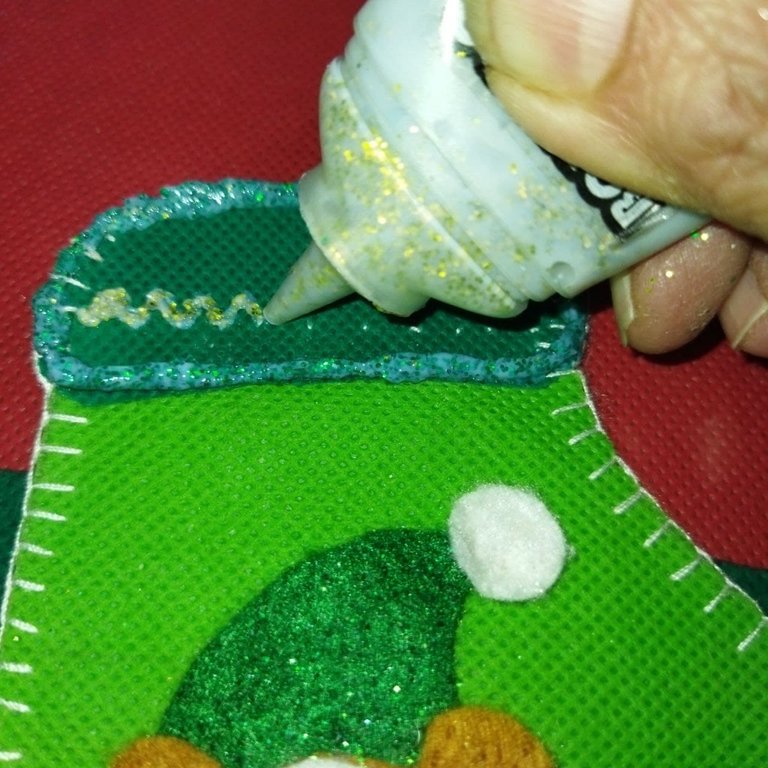
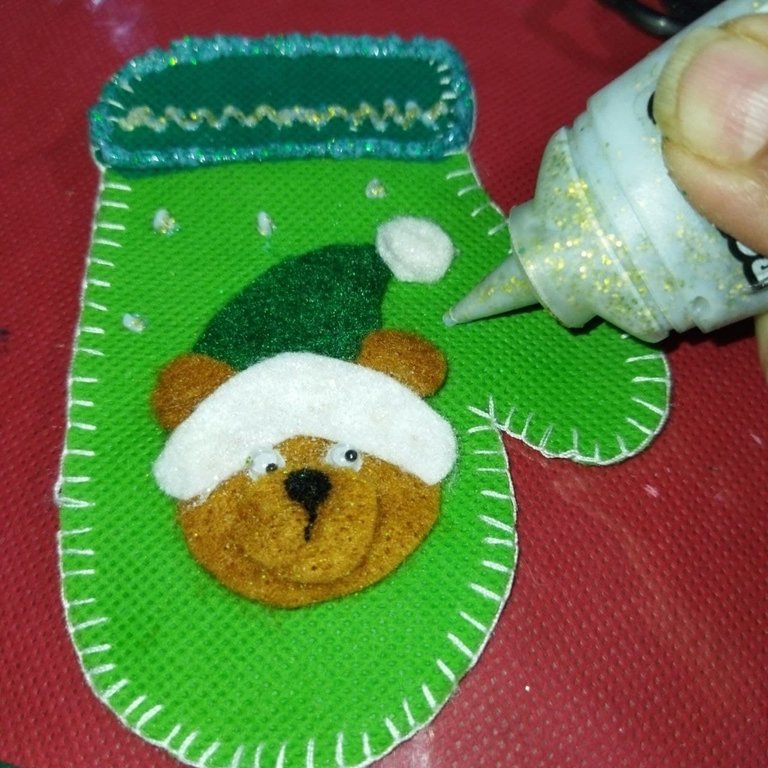
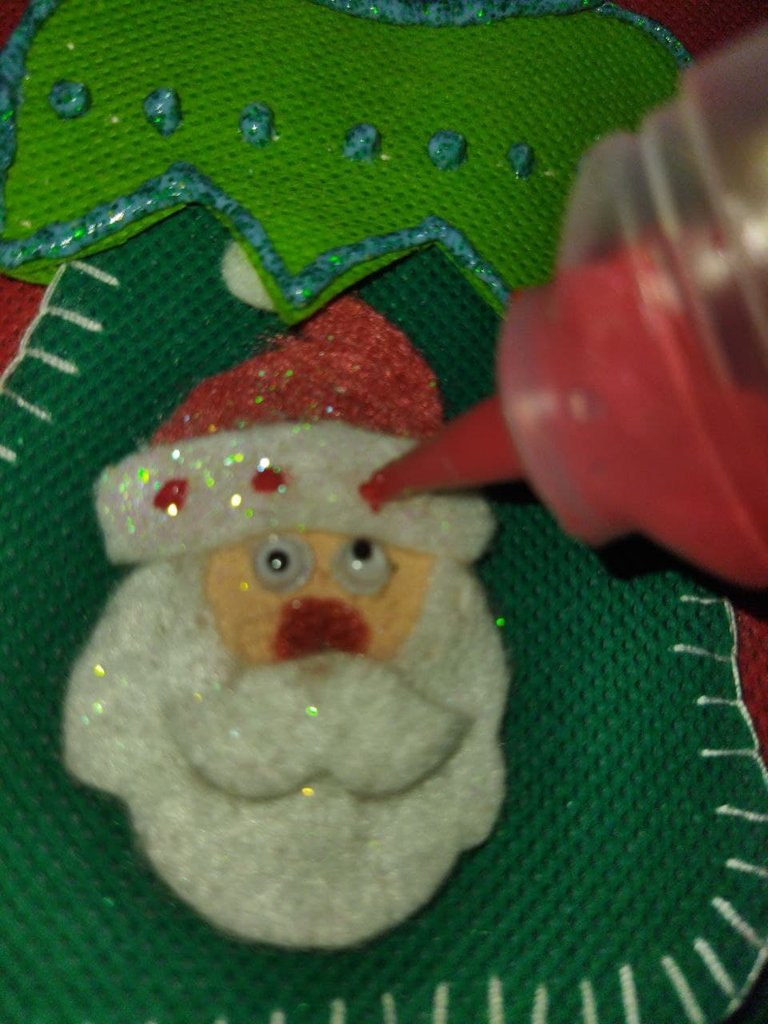
- I placed glue and frost on the hat and with liquid silicone I glued the crazy eyes. Then I sewed the appliqué on the cover.
- Una vez cortadas todas las piezas, procedí a unirlas con hilo y aguja, haciendo pequeñas puntadas al azar hasta unirlas todas.
- En la trompa del osito, cosí la nariz con hilo negro e hice una costura pespunte para realizar la boca.
- Coloqué pega y escarcha en el gorro y con silicón líquido pegué los ojitos locos. Luego cosí el aplique en la funda.

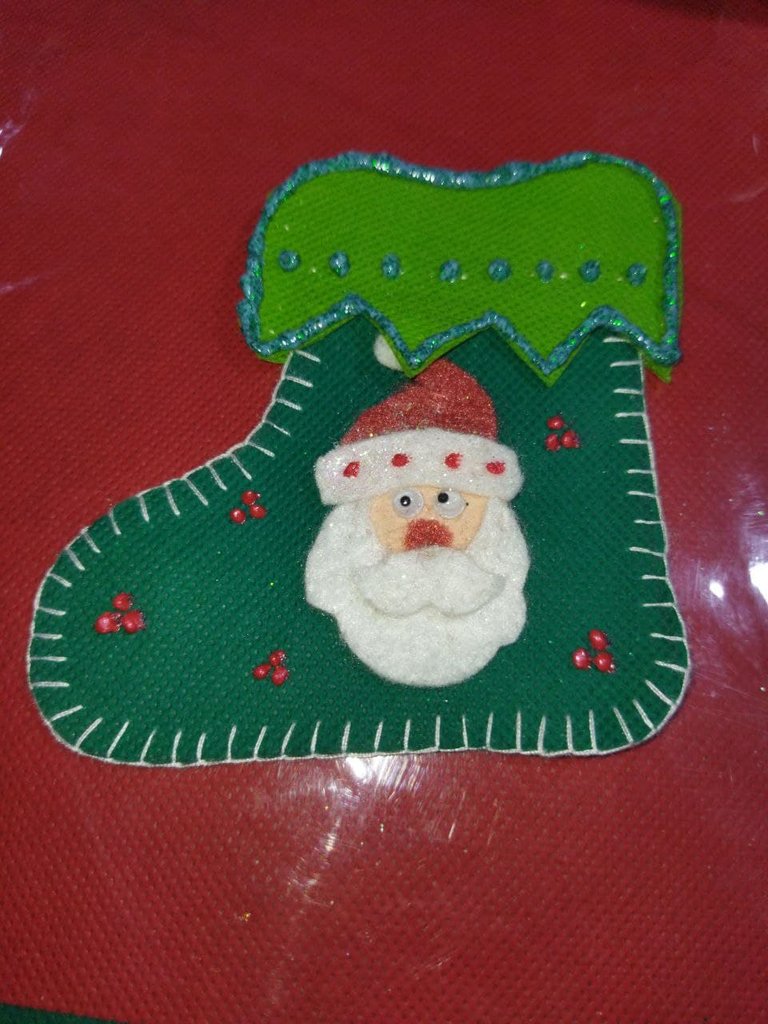
- I joined both boots and began to sew from the upper left end of the boot to the other end, keeping the upper part to insert the cutlery. For this step, I made the buttonhole stitch, which is great for sealing and spicing up the seam.
- Uní ambas botas y comencé a coser desde el extremo superior izquierdo de la bota hasta el otro extremo, conservando la parte superior para introducir los cubiertos. Para este paso, realicé el punto de ojal, que es magnifico para sellar y darle vida a la costura.
- And to finish with this beautiful ornament, I made the last details with liquid embroidery around the green and gold boot to cover the details of the stitching. I also placed golden dots to decorate.
- Y ya para terminar con este lindo adorno, realicé los últimos detalles con bordado líquido alrededor de la bota de color verde y dorado para cubrir los detalles de la costura. Igualmente coloqué puntos dorados para adornar.
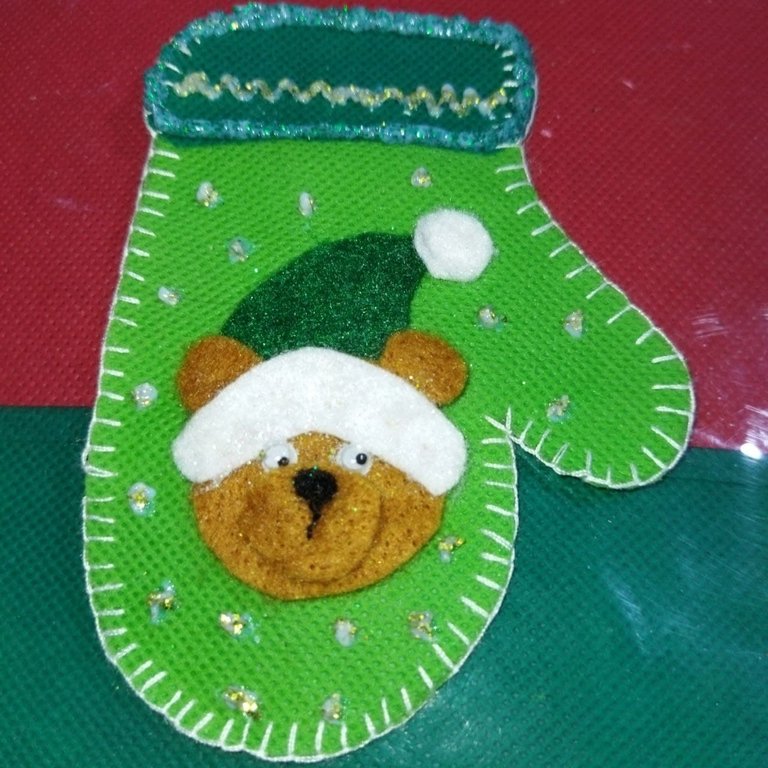
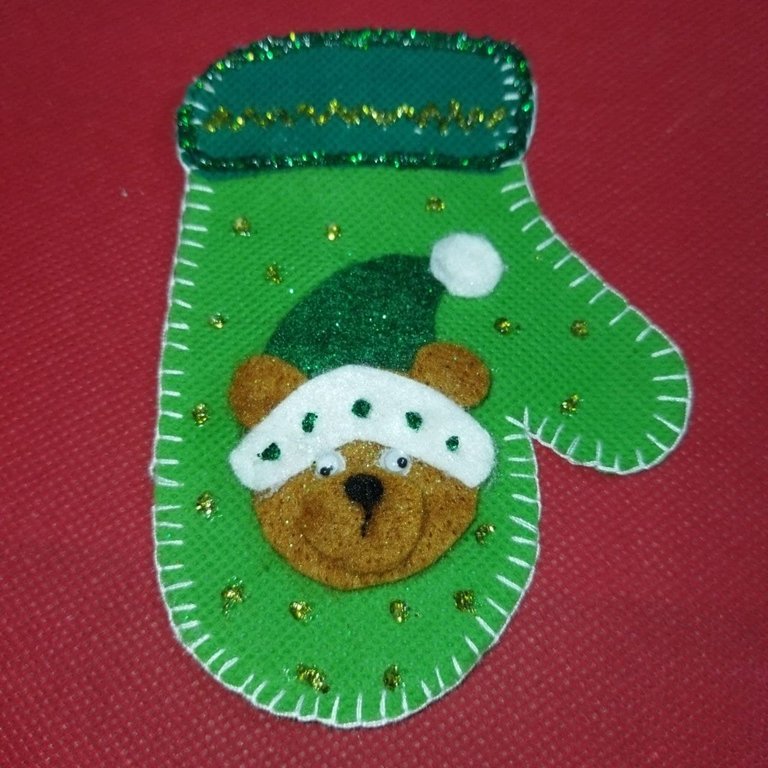
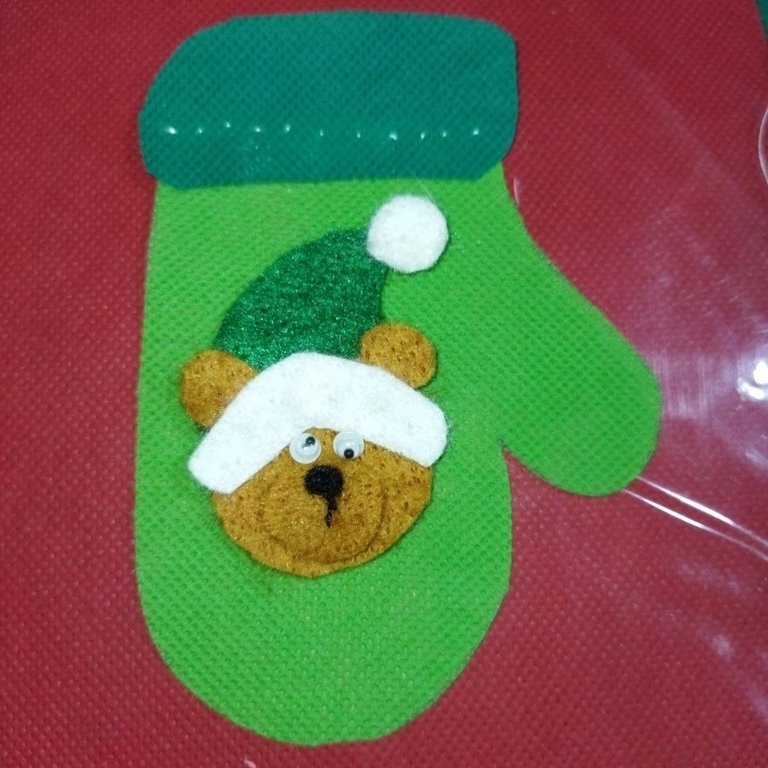
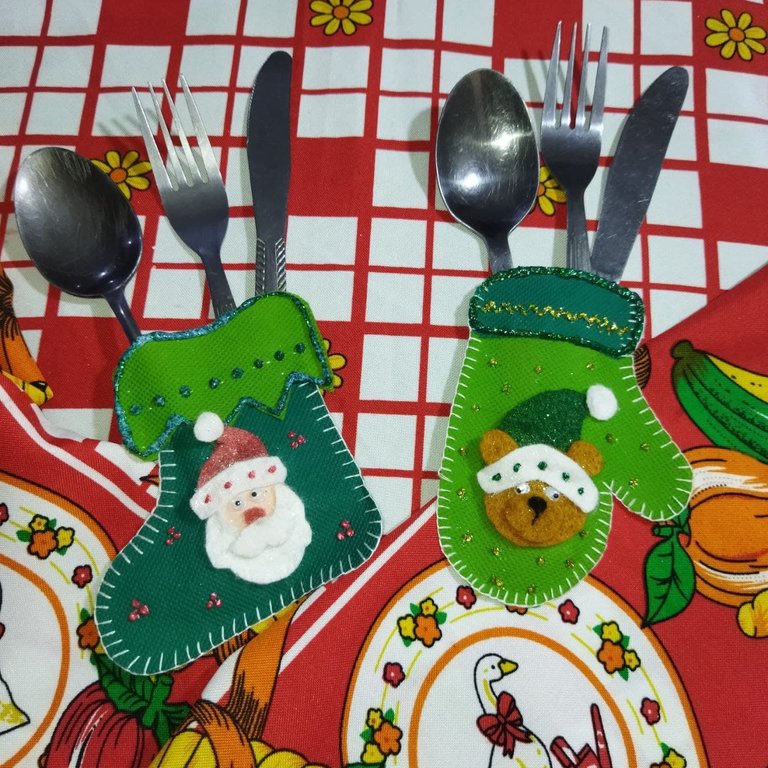
In the same way I made the glove-shaped cover, with the difference that the decorative detail is a cute santa. All steps are the same as above.
De la misma forma realicé la funda con forma de guante, con la diferencia que el detalle decorativo es un lindo santa. Todos los pasos son iguales a los anteriores.

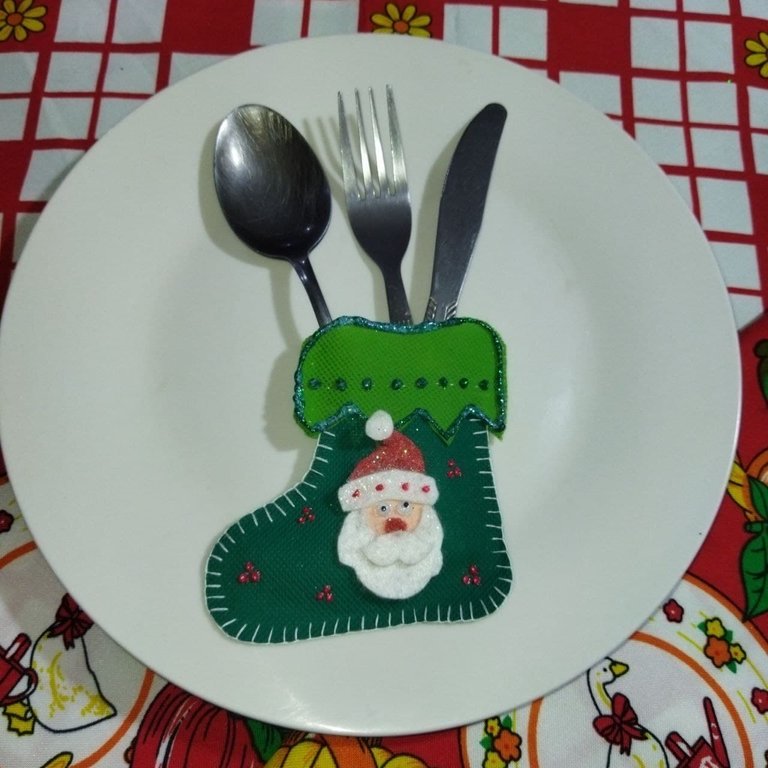
This year my Christmas table will look much prettier than the previous ones with these cute covers that will allow it to be more organized. I hope this idea helps you. And at the same time I take the opportunity to wish you a happy new year in advance. May everything bad serve us for the better and may what we learn remain in our minds and hearts.
HAPPY NEW YEAR 2022!
Este año mi mesa navideña lucirá mucho más bonita que las anteriores con estas lindas fundas que permitirán que esté mas organizada. Espero que esta idea les sirva. Y a la vez aprovecho para desearles de antemano un feliz año nuevo. Que todo lo malo nos sirva para mejor y que lo aprendido quede en nuestras mentes y corazones.
¡FELIZ AÑO NUEVO 2022!
Todas las fotos son de mi autoría, tomadas con mi teléfono POCO M3
Utilicé https://translate.google.com para la traducción
Para la edición de la portada y las fotos Canva y Picsart

Utilicé https://translate.google.com para la traducción
Para la edición de la portada y las fotos Canva y Picsart
Ay qué lindas. Seguro que sí lucirá muy bonita tu mesa este fin de año.
Muchas gracias por dejarnos conocer tu idea para aprovechar esos retazos de tela. Con algo de creatividad se logran proyectos muy útiles. Saludos.
Me alegro que te guste, yo también lo espero. Gracias por comentar.
Hola @linita, te felicito por tu creatividad y talento con las manualidades.
Las fundas quedaron realmente hermosas y coloridas.
Me parece un proyecto genial, me gustó mucho tu trabajo, unas puntadas muy prolijas y delicadas. Te deseo un feliz y bendecido año nuevo, Saludos!
Muchas gracias, encanta de que te haya gustado. Espero ir mejorando en muchas cosas. Esa es una de las ventajas de Hive, que te permite crecer como persona y creador. Feliz Año para ti también.
Wow really beautiful, this is lovely idea I won how you guys do come up with such a wonderful ideas and creativities
Si, esta es una grandiosa plataforma porque nos permite compartir ideas a medida que vas mejorando técnicas. Gracias por comentar, me alegro que te haya gustado.
They are super dupper cute! Great job (^_^)