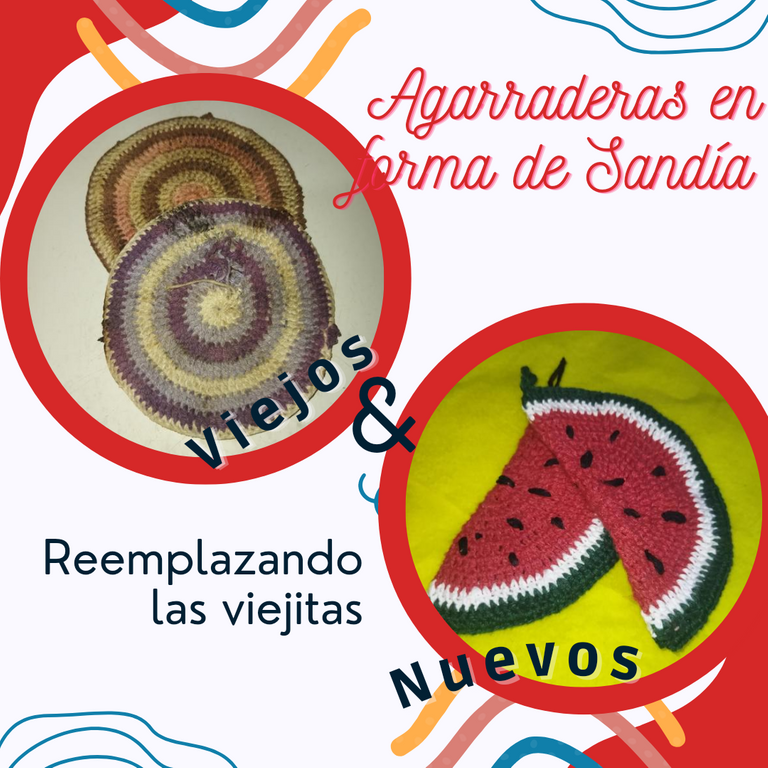
[ENG-ESP] Watermelon shaped handles. Replacing my old potholders. // Agarraderas con forma de Sandía. Reemplazando mis viejas agarraderas.
WELCOME TO MY BLOG!
Hellooooo, hellooooo. Over here again. This time I bring you some beautiful potholders or potholders, as you prefer to call them, woven with all the dedication in the world. Before I must tell you, my mother has had a significant improvement since her fall 5 months ago. She loves to sew, both by hand and by machine, and one of her biggest fears is not being able to hold a pair of scissors again. But thanks to the harsh therapies and perseverance, she has progressed quite a bit. Soon I will show you all her progress.
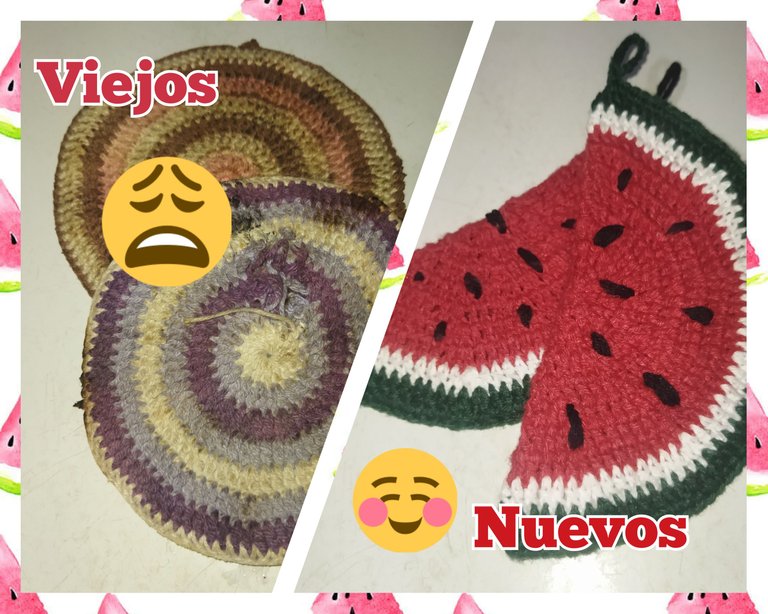
Returning to the subject that concerns us, the pot holders that I had in use were given to me more than a year ago by my sister @creacioneslelys, as you know she is an expert weaver, but they are not eternal and even more so with the use that I give them daily . I think I have also told you that I am a lover of cooking and when I can or when time permits, I also do other activities that help me clear my mind,among them is knitting. Many years ago I knitted a lot, I loved making folders for my bedside tables and centerpieces, but with the passing of time I put it aside and then when I wanted to go back, problems with my vision didn't allow me, but I'll count with my glasses and enough material to use the tissue as a way to release stress.
I always start by telling one thing and go off to another, hahahahaha. The thing is, I made my first knitted pot holders. A complete success and thus be able to replace the ones that my sister gave me more than a year ago.
Now, if you continue reading I will tell you the step by step of how I made them. How quick and easy it is and best of all it brings my kitchen to life thanks to the bright colors of these woven watermelon slices. Without further ado, let's begin.
¡BIENVENIDOS A MI BLOG!
Holaaaaa, holaaaaa. Por aquí nuevamente. Esta vez les traigo unos bellos agarraollas o agarraderas, como prefieras llamarlos, tejidos con toda la dedicación del mundo. Antes debo contarles, que mi madre ha tenido una mejoría significativa, desde su caída hace 5 meses. Ella adora coser, tanto a mano como a máquina y unos de sus mayores temores es no poder agarrar nuevamente una tijera. Pero gracias a las duras terapias y a la constancia ha progresado bastante. Pronto les mostraré todo su progreso.
Volviendo al tema que nos concierne, los agarra ollas que tenía en uso me los regaló hace más de un año mi hermana @creacioneslelys, como saben ella es una experta tejedora, pero no son eternos y más aún con el uso que les doy a diario. Creo que también les he contado que soy amante de la cocina y cuando puedo o el tiempo me lo permite también realizo otras actividades que me ayudan a despejar mi mente, entre ellas está tejer. Hace muchos años tejía mucho, me encantaba realizar carpetas para mis mesitas de noche y centro de mesas, pero con el pasar del tiempo lo dejé a un lado y luego cuando quise retomar, los problemas con la visión no me lo permitieron, pero ya cuento con mis lentes y material suficiente para utilizar el tejido como una forma de liberar estrés.
Siempre empiezo contando una cosa y me desvío a otra, jajajajaja. La cuestión es que hice mis primeras agarraderas tejidas. Todo un éxito y así poder reemplazar las que mi hermana me regaló hace más de un año.
Ahora, si continuas leyendo te cuento el paso a paso de cómo las hice. Lo rápido y fácil que es y lo mejor de todo que le da vida a mi cocina gracias a los vistosos colores de estas rodajas sandías tejidas. Sin más, comencemos.
MATERIALS
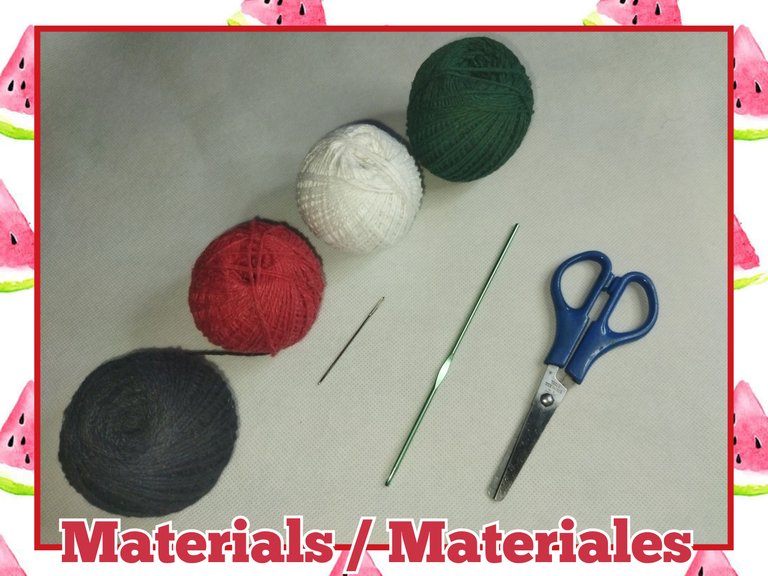
To make these handles we will not need a large amount of materials. Just the following:
- Red, green, white and black cotton threads.
- 2.5 mm knitting needle
- Wool needle or blunt tip
- Scissors
MATERIALES
Para la realización de estas agarraderas no necesitaremos gran cantidad de materiales. Solo lo siguiente:
- Hilos de algodón de colores rojo, verde, blanco y negro.
- Aguja para tejer de 2,5 mm
- Aguja lanera o punta roma
- Tijera
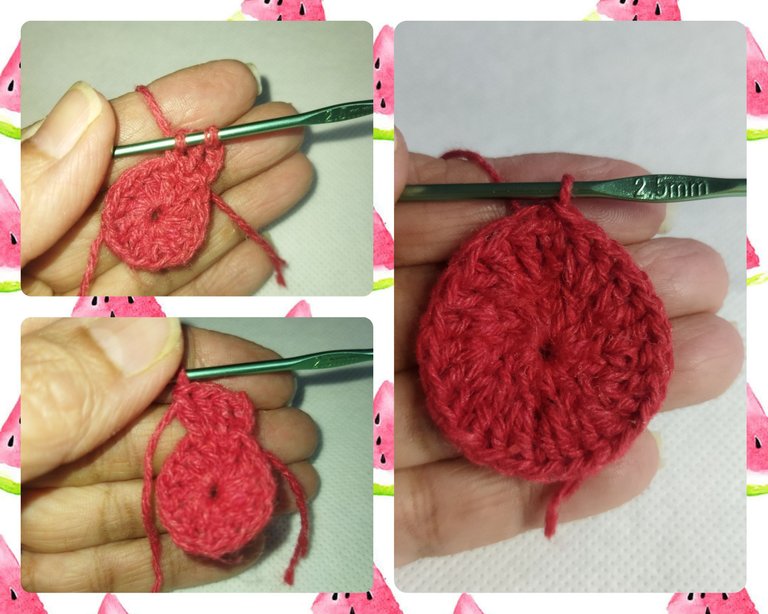
STEP Nº 1
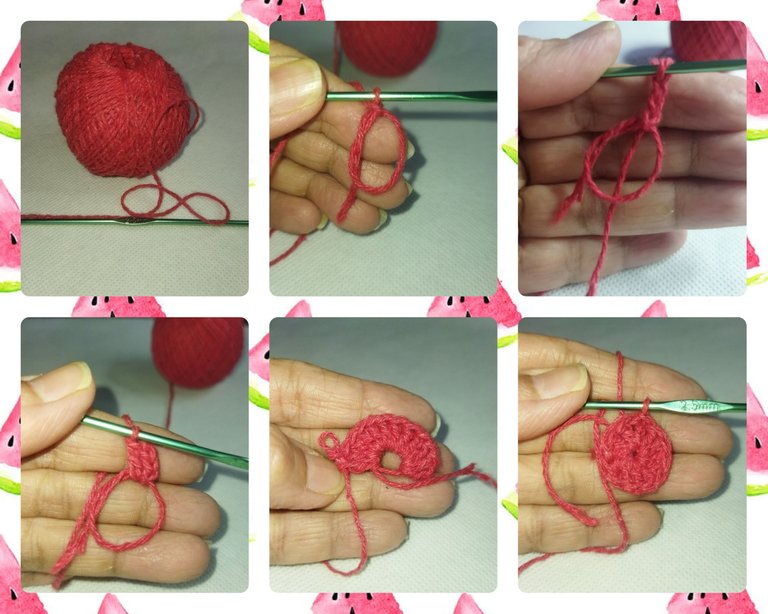
First round: We will start by making a magic ring with the red cotton thread, in it we will form a chain of 3 links and 11 double crochet for a total of 12 stitches. We pull the thread to close the ring and join with a slip stitch.
PASO Nº 1
Primera vuelta: Comenzaremos realizando un anillo mágico con el hilo de algodón rojo, en él formaremos una cadena de 3 eslabones y 11 puntos altos para un total de 12 puntos. Halamos el hilo para cerrar el anillo y unimos con un punto deslizado.
STEP Nº 2
Second round: We pick up three chains and a double crochet in the same stitch to make an increase and then we increase in each stitch of the previous round for a total of 24 double crochets.
PASO Nº 2
Segunda vuelta: Levantamos tres cadenas y un punto alto en el mismo punto para realizar un aumento y luego realizamos aumento en cada punto de la vuelta anterior para un total de 24 puntos altos.
STEP Nº 3
Third round: Now we will make three double crochets and an increase, starting the first double crochet with three chains, then we will make equal series until we finish the round.
PASO Nº 3
Tercera vuelta: Ahora realizaremos tres puntos altos y un aumento, comenzando el primer punto alto con tres cadenas, luego realizamos series iguales hasta terminar la vuelta.
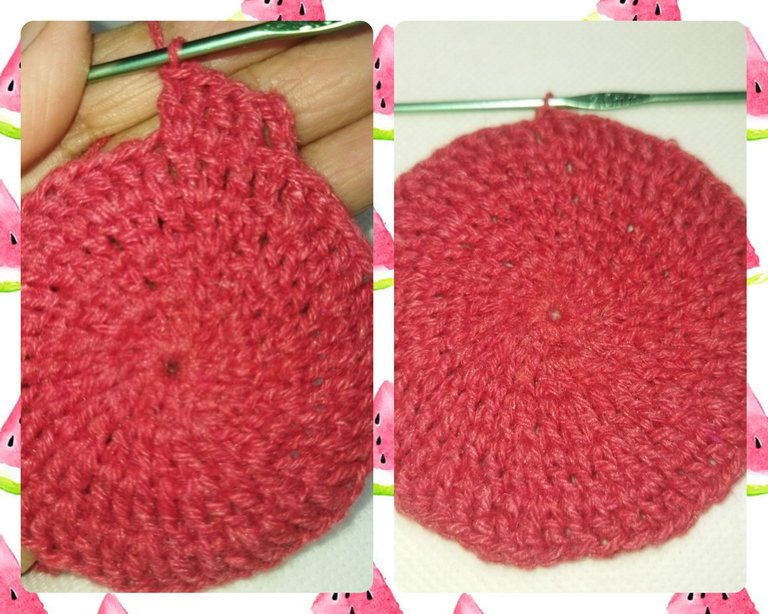
STEP Nº 4
Fourth round: In this round we will make four double crochets and a catkin, we repeat until the end of the round, remembering that we must close the round with a slip stitch.
PASO Nº 4
Cuarta vuelta: En esta vuelta realizaremos cuatro puntos altos y un amento,repetimos hasta culminar la vuelta, recordando que debemos cerrar la vuelta con un punto deslizado.

STEP Nº 5
Fifth round: In this round we will make five double crochets and an increase, we repeat until we finish the round.
PASO Nº 5
Quinta vuelta: En esta vuelta realizaremos cinco puntos altos y un aumento, repetimos hasta culminar la vuelta.
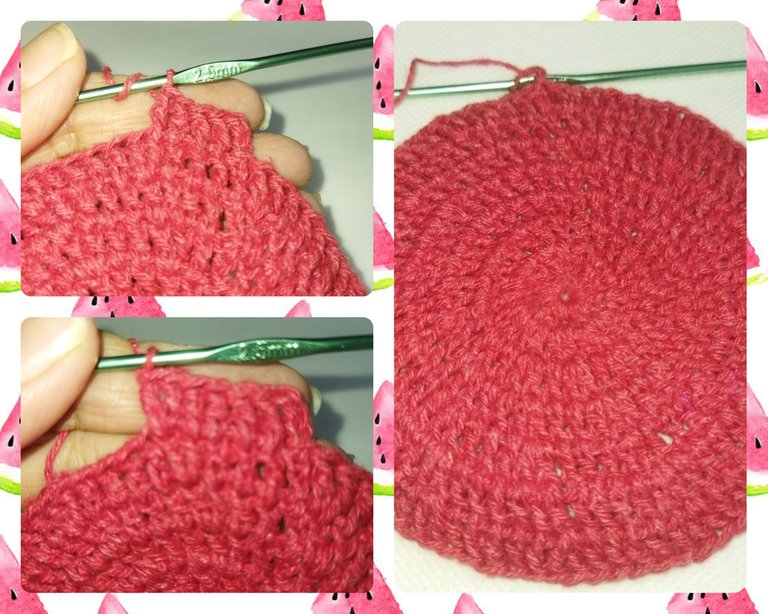
STEP Nº 6
Sixth round: In this round we will make six double crochets and an increase, we repeat this series until we finish the round and close with a slip stitch.
PASO Nº 6
Sexta vuelta: En esta vuelta realizaremos seis puntos altos y un aumento, repetimos esta serie hasta culminar la vuelta y cerramos con un punto deslizado.
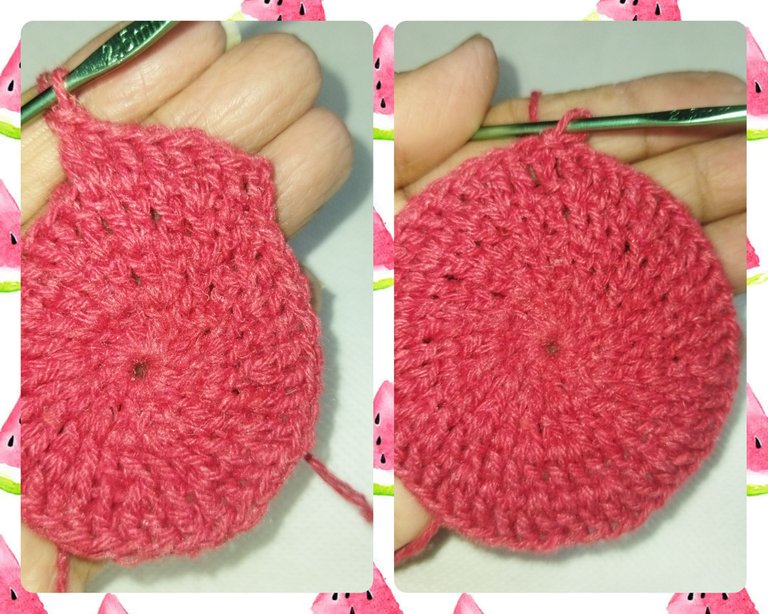
STEP Nº 7
Seventh lap: on this lap we are going to cut the red thread leaving a few extra centimeters to make it easier for us to adjust, and at the same point we are going to replace it with the white cotton thread, we tighten it tight and we start our return, continuing with the previous series. We will make 7 double crochets starting with 3 chains and 6 double crochets, then we will increase for a total of 9 double crochets.
PASO Nº 7
Séptima vuelta: en esta vuelta vamos a cortar el hilo rojo dejando unos centímetros demás para que se nos facilite la tarea de ajustar, y en el mismo punto vamos a sustituirlo con el hilo de algodón blanco, ajustamos bien fuerte y comenzamos nuestra vuelta, continuando con la serie anterior. Realizaremos 7 puntos altos comenzando con 3 cadenas y seis puntos altos, luego haremos un aumento para un total de 9 puntos altos.
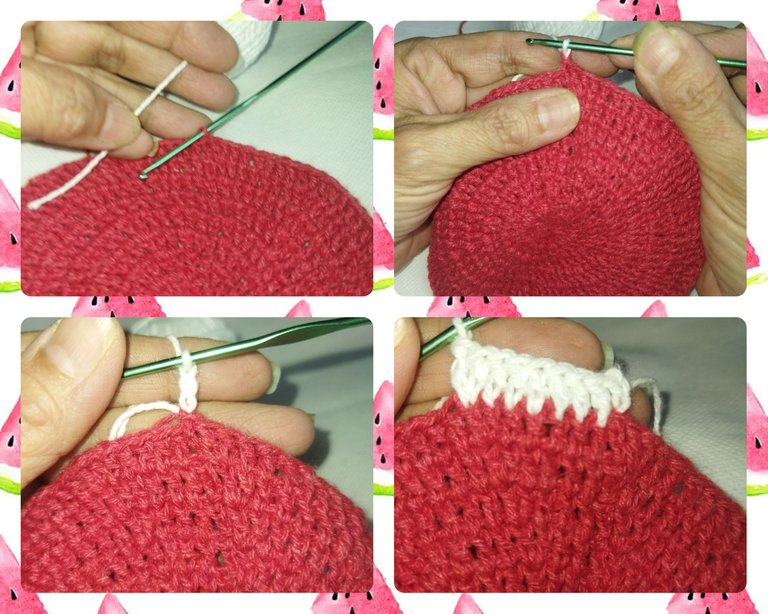
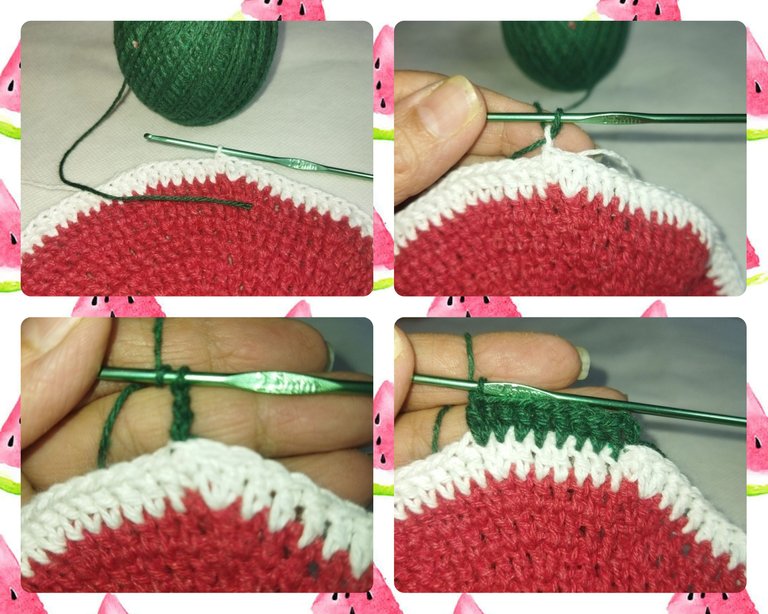
STEP Nº 8
Eighth lap: here we change the thread again, this time with the green one, in the same way as the previous one, we tighten it tightly and begin our lap. We will make 8 double crochets starting with 3 chains and seven double crochets, then we will increase for a total of 10 double crochets. This would be our last lap for the circumference. We must not cut the thread at the end of this round.
PASO Nº 8
Octava vuelta: aquí cambiamos nuevamente de hilo, esta vez con el de color verde, de igual manera que el anterior, ajustamos bien fuerte y comenzamos nuestra vuelta. Realizaremos 8 puntos altos comenzando con 3 cadenas y siete puntos altos, luego haremos un aumento para un total de 10 puntos altos. Esta sería nuestra ultima vuelta para la circunferencia. No debemos cortar el hilo al finalizar esta vuelta.
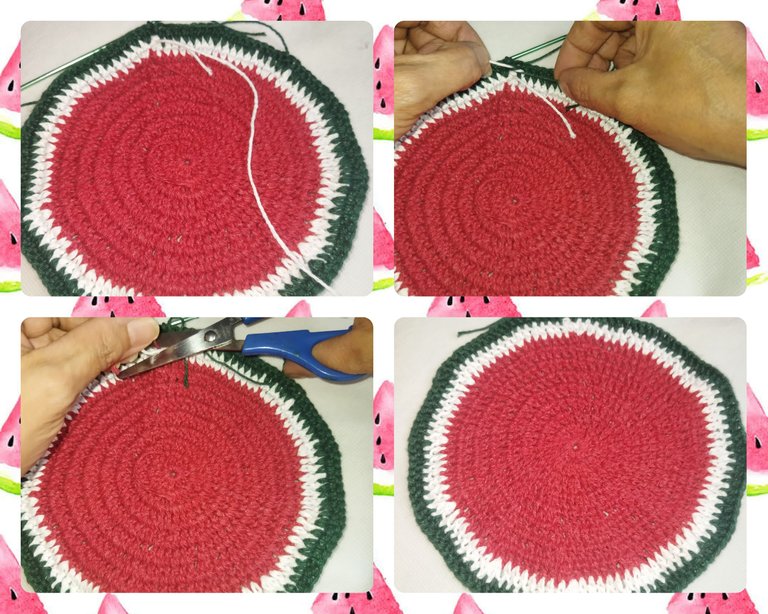
STEP Nº 9
We are going to turn the fabric over and make some knots with the union of the remaining threads to prevent the fabric from unraveling. We cut off the excess.
PASO Nº 9
Vamos a voltear el tejido y realizaremos unos nudos con la unión de los hilos sobrantes para evitar que se nos deshaga el tejido. Cortamos el sobrante.
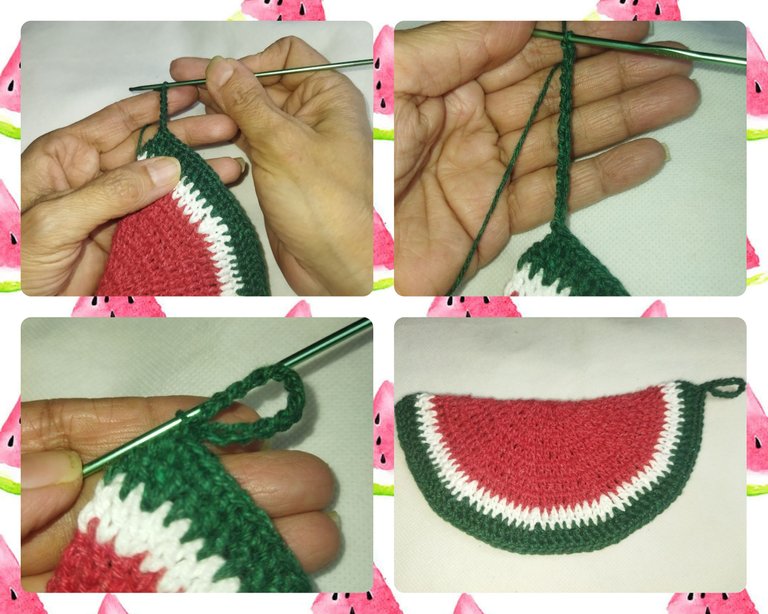
STEP Nº 10
Once the knots have been made, we are going to fold the fabric in half, taking as a reference the slip stitch that we made at the end of row number eight. We are going to join them with single crochet by taking two stitches from both parts until the end. We make a slip stitch and adjust without cutting the thread.
PASO Nº 10
Una vez realizados los nudos vamos a doblar el tejido por la mitad tomando como referencia el punto deslizado que realizamos al final de la vuelta numero ocho. Vamos a unirlos con puntos bajos tomando dos puntos de ambas partes hasta el final. Hacemos un punto deslizado y ajustamos sin cortar el hilo.
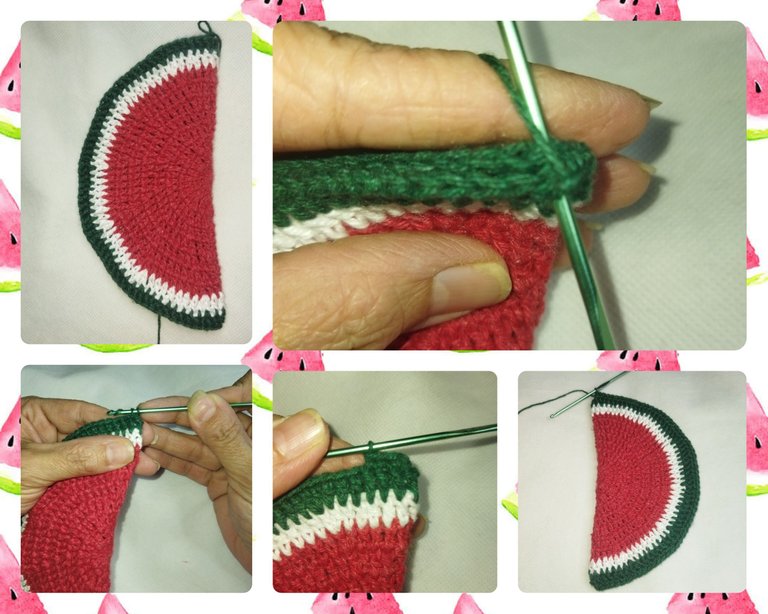
STEP Nº 11
We make a chain of 14 links to form the buttonhole and we link it to the beginning of the chain with a slip stitch. We repeat another slip stitch, adjust and cut.
PASO Nº 11
Hacemos una cadeneta de 14 eslabones para formar el ojal y lo enlazamos al comienzo de la cadena con un punto deslizado. Repetimos otro punto deslizado, ajustamos y cortamos.
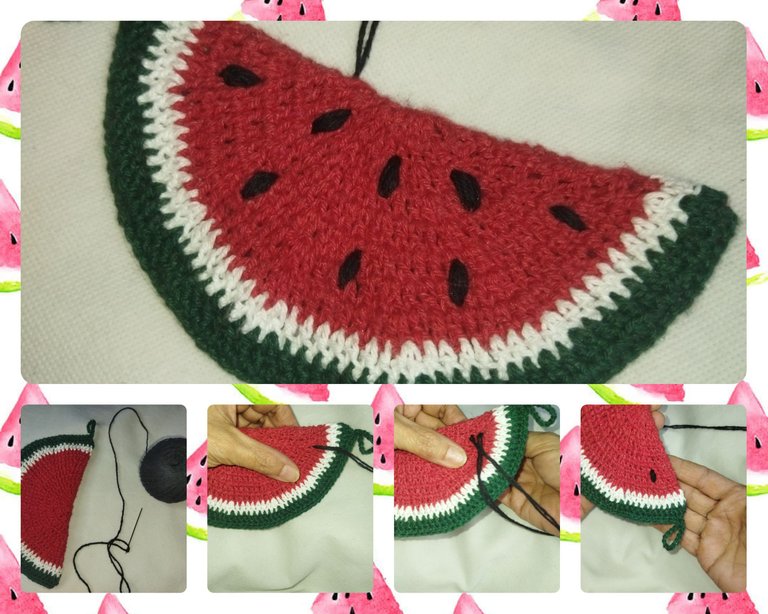
STEP Nº 12
And to finish the work, with a strand of black thread and the wool needle, we will make the seeds to give it the touch of a true watermelon. We will make stitches of approximately 1 cm at the same point, until giving it the shape of a seed. We will pass the stitches on both sides of the watermelon, randomly. We cut the excess thread and hide it inside the fabric.
PASO Nº 12
Y para finalizar la labor, con una hebra de hilo color negro y la aguja lanera, realizaremos las semillas para darle el toque de una verdadera sandía. Haremos puntadas de aproximadamente 1 cm en el mismo punto, hasta darle la forma de semilla. Pasaremos las puntadas por ambas caras de la sandía, de forma aleatoria. Cortamos el hilo sobrante y escondemos por dentro del tejido.
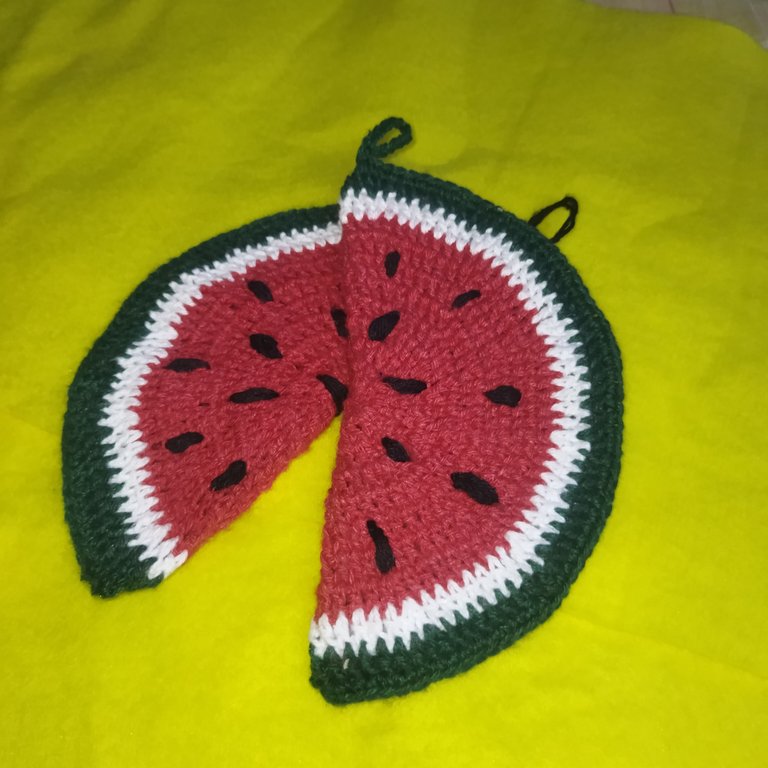
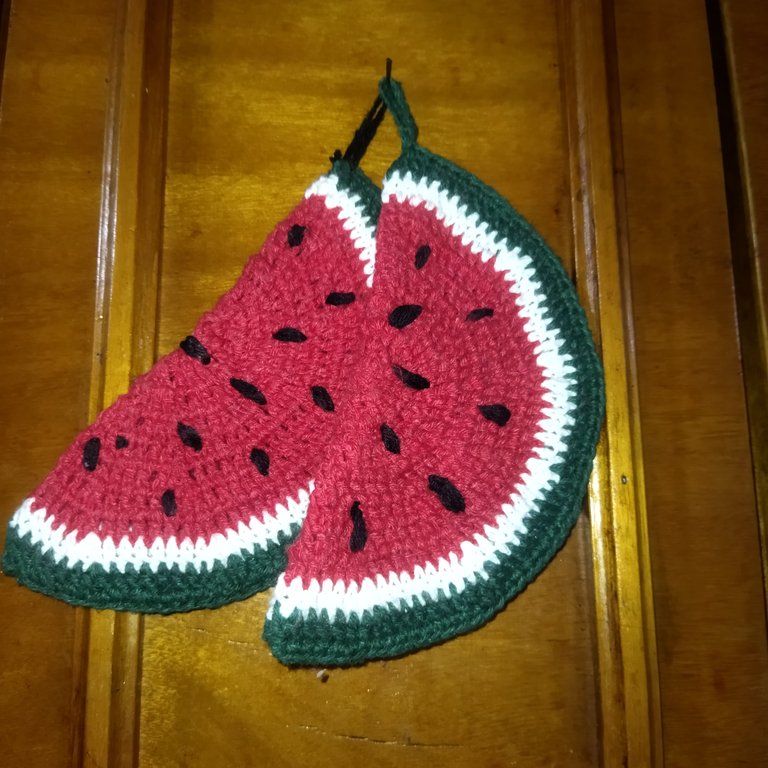
COMPLETED WORK
As most of the time, I have been satisfied and very happy with the final result. Sometimes we stop doing these beauties because we think they are complicated, but I assure you that this one is very simple. Now to brand new my potholders and to give that nice touch to my kitchen. I hope that you also like it and dare to make them to avoid those terrible burns with hot pots. That is all for today. See you next time.
TRABAJO FINALIZADO
Como la mayoría de las veces, he quedado satisfecha y muy contenta con el resultado final. Algunas veces dejamos de realizar estas bellezas porque creemos que son complicadas, pero les aseguro que esta es muy sencilla. Ahora a estrenar mis agarraderas y a darle ese toque tan bonito a mi cocina. Espero que a ustedes también les guste y se atrevan a hacerlas para evitar esas terribles quemaduras con las ollas calientes. Esto es todo por hoy. Nos vemos en la próxima.
Te quedaron muy lindos. Mucho aguantaron los viejitos. Ahora ya tendrás agarraollas por montón y a tu gusto. Los haces muy bien. Abrazos. 🤗
Gracias por los viejitos que cumplieron su tiempo útil 🤭🤭.
Hi @linita, I like your work, it is very original.
Que lindas😍😍 me encantan, debo hacerlas asi porque definitivamente se ven mas lindas que un cuadro con jeans jajaja
Si se viene lindísimas y se puede hacer gran variedad de frutas tejidas para adornar nuestra cocina y la gran utilidad que tienen. Saludos 😁
Congratulations @linita! You have completed the following achievement on the Hive blockchain and have been rewarded with new badge(s):
Your next target is to reach 1000 replies.
You can view your badges on your board and compare yourself to others in the Ranking
If you no longer want to receive notifications, reply to this comment with the word
STOPCheck out the last post from @hivebuzz:
Están muy lindas y bien explicados los pasos!! 🍉🍉🍉Siempre es bueno renovar las cosas que ya no van. Gracias por este tutorial 🌸🌹
Ahora es tiempo de que las viejas agarraderas descansen un poco jjajaja ya han tenido suficiente trabajo! Estas nuevas se ven muy hermosas, renovarse siempre está bueno 💕.
Pues si 😂😂 las pobres resistieron con valor. Y lo mejor de todo es que realizando estás agarraderas tuve un momento para el relax y la reflexión,ahora sí entendí con criterio propio lo antiestrés que resulta está actividad. Gracias por comentar.
Quedaron preciosos esos agarraderos 🤩 te felicito
Gracias 😊😊 practicando para hacer unos amigurumis tan bellos como los tuyos 🤭🤭
Sin duda un proyecto maravilloso y divertido, me gusta mucho que sea doble, porque he visto varios que son bien bonitos, pero muy finos y enseguida se calientan y me quemo 😭
Thank you for sharing this amazing post on HIVE!
Your content got selected by our fellow curator @stevenson7 & you just received a little thank you via an upvote from our non-profit curation initiative!
You will be featured in one of our recurring curation compilations and on our pinterest boards! Both are aiming to offer you a stage to widen your audience within and outside of the DIY scene of hive.
Join the official DIYHub community on HIVE and show us more of your amazing work and feel free to connect with us and other DIYers via our discord server: https://discord.gg/mY5uCfQ !
If you want to support our goal to motivate other DIY/art/music/homesteading/... creators just delegate to us and earn 100% of your curation rewards!
Stay creative & hive on!