[PT/EN]Como fazer seu arranhador - Um presente pra Ariel || How to make your scratching post - A gift for Ariel

Click here for the English version

Ariel tem 9 anos e é uma gata bem caseira. Foi criada pela minha esposa Tamara(@splinter100dedos) e pela minha sogra Sonia durante a maior parte da vida. E em setembro de 2021 alguns meses após a morte da companheira dela Fatinha, decidimos trazer ela pra nossa casa nova que tinhamos acabado de nos mudar.
No inicio tinhamos muito medo de ela não se adaptar, mas a adaptação veio até bem facil. Nos primeiros dias tinhamos que tomar um cuidado maior pra ela nao fugir mas não demorou muito ela começou a se sentir segura e em casa, a escolher os lugares em que ela queria dormir e ganhou até um quarto só pra ela onde ficam as 2 caixinhas de areia dela e sua casinha.
Ela sempre aprendeu as coisas com muita facilidade e logo que chegamos ensinamos a ela que ela só podia arranhar o coqueiro do quintal e a placa grande de madeira que temos pra escola e proibimos de arranhar os moveis e os puffs da casa pra que não estragasse.
Na semana de natal a Tamara foi passar em outra cidade com a familia dela e decidimos que eu ficaria em casa porque a Ariel estava tendo alguns problemas respiratórios que exigia cuidados e medicação em horario certo e levar ela pra viajar não seria uma boa ideia. Nessa semana em que fiquei sozinho decidi fazer um presente pra Ariel e fiz pela primeira vez na minha vida um arranhador e vou tentar falar um pouco sobre isso aqui nessa publicação.
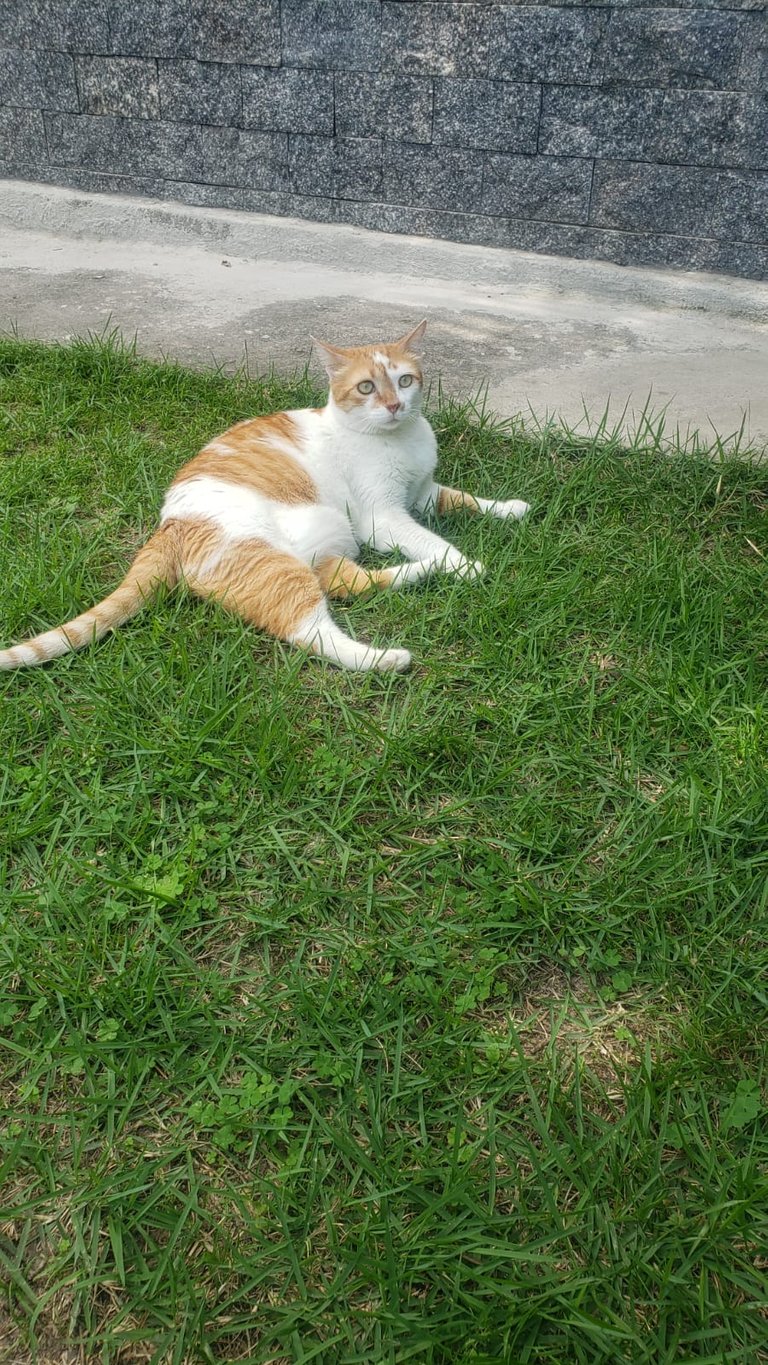
Aqui em baixo vou deixar a foto da Ariel tomando um banho de sol pra vocês esquecerem que esse post ta atrasado a 1mês já que é sobre um presente de natal... Mas meus dias estão curtos de mais preciso de mais 30horas em cada dia...rs
1 - Bastante papelão
2 - Tesoura ou estilete
3 - Cola branca
4 - Papel de presente
5 - Régua
ATENÇÃO!!! NÃO se deve usar papelão de caixas que carregaram produtos de limpeza ou químicos em geral. Isso pode fazer mal ao seu gato. Eu utilizei a caixa da cama que compramos quando nos mudamos. Eu pessoalmente evito até caixas de alimentos que tem contato direto com papelão, mas o problema real são as caixas de produtos quimicos.
Quanto a tesoura eu percebi no meio do caminho que era uma escolha ruim. Eu consegui fazer todo o arranhador com tesoura, mas teria sido muito mais simples se tivesse utilizado um estilete para cortar o papelão.
O papel de presente é para o acabamento e embora não seja 100% necessário ele ajuda a colar as peças finais mantendo o arranhador mais firme.
Reparem aqui o detalhe que falei para o SEU gato, se você pretende fazer um arranhador para a venda recomendo não seguirem meu tutorial já que digamos que minha veia artística passa longe de produtos manufaturados.rs
O arranhador ficou bonito e cumpriu seu papel, porem no quesito acabamento não foi dos melhores. Então vamos ver o passo a passo.
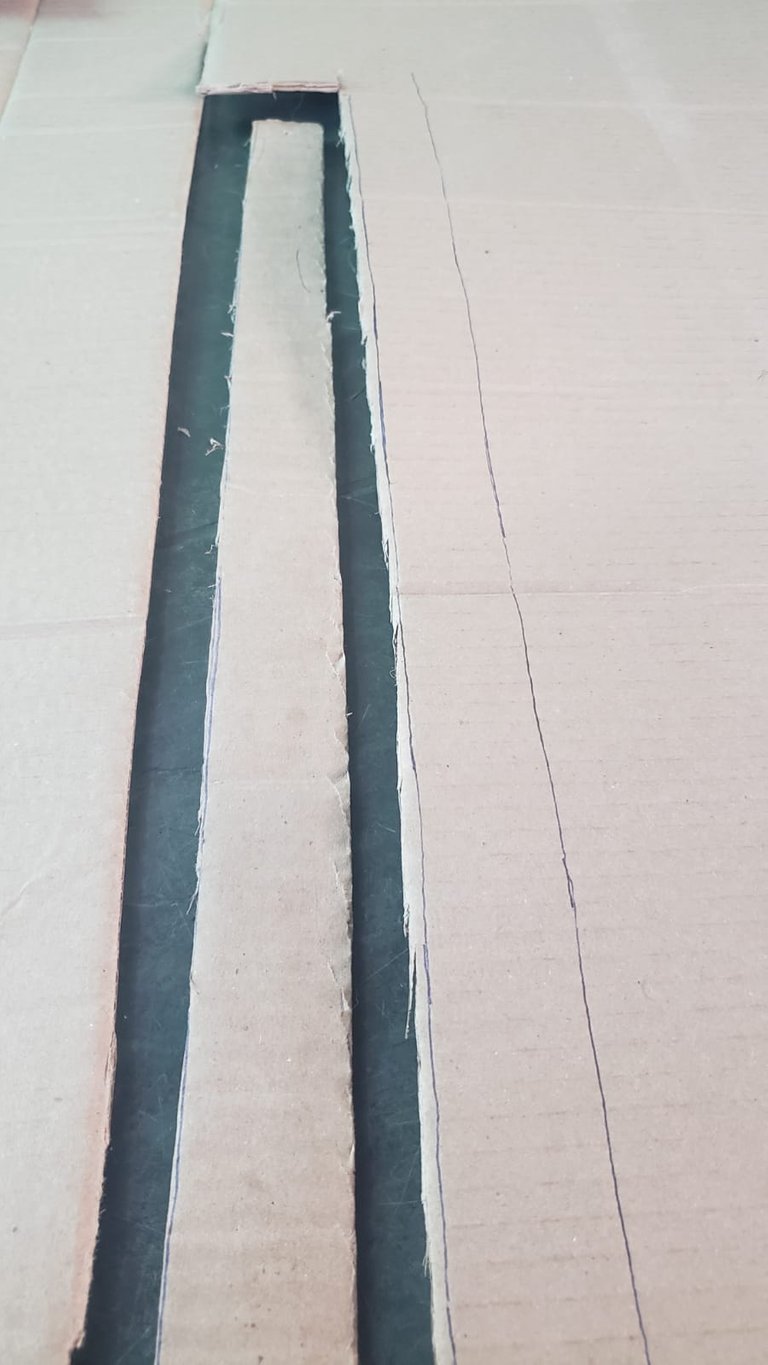
### Passo 1 - Corte 1 tira de papelãoA primeira tira é muito importante porque ela vai ser a tira que você vai usar pra marcar as outras tiras.
É preciso cortar contra as linhas naturais do papelão pra que o arranhador de certo então fique atento as pequenas dobrinhas e corte em outra direção assim como na foto abaixo.
Quanto ao tamanho da tira depende de qual tamanho você vai querer o seu arranhador, eu cortei +- 5cm pra ser a altura do meu arranhador e +- 50cm pra ser o comprimento já que eu queria que tivesse espaço pra Ariel poder deitar no arranhador quando quisesse.
O passo 2 consiste basicamente em copiar a primeira tira varias vezes.
Para o meu arranhador eu fiz 35 tiras, a quantidade de tiras determina a largura. Eu fui cortando e testando no olho até chegar o tamanho que eu queria e a quantidade pode variar também dependendo da largura do papelão que você estiver usando.

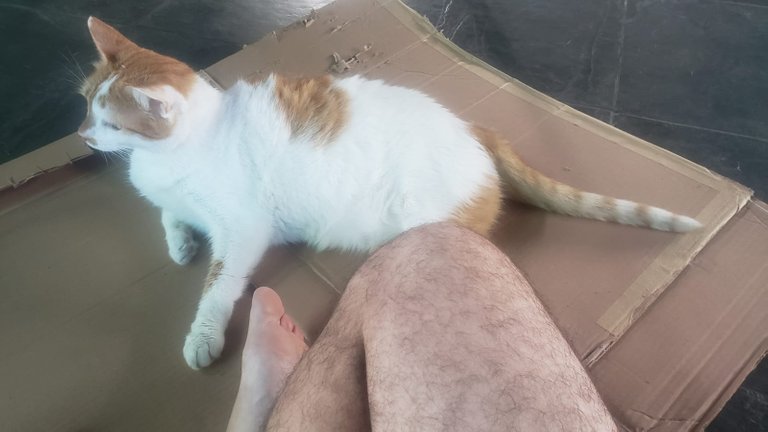
Eu fiz questão de fazer todo o processo na frente da Ariel exatamente para despertar a curiosidade dela e para que ela pudesse já ir deixando o cheiro dela mesmo antes de o arranhador pronto. O problema foi que quando ela me viu cortando o papelão ela começou a tentar me impedir, tentou morder a tesoura, empurrou minha mão e quando não conseguiu simplesmente deitou em cima do papelão.
Geralmente quando tem algum pedaço pequeno de papelão eu dou pra ela brincar, pode ser por isso que ela não queria deixar eu cortar, associando que eu estava estragando o brinquedo dela. Caso sua gata não te impeça de cortar o papelão pode pular essa etapa :p

Depois de cortar todas as tiras de papelão eu e Ariel estávamos cansados e já estava tarde então fomos descansar um pouco. Caso você seja mais rápido que eu cortando papelão ou não decida começar de madrugada pode pular essa também :p
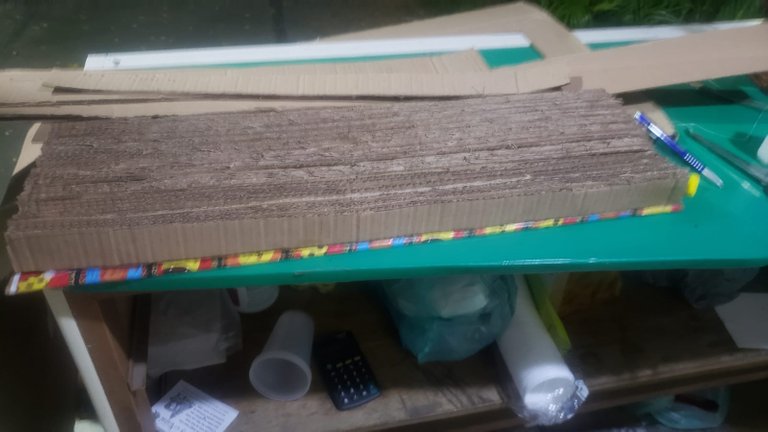
Após cortar todas as tiras cole uma ao lado da outra usando a mesa para nivelar e não ficarem desalinhadas.
Eu preferi colar de 5 em 5, esperar secar e depois colar os blocos de 5 tiras já coladas mas você pode fazer blocos maiores ou menores de acordo com sua paciência.
Após todos as tiras coladas você vai ter algo parecido com a foto abaixo.
Agora que já temos o tamanho do nosso arranhador vamos aos toques finais.
Usando as tiras coladas vamos cortar um pedaço de papelão para cobrir todo o fundo do nosso arranhador e embrulhar ele em papel de presente.
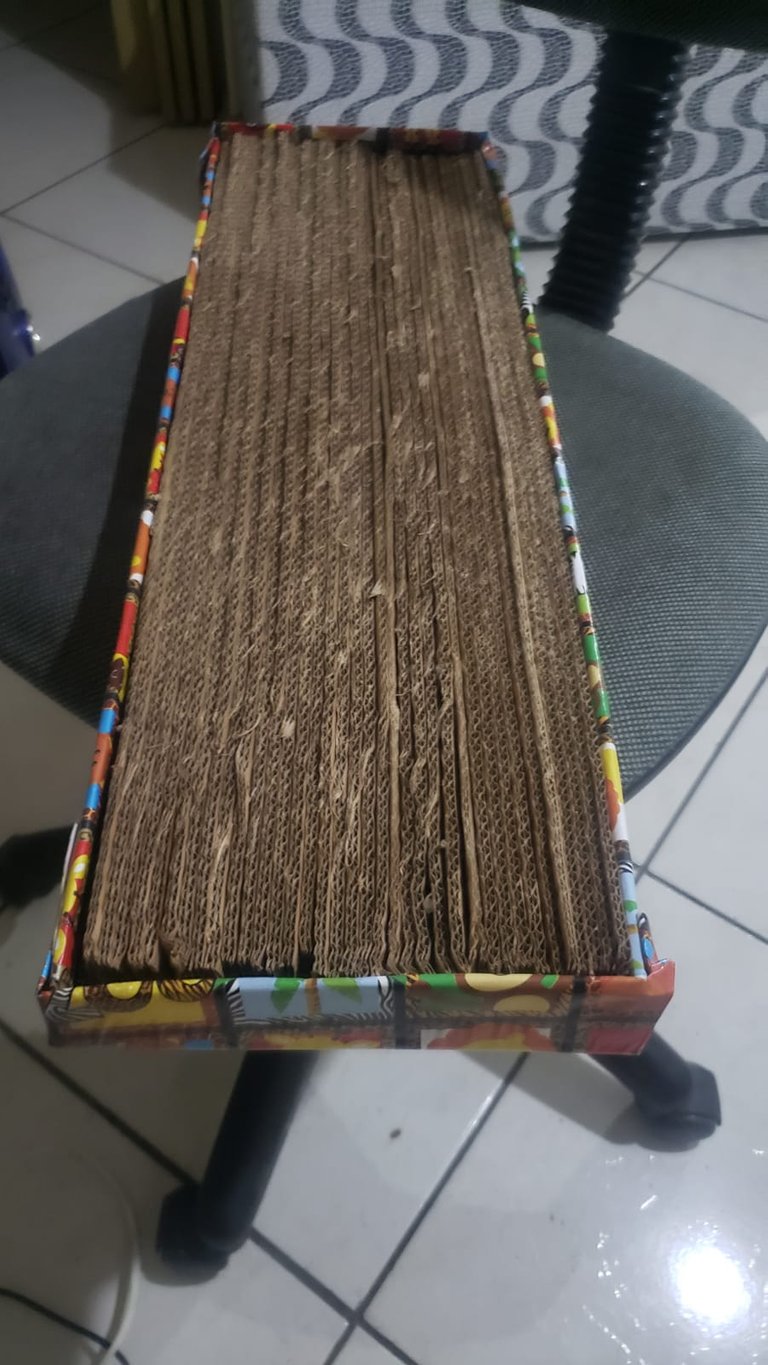
Após cortar o fundo e colar o papel de presente nele, vamos colar o fundo na parte de baixo do arranhador, isso fará com que as tiras tenham uma base aumentando a resistencia e durabilidade do arranhador. Vai ficar mais ou menos o resultado abaixo.
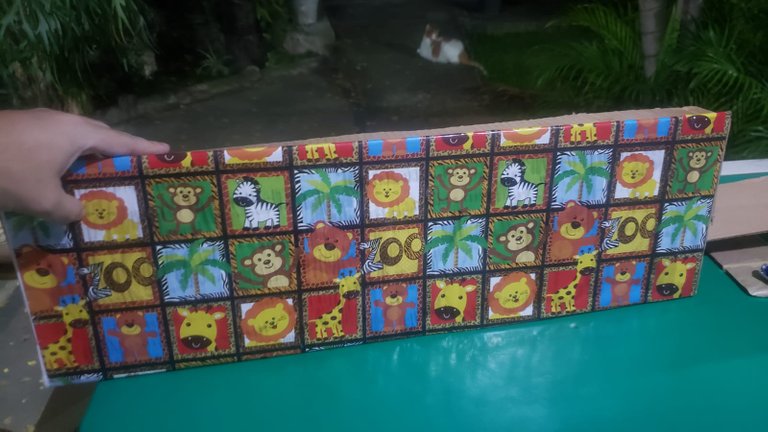
Depois que a base secar faremos o mesmo nas 4 laterais do arranhador, aqui a colagem do papel de presente pode nos ajudar a encaixar melhor uma lateral na outra.
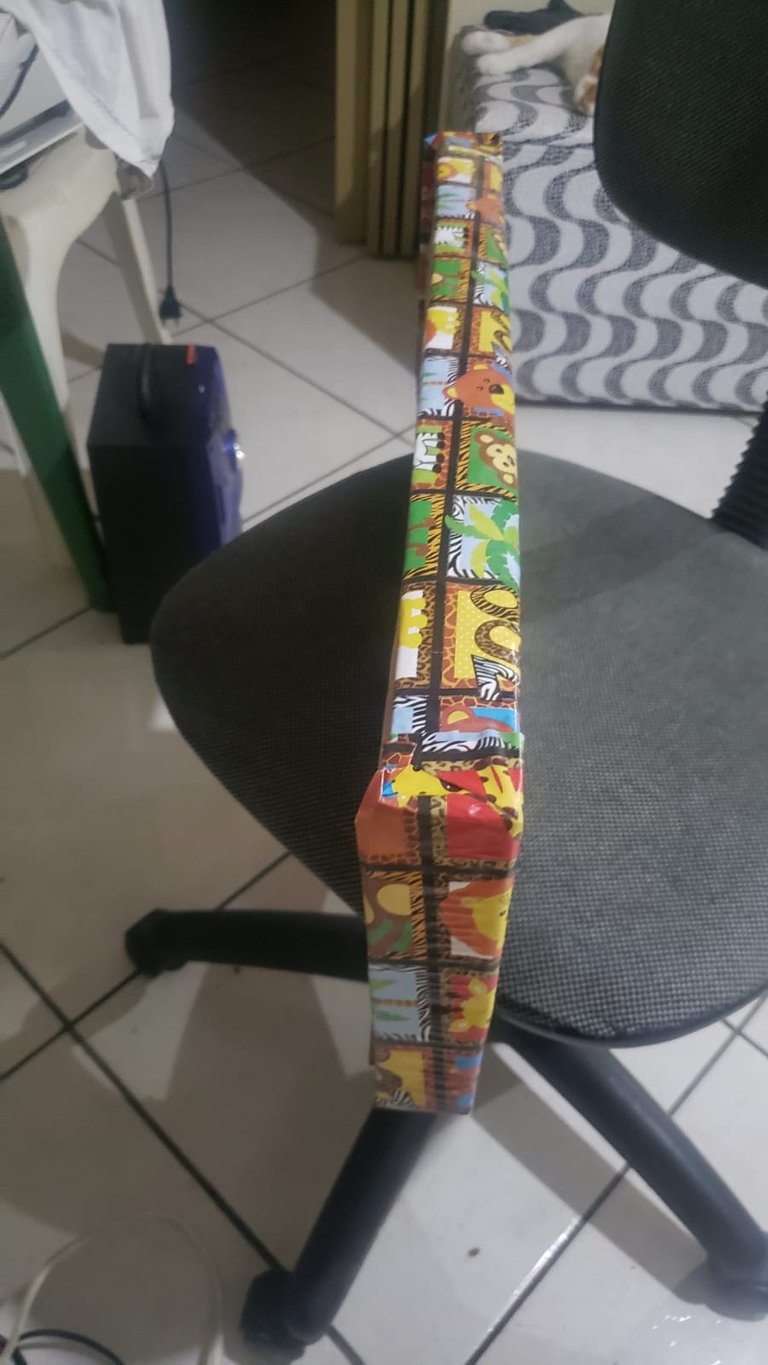
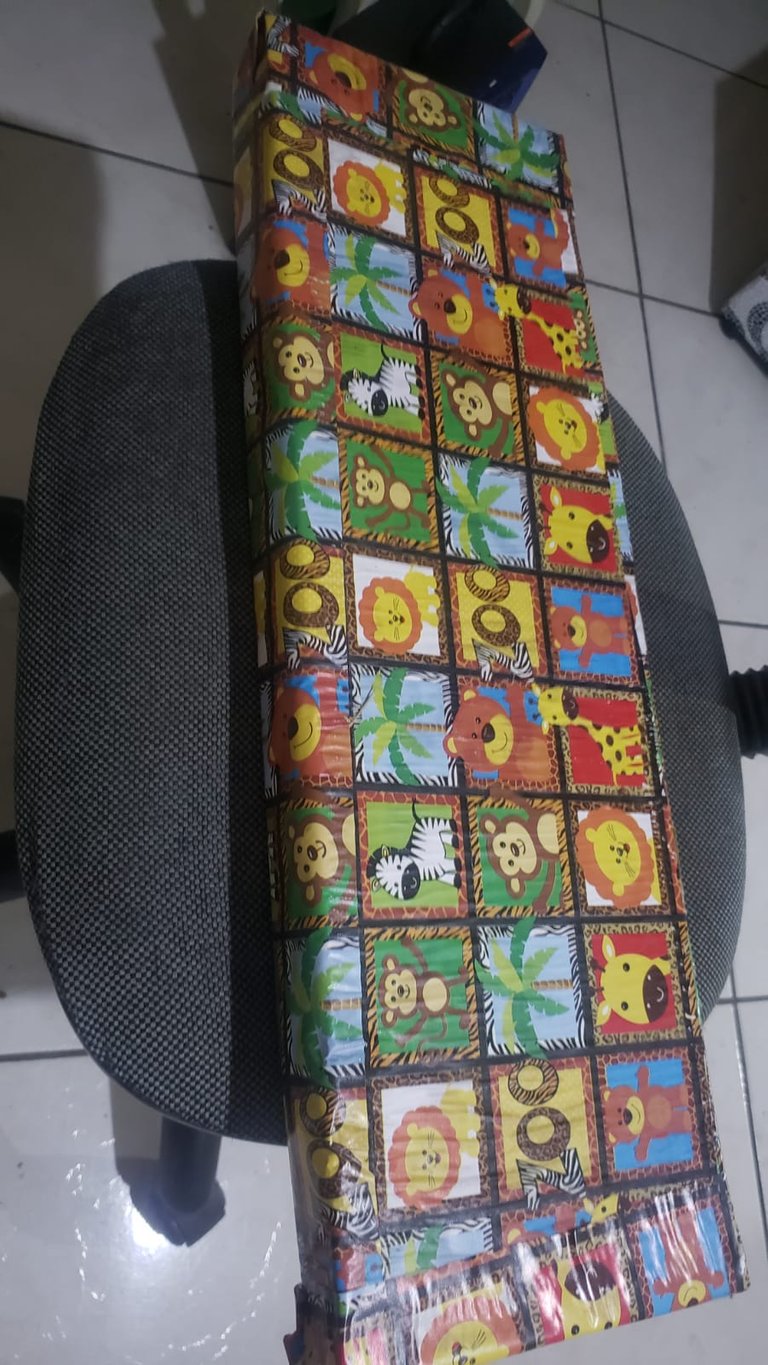
Após secar seu arranhador estará pronto. O meu ficou como nas fotos abaixo.
# A entrega e o resultado
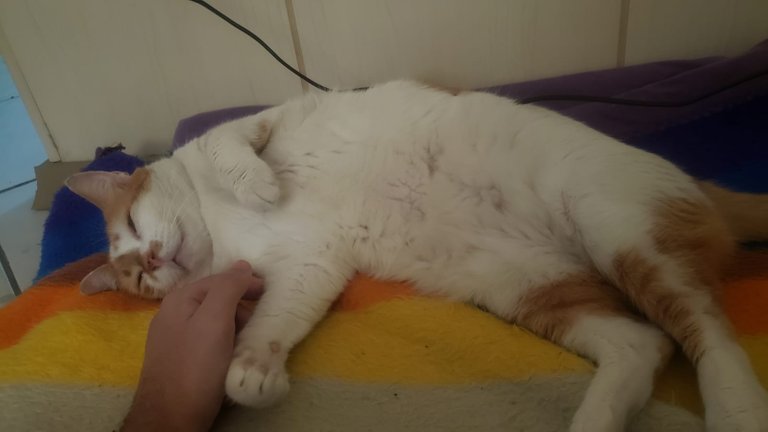
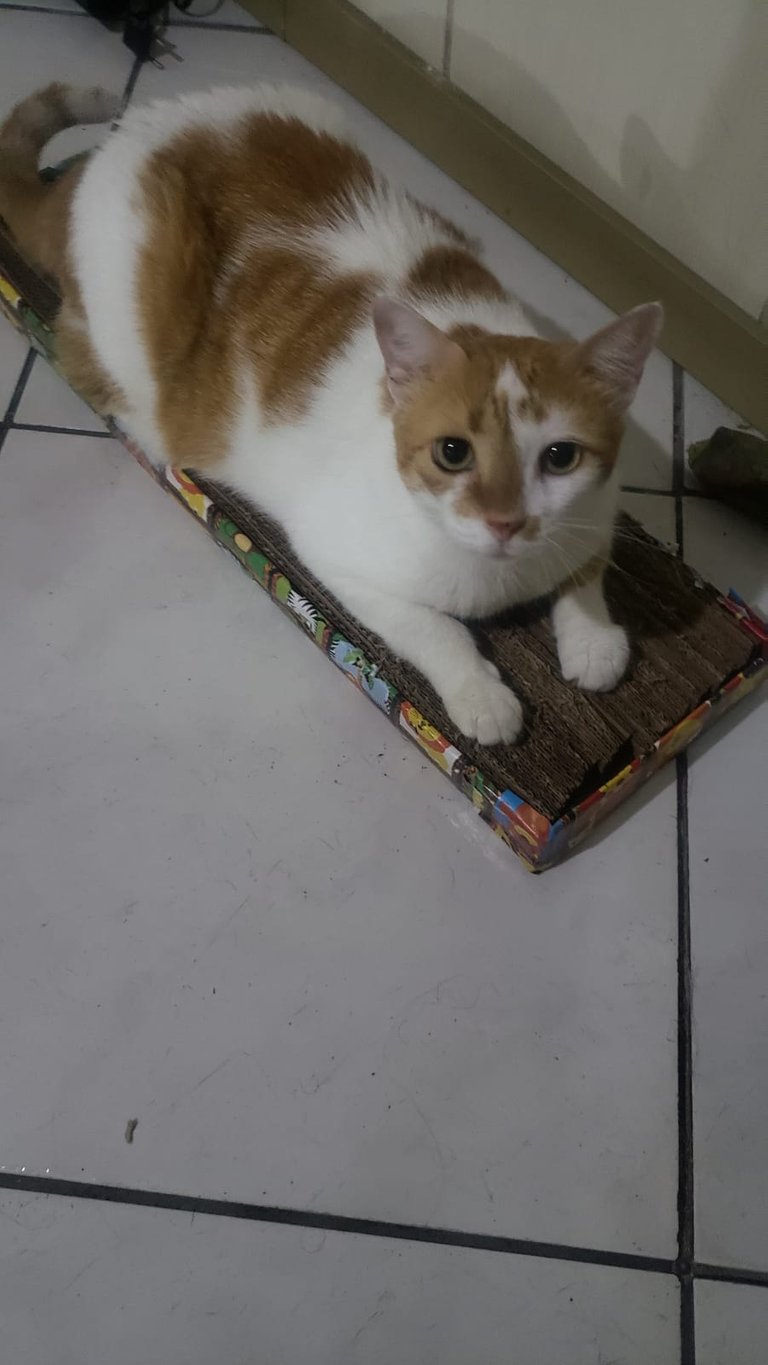
A Ariel não gosta de qualquer presente, ela raramente brinca com brinquedos, não gosta de barbantes como a maioria dos gatos e geralmente não se apega a nada que damos pra ela. Mas desde o momento que ela ganhou o arranhador ela adorou e não largava mais ele.
No primeiro dia ela dormiu deitada nele e durante umas 2 semanas ela todo dia ela ia chamar eu e Tamara no quarto até irmos ver ela arranhando ele. Todos os dias era a primeira coisa que ela mostrava pra gente era ela com o arranhador.
Ela não arranha nem mais a placa e o coqueiro que sempre deixamos ela arranhar.
Hoje o arranhador já está bem gasto. Precisamos fazer um novo, mas ainda assim ela arranha todos os dias e passa bastante tempo deitada nele.
Vou deixar só uma palinha de como foi quando ela ganhou o presente aqui em baixo.

Gostaria de agradecer a todos que leram até aqui, espero que tenham gostado do conteúdo. Se você quer ver mais publicações sobre a Ariel comenta aqui em baixo pra que eu possa trazer mais conteúdos como esse.

Quer saber como ganhar renda passiva delegando seu HP ou apenas holdando o token NEXO? Entre no nosso discord e saiba mais. Vamos espalhar a arte pelas redes!

Clique aqui para a versão em português
Ariel is 9 years old and a very homely cat. It was raised by my wife Tamara(@splinter100dedos) and my mother-in-law Sonia for most of her life. And in September 2021 a few months after the death of her partner Fatinha, we decided to bring her to our new house that we had just moved in.
At the beginning we were very afraid of her not adapting, but the adaptation came quite easily. In the first days we had to be more careful for her not to run away but it didn't take long for her to feel safe and at home, to choose the places where she wanted to sleep and she even got a room just for her where the 2 boxes of her sand and her little house.
She always learned things very easily and as soon as we arrived we taught her that she could only scratch the coconut tree in the backyard and the large wooden sign we have for school and we forbade her to scratch the furniture and beanbags in the house so that don't spoil.
During Christmas week, Tamara went to spend in another city with her family and we decided that I would stay at home because Ariel was having some breathing problems that required care and medication at the right time and taking her to travel would not be a good idea. This week when I was alone I decided to make a gift for Ariel and I made a scratching post for the first time in my life and I'll try to talk a little about it here in this post.
Below I'll leave a photo of Ariel sunbathing so you can forget that this post is 1 month late since it's about a Christmas present... But my days are short and I need another 30 hours in every day... lol
1 - Lots of cardboard
2 - Scissors or utility knife
3 - White glue
4 - Wrapping paper
5 - Ruler
ATTENTION!!! DO NOT use cardboard from boxes that have carried cleaning products or chemicals in general. This can harm your cat. I used the bed box we bought when we moved in. I personally avoid even food boxes that have direct contact with cardboard, but the real problem is chemical product boxes.
As for the scissors I realized halfway through that it was a bad choice. I managed to make the entire scratching post with scissors, but it would have been much simpler if I had used a utility knife to cut the cardboard.
The wrapping paper is for finishing and although it is not 100% necessary it helps to glue the final pieces together keeping the scratching post firmer.
Note here the detail I told YOUR cat, if you intend to make a scratching post for sale I recommend not following my tutorial since let's say that my artistic vein goes far from manufactured products.lol
The scratching post was beautiful and fulfilled its role, but in terms of finishing, it was not the best. So let's see the step by step.
### Step 1 - Cut 1 cardboard stripThe first strip is very important because it will be the strip you will use to mark the other strips.
You need to cut against the natural lines of the cardboard for the scratching post to work so watch out for small creases and cut in the other direction just like in the photo below.
As for the size of the strip, it depends on how big you want your scratching post, I cut +- 5cm to be the height of my scratching post and +- 50cm to be the length since I wanted there to be space for Ariel to lie down on the scratching post whenever she wanted.
Step 2 basically consists of copying the first strip several times.
For my scratching post I made 35 strips, the number of strips determines the width. I cut and tested on the eye until I got the size I wanted and the amount can also vary depending on the width of the cardboard you are using.
I made a point of doing the whole process in front of Ariel exactly to arouse her curiosity and so that she could leave her scent even before the scratching post was ready. The problem was that when she saw me cutting the cardboard she started to try to stop me, she tried to bite the scissors, she pushed my hand and when she couldn't she just lay down on top of the cardboard.
Usually when there's a small piece of cardboard I give it to her to play with, maybe that's why she didn't want to let me cut it, associating that I was ruining her toy. If your cat doesn't stop you from cutting the cardboard, you can skip this step :p
After cutting all the cardboard strips Ariel and I were tired and it was late so we went to get some rest. If you're faster than me cutting cardboard or don't decide to start at dawn, you can skip this one too :p
After cutting all the strips, glue them next to each other using the table to level them so they are not misaligned.
I preferred to glue 5 by 5, wait to dry and then glue the blocks of 5 strips already glued but you can make larger or smaller blocks according to your patience.
After all the strips are glued together you will have something similar to the picture below.
Now that we have the size of our scratching post, let's get to the final touches.
Using the glued strips we will cut a piece of cardboard to cover the entire bottom of our scratching post and wrap it in wrapping paper.
After cutting the bottom and sticking the wrapping paper on it, we are going to glue the bottom to the bottom of the scratching post, this will make the strips have a base, increasing the strength and durability of the scratching post. It will look more or less like the result below.
After the base dries, we will do the same on the 4 sides of the scratching post, here the wrapping paper can help us to better fit one side to the other.
After drying your scratching post will be ready. Mine looked like the pictures below.
# The delivery and the result
Ariel doesn't like just any gift, she rarely plays with toys, doesn't like string like most cats, and generally doesn't get attached to anything we give her. But from the moment she got the scratching post she loved it and couldn't put it down.
The first day she slept lying on it and for about 2 weeks she would call me and Tamara in the room every day until we went to see her scratching him. Every day, the first thing she showed us was her with the scratching post.
She doesn't even scratch the sign and coconut tree we always let her scratch.
Today the scratching post is already well worn. We need to make a new one, but she still scratches every day and spends a lot of time lying on it.
I'll leave just a little bit of what it was like when she got the gift below.
I would like to thank everyone who read this far, I hope you enjoyed the content. If you want to see more publications about Ariel, comment below so I can bring you more content like this.
Want to know how to earn passive income by delegating your HP or just holding the NEXO token? Join our discord and learn more. Let's spread the art through the networks!

Obrigado por promover a comunidade Hive-BR em suas postagens.
Vamos seguir fortalecendo a Hive
Um lindo trabalho manual e ela adorou então já cumpriu sua função.
Obrigado por compartilhar.
https://twitter.com/1436569655901102081/status/1619248778212671488
https://twitter.com/1884771912/status/1619460711746506752
The rewards earned on this comment will go directly to the people( @lipe100dedos, @shiftrox ) sharing the post on Twitter as long as they are registered with @poshtoken. Sign up at https://hiveposh.com.
That's awesome idea! definitely saves more furniture at home from being scratched and ruined 😂. At my house, we had a few sofas being scratched and it wasn't restorable.
And it's practically free because I can get the cardboard by asking in supermarkets for free since they throw it away and the only costs are white glue and wrapping paper which is very cheap.
And her happiness when receiving is priceless!
Thank you for supporting my publication.
!1UP Eu tenho zero habilidade para fazer algo assim (e também não tenho gato kkkkk) mas acho muito foda quem consegue. Parabéns pelo ótimo trabalho!
!PGM !PIZZA !PIMP
You must be killin' it out here!
@underlock just slapped you with 1.000 PIMP, @lipe100dedos.
You earned 1.000 PIMP for the strong hand.
They're getting a workout and slapped 1/1 possible people today.
Read about some PIMP Shit or Look for the PIMP District
Tambem não tenho muita habilidade pra coisas manuais não tanto que minhas tiras ficaram bem tortas..rs
Mas no final cumpriu sua função e ela amou. Cuida como nunca vi ela cuidando de nda... se alguem chegar perto ela vai e ja deita em cima pra não pegarem...rs
Obrigado pelo suporte na publicação.
BUY AND STAKE THE PGM TO SEND A LOT OF TOKENS!
The tokens that the command sends are: 0.1 PGM-0.1 LVL-0.1 THGAMING-0.05 DEC-15 SBT-1 STARBITS-[0.00000001 BTC (SWAP.BTC) only if you have 2500 PGM in stake or more ]
5000 PGM IN STAKE = 2x rewards!
Discord
Support the curation account @ pgm-curator with a delegation 10 HP - 50 HP - 100 HP - 500 HP - 1000 HP
Get potential votes from @ pgm-curator by paying in PGM, here is a guide
I'm a bot, if you want a hand ask @ zottone444
I gifted $PIZZA slices here:
@curation-cartel(5/20) tipped @lipe100dedos (x1)
underlock tipped lipe100dedos (x1)
Learn more at https://hive.pizza!
You have received a 1UP from @underlock!
@bee-curator, @ccc-curator, @vyb-curator, @pob-curator, @neoxag-curator, @cent-curator
And they will bring !PIZZA 🍕.
Learn more about our delegation service to earn daily rewards. Join the Cartel on Discord.
Ficou muito bem feito e o melhor de tudo é quando você mesmo cria algo para presentar alguém ou seu pet. Eu amo gatos, mas infelizmente não tenho um ainda para cuidar kkkk.
Essa arte de trabalhos manuais é incrível, eu não costumo fazer nada do tipo, pois não tenho muita paciência com isso haha, mas de qualquer forma, ficou sensacional o de vocês! Parabéns!
!PIZZA !PGM !LOL !LUV !PIMP !CTP
BUY AND STAKE THE PGM TO SEND A LOT OF TOKENS!
The tokens that the command sends are: 0.1 PGM-0.1 LVL-0.1 THGAMING-0.05 DEC-15 SBT-1 STARBITS-[0.00000001 BTC (SWAP.BTC) only if you have 2500 PGM in stake or more ]
5000 PGM IN STAKE = 2x rewards!
Discord
Support the curation account @ pgm-curator with a delegation 10 HP - 50 HP - 100 HP - 500 HP - 1000 HP
Get potential votes from @ pgm-curator by paying in PGM, here is a guide
I'm a bot, if you want a hand ask @ zottone444
Muito obrigado!
Realmente o presente quando é feito tem muito mais valor que um comprado.
Obrigado pelo suporte!
!PIZZA