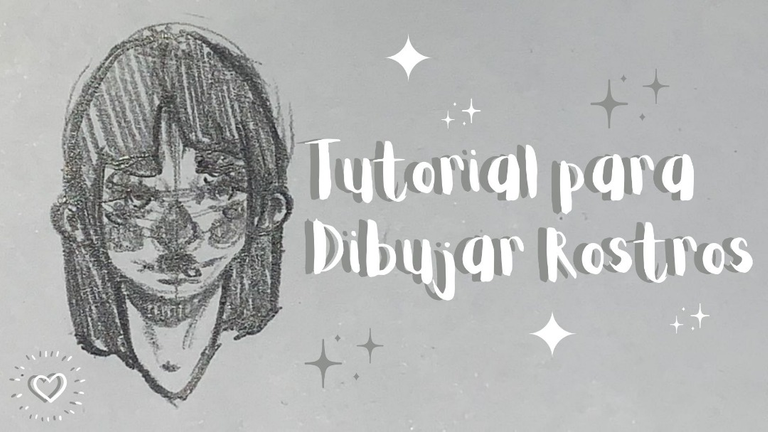
Tutorial para dibujar rostros (es-en)
Tutorial para dibujar rostros || How to draw faces
▶️ 3Speak
Un saludo a toda la comunidad de Hive DIY!! El día de hoy les traigo un tutorial para dibujar rostros, especificamente un tutorial de la forma en la que YO dibujo rostros. Es importante recordar que hay muchisimos y variados métodos para dibujar rostros, cuerpos, objetos, etc. No hay formas correctas o incorrectas, ya que cada artista es un mundo y eso está bien. En este tutorial quiero compartir con ustedes mis técnicas y consejos a la hora de dibujar (rostros en este caso). Yo estoy aplicando mi propio estilo de dibujo el cual es semirealista.
Al dibujar yo me dejo llevar por mi creatividad y no tanto por la realidad, es decir, muchas veces mis dibujos suelen ser un poco exagerados, de modo que exagero rasgos, figuras, trazos, entre otras cosas. Tiendo a dibujar elementos cambiando su tamaño natural, es por esto que no dibujo dentro del estilo realista por completo.
Para este tutorial voy a estar utilizando un lapiz 2B de la marca Stabilo, que es uno de mis favoritos para practicar. En este tutorial me enfoco más que todo en el rostro y no tanto en el cabello, ya que el cabello suele ser un poco más extenso y díficil de explicar y dibujar.
Entonces, ya con todo esto explicado... ¡¡Vamos a dibujar!!

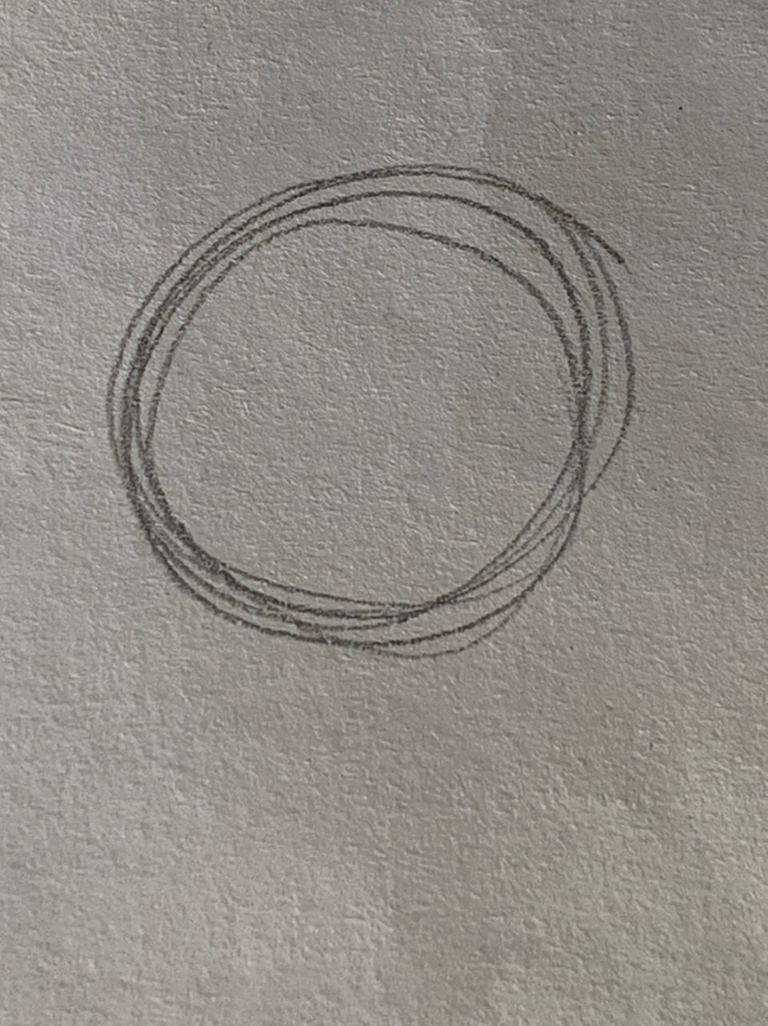
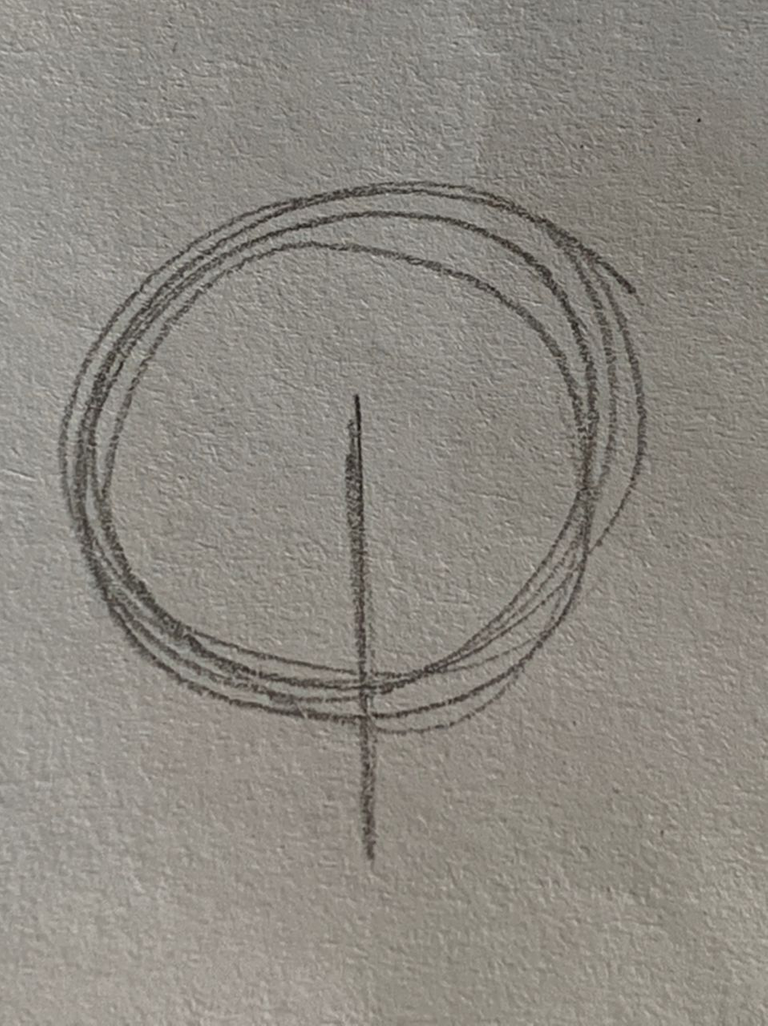
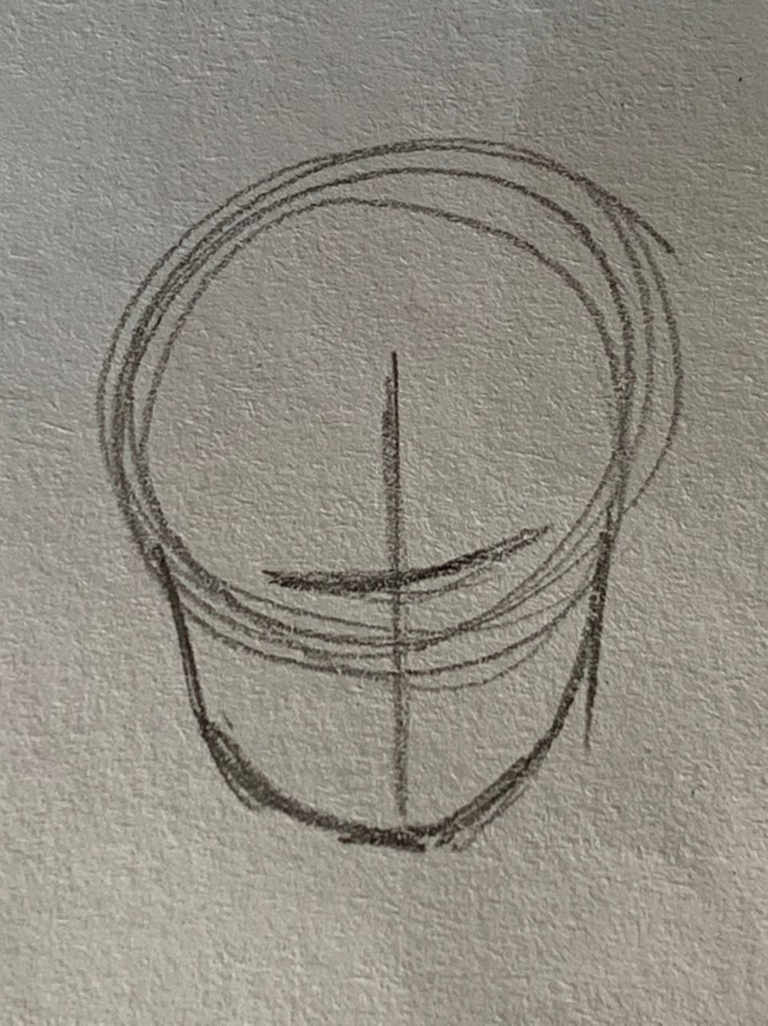
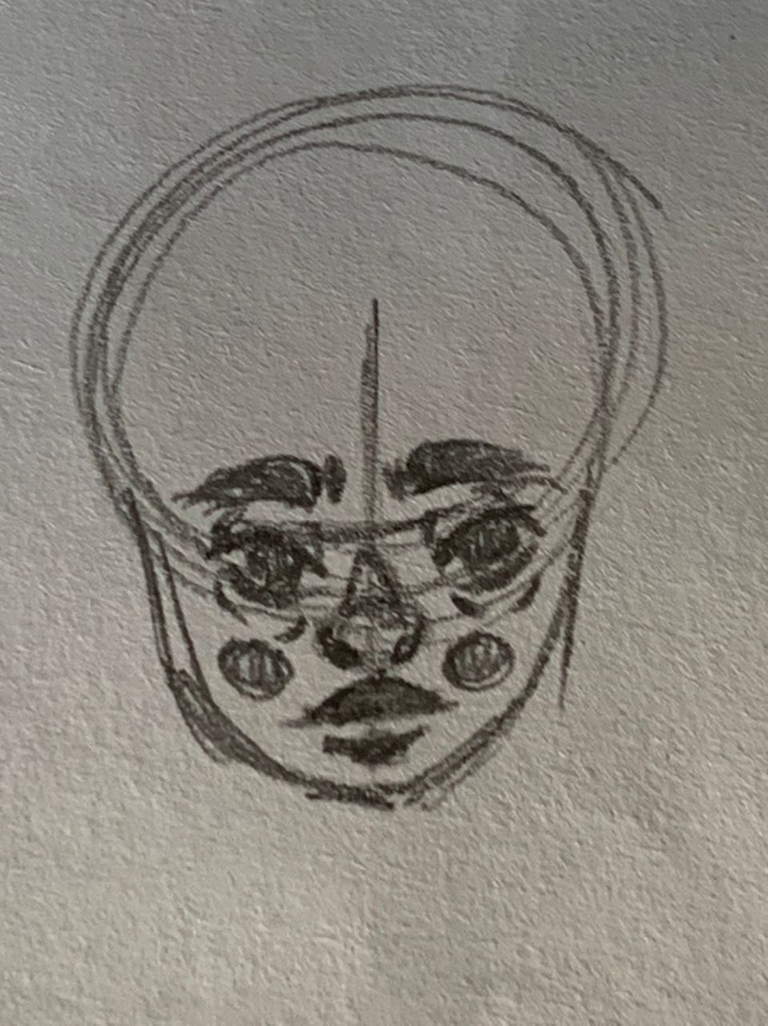
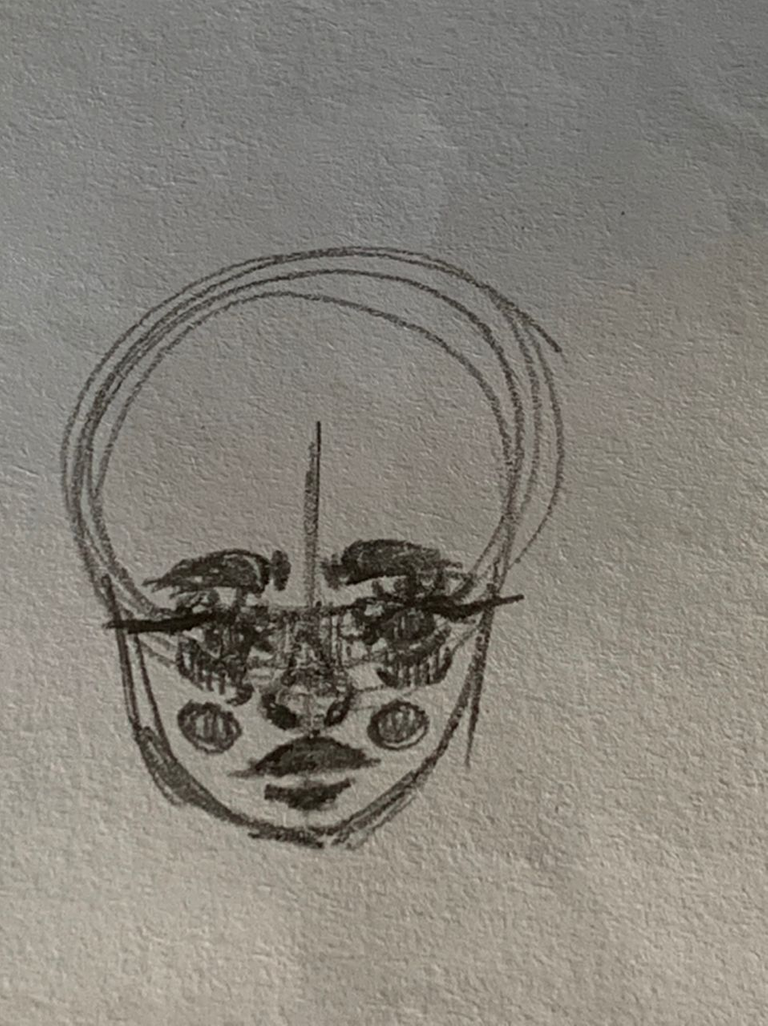
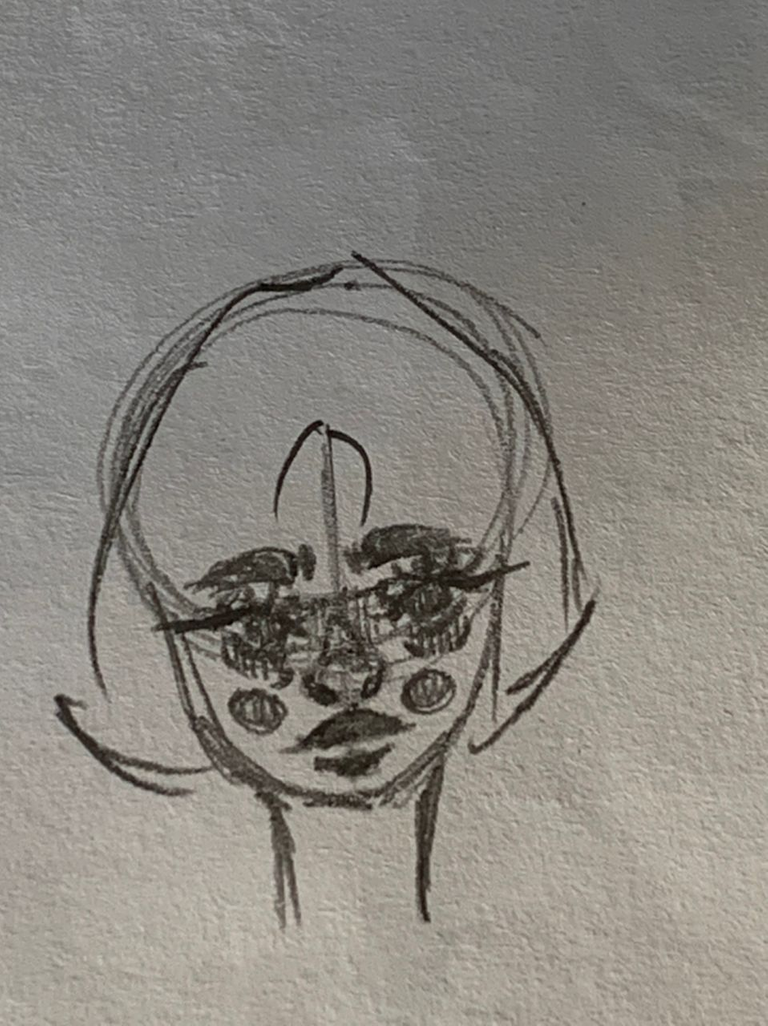
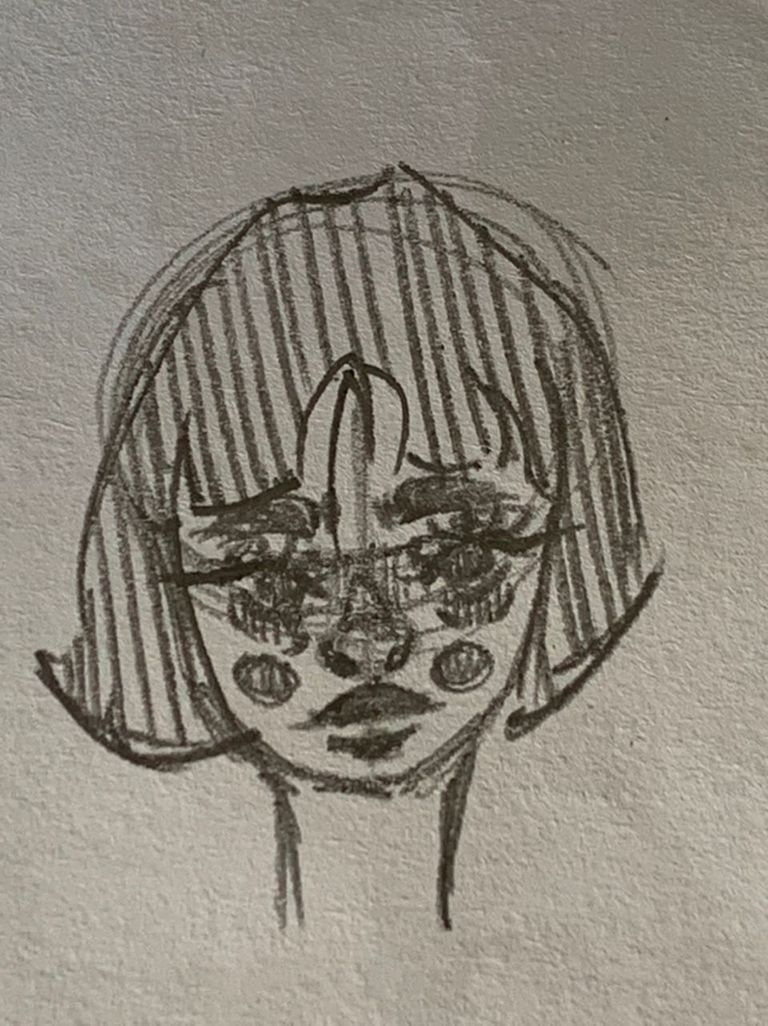
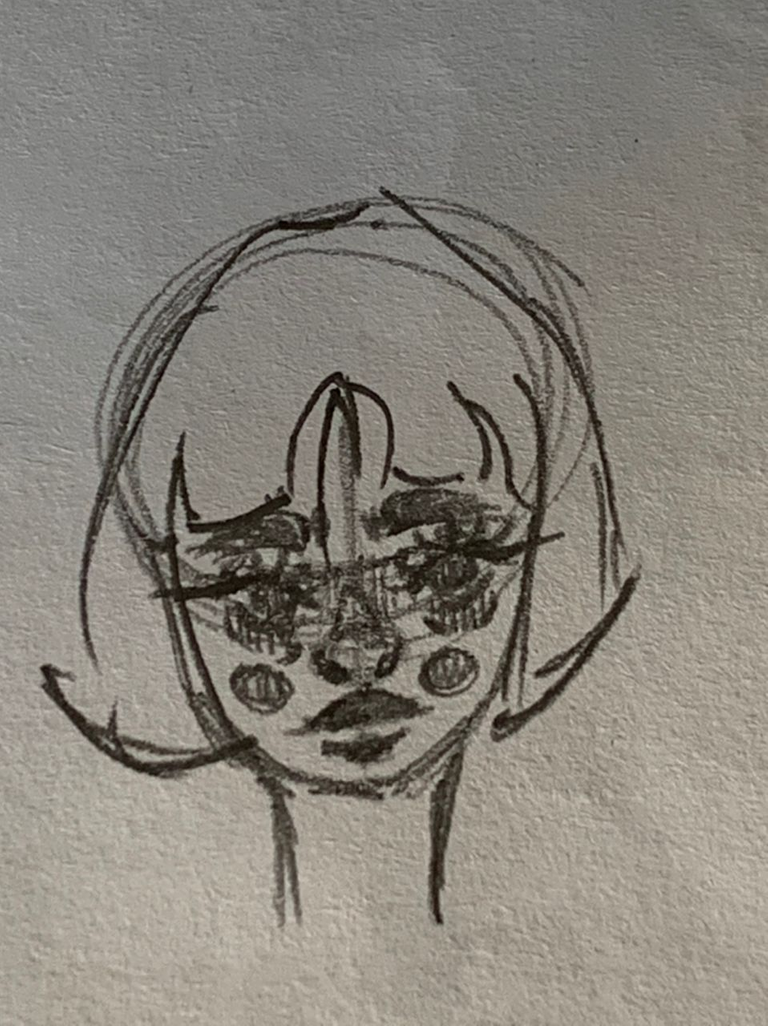
Siempre comienzo dibujando un circulo, el tamaño del circulo va a definir el tamaño de nuestro rostro, más no los rasgos, es decir, el tamaño del circulo define cuanto espacio en el papel va a ocupar nuestro dibujo. Luego de dibujar este circulo trazo una linea vertical en el centro del circulo, que va desde el tope del circulo hasta abajo (fuera del circulo) hasta donde llegue esta línea va a definir el tramaño de la barbilla y el tamaño de la cabexa (cabeza infantil o de adulto, forma redonda u ovalada, etc).
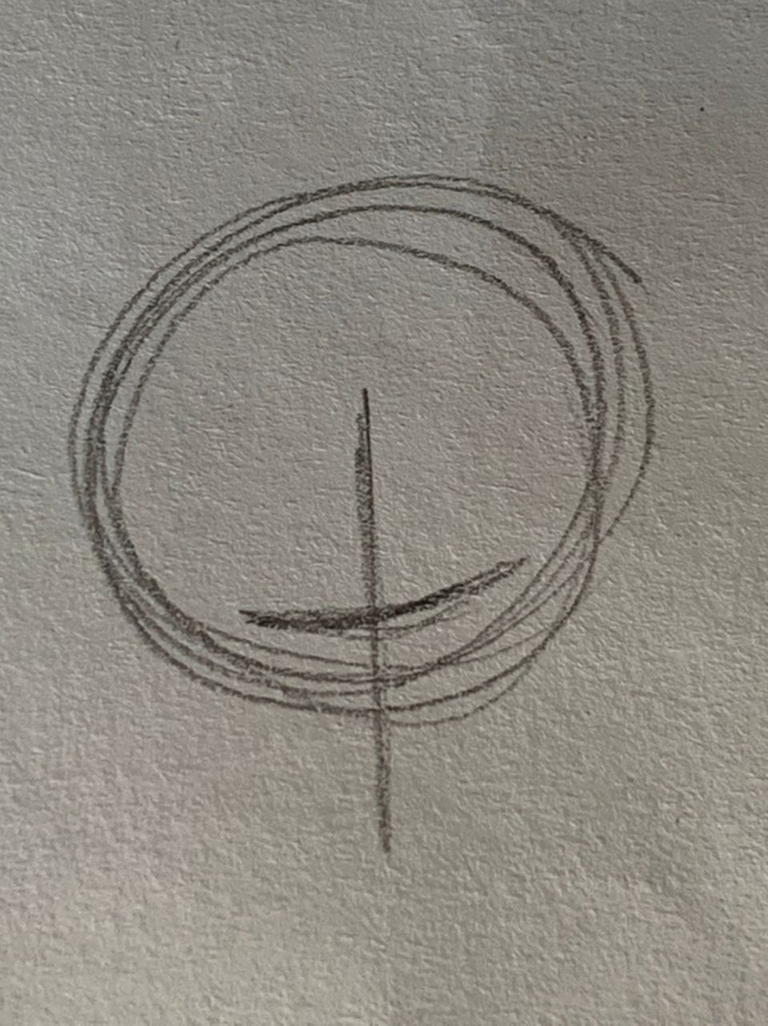
Luego dibujo una linea horizontal en el centro de la línea vértical, esta linea vertical va ubicada un poco mas abajo del centro del círculo. Luego de dibujar las lineas, vertical y horizontal, hago la forma de la barbilla.
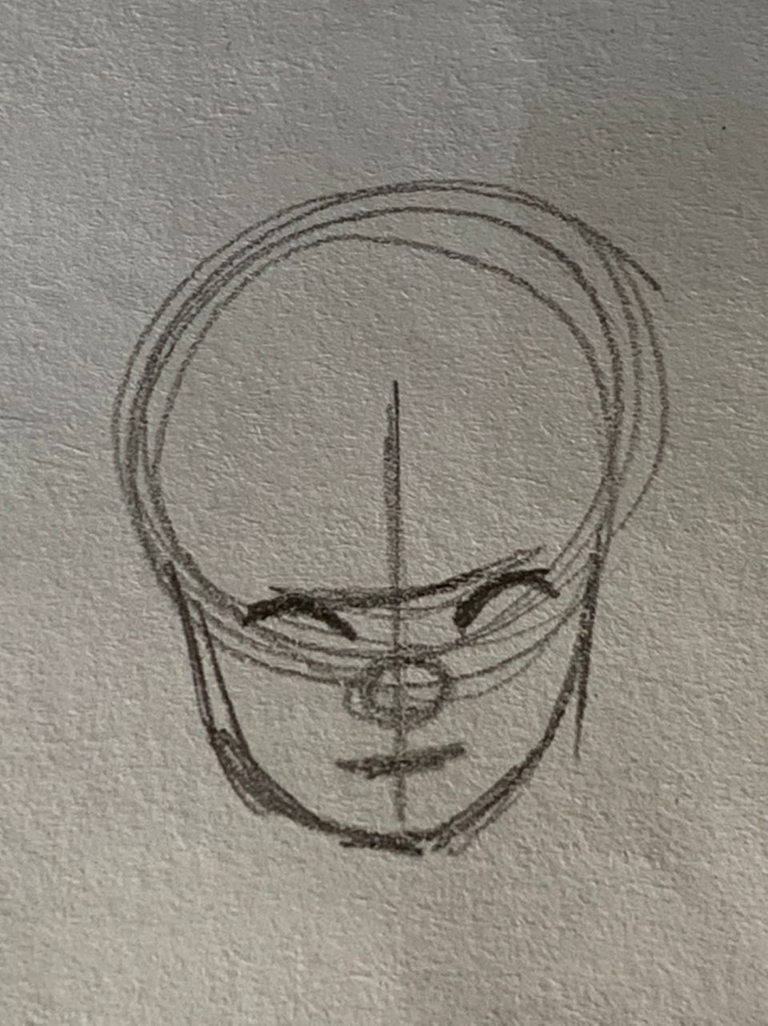
Con la formade la cabeza lista, posiciono cada elemento del rostro en su lugar. Los ojos los dibujo sobre la línea horizontal (es importante que la distacia entre ojo y ojo sea otro ojo imaginario), la nariz la dibujo justo en la linea del circulo, la linea de abajo y en el centro, y los labios los coloco en el espacio que delimite para la barbilla. A todos estos elementos los posicioné sin dibujarlos por completos.
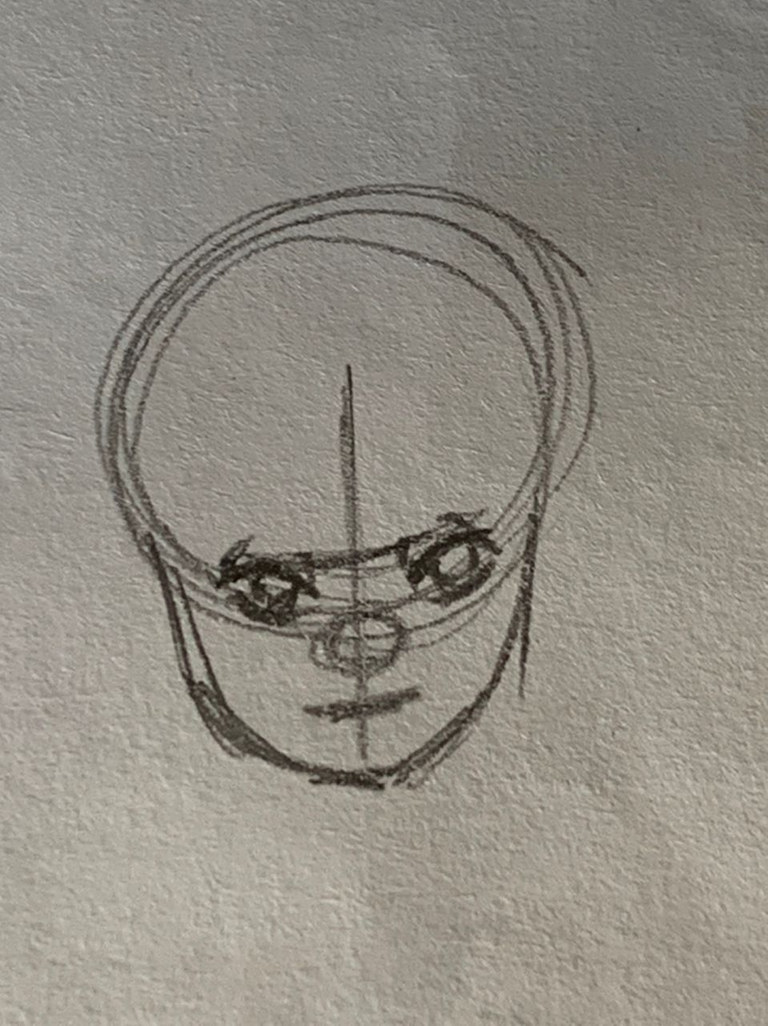
Luego de tener cada elemento en us lugar, empiezo a dibujar con detalle cada uno. Primero los ojos: Dibujo una linea que define cual es la "base" del ojo y en el centro dibujo el circulo que viene siendo la pupila. mediante trazos incompletos dibujo los parpados y las bolsas de los ojos (ojeras)
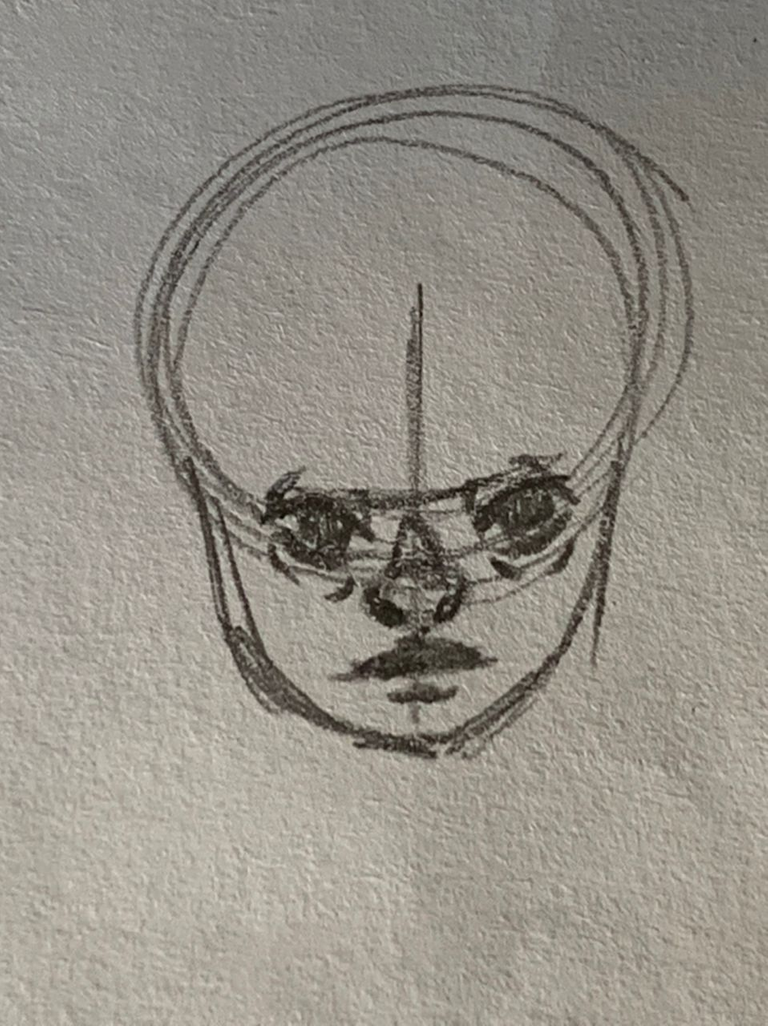
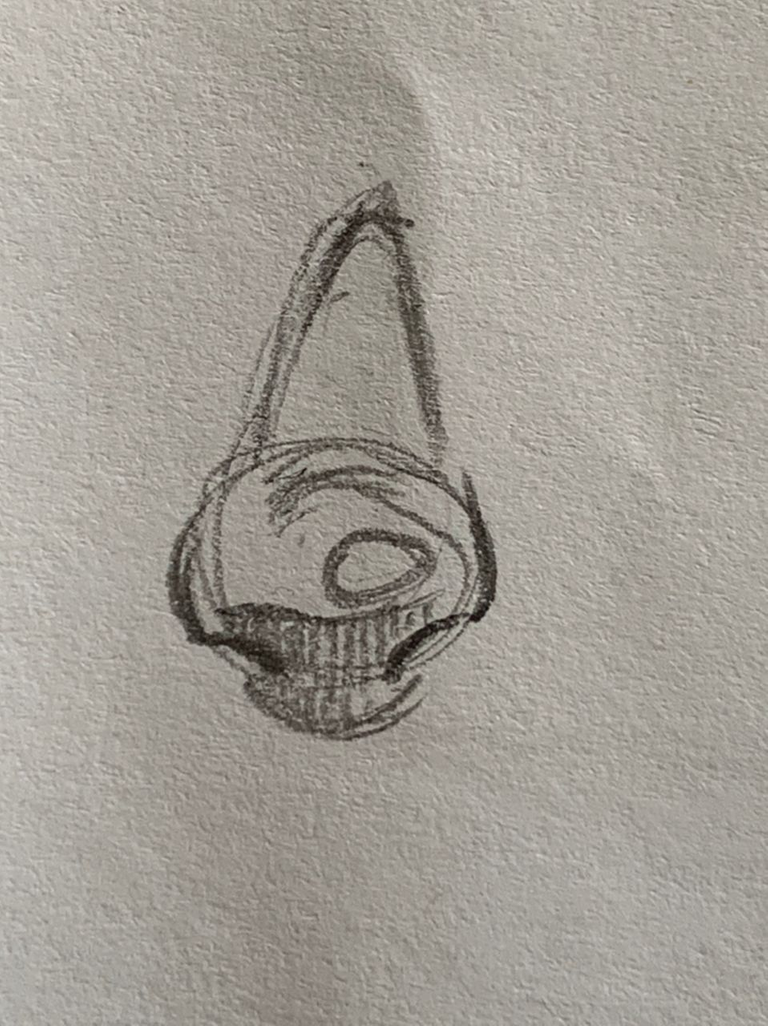
Para dibujar la nariz, la coloque en su lugar dibujando un óvalo, a partir de ese óvalo sale la forma y el tamaño de la nariz. Los orificios de la nariz los represento mediante lineas y no mediante circulos, luego coloco los nostriles que son los lados de la nariz y con un triangulo de puntas redondas represento lo que viene siendo la parte de arriba de la nariz (el tabique). Los labios son simplemente tres líneas horizontales, la de arriba es el labio superior y es la más redonda y puntiaguda, la linea del centro forma parte tanto del labio superior como el de abajo, entonces generalmente esta linea es la más recta, esta línea del centro es la que define si se está sonriendo y entre otras cosas (expresiones faciales) y la línea de abajo es la del labio inferior, suele ser la mas corta y distanciada hacia abajo.
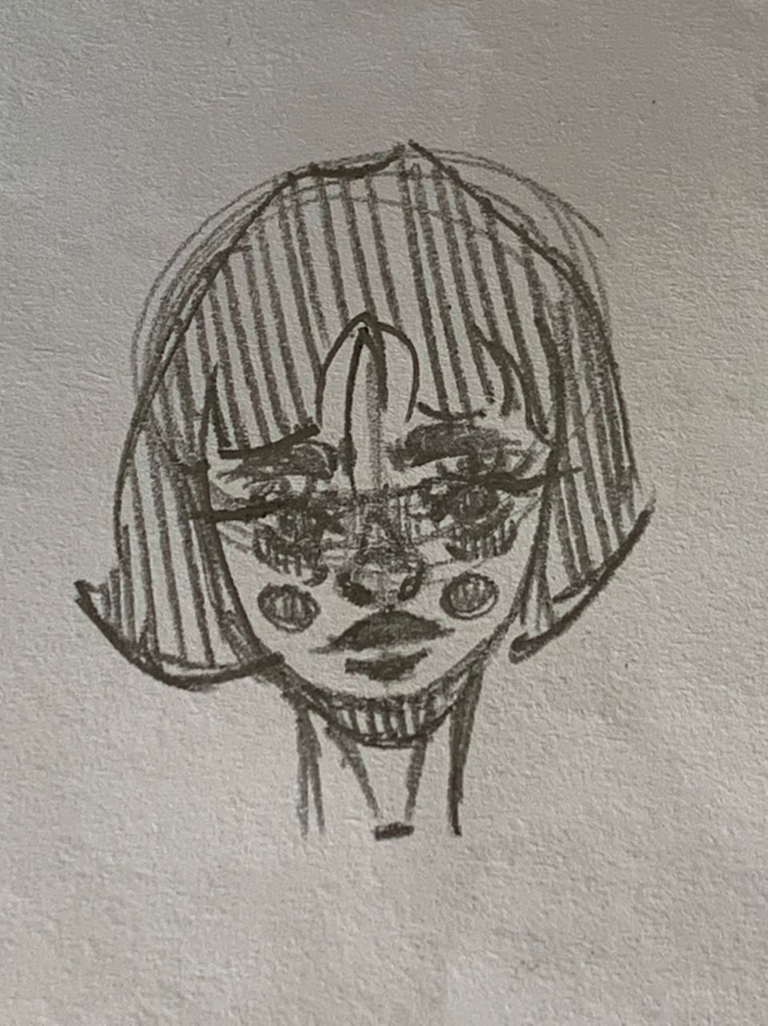
ahora que ya dibujé bien todos los elementos, agrego detallitos, como circulos en las mejillas, que representan el rubor. Agrego pestañas(me gusta hacerlas bastante largas y desordenadas) y ademas agrego bien las sombra y las cejas.

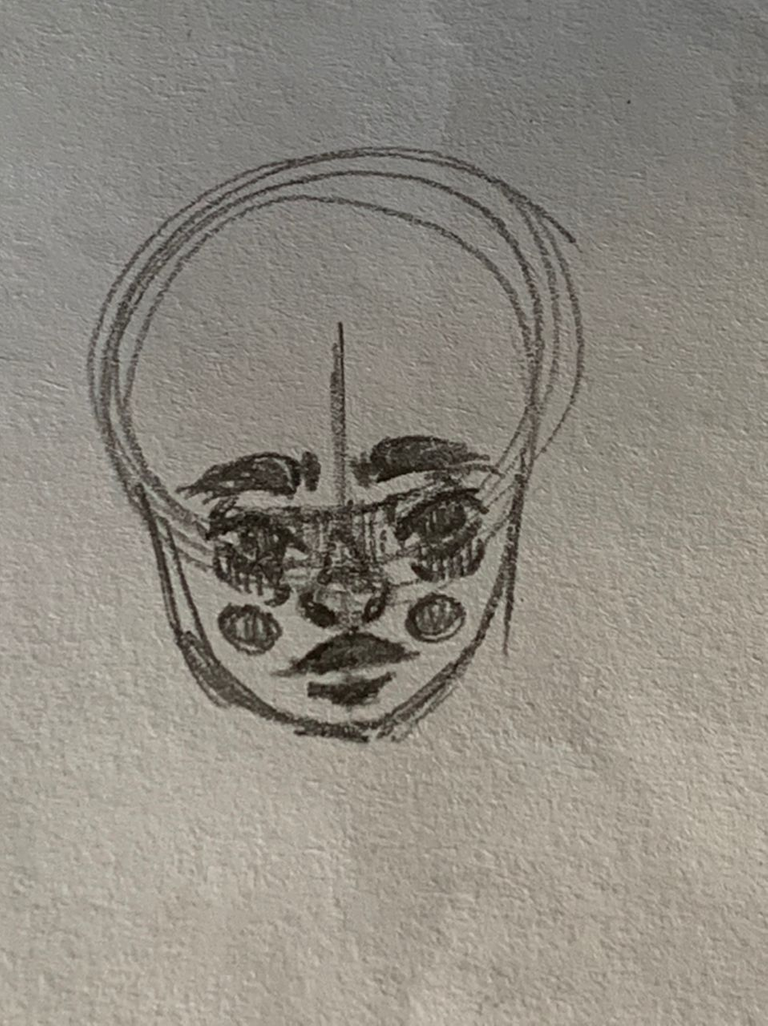
Le agrego cuello y cabello.
Repaso de cada elemento del rostro
Ojo y cejas

Labios
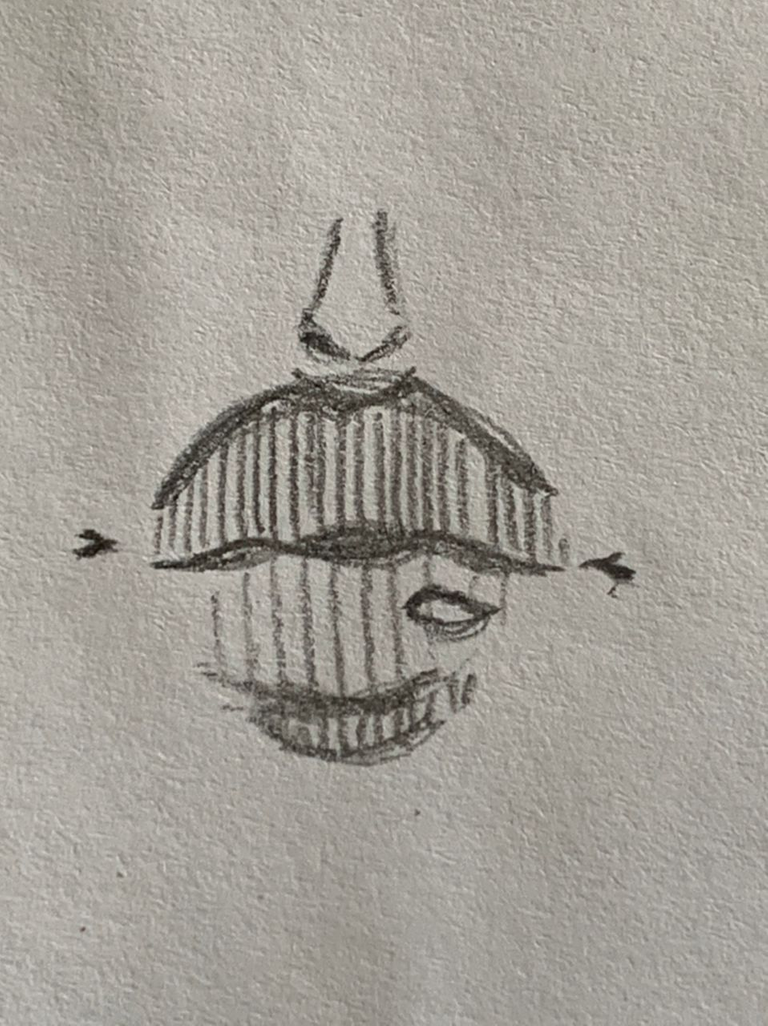
Nariz
Y este sería todo el tutorial de mi método para dibujar rostros, espero que les haya gustado y puedan ponerlo en práctica. Recuerden que para empezar a dibujar no necesitamos muchos materiales ni materiales caros, solo necesitamos papel, lapiz y práticar diariamente, vuelvanse mejores amigos del dibujo.
English version
Greetings to all the Hive DIY community! Today I bring you a tutorial for drawing faces, specifically a tutorial of the way I draw faces. It's important to remember that there are many and varied methods for drawing faces, bodies, objects, etc. There are no right or wrong ways, as every artist is different and that's ok. In this tutorial I want to share with you my techniques and tips when drawing (faces in this case). I am applying my own drawing style which is semi-realistic.
When drawing I let myself go by my creativity and not so much by reality, that is, many times my drawings tend to be a little exaggerated, so I exaggerate features, figures, strokes, among other things. I tend to draw elements changing their natural size, that's why I don't draw within the realistic style completely.
For this tutorial I will be using a Stabilo 2B pencil, which is one of my favorite pencils to practice with. In this tutorial I focus mostly on the face and not so much on the hair, since the hair is usually a bit more extensive and difficult to explain and draw.
So, with all this explained .... Let's draw!
I always start drawing a circle, the size of the circle will define the size of our face, but not the features, that is, the size of the circle defines how much space on the paper will occupy our drawing. After drawing this circle I draw a vertical line in the center of the circle, that goes from the top of the circle to the bottom (outside the circle) until where this line reaches will define the size of the chin and the size of the head (child or adult head, round or oval shape, etc).
Then I draw a horizontal line in the center of the vertical line, this vertical line is located a little below the center of the circle. After drawing the vertical and horizontal lines, I make the shape of the chin.
With the head shape ready, I position each element of the face in its place. The eyes I draw on the horizontal line (it is important that the distance between eye and eye is another imaginary eye), the nose I draw right on the line of the circle, the line below and in the center, and the lips I place them in the space I delimited for the chin. I positioned all these elements without drawing them completely.
After having each element in its place, I start to draw in detail each one. First the eyes: I draw a line that defines which is the "base" of the eye and in the center I draw the circle that is the pupil. With incomplete strokes I draw the eyelids and the eye bags (dark circles).
To draw the nose, I put it in place by drawing an oval, from that oval I draw the shape and size of the nose. The holes of the nose I represent them with lines and not with circles, then I place the nostrils that are the sides of the nose and with a triangle of round tips I represent what is the top of the nose (the septum). The lips are simply three horizontal lines, the top line is the upper lip and is the most rounded and pointed, the center line is part of both the upper and lower lip, then generally this line is the straightest, this center line is the one that defines if you are smiling and among other things (facial expressions) and the bottom line is the lower lip, it is usually the shortest and distanced downwards.
Now that I have drawn all the elements well, I add details, such as circles on the cheeks, which represent the blush. I add eyelashes (I like to make them quite long and messy) and I also add the shadow and eyebrows.
I add the neck and hair.
Review of each element of the face
Eye and Eyebrows
Lips
Nose
And this would be the whole tutorial of my method to draw faces, I hope you liked it and you can put it into practice. Remember that to start drawing we don't need a lot of materials or expensive materials, we only need paper, pencil and practice daily, become better friends of drawing.
Recursos: Canva - Pinterest - Ezgif|| Xiaomi Redmi S2
Traducido con Deepl.com
Todos los Derechos Reservados || © @
2021 -2022
💌 Discord: MyMelody#5297
_
Original content by the author.
Resources: Canva - Pinterest - Ezgif|| Xiaomi Redmi S2
Translation done with Deepl.com
All Rights Reserved || © @ 2021-2022
💌 Discord: MyMelody#5297

Congratulations @lirioapc! You have completed the following achievement on the Hive blockchain and have been rewarded with new badge(s):
Your next target is to reach 500 upvotes.
You can view your badges on your board and compare yourself to others in the Ranking
If you no longer want to receive notifications, reply to this comment with the word
STOPTo support your work, I also upvoted your post!
Check out the last post from @hivebuzz:
Support the HiveBuzz project. Vote for our proposal!
Esto es lo que más se me complica al momento de hacer un dibujo, hace tiempo tome algunas clases de dibujo y los rostros de personajes o personas era lo más complicado para mi
Me gusto el tutorial que compartiste !PIZZA
@zona-art, sorry! You need more to stake more $PIZZA to use this command.
The minimum requirement is 20.0 PIZZA staked.
More $PIZZA is available from Hive-Engine or Tribaldex