[Esp | Eng] Pulsera de flores en zig zag | Zig zag flower bracelet
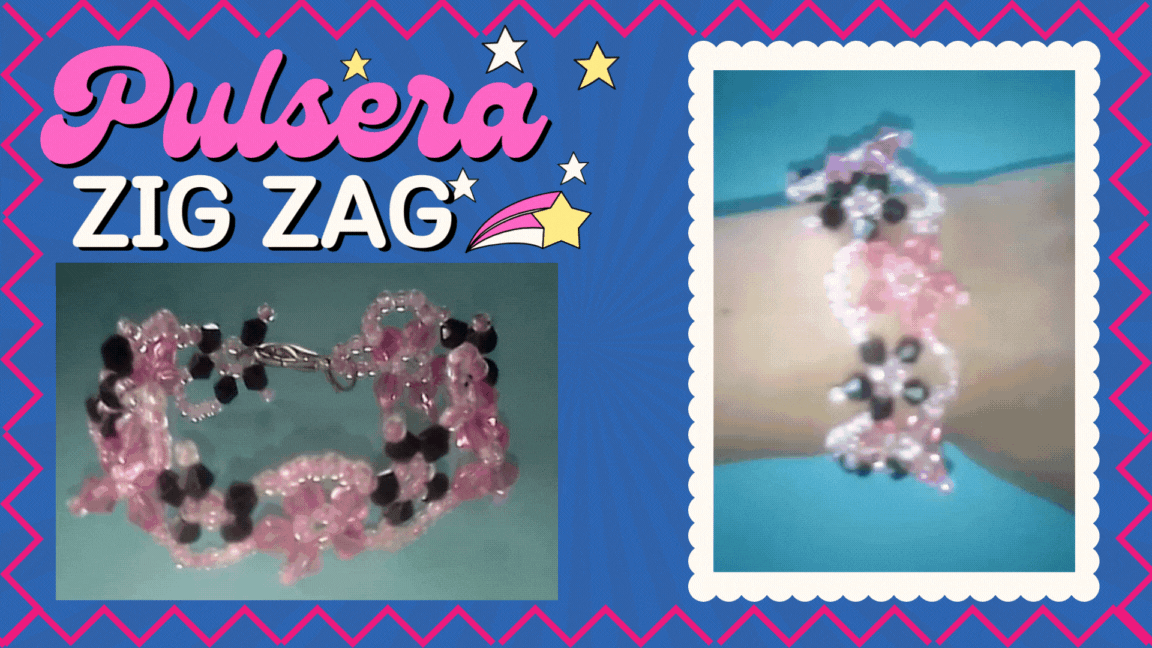
Hola amigos de la comunidad de Jewelry, hoy hice una linda pulserita que me gusto mucho realizarla, es rosada y es en zig zag, al principio me dio un poco de trabajo pero luego poco a poco con paciencia la pude ir haciendo y ya lo demás fué repetir los pasos y ver bien como se va haciendo el zig zag para no equivocarme haciendo el patrón. Espero disfruten el paso a paso.
Hello friends of the Jewelry community, today I made a nice bracelet that I really liked to make it, it is pink and is in zig zag, at first it gave me a little work but then little by little with patienciala I could be doing and the rest was to repeat the steps and see well how to do the zig zag to not make a mistake making the pattern. I hope you enjoy the step by step.
Materiales | Materials
Procedimiento | Procedure
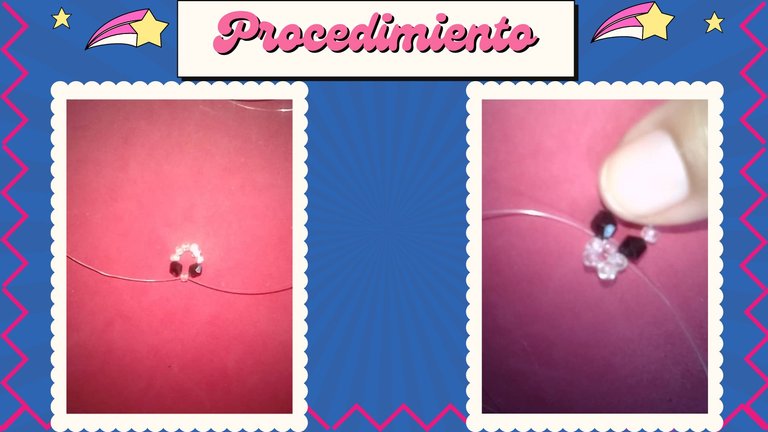
Paso 1 | Step 1
Primero introducimos 6 mostacillas rosadas luego dos cristales negros , luego agregamos una mostacilla y cruzamos en esa mostacilla.
First we introduce 6 pink beads, then two black crystals, then we add a bead and cross in that bead.
Paso 2 | Step 2
Luego agregamos 2 mostacilla en cada hilo nylon y les damos lavuelta hasta que los dos hilos salgan por la mostacilla que cruzamos al principio.
Then we add 2 beads on each nylon thread and we turn them until the two threads come out through the bead we crossed at the beginning.
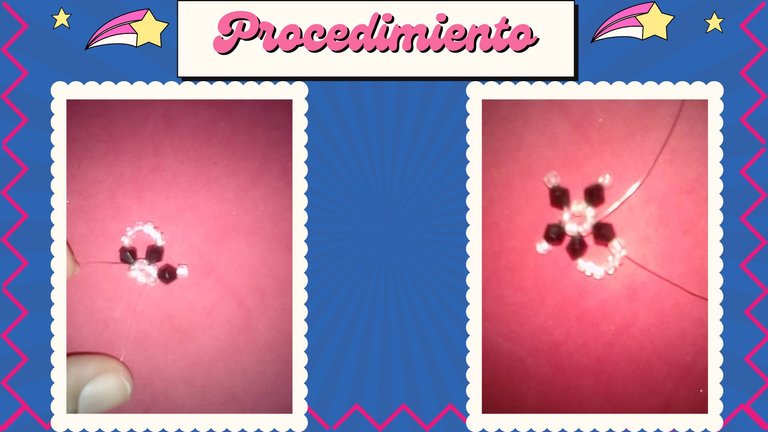
Paso 3 | Step 3
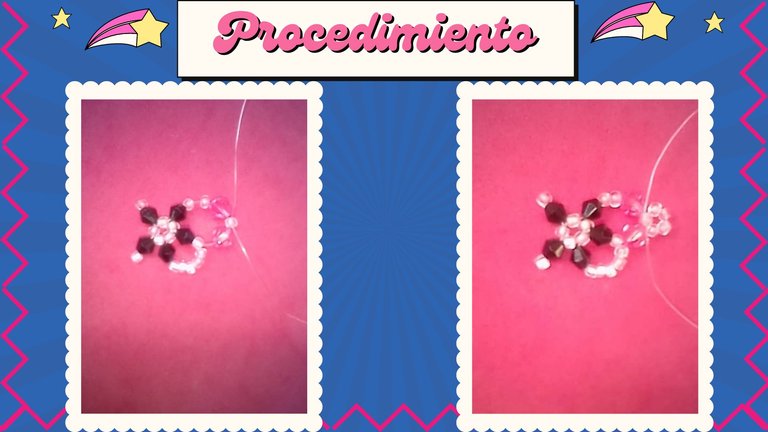
Luego en este paso le vamos a ir agregando los petalos a la flor , antes de agregar cada petalo, debemos darnos cuenta de que va a ser petalo, mostacilla, petalo, mostacilla, entonces para agregar el tercer petalo debemos pasar el hilo por dentro de una mostacilla que esta en el circulo que acabamos de hacer y añadirmos un cristal checo negro luego una mostacilla rosada, entonces nos devolvemos por esa misma mostacilla y por ese cristal y seguimos pasando el hilo por dentro de una mostacilla mas para seguir haciendo el resto de los petalos.
Then in this step we are going to add the petals to the flower, before adding each petal, we must realize that it will be petal, bead, bead, bead, bead, bead, then to add the third petal we must pass the thread inside a bead that is in the circle that we just made and add a black Czech crystal then a pink bead, then we go back through that same bead and through that crystal and continue passing the thread inside one more bead to continue making the rest of the petals.
Paso 4 | Step 4
Como pueden ver al final se forma la flor y queda un hilo suelto ese hilo se saca completamente por el petalo que esta justo arriba, y con ese nylon pasamos una mostacilla y un cristal y por otro nilon que se ve abajo pasamos un cristal checo rosado, luego pasamos una mostacilla y cruzamos . Luego como pueden ver repetimos lo que hicimos en el paso 2 para hacer el centro de la flor y luego hacemos el paso 3 para hacer los petalos.
As you can see at the end the flower is formed and there is a loose thread that thread is completely removed by the petal that is just above, and with that nylon we pass a bead and a crystal and by another nylon that is seen below we pass a pink Czech crystal, then we pass a bead and cross. Then as you can see we repeat what we did in step 2 to make the center of the flower and then we do step 3 to make the petals.
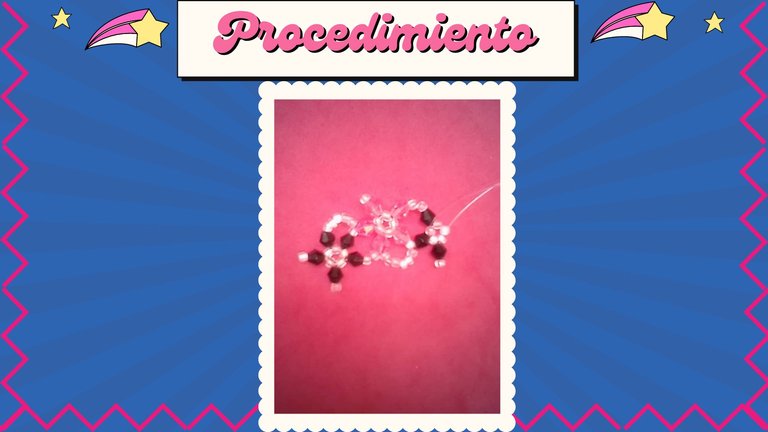
Paso 5 | Step 5
Siempre demos estar pendientes del sentido en el que va el zig zag. En esta ocasión debemos dejar de una vez el hilo que va a salir por la parte de arriba de la flor rosada , entonces subimos el hilo desde el centro dela flor rosada y lo pasamos por el cristal checo rosado y lo sacamos por una mostacilla rosada. Con el otro hilo armamos los petalos de flor, con el hilo de abajo, como en el paso 3 y pasamos las 6 mostacillas rosadas por la parte de arriba de la flor. Finalmente lo que queda es repetir desde el paso 2, 3 y 4 para completar el resto de las flores segun nuestra muñeca. Agregamos los aros y colocamos el gancho.
We must always pay attention to the direction of the zig zag. This time we must leave the thread that will come out from the top of the pink flower, then we raise the thread from the center of the pink flower and pass it through the pink Czech glass and take it out through a pink bead. With the other thread we assemble the flower petals with the thread below, as in step 3 and pass the 6 pink beads through the top of the flower. Finally what remains is to repeat from step 2, 3 and 4 to complete the rest of the flowers according to our doll. Add the earrings and attach the hook.

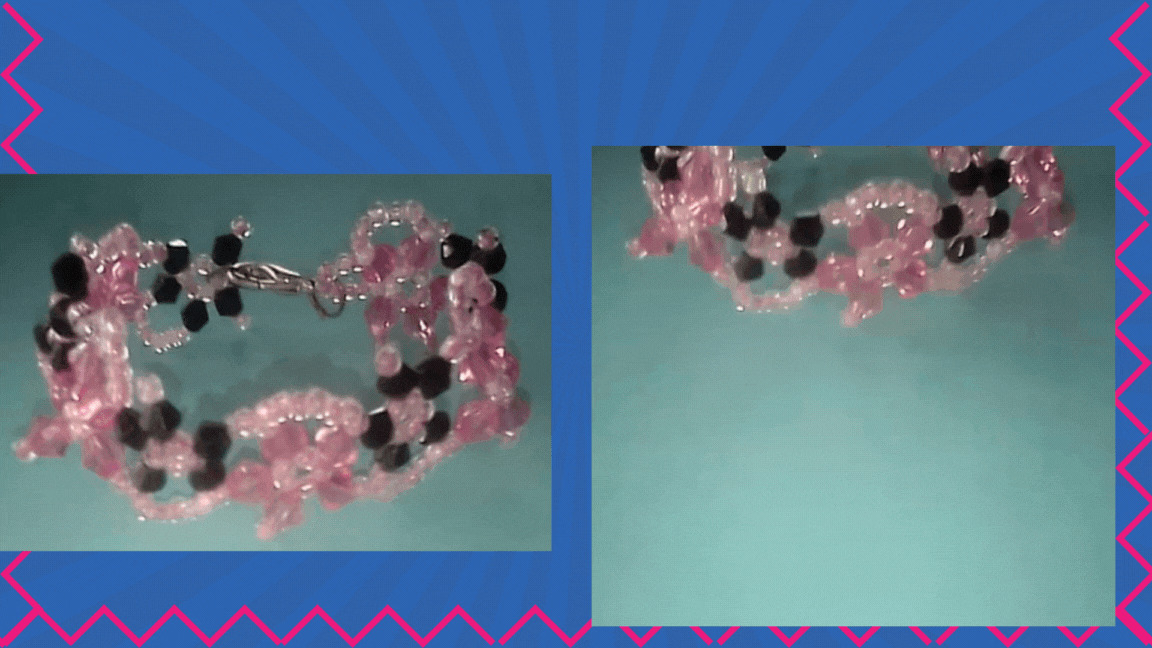
Resultado | Result
Finalmente, así es como queda basicamente repetimos los pasos lo bueno es que no es tan elaborado el procedimiento y la pulsera queda con brillo especial, entre el rosado de las mostacillas. Creo que el cristal checo me está gustando mas que el swarovski de imitacion . Tambien tengo swarovski original pero es mas costoso, el original lo venden por docena y el de imitación lo venden por dedal, claro el swarovski blanco tiene un brillo que es especial y combina con todo pero yo sigo prefiriendo el rosa y los cristales checos que son rosados y menos costosos.
Finally, this is how it is basically repeat the steps, the good thing is that the procedure is not so elaborate and the bracelet is with special brightness, between the pink of the beads. I think I like the Czech crystal more than the imitation swarovski. I also have original swarovski but it is more expensive, the original is sold by the dozen and the imitation is sold by the thimble, of course the white swarovski has a special shine that is special and combines with everything but I still prefer the pink and the Czech crystals that are pink and less expensive.

Gracias por leer !!!
Thanks for reading!!!
Créditos | Credits
Utilicé Canva para editar imágenes y personalicé un poco una plantilla de Canva.
I used Canva to edit images and customize a Canva template a bit.
Utilicé deepl.com para la traducción
I used deepl.com to traduction.
Todas las imagenes del paso a paso son mías, tomadas con mi telefono Yezz Liv1.
All the step by step images are mine, taken with my Yezz Liv1 phone.
 |
 |
 |
Congratulations @lismarcarolina2! You have completed the following achievement on the Hive blockchain And have been rewarded with New badge(s)
Your next target is to reach 40 posts.
You can view your badges on your board and compare yourself to others in the Ranking
If you no longer want to receive notifications, reply to this comment with the word
STOPTo support your work, I also upvoted your post!
Check out our last posts:
Amiga te quedó muy hermosa y delicada la pulsera, me encantó el color que escogiste para su elaboración... Muchas gracias por compartir, un saludo.
Gracias
This wanted to confuse me at initial but the steps you provided gave me good instruction and direction on the final outcome of the bracelet.
Thank you
Gracias por el apoyo
Ha quedado muy hermosa, me encanta el diseño de esta pulsera 👍
Hola , muchas gracias
muy hermoso amiga te felicito feliz día.
Gracias
Feliz noche bendiciones.
Quedó muy bonita la pulsera .. saludos
Gracias