Hermosos Aretes redondos de Hilo de coser | Beautiful Round Sewing Thread Earrings
Español
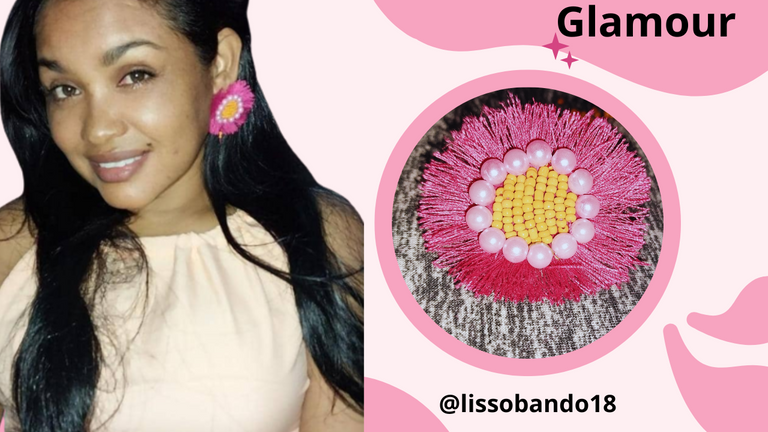
Los zarcillos son un complemento infaltable en el mundo de la moda. Son un accesorio que no solo complementa hasta el más sencillo de los looks, sino que también puede elevar cualquier atuendo a uno totalmente elegante. Si bien, existen muchos materiales como el oro, la plata, el acero, y algunos otros tipos de metales que pueden ser usados en su elaboración, hoy nos enfocaremos en hablar sobre los zarcillos hechos con hilos de coser.
Una de las razones por las que los zarcillos hechos con hilos de coser son cada vez más populares hoy en día, es su versatilidad. Con ellos, es posible elaborar distintas creaciones a nuestro gusto, combinando nuestra personalidad y estilo. Es una oportunidad para que cada persona exhiba su creatividad y originalidad, ya que no solo podemos elegir los colores o diseños, sino que también podemos mezclar diferentes grosores y materiales, por lo que es posible crear collares, pulseras, y hasta detalles para la ropa a juego con los zarcillos.
En esta ocasion les voy a presentar el paso a paso para la elaboración de unos hermosos aretes de hilo en forma circular.
Los Materiales que necesitarameos son los siguientes:
Materiales
- Fieltro Fucsia
- Perlas rosada
- Hilo de coser fucsia
- Pega
- mostacillas naranja
- Alambre fino
- tarjeta sin uso
Paso a Paso
1
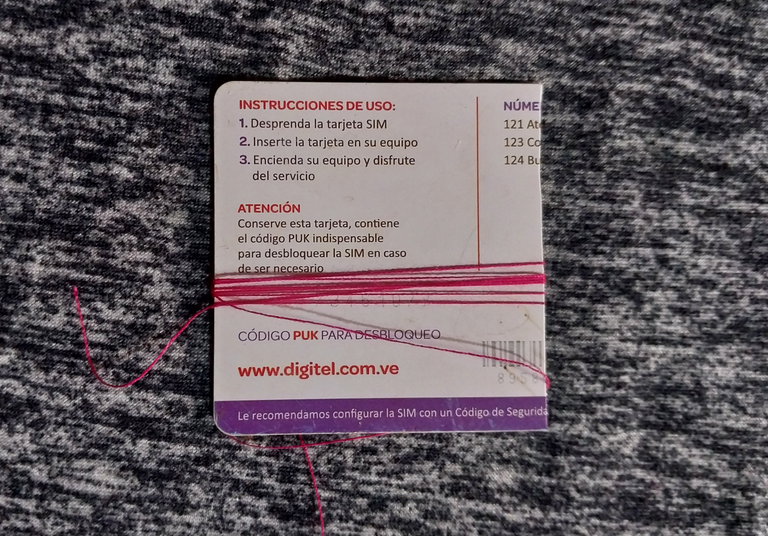
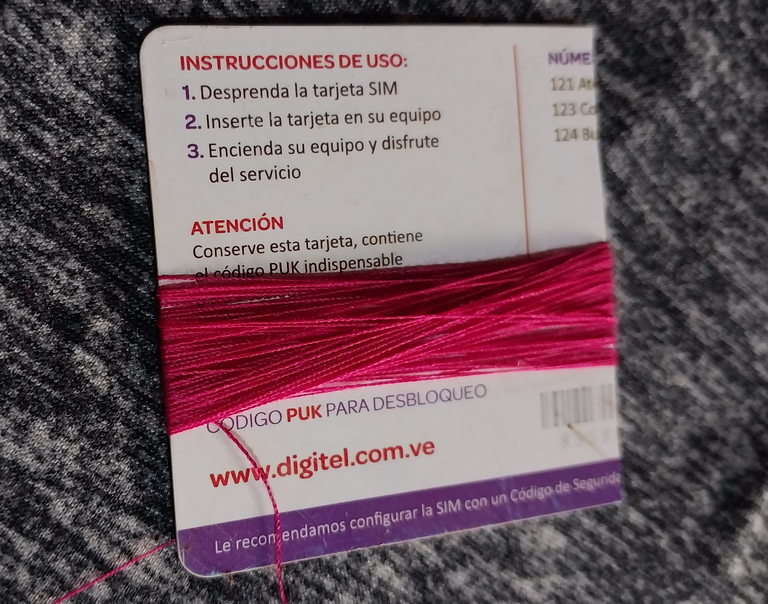
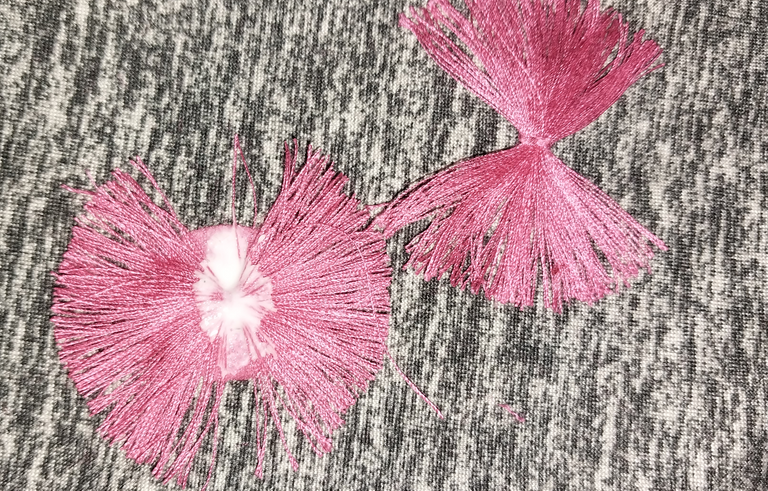
Se procede a tomar la tarjeta y cortarla a la mitad, luego se debe enrollar sobre esta el hilo de coser fucsia. Se debe hacer varias vueltas alrededor del hilo de coser, hasta que este tome un grosor significativo.
2

Cuando se termnie de enrrollar un grosor considerable de hilos sobre la tarjeta se procede a |toma|r un hilo de coser y este se debe amarrar en el medio de los hilos. De forma que se hace un nudo.
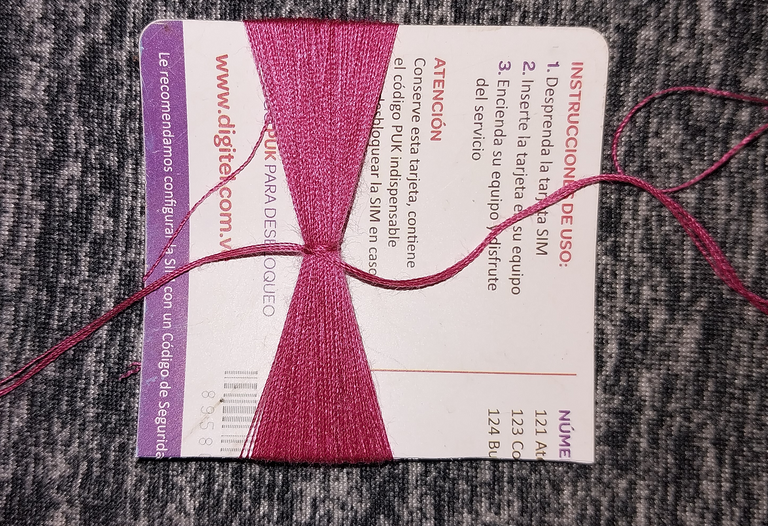
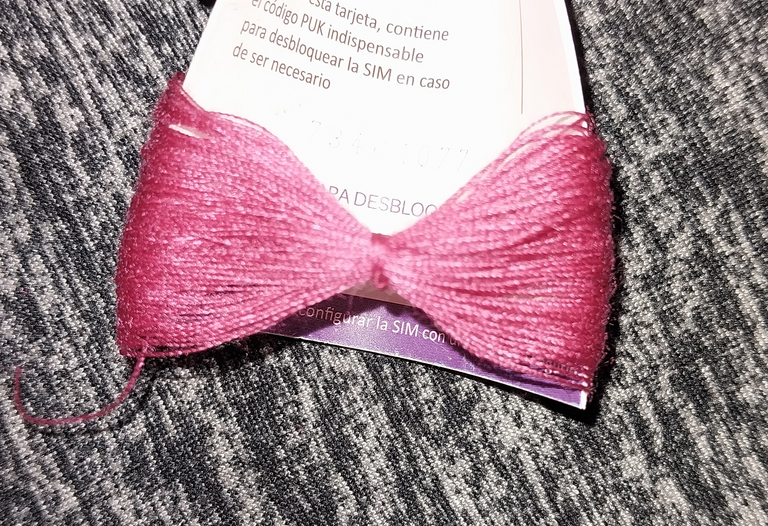
De esta manera debe quedar el nudo en uno de los lados de los hilos enrollados en la tarjeta. Seguidamente se debe sacar el material de hilos de la tarjeta.
3
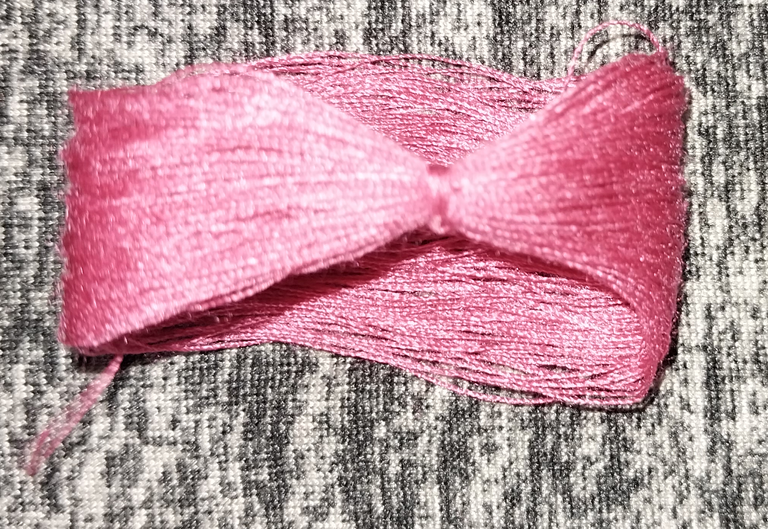
Es asi que se sacan los hilos de la tarjeta.
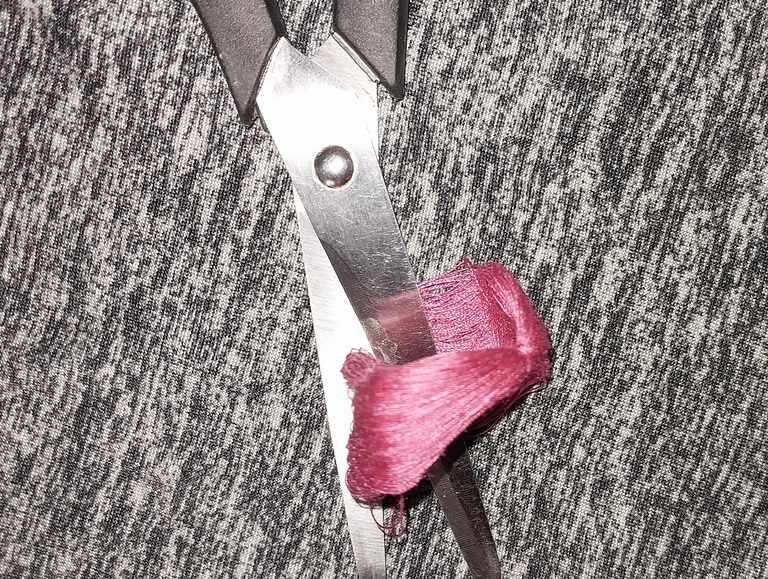
Ahoa solo se debe cortar los hilos por la mitad con la ayuda de la tijera.
4

De esta forma debe quedar el diseño de los hilos a proceder a formar nuestro aretes.

Se debe realizar otro rollito de hilos siguiendo los pasos anteriores.
5
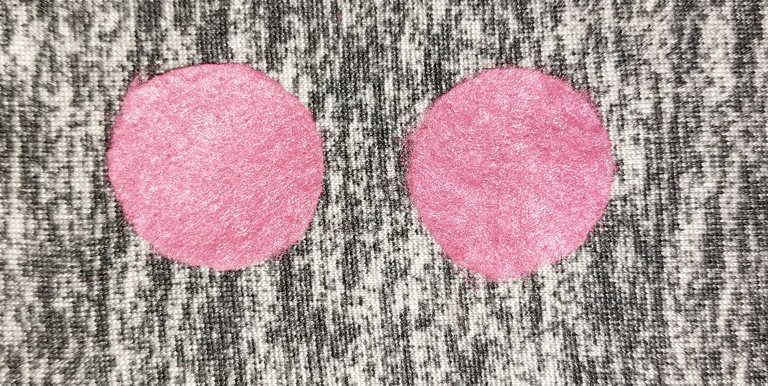
Luego sobre el fieltro se procede a realizar dos figuras circulares de un diametro de 3 cm aproximadamente.
6
Se debe pegar los uno de los hilos en la figura circular apllicando un poco de pegamento en ambas caras del centro del hilo.
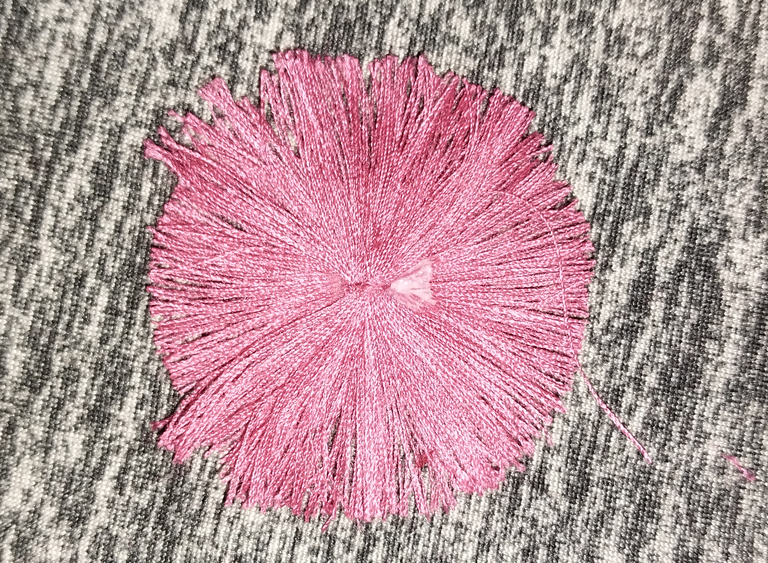
Luego se pega el otro rollirto de hilo en el espacio abierto que ha dejado el prier circulo, formando asi el circulo de hilos.
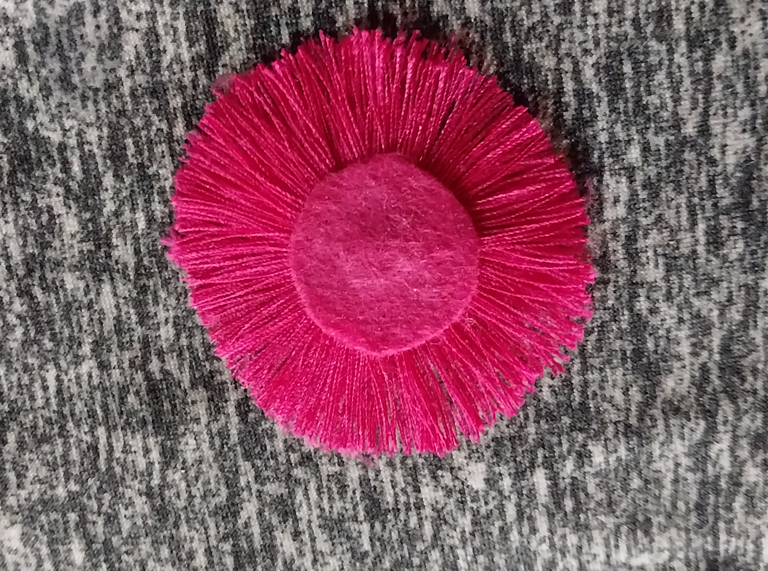
Posteriormente se procede a pegar un fieltro circular sobre los hilos.
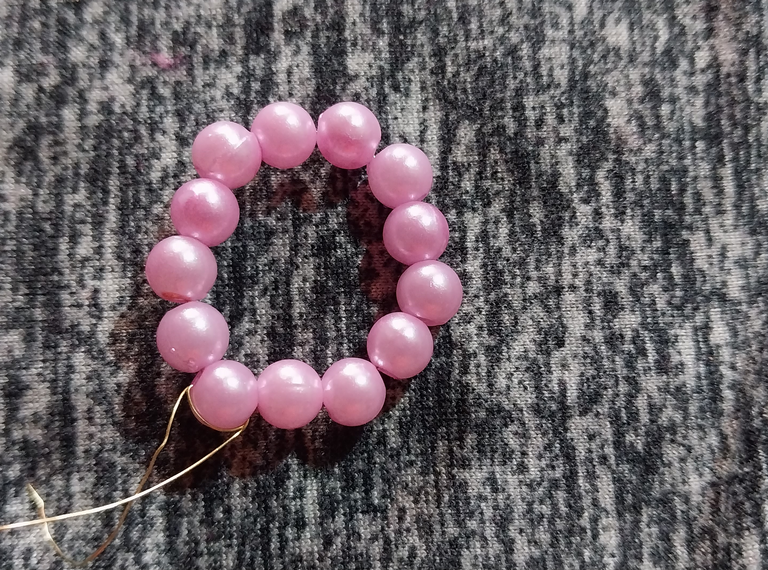
Seguidamente se hace un circulo con 13 perlas introduciendolas en un alambre fino.
7
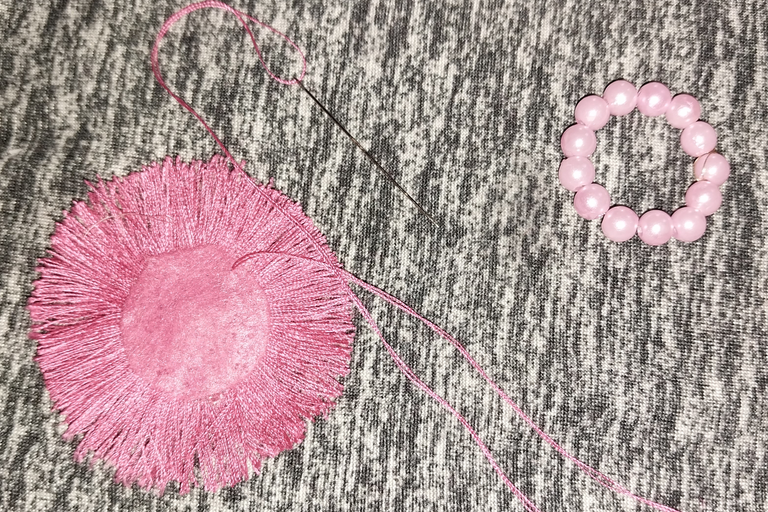
Se procede a isertar el hilo de coser con una aguja en el borde del fieltro para fijar las perlas de cristales rosadas al rededor del fieltro.
8
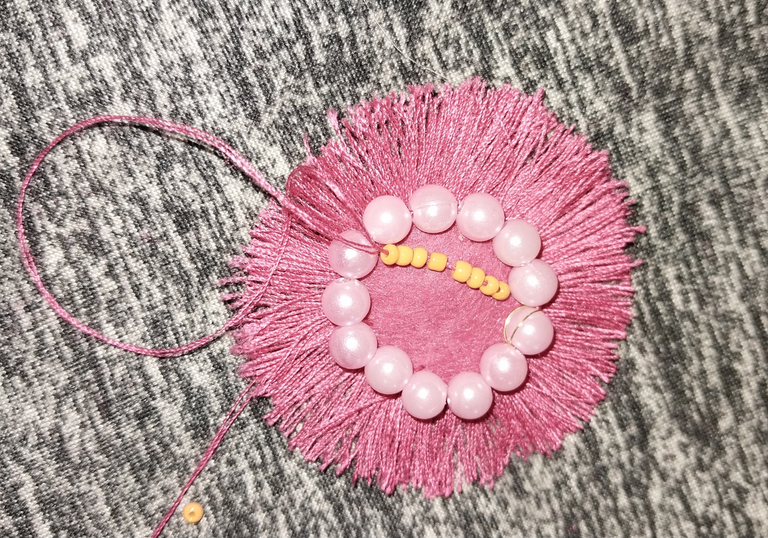
Luego se toman las mostacillas naranjas y se deben formar filas en la parte interna del circulo de fieltro.
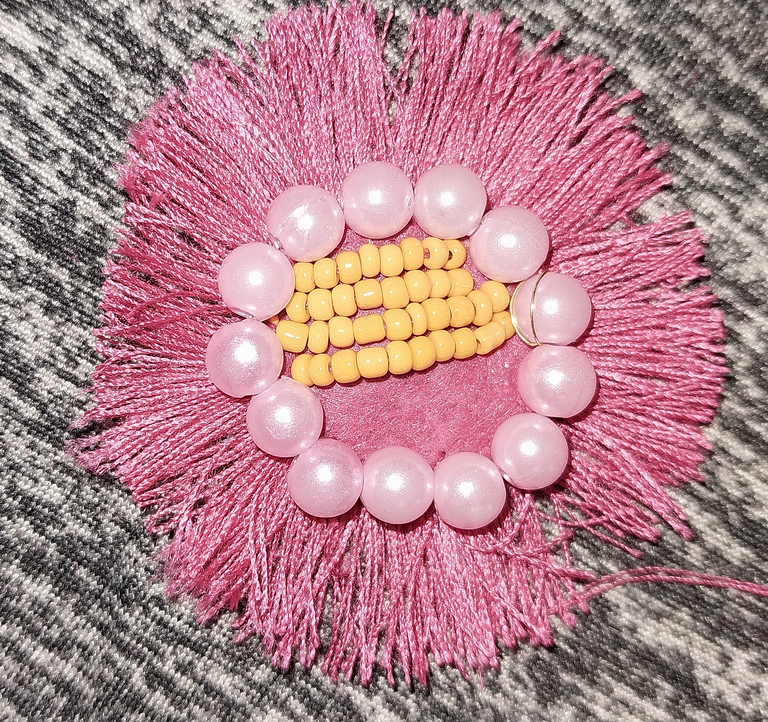
Es asi que se va llenando todo el area interna del circulo del arete.
9
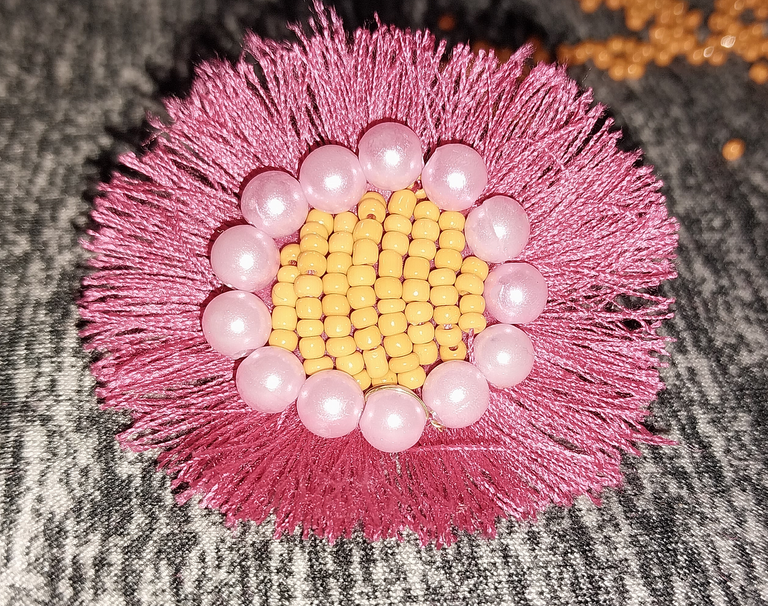
Es asi que hemos termiando la pieza!
Espero les guste y que se animen a realizarlo. Hasta la proxima queridos amigos.
- Las imagenes me pertenecen
- El babber fue editado en Canva
- Traductor; Deepl Traslator
English
Earrings are a must-have accessory in the fashion world. They are an accessory that not only complements even the simplest of looks, but can also elevate any outfit to a totally elegant one. While there are many materials such as gold, silver, steel, and some other types of metals that can be used in their manufacture, today we will focus on talking about tendrils made with sewing threads.
One of the reasons why tendrils made with sewing threads are becoming more and more popular nowadays is their versatility. With them, it is possible to elaborate different creations to our liking, combining our personality and style. It is an opportunity for each person to exhibit their creativity and originality, since we can not only choose the colors or designs, but we can also mix different thicknesses and materials, so it is possible to create necklaces, bracelets, and even details for clothing to match the tendrils.
This time I am going to show you the step by step for the elaboration of some beautiful earrings of thread in circular form.
The materials you will need are the following:
Materials
- Fuchsia Felt
- Pink beads
- Fuchsia sewing thread
- Glue
- orange beads
- Thin wire
- unused card
Step by Step
1
Take the card and cut it in half, then wind the fuchsia sewing thread around it. Make several turns around the sewing thread until it reaches a significant thickness.
2
When you have finished winding a considerable thickness of threads on the card, take a sewing thread and tie it in the middle of the threads. So that a knot is made.
In this way the knot should be on one of the sides of the threads wound on the card. Then remove the yarn material from the card.
3
This is how to remove the yarns from the card.
Now just cut the yarns in half with the scissors.
4
This should be the design of the threads to proceed to form our earrings.
Another thread roll should be made following the previous steps.
5
Then, on the felt, proceed to make two circular figures of approximately 3 cm in diameter.
6
Glue one of the threads in the circular figure applying a little glue on both sides of the center of the thread.
Then glue the other yarn roll in the open space left by the first circle, thus forming the circle of yarns.
Then proceed to glue a circular felt over the threads.
Then make a circle with 13 beads by inserting them in a thin wire.
7
Then, insert the sewing thread with a needle on the edge of the felt to fix the pink crystal beads around the felt.
8
Then take the orange beads and form rows on the inside of the felt circle.
This is the way to fill all the inner area of the earring circle.
9
This is how we have finished the piece!
I hope you like it and that you are encouraged to make it. Until next time dear friends.
- The images belong to me
- The babber was edited in Canva
- Translator: Deepl Translator
Muy lindos amiga ...
Que bonito diseño, es diferente y lindo ✨🌺
Muy delicados y bonitos te quedaron @lissobando, me gustó tu diseño, saluditos 🤗
Thank you for using the #diy tag, the go-to-tag to earn and grow your BUIDL power.
You will be upvoted as long as you post plagiarism-free content/images and continue growing your BUIDL Power.
Whenever you are posting anything related to a DIY creation, you can use #diy tag, which will give your posts extra eyeballs and you will be entitled to earn BUIDL tokens as well.
Check out this post for more information about BUIDL tokens.
Likewise, whenever you are posting anything related to hivelist related tags use the #contests, #forsale, #services, #gigs, #events or #fundraising tags and your posts will be featured in https://hivelist.org, which will give your posts extra eyeballs and you will be entitled to earn LIST tokens as well.
Hermosos aretes con unos colores muy bonitos , me encantó la combinación 👌👍