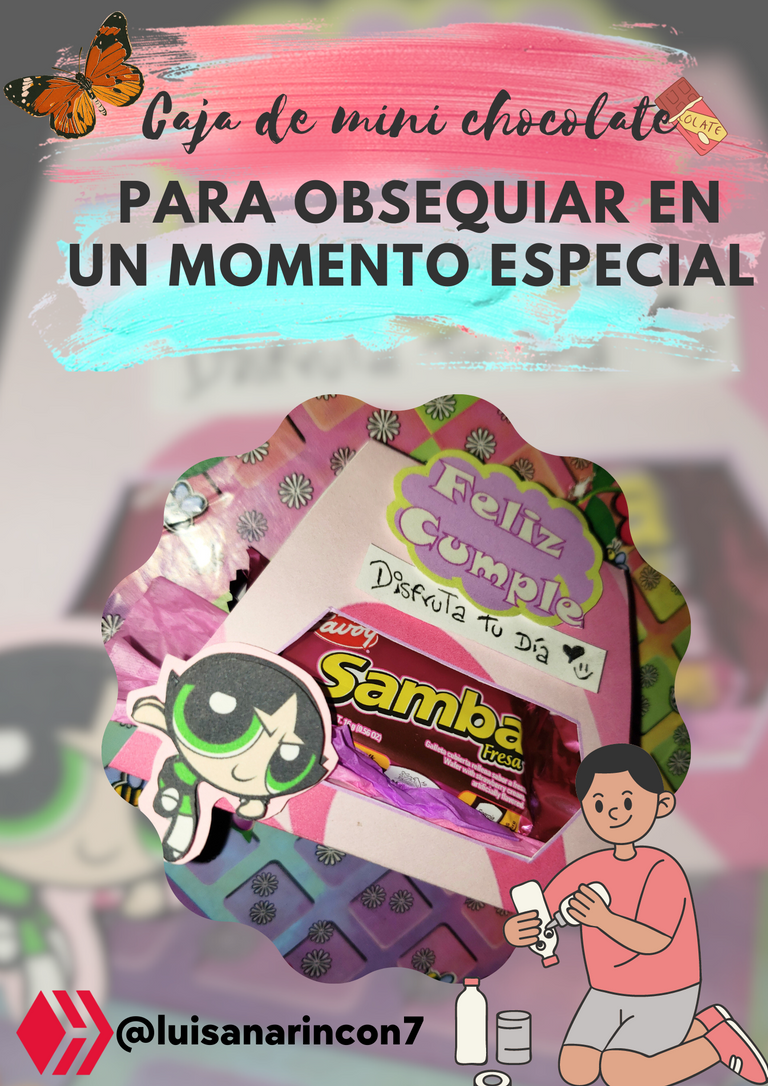
Caja para mini chocolate fácil, para obsequiar en un momento especial (Esp/Eng)
Hola amigos de hive, y comunidad de Hive Diy, el día de hoy quiero traerles un pequeño tutorial para realizar y armar una caja para un mini chocolate. Esta idea comenzó ya que hay una amiga de mi prima que cumplía 16 años y esta chica es muy especial con mi niña, le gusta peinarla y consentirla, entonces yo quería darle un pequeño detalle, pues no tenia mucho dinero, y siempre me ha gustado la papelería creativa, sin embargo, nunca me había atrevido a realizar algo físico, simplemente plasmo mis ideas en PowerPoint, pero allí quedan. Entonces esta vez quise intentarlo y que además solo debía comprar el chocolate, pues los demás materiales lo tenia en casa.
Hello friends of hive, And community of Hive Diy, today I want to bring you a small tutorial to make and assemble a box for a mini chocolate. This idea started because there is a friend of my cousin who was turning 16 years old and this girl is very special with my girl, she likes to do her hair and pamper her, so I wanted to give her a little detail, because I did not have much money, and I have always liked creative stationery, however, I had never dared to make something physical, I just capture my ideas in PowerPoint, but there they remain. So, this time I wanted to try it and that I also only had to buy the chocolate, because the other materials I had at home.
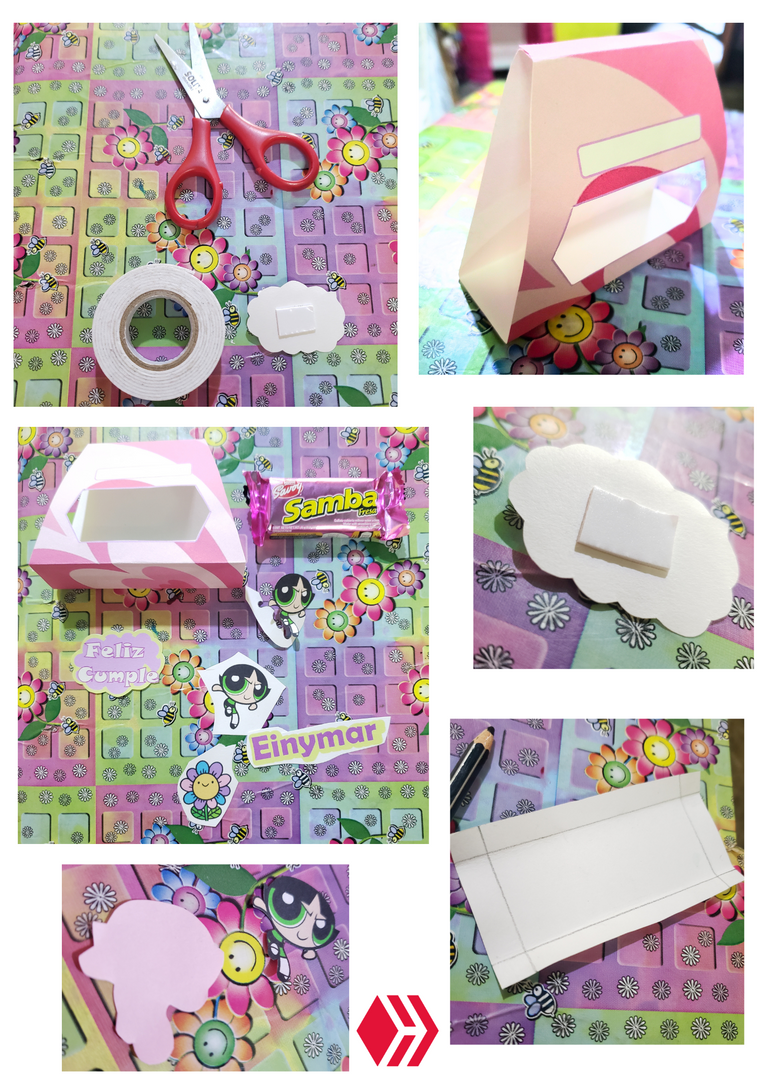
🖌Materiales:
*Impresora EcoTank (opcional, puedes pagar por la impresión, en caso de tener impresora)
*Cartulina de hilo tamaño carta
*Tijeras
*cinta doble faz
*chocolate de tu preferencia
🖌Materials:
*EcoTank printer (optional, you can pay for printing, in case you have a printer).
*Letter size card stock
*Scissors
*Double-sided tape
*Chocolate of your choice
Comenzamos creando nuestra cajita para el chocolate con PowerPoint:
- Coloca la presentación en tamaño panorámica.
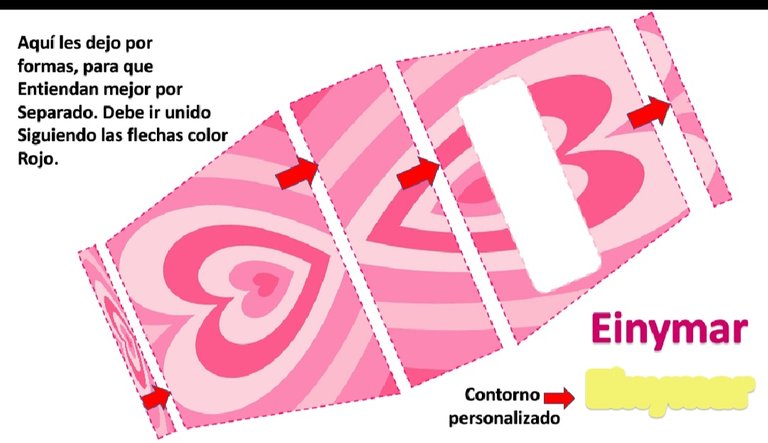
- Buscas en formas e insertas un trapecio lo haces a tu gusto de acuerdo al tamaño de tu chocolate, en mi caso el chocolate que había comprado media 6cm de largo x 3.5 de ancho.
- Luego insertas la forma rectángula y la agrupas al lado superior del trapecio (esta será la pestaña para cerrar la caja).
- De igual forma vuelves a insertar el rectángulo en la parte inferior del trapecio, lo ajustas al tamaño.
- Copias el trapecio y el primer rectángulo y lo ajustas al siguiente lado del segundo rectángulo.
- Ya tendrás el cuerpo de la caja, le faltan los detalles.
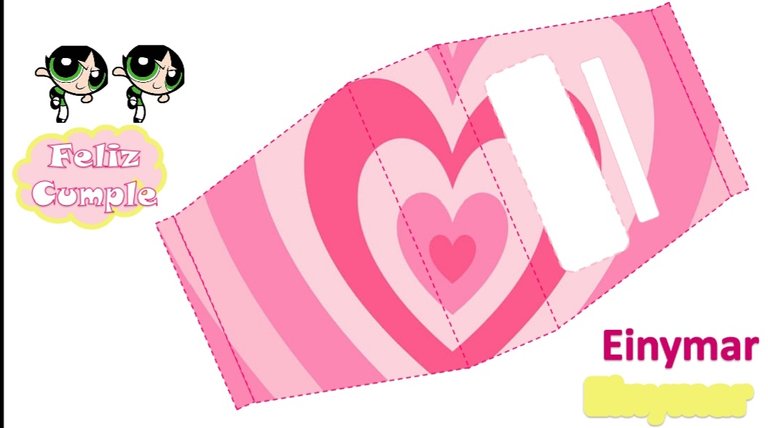
- Agregas la siguiente forma llamada rectángulo esquinas redondeadas (será la parte delantera donde nos dará visibilidad al chocolate dentro de la caja)
- Agregas nuevamente la misma forma de rectángulo de esquinas redondeadas, pero mucho más angosto (con el motivo de poder escribir una corta frase).
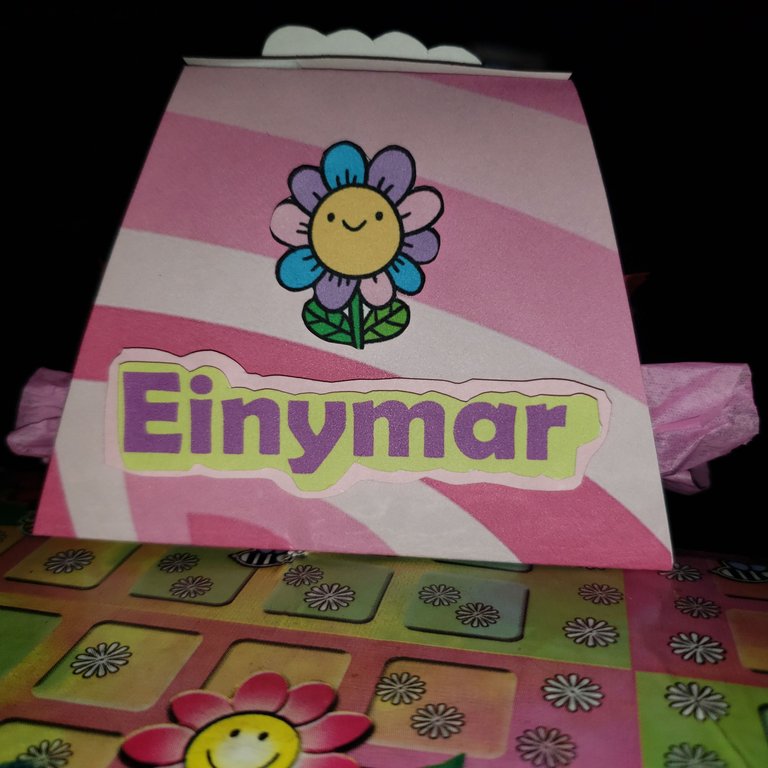
- Buscas el fondo de tu preferencia; en este caso busqué un fondo con motivo de las chicas superpoderosas (es el corazón de varios tonos de color rosa) y además alguna caricatura (yo elegí a bellota.
- En el relleno de forma eliges Imagen, luego buscas en tus archivos y seleccionas tu preferida.
- A un lado agregas la caricatura, le quitas el fondo (en caso de que tenga fondo), copias y pegas (teniendo un par de la misma caricatura).
- Seleccionas la forma de nube, le agregas el color de tu preferencia. Insertas un WordArt, el modelo de letra que quieres.
- Luego escribes lo deseado, y le colocas la fuente preferida, de igual forma le colocas el color deseado.
- De igual forma con el nombre, mediante WordArt, copias pegas y en formato de forma, busca las opciones de texto, en la parte de contorno de texto, seleccionas línea sólida, eliges el color, y en el ancho le aumentas a 12.25 pt.
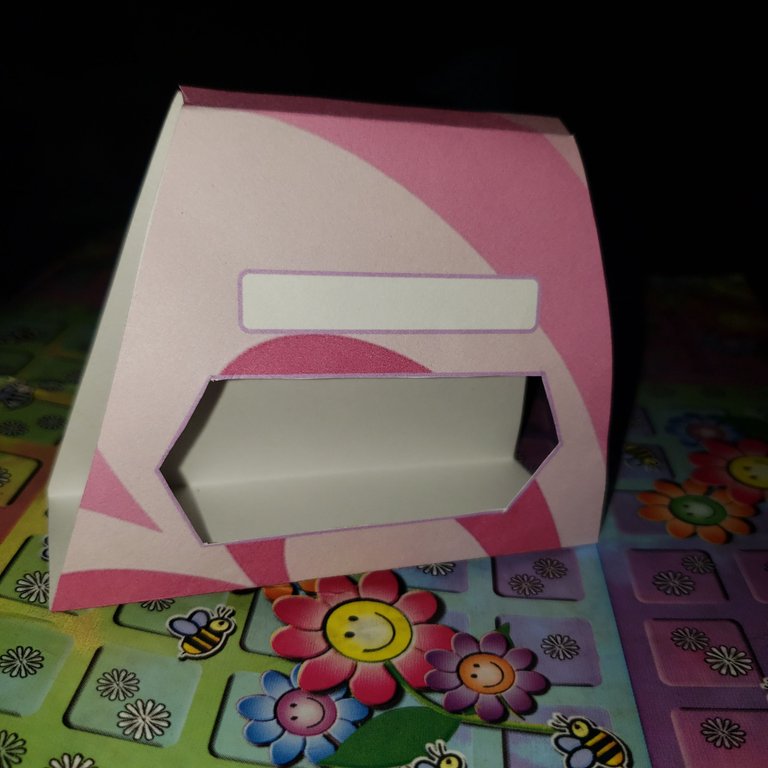
- Ya tendrás lista tu caja, solo debes imprimir, cortar y armar.
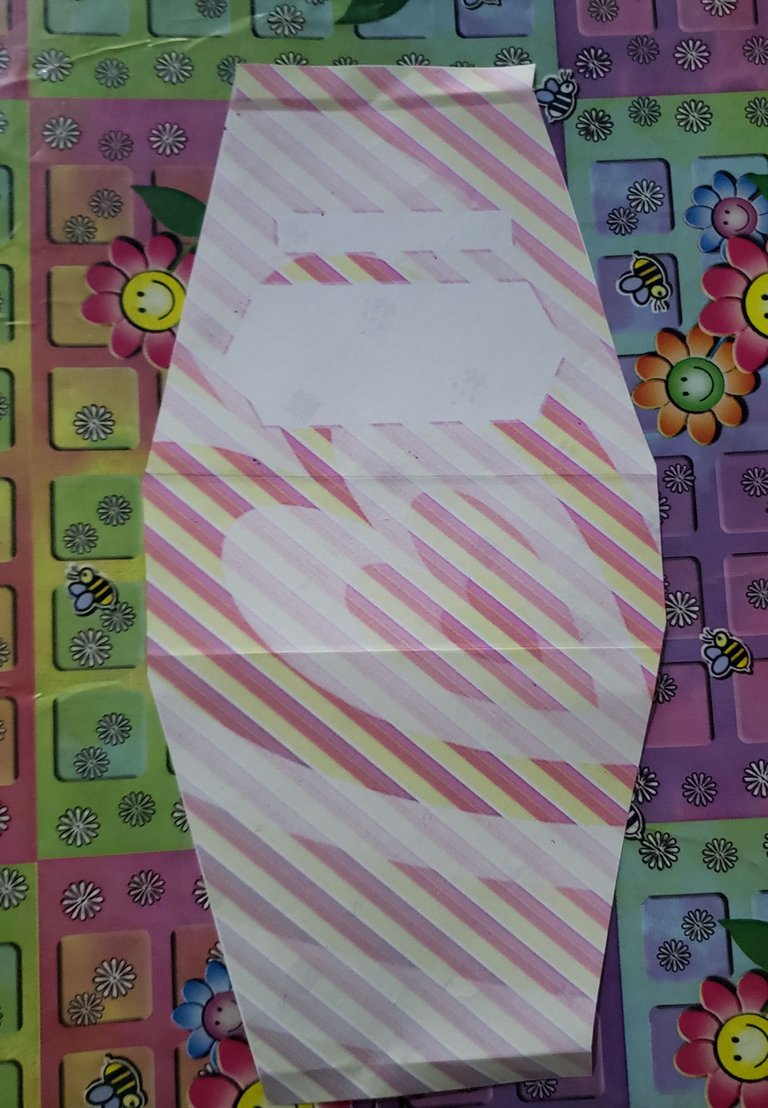
primero lo imprimí en una hoja blanca, para ver si debía corregir algún detalle
I first printed it on a white sheet, to see if I needed to correct any details
Let's start by creating our chocolate box with PowerPoint:
- Place the presentation in panoramic size.
- Look in shapes and insert a trapezoid according to the size of your chocolate, in my case the chocolate I had bought was 6cm long x 3.5 wide.
- Then insert the rectangle shape and group it to the top side of the trapezoid (this will be the tab to close the box).
- In the same way you insert again the rectangle at the bottom of the trapezoid, adjust it to the size.
- Copy the trapezoid and the first rectangle and adjust it to the next side of the second rectangle.
- Now you have the body of the box, you just need to add the details.
- Add the next shape called rectangle with rounded corners (it will be the front part where the chocolate will be visible inside the box).
- Add again the same rectangle shape with rounded corners, but much narrower (in order to be able to write a short phrase).
- You look for the background of your preference; in this case I looked for a background with a Powerpuff Girls motif (it is the heart in various shades of pink) and also a cartoon (I chose an acorn).
- In the form filler you choose Image, then search in your files and select your favorite one.
- To one side you add the cartoon, remove the background (in case it has a background), copy and paste (having a couple of the same cartoon).
- Select the cloud shape, add the color of your choice. Insert a WordArt, the font you want.
- Then you write what you want, and you place the preferred font, in the same way you place the desired color.
- In the same way with the name, using WordArt, copy, paste and in the shape format, look for the text options, in the text outline part, select solid line, choose the color, and in the width, you increase it to 12.25 pt.
- Now you have your box ready, just print, cut and assemble.
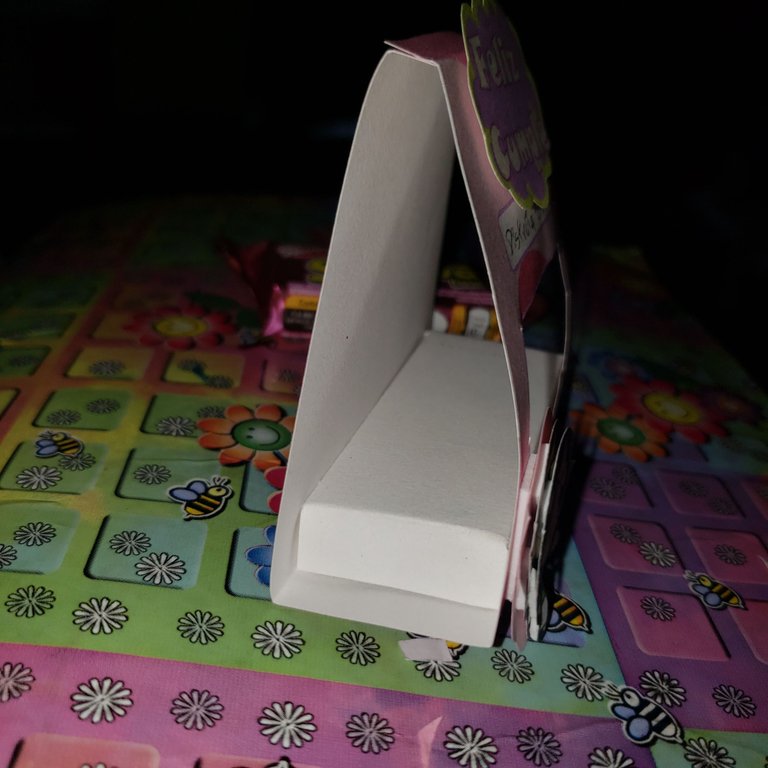
con un poco de Cartulina que quedó, realicé un pequeño rectángulo, para que le diera más altura al chocolate
with a little bit of cardboard left over, I made a small rectangle, to give more height to the chocolate
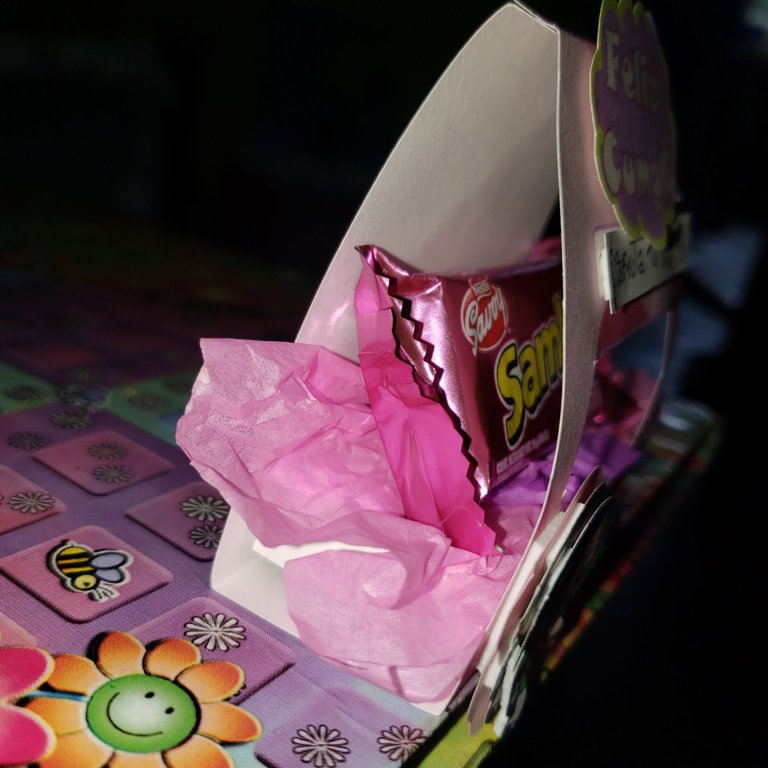
le añadí un poco de papel seda, para resaltar más el chocolate
I added a bit of tissue paper, to highlight the chocolate.
así quedó la parte de atrás
This is how the back side looked
La fuente que use para la letra la encontré en la página gratuita de DaFont y se llama “CHERI”; y para el contorno del texto, lo personalice en opciones de texto.
Muchas Gracias queridos amigos por llegar hasta aquí, la verdad me siento satisfecha con el resultado, algo super económico y práctico.
The font I used for the lettering I found it in the free DaFont page and it is called "CHERI"; and for the outline of the text, I customized it in text options.
Thank you, very much dear friends, for coming this far, the truth is that I feel satisfied with the result, something super economical and practical.

👩🏫 Créditos:
Contenido de mi autoría / Content authored by me.
☆ Imágenes tomadas desde mi celular Samsung S9+ / Images taken from my Samsung S9+ cell phone.
☆ Imágenes editadas en / Images edited in Canva.
☆ Traducción realizada en / Translated using DeepL.
Congratulations @luisanarincon7! You have completed the following achievement on the Hive blockchain And have been rewarded with New badge(s)
Your next target is to reach 50 posts.
You can view your badges on your board and compare yourself to others in the Ranking
If you no longer want to receive notifications, reply to this comment with the word
STOPTo support your work, I also upvoted your post!
Check out our last posts:
Gracias
¡Eso es genial @luisanarincon7! ¡Estamos emocionados de ver tus logros en Hive! ¡Seguimos animándote para tu próxima meta!
Muy bella la cajita y decorativa.... Saludos y bendiciones.
Muchas gracias 😘
Thank you very much, sincerely grateful to you 🙏
Que cajita más linda y cuchi, ideal para dejar en claro que hasta para el más mínimo detalle hay que botarse con el arreglo y ser creativos, me encanto, saludos.💙
Si así es amiga, muchas gracias!
Contáctenos para saber más del proyecto a nuestro servidor de Discord.
Si deseas delegar HP al proyecto: Delegue 5 HP - Delegue 10 HP - Delegue 20 HP - Delegue 30 HP - Delegue 50 HP - Delegue 100 HP.
Mil gracias 😊
Mil gracias 😊